Home>Articles>How Do You Change The Electrical Cord On A Lakewood 5500 Heater
Articles
How Do You Change The Electrical Cord On A Lakewood 5500 Heater
Modified: October 18, 2024
Looking for articles on how to change the electrical cord on a Lakewood 5500 heater? Find step-by-step instructions and tips in our informative guide.
(Many of the links in this article redirect to a specific reviewed product. Your purchase of these products through affiliate links helps to generate commission for Storables.com, at no extra cost. Learn more)
Introduction
Welcome to this comprehensive guide on changing the electrical cord of a Lakewood 5500 heater. The electrical cord is a crucial component that delivers power to the heater, and over time, it may become worn, damaged, or need replacing for various reasons. Fortunately, with the right tools and a little bit of know-how, you can easily change the electrical cord and ensure safe and uninterrupted operation of your Lakewood 5500 heater.
In this guide, we will walk you through each step of the process, providing clear instructions and tips along the way. Whether you are a DIY enthusiast looking to expand your skillset or simply need to replace a faulty cord, this guide has got you covered.
Before we dive into the steps, let’s quickly go over the tools you will need to successfully complete this task:
- Replacement electrical cord: Make sure to purchase a cord that is compatible with the Lakewood 5500 heater. Check the specifications provided by the manufacturer or consult a professional if you are unsure.
- Flathead screwdriver: This will be used to remove screws and pry open panels.
- Wire cutters/strippers: You will need these to cut and strip wires as necessary.
- Electrical tape: This will help secure the new cord and ensure proper insulation.
- Marker or label: It is helpful to label or mark the wire connections for easy reattachment later.
- Protective gloves and eyewear: Safety should always come first when working with electrical components. Ensure you have the appropriate protective gear.
Now that you have gathered the necessary tools, let’s proceed to the first step: disconnecting the old electrical cord.
Key Takeaways:
- Replacing the electrical cord on a Lakewood 5500 heater is a manageable DIY task that ensures safe and uninterrupted heater operation. By following the comprehensive guide and using the right tools, you can successfully complete this maintenance task.
- Prioritizing safety, proper wire identification, secure attachment of the new cord, and thorough testing are essential for a successful cord replacement. Regular maintenance of electrical components ensures longevity and peace of mind.
Read more: How To Change Electrical Cord On A Dryer
Step 1: Gathering necessary tools
Before you can begin replacing the electrical cord on your Lakewood 5500 heater, it’s important to gather all the necessary tools. Here is a list of tools you will need for this task:
- Replacement electrical cord: Make sure to purchase a cord that is compatible with the Lakewood 5500 heater. Check the specifications provided by the manufacturer or consult a professional if you are unsure.
- Flathead screwdriver: This tool will be essential for removing screws and prying open panels on the heater.
- Wire cutters/strippers: You will need these tools to cut and strip wires as necessary during the cord replacement process.
- Electrical tape: This tape will be used to secure the new cord and provide adequate insulation.
- Marker or label: It is helpful to have a marker or label on hand to mark the wire connections for easy reattachment later.
- Protective gloves and eyewear: It’s crucial to prioritize safety when working with electrical components, so make sure to wear protective gloves and eyewear throughout the process.
By gathering these tools in advance, you’ll be well-prepared for the cord replacement procedure, ensuring a smooth and efficient process.
Now that you have all the necessary tools ready, you can proceed to the next step: disconnecting the old electrical cord from the Lakewood 5500 heater.
Step 2: Disconnecting the old electrical cord
Before you can begin replacing the electrical cord on your Lakewood 5500 heater, you need to disconnect the old cord. Follow these steps to safely disconnect the old electrical cord:
- Unplug the heater: Before you start working on the heater, ensure that it is completely unplugged from the power source. This will eliminate the risk of electrical shock.
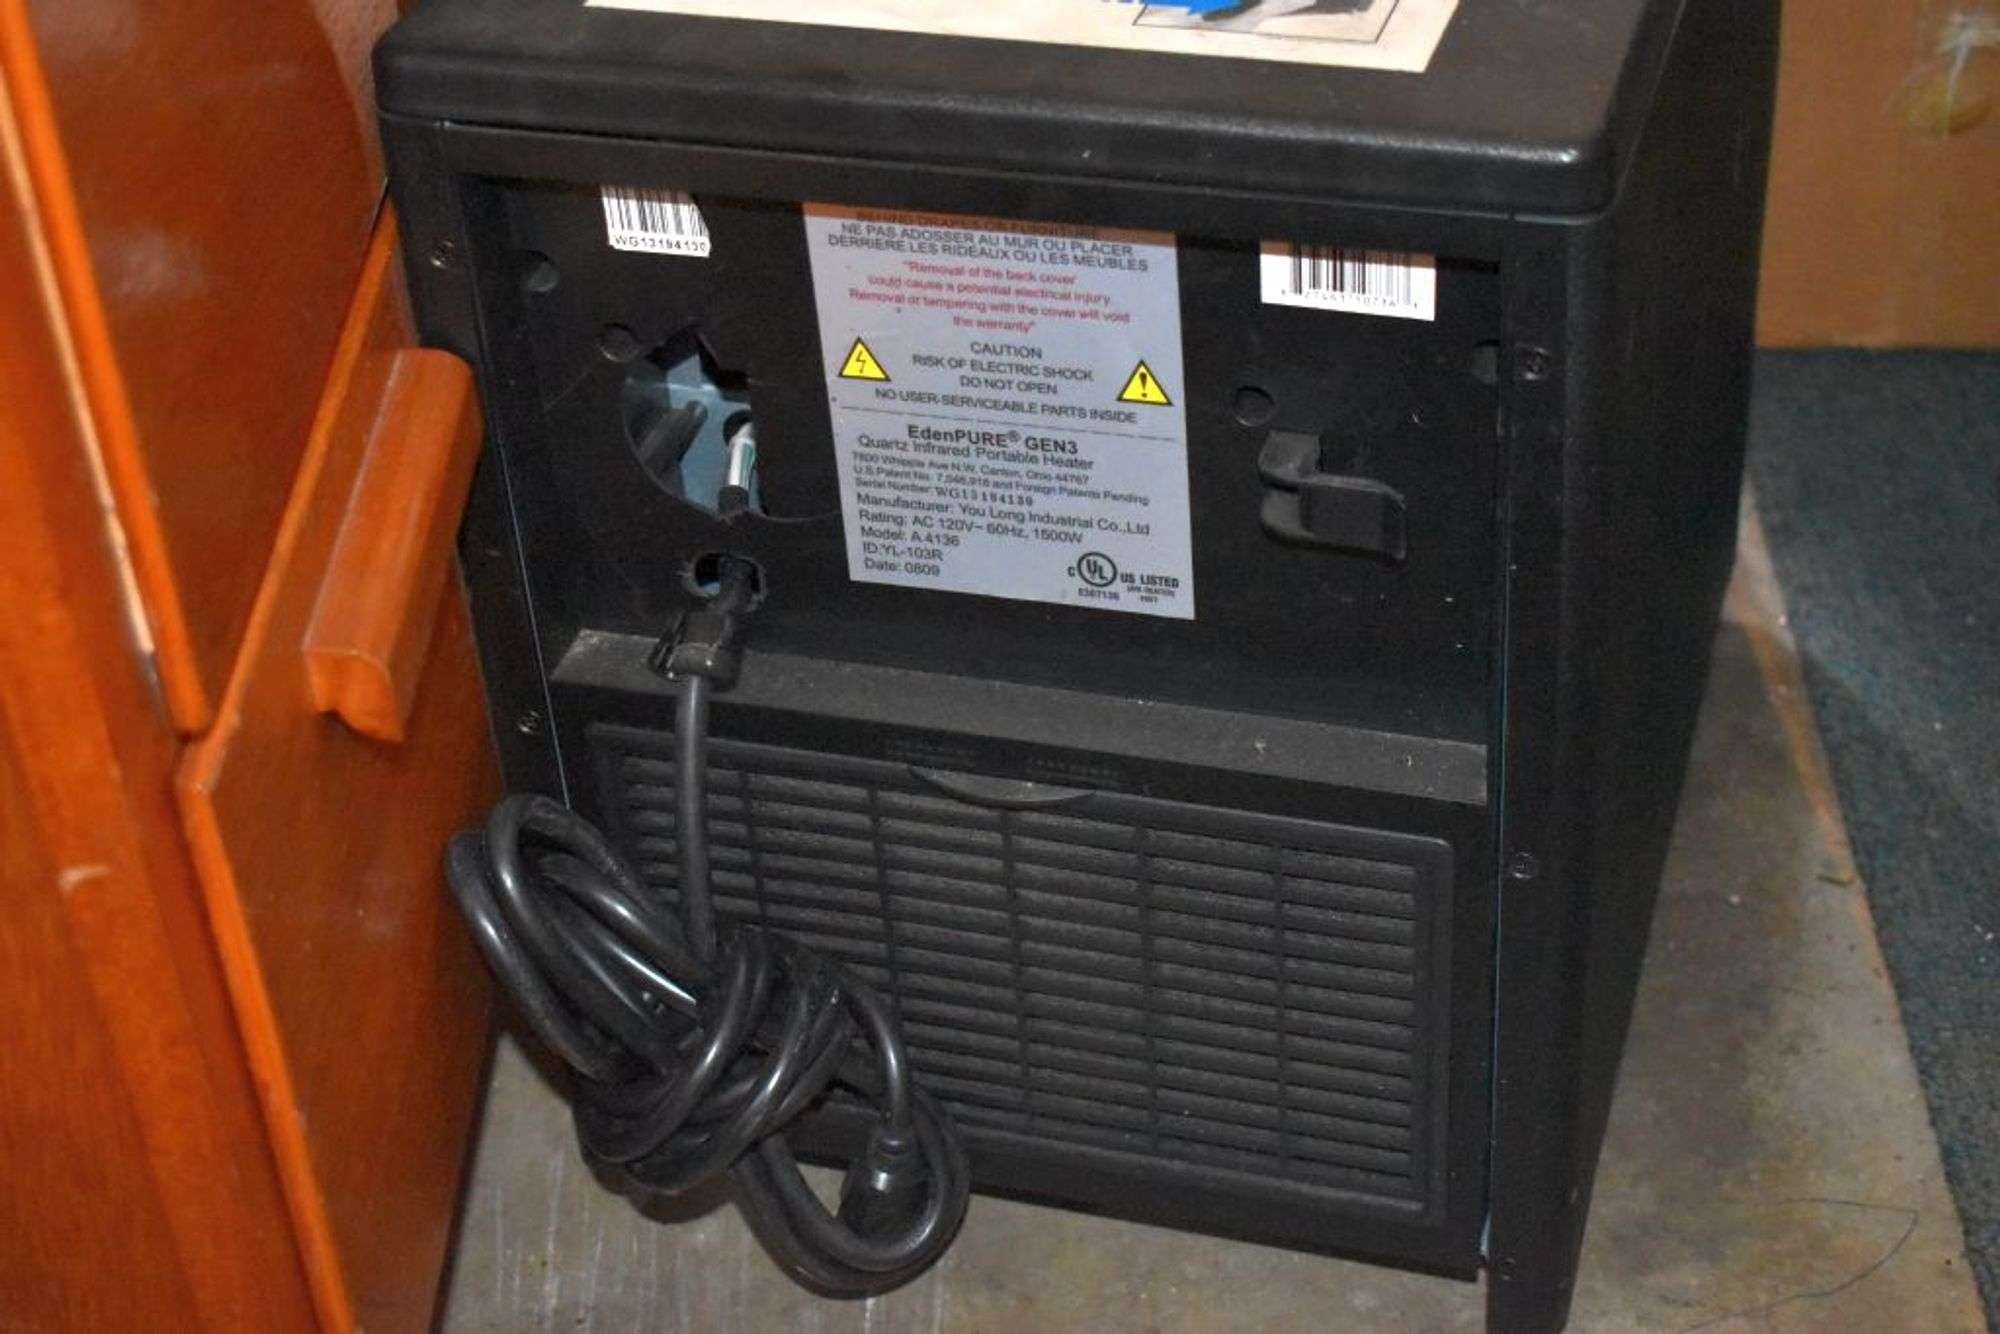
- Locate the cord: Depending on the model of your Lakewood 5500 heater, the electrical cord may be located on the back or bottom of the unit. Take a moment to locate the cord before proceeding.
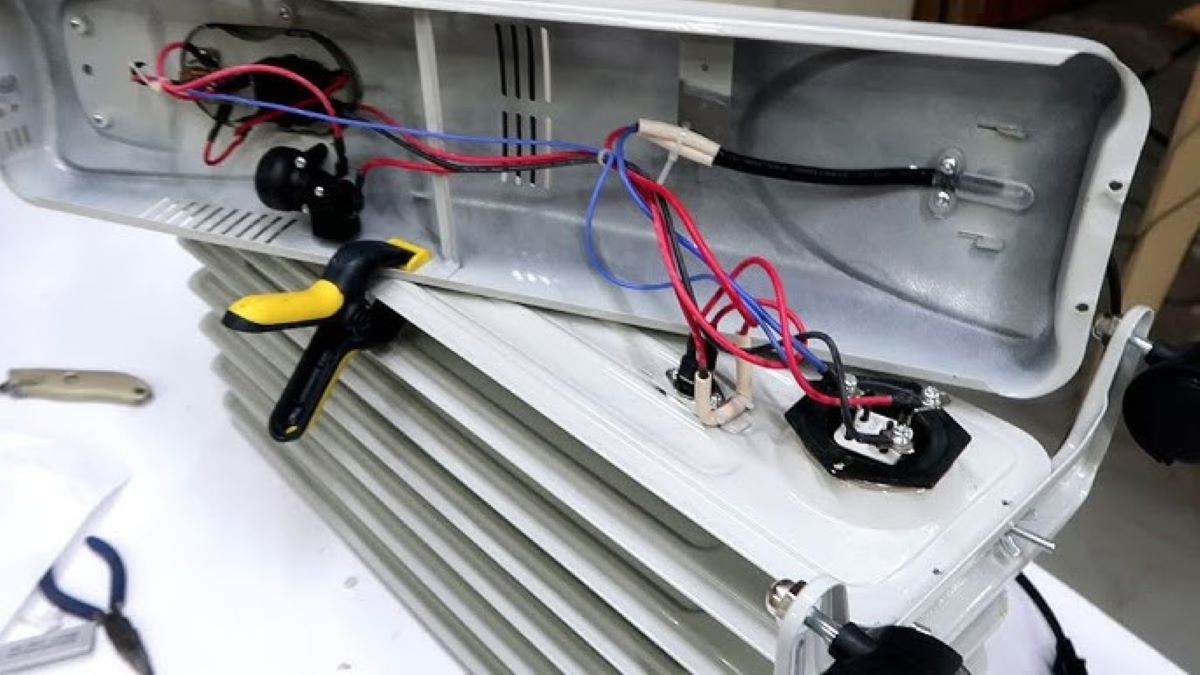
- Identify the wire connections: With the heater unplugged, you will now need to identify the wire connections. The electrical cord is typically connected to the heater through a terminal block or wire nuts.
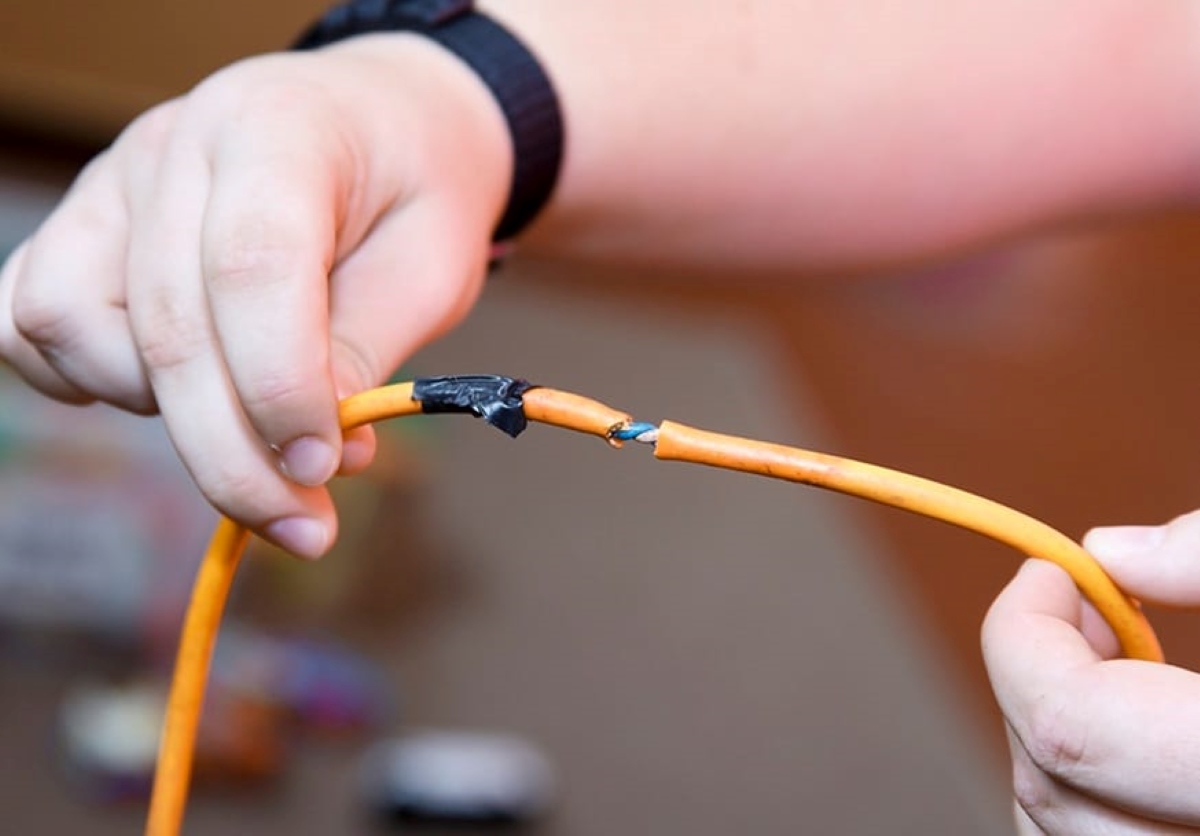
- Disconnect the wire connections: Use a flathead screwdriver to loosen the screws or nuts securing the wires. Carefully remove the wires from their respective connections. It’s important to pay attention to the wire colors and their corresponding terminals, as this will be helpful when connecting the new cord.
- Secure loose wires: Once you have disconnected the old cord, secure the loose wires to prevent them from accidentally touching any metal components. You can use electrical tape to wrap around the exposed ends of the wires.
By following these steps, you can safely disconnect the old electrical cord from your Lakewood 5500 heater. In the next step, we will guide you through removing the access panel to gain further access to the inner workings of the heater.
Step 3: Removing the access panel of the Lakewood 5500 heater
With the old electrical cord disconnected, the next step in replacing the cord on your Lakewood 5500 heater is to remove the access panel. Follow these instructions to safely remove the access panel:
- Ensure the heater is unplugged: Before proceeding, make sure that the heater is completely unplugged from the power source. This will help prevent any accidental electric shocks.
- Locate the access panel: The access panel is usually located on the back or front of the Lakewood 5500 heater, depending on the model. It is designed to provide access to the internal components of the heater.
- Use a flathead screwdriver: Take your flathead screwdriver and carefully insert it into the screws securing the access panel. Turn the screwdriver counterclockwise to loosen and remove the screws. Keep the screws in a safe place, as you will need them for reassembly later.
- Remove the access panel: Once all the screws are removed, gently lift or slide the access panel away from the heater. Be cautious not to force anything or damage any internal components.
- Set aside the access panel: Place the removed access panel in a safe location where it will not get damaged or misplaced during the rest of the cord replacement process.
By following these steps, you will successfully remove the access panel of your Lakewood 5500 heater, allowing you to access the inner components and continue with the cord replacement process. In the next step, we will guide you through the process of identifying the wire connections inside the heater.
Step 4: Identifying the wire connections
After removing the access panel, it is time to identify the wire connections inside your Lakewood 5500 heater. Identifying the wire connections is crucial for properly attaching the new electrical cord. Follow these steps to identify the wire connections:
- Inspect the terminal block or wire nuts: Look for the terminal block or wire nuts where the old electrical cord was connected. These components may be located near the power input or control panel of the heater.
- Observe the wire colors: Take note of the wire colors that were connected to the terminal block or wire nuts. Standard wire colors include black (hot), white (neutral), and green or bare copper (ground).
- Take pictures or label the wire connections: To ensure an accurate reconnection of the new cord, you can take pictures of the wire connections or use a marker and labels to mark them. This will help you remember which wire goes where.
- Verify the wire connections with the manufacturer’s manual: If available, refer to the manufacturer’s manual for your Lakewood 5500 heater. It may provide specific instructions and diagrams regarding the wire connections.
- Double-check the wire connections: Before proceeding to attach the new cord, double-check that you have correctly identified the wire connections. This will help prevent any potential wiring mistakes.
By following these steps, you will be able to accurately identify the wire connections inside your Lakewood 5500 heater. This step is crucial for ensuring a proper and safe attachment of the new electrical cord. In the next step, we will guide you through detaching the old cord from the wire connections.
Step 5: Detaching the old cord from the wire connections
Now that you have identified the wire connections, it’s time to detach the old cord from these connections inside your Lakewood 5500 heater. Follow these steps to safely detach the old cord:
- Use wire cutters/strippers: Take your wire cutters or wire strippers and carefully cut the old cord near the terminal block or wire nuts. Leave enough length on the old cord so that you can easily work with the wires.
- Strip the wire ends: Using the wire cutters/strippers, strip off the insulation from the ends of the wires. It’s important to expose a sufficient amount of bare wire to ensure a secure and proper connection with the new cord.
- Clean the wire ends (optional): If the wire ends are covered in dirt, debris, or corrosion, you can use a wire brush or sandpaper to clean them. This will help ensure better conductivity when attaching the new cord.
- Inspect the wire connections: Take a moment to inspect the terminal block or wire nuts and ensure that they are in good condition. If you notice any damage or excessive wear, it may be necessary to replace these components before proceeding.
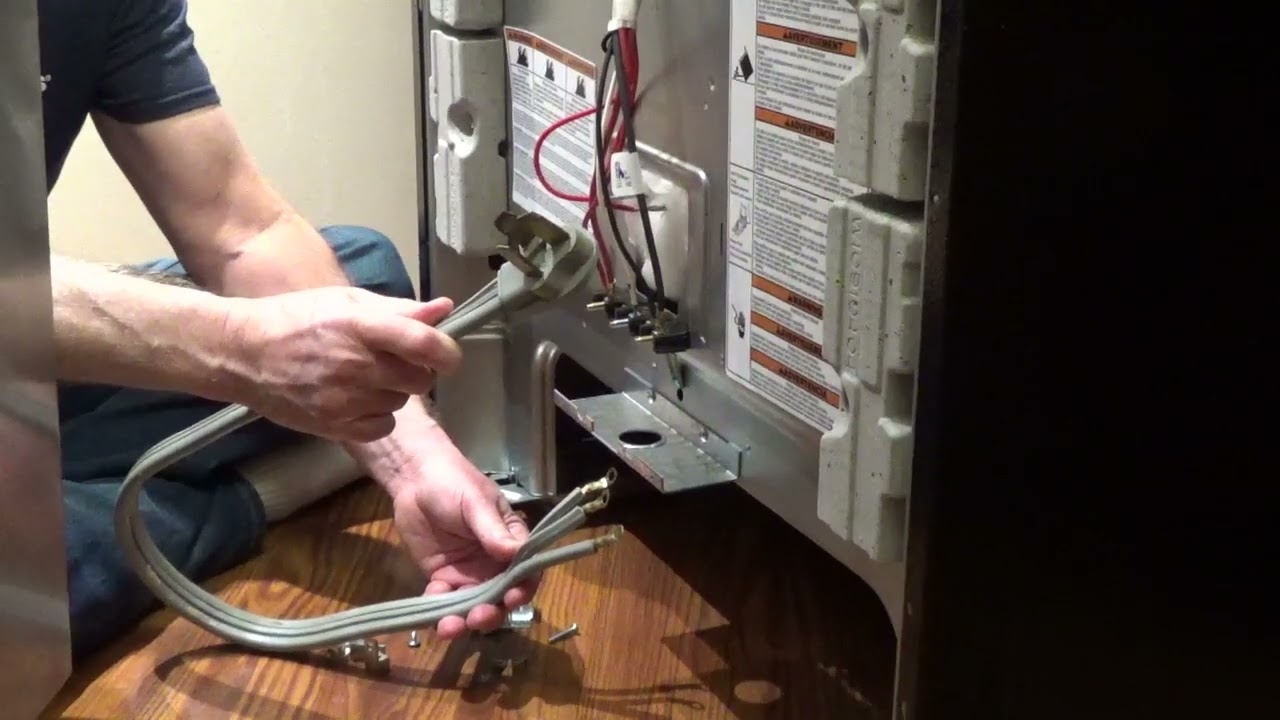
- Attach the new cord: Take the new electrical cord and match the wire colors with their corresponding connections. For example, connect the black wire to the hot terminal, the white wire to the neutral terminal, and the green or bare copper wire to the ground terminal.
- Screw or tighten the connections: Once the wires are securely attached to the terminal block or wire nuts, use a screwdriver or pliers to tighten the connections. Ensure that the wires are snugly secured but avoid overtightening, as this can damage the terminals.
By following these steps, you will be able to safely detach the old cord from the wire connections inside your Lakewood 5500 heater. With the old cord removed, you are now ready to attach the new electrical cord, which we will guide you through in the next step.
When changing the electrical cord on a Lakewood 5500 heater, make sure to unplug the heater and allow it to cool down completely before starting. Follow the manufacturer’s instructions for disassembly and reassembly to ensure safety and proper function.
Step 6: Attaching the new electrical cord
With the old cord successfully detached from the wire connections, it’s time to attach the new electrical cord to your Lakewood 5500 heater. Follow these steps to properly connect the new cord:
- Prepare the new cord: If necessary, trim the new electrical cord to the desired length, keeping in mind the location of the terminal block or wire nuts. Strip off about half an inch of insulation from the ends of each wire.
- Match wire colors: Align the wire colors of the new cord with their respective connections. Connect the black wire to the hot terminal, the white wire to the neutral terminal, and the green or bare copper wire to the ground terminal.
- Insert wires into terminal block or wire nuts: Insert the stripped ends of the wires into the appropriate openings in the terminal block or wire nuts. Make sure each wire is fully seated and secure, with no loose strands sticking out.
- Tighten or secure the connections: Using a screwdriver or pliers, tighten the screws on the terminal block or wire nuts to securely hold the wires in place. Ensure that the connections are tight but be careful not to overtighten and damage the terminals or wires.
- Double-check the connections: Once all the wires are securely attached, double-check that each wire is connected to the correct terminal. This step is crucial to ensure the proper functioning of your Lakewood 5500 heater.
- Insulate the connections: Using electrical tape, wrap each individual connection to provide insulation and prevent any accidental contact. Wrap the tape tightly around the exposed wires and extend it slightly onto the insulation for added protection.
By following these steps, you will be able to successfully attach the new electrical cord to your Lakewood 5500 heater. Remember to double-check all connections, secure them properly, and insulate them with electrical tape for safety. In the next step, we will guide you through securing the new cord inside the heater.
Step 7: Securing the new cord inside the heater
Now that the new electrical cord is securely attached to the wire connections of your Lakewood 5500 heater, it’s important to properly secure the cord inside the heater to ensure safe and stable operation. Follow these steps to secure the new cord:
- Inspect the cord placement: Take a moment to ensure that the new cord is positioned in a way that it will not interfere with any moving parts or come into contact with hot surfaces within the heater.
- Check for cord clips or holders: Some heaters come with built-in cord clips or holders that are designed to keep the cord in place. If your heater has these features, make sure the cord is securely held in the designated clips or holders.
- Use zip ties or straps: If there are no built-in cord clips or holders, you can use zip ties or straps to secure the new cord to existing wiring or structural components within the heater. This will help prevent the cord from dangling or getting entangled.
- Avoid sharp edges: Make sure that the new cord is not running across any sharp edges or corners that could damage the insulation. If necessary, use rubber grommets or duct tape to cover any sharp edges that may come into contact with the cord.
- Ensure proper strain relief: It’s important to provide adequate strain relief for the new cord to prevent excessive tension or pulling on the wire connections. This can be achieved by routing the cord in a way that avoids putting stress on the connections.
- Test the cord movement: After securing the new cord, gently tug on it to ensure that it is held firmly in place. Check for any signs of looseness or movement. The cord should be stable and not easily dislodged from its secured position.
By following these steps, you will be able to properly secure the new electrical cord inside your Lakewood 5500 heater. This will help prevent any potential accidents or damage caused by a loose or improperly positioned cord. In the next step, we will guide you through reassembling the access panel of the heater.
Step 8: Reassembling the access panel
With the new cord securely in place inside your Lakewood 5500 heater, it’s time to reassemble the access panel. Follow these steps to properly reassemble the access panel:
- Inspect the access panel: Before attaching the access panel, check for any debris or dirt that may have accumulated on it. Wipe it clean if necessary to ensure a proper fit.
- Align the access panel: Hold the access panel in alignment with the body of the heater, ensuring that any screw holes or tabs on the panel align with their corresponding counterparts on the heater.
- Insert screws: Take the screws that you removed earlier and insert them back into their respective holes on the access panel. Use a screwdriver to tighten them securely, but be careful not to overtighten and strip the screw holes.
- Test the panel: After the screws are in place, gently push or pull on the access panel to ensure that it is properly aligned and securely attached to the heater. It should not wobble or feel loose.
- Double-check for any loose wires: Before considering the reassembly process complete, check the wire connections to ensure that none of them have become loose or dislodged during the reassembling of the access panel.
By following these steps, you will be able to successfully reassemble the access panel of your Lakewood 5500 heater. This step is important as it ensures that the internal components are protected and properly enclosed. In the final step, we will guide you through testing the new electrical cord.
Step 9: Testing the new electrical cord
After completing the reassembly of the access panel, the final step in replacing the electrical cord on your Lakewood 5500 heater is to test the functionality of the new cord. Follow these steps to ensure that the new cord is working properly:
- Plug in the heater: Make sure the heater is still unplugged before proceeding. Plug it into a power outlet and ensure a steady power supply.
- Turn on the heater: Use the heater’s power switch or control knob to turn it on. Listen for any unusual sounds or vibrations that may indicate a problem with the cord connection.
- Check for proper heating: Allow the heater to run for a few minutes and monitor if it is producing heat as expected. Ensure that the heat settings and controls are functioning properly.
- Inspect the cord during operation: Keep an eye on the new cord during operation. Look for any signs of overheating, sparking, or loose connections. If you notice any issues, immediately unplug the heater and address the problem.
- Test multiple functions (if applicable): If your Lakewood 5500 heater has multiple functions such as thermostat control or fan settings, test each function to ensure they are working correctly with the new cord.
- Perform a visual inspection: After testing the functionality, inspect the cord visually to ensure that it remains securely attached and in good condition. Look for any signs of wear or damage that may require attention.
By following these steps and conducting a thorough test of the new electrical cord, you can ensure that it is functioning properly and safely. If you encounter any issues or have concerns during the testing process, it is advisable to seek professional assistance.
Congratulations! You have successfully replaced the electrical cord on your Lakewood 5500 heater. By taking the time to perform this task correctly, you have ensured the safe operation of your heater for continued use.
Conclusion
Replacing the electrical cord on your Lakewood 5500 heater is a straightforward process that can be done with the right tools and a little bit of know-how. By following the steps outlined in this guide, you can successfully change the cord and ensure the safe and uninterrupted operation of your heater.
Throughout this guide, we covered the necessary tools, the steps to disconnect the old cord, remove the access panel, identify the wire connections, detach the old cord, attach the new cord, secure it inside the heater, reassemble the access panel, and test the functionality of the new cord. Each step was designed to be informative, comprehensive, and easy to follow.
Remember, safety should always be a priority when working with electrical components. Ensure that the heater is unplugged before starting the process, use protective gear, and exercise caution at all times.
By replacing the old cord with a new one, you can eliminate potential hazards such as frayed wires or loose connections that may cause electrical malfunctions or accidents. Regularly inspecting and maintaining your heater’s electrical components is essential for its longevity and your peace of mind.
If you encounter any difficulties during the cord replacement process or have concerns about electrical components, it is always recommended to consult a professional technician or seek assistance from the manufacturer.
With your Lakewood 5500 heater’s new electrical cord in place, you can now enjoy a warm and cozy space without any worries. By following the steps outlined in this guide, you have taken proactive action to ensure the continued functionality and safety of your heater.
Remember, if you are not confident in performing the cord replacement yourself, it is always best to seek professional help. Stay warm and stay safe!
Frequently Asked Questions about How Do You Change The Electrical Cord On A Lakewood 5500 Heater
Was this page helpful?
At Storables.com, we guarantee accurate and reliable information. Our content, validated by Expert Board Contributors, is crafted following stringent Editorial Policies. We're committed to providing you with well-researched, expert-backed insights for all your informational needs.
0 thoughts on “How Do You Change The Electrical Cord On A Lakewood 5500 Heater”