
Articles
How Do You Fill A Kegerator
Modified: October 20, 2024
Discover the best articles on how to fill a kegerator and enjoy fresh, ice-cold draft beer at home. Find step-by-step guides and expert tips to enhance your kegging experience.
(Many of the links in this article redirect to a specific reviewed product. Your purchase of these products through affiliate links helps to generate commission for Storables.com, at no extra cost. Learn more)
Introduction
A kegerator is a must-have appliance for beer enthusiasts who want to enjoy their favorite brew straight from the tap at home. It combines the convenience of a refrigerator with a built-in tap system, allowing you to store and serve kegs of beer without the need for bottles or cans. Whether you are hosting a party, enjoying a game day, or simply craving a cold beer, a kegerator is the ultimate addition to your home bar or man cave.
In this article, we will guide you through the process of filling a kegerator from start to finish. We will explore the different types of kegerators, discuss the factors to consider before filling one, and provide step-by-step instructions on how to set up and maintain your kegerator for optimal beer enjoyment.
So, grab a pint, sit back, and let’s dive into the world of kegerators!
Key Takeaways:
- Enjoy the convenience and cost savings of a kegerator by following step-by-step instructions for setup, maintenance, and pouring. Elevate your home beer-drinking experience with perfectly chilled, freshly poured pints.
- Master the art of filling and maintaining a kegerator to ensure optimal beer enjoyment. From selecting the right keg to troubleshooting, savor the satisfaction of perfectly poured, flavorful pints at home.
Read more: How Do You Fill In A Swimming Pool
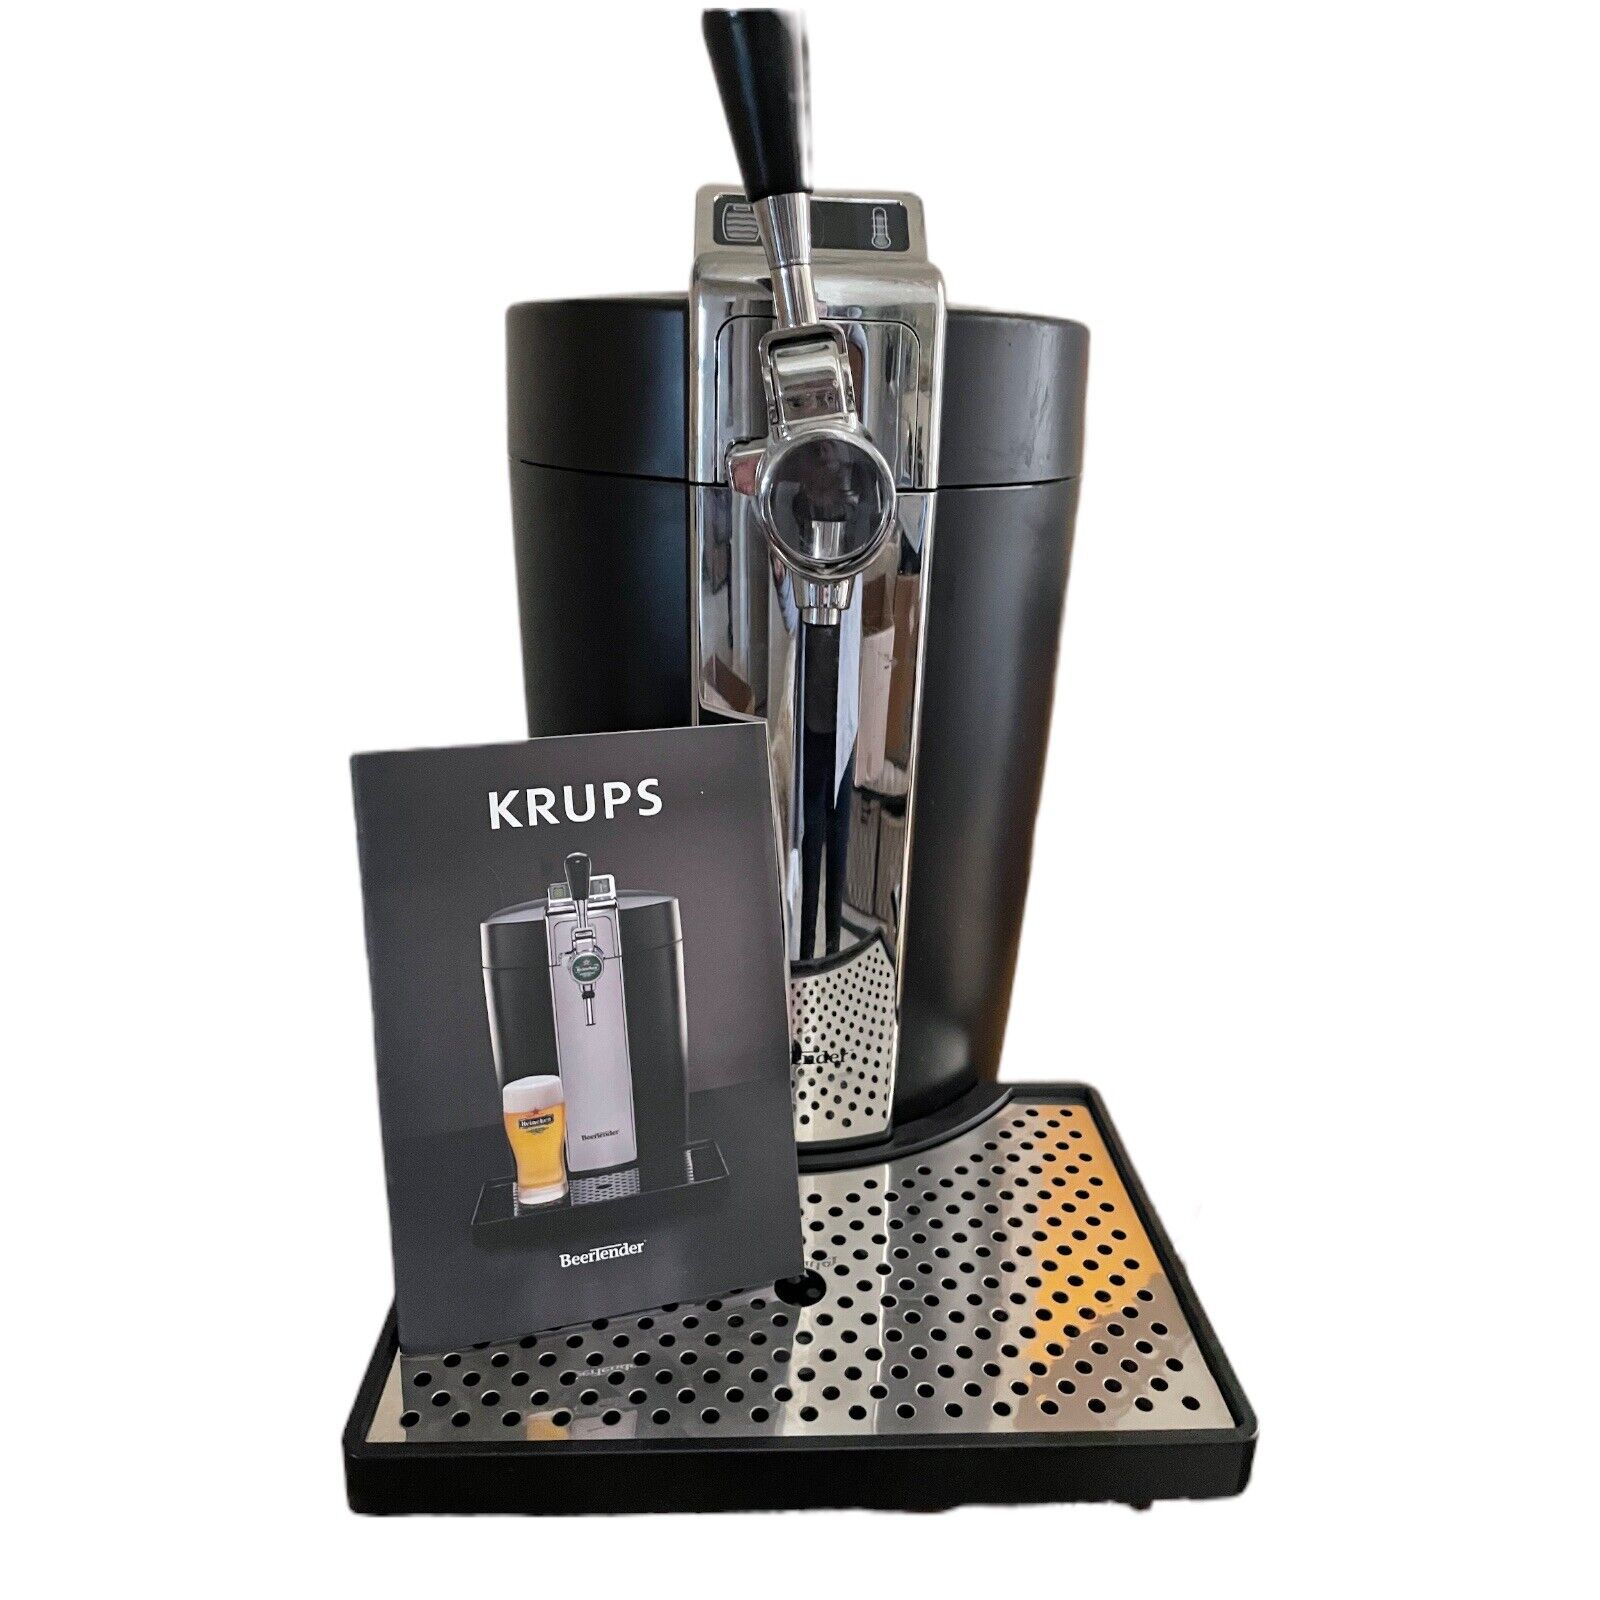
What is a kegerator?
A kegerator is a specialized refrigerator or beverage dispenser that is designed to store and dispense kegs of beer. It is essentially a combination of a refrigerator and a draft beer system, allowing you to have a ready-to-pour draft beer experience at home.
The main component of a kegerator is the refrigeration system, which keeps the beer chilled to the optimal serving temperature. The temperature control is crucial for maintaining the freshness and quality of the beer. Kegerators are equipped with a carbon dioxide (CO2) tank and regulator, which helps to maintain the appropriate level of carbonation in the beer, ensuring a great-tasting pour every time.
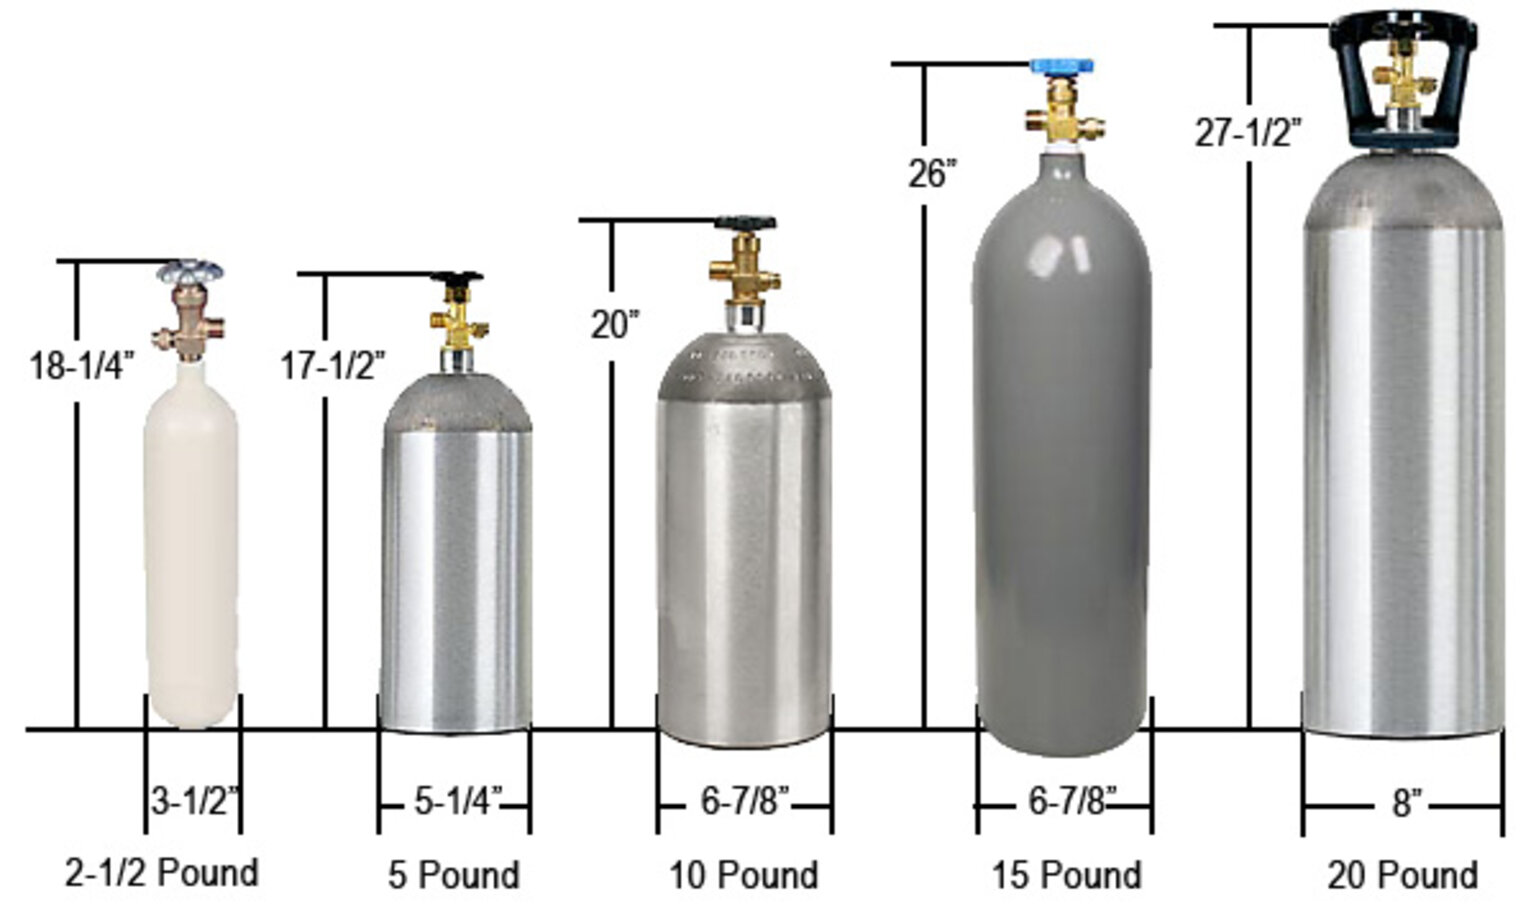
Kegerators come in various sizes and configurations to accommodate different keg sizes and types. The most common keg sizes are the standard half-barrel (15.5 gallons), quarter-barrel (7.75 gallons), and sixth-barrel (5 gallons) kegs. Some kegerators can also be adapted to serve different beverages like wine, cider, or kombucha.
One of the main advantages of a kegerator is the cost savings it offers compared to buying beer in bottles or cans. Kegged beer is generally less expensive per ounce, and by serving beer on tap, you eliminate the need for packaging and reduce waste. Additionally, kegerators provide a more environmentally friendly option, as they eliminate the need for single-use bottles or cans.
Furthermore, kegerators offer a convenient and efficient way to serve beer, particularly for gatherings or parties. With a kegerator, you don’t have to worry about running out of beer, constantly restocking the fridge, or disposing of empty bottles. It simplifies the serving process and allows your guests to pour their own beer, giving you more time to socialize and enjoy the festivities.
In summary, a kegerator is a specialized fridge-like appliance that enables you to store and serve kegs of beer at the perfect temperature. It provides a cost-effective, environmentally friendly, and convenient way to enjoy draft beer from the comfort of your own home.
Types of kegerators
When it comes to kegerators, there are several types available on the market. Each type has its own unique features and benefits, catering to different preferences and needs. Let’s take a closer look at some of the common types of kegerators:
- Freestanding kegerators: Freestanding kegerators are standalone units that can be placed anywhere in your home or bar. They come in various sizes and styles, ranging from compact countertop models to larger, full-size units. Freestanding kegerators offer flexibility in terms of placement and are suitable for those who have designated space for a kegerator.
- Undercounter kegerators: Undercounter kegerators are designed to fit seamlessly into your cabinetry or bar area. They are built with a front-venting system, allowing for proper ventilation and insulation. Undercounter kegerators are a popular choice for those who want a more integrated and streamlined look in their kitchen or bar setup.
- Outdoor kegerators: If you enjoy entertaining outdoors or have a backyard bar area, outdoor kegerators are the perfect choice. These kegerators are constructed with durable materials that can withstand various weather conditions. They often feature built-in security locks and weather-resistant finishes to protect the kegerator from the elements.
- Built-in kegerators: Built-in kegerators are designed to be installed directly into a wall or cabinetry. They provide a customized and high-end look, seamlessly blending with the surrounding decor. Built-in kegerators typically require professional installation to ensure proper ventilation and insulation.
In addition to the different types, kegerators also vary in terms of their cooling methods. The two main cooling methods used in kegerators are:
- Forced-air cooling: Kegerators with forced-air cooling use a fan to circulate cold air evenly throughout the keg storage area. This ensures that the beer is chilled consistently, resulting in a uniform temperature across all kegs.
- Digital/compressor cooling: Kegerators with digital or compressor cooling systems utilize a high-performance compressor to cool the beer. These kegerators offer precise temperature controls and are more efficient in maintaining a constant and stable temperature, making them ideal for beer enthusiasts who are particular about their serving temperatures.
When choosing a kegerator, consider factors such as your available space, installation requirements, desired cooling method, and specific features that would enhance your beer-drinking experience. Ultimately, the type of kegerator you choose will depend on your individual needs and preferences.
Factors to consider before filling a kegerator
Before you start filling your kegerator with a delicious keg of beer, there are a few important factors to consider. Taking these factors into account will ensure that you have a smooth and enjoyable experience. Here are some key considerations:
- Available space: Determine the space where you plan to place the kegerator. Measure the dimensions and ensure that the kegerator will fit comfortably in the chosen location. Consider any surrounding clearance needed for proper ventilation and accessibility.
- Keg selection: Choose the type of keg you want to fill your kegerator with. Consider the size and style of the keg, as well as the type of beer you prefer. Popular options include half-barrel (full-size), quarter-barrel (pony keg), and sixth-barrel (sixtel) kegs.
- Cleaning and maintenance: Understand the cleaning and maintenance requirements of the kegerator. This includes regular cleaning of beer lines, faucets, and the keg coupler, as well as sanitizing the system to prevent bacteria growth and maintain the quality of the beer.
- Temperature control: Ensure that your kegerator has proper temperature control capabilities. Different styles of beer require specific serving temperatures for optimum taste and enjoyment. Verify that your kegerator can achieve and maintain the recommended temperature range for the type of beer you plan to serve.
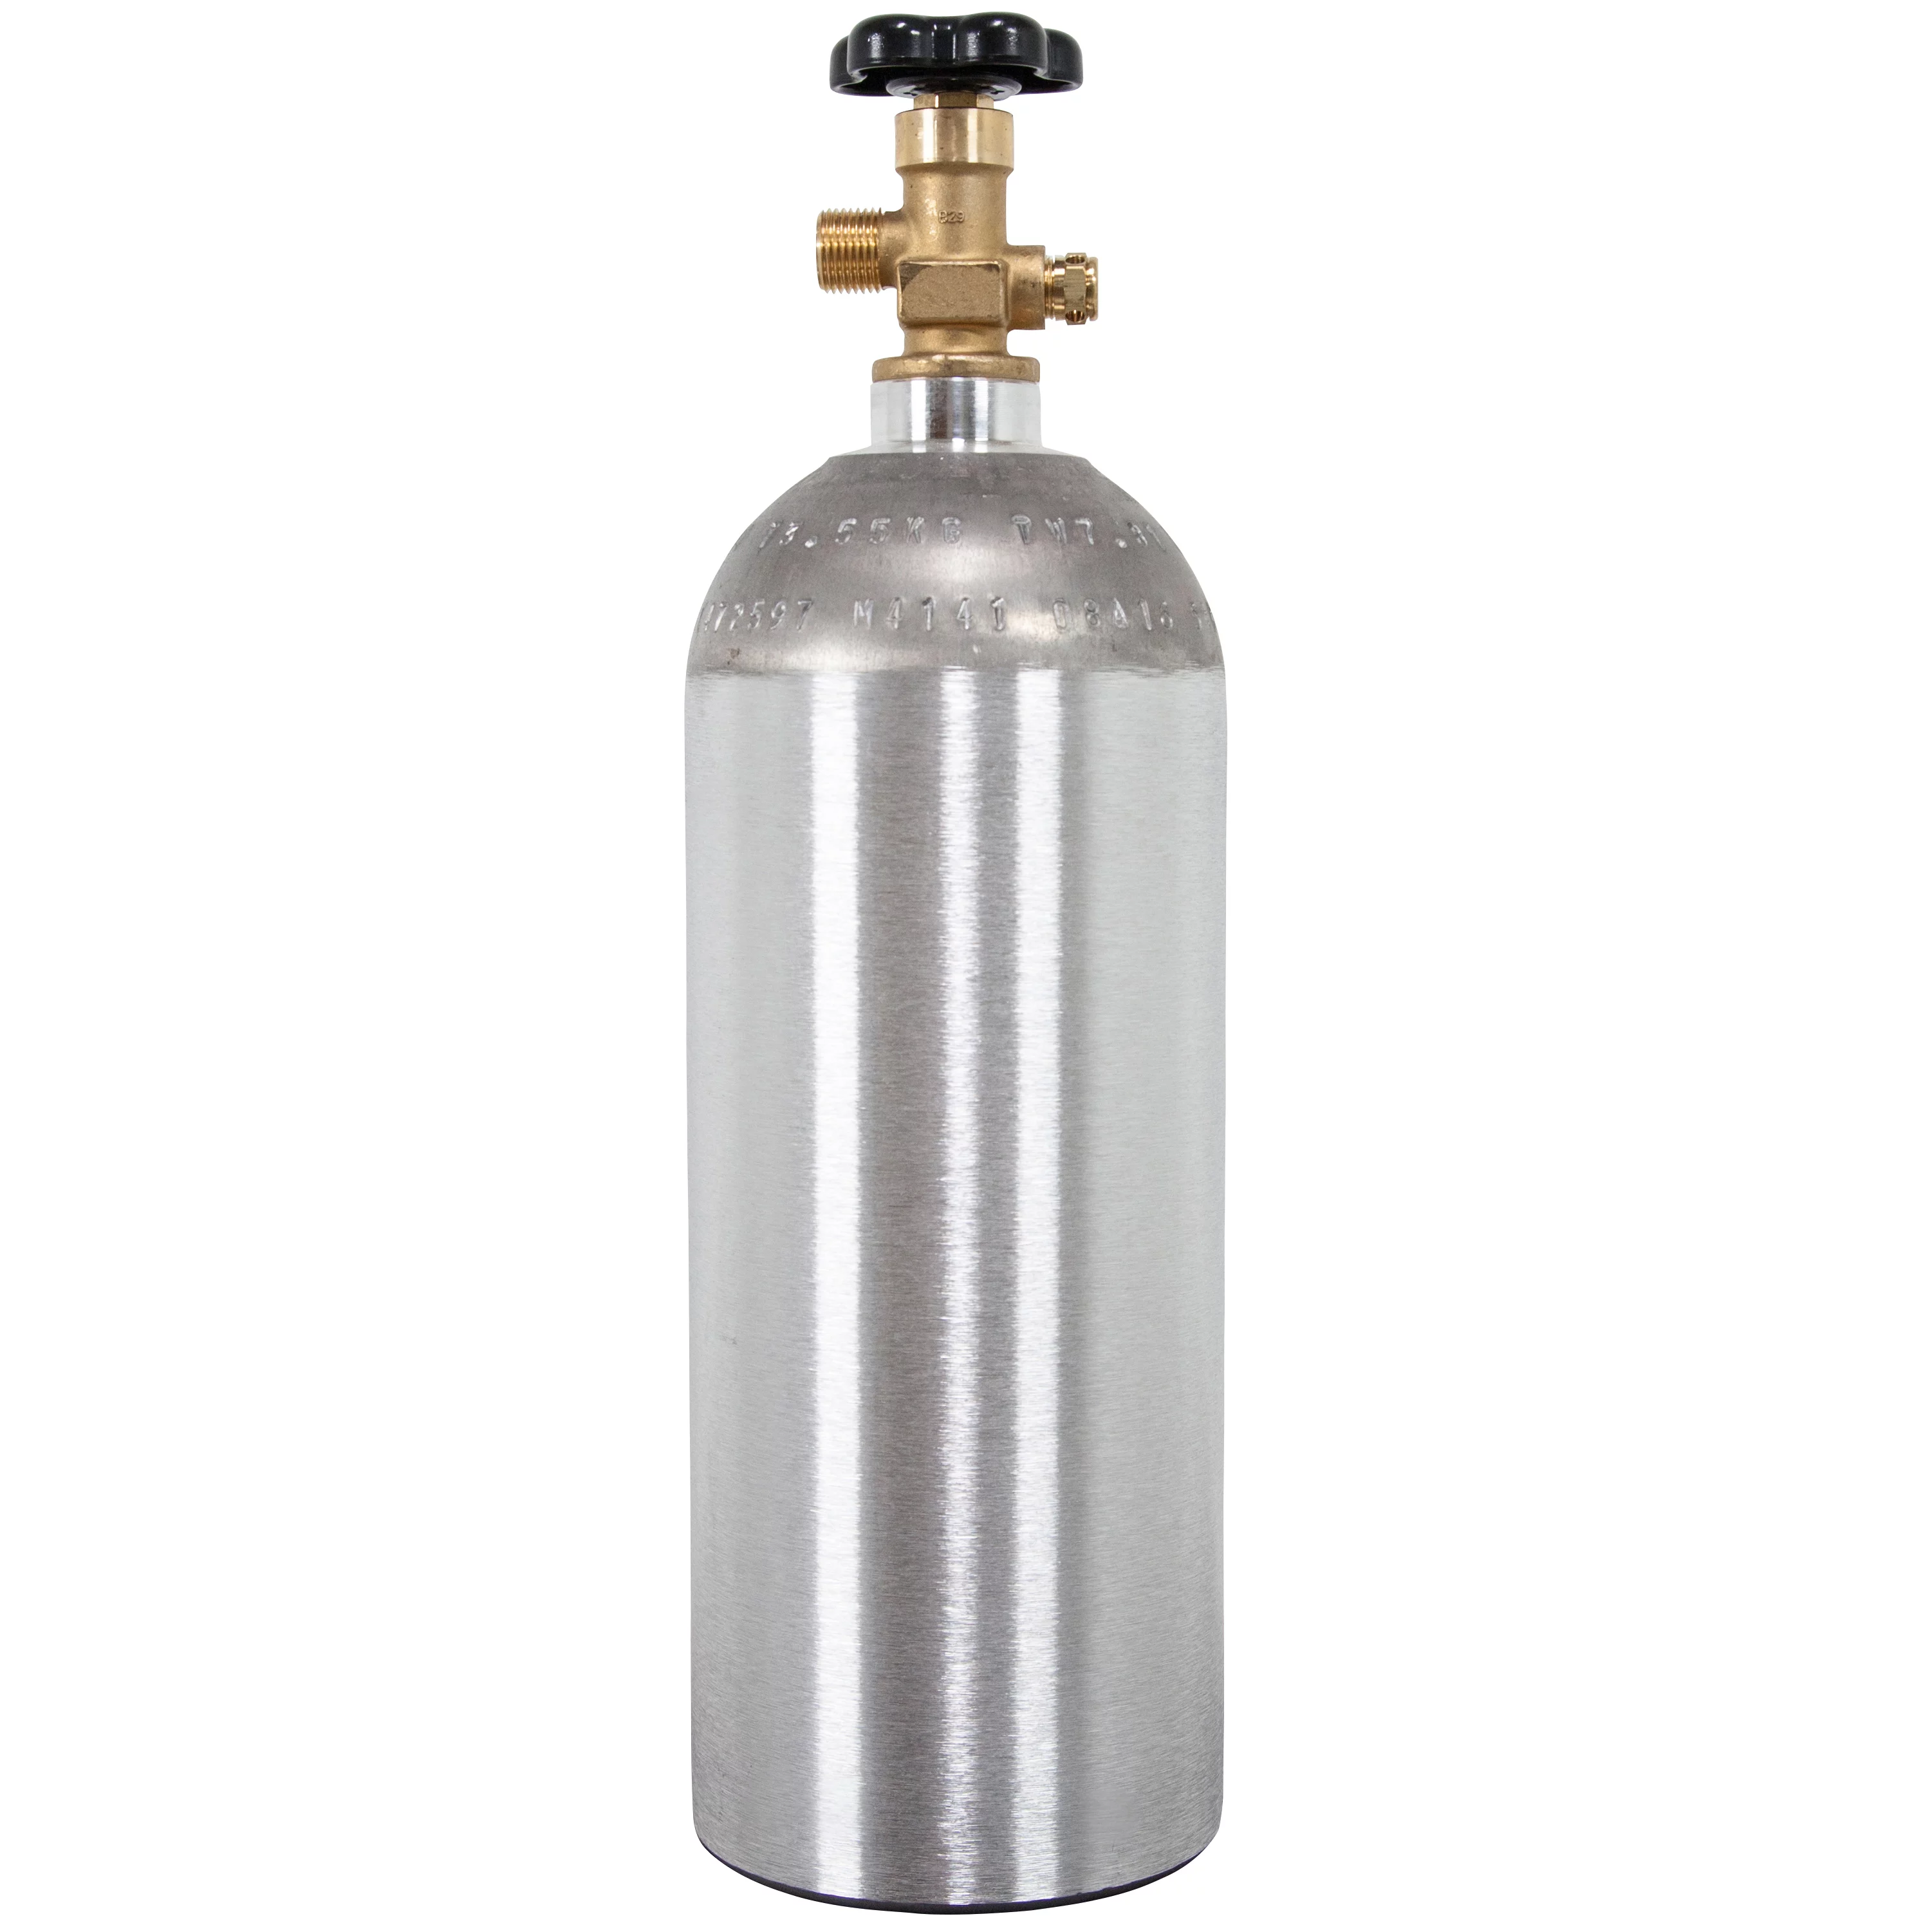
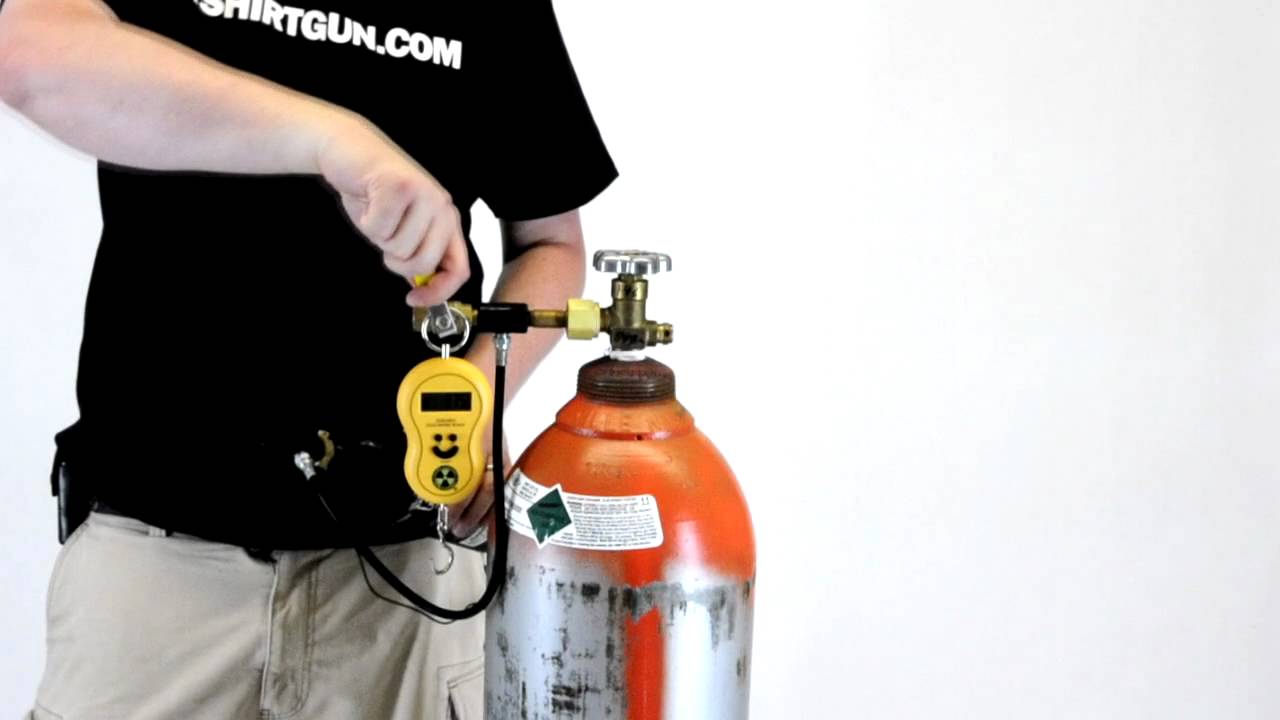
- CO2 setup: Familiarize yourself with the CO2 setup of your kegerator. Ensure that the CO2 tank is filled or has sufficient pressure to carbonate and dispense the beer. Understand how to regulate the CO2 pressure and adjust it according to the desired carbonation level.
- Dispensing system: Determine the type of dispensing system you want for your kegerator. This includes the type of faucet and tap handle you prefer, as well as any additional accessories such as drip trays, beer towers, or custom branding.
- Beer line length: Consider the length of the beer lines in your kegerator. Longer beer lines can help balance the pressure and reduce foaming issues. However, excessively long lines may require higher serving pressures, resulting in slower pour times.
- Brand reputation and warranty: Research and choose a kegerator brand that has a solid reputation for quality and reliability. Look for a manufacturer that offers a warranty on their products to provide peace of mind and assurance.
By considering these factors, you can ensure that you have the right kegerator setup and conditions to fill and serve your favorite beer with optimal taste and quality. Taking the time to carefully plan and prepare will create a rewarding experience as you enjoy perfectly poured beers from your kegerator.
Step 1: Selecting the right keg
Choosing the right keg is an essential step in the process of filling your kegerator. The type and size of keg you select will depend on your personal preferences, available space, and the type of beer you want to serve. Here are some factors to consider when selecting the right keg:
- Keg size: Determine the size of the keg that will fit comfortably in your kegerator. Common keg sizes include:
- – Half-barrel (15.5 gallons): This is the standard full-size keg, ideal for large gatherings or commercial use.
- – Quarter-barrel (7.75 gallons): Also known as a pony keg, this size is more suitable for smaller gatherings or personal use.
- – Sixth-barrel (5 gallons): Often referred to as a sixtel, this size is perfect for those who want variety and flexibility, as it can accommodate multiple kegs in the kegerator.
- Beer type: Consider the style of beer that you prefer. Different beers have different flavors, characteristics, and serving recommendations. Some examples include lagers, ales, stouts, IPAs, and specialty craft beers. Choose a keg that aligns with your taste preferences and the preferences of your guests.
- Brewery or brand: If you have a favorite brewery or specific beer brand, check if they offer kegs for sale. This way, you can enjoy your preferred beer in the comfort of your own home. Many breweries offer kegs for purchase or rent, so reach out to your local brewery or distributor for availability.
- Freshness: Consider the freshness of the beer when selecting a keg. Opt for kegs that have a reasonable shelf life remaining to ensure that the beer maintains its quality and taste. Check the production date or inquire about the delivery date to ensure you are getting the freshest beer possible.
- Keg compatibility: Ensure that the keg you select is compatible with your specific kegerator system. Different kegerators may have varying coupler styles, such as a Sankey D, Sankey S, or European/G-type couplers. Verify the appropriate coupler type required by your kegerator manufacturer to ensure a proper fit.
- Price and availability: Consider your budget and the availability of the keg you want. Prices for kegs can vary depending on the brand, size, and beer type. Check with local liquor stores, beverage distributors, or online retailers to compare prices and availability.
By considering these factors, you can select the right keg that fits your kegerator and satisfies your beer preferences. Take your time to research and make an informed decision to ensure that you have a great selection of beer ready to be enjoyed from your kegerator.
Read more: How To Fill A Growler Using Your Kegerator
Step 2: Setting up the kegerator
Setting up your kegerator properly is crucial for optimal performance and a great beer-drinking experience. Follow these step-by-step instructions to ensure a smooth setup:
- Choose a suitable location: Find a suitable location for your kegerator, considering factors such as accessibility, ventilation, and clearance. Ensure that the kegerator is placed on a stable, level surface to avoid any imbalance or damage.
- Unpack and clean: Carefully unpack your kegerator and remove any packaging materials. Before putting the kegerator into operation, clean the inside with warm water and mild soap. Rinse thoroughly to remove any residue.
- Allow for ventilation: Check the manufacturer’s instructions for the specific ventilation requirements of your kegerator model. Make sure there is sufficient space around the kegerator to allow for proper air circulation and ventilation to prevent overheating.
- Assemble accessories: Install any additional accessories, such as beer towers, drip trays, or tap handles, according to the manufacturer’s instructions. Ensure they are securely attached and properly aligned.
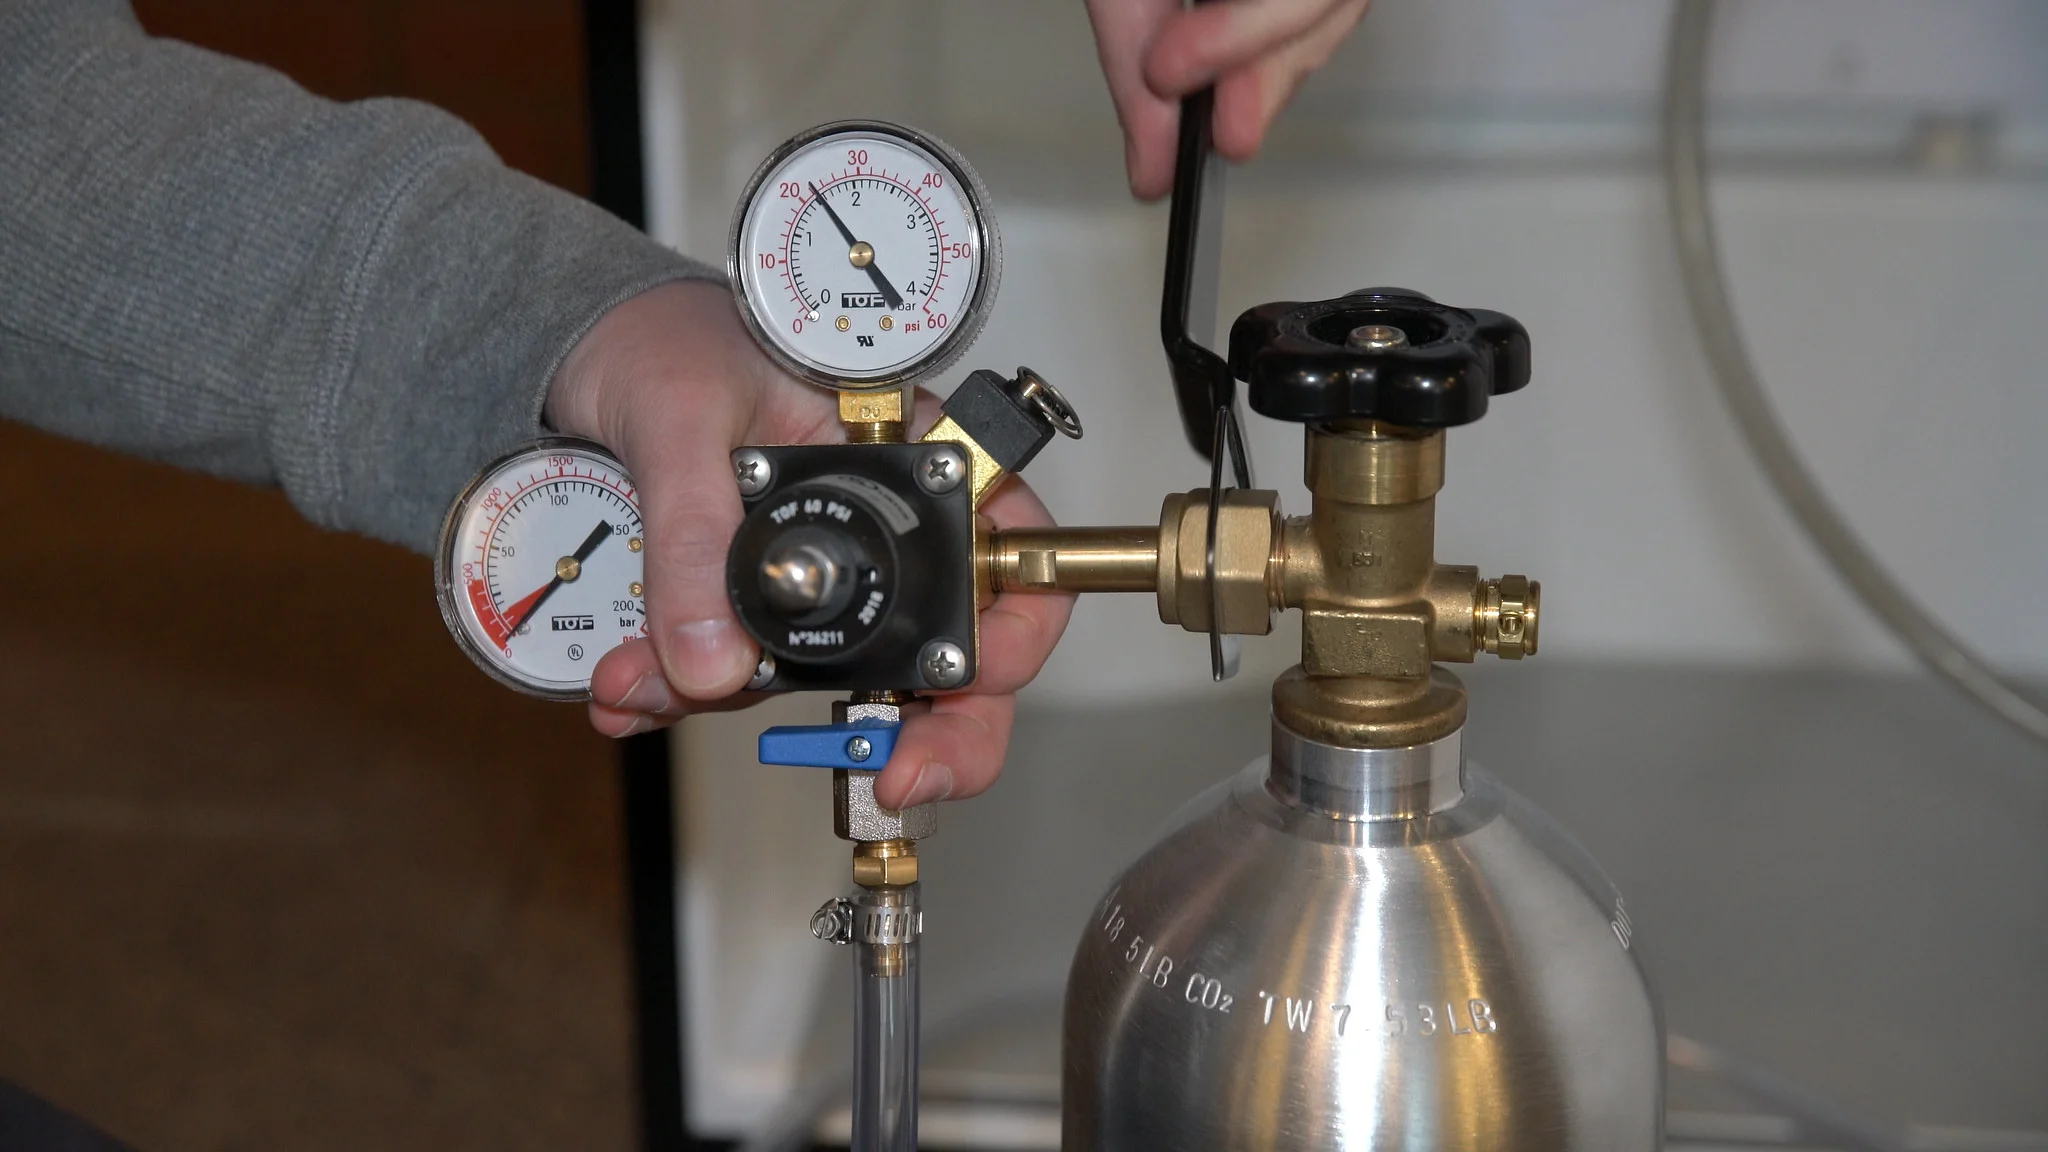
- Set up CO2 system: Connect the CO2 tank to the kegerator according to the manufacturer’s instructions. Ensure that the CO2 tank is securely fastened and in an upright position. Use a wrench to tighten the connections gently, being careful not to over-tighten.
- Connect beer lines: Connect the beer lines from the keg coupler to the faucet/tap tower. Ensure that the connections are tight and secure, using the appropriate connectors for your kegerator’s system.
- Clean tap system: Before connecting your keg, it is essential to clean the tap system, including the faucet, shank, and beer lines. This will ensure that you have a clean and sanitized setup for dispensing your beer. Use a cleaning solution recommended by the manufacturer and follow the instructions carefully.
- Test for leaks: Once everything is connected, turn on the CO2 and pressurize the system. Spray a mixture of soapy water on all the connections and look for any bubbles. Bubbling indicates a leak, which should be addressed and repaired before proceeding.
- Power on and adjust temperature: Finally, plug in your kegerator and power it on. Set the temperature to the recommended range for the beer you are planning to serve. Allow the kegerator to cool down to the desired temperature before proceeding to the next steps.
By following these steps, you will have your kegerator set up and ready to go. Ensure that you read the manufacturer’s instructions and guidelines specific to your kegerator model for any additional or unique setup requirements. With your kegerator properly set up, you’re one step closer to enjoying a refreshing, perfectly poured beer.
Step 3: Cleaning the kegerator
Regular cleaning of your kegerator is vital to maintain the quality and taste of your beer. This step ensures that your system remains free from bacteria, mold, and unwanted residue that can affect the flavor of the beer. Follow these step-by-step instructions to clean your kegerator:
- Gather cleaning supplies: Before you begin, gather the necessary cleaning supplies. This typically includes a cleaning solution recommended by the kegerator manufacturer, a cleaning brush or sponge, and a bucket for mixing the cleaning solution.
- Disconnect and empty keg: Start by disconnecting the keg from the kegerator system. Gently depressurize the keg by pulling on the pressure relief valve. Once depressurized, remove the keg from the kegerator and set it aside.
- Flush and clean beer lines: Remove the draft faucet/tap handle, faucet shank, and any other detachable parts connected to the beer lines. Soak these parts in the cleaning solution as recommended by the manufacturer. Use a cleaning brush or sponge to thoroughly clean the inside of the beer lines, removing any buildup or residue.
- Clean keg coupler: If your kegerator has a keg coupler, detach it from the kegerator and disassemble any removable parts. Soak these parts in the cleaning solution and use a brush or sponge to clean them thoroughly. Rinse all components with clean water before reassembling.
- Wash kegerator interior: Mix the cleaning solution with warm water in a bucket according to the manufacturer’s instructions. Use this solution to thoroughly clean the interior walls, shelves, and surfaces of the kegerator. Pay special attention to areas that come into contact with the beer, such as the bottom and the drip tray. Rinse all surfaces with clean water to remove any residue.
- Sanitize the system: After cleaning, sanitize the kegerator and all the detachable parts using a food-safe sanitizing solution. This step ensures that any remaining bacteria or contaminants are eliminated. Follow the instructions provided by the manufacturer to ensure proper sanitation.
- Reassemble and reconnect: Once the interior and detachable parts are clean and sanitized, reassemble the kegerator and reconnect the beer lines, faucet, and keg coupler. Ensure that all connections are secure and tight.
- Flush system and reattach keg: To flush the cleaning solution from the system, connect a container of clean water to the keg coupler and run it through the beer lines until the water runs clear. Once flushed, reattach the keg and pressurize the system with CO2.
- Test for cleanliness and functionality: To ensure that the cleaning process was effective, pour a small sample of beer and assess its taste, clarity, and aroma. Verify that all components are functioning properly, including the faucet, tap handle, and CO2 pressure.
Regularly cleaning your kegerator will help maintain the integrity of your beer and prevent any potential contaminants from affecting its taste. Following these cleaning steps will ensure that your kegerator remains a hygienic and reliable system for dispensing fresh and delicious beer.
When filling a kegerator, make sure to clean and sanitize the lines and tap to prevent off-flavors and contamination. Also, use a CO2 tank to pressurize the keg for dispensing.
Step 4: Connecting the keg to the kegerator
Once your kegerator is set up and clean, it’s time to connect the keg and get ready to pour some beer. Follow these step-by-step instructions to properly connect the keg to the kegerator:
- Prepare the keg: Ensure that the keg is chilled to the appropriate serving temperature before connecting it to the kegerator. Most kegs require a temperature range of 36-40°F (2-4°C) for optimal taste and carbonation.
- Locate the keg coupler: Identify the keg coupler, which is the device that connects the keg to the kegerator’s beer line system. The type of coupler you have will depend on the brand and style of your kegerator and keg.
- Sanitize the keg coupler: Before connecting the keg, it’s important to sanitize the keg coupler. Use a sanitizing solution or wipes to clean the coupler, ensuring that any bacteria or contaminants are eliminated.
- Remove the keg coupler cap: If there is a cap covering the keg coupler, remove it carefully. This cap helps to keep the coupler clean and protected during storage and transport.
- Position the keg: Slide the keg into the kegerator, making sure it is properly aligned with the opening. Be cautious, as kegs can be heavy and bulky.
- Insert the keg coupler: Firmly push the keg coupler into the opening on top of the keg. Rotate the coupler clockwise to lock it in place and ensure a tight seal.
- Secure the connection: Once the keg coupler is inserted and locked, use the coupling lever to secure the connection. Pull the lever down or to the side, depending on the coupler style, until it is in the locked position.
- Connect the beer line: Attach the beer line from the kegerator to the keg coupler. Ensure that the connection is secure and tight to prevent any leaks.
- Check for leaks: Once the keg is connected, check for any leaks around the keg coupler and beer line connection. Use a soapy water solution or spray to identify any bubbles, which indicate a leak. If you notice any leaks, recheck the connections and tighten them as needed.
- Pressurize the keg: Open the valve on the CO2 tank to pressurize the keg. Adjust the CO2 regulator to the recommended pressure for the type of beer you are serving. Consult the beer supplier or manufacturer for the appropriate pressure settings.
- Clean and sanitize the tap handle: Before pouring your first beer, clean and sanitize the tap handle to ensure cleanliness. Use a sanitizing solution or wipe to remove any potential contaminants.
By following these steps, you can confidently connect the keg to your kegerator and ensure a secure and sealed connection. Remember to handle the keg with care and always follow the specific instructions provided by your kegerator manufacturer for your particular model.
Step 5: Regulating the temperature
Proper temperature regulation is essential to ensure that your beer is served at its best. Maintaining the correct temperature in your kegerator helps preserve the flavor, carbonation, and overall quality of the beer. Follow these step-by-step instructions to regulate the temperature in your kegerator:
- Refer to the beer’s serving temperature: Consult the beer supplier or the beer’s manufacturer for the recommended serving temperature. Different beer styles have specific temperature ranges that enhance their flavors.
- Locate the temperature control settings: On your kegerator, locate the temperature control settings. These can typically be found on the inside of the kegerator or on the external control panel.
- Set the temperature: Adjust the temperature settings according to the recommended temperature for the beer you are serving. Typically, a temperature range of 36-40°F (2-4°C) is suitable for most beers, although specific styles may have different requirements.
- Allow time for adjustment: After adjusting the temperature setting, allow the kegerator some time to reach the desired temperature. This may take several hours or even up to a day, depending on the size and efficiency of your kegerator.
- Check and monitor: Use a thermometer to periodically check and monitor the temperature inside the kegerator. Ensure that it remains within the desired range. Make adjustments to the temperature settings as needed to maintain a consistent temperature.
- Be mindful of variations: Be aware that the temperature near the faucet may differ slightly from the internal temperature of the kegerator. The beer lines and faucets are exposed to ambient air, which can cause a minor temperature variation. Take this into account when measuring and setting the temperature.
- Consider external factors: Keep in mind that external factors, such as the frequency of opening the kegerator, ambient room temperature, and the number of kegs stored, can all impact the internal temperature. Adjustments may need to be made to compensate for these factors.
- Regularly monitor and adjust: Regularly check the temperature and adjust the kegerator settings as needed to maintain the desired serving temperature. This will ensure a consistently enjoyable beer-drinking experience.
It’s important to note that different beer styles may have specific temperature preferences. Lighter beers, such as lagers and pilsners, are typically served at colder temperatures, while darker beers, like stouts and porters, are often served at slightly higher temperatures. Understanding the optimal serving temperature for your chosen beer style will help you set and regulate the temperature in your kegerator more effectively.
By properly regulating the temperature in your kegerator, you can ensure that each pour is at the perfect temperature, enhancing the flavor and enjoyment of your beer.
Read more: What Do You Need To Know To Buy A Kegerator
Step 6: Carbonating the beer
Carbonation plays a crucial role in creating the right mouthfeel and effervescence in your beer. Carbonating your beer properly ensures that it is refreshing and satisfying to drink. Follow these step-by-step instructions to carbonate your beer in the kegerator:
- Choose the appropriate carbonation method: There are two common methods for carbonating your beer in a kegerator: natural carbonation and forced carbonation.
- Natural carbonation: Natural carbonation involves allowing the beer to naturally carbonate over time. After connecting the keg to the kegerator, set the CO2 pressure to a low level (around 10-12 PSI) or even turn it off completely. Allow the beer to sit in the kegerator for a few weeks, allowing the remaining yeast to naturally carbonate the beer. This method requires patience, as it takes time for the beer to fully carbonate.
- Forced carbonation: Forced carbonation is a quicker method that involves using the CO2 system to carbonate the beer. After connecting the keg to the kegerator, set the CO2 pressure to the desired level for the beer style you are serving. Typically, this ranges from 10-20 PSI. Leave the CO2 connected for a few days, periodically shaking or rolling the keg to help facilitate carbonation. The time required for forced carbonation depends on factors such as temperature, pressure, and desired level of carbonation.
- Check carbonation levels: After the carbonation process, check the carbonation level of your beer. Release some pressure from the keg and pour a small sample. Assess the level of carbonation by observing the amount of foam, bubbles, and effervescence in the beer as it pours and the taste on the palate.
- Adjust carbonation if necessary: If the beer is under-carbonated, increase the CO2 pressure slightly and continue the carbonation process. If it is over-carbonated, reduce the CO2 pressure gradually and allow excess carbonation to escape through the pressure relief valve before serving.
- Store and condition the beer: Once you have achieved the desired carbonation levels, store the keg in the kegerator and condition the beer at the recommended serving temperature for a few days. This will allow the flavors to meld and the carbonation to stabilize, resulting in a well-balanced and delicious beer.
It’s important to note that the carbonation process may vary depending on factors such as the type of beer, desired carbonation level, and personal preference. Experimenting with different pressure levels and carbonation methods will help you discover the perfect carbonation for your beer.
By following these steps, you can carbonate your beer to perfection in your kegerator, creating a satisfying and enjoyable drinking experience for yourself and your guests.
Step 7: Pouring beer from the kegerator
Now that your beer is properly carbonated and ready to be enjoyed, it’s time to pour a perfect pint from your kegerator. Follow these step-by-step instructions to ensure a smooth and satisfying pour:
- Clean and sanitize the faucet and glass: Before pouring your first beer, clean and sanitize the faucet and the glass you will be using. This helps maintain hygiene and prevents any off-flavors or contaminants from affecting the taste of the beer.
- Position the glass: Hold the glass at a 45-degree angle, just below the faucet. This angle allows the beer to flow down the side of the glass, preventing excess foam and maximizing the flavors and aromas.
- Open the faucet: Slowly open the faucet by pulling the tap handle forward towards you. Gradually increase the flow of beer until the glass is about halfway full. Be careful not to open the faucet too quickly, as it can cause excessive foam and an improper pour.
- Straighten the glass: Once the glass is halfway full, gradually straighten it to an upright position while continuing to pour. This helps create a smooth and controlled pour, reducing excess foam and allowing the beer to settle properly.
- Control the flow: Adjust the flow of beer by partially opening or closing the faucet. This allows you to achieve the desired amount of head on the beer. Experiment to find the perfect balance between beer and foam according to your preference and the beer style.
- Fill the glass: Continue pouring the beer into the glass until it is nearly full, leaving some room at the top for the head. Aim to leave about 1 inch of headspace, as this enhances the aromas and releases the carbonation in the beer.
- Cap and refrigerate the keg: Once you have poured your desired amount of beer, cap the keg with a clean and sanitized cap. Store the keg back in the kegerator at the recommended temperature to maintain the freshness and quality of the remaining beer.
- Enjoy your beer: Take a moment to appreciate your perfectly poured beer. Savor the flavors, aromas, and textures as you enjoy your pint from the kegerator.
Remember, practice makes perfect when it comes to pouring beer from the kegerator. It may take a couple of tries to get the pour just right, but with each attempt, you’ll become more skilled in achieving the ideal balance of beer and foam.
By following these steps, you can confidently pour a refreshing pint of beer from your kegerator, showcasing the flavors and characteristics of the brew to the fullest extent.
Maintenance and Troubleshooting Tips
Regular maintenance and troubleshooting are essential to keep your kegerator running smoothly and to address any issues that may arise. Here are some maintenance and troubleshooting tips to help you maintain and troubleshoot your kegerator:
- Regular cleaning: Clean your kegerator regularly to prevent bacteria growth and maintain the quality of your beer. This includes cleaning the interior, beer lines, faucets, and other removable parts. Refer to the manufacturer’s instructions for specific cleaning recommendations.
- Check CO2 levels: Regularly check the CO2 levels in your tank to ensure it is adequately filled. Low CO2 levels can result in flat beer or difficulty in pouring properly. Replace or refill the tank as needed.
- Inspect seals and connections: Periodically inspect all seals, gaskets, and connections for any signs of wear or leaks. Replace any worn-out parts to prevent air or CO2 leakage, which can affect the pressure and carbonation of the beer.
- Monitor temperature: Continuously monitor the temperature inside your kegerator to ensure it remains within the desired range. Fluctuations in temperature can affect the quality and taste of the beer. Adjust the temperature settings if necessary.
- Adjust CO2 pressure: As the temperature changes, you may need to adjust the CO2 pressure to maintain the appropriate carbonation level. Higher temperatures may require lower pressure, while colder temperatures may require higher pressure. Monitor the carbonation and adjust as needed to achieve the desired results.
- Inspect and clean faucets: Regularly inspect and clean the faucets to prevent any buildup or clogging. Disassemble the faucet and soak it in a cleaning solution, then use a brush to remove any residue. Rinse thoroughly before reassembling.
- Bleed system before pouring: If you encounter excessive foam or inconsistent pouring, it may be necessary to bleed the system. This involves releasing some pressure from the keg by pressing the pressure relief valve. Bleeding the system helps release excess carbonation and allows for a smoother pour.
- Troubleshoot foaming issues: Excessive foam can be caused by various factors, such as incorrect temperature, improper pressure, dirty lines, or improperly balanced system. Troubleshoot the issue by adjusting the temperature, pressure, and cleaning the lines. If necessary, consult the kegerator manufacturer’s manual or contact customer support for further assistance.
- Check for leaks: Regularly inspect all connections for any signs of leaks. Use a soapy water solution and check for bubbles. If you notice any bubbles, tighten the connections or replace any faulty parts to prevent air or CO2 leakage.
- Keep kegs organized: Properly organize and rotate your kegs to ensure that the older kegs are used first. This helps maintain freshness and avoids any spoilage or off-flavors.
By performing regular maintenance and addressing troubleshooting issues promptly, you can ensure that your kegerator operates efficiently and provides you with consistently great-tasting beer. Refer to the manufacturer’s guidelines and instructions for additional maintenance recommendations specific to your kegerator model.
Remember, each kegerator may have unique features and requirements, so it’s essential to consult the manufacturer’s manual and follow their specific recommendations for maintenance and troubleshooting.
Conclusion
Congratulations! You have now mastered the art of filling, maintaining, and enjoying beer from your kegerator. By following the steps outlined in this guide, you can ensure that your kegerator provides you and your guests with fresh, perfectly poured pints of beer.
From selecting the right keg to cleaning and troubleshooting your kegerator, each step is essential in creating an optimal beer-drinking experience. The type of kegerator you choose, the keg you fill it with, and the care and maintenance you provide all contribute to the quality and taste of the beer.
Remember to keep your kegerator clean, properly regulate the temperature, and monitor the carbonation levels to ensure the best possible pour. Regular maintenance and troubleshooting will help address any issues that may arise, ensuring the longevity and performance of your kegerator.
Whether you’re enjoying a refreshing lager, a hoppy IPA, or a smooth stout, the joy of pouring a fresh pint from your kegerator cannot be understated. You can now invite friends and family over to share in the delight of enjoying beer on tap in the comfort of your own home.
Cheers to your new-found expertise in filling a kegerator and to many happy moments of sharing great beer with your loved ones!
Frequently Asked Questions about How Do You Fill A Kegerator
Was this page helpful?
At Storables.com, we guarantee accurate and reliable information. Our content, validated by Expert Board Contributors, is crafted following stringent Editorial Policies. We're committed to providing you with well-researched, expert-backed insights for all your informational needs.


0 thoughts on “How Do You Fill A Kegerator”