
Articles
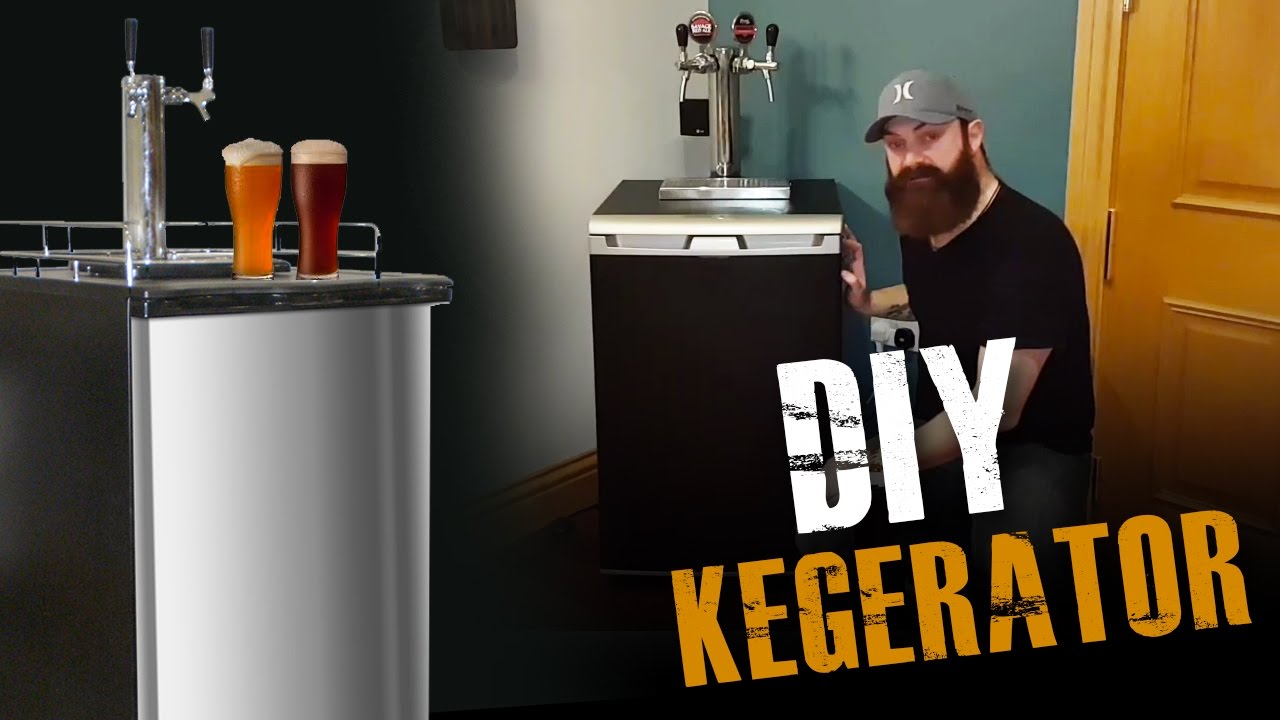
How To Setup A Kegerator
Modified: August 30, 2024
Learn how to set up a kegerator with our informative articles. Find step-by-step instructions and tips for a perfect pour.
(Many of the links in this article redirect to a specific reviewed product. Your purchase of these products through affiliate links helps to generate commission for Storables.com, at no extra cost. Learn more)
Introduction
Welcome to the world of draft beer – where you can enjoy the rich flavors and refreshing tastes of your favorite brews right in the comfort of your own home. Whether you are a beer connoisseur, a homebrewer, or simply a casual drinker who wants to elevate their at-home drinking experience, setting up a kegerator is the perfect solution.
A kegerator is a specialized refrigerator specifically designed to store and dispense kegs of beer. It provides a convenient and efficient way to keep your beer cool and carbonated, eliminating the need for bottles or cans. Not only does it offer a cost-effective alternative for those who frequently entertain or enjoy a pint at home, but it also allows for greater variety by enabling you to have multiple beer options on tap at once.
In this article, we will guide you through the process of setting up a kegerator, from choosing the right model to assembling and installing the tap system. We’ll also cover maintenance and troubleshooting tips to ensure that your kegerator continues to pour perfect pints for years to come.
So, if you’re ready to take your home bar to the next level and enjoy the unmatched freshness and convenience of draft beer at home, let’s dive in and learn how to set up your very own kegerator.
Key Takeaways:
- Elevate your at-home drinking experience by setting up a kegerator, offering convenience, variety, and the ability to enjoy freshly poured draft beer anytime you want.
- Ensure optimal performance and perfect pours by following proper cleaning, maintenance, and troubleshooting practices for your kegerator, extending its lifespan and enhancing your beer-drinking experience.
Read more: How To Setup A Hot Tub
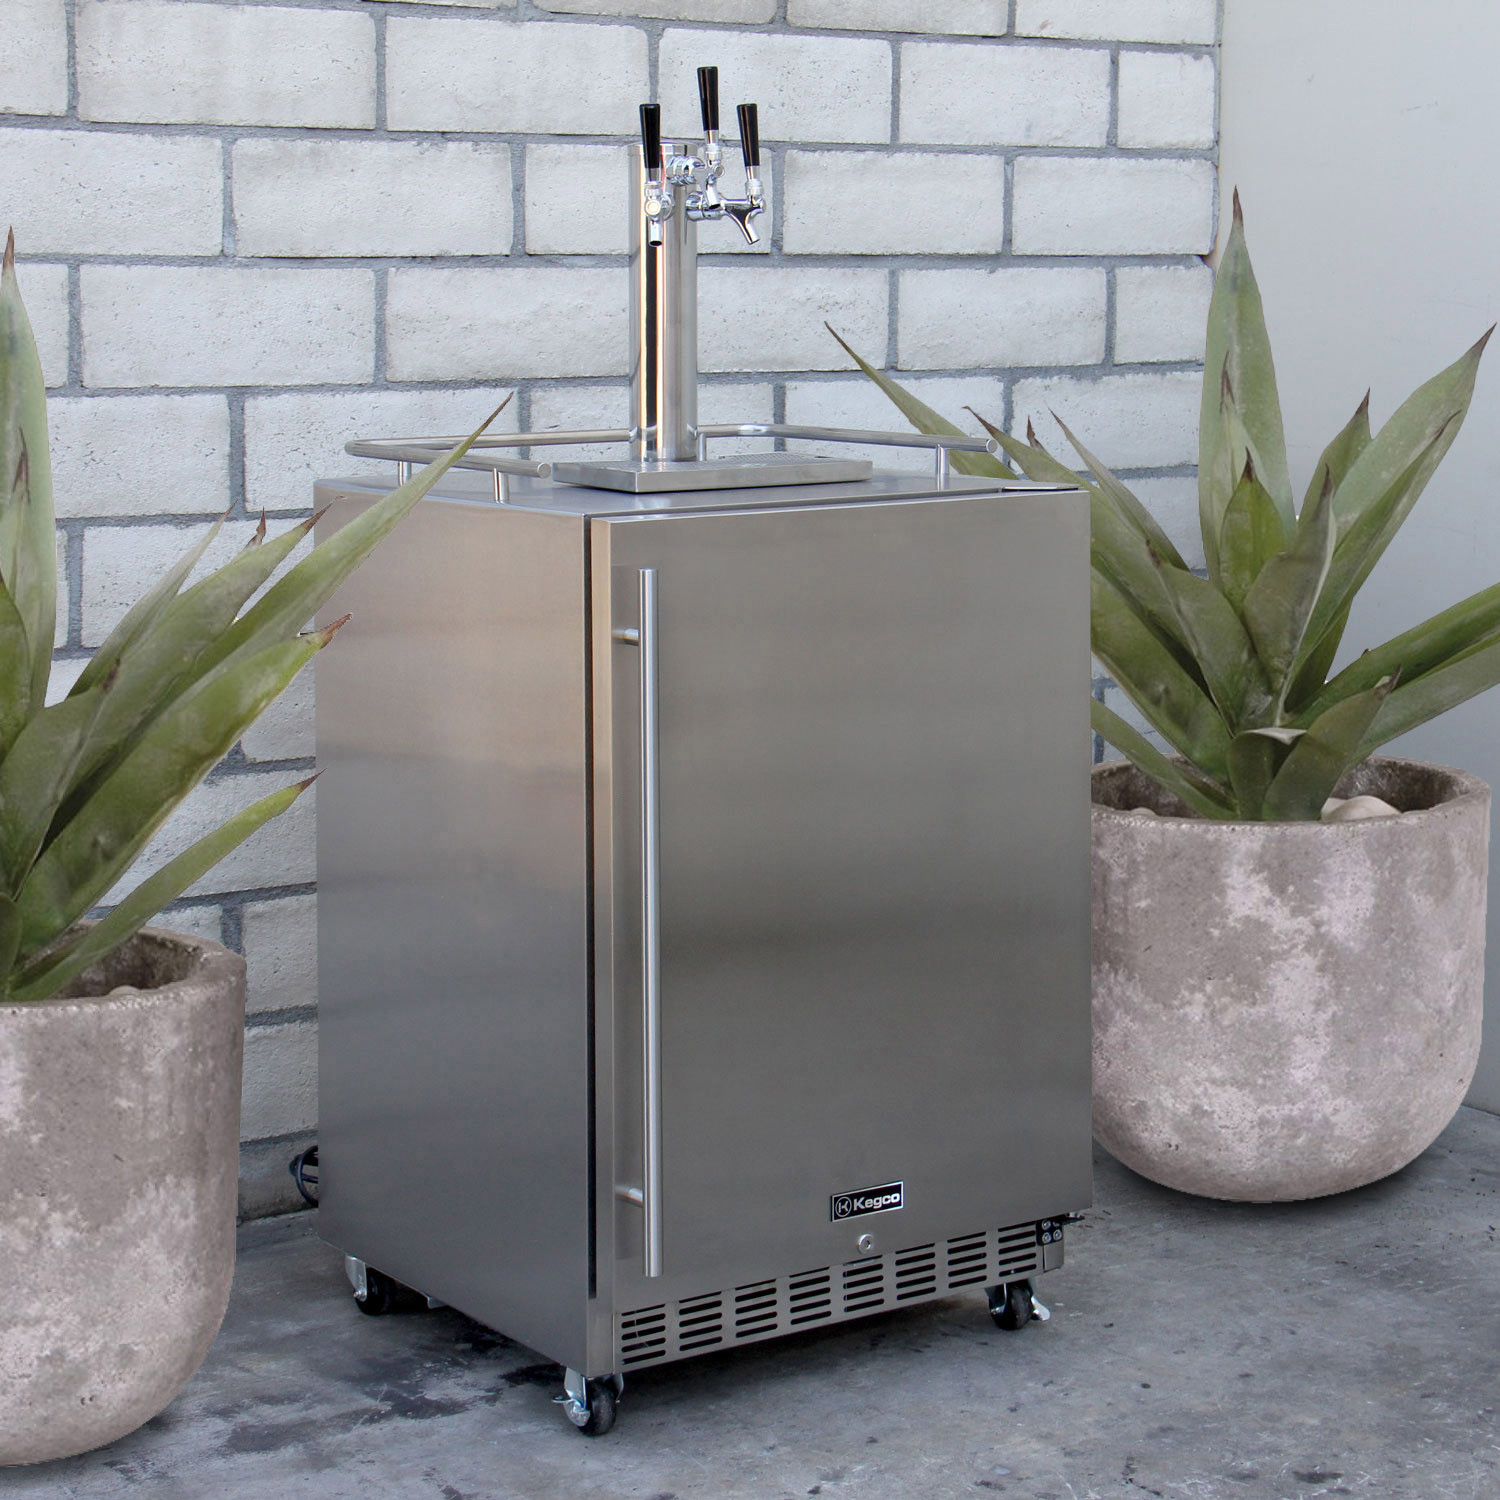
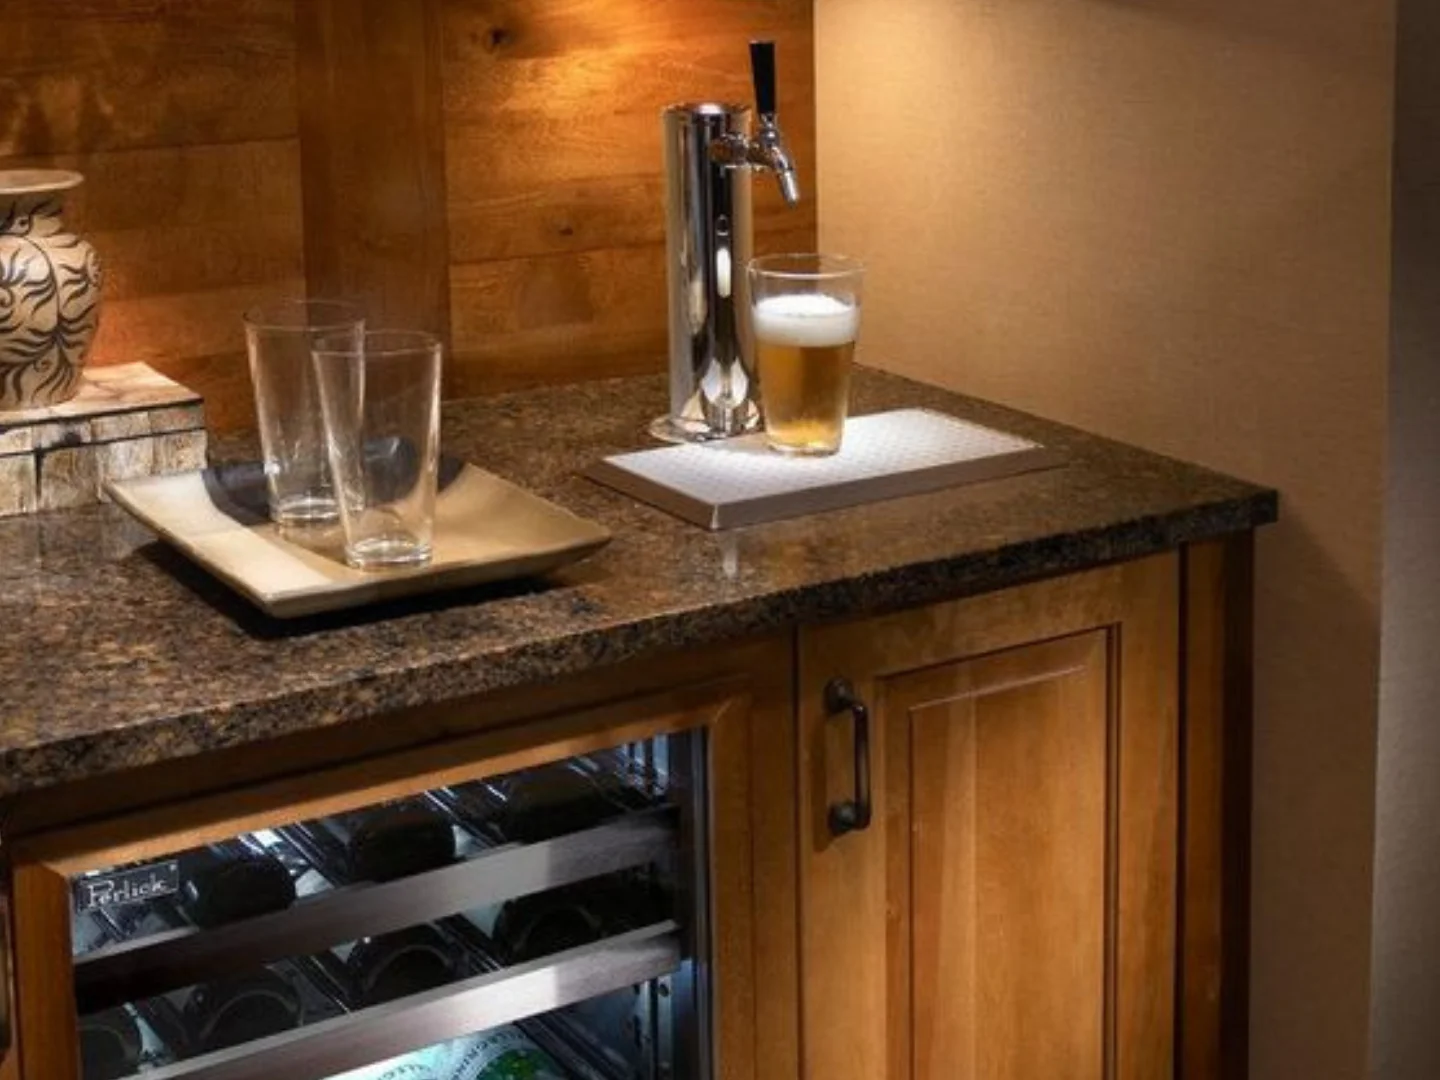
Choosing a Kegerator Model
When it comes to selecting a kegerator model, there are several factors to consider to ensure that you choose the right one for your needs. Here are some key points to keep in mind:
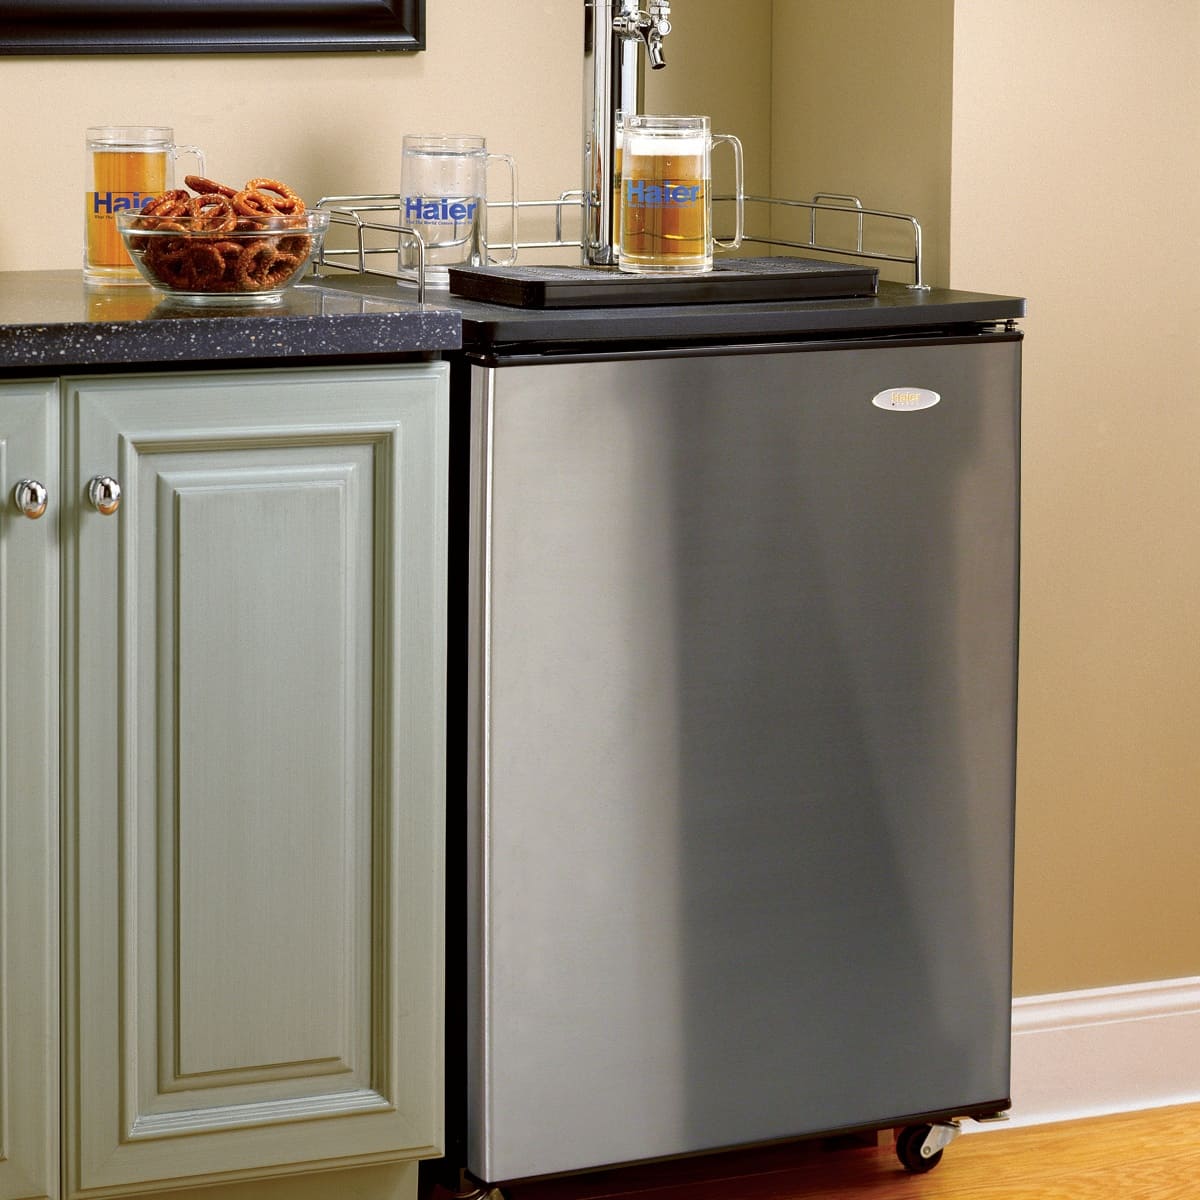
- Size and Capacity: Kegerators come in various sizes, ranging from compact countertop models to larger freestanding units. Consider the available space in your home or bar area and the number of kegs you plan to have on tap simultaneously. Make sure to choose a kegerator with enough internal space to accommodate your desired keg sizes.
- Single or Multiple Tap: Determine whether you want a kegerator with a single tap or multiple taps. A single tap is ideal if you primarily drink one type of beer, while multiple taps allow you to have different beers available at the same time. This is great for parties or for those who enjoy a variety of beer styles.
- Built-in or Freestanding: Decide whether you want a built-in kegerator that can be integrated into your home bar or a freestanding unit that can be moved around. Built-in kegerators offer a sleek and customized look, while freestanding models provide more flexibility in terms of placement.
- Temperature Control: Look for a kegerator with adjustable temperature control. Different beers have different temperature requirements for optimal taste and carbonation, so having the ability to adjust the temperature ensures that you can serve your beer at the perfect temperature every time.
- Brand and Reviews: Research different kegerator brands and read customer reviews to get an idea of their reliability and performance. Look for brands that have a good reputation for quality and durability.
Once you have a clear understanding of your requirements and preferences, it’s time to start shopping for a kegerator that meets your needs. Compare prices and features across different models and brands, keeping in mind the factors mentioned above. Remember, investing in a high-quality kegerator will ultimately provide you with years of enjoyment and save you money in the long run.
Now that you have chosen the right kegerator model, let’s move on to gathering the necessary supplies to complete the setup process.
Gathering the Necessary Supplies
Before you can start assembling and setting up your kegerator, you’ll need to gather a few essential supplies. Having everything ready in advance will help streamline the process and ensure a smooth installation. Here’s a list of supplies you will need:
- Kegerator: Of course, you’ll need the kegerator itself, which you have already selected based on your preferences and requirements.
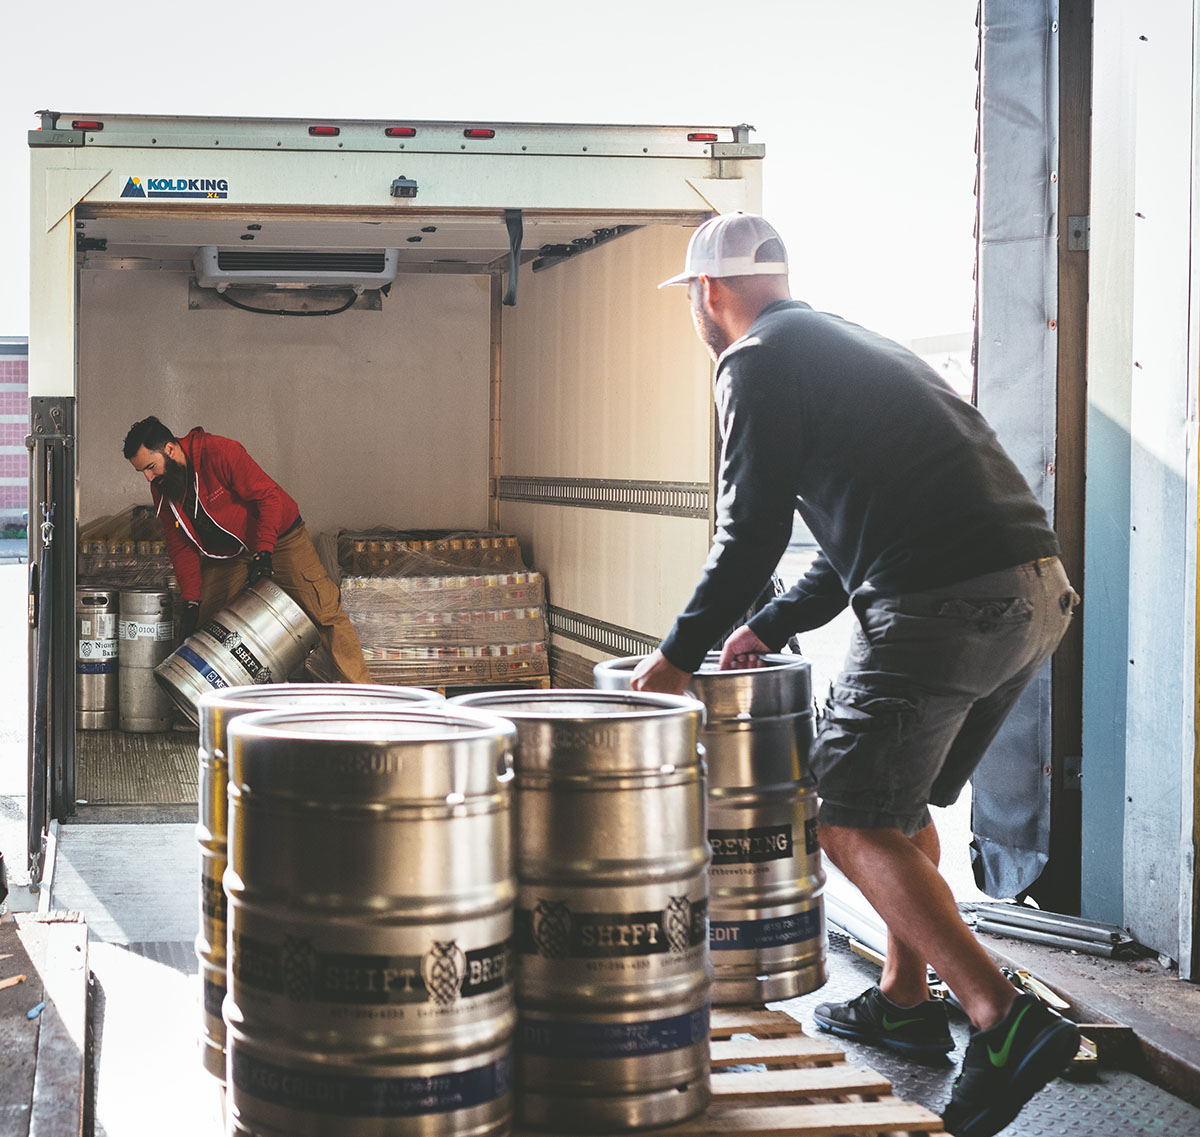
- Keg: Purchase the beer kegs that you want to have on tap. Make sure to choose kegs that are compatible with your chosen kegerator model. Typically, you can opt for standard 5-gallon kegs, but there are also smaller or larger keg options available depending on your needs.
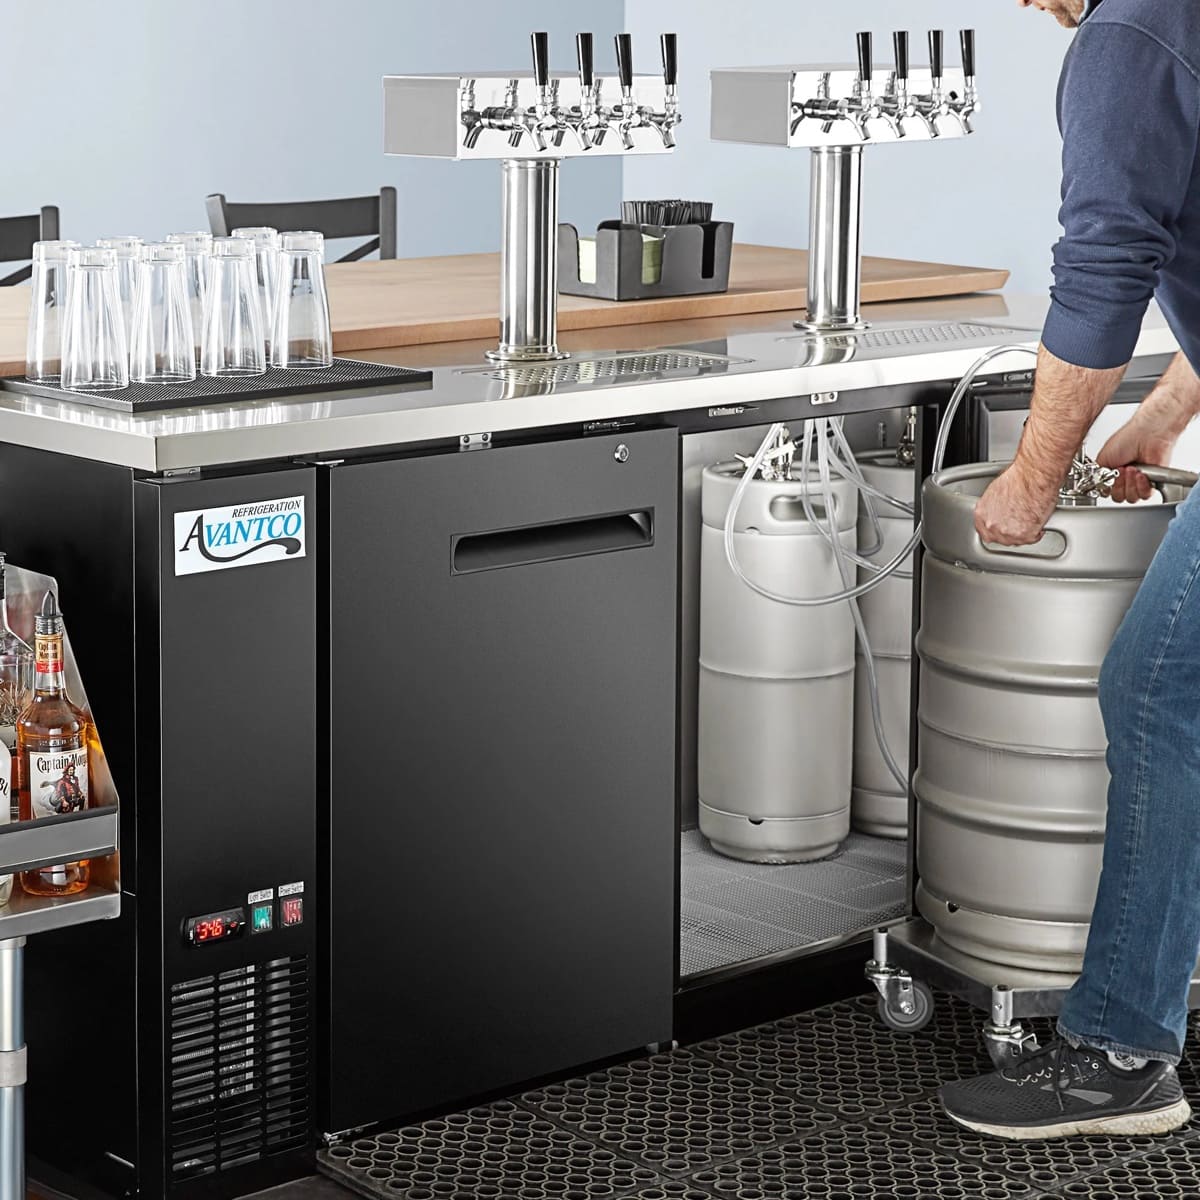
- Tap System: You’ll need a tap system to dispense the beer from the keg. This includes taps, faucets, tap handles, beer lines, and connectors. The number of taps and the specific components will depend on whether you opted for a single or multiple tap kegerator and the style of tap system you prefer.
- CO2 Tank: CO2 is used to carbonate and push the beer from the keg to the tap. You will need a CO2 tank, regulator, and hoses to connect the tank to the keg system. Ensure that the size of the CO2 tank is appropriate for your needs and that it has enough pressure capacity.
- CO2/Beer Line Cleaner: Cleaning your tap lines and kegerator regularly is essential for maintaining the quality and taste of the beer. Purchase a designated cleaner specifically for beer lines and a cleaner for the kegerator itself.
- Sanitizing Solution: It’s crucial to sanitize all the components of your kegerator before assembly to eliminate any potential contaminants. Use a sanitizing solution that is safe for use with food-grade equipment.
- Wrenches and Tools: You may need various wrenches and tools to assemble and tighten the connections of the tap system. Keep a set of adjustable wrenches, a screwdriver, and other basic tools handy.
By gathering these supplies ahead of time, you’ll have everything you need to set up your kegerator without any delays or interruptions. If you want to avoid any last-minute trips to the store, it’s always a good idea to check your inventory and make sure you have all the necessary supplies before you begin the installation process.
Now that you have everything ready, it’s time to move on to assembling and setting up your kegerator.
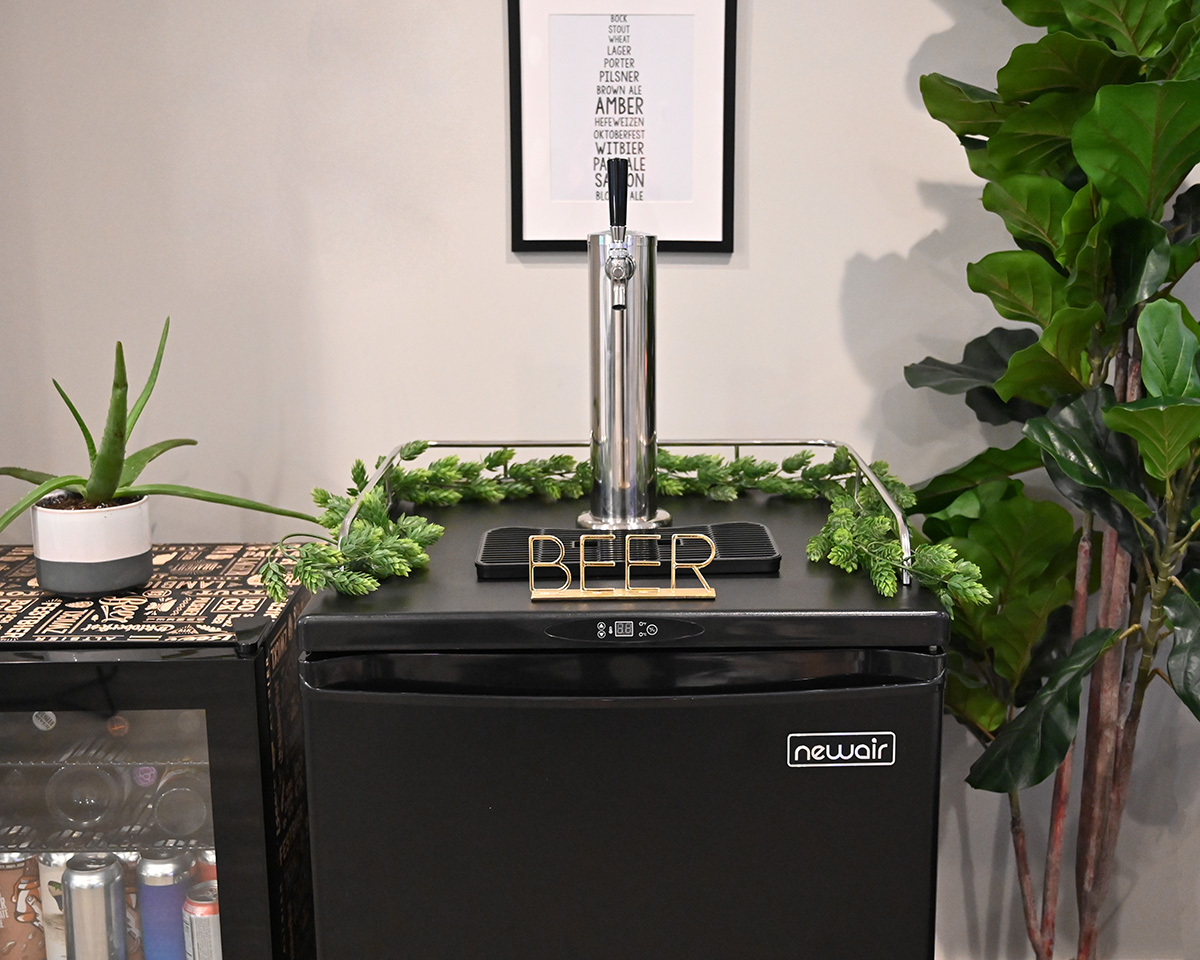
Assembling the Kegerator
Now that you’ve gathered all the necessary supplies, it’s time to assemble your kegerator. Follow these step-by-step instructions to ensure a successful setup:
- Prepare the kegerator: Start by unpacking the kegerator and removing any packaging materials. Place the kegerator in its designated location, ensuring that there is enough space around it for ventilation and easy access to the keg and tap system.
- Insert the drip tray: Most kegerators come with a drip tray that catches any spills or excess beer from the tap. Attach the drip tray according to the manufacturer’s instructions, typically by sliding it into a designated slot on the front of the kegerator.
- Install the beer tower: If your kegerator has a separate beer tower, assemble it and attach it to the top of the kegerator. Secure it in place using the included hardware or by following the manufacturer’s instructions. Make sure the tower is level and tightly attached to prevent any leaks or instability.
- Connect the beer lines: Attach the beer lines to the back of the kegerator. Depending on the kegerator model, there may be designated ports or connectors for the beer lines. Ensure a secure connection and avoid any kinks or bends in the lines that could impede the flow of beer.
- Connect the tap handles: If your kegerator has multiple taps, attach the corresponding tap handles to the front of the beer tower. Screw them into place using the provided hardware, making sure they are firmly attached.
- Sanitize the keg: Before inserting the keg, thoroughly sanitize the inside of the kegerator and the keg itself. Use a sanitizing solution designed for use with food-grade equipment and follow the manufacturer’s instructions. Rinse everything well with clean water after sanitizing.
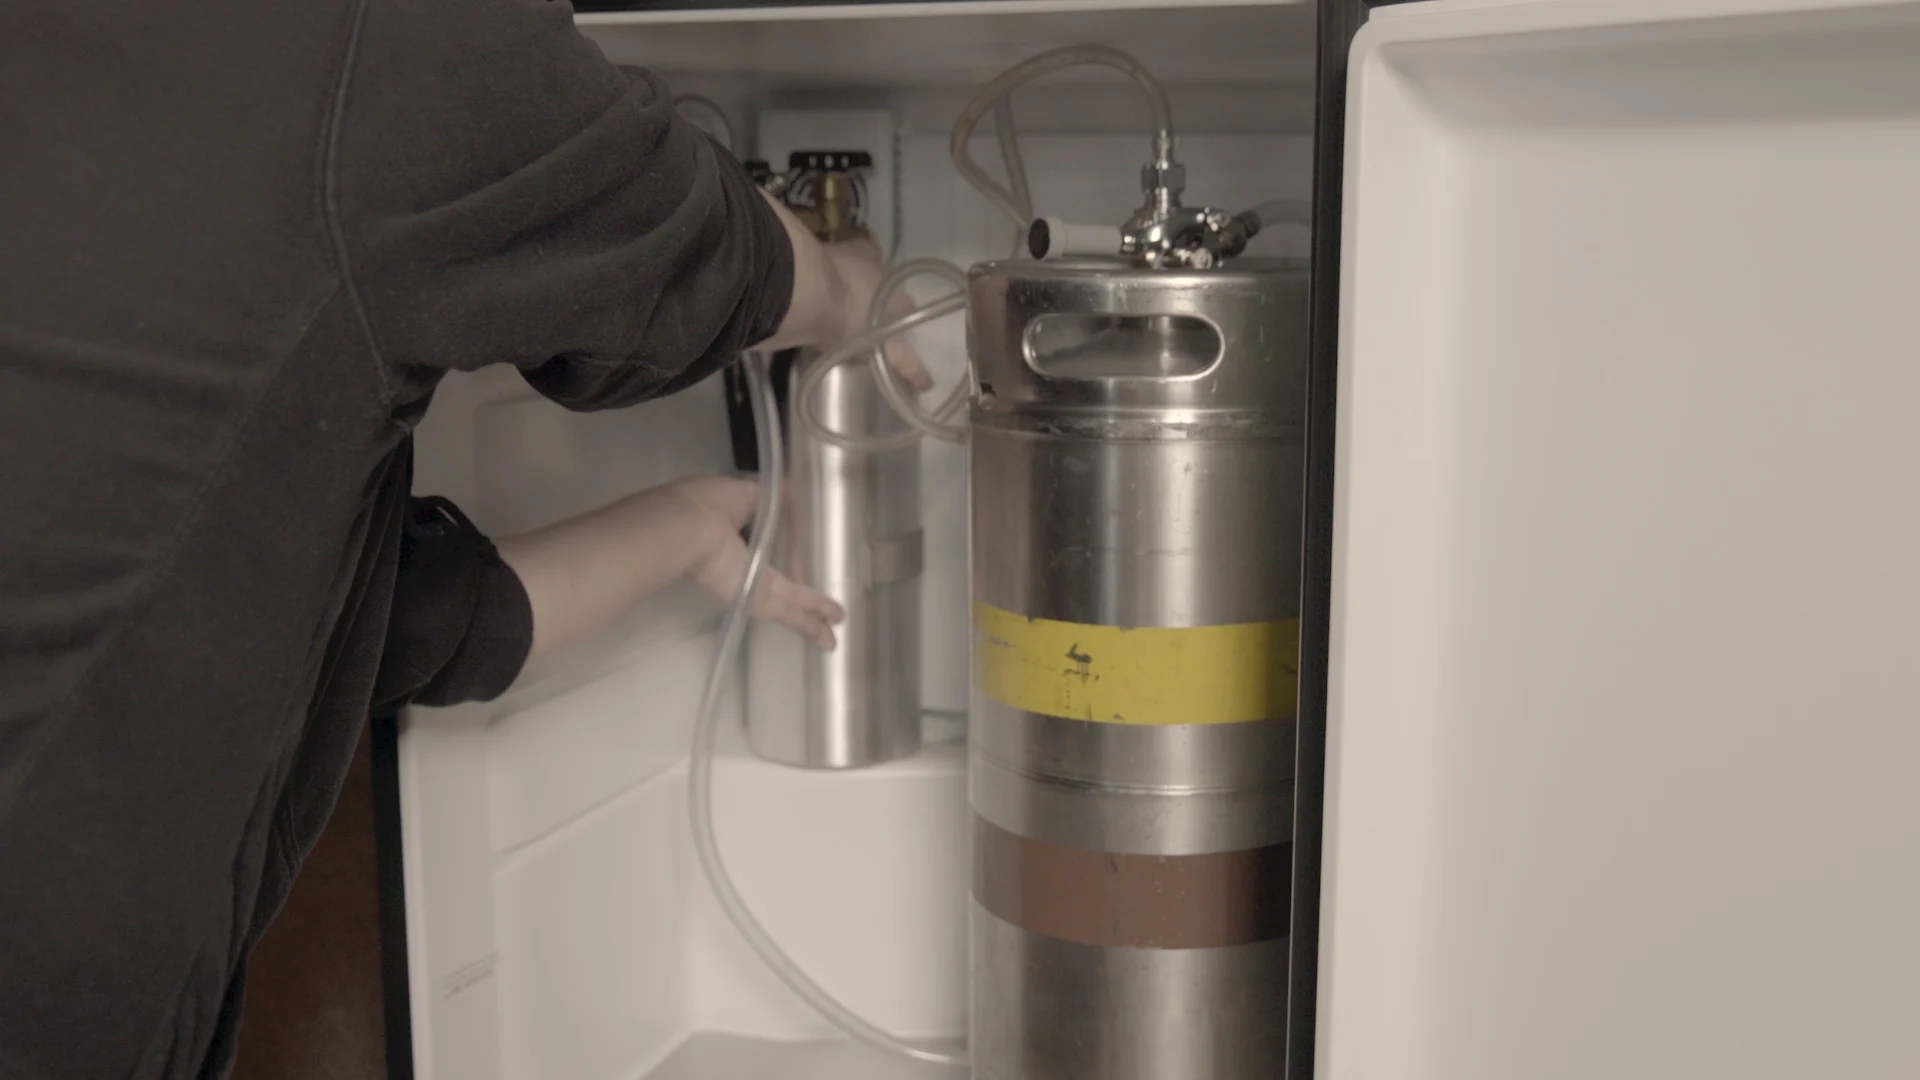
- Insert the keg: Carefully slide the keg into the kegerator, ensuring that it is level and secure. Align the keg’s coupler with the corresponding opening on the kegerator’s beer lines and push it in until it locks into place.
- Secure the CO2 tank: Depending on your kegerator model, there is a designated location inside or outside the kegerator to secure the CO2 tank. Follow the manufacturer’s instructions to properly position and attach the tank. Make sure the tank is securely fastened and that the regulator and hoses are connected to it.
- Final checks: Double-check all the connections, ensuring that everything is properly tightened and secured. Check for any leaks by turning on the CO2 tank and watching for any bubbles or hissing sounds around the connections. If there are any leaks, tighten the connections or replace any faulty components.
Once you’ve completed these steps, your kegerator should be assembled and ready to dispense delicious beer. However, before you can start pouring pints, you’ll need to install the tap system and connect the CO2 tank. We’ll cover those steps in the next sections.
Now that your kegerator is assembled, let’s move on to installing the tap system.
Installing the Tap System
Installing the tap system is a crucial step in setting up your kegerator as it allows you to dispense the beer from the keg. Follow these steps to properly install the tap system:
- Prepare the tap system: Start by cleaning and sanitizing all the tap system components, including the faucet, tap handle, beer lines, and connectors. Use a designated beer line cleaner and sanitizer to ensure cleanliness.
- Attach the faucet to the beer tower: If your kegerator has a separate beer tower, attach the faucet to the appropriate opening on the tower. Tighten it securely using the provided hardware. Make sure the faucet is positioned correctly and is aligned with the tap handle.
- Connect the beer lines: Take the beer lines coming from the kegerator and connect them to the appropriate ports on the faucet. Ensure a tight and secure connection, avoiding any kinks or bends in the lines. You may need to use connectors or clamps provided with the tap system to ensure a proper fit.
- Attach the tap handles: If your kegerator has multiple taps, attach the tap handles to the front of the beer tower. Make sure each tap handle corresponds to the correct faucet and that they are firmly attached.
- Check for leaks: Turn on the CO2 tank and pressurize the system. Check for any leaks by inspecting all the connections and listening for any hissing sounds. If there are any leaks, tighten the connections or replace any faulty components.
- Purge the lines: Before pouring your first beer, it’s important to purge the lines of any air or residual cleaning solution. Open the faucet and allow beer to flow through the lines for a few seconds. This will ensure that the lines are filled with beer and ready for dispensing.
- Tap the keg: Finally, tap the keg by pulling the handle on the keg coupler downward and then pushing it inward until it locks into place. This will allow the beer to flow from the keg to the faucet. Make sure the coupler is securely attached and that there are no leaks around the connection.
- Adjust the regulator: If necessary, adjust the CO2 regulator to achieve the desired carbonation level. Refer to the user manual or consult brewing resources to determine the appropriate pressure setting for the style of beer you are dispensing.
Congratulations! You have successfully installed the tap system on your kegerator, and it’s now ready to serve your favorite beer on draft. However, before you start pouring, it’s essential to connect the CO2 tank to ensure that your beer remains carbonated and ready to enjoy. We’ll cover that in the next section.
Now that your tap system is installed, let’s move on to connecting the CO2 tank.
When setting up a kegerator, make sure to clean and sanitize all components thoroughly before use to prevent any off-flavors or contamination in your beer.
Read more: How To Work A Kegerator
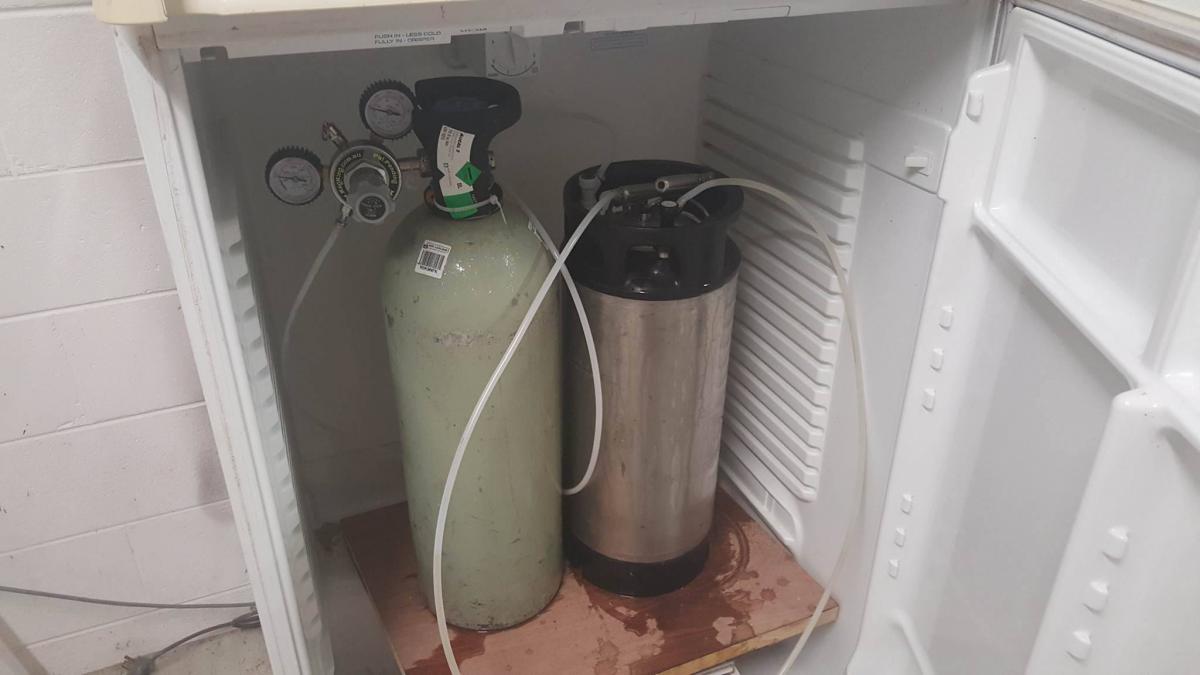
Connecting the CO2 Tank
Connecting the CO2 tank is an essential step in the setup process of your kegerator. The CO2 tank provides the necessary carbonation and pressure to push the beer from the keg to the tap. Follow these steps to properly connect the CO2 tank:
- Ensure safety: Before connecting the CO2 tank, it’s important to ensure safety precautions. Ensure that the CO2 tank is in good condition, free from any damage or signs of leakage. Make sure to handle the tank carefully and avoid dropping or bumping it.
- Identify the components: Familiarize yourself with the different components involved in connecting the CO2 tank. These may include the CO2 tank, pressure regulator, gas hoses, and hose clamps.
- Attach the regulator: Start by attaching the pressure regulator to the CO2 tank valve. Some regulators have a screw-on attachment, while others may require a wrench to tighten. Follow the manufacturer’s instructions for proper attachment.
- Check the tank valve: Ensure that the CO2 tank valve is closed before attaching the regulator. This will prevent any sudden release of gas or pressure.
- Connect the gas hose: Connect one end of the gas hose to the outlet port on the pressure regulator. Use a hose clamp to secure the connection and prevent any leaks. Tighten the clamp with a screwdriver or a wrench, if necessary.
- Attach the other end of the gas hose: Connect the opposite end of the gas hose to the corresponding gas inlet on the kegerator. Consult the kegerator manual or manufacturer’s instructions to locate the appropriate inlet port.
- Tighten the gas hose: Secure the connection between the gas hose and the kegerator by tightening another hose clamp. Make sure the clamp is snug and tight enough to prevent any leaks. Avoid overtightening, as it may damage the hose or the connection.
- Open the tank valve: Once all the connections are secure, slowly open the CO2 tank valve. Pay attention to any hissing sounds or signs of gas leakages. If you notice any leaks, shut off the valve immediately and check the connections for tightness.
- Adjust the pressure: Adjust the pressure on the regulator to the desired setting. Different beers may require different carbonation levels, so refer to brewing resources or consult with experts to determine the appropriate pressure setting for your beer style.
- Test for leaks: After connecting the CO2 tank, carefully inspect all connections for any signs of leakage. Apply a water and soap solution to the connections and watch for bubbles. If you notice any bubbles forming, it indicates a leak, and you should tighten the connection or replace any faulty parts.
Once you have successfully connected the CO2 tank, you can begin enjoying freshly poured draft beer from your kegerator. However, it’s important to periodically check the CO2 tank and regulator to ensure they are functioning properly and have an adequate supply of CO2. Additionally, remember to refill or replace the CO2 tank as needed.
Now that your CO2 tank is connected, it’s time to move on to testing and troubleshooting your kegerator to ensure optimal performance. We’ll cover that in the next section.
Now that your CO2 tank is connected, you can enjoy the thrill of pouring your favorite beers on tap in the comfort of your own home. However, to ensure the longevity and optimal performance of your kegerator, it’s important to follow proper cleaning and maintenance practices.
Testing and Troubleshooting
Once you have assembled and connected your kegerator, it’s important to test it and troubleshoot any issues that may arise. This will ensure that your kegerator is functioning properly and pouring perfect pints of beer. Here are some steps to follow:
- Perform a functionality test: Begin by pouring a small sample of beer to test the flow and carbonation. Check the temperature, carbonation level, and taste to ensure everything is to your liking.
- Check for leaks: Inspect all connections, including the keg coupler, beer lines, and CO2 connections, for any leaks. Use a water and soap solution to spot bubbles indicating leaks. Tighten any loose connections and replace any faulty components to prevent air or gas leaks.
- Adjust temperature and pressure: Monitor the temperature inside the kegerator and adjust it if necessary to ensure the optimal serving temperature for your beer. Also, adjust the CO2 pressure to achieve the desired carbonation level. Consult beer resources or experts for recommended temperature and pressure settings.
- Check for foam issues: Excessive foam can be a common issue when pouring beer from a kegerator. If you encounter foaming problems, ensure that the beer lines are properly insulated and not warmed by external sources. Also, adjust the pressure and length of beer lines to regulate the flow and minimize foam formation.
- Regular cleaning and maintenance: Clean your kegerator and tap lines regularly to prevent any build-up of bacteria or mold. Use a designated beer line cleaner to flush and sanitize the lines, faucets, and other components. Deep clean the kegerator periodically, removing any spills or residue to keep it in optimal condition.
- Troubleshoot any malfunctions: If you encounter any issues, such as a slow flow, inconsistent pouring, or unusual tastes, consult the user manual for troubleshooting tips or contact customer support for assistance. They can provide guidance on resolving specific issues or recommend service technicians if necessary.
Regular testing and troubleshooting will help to ensure that your kegerator continues to pour great-tasting beer. Remember, each beer may have specific temperature and pressure requirements, so it’s important to adjust accordingly and provide the best drinking experience.
By following these testing and troubleshooting steps, you can troubleshoot and resolve common issues that may arise with your kegerator. This will allow you to enjoy a seamless and satisfying beer-drinking experience.
Now that you are equipped with the knowledge to test and troubleshoot your kegerator, let’s move on to cleaning and maintenance to keep your kegerator in top-notch condition.
Cleaning and Maintenance
Regular cleaning and maintenance of your kegerator are essential to ensure the longevity and optimal performance of the appliance. By following these cleaning and maintenance practices, you can keep your kegerator in top-notch condition:
- Regularly clean the tap lines: Clean the tap lines between kegs or at least every two weeks to prevent build-up and ensure the freshness of the beer. Use a designated beer line cleaning solution and follow the manufacturer’s instructions for proper cleaning. Flush the lines thoroughly with clean water after cleaning.
- Sanitize the kegerator interior: Periodically sanitize the interior of the kegerator using a food-safe sanitizing solution. Remove any spilled beer, debris, or residue that may collect inside the kegerator. Clean the shelves, walls, and all surfaces to eliminate any potential contaminants.
- Clean the faucets and tap handles: Remove and disassemble the faucets and tap handles for thorough cleaning. Scrub them with a soft brush or cloth, using a solution of warm water and mild detergent. Rinse them well and reassemble before reinstalling them on the kegerator.
- Clean the drip tray: Regularly remove and clean the drip tray to prevent the build-up of residue or mold. Wash it with warm soapy water, scrubbing off any stains or debris. Rinse it well and dry before reattaching it to the kegerator.
- Check and replace gaskets: Inspect the gaskets and seals on the kegerator doors for any signs of wear or damage. Replace any worn-out or damaged gaskets to maintain proper insulation and prevent air leaks.
- Monitor and regulate temperatures: Regularly check and monitor the temperature inside the kegerator to ensure it remains within the optimal range for serving beer. Adjust the temperature settings if necessary and avoid frequent opening and closing of the door to maintain a consistent temperature.
- Refill or replace CO2 tanks: Keep an eye on the CO2 tank levels to ensure an uninterrupted flow of carbonation. Refill or replace the CO2 tank as needed to avoid any downtime or fluctuations in carbonation pressure.
- Inspect and clean the CO2 regulator: Regularly inspect the CO2 regulator for any signs of damage or malfunction. Clean it by wiping it with a damp cloth, removing any dust or debris that may accumulate on the surface. Check the pressure gauge and adjust it as necessary.
- Maintain proper ventilation: Ensure that the kegerator has proper ventilation by keeping it at a distance from walls or other obstructions. Adequate airflow helps to maintain optimal cooling and prevents the refrigerator from overworking.
- Follow manufacturer’s instructions: Always refer to the manufacturer’s instructions and guidelines for specific cleaning and maintenance recommendations. Different kegerator models may have slightly different requirements, so it’s important to follow the instructions provided.
By following these cleaning and maintenance practices, you can keep your kegerator in optimal condition, ensuring the best quality and taste of your beer. Regular cleaning and maintenance also contribute to the longevity of your kegerator, allowing you to enjoy draft beer in the comfort of your own home for years to come.
Now that you have learned how to properly clean and maintain your kegerator, you are equipped with the knowledge to keep it in excellent working order. By following these practices, you can extend the lifespan of your kegerator and continue to pour fresh, delicious beer for yourself and your guests.
With cleaning and maintenance out of the way, you are now ready to enjoy the benefits of having a kegerator in your home. Cheers to perfectly poured pints and unforgettable beer-drinking experiences!
Conclusion
Setting up a kegerator at home allows you to bring the experience of freshly poured draft beer into your own space. Whether you’re a beer enthusiast, a homebrewer, or someone who enjoys entertaining guests, a kegerator offers convenience, variety, and the ability to enjoy your favorite beers anytime you want. By following the steps outlined in this article, you can successfully set up and maintain your kegerator, ensuring optimal performance and the perfect pour every time.
We started by discussing the importance of choosing the right kegerator model for your needs, considering factors such as size, capacity, number of taps, and temperature control. Gathering the necessary supplies and assembling the kegerator were the next steps, ensuring that you have everything you need before moving forward. We then moved on to installing the tap system and connecting the CO2 tank, both vital components for dispensing beer and maintaining carbonation.
Once your kegerator was set up, we explored the importance of testing and troubleshooting to ensure everything is functioning as it should. Monitoring for leaks, adjusting temperature and pressure, and addressing any foam or pouring issues are key steps in this process. Moreover, regular cleaning and maintenance were emphasized to keep your kegerator in optimal condition, including cleaning tap lines, sanitizing surfaces, and checking gaskets and seals.
By following these steps and incorporating proper cleaning and maintenance, you can enjoy the benefits of owning a kegerator for years to come. The ability to serve draft beer in your own home adds a touch of sophistication to events and gatherings while allowing you to experience the unmatched freshness and flavor that comes with it.
Now that you have a comprehensive understanding of the setup, maintenance, and troubleshooting of a kegerator, it’s time to bring your at-home beer-drinking experience to a whole new level. So, gather your supplies, set up your kegerator, and invite your friends over for a memorable evening of perfectly poured pints and endless enjoyment.
Frequently Asked Questions about How To Setup A Kegerator
Was this page helpful?
At Storables.com, we guarantee accurate and reliable information. Our content, validated by Expert Board Contributors, is crafted following stringent Editorial Policies. We're committed to providing you with well-researched, expert-backed insights for all your informational needs.


0 thoughts on “How To Setup A Kegerator”