Articles
How To Use A Kegerator Co2 Regulator
Modified: August 27, 2024
Learn how to properly use a kegerator CO2 regulator with our informative articles. Master the art of controlling carbonation and get the perfect pour every time.
(Many of the links in this article redirect to a specific reviewed product. Your purchase of these products through affiliate links helps to generate commission for Storables.com, at no extra cost. Learn more)
Introduction
Welcome to your comprehensive guide on how to use a kegerator CO2 regulator. If you’re a beer enthusiast or love hosting parties, having a kegerator can elevate your drinking experience to a whole new level. But to ensure that your beer pours perfectly every time, it’s essential to understand how to use a CO2 regulator effectively. In this article, we’ll walk you through the process step by step and provide you with valuable insights along the way.
A kegerator CO2 regulator is a crucial component of a kegerator system that controls the flow and pressure of the CO2 gas. CO2 is used to carbonate the beer and push it out of the keg, ensuring a smooth pour with a beautiful head of foam. By learning how to use the CO2 regulator correctly, you can achieve the perfect carbonation level and pour consistency for your favorite brews.
Before diving into the details, it’s important to note that each kegerator may have slight variations in design, so it’s always a good idea to consult your kegerator’s manual for specific instructions. However, the general principles we’ll outline in this guide will apply to most kegerator models.
In the following sections, we will cover the basics of a kegerator CO2 regulator, including how to check the gas cylinder, connect the regulator to the keg, set the desired pressure, test for leaks, and adjust the pressure as needed. We will also provide tips on maintaining and cleaning the regulator to ensure its longevity and optimal performance. So let’s get started on this keg-cooling journey!
Key Takeaways:
- Mastering the use of a kegerator CO2 regulator ensures perfect carbonation and pour consistency, elevating your beer-drinking experience to a whole new level. Follow the step-by-step guide for optimal results.
- Regular maintenance and proper pressure adjustments are key to achieving the ideal carbonation level and ensuring a smooth and enjoyable beer pour from your kegerator. Cheers to perfectly crafted brews!
Read more: How To Build A Co2 Kegerator
Understanding the Basics of a Kegerator CO2 Regulator
Before diving into the practical steps of using a kegerator CO2 regulator, it’s important to have a basic understanding of how it works. A CO2 regulator is a device that attaches to the gas cylinder and enables you to control the pressure at which the CO2 is dispensed into the keg.
Pressure is a critical variable when it comes to serving beer from a kegerator. Too much pressure can result in excessive foaming, while too little pressure can cause flat, undercarbonated beer. The CO2 regulator allows you to adjust the pressure to achieve the perfect balance.
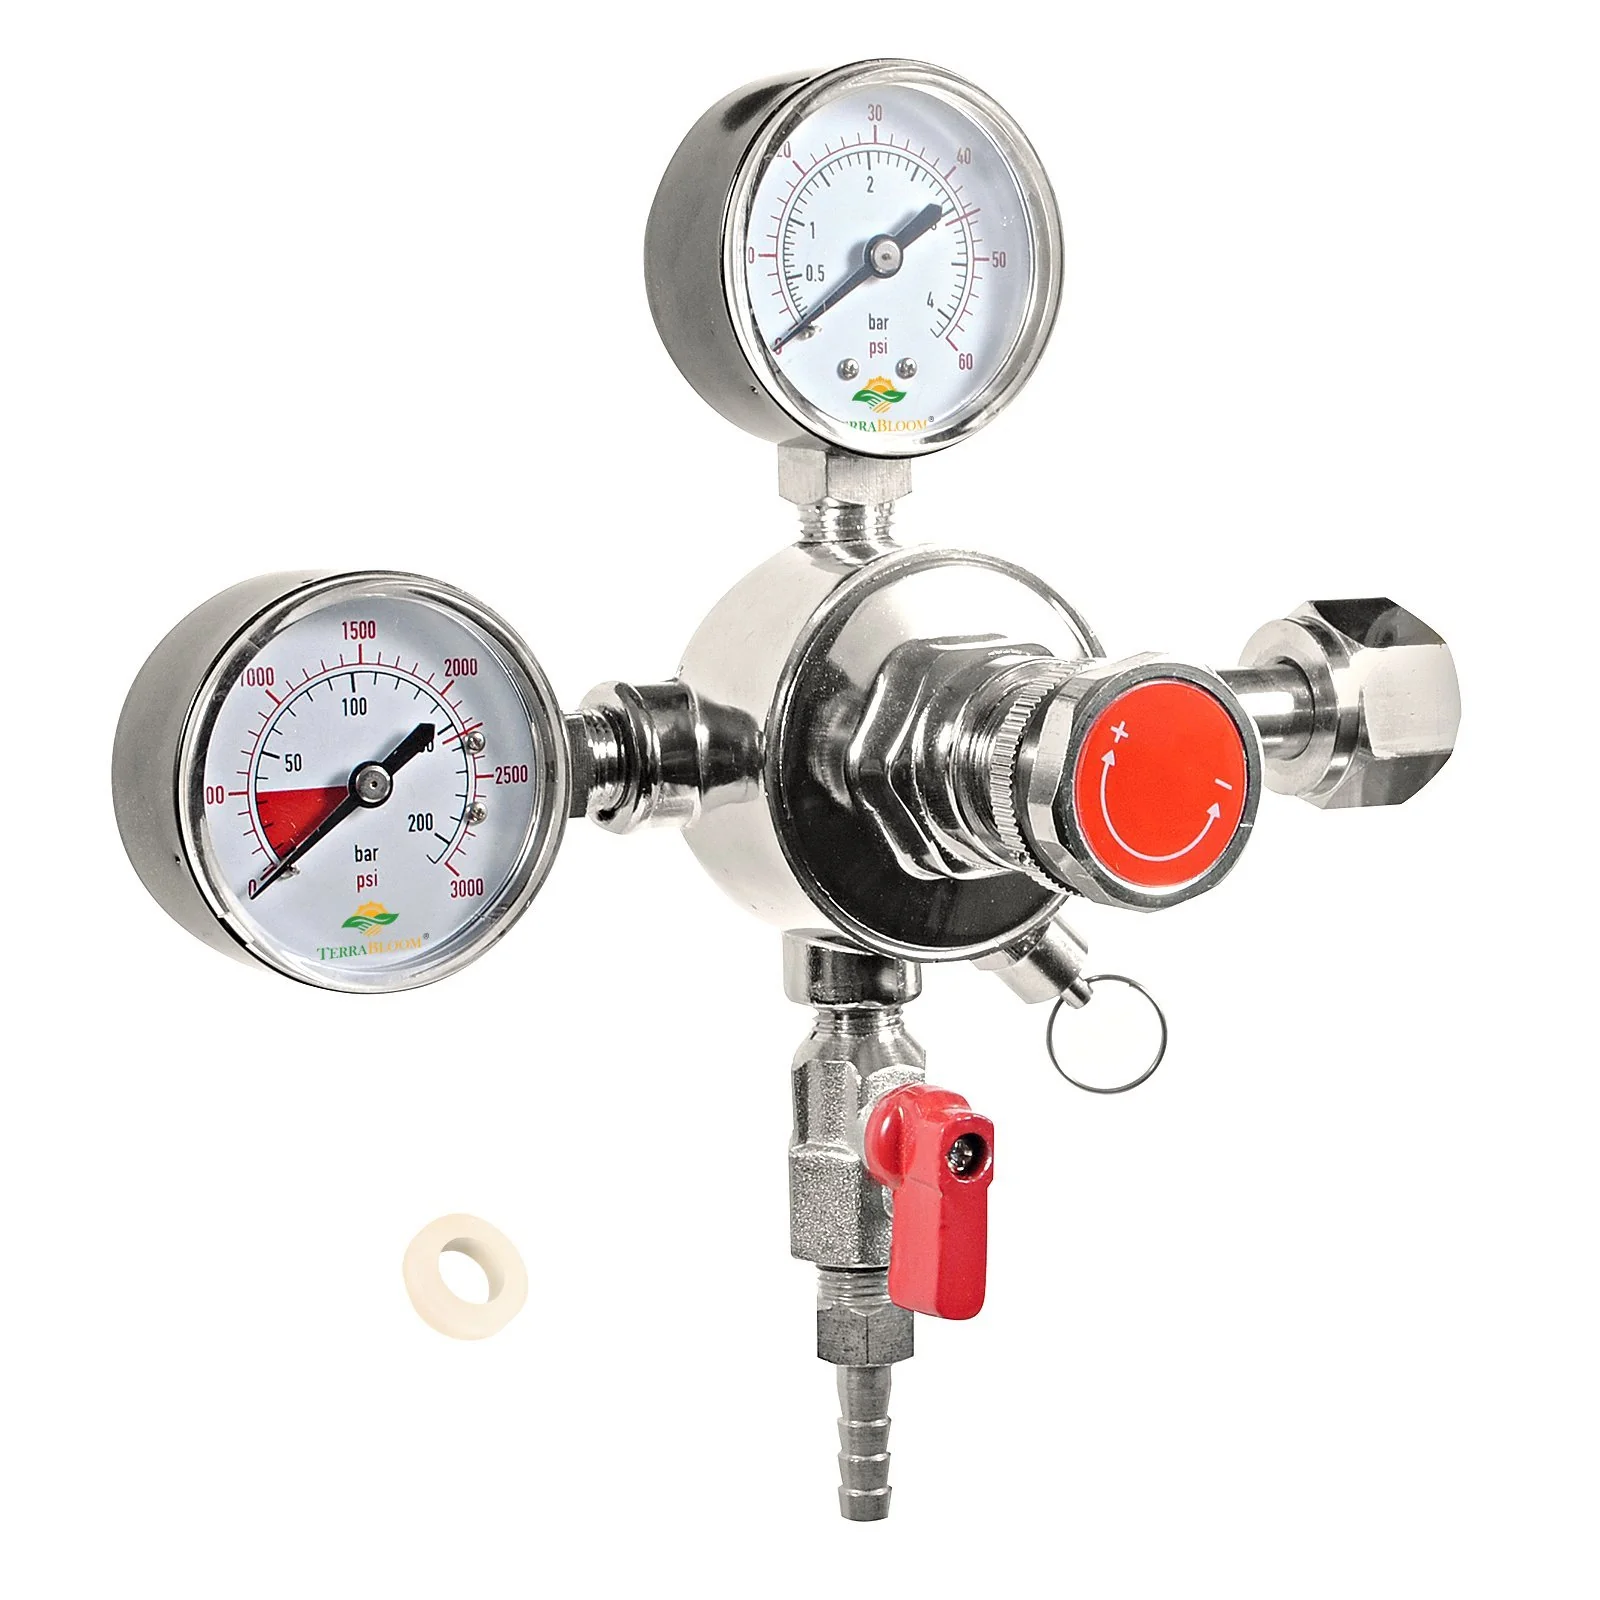
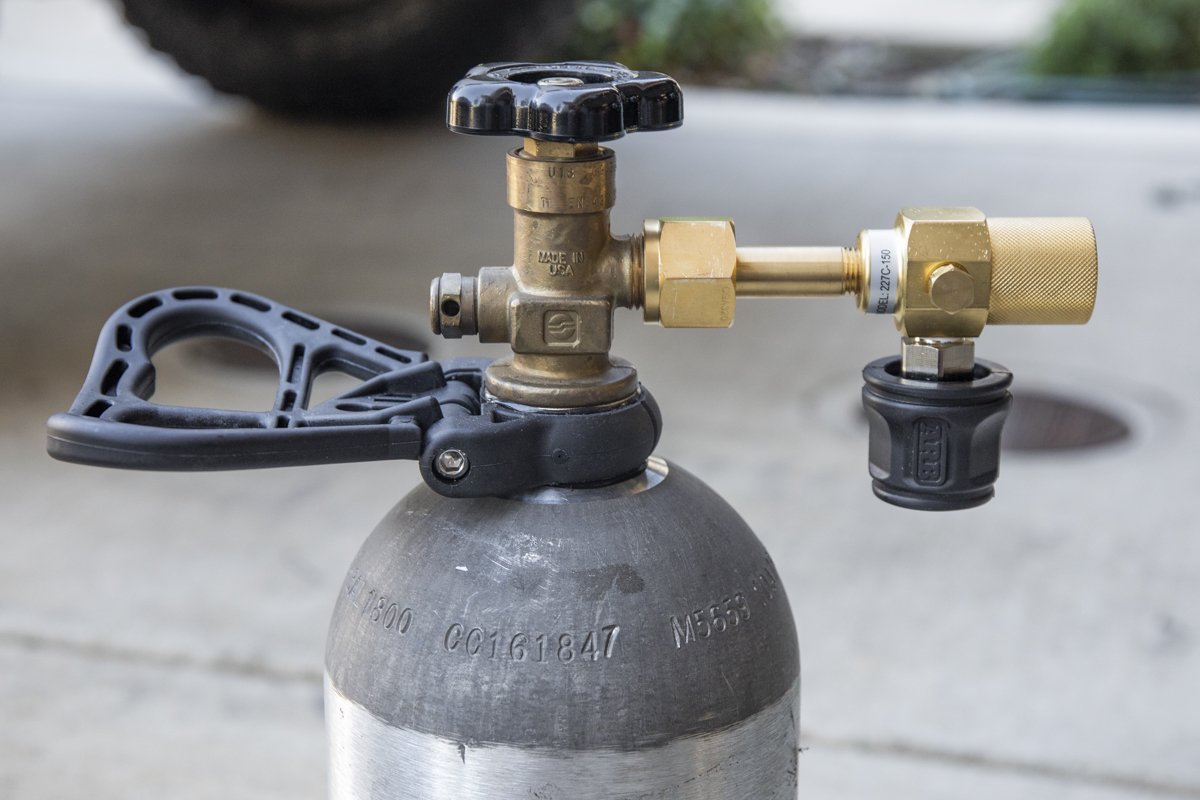
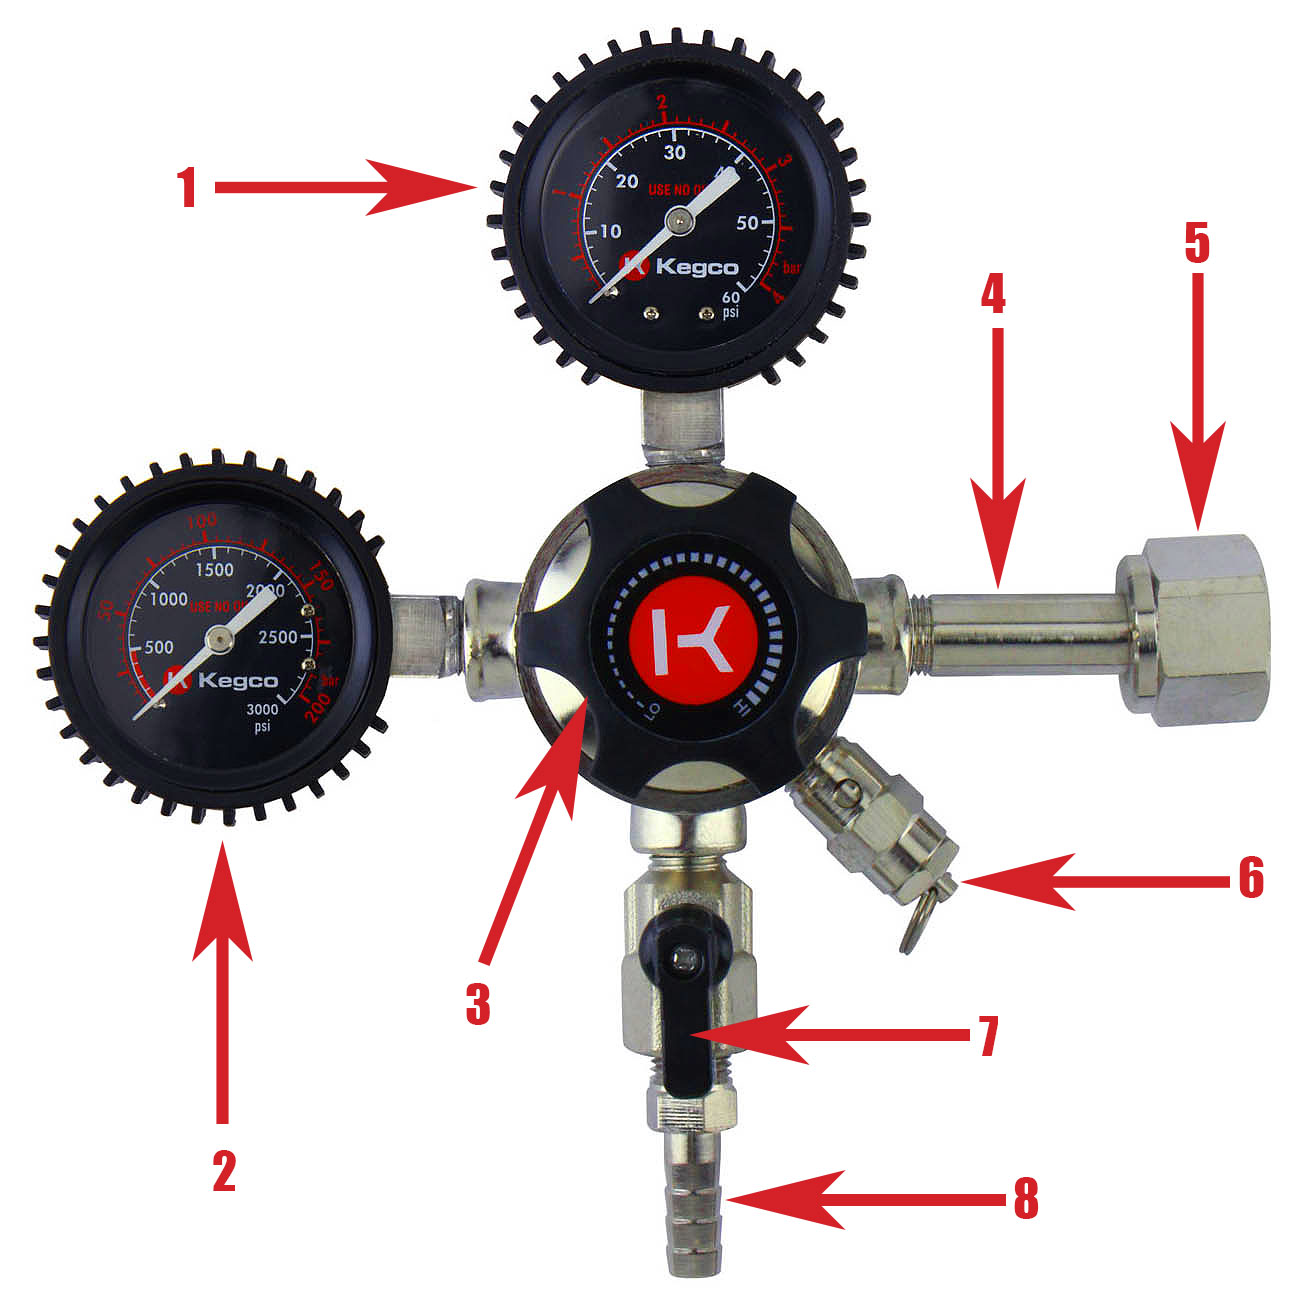
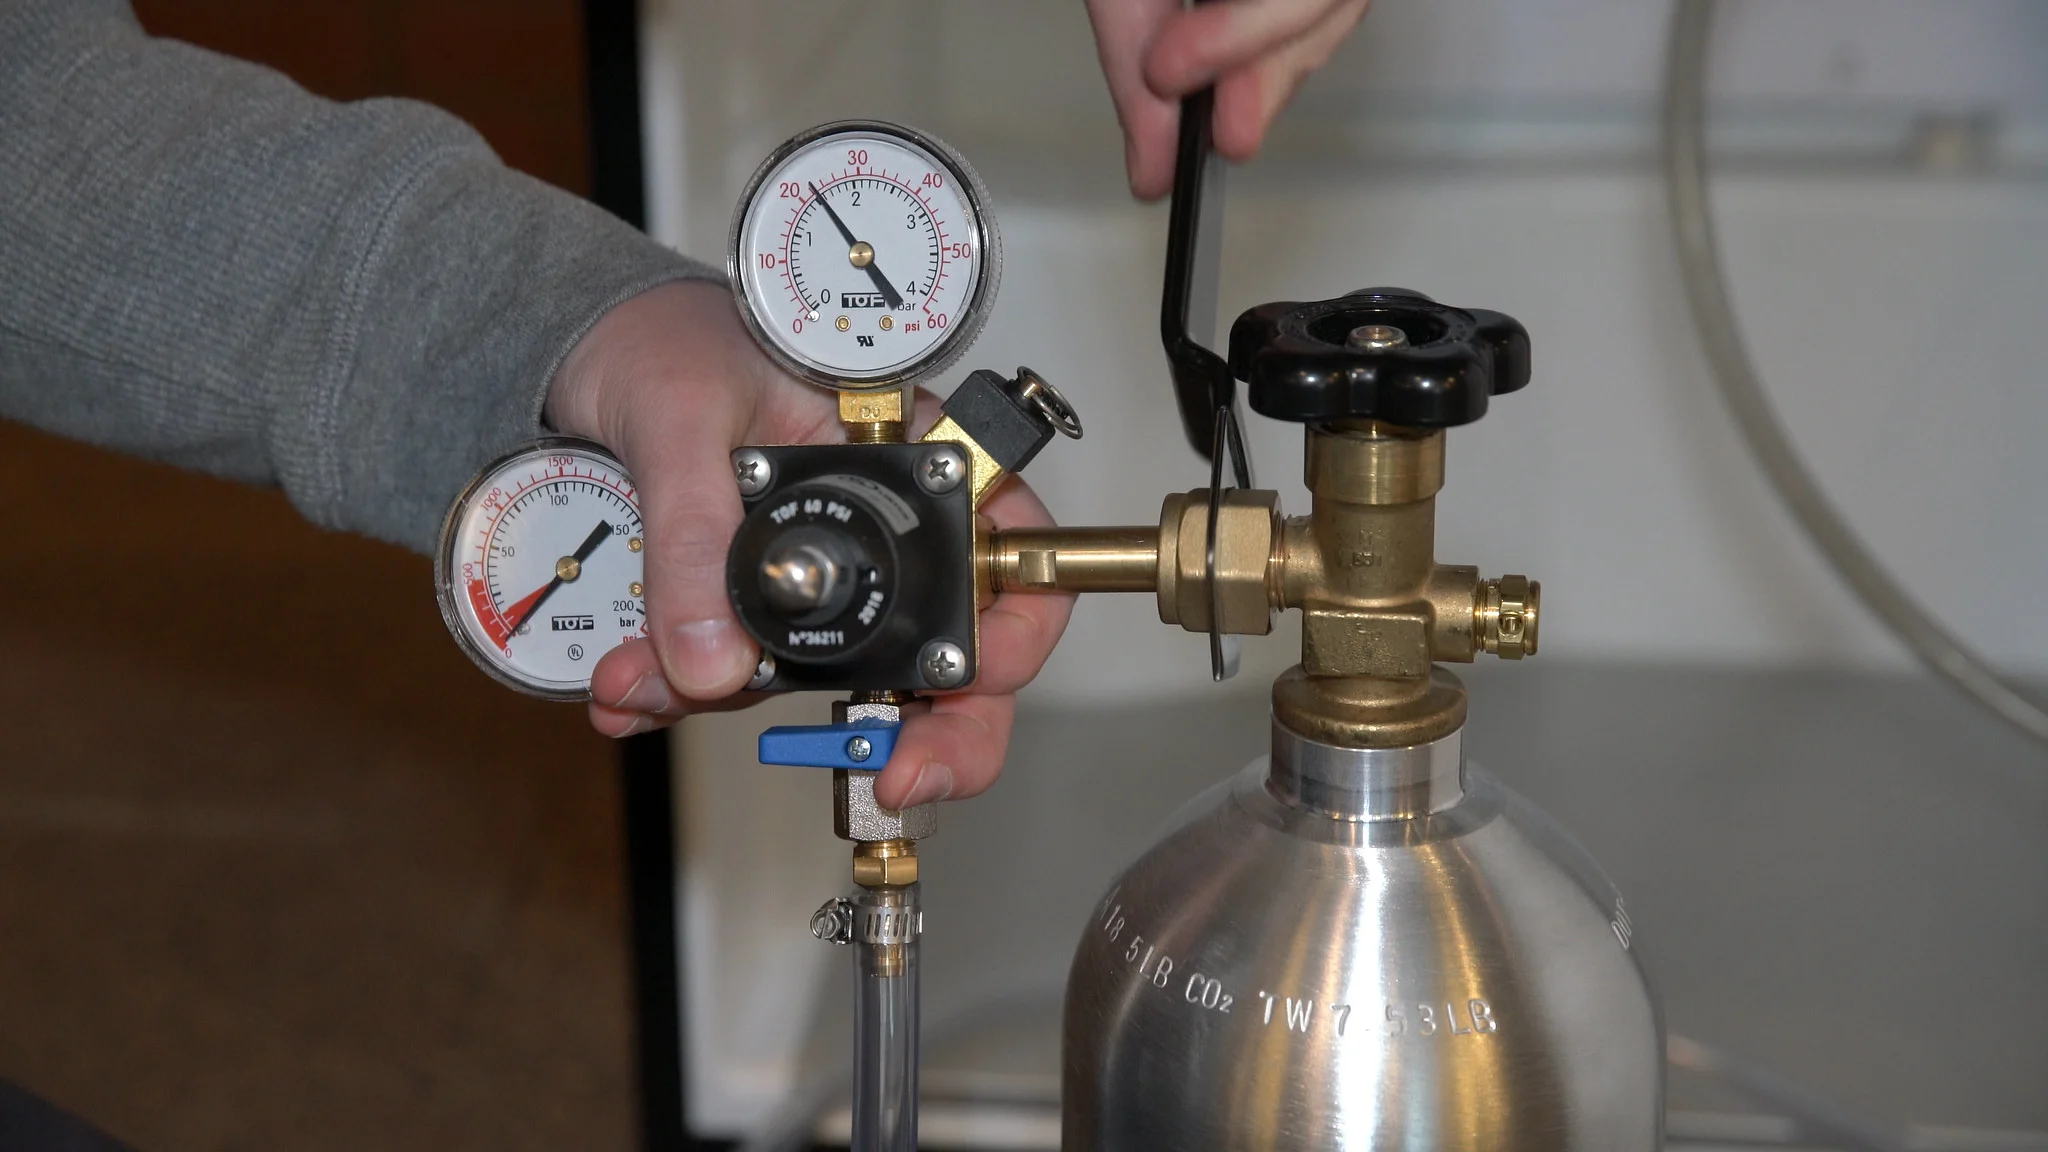
Most CO2 regulators consist of a gauge, a pressure adjustment knob, and an output connection. The gauge displays the pressure inside the gas cylinder, while the adjustment knob allows you to increase or decrease the pressure. The output connection is where you attach the gas line that will lead to your keg.
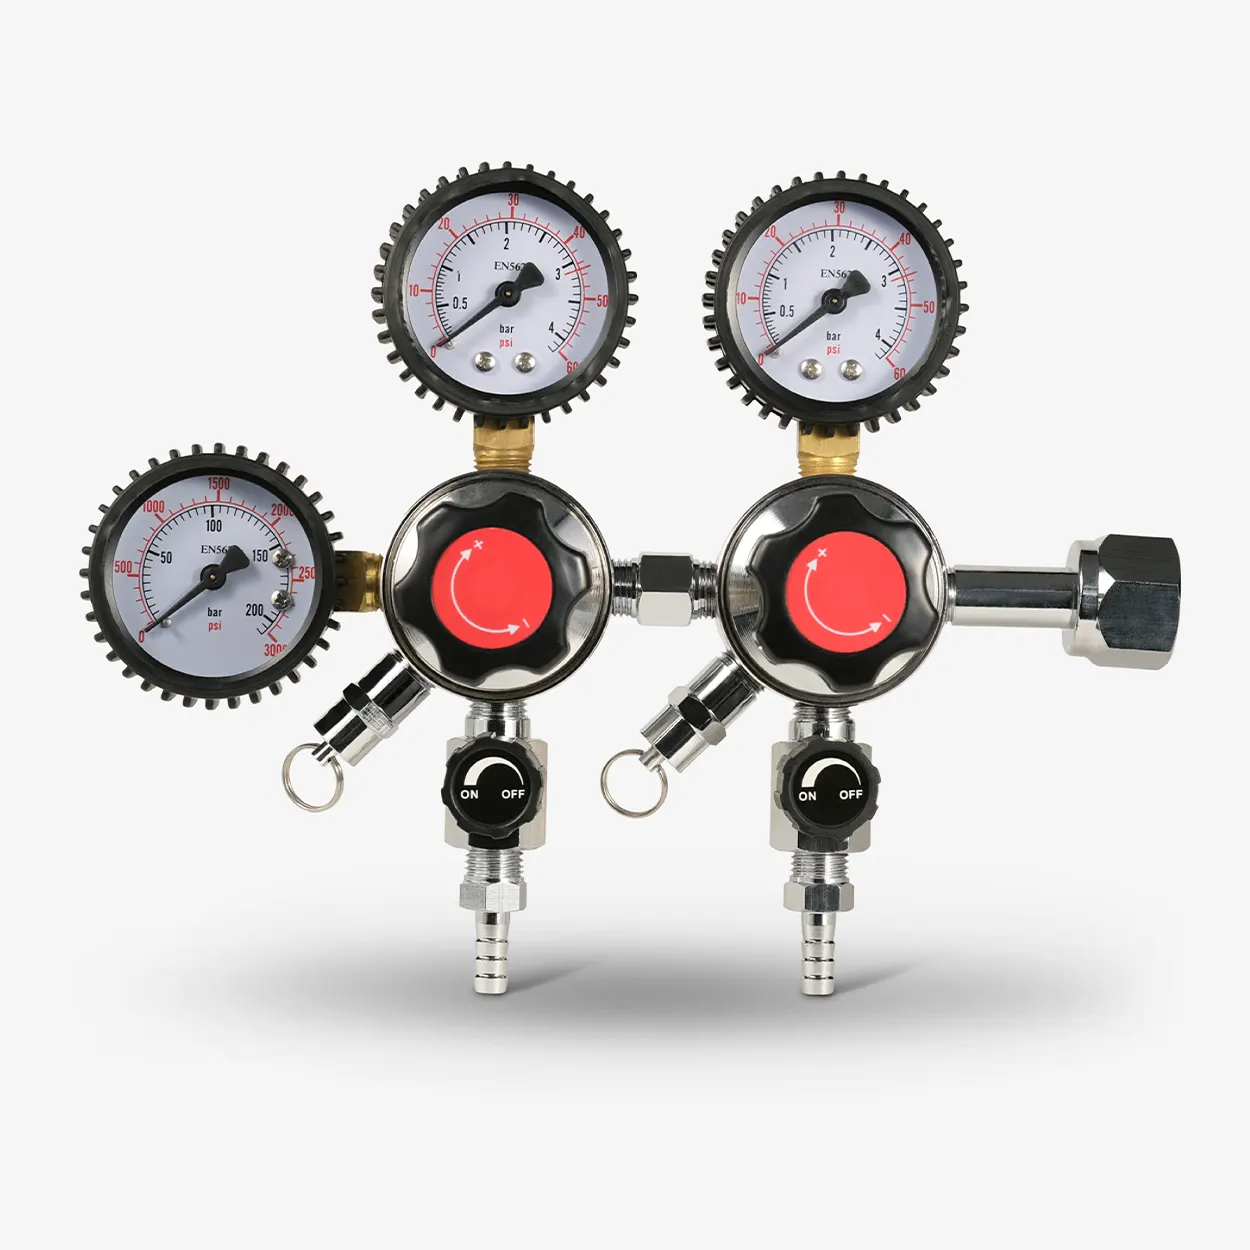
It’s important to mention that there are two types of CO2 regulators: single gauge and dual gauge. A single gauge regulator features only one pressure gauge, which displays the pressure inside the gas cylinder. A dual gauge regulator, on the other hand, has two pressure gauges. The first gauge indicates the pressure inside the gas cylinder, while the second gauge displays the pressure at which the gas is being dispensed into the keg.
Now that we have a basic understanding of a kegerator CO2 regulator, we can move on to the step-by-step process of using it. In the next section, we will cover how to check the gas cylinder to ensure a proper gas supply.
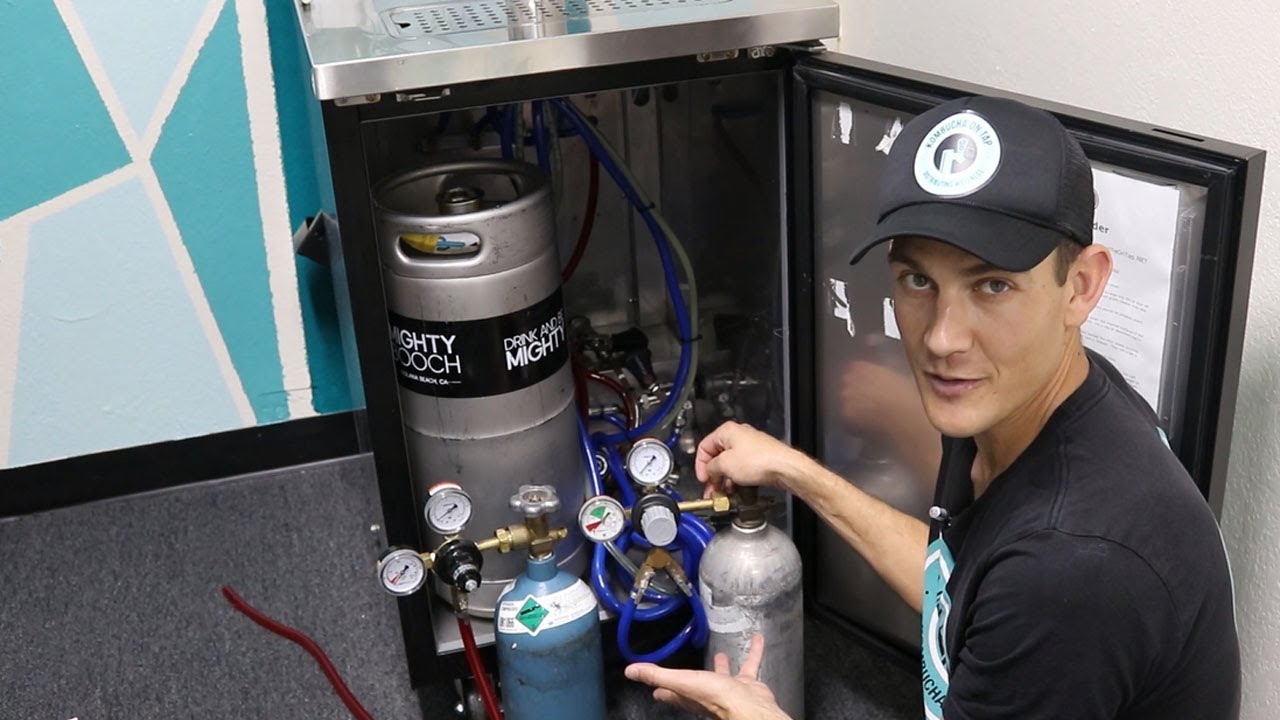
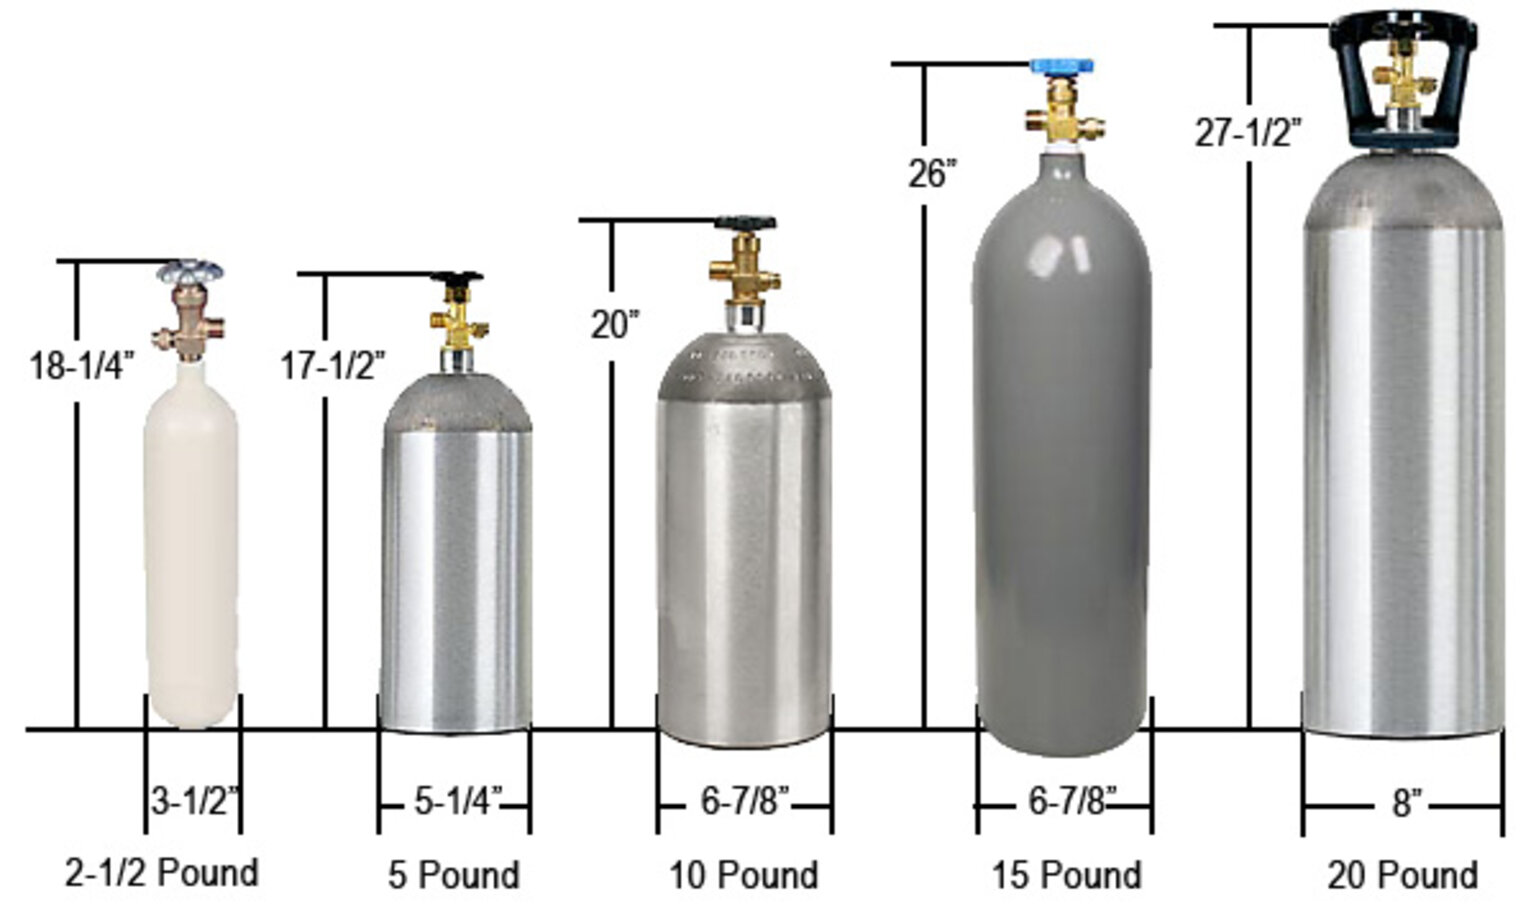
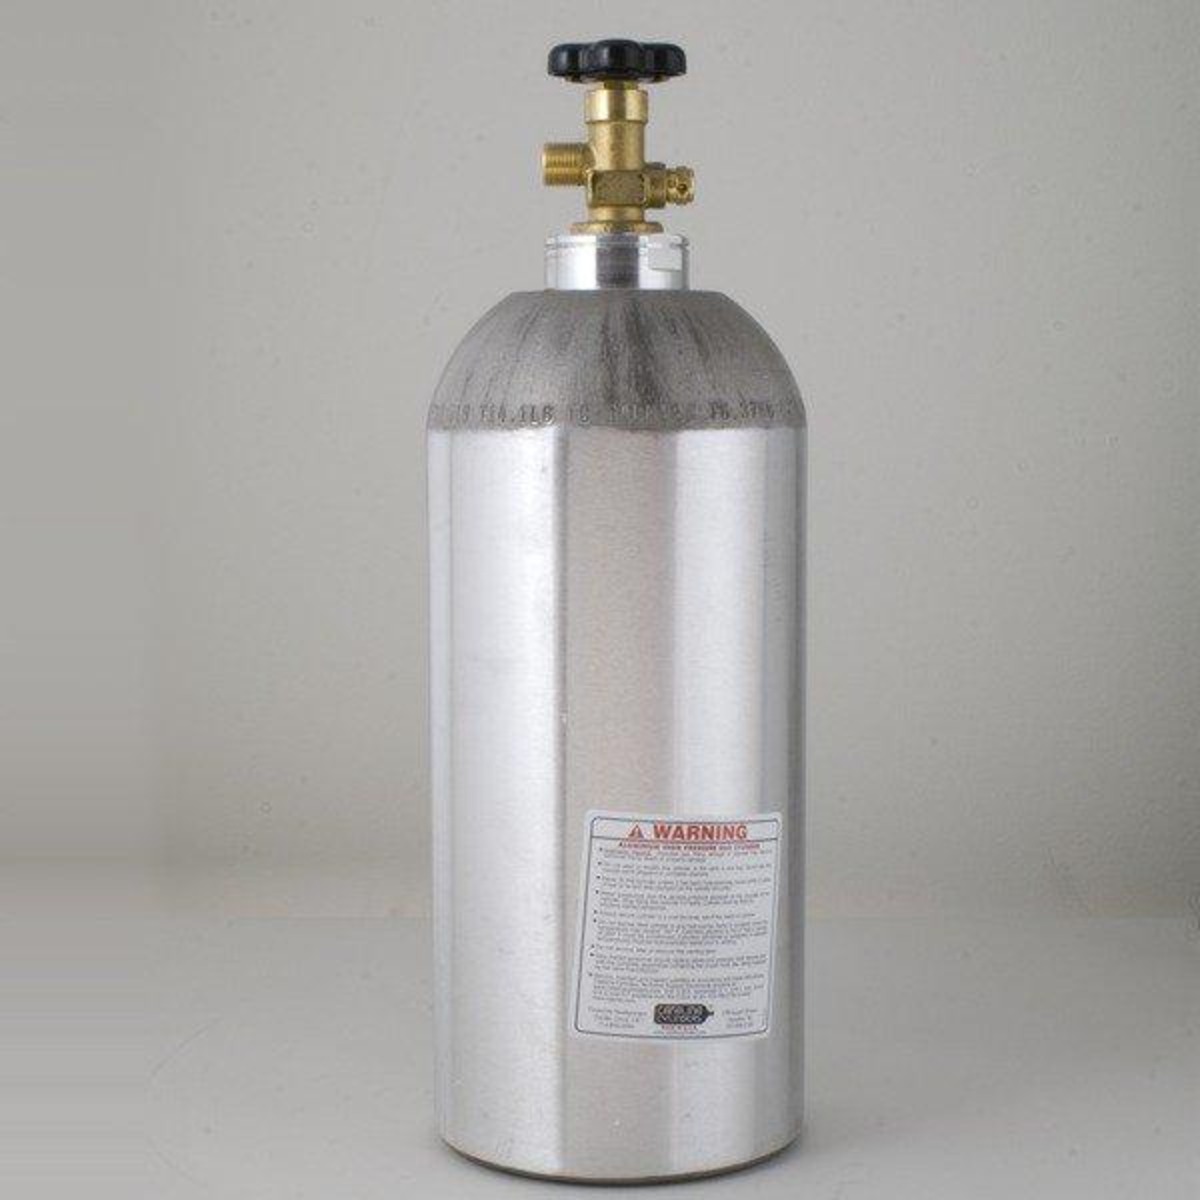
Step 1: Checking the Gas Cylinder
Before connecting your CO2 regulator to the keg, it’s crucial to ensure that the gas cylinder is in good condition and has an adequate supply of CO2. Here are the steps to follow:
- Inspect the cylinder: Start by visually inspecting the gas cylinder for any signs of damage or corrosion. Look for dents, rust, or leaks. If you notice any issues, do not use the cylinder and consult a professional.
- Check the pressure: Look at the pressure gauge on the CO2 regulator. It should read zero or close to zero. If the gauge shows pressure, it means the regulator is still connected to the gas cylinder, and you need to release the pressure before proceeding further. To do this, open the pressure adjustment knob fully to release the trapped gas.
- Attach the regulator: Once the pressure is released, carefully attach the CO2 regulator to the gas cylinder. Make sure it is securely tightened to prevent gas leaks.
- Open the cylinder valve: Slowly open the valve on the gas cylinder. As you do this, keep an eye on the pressure gauge on the regulator. It should start to show the pressure from the gas cylinder. If the gauge doesn’t move, it might indicate a problem with the gas cylinder or regulator connection. In such cases, seek professional assistance.
- Check for leaks: Using a soapy water solution or a specially formulated leak detection solution, apply it to the regulator’s connections and the gas cylinder valve. If you notice any bubbles forming, it indicates a gas leak. Tighten the connection or replace parts if necessary.
- Ensure proper gas supply: Once you have confirmed that there are no leaks and the gas cylinder is connected correctly, verify that it has enough CO2 supply for your needs. Maintaining an adequate supply is crucial, as running out of CO2 mid-way through a keg can be inconvenient.
By following these steps and ensuring the gas cylinder is in good condition, you can move on to the next step of connecting the CO2 regulator to the keg. We will cover this in detail in the following section.
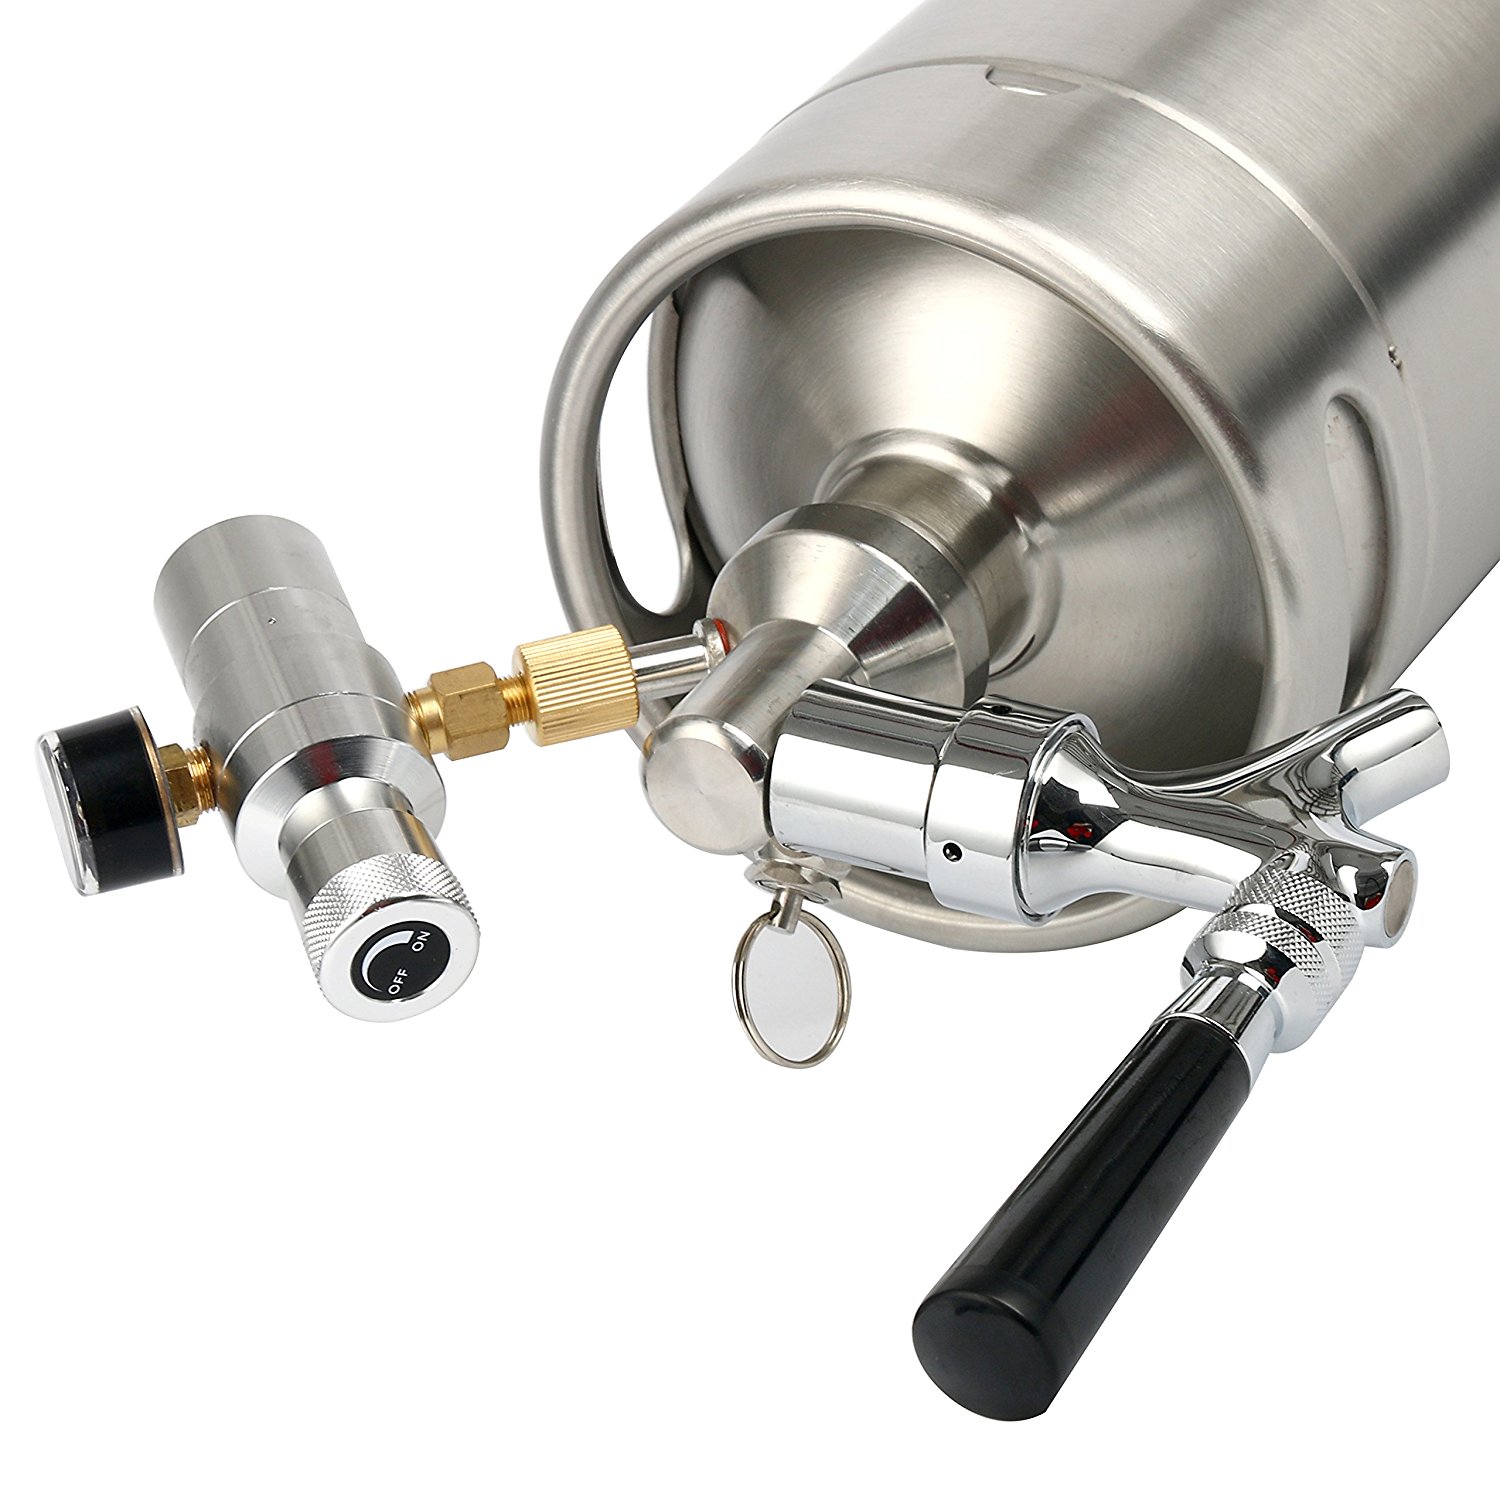
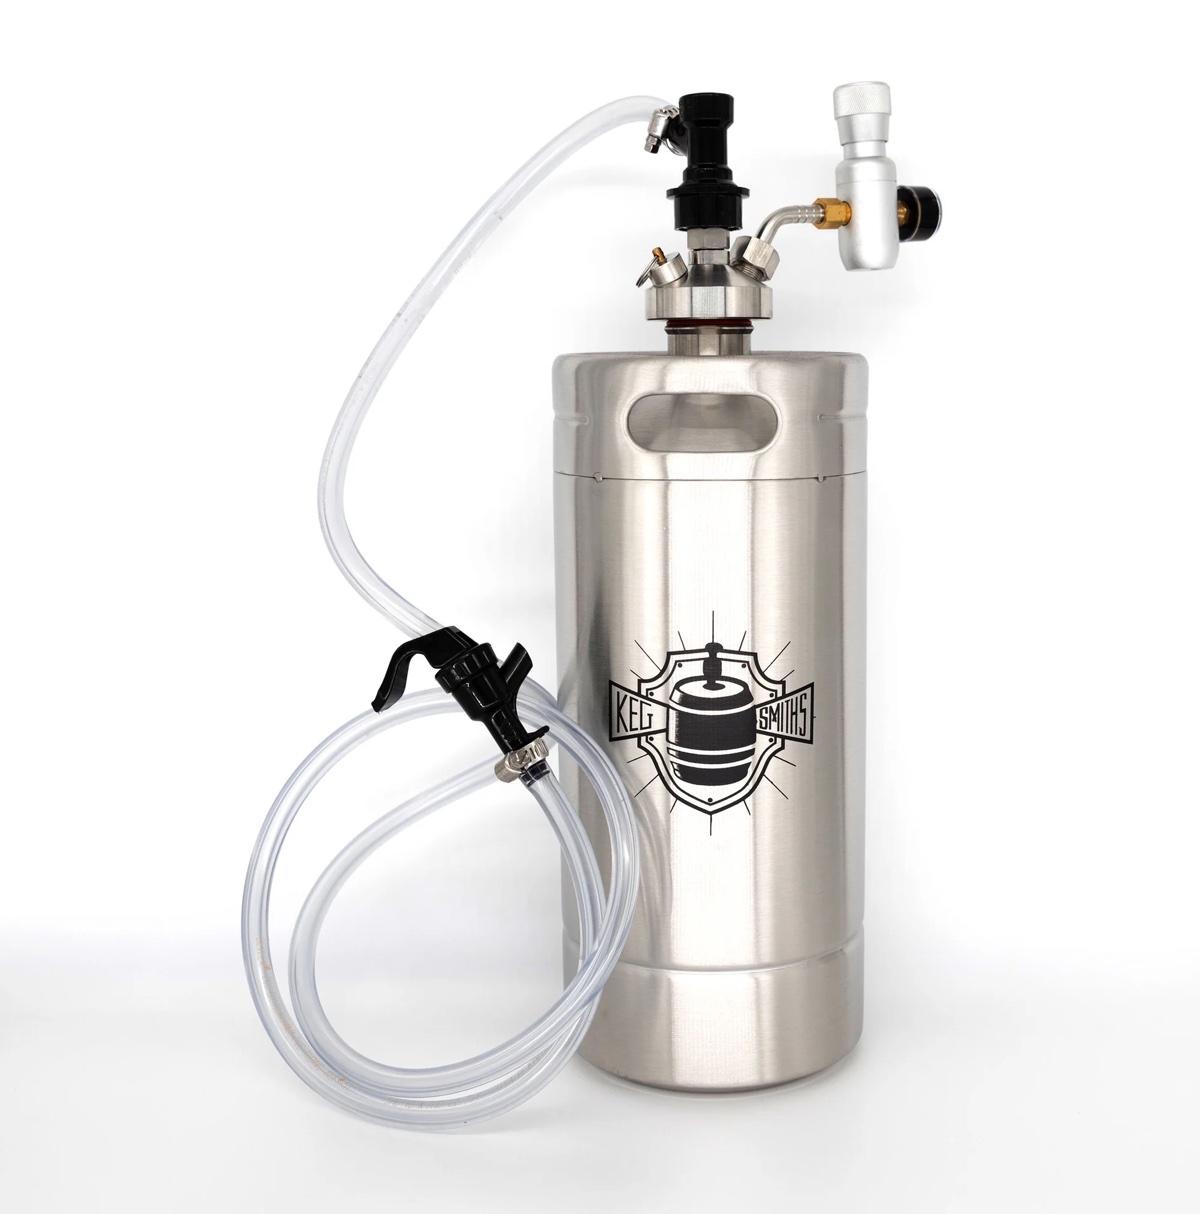
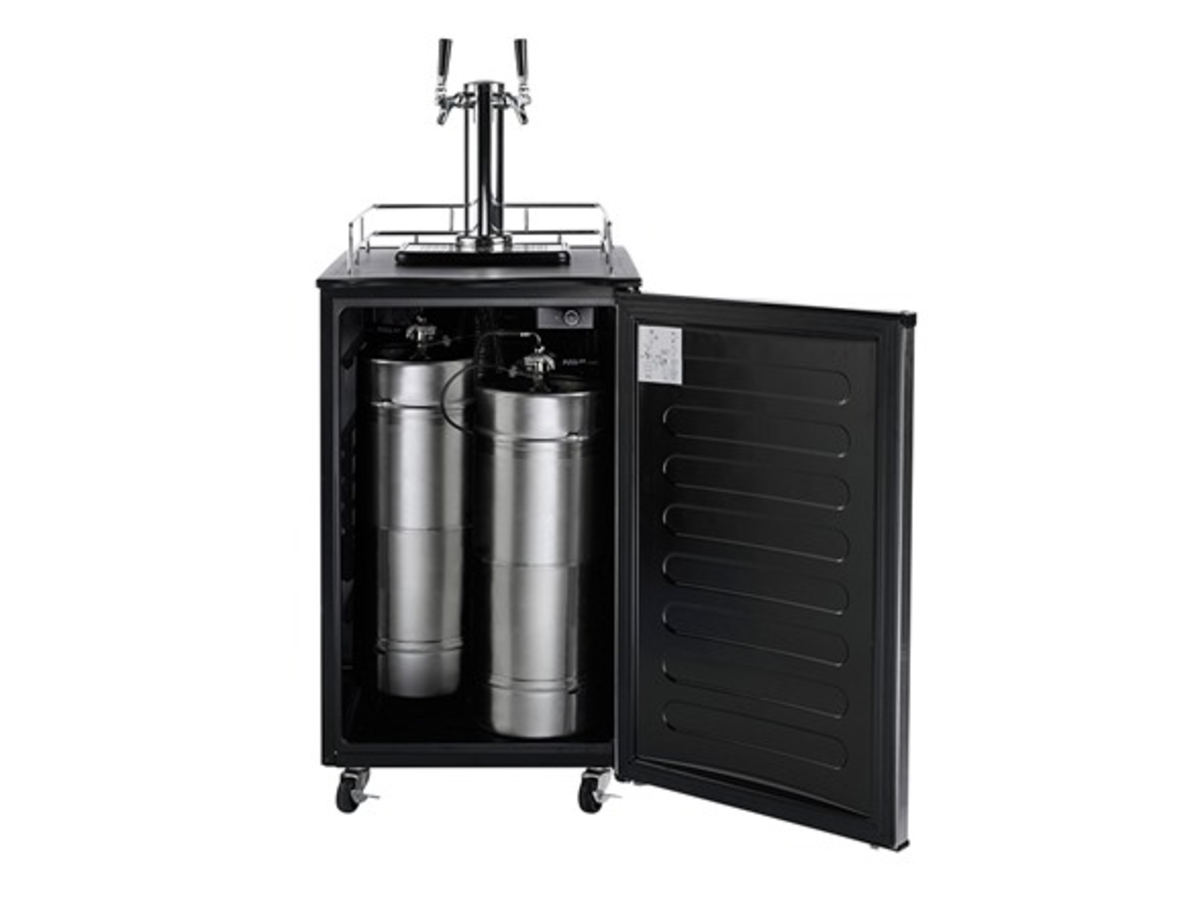
Step 2: Connecting the CO2 Regulator to the Keg
Now that you have checked the gas cylinder and ensured its proper condition, it’s time to connect the CO2 regulator to your keg. Follow these steps:
- Prepare the keg: Make sure your keg is clean and properly sanitized. Ensure that the keg’s pressure relief valve is closed.
- Locate the gas inlet: Look for the gas inlet valve on the top of the keg. It is typically marked with a “G” or “Gas” label.
- Attach the gas line: Take the gas line attached to the CO2 regulator and connect it to the gas inlet valve on the keg. Ensure a tight seal by firmly pushing the connector onto the valve.
- Secure the connection: If your gas line has a clamp or a screw, use it to secure the connection between the gas line and the keg. This will prevent accidental disconnects.
- Check for leaks: Once the connection is secure, perform a leak test. Apply a soapy water solution or a leak detection solution to the connections and look for any bubbles. If you notice bubbles forming, it indicates a gas leak. Tighten the connection or replace parts if necessary.
After completing these steps, you have successfully connected the CO2 regulator to the keg. The next step is to set the desired pressure to ensure proper carbonation and dispensing. We will cover this in detail in the following section.
Step 3: Setting the Desired Pressure
Setting the proper pressure on your CO2 regulator is crucial to achieve the desired carbonation level and ensure a smooth and consistent pour. Follow these steps to set the desired pressure:
- Understand the optimal pressure: Different beer styles and personal preferences may require different levels of carbonation. Generally, most beers are carbonated between 10-12 psi (pounds per square inch). However, it’s always best to consult the specific recommendations for the beer you’re serving.
- Adjust the pressure: Locate the pressure adjustment knob on your CO2 regulator. Turn the knob clockwise to increase the pressure or counterclockwise to decrease it. Make small adjustments to avoid sudden changes in pressure.
- Monitor the pressure: As you adjust the pressure, keep an eye on the second gauge if you are using a dual gauge regulator. It indicates the pressure being dispensed into the keg. Adjust the pressure until it reaches the desired psi.
- Allow time for carbonation: After setting the desired pressure, it’s important to allow time for the beer to carbonate properly. This process can take anywhere from a few hours to several days, depending on the beer style and the temperature at which your kegerator is set.
- Regularly check pressure and adjust if needed: It’s important to periodically check and adjust the pressure throughout the carbonation process. Take into account any temperature fluctuations, as temperature can affect the carbonation level. Adjust the pressure as needed to maintain the desired carbonation.
By following these steps, you can ensure that your beer is carbonated to perfection. Once your beer is carbonated, it’s time to test for any potential leaks in the system, which we will cover in the next step.
When using a kegerator CO2 regulator, always check the pressure gauge to ensure it is set to the appropriate level for the type of beer you are dispensing. Different styles of beer require different levels of CO2 pressure for optimal carbonation and dispensing.
Read more: How Adjust Co2 Kegerator
Step 4: Testing for Leaks
Now that you have set the desired pressure on your CO2 regulator, it’s important to test the system for any potential leaks. Identifying and fixing leaks is crucial to maintain the integrity of your kegerator setup and ensure optimal performance. Follow these steps to test for leaks:
- Prepare a soapy water solution: Mix a small amount of dish soap or a specially formulated leak detection solution with water in a spray bottle. Shake it well to create a solution that will produce visible bubbles when applied to areas with a leak.
- Spray the connections: Start by spraying the connections on your CO2 regulator, gas lines, and any other connection points in your kegerator setup. Pay close attention to areas where there are o-rings or seals, as these are common areas for leaks to occur.
- Observe for bubbles: As you apply the soapy water solution, carefully observe the connections for any signs of bubbles forming. Bubbles indicate the presence of a leak. Keep in mind that some small bubbles may be normal, but if you notice a steady stream of bubbles or large bubbles forming, you likely have a leak that needs to be addressed.
- Tighten connections: If you identify a leak, first try tightening the connection where the leak is occurring. Use caution not to overtighten, as this can damage the fittings or o-rings. Repeat the leak test after tightening to ensure the leak has been resolved.
- Replace faulty parts: If tightening the connections doesn’t solve the leak issue, you may need to replace faulty parts such as o-rings or seals. Consult your kegerator’s manual or contact the manufacturer for replacement parts and instructions.
By testing for leaks and addressing any issues promptly, you can ensure that your kegerator functions effectively without any wasted CO2 or compromised beer quality. Once you have confirmed there are no leaks, you can move on to adjusting the pressure if necessary.
Step 5: Adjusting the Pressure as Needed
After testing for leaks and ensuring a tight and secure connection, it’s time to fine-tune the pressure on your CO2 regulator to meet your specific requirements. Adjusting the pressure allows you to maintain optimal carbonation levels and ensure a perfect pour. Follow these steps to adjust the pressure as needed:
- Taste and evaluate: Pour a small sample of beer from the keg and taste it. Pay attention to the carbonation level and overall flavor profile. This will give you a sense of whether you need to increase or decrease the pressure.
- Increase the pressure: If the beer seems undercarbonated or lacks a good head of foam, you may need to increase the pressure. Slowly turn the pressure adjustment knob clockwise to increase the pressure. Monitor the response and make small adjustments to avoid sudden carbonation changes.
- Decrease the pressure: If the beer pours with excessive foam or a gushing effect, it may be overcarbonated. In this case, you need to decrease the pressure. Turn the adjustment knob counterclockwise to lower the pressure. Make gradual adjustments and continue testing until you reach the desired carbonation level.
- Allow time for adjustments: After making pressure adjustments, allow some time for the beer to reach the desired carbonation level. Keep in mind that it may take a few hours or even a day for the changes to take effect.
- Monitor and fine-tune: Continuously monitor the pour and carbonation level of your beer. Make small adjustments to the pressure as needed to maintain the optimal carbonation and serving conditions.
By regularly evaluating the taste and appearance of your beer, you can dial in the perfect pressure settings for your keg and ensure a consistently enjoyable drinking experience. With the pressure properly adjusted, you’re ready to enjoy your favorite brews straight from the kegerator!
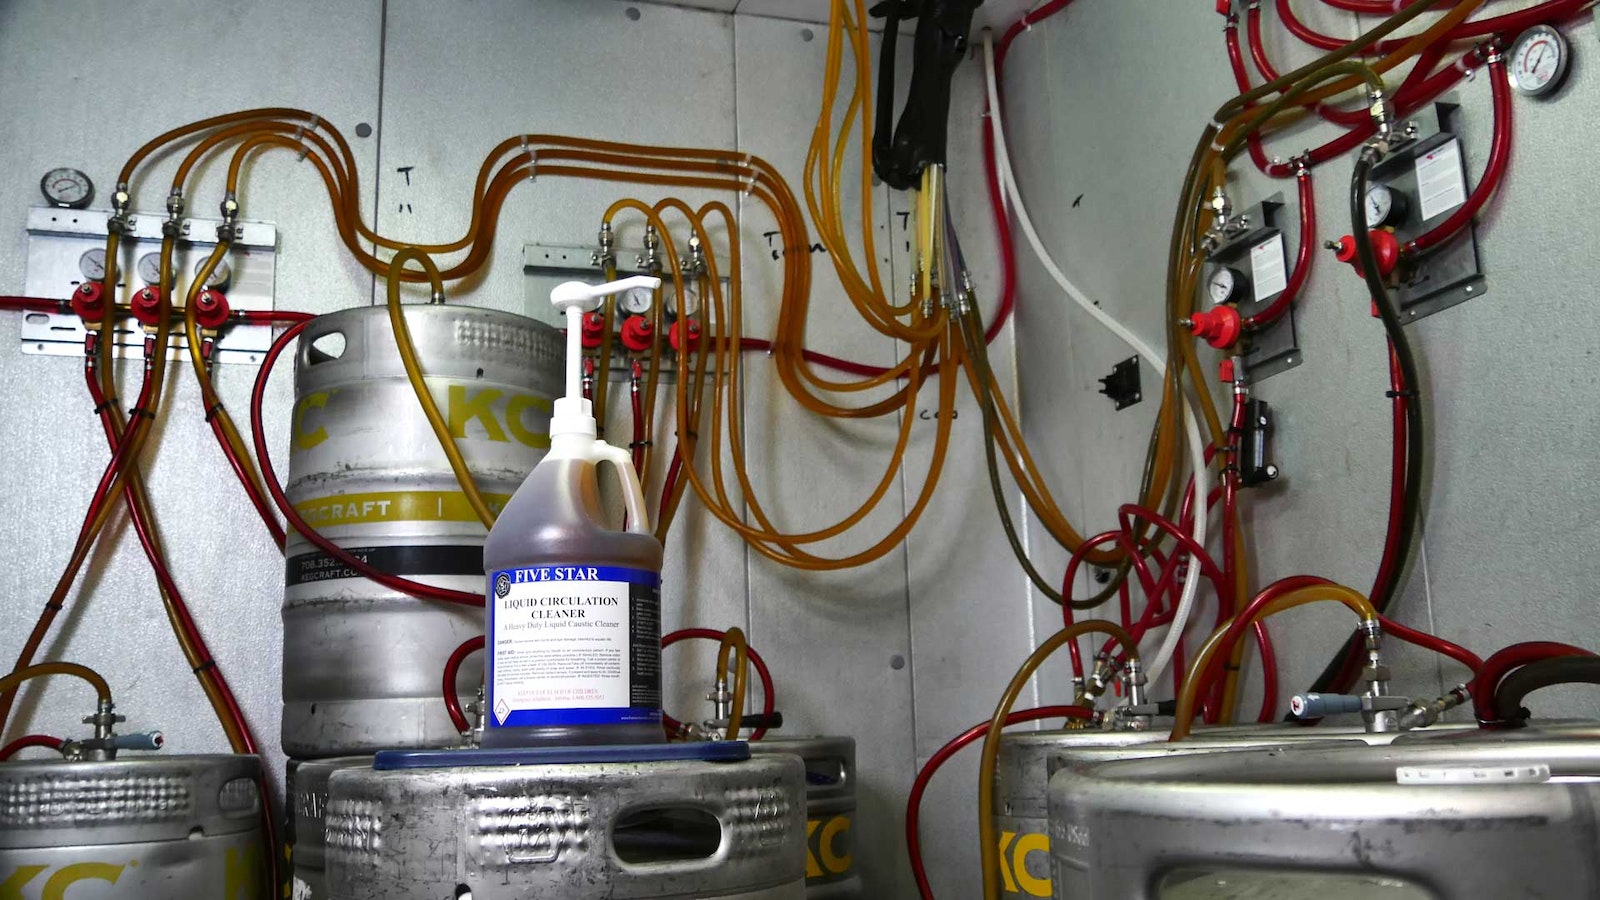
Step 6: Maintaining and Cleaning the Regulator
Maintaining and cleaning your CO2 regulator is essential to ensure its longevity and optimal performance. Regular maintenance helps prevent issues such as corrosion, clogs, or pressure inconsistencies. Follow these steps to maintain and clean your regulator:
- Disconnect the regulator: Before starting any maintenance or cleaning tasks, disconnect the regulator from the gas cylinder and the keg. This ensures your safety and prevents unintentional gas leaks.
- Inspect the regulator: Take a close look at the regulator for any signs of damage, wear, or corrosion. Pay attention to the seals, gauges, and adjustment knobs. If you notice any issues, consult the manufacturer or a professional for guidance on repair or replacement.
- Clean the exterior: Use a mild soap and water solution to clean the exterior of the regulator. Gently wipe it down with a cloth or sponge to remove any dirt or residue. Avoid using harsh chemicals or abrasive materials that could damage the regulator’s surface.
- Check the gauges: Ensure that the gauges on your regulator are functioning properly. If you notice any inaccuracies or inconsistencies, it may be time to replace them. Consult the regulator’s manual or contact the manufacturer for guidance.
- Clean the gas lines: Disconnect the gas lines from the regulator and use a sanitizing solution to clean them. Rinse thoroughly with clean water and allow them to dry completely before reattaching them.
- Inspect and replace o-rings: Inspect the o-rings and seals on the regulator and gas line connections. If you notice any signs of wear or deterioration, replace them with new ones to ensure a tight seal and prevent gas leaks.
- Store properly: When you’re not using the regulator, store it in a clean and dry place. Protect it from extreme temperatures, direct sunlight, and moisture, as these can affect its performance and lifespan.
By following these maintenance and cleaning steps, you can keep your CO2 regulator in optimal condition and ensure a smooth and trouble-free operation. Regular care will extend the lifespan of your regulator and contribute to the longevity of your kegerator setup.
With your CO2 regulator maintained and functioning properly, you’re now equipped with all the knowledge and steps necessary to use your kegerator like a pro. Cheers to perfectly carbonated and poured beers!
Conclusion
Congratulations! You have now completed your comprehensive guide on how to use a kegerator CO2 regulator. By following the step-by-step instructions and understanding the basics of a CO2 regulator, you can confidently set up your kegerator, achieve the perfect carbonation level, and enjoy a smooth and consistent beer pour.
We started by understanding the fundamentals of a kegerator CO2 regulator and its role in controlling the flow and pressure of CO2 gas. We then walked through the essential steps, including checking the gas cylinder, connecting the CO2 regulator to the keg, setting the desired pressure, testing for leaks, adjusting the pressure as needed, and maintaining and cleaning the regulator.
Remember, each kegerator may have slight variations, so it’s always important to consult your kegerator’s manual for specific instructions. Pay attention to safety precautions throughout the process, such as disconnecting the regulator before maintenance or cleaning tasks, and always ensuring a tight seal to prevent gas leaks.
Regular maintenance, including inspecting the regulator, cleaning the exterior, checking the gauges, and cleaning the gas lines, will help keep your CO2 regulator in optimal condition and ensure its longevity. Proper storage of the regulator when not in use is also critical to maintain its performance over time.
Now that you have a solid understanding of how to use a kegerator CO2 regulator, it’s time to put your knowledge into practice. Invite friends over for a pint, experiment with different beer styles, and impress everyone with the perfectly carbonated and poured beers from your kegerator.
Enjoy the convenience, freshness, and satisfaction that come with having a kegerator at home. Cheers to many memorable moments and great-tasting beers!
Frequently Asked Questions about How To Use A Kegerator Co2 Regulator
Was this page helpful?
At Storables.com, we guarantee accurate and reliable information. Our content, validated by Expert Board Contributors, is crafted following stringent Editorial Policies. We're committed to providing you with well-researched, expert-backed insights for all your informational needs.


0 thoughts on “How To Use A Kegerator Co2 Regulator”