Articles
How To Adjust Pressure On Pressure Washer
Modified: October 20, 2024
Learn how to adjust the pressure on your pressure washer with our informative articles. Improve efficiency and achieve optimal results.
(Many of the links in this article redirect to a specific reviewed product. Your purchase of these products through affiliate links helps to generate commission for Storables.com, at no extra cost. Learn more)
Introduction
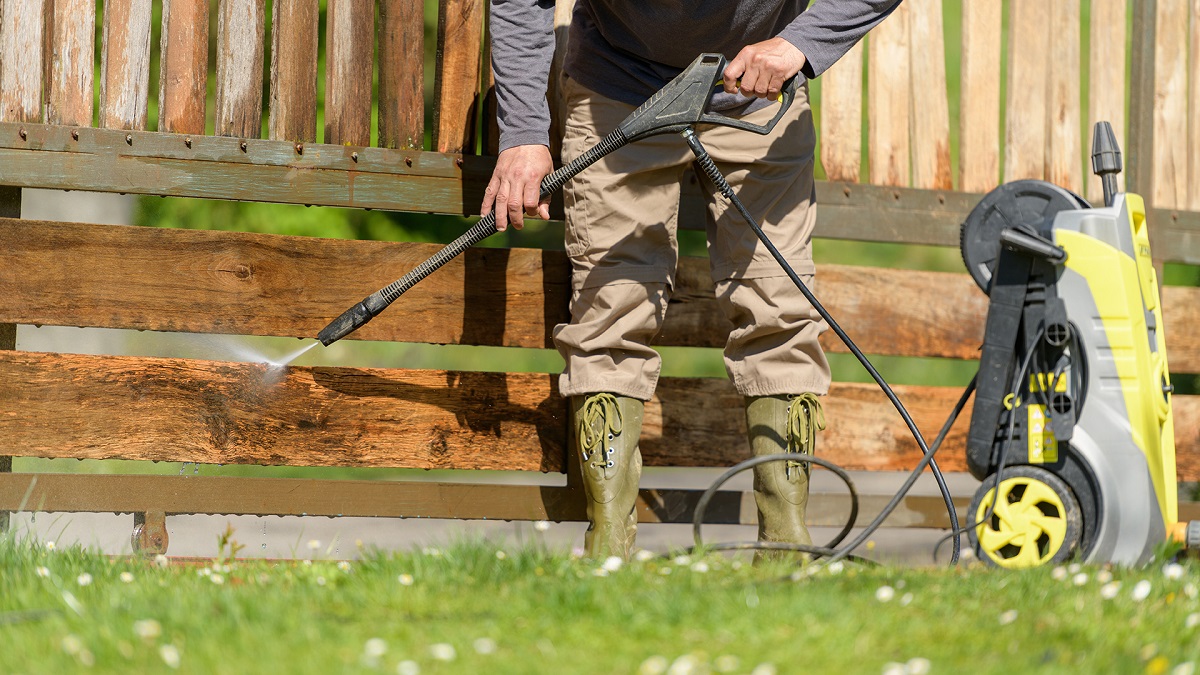
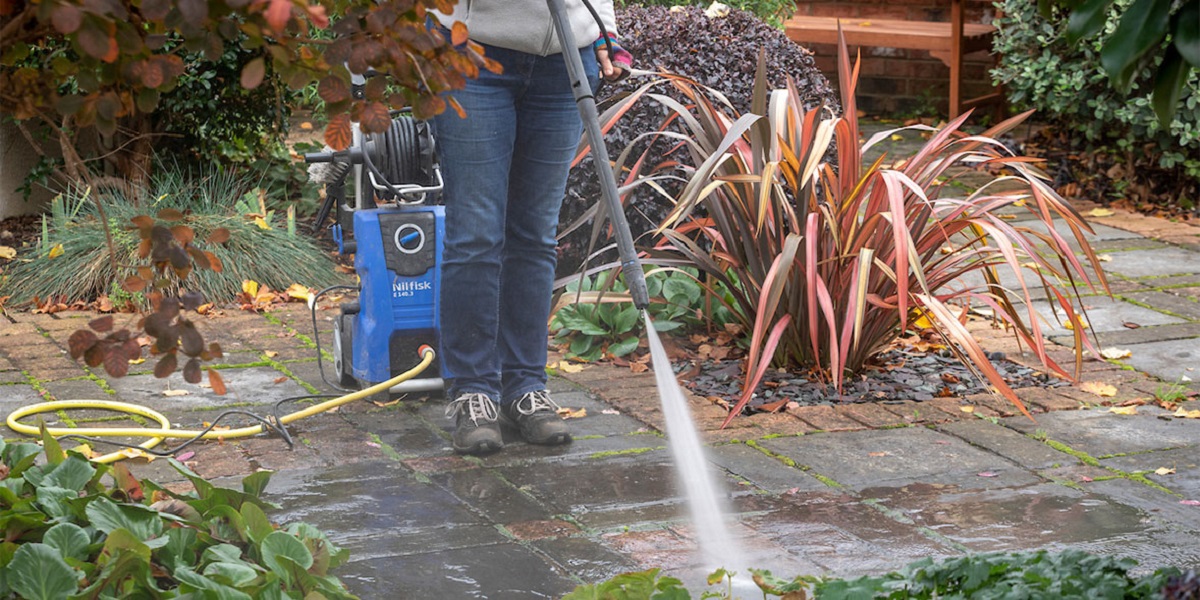
In the world of outdoor cleaning, pressure washers have become an indispensable tool. From removing dirt and grime from your driveway to tackling tough stains on your deck or siding, a pressure washer can make cleaning tasks faster and more efficient. However, to get the best results, it’s essential to adjust the pressure of your pressure washer according to the task at hand.
Understanding how to adjust the pressure on a pressure washer is crucial for achieving optimal cleaning performance while also ensuring the safety of both the operator and the surfaces being cleaned. In this article, we will walk you through the process of adjusting the pressure on your pressure washer and provide some helpful tips and troubleshooting advice along the way.
Before we dive into the steps, let’s take a moment to understand the different components of a pressure washer and why adjusting the pressure is important. A pressure washer consists of a motor or engine, a water pump, a high-pressure hose, and a spray wand or nozzle. The water pump is responsible for pressurizing the water, which is then expelled through the nozzle at high velocity to remove dirt and grime.
Why is adjusting the pressure important? Well, different surfaces and cleaning tasks require different levels of pressure. For example, cleaning delicate surfaces like a car or wooden furniture may require lower pressure to prevent damage. On the other hand, removing stubborn stains or debris from concrete may require higher pressure. By adjusting the pressure, you can ensure that the cleaning power of the pressure washer is neither too weak nor too strong for the task at hand.
Promoting safety is also a critical aspect of using a pressure washer. High-pressure water can cause serious injuries if it comes into direct contact with your body or if you accidentally hit someone else or fragile objects nearby. Adjusting the pressure allows you to have better control over the force of the water, reducing the risk of accidents and damage.
In the next sections, we will guide you through the process of adjusting the pressure on your pressure washer. We will also cover some important safety precautions to keep in mind while operating this powerful cleaning tool. So, let’s get started and learn how to adjust the pressure on your pressure washer effectively and safely.
Key Takeaways:
- Adjusting pressure on a pressure washer is crucial for optimal cleaning results and safety. Follow manufacturer’s guidelines, troubleshoot issues, and prioritize maintenance for efficient operation.
- Troubleshooting common pressure washer issues like insufficient pressure, fluctuating pressure, and excessive pressure ensures consistent and reliable cleaning performance. Regular maintenance and adherence to safety guidelines are key.
Read more: How To Adjust Pressure Washer Unloader Valve
Understanding the Pressure Washer System
To effectively adjust the pressure on your pressure washer, it’s important to have a basic understanding of how the system works and the key components involved. Let’s take a closer look at these components and their roles in the pressure washer system.
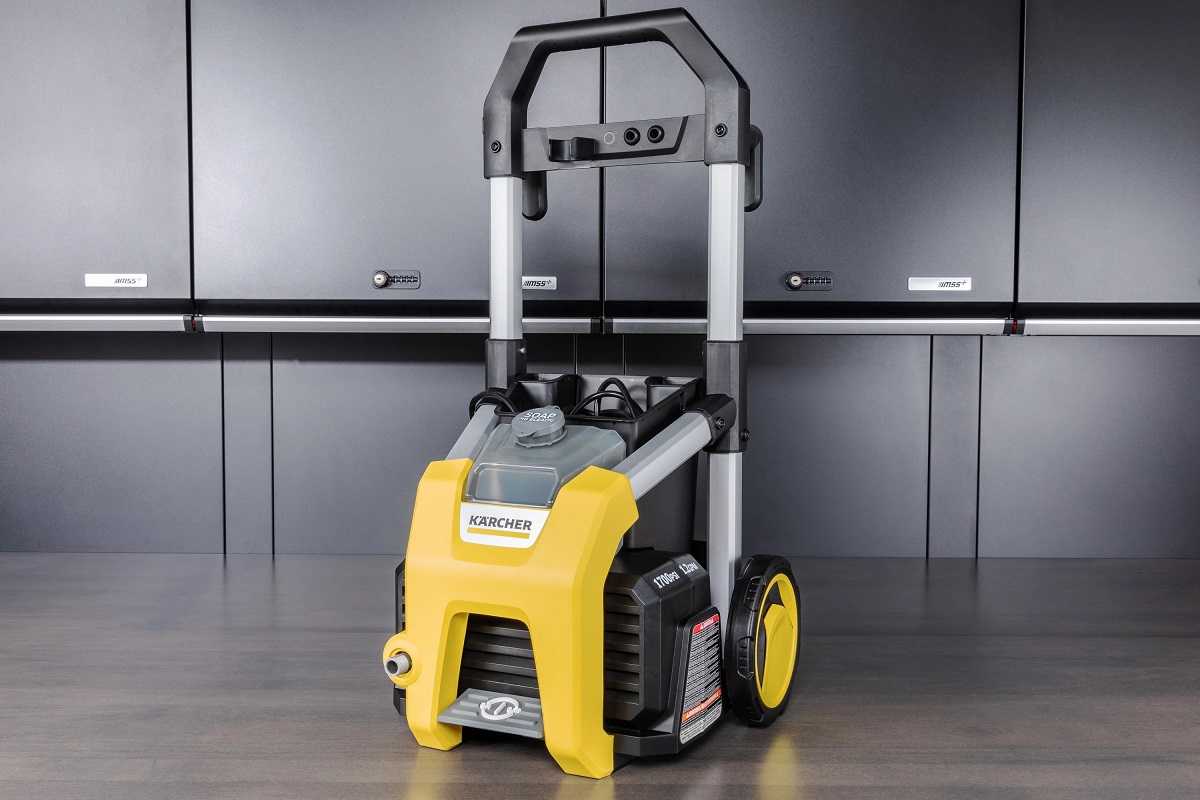
1. Motor or Engine: The motor or engine is responsible for powering the pressure washer. It can be either electric or gas-powered, depending on the model. The motor powers the water pump, creating the pressure needed to propel the water through the nozzle.
2. Water Pump: The water pump is the heart of the pressure washer. It takes in water from the source and pressurizes it before delivering it through the hose and spray wand. The pump is designed to generate high pressure and flow rates to achieve effective cleaning results.
3. High-Pressure Hose: The high-pressure hose is a durable and flexible tube that carries pressurized water from the water pump to the spray wand or nozzle. It is designed to withstand high pressures without bursting or leaking.
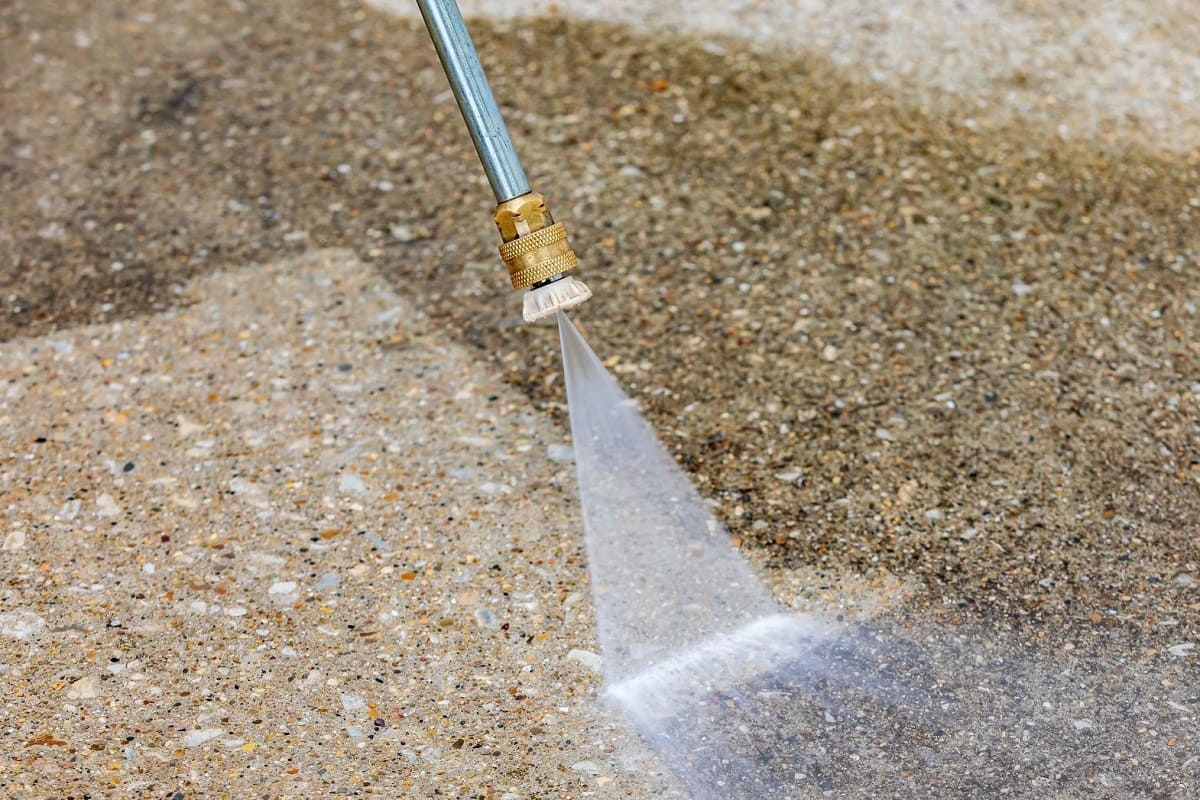
4. Spray Wand/Nozzle: The spray wand or nozzle is the part of the pressure washer that determines the spray pattern and intensity of the water. It is typically equipped with adjustable settings to control the pressure and the type of spray, such as a concentrated jet, wide fan, or gentle mist.
Now that we have an understanding of the pressure washer components, let’s explore the importance of adjusting the pressure for different cleaning tasks. As mentioned earlier, different surfaces and cleaning scenarios require varying levels of pressure.
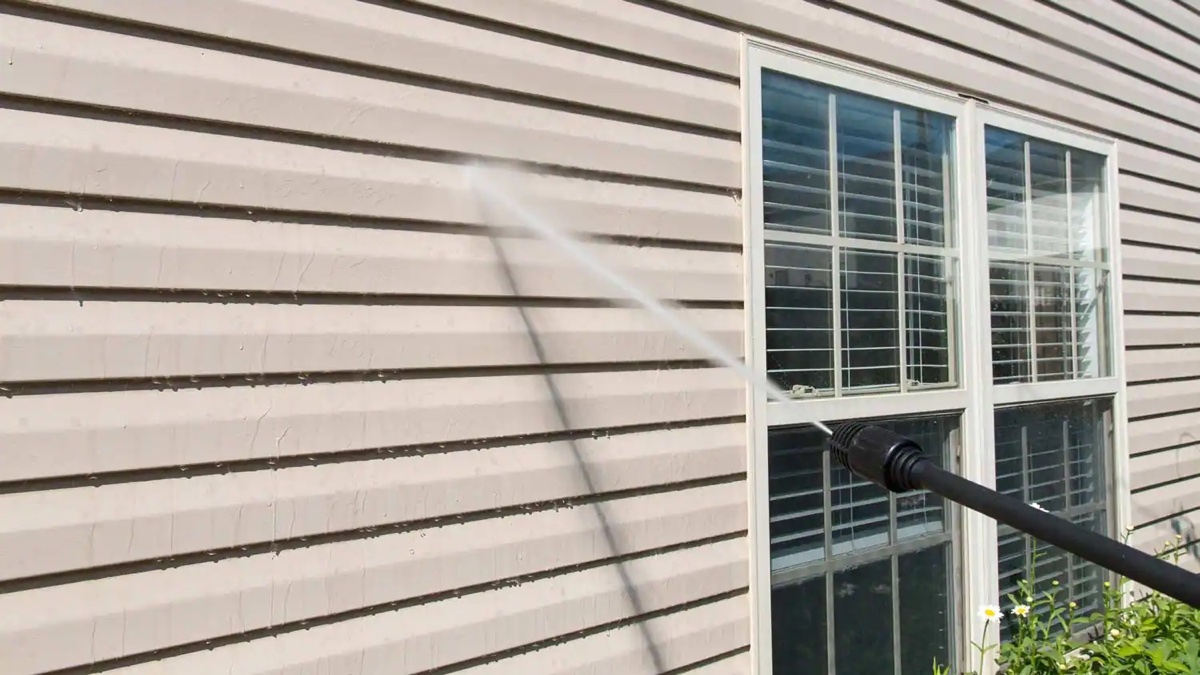
For example, delicate surfaces like cars, wooden furniture, or windows may need lower pressure settings to avoid causing damage. On the other hand, tougher surfaces like concrete driveways or brick walls may require higher pressure to effectively remove dirt and grime.
Adjusting the pressure allows you to customize the cleaning power of your pressure washer to match the specific cleaning task. It ensures that you achieve optimal results without causing harm to the surface being cleaned.
In the next section, we will discuss important safety precautions to keep in mind while operating a pressure washer. Safety should always be a top priority to prevent accidents and injuries.
Components of a Pressure Washer
A pressure washer is made up of several key components that work together to create the powerful cleaning force required for various tasks. Understanding these components will give you a better grasp of how your pressure washer operates. Let’s take a closer look at each of these components:
1. Motor or Engine: The motor or engine is the power source of the pressure washer. It provides the energy needed to drive the water pump and create the high-pressure water stream. Pressure washers can be powered by either electric motors or gas engines, each with its own advantages and considerations.
2. Water Pump: The water pump is the heart of the pressure washer system. It takes in water from a connected water source and pressurizes it to produce a high-pressure stream. The pump’s design and construction play a vital role in determining the pressure and flow rate capability of the pressure washer.
3. High-Pressure Hose: The high-pressure hose is a sturdy and flexible tube that carries pressurized water from the pump to the spray wand or nozzle. It is specifically designed to withstand the high pressures generated by the pump and deliver water without leaking or bursting. The length and quality of the hose are important factors to consider for optimal performance.
4. Spray Wand/Nozzle: The spray wand or nozzle is the part of the pressure washer where the high-pressure water is expelled. It determines the spray pattern and intensity of the water stream. Spray wands are usually equipped with quick-connect fittings for easy attachment and detachment of different nozzles. The nozzle’s shape and size directly impact the pressure and spray pattern, allowing you to adjust the cleaning power according to your needs.
5. Detergent Injection System: Many pressure washers have a built-in detergent injection system. This feature allows you to apply soaps, detergents, or cleaning solutions to the surface being cleaned, enhancing the cleaning effectiveness. The detergent is usually connected to the pressure washer through a separate inlet and mixed with the pressurized water before it leaves the nozzle.
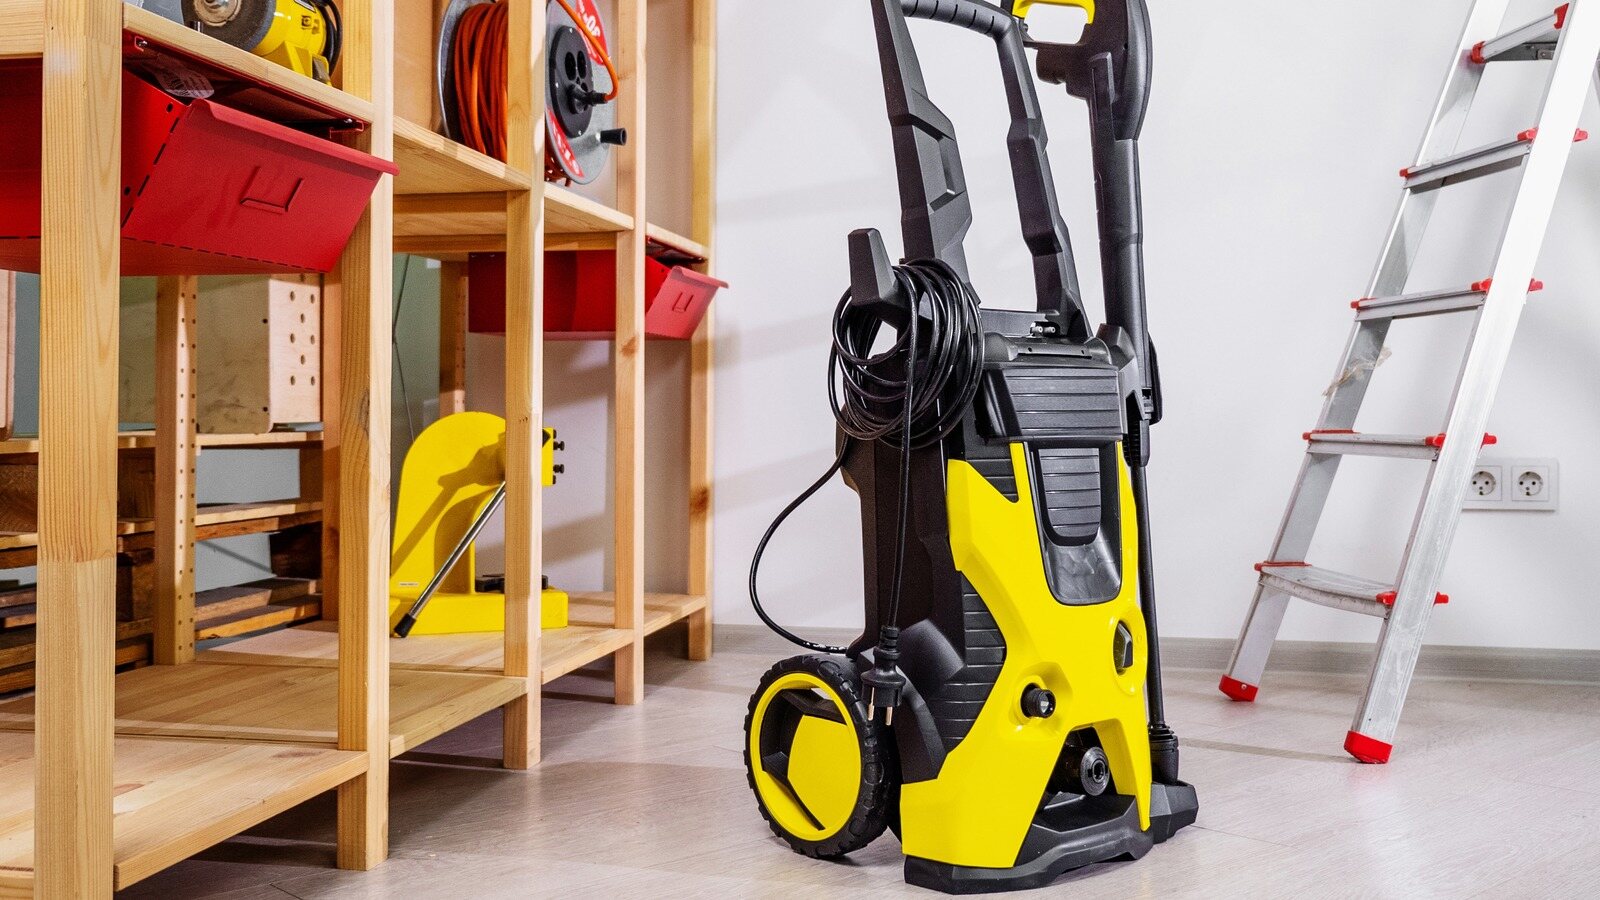
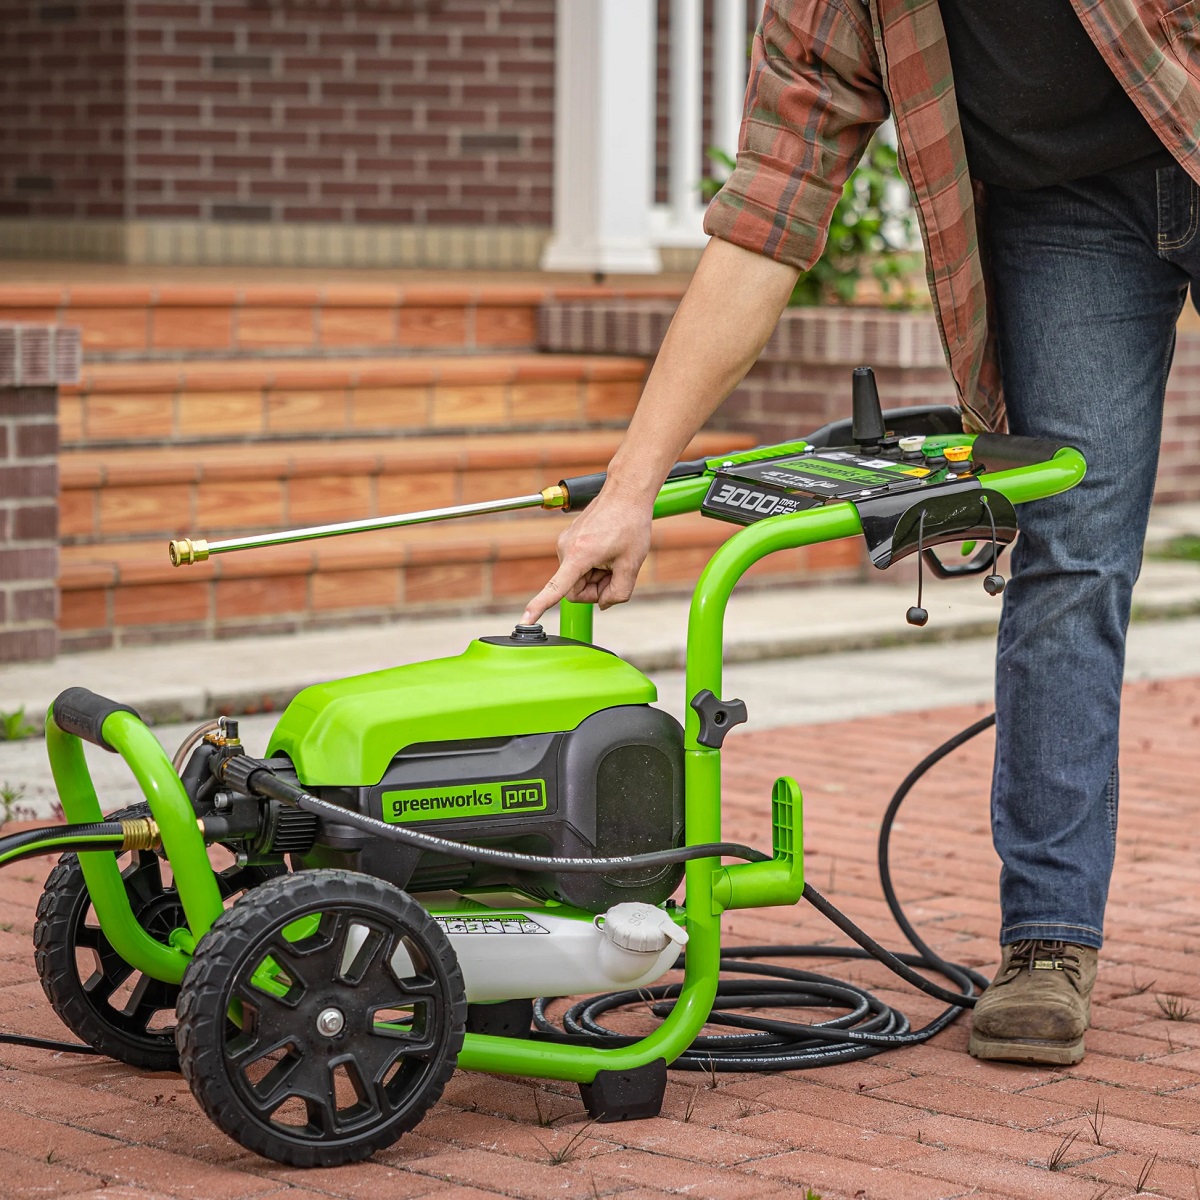
6. Wheels and Handle: Most pressure washers are designed with wheels and a handle to facilitate mobility and maneuverability. This makes it easier to transport the pressure washer and navigate it around various cleaning areas. Sturdy wheels and a comfortable handle ensure better control and ease of use.
Understanding these components will help you navigate your pressure washer’s settings and features more effectively. It’s important to familiarize yourself with the functions and capabilities of each part to ensure smooth operation and optimal results.
Importance of Adjusting Pressure
Adjusting the pressure of your pressure washer is an essential aspect of achieving effective and efficient cleaning results. The importance of adjusting the pressure lies in its ability to optimize cleaning power for different surfaces and tasks. Let’s delve into the key reasons why adjusting pressure is important:
1. Prevention of Damage: Different surfaces have varying degrees of durability. Adjusting the pressure ensures that you can customize the cleaning power to match the surface you are cleaning. Using too high a pressure on delicate surfaces like cars, wooden decks, or fragile objects can cause damage, such as paint stripping, surface gouging, or even structural harm. Conversely, insufficient pressure may result in ineffective cleaning. By adjusting the pressure, you can find the right balance between powerful cleaning and avoiding damage.
2. Effective Stain and Dirt Removal: Certain cleaning tasks require higher pressure to effectively remove stubborn stains, deeply embedded dirt, or algae buildup. For example, cleaning concrete driveways or brick walls may require increased pressure to penetrate and dislodge tough grime. By adjusting the pressure, you can ensure that the water stream has enough force to tackle challenging cleaning tasks, ensuring thorough and efficient cleaning.
3. Safety Precautions: Adjusting the pressure of your pressure washer is crucial for safety reasons. High-pressure water can be dangerous if it comes into direct contact with your body or if it accidentally hits someone else or fragile objects nearby. By adjusting the pressure to an appropriate level, you have better control over the force of the water stream, minimizing the risk of accidents, injuries, and property damage.
4. Optimal Cleaning Efficiency: Each cleaning task requires a specific level of pressure to achieve optimal cleaning efficiency. Adjusting the pressure according to the task at hand ensures that you are utilizing the pressure washer’s cleaning capabilities to their fullest potential. It allows you to remove dirt, grime, and stains efficiently, saving time and effort in the process.
5. Preservation of Surfaces: Adjusting the pressure is essential for preserving the longevity and appearance of surfaces. By using the appropriate pressure, you can prevent unnecessary wear and tear on the surfaces being cleaned. This is particularly important for surfaces like wooden decks, delicate sidings, or painted objects that require extra care to maintain their integrity.
By understanding the importance of adjusting pressure and implementing it in your cleaning routine, you can optimize the performance of your pressure washer while ensuring safety and protecting the surfaces being cleaned. It’s crucial to find the right balance between cleaning power, efficiency, and surface protection for the best results.
Safety Precautions
When using a pressure washer, it is essential to prioritize safety. The high-pressure water stream generated by a pressure washer can be powerful and potentially dangerous if not handled with caution. By following these safety precautions, you can ensure a safe and incident-free cleaning experience:
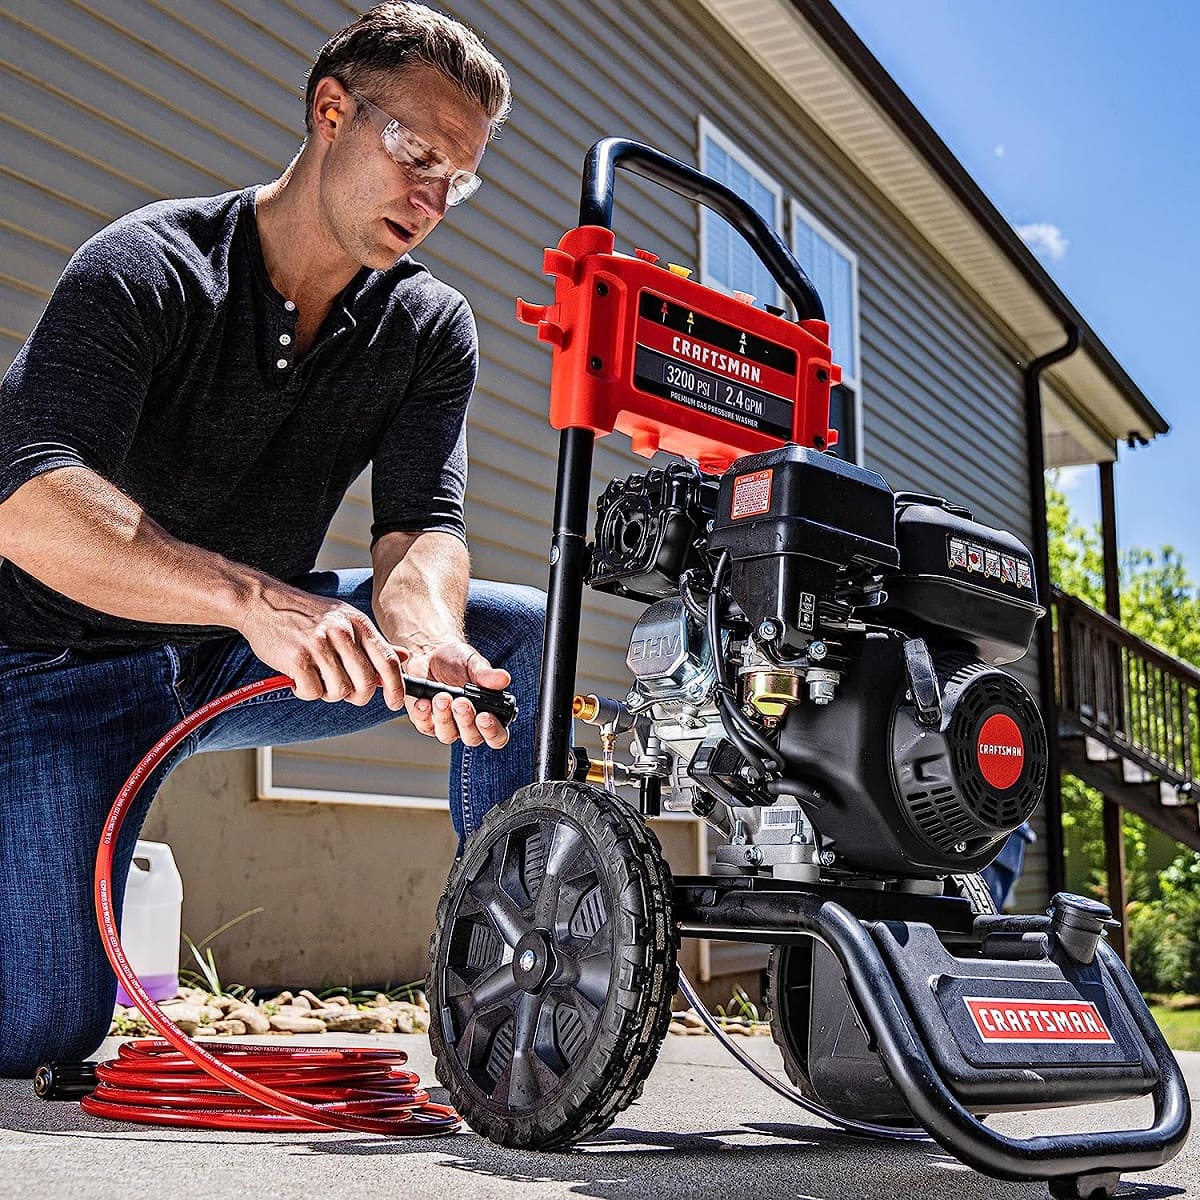
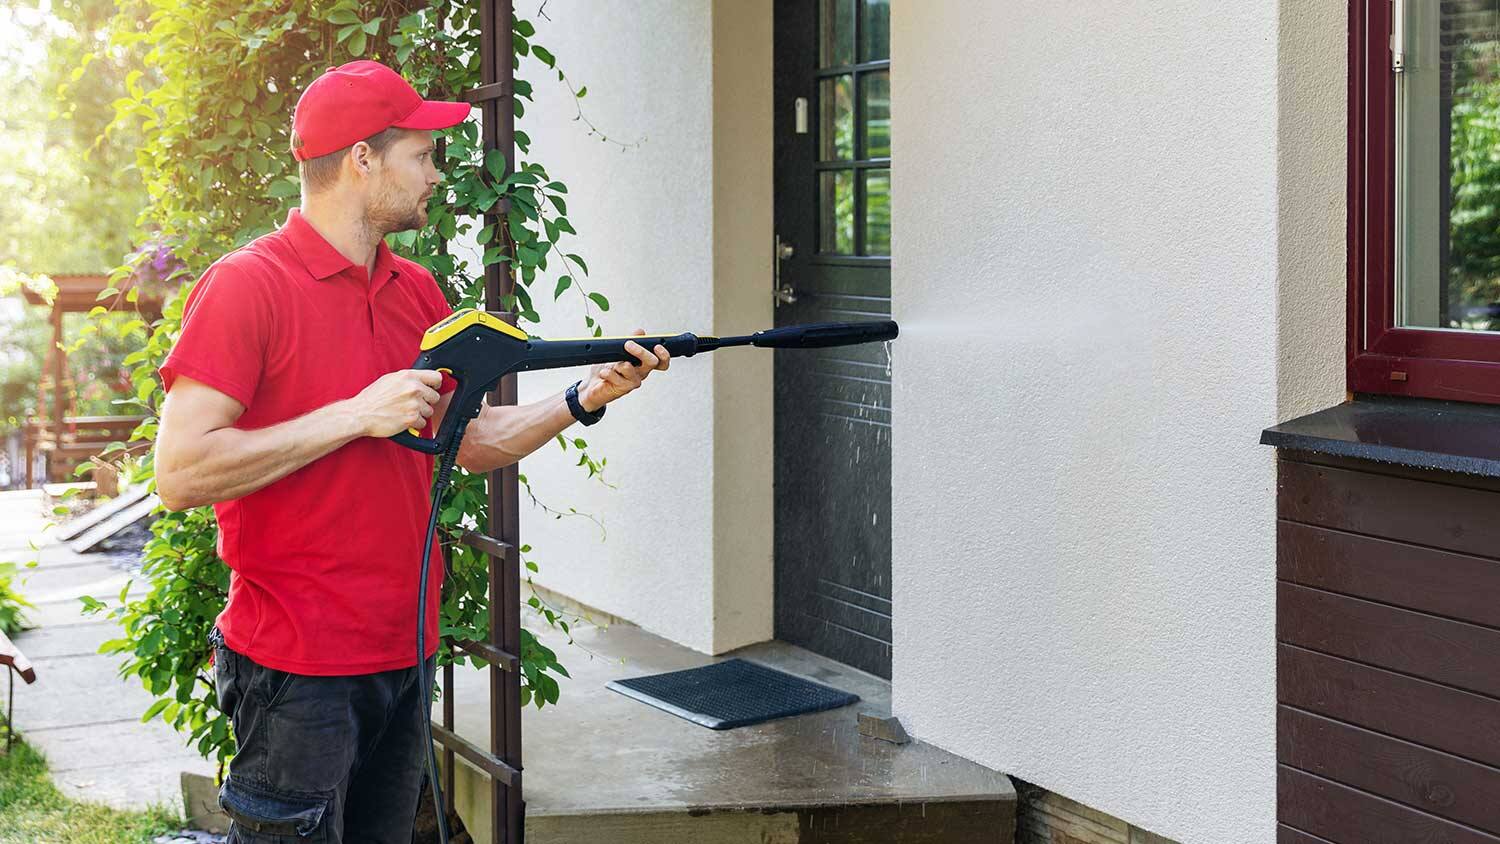
1. Wear Protective Gear: Always wear appropriate safety gear to protect yourself from potential hazards. This includes safety goggles or a face shield to shield your eyes from flying debris and water droplets, as well as ear protection if the pressure washer is noisy. Additionally, wear sturdy, non-slip footwear to prevent slipping and falling on wet surfaces.
2. Avoid Direct Contact: Never point the pressure washer nozzle at yourself, others, or animals. The high-pressure water stream can cause serious injuries, including cuts and lacerations. Also, avoid spraying the pressure washer near electrical outlets or equipment to prevent electric shocks.
3. Use Caution Near Electrical Outlets: When using an electric pressure washer, be mindful of the power cord and ensure it is not damaged or frayed. Keep the cord away from water and do not use extension cords unless approved by the manufacturer. If using a gas-powered pressure washer, avoid operating it in enclosed spaces to prevent carbon monoxide buildup.
4. Read the Manufacturer’s Manual: Familiarize yourself with the pressure washer’s operation and safety instructions by carefully reading the manufacturer’s manual. Pay particular attention to recommended operating procedures, maintenance guidelines, and safety precautions specific to your model.
5. Choose the Right Nozzle: Select the appropriate nozzle for the task at hand. Different nozzles provide varying levels of pressure and spray patterns. Start with a wider spray pattern and lower pressure for delicate surfaces, gradually increasing the pressure if needed. Always test the pressure on a small, inconspicuous area before proceeding to larger surfaces.
6. Maintain a Safe Distance: Keep a safe distance from the surface being cleaned. Start with a distance of at least two feet and adjust as necessary. Getting too close to the surface can cause damage or force water and debris back toward you.
7. Regularly Inspect Equipment: Before each use, inspect the pressure washer for any signs of damage or leaks. Ensure that all connections are tight and secure. Replace any worn or damaged parts before operating the pressure washer.
8. Store Properly: After use, properly store the pressure washer in a secure and dry location, away from children and pets. Avoid exposing it to extreme temperatures or harsh weather conditions, which can damage the equipment.
By following these safety precautions, you can minimize the risk of accidents and injuries while operating a pressure washer. Always prioritize safety and use common sense when using this powerful cleaning tool. Remember, the goal is to achieve a clean and well-maintained space while ensuring the well-being of yourself and those around you.
Read more: How To Adjust Elkay Water Fountain Pressure
Wear Protective Gear
One of the most important safety precautions when using a pressure washer is to always wear the appropriate protective gear. The high-pressure water stream produced by a pressure washer can pose various hazards, including flying debris, water droplets, and potential exposure to harmful chemicals. By wearing protective gear, you can minimize the risk of injuries and stay safe during the cleaning process. Here are some essential items of protective gear to consider:
1. Safety Goggles or Face Shield: Protecting your eyes is vital when operating a pressure washer. Safety goggles or a face shield provide a barrier between the high-pressure water stream and your eyes, preventing particles, debris, and water droplets from causing eye injuries. Opt for goggles or a face shield that fit securely and provide full coverage, ensuring maximum protection.
2. Ear Protection: Pressure washers can generate a significant amount of noise, especially gas-powered models. Prolonged exposure to loud noise can cause hearing damage and discomfort. To safeguard your hearing, consider wearing earplugs or earmuffs designed to reduce noise levels while still allowing you to hear important sounds, such as warnings or instructions from others.
3. Protective Clothing: It is essential to wear appropriate clothing that offers protection from water, debris, and chemicals. Choose long-sleeved shirts, pants, and work gloves made from durable and water-resistant materials to shield your skin. This will prevent injuries caused by abrasions, cuts, or chemical contact.
4. Non-Slip Footwear: When operating a pressure washer, it’s important to have a steady foothold to avoid slips, trips, and falls. Wearing sturdy, closed-toe shoes with non-slip soles will provide traction on wet and slippery surfaces, reducing the risk of accidents. Avoid wearing sandals or open-toe shoes that may expose your feet to potential hazards.
5. Respiratory Protection: In certain situations, the use of chemical cleaning solutions may be necessary. These solutions can produce fumes or airborne particles that may be harmful when inhaled. If you are working in an enclosed space or using strong chemicals, consider wearing a respirator or a face mask rated for chemical filtration to protect your lungs from harmful substances.
Always remember to properly clean and maintain your protective gear after each use. Inspect goggles, face shields, gloves, and other items for any signs of damage, such as cracks, tears, or degraded materials. Replace any damaged gear before using your pressure washer again.
Wearing protective gear not only safeguards your well-being but also promotes a responsible and secure approach to using a pressure washer. By taking the necessary precautions and prioritizing your safety, you can confidently and effectively clean your surroundings while minimizing the risk of injuries.
Avoid Direct Contact
When operating a pressure washer, it is crucial to avoid direct contact with the high-pressure water stream. The force generated by a pressure washer can cause serious injuries if it comes into direct contact with your body or if it accidentally hits someone else or fragile objects nearby. By following these precautions, you can minimize the risk of accidents and keep yourself, others, and your surroundings safe:
1. Never Point the Nozzle at Yourself or Others: Always be mindful of the direction in which you are pointing the pressure washer nozzle. Avoid pointing it toward yourself, others, or pets. The high-pressure water stream can cause cuts, lacerations, or serious injuries if it comes into direct contact with the skin. Always keep the nozzle pointed away from people and animals.
2. Avoid Spraying Near Electrical Outlets or Equipment: Water and electricity are a dangerous combination. When using an electric pressure washer, be mindful of the power cord and make sure it is away from any water sources. Additionally, avoid spraying near electrical outlets, light fixtures, or any other electrical equipment to prevent the risk of electric shock or damage to the equipment.
3. Use Caution Around Windows, Glass, and Fragile Objects: Glass windows, delicate surfaces, or fragile objects can be easily damaged by the powerful force of a pressure washer. Avoid spraying directly at windows, glass panels, or items that can be easily broken. Instead, maintain a safe distance and use a wider spray pattern to minimize the risk of damage.
4. Be Mindful of Surrounding Objects and People: Take note of your surroundings and ensure that there are no bystanders, children, or pets in the vicinity before you begin using the pressure washer. Communicate to others that you will be operating the pressure washer, instructing them to keep a safe distance. Clear the area of any loose objects, debris, or potential tripping hazards to prevent accidents or damage caused by the force of the water stream.
5. Avoid Spraying Upward or at an Angle: It is recommended to avoid spraying the pressure washer at an upward angle. This can lead to the water stream bouncing back towards you, increasing the likelihood of direct contact or accidental slippage. Keep the nozzle pointed downward, following the path of the surface you are cleaning.
By implementing these safety precautions, you can significantly reduce the risk of accidents caused by direct contact with the high-pressure water stream. Always exercise caution, be aware of your surroundings, and prioritize the safety of yourself and others when using a pressure washer.
Use Caution Near Electrical Outlets
When operating a pressure washer, it is important to exercise caution and follow safety guidelines, especially when it comes to electrical outlets. Pressure washers are powered by electricity or fuel, and improper handling near electrical outlets can lead to electric shocks or damage to the equipment. Here are some essential precautions to take when using a pressure washer near electrical outlets:
1. Inspect Power Cord: Before use, carefully examine the power cord of your pressure washer for any signs of damage, such as cuts, fraying, or exposed wires. If you notice any issues, it is crucial to have the cord repaired or replaced by a qualified professional before operating the equipment. Using a damaged cord can increase the risk of electrical accidents.
2. Keep Power Cord Away from Water: Water and electricity are a dangerous combination. Ensure that the power cord of the pressure washer is kept away from any water source. Do not allow the cord to come into contact with puddles, wet surfaces, or the water stream being sprayed. Using a cord reel or keeping the cord elevated can help prevent it from getting wet.
3. Avoid Spray Contact with Outlets: When operating the pressure washer, make sure that the spray wand or nozzle does not come into direct contact with electrical outlets. The force of the high-pressure water stream can potentially damage outlets or cause a short circuit. Maintain a safe distance from electrical outlets while using the pressure washer.
4. Use Ground Fault Circuit Interrupters (GFCIs): GFCIs are electrical devices designed to protect against ground faults and electric shocks. They are typically installed in areas where water and electricity are in close proximity, such as outdoor outlets. Ensure that your pressure washer is connected to a GFCI-protected outlet to provide an additional layer of electrical safety.
5. Avoid Extension Cords: Using an extension cord with a pressure washer can introduce additional risks. It is best to connect the pressure washer directly to the power source using a grounded outlet. If you need to use an extension cord, ensure that it is an appropriate type and length for the power requirements of the pressure washer. Follow the manufacturer’s guidelines to avoid electrical issues.
6. Use Gas-Powered Pressure Washers Safely: If you are using a gas-powered pressure washer, take extra precautions to operate it safely. Avoid using gas-powered equipment in enclosed spaces, as carbon monoxide fumes can accumulate and pose serious health risks. Ensure proper ventilation when operating outdoors, and keep the exhaust away from windows, doors, or other openings where fumes can enter enclosed areas.
By following these cautionary measures when using a pressure washer near electrical outlets, you can ensure your safety and prevent electrical accidents. Always prioritize safety, adhere to manufacturer’s instructions, and seek professional assistance if you require electrical repairs or modifications for your pressure washer.
Steps to Adjust Pressure on a Pressure Washer
Adjusting the pressure on a pressure washer allows you to tailor the cleaning power to the specific task at hand. Here are the steps to effectively adjust the pressure on your pressure washer:
1. Step 1: Read the Manufacturer’s Manual: Start by thoroughly reading the manufacturer’s manual that came with your pressure washer. Familiarize yourself with the specific instructions and guidelines for adjusting the pressure. Different pressure washers can have varying mechanisms or settings, so it is important to understand the specific features of your model.
2. Step 2: Locate the Pressure Adjusting Knob: Most pressure washers have a pressure adjusting knob or control that allows you to increase or decrease the pressure. The knob is usually located on the pump or near the water inlet. Consult your pressure washer’s manual to locate the precise position of the pressure adjusting knob on your model.
3. Step 3: Turn the Knob Clockwise to Increase Pressure: To increase the pressure, turn the pressure adjusting knob in a clockwise direction. This action typically tightens the valve inside the pump, allowing more pressure to build up. Gradually increase the pressure by turning the knob in small increments until you reach the desired level. Remember to refer to the manual for any specific recommendations or limitations on pressure adjustment.
4. Step 4: Turn the Knob Counterclockwise to Decrease Pressure: If you need to reduce the pressure, turn the pressure adjusting knob in a counterclockwise direction. This action loosens the valve, allowing less pressure to build up. Again, make adjustments in small increments to fine-tune the pressure and avoid sudden changes that may affect the efficiency of the pressure washer.
5. Step 5: Test the Pressure Settings: After adjusting the pressure, it is crucial to test the settings before beginning the cleaning task. Attach the appropriate nozzle to the spray wand and start by spraying a small, inconspicuous area to assess the pressure. Observe the cleaning power and adjust as needed. Remember that different surfaces and cleaning requirements may necessitate further fine-tuning of the pressure.
Throughout the pressure adjustment process, it is essential to continually refer to the manufacturer’s manual to ensure that you are following the specific instructions for your pressure washer model. Additionally, take note of any recommended pressure limits to prevent damage to surfaces or the equipment itself.
Adjusting the pressure on your pressure washer provides you with the flexibility to optimize cleaning power, achieve desired results, and ensure the safety of both yourself and the surfaces being cleaned. Take the time to understand the pressure adjustment process for your specific pressure washer model, and always exercise caution while operating the equipment.
Read more: How To Adjust Pressure Switch On Hot Tub
Step 1: Read the Manufacturer’s Manual
Before attempting to adjust the pressure on your pressure washer, it is essential to read and familiarize yourself with the manufacturer’s manual. The manual provides valuable information specific to your pressure washer model, including guidelines, instructions, and safety precautions. Here’s why reading the manual is important:
1. Understanding Your Pressure Washer: The manufacturer’s manual provides in-depth information about the features, functions, and specifications of your pressure washer. It gives you a comprehensive understanding of how your specific model operates, including details on the pressure adjustment mechanism and control.
2. Specific Pressure Adjustment Instructions: Each pressure washer model may have a different method of adjusting pressure. The manual will provide step-by-step instructions on how to adjust the pressure specific to your machine. It may include details on locating the pressure adjusting knob or control and the recommended techniques for making adjustments.
3. Manufacturer’s Recommendations: The manual often contains valuable recommendations and guidelines from the manufacturer. This includes information on the ideal pressure range, helpful tips for different cleaning tasks, and any specific limitations or precautions to be aware of when adjusting the pressure. Following these recommendations ensures optimal performance and extends the lifespan of your pressure washer.
4. Safety Precautions: The manual will outline important safety precautions to keep in mind while operating the pressure washer. This includes information on wearing appropriate protective gear, avoiding potential hazards, and adhering to electrical safety guidelines. By understanding and following these safety precautions, you can prevent accidents and injuries.
5. Maintenance and Troubleshooting: The manual typically includes useful maintenance and troubleshooting tips specific to your pressure washer model. It provides guidance on routine maintenance tasks, such as cleaning the filters or checking for leaks. It also outlines common issues that may arise and provides solutions to address them effectively.
Reading the manufacturer’s manual ensures that you have the necessary knowledge and information to adjust the pressure on your pressure washer correctly and safely. It empowers you to make informed decisions and optimize the performance of your machine for different cleaning tasks. Additionally, it helps you maintain the longevity of your pressure washer by following proper operating procedures and maintenance guidelines.
Remember, each pressure washer model may have unique features and instructions, so reading the manual specific to your machine is crucial for a successful pressure adjustment process. Take the time to review the manual thoroughly and refer to it as a helpful resource whenever needed.
When adjusting the pressure on a pressure washer, start with the lowest setting and gradually increase until you reach the desired pressure for the task at hand. Always refer to the manufacturer’s guidelines for specific instructions.
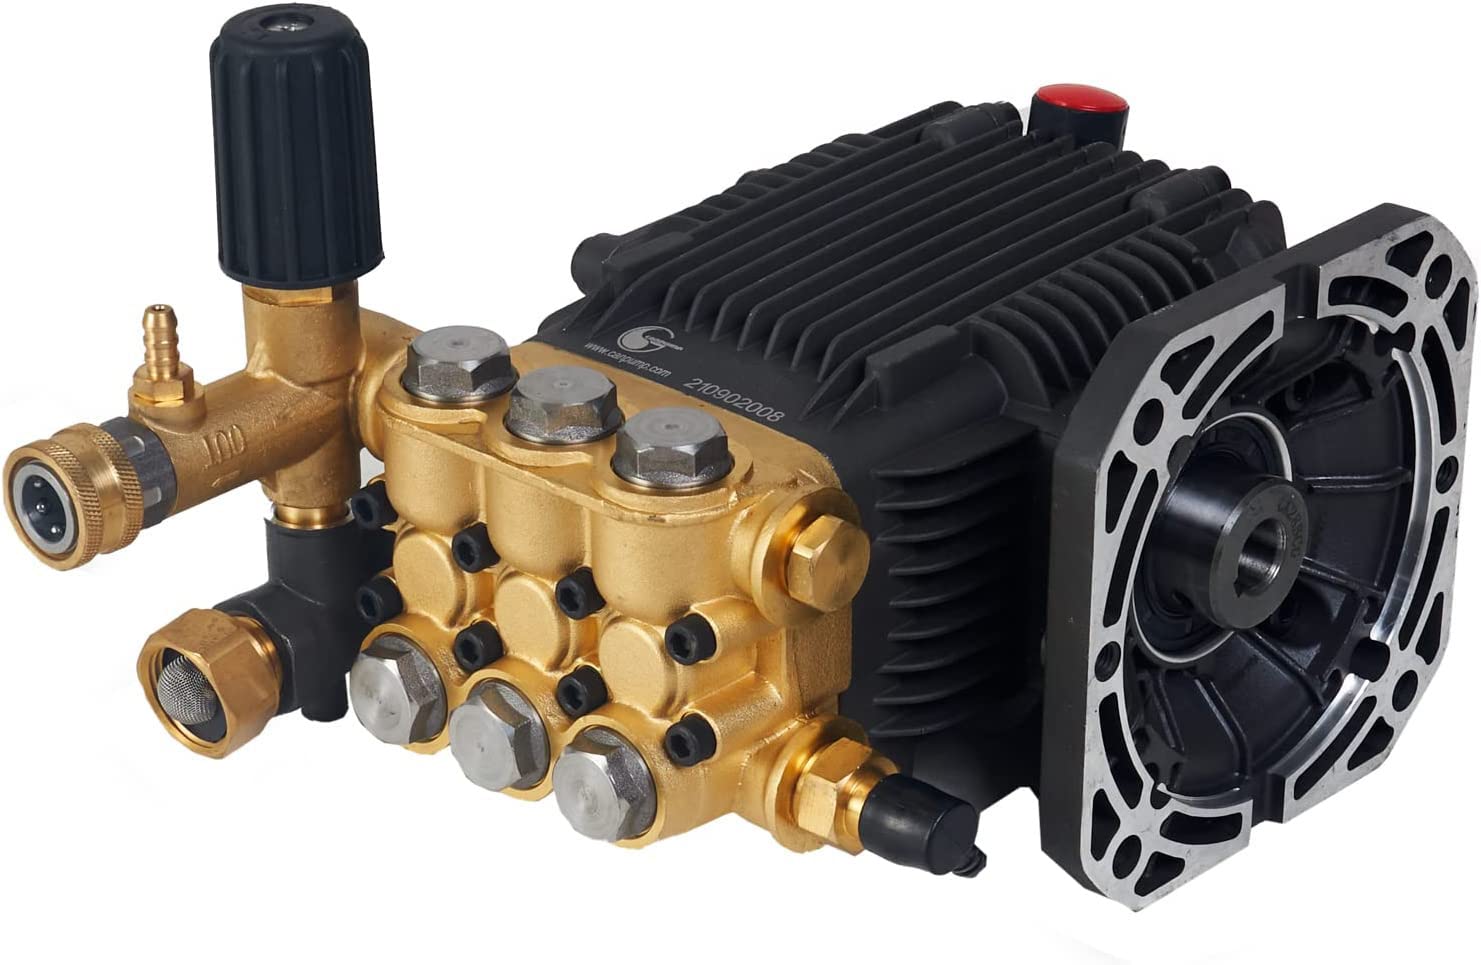
Step 2: Locate the Pressure Adjusting Knob
Once you have familiarized yourself with the manufacturer’s manual, the next step is to locate the pressure adjusting knob or control on your pressure washer. This knob is the key component that allows you to increase or decrease the pressure according to your cleaning needs. Here’s why locating the pressure adjusting knob is important and how to find it:
1. Central Control Point: The pressure adjusting knob is typically a centralized control point on the pressure washer. Locating this knob is crucial because it is where you will make the necessary adjustments to set the desired pressure level. Once you have found the knob, you can easily access it whenever you need to fine-tune the pressure settings.
2. Varies by Pressure Washer Model: The location of the pressure adjusting knob may differ based on the design and model of your pressure washer. Some pressure washers have the knob positioned on the pump itself, while others may have it near the water inlet or on the control panel. The manufacturer’s manual will provide specific information on where to find the pressure adjusting knob for your particular model.
3. Consult the Manufacturer’s Manual: To locate the pressure adjusting knob on your pressure washer, consult the manufacturer’s manual. The manual will contain visual diagrams, descriptions, or specific instructions to help you identify the precise location of the knob. It may also provide additional information on any special features or markings on the knob that indicate its purpose.
4. Take Note of Markings or Labels: While inspecting your pressure washer, keep an eye out for any markings, labels, or indicators that signify the pressure adjusting knob. These markings may include symbols, icons, or text that clearly indicate its function. Some pressure washers may even have the word “pressure” or other related terms engraved near the knob area.
5. Identify the Knob’s Design or Shape: The pressure adjusting knob can come in various designs or shapes, depending on the pressure washer model. It might be a rotating knob, a dial, or a lever that you can move vertically or horizontally. By identifying the design or shape, it will be easier to recognize the pressure adjusting knob among other controls or buttons on your pressure washer.
Knowing the exact location of the pressure adjusting knob is crucial for making accurate pressure adjustments on your pressure washer. Familiarize yourself with the design, shape, and positioning of the knob based on the information provided in the manufacturer’s manual. This will allow for a smoother adjustment process and ensure that you can easily find the knob whenever you need to modify the pressure settings.
Step 3: Turn the Knob Clockwise to Increase Pressure
After locating the pressure adjusting knob on your pressure washer, you can proceed to adjust the pressure according to your specific cleaning needs. Turning the knob clockwise is the general method for increasing the pressure output. Here’s why this step is important and how to effectively turn the knob to increase the pressure:
1. Increasing Cleaning Power: When you encounter stubborn stains, tough grime, or heavily soiled surfaces, increasing the pressure of your pressure washer can boost its cleaning power. By turning the pressure adjusting knob clockwise, you tighten the valve inside the pump, allowing more pressure to build up in the system. This higher pressure will give you the additional force needed to tackle challenging cleaning tasks effectively.
2. Gradual Adjustments: It is important to make adjustments to the pressure in gradual increments. Turning the knob clockwise too quickly or by a large amount in one go may result in excessive pressure, which can be damaging to delicate surfaces or create safety hazards. Take your time and make small adjustments to the pressure, testing it periodically to ensure that you achieve the desired cleaning performance without risk of damage.
3. Refer to the Manufacturer’s Manual: Depending on your specific pressure washer model, the manual may provide further guidance on how to turn the knob properly. Some pressure washers have specific instructions, such as the number of rotations or the degree of turn required to increase the pressure effectively. Consulting the manual will ensure that you follow the correct procedure for your particular pressure washer.
4. Monitor Pressure Changes: As you turn the pressure adjusting knob clockwise, pay attention to the pressure changes. Observe the pressure gauge or any visual indicators on your pressure washer that provide feedback on the pressure level. Continuously check the pressure while making adjustments to ensure that you stay within the required range and avoid exceeding the manufacturer’s recommended maximum pressure.
5. Test the Adjusted Pressure: Once you have made the necessary adjustments, it is crucial to test the pressure before proceeding with your cleaning task. Attach the appropriate nozzle to the spray wand and spray a small, inconspicuous area to determine if the increased pressure is suitable for the surface and the cleaning task at hand. Adjustments may still need to be made based on the results of the test.
Remember, the pressure adjustments should be made cautiously and in accordance with the manufacturer’s instructions. This will allow you to increase the pressure safely and achieve the desired cleaning power for efficient and effective results. Taking the time to make gradual adjustments and testing the pressure will help you find the optimal pressure level for the specific cleaning task and surface conditions.
Step 4: Turn the Knob Counterclockwise to Decrease Pressure
If you find that the pressure from your pressure washer is too high for a particular cleaning task or surface, you can decrease the pressure by turning the pressure adjusting knob counterclockwise. Here’s why this step is important and how to effectively turn the knob to decrease the pressure:
1. Adjusting to the Right Level: Decreasing the pressure is necessary when you need to protect delicate surfaces or when a lower pressure setting is sufficient to clean effectively. Turning the pressure adjusting knob counterclockwise loosens the valve inside the pump, allowing less pressure to build up in the system. This adjustment ensures that you have the appropriate pressure level for the task at hand.
2. Make Gradual Adjustments: Just as with increasing the pressure, it is important to make adjustments to the pressure in gradual increments when decreasing it. Turning the knob counterclockwise too quickly or by a large amount at once may result in a sudden drop in pressure, which can affect the cleaning efficiency or prevent the pressure washer from operating properly. Take your time and make small adjustments, testing the pressure periodically to ensure that you achieve the desired result.
3. Refer to the Manufacturer’s Manual: Consult the manufacturer’s manual for guidance on how to effectively turn the pressure adjusting knob counterclockwise for your specific pressure washer model. The manual may provide additional instructions or recommendations, such as the number of rotations or the degree of turn required to decrease the pressure safely and effectively.
4. Monitor Pressure Changes: As you turn the pressure adjusting knob counterclockwise, pay attention to the pressure changes. Observe the pressure gauge or any visual indicators on your pressure washer that provide feedback on the pressure level. Continuously check the pressure while making adjustments to ensure that you stay within the desired range and avoid reducing it too much or below the manufacturer’s recommended minimum pressure.
5. Test the Adjusted Pressure: After making the necessary adjustments to decrease the pressure, it is crucial to test the pressure before proceeding with your cleaning task. Attach the appropriate nozzle to the spray wand and spray a small, inconspicuous area to determine if the adjusted pressure is suitable for the surface and the cleaning task at hand. Further adjustments may still be needed based on the results of the test.
By following these steps and turning the pressure adjusting knob counterclockwise in a controlled manner, you can decrease the pressure of your pressure washer effectively. Taking the time to make gradual adjustments and testing the pressure ensures that you achieve the desired pressure level for efficient and safe cleaning. Remember to refer to the manufacturer’s manual for specific instructions and recommendations for your particular pressure washer model.
Read more: How To Buy A Pressure Washer
Step 5: Test the Pressure Settings
After adjusting the pressure on your pressure washer, it is crucial to test the pressure settings to ensure that they are suitable for the cleaning task at hand. By testing the pressure, you can fine-tune the settings to achieve optimal cleaning performance. Here’s why this step is important and how to effectively test the pressure settings:
1. Assess Cleaning Power: Testing the pressure settings allows you to evaluate the cleaning power of your pressure washer. By applying the adjusted pressure to a small, inconspicuous area, you can observe how effectively the water stream removes dirt, grime, and stains. Assessing the cleaning power helps you determine if the pressure is sufficient to achieve the desired results.
2. Surface Compatibility: Different surfaces have varying tolerances to pressure. Testing the pressure settings ensures that it is appropriate for the surface you are cleaning. Delicate surfaces like cars or painted objects may require lower pressure settings to prevent damage, while tougher surfaces like concrete might benefit from higher pressure. By testing the pressure, you can ensure that it is compatible with the surface, minimizing the risk of damage.
3. Adjustment Refinement: Testing the pressure settings allows you to fine-tune the adjustments if necessary. You may find that the initial pressure setting needs further refinement based on the cleaning effectiveness or your desired outcome. By observing the results on a small test area, you can make additional adjustments to achieve the optimal pressure level for the specific cleaning task.
4. Incremental Changes: As you test the pressure, make adjustments in small increments to achieve the ideal cleaning performance. Gradually increase or decrease the pressure as needed until you find the sweet spot for your cleaning requirements. Avoid making sudden or drastic changes, as this can impact the efficiency of the pressure washer and potentially cause damage.
5. Accuracy and Safety: Testing the pressure settings ensures that you can achieve accurate and safe cleaning. Adjusting the pressure based on the surface and cleaning task allows for effective removal of dirt and stains while minimizing the risk of damage or accidents. By taking the time to test the settings, you can have better control over the pressure and improve your overall cleaning experience.
Remember to always follow safety precautions while testing the pressure settings, including wearing appropriate protective gear and avoiding direct contact with the high-pressure water stream. By testing the pressure, you can fine-tune the settings and ensure that your pressure washer performs optimally for the specific cleaning task at hand.
By following these steps and testing the pressure settings, you can achieve the desired cleaning results while maximizing the efficiency and effectiveness of your pressure washer. Take the time to observe and make adjustments as needed until you find the ideal pressure level for your specific cleaning requirements.
Troubleshooting Common Issues
While using a pressure washer is generally a straightforward process, there are some common issues that may arise during operation. Understanding how to troubleshoot these issues can help you overcome challenges and ensure a smooth cleaning experience. Here are some common problems you may encounter with your pressure washer and how to troubleshoot them:
1. Insufficient Pressure: If you notice that the pressure from your pressure washer is lower than expected, there are several potential causes to investigate. First, check if the water supply is sufficient and the hose is not kinked or blocked. Ensure that the nozzle is not clogged with debris and that it is properly attached to the spray wand. If these steps do not resolve the issue, refer to the manufacturer’s manual for specific troubleshooting steps related to low pressure.
2. Fluctuating Pressure: Fluctuating pressure can indicate an issue with either the water supply or the pressure washer itself. Check if the water supply is steady and there are no restrictions or air leaks in the hose or connections. Inspect the inlet filter for clogs or debris and clean it if necessary. If the issue persists, it may be related to a malfunctioning pump, in which case it is recommended to consult a professional for further inspection and repair.
3. Excessive Pressure: If the pressure from your pressure washer is too high or uncontrollable, it can pose a safety risk and potentially damage surfaces. First, ensure that the pressure adjusting knob is not set too high and adjust it accordingly. If the pressure remains excessively high, it may be caused by a malfunctioning unloader valve or pressure regulator. In such cases, it is recommended to seek professional assistance to assess and repair the issue.
4. Leaks: Leaks can occur in various parts of the pressure washer. Inspect all connections, including the spray wand, hose, and fittings, for any signs of leakage. Tighten or replace any damaged or worn-out components as necessary. If the leaks persist, it may indicate a more serious issue with seals, valves, or the pump itself. In such cases, it is advisable to consult a professional for repair or replacement.
5. Poor Spray Pattern: If the spray pattern appears uneven, erratic, or sputtering, it may be an indication of nozzle issues. Check if the nozzle is clogged or worn out, as this can affect the spray pattern. Clean or replace the nozzle as needed. Additionally, ensure that the nozzle is properly attached and aligned with the spray wand to achieve a consistent and effective spray pattern.
6. Lack of Detergent Suction: If your pressure washer has a detergent injection system but is not suctioning detergent properly, check if the detergent tube is properly connected and not clogged. Ensure that the detergent intake valve is turned on and adjust the ratio of water to detergent according to the manufacturer’s recommendations. If the problem persists, refer to the manufacturer’s manual for specialized troubleshooting steps.
Remember, safety should always be a priority when troubleshooting issues with your pressure washer. Disconnect the power source and follow proper safety procedures while investigating and resolving problems. If you encounter complex or persistent issues that you are unsure how to tackle, it is recommended to seek professional assistance from an authorized service provider or contact the manufacturer for support.
By troubleshooting common issues and resolving them promptly, you can ensure optimal performance and extend the lifespan of your pressure washer. Regular maintenance, including cleaning, inspecting connections, and following manufacturer’s guidelines, can also help prevent troublesome issues from occurring in the first place.
Insufficient Pressure
One common issue that pressure washer users may encounter is insufficient pressure. Insufficient pressure can hinder the cleaning performance and make it challenging to remove dirt, grime, or stains effectively. Here are some potential causes and troubleshooting steps to address the issue of insufficient pressure:
1. Check Water Supply: Insufficient pressure can be caused by a low water supply. Ensure that the water source is providing adequate water flow to the pressure washer. Check for any blockages or restrictions in the water supply hose. If using a garden hose, make sure it is free from kinks or bends that could impede water flow.
2. Clear Clogs: Clogged nozzles or spray tips can restrict the flow of water and lead to insufficient pressure. Detach the nozzle from the spray wand and inspect for any debris or blockages. Clean the nozzle thoroughly using a small wire or needle to clear any clogs. Replace the nozzle if it is damaged or heavily worn.
3. Inspect the Hose: Examine the high-pressure hose for any blockages, kinks, or leaks. Straighten out any kinks or bends in the hose to ensure a smooth water flow. If there are any visible leaks, repair or replace the hose as necessary. Additionally, check the hose connections to ensure they are secure and tight without any leaks.
4. Verify Filter Condition: Many pressure washers have an inlet filter or screen that prevents debris from entering the system. Inspect the filter and clean it if it is clogged with dirt or debris. A clogged filter can restrict water flow and lead to a decrease in pressure. Refer to the manufacturer’s instructions on how to remove, clean, and reinstall the filter properly.
5. Check Unloader Valve: The unloader valve regulates the water pressure inside the pressure washer. If the unloader valve is not functioning correctly, it can result in insufficient pressure. Consult the manufacturer’s manual for instructions on how to inspect and adjust the unloader valve. If necessary, have a professional service technician check and repair the valve.
6. Perform Pump Maintenance: A worn-out or damaged pump can contribute to low pressure. Regular maintenance, such as cleaning the pump and inspecting seals, can help ensure proper functioning. Check for any visible signs of damage to the pump, such as leaks or worn-out components. If significant pump issues are detected, it is advisable to consult a professional for repair or replacement.
7. Refer to Manufacturer’s Manual: If the above steps do not resolve the issue of insufficient pressure, consult the manufacturer’s manual for model-specific troubleshooting steps. The manual may provide further guidance on troubleshooting procedures or recommend contacting the manufacturer’s customer support for assistance.
By troubleshooting and addressing the issue of insufficient pressure, you can optimize the cleaning performance of your pressure washer. Regular maintenance, proper cleaning of components, and following manufacturer’s guidelines can help prevent issues with pressure and keep your pressure washer operating at its best.
Fluctuating Pressure
Fluctuating pressure is a common issue that can occur while using a pressure washer. It can disrupt the cleaning process and make it challenging to achieve consistent and effective results. Here are some potential causes and troubleshooting steps to address the issue of fluctuating pressure:
1. Check Water Supply: Inconsistent water supply can contribute to fluctuating pressure. Ensure that the water source is providing a steady and uninterrupted flow of water to the pressure washer. Check for any restrictions, such as a partially closed or clogged water valve. If using a garden hose, ensure that it is free from kinks or bends that could impede water flow.
2. Inspect the Inlet Filter: A clogged or dirty inlet filter can restrict water flow and cause fluctuations in pressure. Locate the inlet filter (usually located near the water inlet connection) and remove it. Clean the filter thoroughly using water or a brush to remove any dirt, debris, or mineral deposits. Make sure the filter is completely dry before reattaching it to the pressure washer.
3. Examine the High-Pressure Hose: Inspect the high-pressure hose for any leaks, cracks, or damage. Even small leaks can disrupt the water flow and lead to fluctuating pressure. Tighten any loose connections and replace any damaged parts. Ensure that the hose is properly connected and tightly secured to both the pressure washer and the spray wand.
4. Check for Air Leaks: Air leaks in the system can cause pressure fluctuations. Inspect all connections, including the hose fittings, spray wand, and nozzle, for any signs of air leaks. Tighten or replace any leaking components as necessary. Apply Teflon tape or sealant to the threaded connections to ensure a tight seal and prevent air from entering the system.
5. Inspect Unloader Valve: The unloader valve is responsible for regulating the pressure inside the pressure washer. If the unloader valve is not functioning correctly, it can contribute to pressure fluctuations. Check for any visible signs of damage, such as leaks or worn-out components. Consult the manufacturer’s manual for instructions on how to inspect and adjust the unloader valve properly.
6. Perform Pump Maintenance: Regular pump maintenance is essential to ensure consistent pressure. Clean the pump thoroughly, checking for any blockages or debris that may affect its performance. Inspect the pump seals and valves for wear or damage. Replace any worn-out parts and ensure proper lubrication of moving components as recommended by the manufacturer.
7. Refer to Manufacturer’s Manual: If the above steps do not resolve the issue of fluctuating pressure, consult the manufacturer’s manual for model-specific troubleshooting steps. The manual may provide further guidance, specific recommendations, or suggest contacting the manufacturer’s customer support for assistance.
By troubleshooting and addressing the issue of fluctuating pressure, you can maintain a consistent and reliable cleaning performance with your pressure washer. Regular maintenance, thorough inspections, and adherence to manufacturer’s guidelines will help prevent issues and ensure optimal pressure during operation.
Read more: How To Choose A Pressure Washer
Excessive Pressure
Dealing with excessive pressure from a pressure washer can pose safety risks and potentially damage surfaces. It is crucial to address this issue promptly. Here are some potential causes and troubleshooting steps to handle the issue of excessive pressure:
1. Check Pressure Adjusting Knob: Examine the pressure adjusting knob or control on your pressure washer. Ensure that it is set to an appropriate level and has not been turned too high. If the knob is set correctly but the pressure remains excessive, there may be an issue with the pressure regulating mechanism that needs further inspection.
2. Inspect Unloader Valve: The unloader valve is responsible for regulating the pressure inside the pressure washer. If the unloader valve is not functioning properly, it can cause excessive pressure. Check for any visible signs of damage or wear on the valve. Clean or replace the valve as recommended by the manufacturer.
3. Verify Nozzle Size: Check the nozzle size being used with your pressure washer. Using a smaller-sized nozzle than recommended can result in increased pressure. Ensure that you are using the appropriate nozzle for the cleaning task. If necessary, switch to a larger-sized nozzle to reduce the pressure output.
4. Inspect for Nozzle Blockages: Clogged or partially obstructed nozzles can restrict water flow and increase pressure. Detach the nozzle from the spray wand and inspect it for any debris or blockages. Clean the nozzle thoroughly using a small wire or needle to remove any obstructions. Make sure the nozzle is clear before reattaching it.
5. Check for Damaged or Worn Parts: Inspect the hose, fittings, and other components of your pressure washer for any signs of damage or wear. Damaged or worn parts can contribute to excessive pressure. Tighten loose connections and replace any damaged components as necessary. Ensure that all parts are properly secured and in good condition.
6. Refer to Manufacturer’s Manual: If the above steps do not resolve the issue of excessive pressure, consult the manufacturer’s manual for model-specific troubleshooting steps. The manual may provide further guidance on how to address this issue or recommend seeking professional help from an authorized service provider.
Always prioritize safety when troubleshooting the issue of excessive pressure. Take care to wear appropriate protective gear, such as safety goggles and gloves, when handling and operating the pressure washer. Regular maintenance, including cleaning and inspection of components, can help prevent issues and ensure the pressure washer operates within safe pressure limits.
By troubleshooting and addressing the issue of excessive pressure, you can protect surfaces from damage and improve the overall performance and safety of your pressure washer. Regular checks, adherence to manufacturer’s guidelines, and prompt resolution of issues will ensure the efficient operation of your pressure washer.
Conclusion
Adjusting the pressure on a pressure washer is a crucial aspect of achieving optimal cleaning results while maintaining safety. By understanding the components of a pressure washer and why adjusting pressure is important, you can effectively tailor the cleaning power to different surfaces and tasks.
Throughout the process, it is essential to prioritize safety precautions, such as wearing protective gear and avoiding direct contact with the high-pressure water stream. Following the manufacturer’s manual and consulting specific guidelines for your pressure washer model will ensure accurate pressure adjustments and proper maintenance.
The steps to adjust pressure on a pressure washer involve reading the manufacturer’s manual, locating the pressure adjusting knob, turning it clockwise to increase pressure, counterclockwise to decrease pressure, and testing the pressure settings before starting the cleaning task. Troubleshooting common issues like insufficient pressure, fluctuating pressure, excessive pressure, and leaks will help address challenges that may arise during operation.
Regular maintenance, thorough inspections, and adherence to safety guidelines will ensure the longevity and performance of your pressure washer. By implementing these practices, you can achieve efficient and effective cleaning while safeguarding yourself, others, and the surfaces being cleaned.
Remember, adjusting pressure on a pressure washer requires a balance between cleaning power and surface protection. With knowledge, attention to detail, and cautious adjustment, you can optimize the pressure settings to deliver outstanding cleaning results on various surfaces and maintain the longevity of your pressure washer.
Now that you've mastered adjusting your pressure washer, why stop there? Dive into our latest feature, "Incredible Pressure Washer Tips For 2024," where we spill all the secrets on maximizing your machine's performance. From optimizing water flow to strategic cleaning techniques, each tip offers practical advice that will take your washing game to the next level. Don't miss out on transforming routine chores into quick, enjoyable tasks!
Frequently Asked Questions about How To Adjust Pressure On Pressure Washer
Was this page helpful?
At Storables.com, we guarantee accurate and reliable information. Our content, validated by Expert Board Contributors, is crafted following stringent Editorial Policies. We're committed to providing you with well-researched, expert-backed insights for all your informational needs.
0 thoughts on “How To Adjust Pressure On Pressure Washer”