Articles
Why Is My Washer Not Draining Or Spinning
Modified: October 20, 2024
Discover helpful articles on why your washer may not be draining or spinning. Find solutions to fix your appliance and get it working properly again.
(Many of the links in this article redirect to a specific reviewed product. Your purchase of these products through affiliate links helps to generate commission for Storables.com, at no extra cost. Learn more)
Introduction
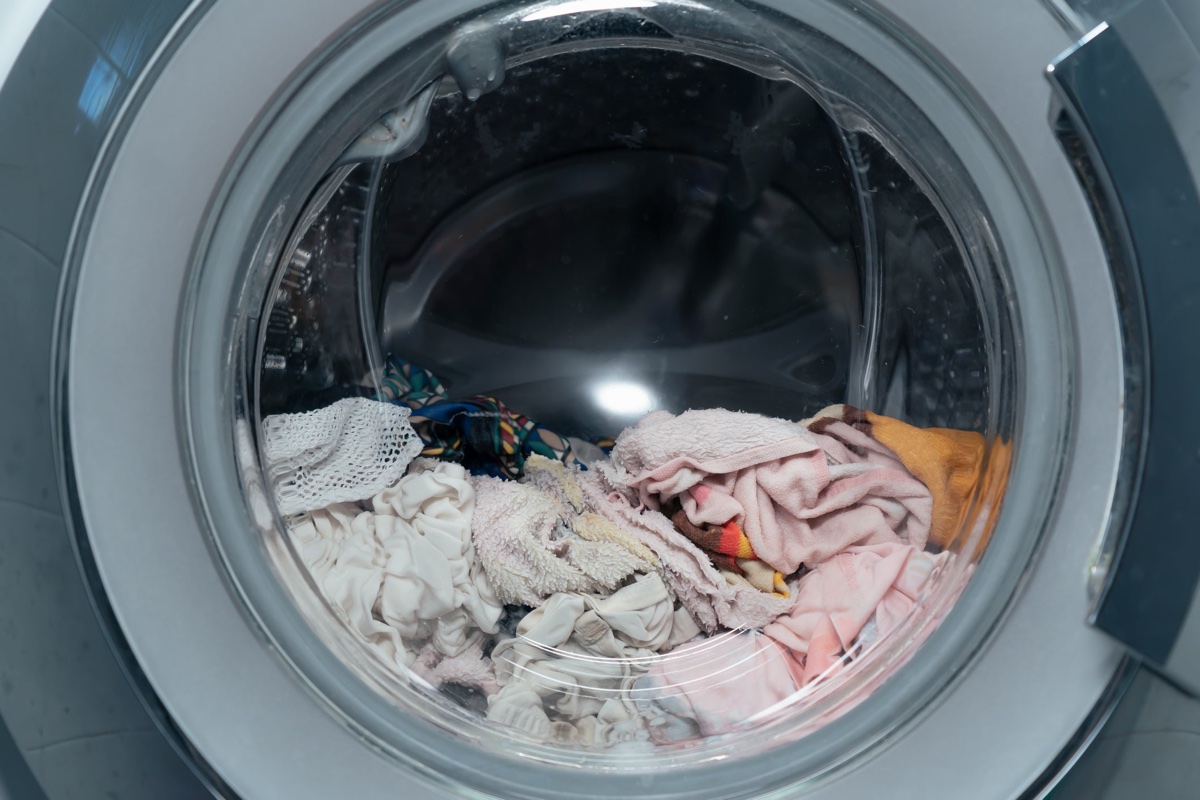
When your washer is not draining or spinning, it can be incredibly frustrating. Doing laundry becomes a hassle, and the pile of unwashed clothes starts to grow. But before you panic or call a repair service, it’s important to understand the common causes behind this issue.
A washer not draining or spinning can be attributed to several factors, ranging from minor issues to more complex malfunctions. By identifying the root cause, you can troubleshoot and fix the problem yourself or communicate the issue more effectively to a repair technician.
In this article, we will explore the common causes of a washer not draining or spinning and provide troubleshooting steps to help you get your laundry routine back on track.
Key Takeaways:
- Proper maintenance and troubleshooting of common washer issues such as clogged drain hoses, malfunctioning drain pumps, and unbalanced loads can restore efficient drainage and spinning, ensuring smooth laundry routines.
- Addressing electrical or control board problems, inspecting and replacing components like the drive belt and motor coupling, and ensuring proper load balancing can resolve drainage and spin issues, restoring optimal washer performance.
Read more: Why Does My Washer Not Drain
Common Causes for Washer Not Draining or Spinning
There are several reasons why a washer may fail to drain or spin properly. Here are some of the most common causes:
- Clogged Drain Hose: One of the primary culprits behind a washer not draining is a clogged drain hose. Over time, debris, lint, or small objects can accumulate in the hose, restricting water flow. This can prevent the washer from draining properly.
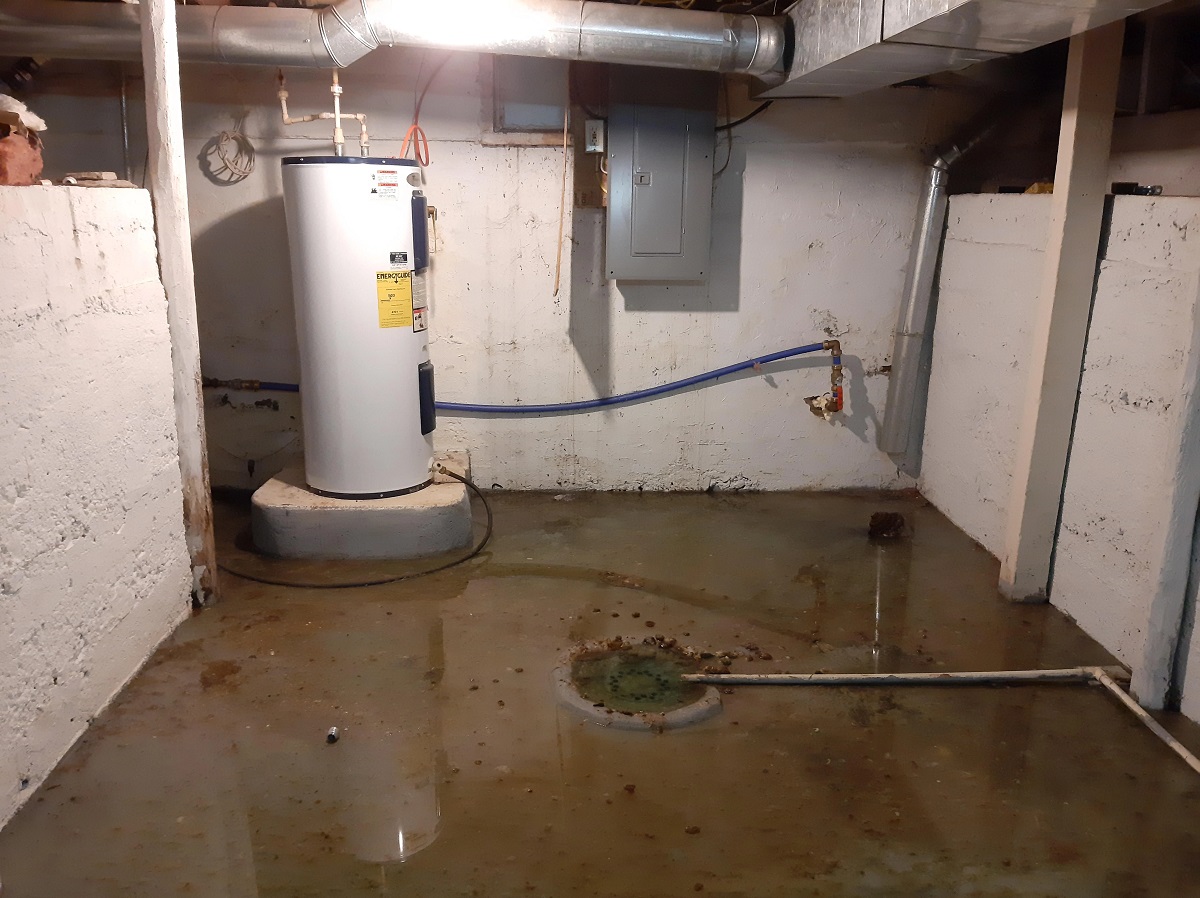
- Malfunctioning Drain Pump: The drain pump plays a crucial role in removing water from the washer during the draining cycle. If the drain pump is faulty, it may not be able to effectively pump out the water, leading to drainage issues.
- Faulty Lid Switch or Door Lock: Many washers are equipped with a lid switch or door lock mechanism that ensures the machine stops spinning or draining when the lid or door is open. If this switch or lock is faulty, the washer may not drain or spin at all.
- Blocked or Faulty Drain Filter: Most washers have a drain filter that traps debris and prevents it from entering the drain pump. If this filter becomes blocked or damaged, it can impede proper drainage and spinning.
- Unbalanced Load: If the load inside the washer is not distributed evenly, it can cause the machine to become unbalanced. When this happens, the washer may automatically stop spinning to prevent damage. Additionally, an unbalanced load can hinder proper drainage.
- Broken Drive Belt: The drive belt connects the motor to the drum in a washer. If this belt becomes worn out or breaks, it can prevent the drum from spinning, resulting in a washer that does not drain or spin.
- Defective Motor Coupling: The motor coupling connects the motor to the transmission in the washer. When this coupling is damaged or broken, it can lead to various issues, including drainage and spinning problems.
- Electrical Issues or Control Board Problems: In some cases, a washer not draining or spinning may be caused by electrical issues or problems with the control board. This could include issues with the power supply, faulty wiring, or malfunctioning control panel components.
Now that we have identified the common causes of a washer not draining or spinning, let’s move on to troubleshooting and fixing these issues.
Clogged Drain Hose
A clogged drain hose is one of the most common reasons why a washer fails to drain properly. Over time, lint, debris, and other particles can accumulate in the drain hose, obstructing the water flow. When this happens, the water may not be able to drain out of the washer, causing it to remain stagnant in the tub.
To check for a clogged drain hose, follow these steps:
- Unplug the washer: Before inspecting the drain hose, always make sure that the washing machine is unplugged to avoid any electrical hazards.
- Locate the drain hose: The drain hose is usually located at the back of the washer. It is a flexible tube that connects to the drain pipe or standpipe.
- Inspect the drain hose: Carefully examine the drain hose for any signs of blockages. Look for lint, debris, or objects that may be lodged inside the hose. You can use a flashlight to get a better view.
- Remove the clog: If you spot a blockage in the drain hose, you can try to remove it by gently squeezing the hose or using a plumbing snake. Be cautious not to damage the hose or push the clog further into the system.
- Clean the drain hose: After removing the blockage, rinse the drain hose with warm water to flush out any remaining debris. You can also use a small brush to scrub the interior of the hose gently.
- Reconnect and test: Once the drain hose is clean, reconnect it to the washer and ensure it is securely attached. Plug the washer back in and run a test cycle to see if the drainage issue is resolved.
If clearing the drain hose does not solve the problem, it may be necessary to investigate other potential causes of the drainage issue, such as a malfunctioning drain pump or a faulty drain filter.
Remember to always refer to your washer’s manual for specific instructions on cleaning and maintaining the drain hose, as different models may have variations in design and troubleshooting procedures.
Malfunctioning Drain Pump
A malfunctioning drain pump is another common reason why a washer may fail to drain properly. The drain pump is responsible for removing water from the washer during the drainage cycle. If the pump is not functioning correctly, it can hinder the draining process and leave water in the tub.
To troubleshoot and fix a malfunctioning drain pump, follow these steps:
- Unplug the washer: Before inspecting or working on the drain pump, always make sure that the washing machine is unplugged to avoid any electrical hazards.
- Locate the drain pump: The drain pump is typically located at the bottom of the washer, either at the front or back. Consult your washer’s manual for the exact location and access instructions.
- Check for blockages: Inspect the drain pump for any blockages, such as lint, debris, or small objects. These blockages can prevent the pump from effectively removing the water. Use a flashlight to get a clear view of the pump’s interior.
- Clear the blockage: If you find any blockages, carefully remove them using a pair of tweezers or needle-nose pliers. Ensure that you do not damage the pump or its components while doing so.
- Test the pump: Once you have cleared any blockages, you can test the drain pump to check its functionality. Plug the washer back in and run a test cycle that includes the drainage process. Listen for any unusual noises coming from the pump or observe if the water is being effectively pumped out of the washer.
- Replace the drain pump: If the drain pump is still not working correctly after clearing blockages, it may need to be replaced. Contact a professional technician or refer to your washer’s manual for guidance on replacing the drain pump.
It’s worth noting that drain pump issues can also be caused by other factors, such as a malfunctioning control board or wiring problems. If you suspect that the drain pump is not the sole cause of the drainage problem, it’s advisable to seek professional assistance to diagnose and resolve the issue.
Remember to exercise caution and follow safety guidelines when working with electrical components or accessing the inner workings of your washer. If you are unsure or uncomfortable with performing the troubleshooting steps, it is best to consult a qualified service technician for assistance.
Faulty Lid Switch or Door Lock
A faulty lid switch or door lock mechanism can cause a washer to not drain or spin. This safety feature is designed to prevent the machine from operating when the lid or door is open. If the switch or lock is malfunctioning, it may not allow the washer to proceed with the draining or spinning cycles.
To troubleshoot and fix a faulty lid switch or door lock, follow these steps:
- Unplug the washer: Before working on the lid switch or door lock, always make sure that the washing machine is unplugged to avoid any electrical hazards.
- Locate the lid switch or door lock: The location of the lid switch or door lock mechanism may vary depending on the make and model of your washer. Consult your washer’s manual for specific instructions on locating these components.
- Inspect the mechanism: Check the lid switch or door lock for any visible damage, such as broken parts or loose connections. Ensure that the switch or lock is making proper contact when the lid or door is closed.
- Test the functionality: Use a multimeter to test the electrical continuity of the lid switch or door lock. Follow the manufacturer’s instructions on how to use the multimeter properly. If the switch or lock does not pass the continuity test, it is likely faulty and needs to be replaced.
- Replace the lid switch or door lock: If the lid switch or door lock is determined to be faulty, it will need to be replaced. Contact a professional technician or refer to your washer’s manual for guidance on replacing these components. Make sure to use the correct replacement parts recommended by the manufacturer.
- Reassemble and test: Once the lid switch or door lock has been replaced, reassemble any components that were removed and plug the washer back in. Run a test cycle to verify that the washer is now draining and spinning properly.
If you’ve followed these steps and the washer still does not drain or spin, it’s possible that there may be additional issues contributing to the problem. In such cases, it is best to consult a qualified service technician for further diagnosis and repair.
Keep in mind that safety should always be a priority when working on electrical components. If you are not confident in your abilities or have concerns about working on the lid switch or door lock, it is advisable to seek professional assistance.
Read more: Why Is My Bathroom Sink Not Draining
Blocked or Faulty Drain Filter
A blocked or faulty drain filter can cause a washer to experience drainage issues. The drain filter is responsible for trapping lint, debris, and other substances that may be present in the washer. Over time, these trapped particles can accumulate and clog the filter, impeding the proper flow of water and leading to drainage problems.
To troubleshoot and fix a blocked or faulty drain filter, follow these steps:
- Unplug the washer: Before working on the drain filter, always make sure that the washing machine is unplugged to avoid any electrical hazards.
- Locate the drain filter: The drain filter is typically located near the bottom front of the washer. It is usually accessible by removing a small panel or cover. Consult your washer’s manual for the exact location and access instructions.
- Prepare for water drainage: Place a shallow container or towel beneath the filter area to catch any water that may be released when removing the filter.
- Remove the filter: Carefully unscrew or unlatch the drain filter, depending on the design of your washer. Slowly pull the filter out and allow any water trapped inside to drain into the container or towel.
- Clean the filter: Rinse the drain filter under running water to remove any lint, debris, or residue. Use a soft brush or toothbrush to gently scrub the filter if necessary. Ensure that all blockages have been cleared, and the filter is clean.
- Inspect the filter and housing: While the filter is removed, check both the filter and the filter housing for any signs of damage or defects. Look for cracks, broken parts, or loose connections. If the filter or housing is faulty, it may need to be replaced.
- Reinstall the filter: Once the drain filter and housing are clean and in good condition, carefully reinsert the filter into the proper position. Secure it in place by screwing it back or latching it as per the manufacturer’s instructions.
- Test the washer: Plug the washer back in and run a test cycle to ensure that the drainage issue has been resolved. The water should drain properly, leaving the washer tub empty.
If cleaning the drain filter does not solve the problem or if you notice significant damage to the filter or housing, it is recommended to contact a professional technician for further assistance. They can provide the necessary repairs or help you obtain a replacement filter or housing if needed.
Regularly cleaning the drain filter can help prevent future drainage issues and ensure the proper functioning of your washer. It is recommended to perform this maintenance task at least once every few months or as specified in your washer’s manual.
Unbalanced Load
An unbalanced load is a common cause of a washer not draining or spinning properly. When the laundry inside the machine is not distributed evenly, it can throw off the balance during the spinning cycle. As a safety measure, the washer may automatically stop spinning to prevent damage and ensure the stability of the machine.
To troubleshoot and address issues related to an unbalanced load, follow these steps:
- Pause or stop the cycle: If you notice that the washer is not draining or spinning, pause or stop the current cycle. Avoid opening the lid or door abruptly, as it may be locked for safety reasons.
- Resettle the load: Open the lid or door and carefully redistribute the laundry inside the washer. Ensure that the load is evenly spread out and no heavy items are grouped together. This will help to distribute the weight evenly and prevent the machine from becoming unbalanced.
- Remove and add items: If necessary, remove any excessively heavy items from the load and set them aside. Add a few lightweight items or rearrange the laundry to achieve a more balanced distribution.
- Close the lid or door: Once you have repositioned the laundry, close the lid or door securely. Ensure that it is closed properly and that any locking mechanisms are engaged.
- Resume the cycle: Restart the washer and allow it to continue the cycle. The machine should now be able to drain and spin properly without getting unbalanced.
- Avoid overloading: In the future, be mindful of not overloading the washer. Follow the manufacturer’s guidelines for load capacity to prevent strain on the machine and minimize the risk of an unbalanced load.
It’s important to note that an unbalanced load can sometimes be an indication of an underlying issue, such as a problem with the suspension system or an uneven floor. If you consistently experience problems with unbalanced loads, it may be worth contacting a professional technician to assess and address the root cause.
By taking the time to properly balance the load, you can ensure that your washer functions optimally and avoids complications with draining and spinning.
Broken Drive Belt
A broken drive belt can be a common cause of a washer not draining or spinning. The drive belt connects the motor to the drum, allowing it to rotate and agitate the laundry. If the belt becomes worn out, stretched, or broken, it can prevent the drum from spinning properly, leading to drainage issues.
To troubleshoot and address a broken drive belt, follow these steps:
- Unplug the washer: Before inspecting or working on the drive belt, always make sure that the washing machine is unplugged to avoid any electrical hazards.
- Locate the drive belt: The drive belt is typically located at the bottom of the washer, beneath the drum. You may need to remove the back or front panel to access it. Consult your washer’s manual for specific instructions on locating and accessing the drive belt.
- Inspect the belt: Carefully examine the drive belt for any signs of damage, such as fraying, cracks, or a complete break. If the belt appears worn out or broken, it will need to be replaced.
- Replace the drive belt: To replace the drive belt, begin by loosening the tension on the belt by adjusting the motor or pulley. Once the tension is released, remove the old belt by slipping it off the motor and drum pulleys. Install a new drive belt by placing it around the pulleys and adjusting the tension according to the manufacturer’s instructions.
- Test the washer: After replacing the drive belt, plug the washer back in and run a test cycle to ensure that the drainage and spinning issues have been resolved. Make sure the drum is rotating smoothly with the new belt.
It’s important to note that replacing a drive belt can be a complex task and may require technical expertise. If you are not comfortable or experienced with working on the internal components of your washer, it is recommended to seek professional assistance. A qualified technician can assess the state of the drive belt, recommend the appropriate replacement, and ensure the proper installation.
Regular maintenance and inspection of the drive belt can help prevent issues in the future. Check the belt periodically for signs of wear and tear, and replace it as necessary to keep your washer functioning optimally.
Defective Motor Coupling
A defective motor coupling is another potential cause of a washer not draining or spinning properly. The motor coupling connects the motor to the transmission, enabling the transfer of power and motion. If the motor coupling becomes worn out, broken, or damaged, it can result in a loss of power transmission and prevent the washer from functioning correctly.
To troubleshoot and address a defective motor coupling, follow these steps:
- Unplug the washer: Before inspecting or working on the motor coupling, always make sure that the washing machine is unplugged to avoid any electrical hazards.
- Locate the motor coupling: The motor coupling is typically located at the bottom of the washer, near the motor and transmission. Consult your washer’s manual for specific instructions on locating and accessing the motor coupling.
- Inspect the motor coupling: Carefully examine the motor coupling for any visible signs of damage, such as cracks, wear, or a complete break. If the motor coupling appears defective, it will need to be replaced.
- Replace the motor coupling: To replace the motor coupling, begin by disconnecting the power supply and water lines from the washer. Remove any components that may be obstructing access to the motor coupling. Detach the old coupling by loosening the fastening bolts or screws. Install a new motor coupling by aligning it with the motor and transmission shafts and securing it firmly in place.
- Test the washer: After replacing the motor coupling, reconnect the power supply and water lines. Plug the washer back in and run a test cycle to ensure that the drainage and spinning issues have been resolved. Pay attention to the operation of the motor coupling and make sure the washer is functioning properly.
It’s important to note that replacing a motor coupling can be a challenging task and may require technical expertise. If you are not confident or experienced with working on the internal components of your washer, it is best to seek professional assistance. A qualified technician can assess the condition of the motor coupling, recommend the appropriate replacement, and ensure its proper installation.
Regular maintenance and inspection of the motor coupling can help prevent issues in the future. Check the coupling periodically for signs of wear or damage, and replace it as needed to keep your washer running smoothly.
Read more: Why Is My Sink Draining Slowly
Electrical Issues or Control Board Problems
Electrical issues or problems with the control board can also lead to a washer not draining or spinning properly. The control board is responsible for controlling and coordinating various functions of the washer, including the drainage and spinning cycles. If there is a malfunction or disruption in the electrical supply or the control board itself, it can result in drainage and spinning problems.
To troubleshoot and address electrical issues or control board problems, follow these steps:
- Unplug the washer: Before inspecting or working on any electrical components of the washer, always make sure that it is unplugged to avoid any electrical hazards.
- Check the power supply: Ensure that the washer is properly connected to a functioning power source. Check for any issues with the power outlet, circuit breaker, or fuse box. If there is a problem with the power supply, address it accordingly, such as resetting the breaker or replacing a blown fuse.
- Inspect the control board: Carefully examine the control board for any visual signs of damage, such as burnt components, loose connections, or corrosion. Check for any error codes or display messages that may indicate control board issues.
- Reset the control board: Sometimes, a simple reset can help resolve control board problems. Turn off the washer and unplug it from the power source. Wait for a few minutes, then plug it back in and turn it on to see if the issue persists.
- Seek professional help: If you suspect that there is a more significant problem with the control board or other electrical components, it is recommended to contact a professional appliance technician. They have the necessary expertise and equipment to diagnose and repair electrical issues and control board malfunctions.
It’s important to note that working with electrical components can be dangerous, especially if you are not experienced or knowledgeable in this area. If you are unsure about troubleshooting electrical issues or handling the control board, it is best to seek professional assistance for your safety and to prevent further damage to the appliance.
By addressing any electrical issues promptly and ensuring the proper functioning of the control board, you can help restore the proper drainage and spinning capabilities of your washer.
Check the drain hose for clogs or kinks, and ensure it is not pushed too far into the standpipe. Also, inspect the lid switch and the drive belt for any signs of damage.
Troubleshooting and Fixing Washer Drainage and Spin Problems
When encountering drainage and spin problems with your washer, it’s important to follow a systematic troubleshooting process to identify and resolve the underlying issues. Here are the steps you can take to troubleshoot and fix these problems:
- Check the basics: Start by ensuring that the washer is properly plugged in and that the power supply is functioning. Check the water supply valves to confirm that they are open and allowing water to enter the washer.
- Inspect the drain hose: Examine the drain hose for any blockages or kinks that may be obstructing the flow of water. Clear any debris or straighten out any kinks in the hose to facilitate proper drainage.
- Test the drain pump: Listen for any unusual noises coming from the drain pump during operation. If the pump sounds excessively noisy or fails to pump out water, it may need to be replaced.
- Verify the lid switch or door lock: Check if the lid switch or door lock is functioning correctly. Ensure that it engages properly when the lid or door is closed to allow the washer to proceed with the drainage and spinning cycles.
- Inspect the drain filter: Remove and clean the drain filter, removing any debris that may be clogging it. If the filter is damaged or in poor condition, replace it to ensure proper water drainage.
- Balance the load: Ensure that the laundry inside the washer is evenly distributed to prevent an unbalanced load. Rearrange or remove any excessively heavy items to improve the balance and allow for proper spinning and drainage.
- Check the drive belt: Inspect the drive belt for any signs of wear, stretching, or breakage. Replace the belt if it is damaged, as this can impede the spinning cycle.
- Assess the motor coupling: Examine the motor coupling for any signs of damage or wear. If the coupling is faulty, it may need to be replaced to restore proper functionality.
- Address electrical issues: If you suspect electrical problems or if none of the above troubleshooting steps resolve the issue, it’s recommended to seek professional help. An experienced technician can diagnose and repair any electrical or control board problems that may be causing the drainage and spin issues.
Remember to always consult your washer’s manual for specific instructions and safety guidelines when troubleshooting and repairing. If you are unsure about any step or encounter difficulty, it’s best to seek professional assistance to avoid causing further damage to the appliance.
By following these troubleshooting steps and addressing the underlying issues, you can fix washer drainage and spin problems, ensuring the efficient operation of your machine and keeping your laundry routine running smoothly.
Check the Drain Hose
When your washer is not draining properly or spinning, one of the first areas to check is the drain hose. The drain hose is responsible for carrying the water out of the washer and into the drain pipe or standpipe. If the hose is clogged, kinked, or improperly connected, it can hinder the flow of water, resulting in drainage issues.
To check the drain hose and address any problems, follow these steps:
- Unplug the washer: Before inspecting or working on the drain hose, always ensure that the washer is unplugged to avoid any electrical accidents.
- Locate the drain hose: Most washers have a flexible drain hose located at the back of the machine. It is typically attached to the washer on one end and connected to the drain pipe or standpipe on the other end.
- Inspect the hose for clogs: Carefully examine the drain hose for any obstructions or debris that may be causing a blockage. Look for lint, dirt, or small objects that could be restricting the water flow.
- Remove any clogs: If you spot a clog, use a plumber’s snake or a long, flexible brush to gently remove the obstruction. Be cautious not to push the clog further into the pipe or hose.
- Check for kinks or bends: Ensure that the drain hose is free from any kinks or bends that could restrict water flow. Straighten out the hose if necessary to ensure a smooth path for the water to drain.
- Verify proper connection: Confirm that the drain hose is securely connected to both the washer and the drain pipe or standpipe. Ensure that the connections are tight and leak-free.
- Elevate the hose: If the drain hose is lying on the floor, it may be prone to siphoning, which can cause draining issues. Elevate the hose to a height that is at least as high as the back of the washer, securing it with a hook or tie if needed.
- Test the drainage: Once you have checked and resolved any issues with the drain hose, plug in the washer and run a test cycle to see if the drainage problem has been resolved. Monitor the water flow and ensure that it is draining efficiently.
Checking the drain hose is a simple yet essential step in troubleshooting drainage and spinning issues with your washer. By ensuring that the hose is clear of clogs, free of kinks, and properly connected, you can help restore proper water drainage and promote smooth washer operation.
Inspect the Drain Pump
When your washer is not draining or spinning properly, another component to inspect is the drain pump. The drain pump plays a crucial role in removing water from the washer during the drainage cycle. If the pump is clogged, defective, or obstructed, it can hinder the draining process and lead to drainage issues.
To inspect the drain pump and address any issues, follow these steps:
- Unplug the washer: Before inspecting or working on the drain pump, always ensure that the washer is unplugged to avoid any electrical accidents.
- Locate the drain pump: The drain pump is typically located at the bottom of the washer, near the front or back. Refer to your washer’s manual for the precise location.
- Check for blockages: Carefully examine the drain pump for any visible signs of blockages. Look for debris, lint, or small objects that may be obstructing the pump’s impeller or filters.
- Remove the blockages: If you identify any blockages, use a pair of tweezers or needle-nose pliers to carefully remove them. Ensure that you do not damage the pump or its components in the process.
- Inspect the impeller: Check the impeller blades of the drain pump for any damage or breakage. The impeller should rotate freely and without any obstruction.
- Check for leaks: Examine the pump and its connections for any signs of leaks or damage. Replace any faulty or broken parts to prevent water leakage and ensure proper functioning.
- Test the drain pump: Plug in the washer and run a test cycle to observe the drain pump in action. Listen for any unusual noises or vibrations coming from the pump and make sure that it is effectively pumping out the water.
If you encounter severe blockages, a malfunctioning impeller, or any significant issues with the drain pump, it may need to be replaced. Consult a professional technician or refer to your washer’s manual for guidance on replacement procedures.
Regular maintenance of the drain pump, such as periodically cleaning the impeller and filters, can help prevent blockages and maintain proper drainage. Most importantly, always follow safety guidelines when inspecting and working on the drain pump to prevent injuries and ensure the optimal performance of your washer.
Read more: Why Is My Whirlpool Dishwasher Not Draining
Test the Lid Switch or Door Lock
If your washer is not draining or spinning properly, a faulty lid switch or door lock can be the culprit. These safety mechanisms are designed to prevent the washer from operating when the lid or door is open. If the switch or lock is malfunctioning, it may hinder the drainage and spinning cycles.
To test the lid switch or door lock and address any issues, follow these steps:
- Unplug the washer: Before testing or working on the lid switch or door lock, always ensure that the washer is unplugged to avoid any electrical accidents.
- Locate the lid switch or door lock: The location of the lid switch or door lock may vary depending on your washer’s make and model. Refer to the manual or the manufacturer’s instructions for the precise location.
- Verify proper alignment: Check if the lid switch or door lock is properly aligned and making proper contact when the lid or door is closed. If misaligned, adjust or secure the switch or lock accordingly.
- Test the continuity: Use a multimeter to test the electrical continuity of the lid switch or door lock. Follow the manufacturer’s instructions on how to use the multimeter properly. If there is no continuity when the switch or lock is closed, it indicates a faulty component that needs to be replaced.
- Inspect for physical damage: Examine the lid switch or door lock for any visible signs of damage, such as cracks, loose connections, or worn-out parts. Any physical damage may compromise the proper functioning of the switch or lock.
- Replace the lid switch or door lock: If the lid switch or door lock fails the continuity test or shows signs of physical damage, it needs to be replaced. Contact a professional technician or refer to your washer’s manual for guidance on replacing the faulty component.
Ensuring that the lid switch or door lock is functioning properly is essential for the safety and operation of your washer. Always follow safety precautions when working on electrical components and refer to your washer’s manual for specific instructions or guidelines.
If you are uncertain or uncomfortable performing these tests yourself, it is advisable to seek professional assistance. They can accurately diagnose the problem and replace the lid switch or door lock if necessary, ensuring that your washer operates efficiently and safely.
Clean or Replace the Drain Filter
When your washer is not draining or spinning properly, a blocked or faulty drain filter could be the reason behind it. The drain filter is responsible for trapping debris, lint, and other particles to prevent them from clogging the drain pump and causing drainage issues. Over time, the filter can become clogged and hinder proper water flow.
To clean or replace the drain filter, follow these steps:
- Unplug the washer: Before attempting to clean or replace the drain filter, always ensure that the washer is unplugged to avoid any electrical mishaps.
- Locate the drain filter: The drain filter is typically located near the bottom front of the washer. It is often concealed by a small panel or cover that can be easily removed to access the filter. Consult your washer’s manual for precise instructions on locating the drain filter.
- Prepare for water drainage: Place a towel or shallow container beneath the filter area to catch any water that may escape when the filter is removed.
- Remove the drain filter: Carefully unscrew or unlatch the drain filter to remove it from the washer. Be prepared for water and debris to come out with the filter, so ensure your container or towel can catch it.
- Clean the drain filter: Rinse the drain filter under running water to remove any debris, lint, or residue. Use a soft brush, toothbrush, or a combination of water and mild soap to scrub any stubborn deposits. Ensure that the filter is completely clean before proceeding.
- Inspect the filter and housing: While the filter is removed, examine both the filter and the filter housing for any signs of damage or wear. Look for cracks, breakage, or loose connections. If the filter or housing is defective, it may need to be replaced.
- Reinstall the drain filter: Once the drain filter and housing are clean and in good condition, securely reinstall the filter. Ensure that it is properly fastened and tightened to prevent any leaks.
- Test the washer: Plug in the washer and run a test cycle to confirm that the drainage issue has been resolved. Watch for proper water flow and make sure there are no leaks from the filter or its housing.
If cleaning the drain filter does not resolve the problem, or if the filter is damaged beyond repair, it may be necessary to replace it. Contact a professional technician or refer to your washer’s manual for guidance on replacing the drain filter with the correct model for your washer.
Regular maintenance and cleaning of the drain filter are recommended to prevent clogs and ensure the efficient functioning of your washer. Frequency of cleaning depends on the usage and the type of laundry being washed, so refer to your washer’s manual for specific recommendations.
Balance the Load Properly
An unbalanced load can cause your washer to experience drainage and spinning problems. When the laundry inside the machine is not distributed evenly, it can throw off the balance and stability of the washer. This imbalance can result in inadequate water drainage and hinder the spinning cycle.
To ensure that the load is balanced properly, follow these steps:
- Pause the cycle: If you notice that the washer is not draining or spinning properly, pause the cycle to assess the load and make any necessary adjustments. Avoid opening the lid or door abruptly, as it may be locked for safety reasons.
- Open the lid or door: Carefully open the lid or door of the washer to access the laundry inside.
- Inspect the load: Take a look at the distribution of items in the washer. Ensure that the laundry is evenly distributed and not bunching up on one side.
- Reposition the laundry: If you notice any clumps or heavy items grouped together, carefully redistribute the items to create a more balanced load. Separate heavy and lightweight items and spread them out evenly.
- Remove excess items: If the load is too large or overfilled, removing a few items can help improve balance and prevent strain on the washer. Follow the manufacturer’s guidelines regarding load capacity.
- Close the lid or door: Once you have balanced the load, close the lid or door of the washer securely.
- Resume the cycle: Restart the cycle and allow the washer to continue. With a properly balanced load, you should notice improved drainage and spinning performance.
It’s important to remember that overloading the washer can lead to excessive strain on the motor and drum, potentially causing long-term damage to the machine. Always follow the manufacturer’s recommendations for load capacity to ensure optimal performance.
By taking the time to balance the load properly, you can help prevent drainage and spinning issues in your washer. This simple step can improve the efficiency and effectiveness of your laundry cycles, providing cleaner and better results.
Examine and Replace the Drive Belt
If your washer is not draining or spinning properly, a broken or worn-out drive belt could be the culprit. The drive belt is responsible for transferring power from the motor to the drum, enabling it to rotate and agitate the laundry. If the belt becomes damaged or stretched, it can impede proper spinning and drainage.
To examine and replace the drive belt, follow these steps:
- Unplug the washer: Before examining or replacing the drive belt, always ensure that the washer is unplugged to prevent any electrical hazards.
- Locate the drive belt: The drive belt is typically located at the bottom of the washer, visible when you remove the back or front panel. Consult your washer’s manual for the precise location and instructions.
- Inspect the belt: Examine the drive belt for any signs of wear, fraying, stretching, or breakage. If the belt appears damaged or worn-out, it should be replaced.
- Remove the old belt: To remove the drive belt, loosen the tension on the belt by adjusting the motor or pulley. Slip the belt off the motor and drum pulleys, ensuring not to force or damage any components.
- Install a new belt: Match the specifications of the old belt with a new, suitable replacement. Begin by placing the belt around the motor pulley, then stretch and wrap it around the drum pulley. Make sure the new belt is properly aligned and fitted.
- Adjust the tension: Once the new belt is in place, adjust the tension by manipulating the motor or pulley to ensure the belt is neither too loose nor too tight. Consult your washer’s manual for specific instructions on proper tension adjustment.
- Test the washer: Plug in the washer and run a test cycle to ensure that the new drive belt is functioning correctly. Monitor the spinning and drainage performance to confirm that the issue has been resolved.
If you encounter any difficulties or are uncertain about replacing the drive belt, it is recommended to seek professional assistance. A qualified technician can accurately assess the condition of the drive belt, recommend the appropriate replacement, and ensure its proper installation.
Regular inspection and maintenance of the drive belt are advised to prevent issues in the future. Pay attention to signs of wear or damage and replace the belt as needed to keep your washer running smoothly and effectively.
Read more: Why Is My Bathtub Not Draining Water
Assess and Fix the Motor Coupling
If your washer is experiencing drainage and spin problems, a defective motor coupling could be to blame. The motor coupling connects the motor to the transmission, facilitating the transfer of power and motion. If the coupling is broken or damaged, it can disrupt the spinning and draining cycles.
To assess and fix the motor coupling, follow these steps:
- Unplug the washer: Before assessing or working on the motor coupling, ensure that the washer is unplugged to avoid any electrical accidents.
- Locate the motor coupling: The motor coupling is usually positioned near the motor and transmission, visible when you remove the back or front panel of the washer. Refer to your washer’s manual for the specific location and instructions.
- Inspect the motor coupling: Examine the motor coupling for signs of damage or wear. Look for cracks, breakage, or a loose fit. A worn-out or broken motor coupling will likely need to be replaced.
- Remove the old motor coupling: To remove the motor coupling, disconnect any wiring or mounting bolts that secure it to the motor and transmission. Then, carefully separate the coupling from both the motor and transmission shafts.
- Install the new motor coupling: Match the specifications of the old coupling with a suitable replacement. Align the new coupling on both the motor and transmission shafts, making sure it fits snugly. Reattach any wiring or mounting bolts to secure the coupling in place.
- Test the washer: Plug in the washer and run a test cycle to ensure that the new motor coupling is operating correctly. Monitor the spinning and drainage performance to verify that the issue has been resolved.
If you encounter any challenges or are unsure about replacing the motor coupling, it is advisable to seek professional assistance. A qualified technician can accurately assess the condition of the motor coupling, recommend the appropriate replacement, and ensure its proper installation.
Regular inspection and maintenance of the motor coupling are crucial to prevent future issues. Look out for signs of wear or damage and promptly replace the coupling as needed to maintain proper functioning of your washer.
Address Electrical or Control Board Problems
If your washer is experiencing drainage and spin problems, it could be due to electrical issues or problems with the control board. These issues can disrupt the proper functioning of the washer’s components and affect the drainage and spinning cycles. It’s essential to address these problems to restore the optimal performance of your washer.
To address electrical or control board problems, follow these steps:
- Unplug the washer: Before attempting to address electrical or control board problems, ensure that the washer is unplugged to prevent any electrical mishaps.
- Check the power supply: Make sure the washer is correctly connected to a working power outlet. Check the circuit breaker or fuse box to ensure that the washer’s circuit hasn’t tripped or blown a fuse. If necessary, reset the breaker or replace the fuse.
- Inspect the power cord and connections: Examine the power cord for any damage or fraying. Check that the connections are secure and not loose. Replace the power cord if it shows signs of wear or damage.
- Examine the control board: Inspect the control board for any visible signs of damage, such as burnt components or loose wiring. Look for error codes or display messages that may indicate control board issues.
- Reset the control board: Sometimes, a simple reset can resolve control board problems. Turn off the washer and unplug it from the power outlet. Wait for a few minutes, then plug it back in and turn it on. This may clear any temporary glitches or programming errors.
- Seek professional help: If you suspect electrical or control board issues, or if troubleshooting steps do not resolve the problem, it’s advisable to seek professional assistance. An experienced technician can accurately diagnose and repair any electrical or control board problems.
Electrical components can be complex and potentially dangerous. If you’re uncertain about addressing electrical or control board problems yourself, it is best to consult a professional technician. They have the expertise and tools to accurately diagnose and repair these issues, ensuring the safe and efficient operation of your washer.
By addressing electrical or control board problems promptly, you can resolve drainage and spin problems and restore the normal functioning of your washer.
Conclusion
Dealing with a washer that is not draining or spinning properly can be frustrating, but it’s important to approach the problem systematically and troubleshoot the common causes. By examining the drain hose, drain pump, lid switch/door lock, drain filter, load balance, drive belt, motor coupling, and electrical/control board components, you can identify and resolve the issue that is hindering proper drainage and spinning.
The drain hose should be checked for any clogs or kinks, and the drain pump should be inspected for blockages or defects. The lid switch or door lock should be tested to ensure it is functioning correctly. The drain filter must be cleaned or replaced to maintain optimal water flow. Balancing the load properly prevents imbalance issues. The drive belt and motor coupling should be examined to ensure they are in good condition. Electrical issues or control board problems should be addressed by checking the power supply, inspecting the control board, and seeking professional help if needed.
Regular maintenance, such as cleaning the drain filter and inspecting components, can help prevent future drainage and spin issues. It is crucial to closely follow the manufacturer’s instructions and safety guidelines when troubleshooting and handling electrical components.
In conclusion, with proper troubleshooting and maintenance, you can resolve common washer drainage and spin problems. If you find the issue persists or are uncomfortable with the troubleshooting steps, it is always advisable to consult a professional technician. They possess the expertise to accurately diagnose and repair any underlying issues, ensuring your washer functions efficiently and effectively, making laundry day a breeze once again.
Frequently Asked Questions about Why Is My Washer Not Draining Or Spinning
Was this page helpful?
At Storables.com, we guarantee accurate and reliable information. Our content, validated by Expert Board Contributors, is crafted following stringent Editorial Policies. We're committed to providing you with well-researched, expert-backed insights for all your informational needs.


0 thoughts on “Why Is My Washer Not Draining Or Spinning”