Articles
How To Blow-In Insulation With A Shop Vac
Modified: October 28, 2024
Discover the step-by-step process of blowing in insulation using a shop vac in this informative article. Learn the best techniques and tools to effectively insulate your home.
(Many of the links in this article redirect to a specific reviewed product. Your purchase of these products through affiliate links helps to generate commission for Storables.com, at no extra cost. Learn more)
Introduction
Welcome to our guide on how to blow in insulation with a shop vac. Insulation is an essential component of any home, as it helps to regulate temperature, conserve energy, and enhance comfort. While there are various methods to install insulation, blowing in insulation with a shop vac offers a convenient and effective solution. Blowing in insulation with a shop vac is a budget-friendly option that allows you to add insulation to existing walls, attics, or crawl spaces without the need for extensive renovations. This technique involves using a shop vac, which is a versatile tool found in many households, to evenly distribute loose-fill insulation material within the desired space. In this article, we will take you through the step-by-step process of blowing in insulation with a shop vac. We will discuss the materials needed, preparation steps, as well as the proper technique for filling and distributing the insulation. Whether you are a seasoned DIY enthusiast or a homeowner looking to improve energy efficiency in your house, this guide will provide you with the know-how to tackle this project. Before we dive into the details, it’s important to note that blowing in insulation is a task that requires safety precautions. Make sure to wear appropriate protective gear, such as safety goggles, a dust mask, and gloves, to safeguard yourself from airborne particles. Additionally, ensure that you are familiar with the specific insulation product’s safety guidelines and follow them accordingly. Now, without further ado, let’s gather our materials and get started on blowing in insulation with a shop vac!
Key Takeaways:
- Blowing in insulation with a shop vac is a budget-friendly and DIY-friendly method that enhances energy efficiency and home comfort. Prioritize safety, prepare the area, and distribute the insulation evenly for optimal results.
- Properly cleaning up after the insulation installation is crucial for maintaining a tidy workspace and the efficiency of your shop vac. Insulating your home not only reduces energy consumption but also enhances year-round comfort.
Read more: How To Turn A Shop Vac Into A Water Pump
Materials Needed
Before you begin the process of blowing in insulation with a shop vac, it’s important to gather all the necessary materials. Having everything prepared beforehand will help streamline the installation process and ensure a successful outcome. Here are the materials you will need: 1. Insulation Material: Choose a loose-fill insulation material that is suitable for your specific project and meets your insulation needs. Common options include fiberglass, cellulose, and mineral wool. Consult with a professional or refer to the product’s guidelines to determine the appropriate R-value for your desired insulation level. 2. Shop Vac: A shop vac is the primary tool you will use to blow in the insulation. Make sure you have a vacuum cleaner with a powerful motor to effectively distribute the insulation material. It should also have a blower function and a large capacity for holding the insulation. 3. Hoses: You will need flexible hoses that connect the shop vac to the area you wish to insulate. The length of the hoses will depend on the distance between the shop vac and the insulation site. Opt for hoses that are wide enough and have a smooth interior to prevent clogging. 4. Insulation Bags or Bales: If using loose-fill insulation, it is essential to have insulation bags or bales to contain the material. These bags help maintain the consistency and prevent the insulation from clumping or spreading before it reaches the desired location. 5. Protective Gear: Safety should always be a priority when working with insulation materials. Wear safety goggles to protect your eyes from dust and particles, a dust mask to prevent inhalation of airborne debris, and gloves to shield your hands. 6. Ladder or Scaffold: Depending on the area you need to insulate, you may require a ladder or scaffold to access higher spaces safely. Ensure the ladder or scaffold is sturdy and positioned on a stable surface. 7. Tape, Zip Ties, or Clamps: These items will come in handy for securing the hoses to the shop vac and preventing any air leaks. Use tape, zip ties, or clamps to securely attach the hoses, ensuring a smooth flow of insulation. 8. Flashlight: A flashlight can be useful, especially when working in tight or dimly lit areas. It will help you inspect and navigate the space while blowing in insulation.
Step 1: Preparing the Area
Before you start blowing in insulation with a shop vac, it’s essential to properly prepare the area you want to insulate. Preparing the area will ensure a smooth installation process and help achieve optimal insulation performance. Here’s what you need to do: 1. Clear the Space: Remove any furniture, obstructions, or debris from the area you plan to insulate. This will allow for unrestricted access and make it easier to distribute the insulation evenly. 2. Protect Surfaces: Cover any surfaces, such as floors or furniture, that you want to shield from the insulation material. Use plastic sheets, drop cloths, or old blankets to prevent the insulation from getting onto these surfaces. 3. Seal Gaps and Cracks: Inspect the area for any gaps, cracks, or openings that may allow insulation to escape or air to penetrate. Seal these gaps using caulk or foam sealant to ensure a tight seal before proceeding with the insulation installation. 4. Locate Access Points: Identify the access points where you will insert the insulation. These access points can include small holes drilled into walls or accessing the attic through existing openings. Ensure these access points are strategically placed to allow for even distribution of the insulation material. 5. Install Ventilation Chutes: If you are insulating an attic, consider installing ventilation chutes to maintain proper airflow. Ventilation chutes help prevent insulation from blocking air vents and ensure proper ventilation within the space. 6. Turn Off Power: If you are working near electrical outlets or wiring, it is crucial to turn off the power to the area. This will help prevent any potential accidents or electrical hazards while you’re installing the insulation. By taking the time to properly prepare the area, you will create a clean and safe environment for blowing in insulation. This step sets the foundation for a successful insulation installation with your shop vac.
Step 2: Getting the Shop Vac Ready
Once you have prepared the area for insulation, it’s time to get your shop vac ready for the task at hand. Properly setting up the shop vac will ensure efficient operation and minimize any potential issues during the insulation process. Here’s what you need to do: 1. Clean the Shop Vac: Before using the shop vac for blowing in insulation, ensure that it is clean and free from any debris or dirt. Empty the collection canister and clean the filters to maximize airflow and suction power. 2. Check the Blower Function: Verify that your shop vac has a blower function. This feature is necessary for blowing the insulation material into the designated area. If your shop vac doesn’t have a blower function, it may not be suitable for this insulation method. 3. Select the Right Size Nozzle: Depending on the size of the access point and the type of insulation material you are using, choose the appropriate size nozzle attachment for your shop vac. A nozzle that fits securely into the access point will help ensure efficient and controlled distribution of the insulation material. 4. Attach the Nozzle: Connect the chosen nozzle attachment to the blower end of the shop vac hose. Ensure a secure fit by tightening any connectors or clamps that may be present. A snug attachment will prevent any insulation leaks during the installation process. 5. Position the Shop Vac: Place the shop vac in a convenient and accessible location near the access point. Ensure that there is enough space for the shop vac and the insulation bags or bales without any obstructions. 6. Test the Shop Vac: Before beginning the insulation installation, test the shop vac to ensure it is functioning correctly. Turn it on and observe the airflow and suction power. If there are any issues, resolve them before proceeding. By properly preparing and setting up the shop vac, you’ll be ready to move on to the next step of blowing in insulation with ease and confidence. A well-prepared shop vac will contribute to a successful insulation installation.
Step 3: Connecting the Hoses
With the shop vac prepared, the next step in blowing in insulation with a shop vac is to connect the hoses. Properly connecting the hoses will ensure a smooth and uninterrupted flow of insulation material. Follow these steps to connect the hoses: 1. Attach the First Hose: Take one end of the first hose and securely attach it to the nozzle attachment on the shop vac. Use any connectors or clamps provided with the shop vac to ensure a tight seal. Double-check that the connection is secure to prevent any air leakage. 2. Position the First Hose: Position the first hose in a way that allows easy access to the area you are insulating. If needed, use tape or zip ties to secure the hose in place, ensuring it doesn’t move or obstruct your work area. 3. Connect Additional Hoses: If the distance between the shop vac and the insulation site requires additional hoses, attach them in the same manner as the first hose. Extend the hoses as needed, making sure each connection is secure and leak-free. 4. Inspect the Hose Connections: Once all the hoses are connected, inspect the connections to ensure there are no gaps or loose fittings. Airtight connections are essential to maintain optimal suction and prevent any insulation material from escaping. 5. Consider an Extension Wand: Depending on the size or location of the access point, you may find it beneficial to attach an extension wand to the end of the hose. An extension wand will provide added reach and flexibility when distributing the insulation material. Remember to position the hoses and extension wand (if used) in a way that allows for easy movement and access to the areas you are insulating. Double-check the connections and secure any loose fittings before moving on to the next step.
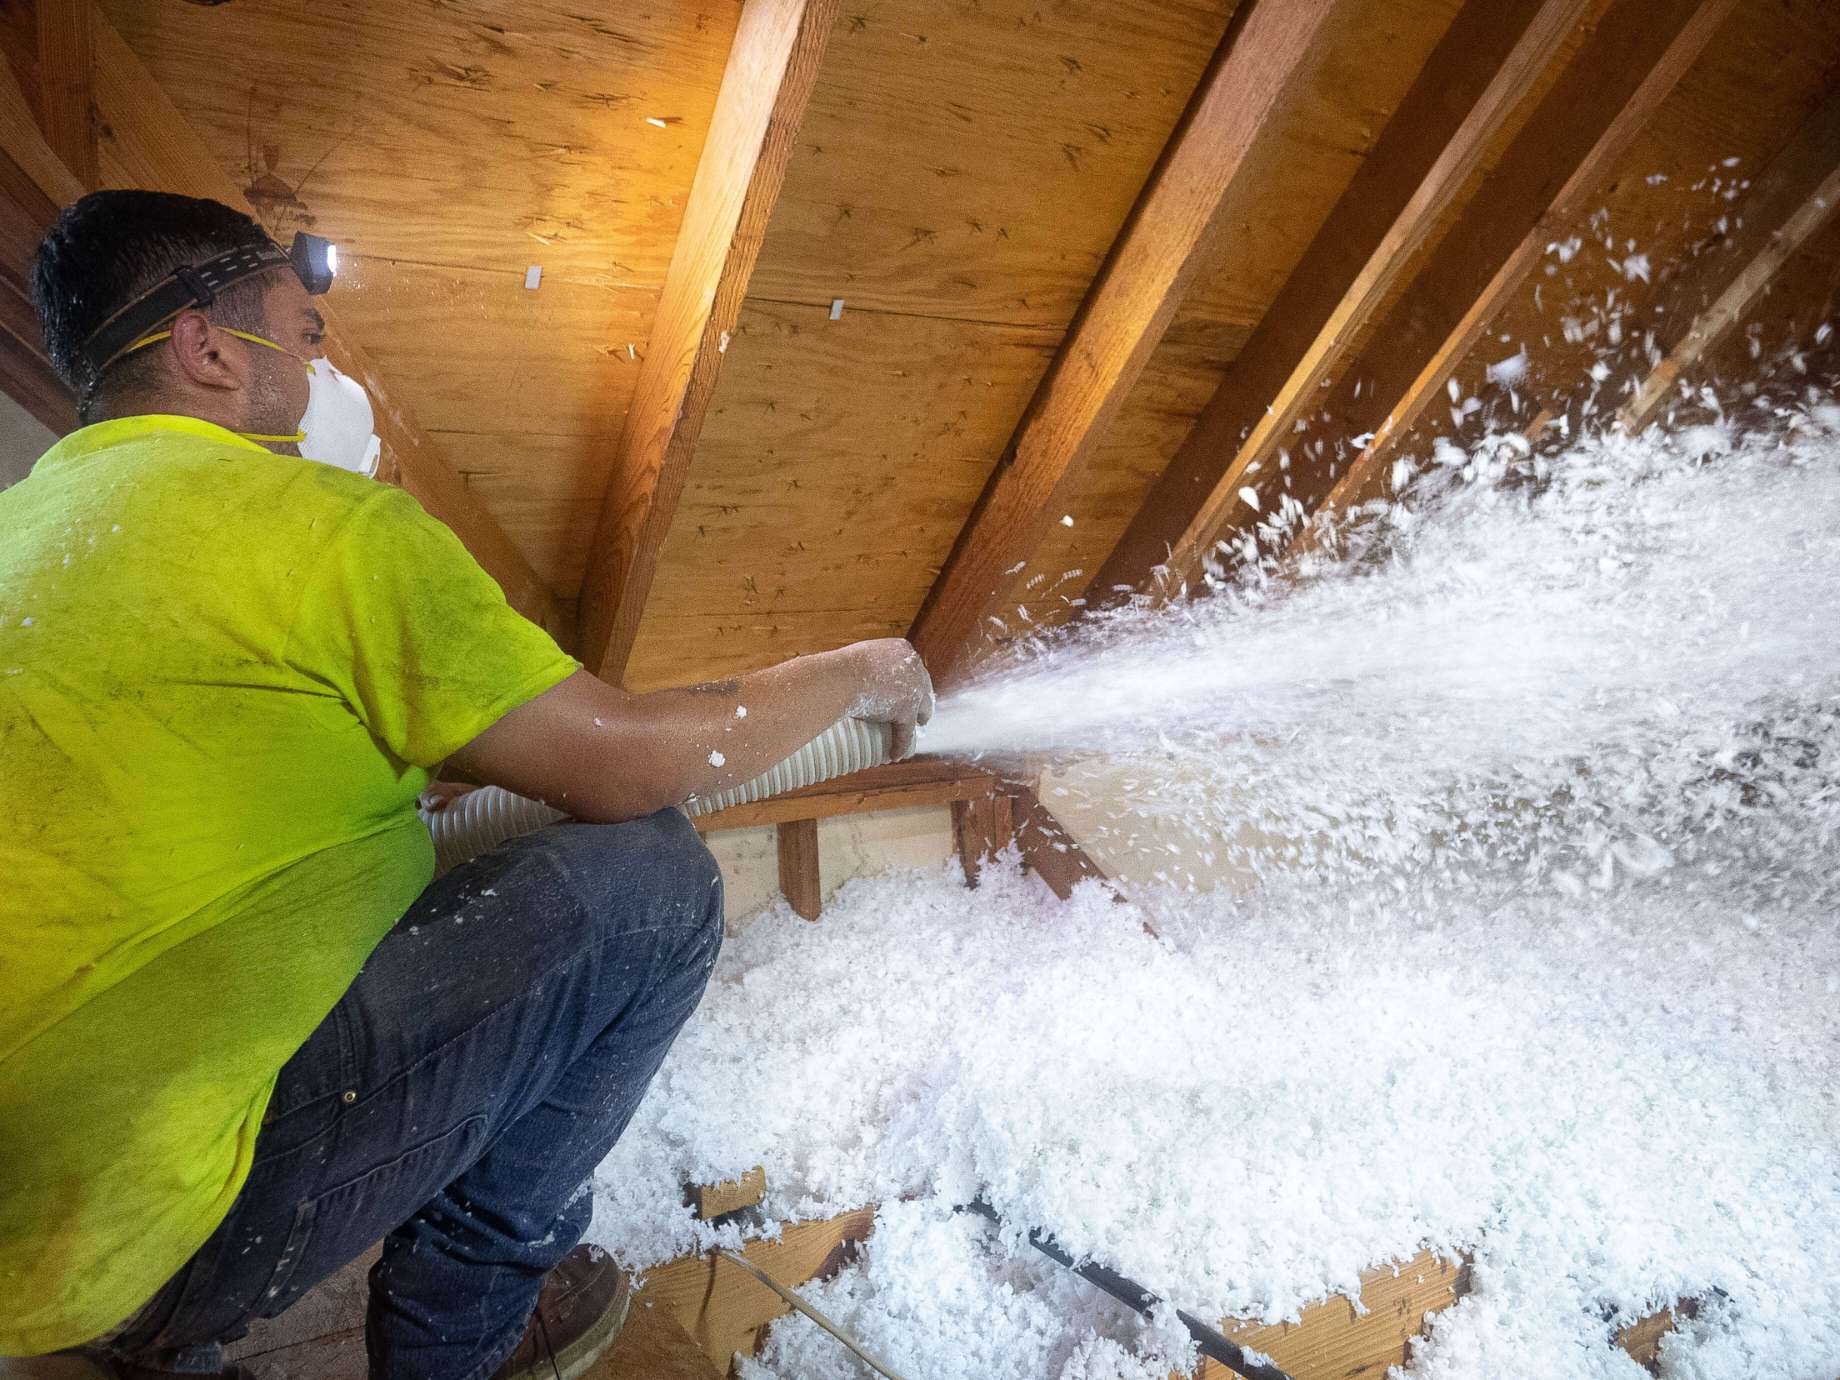
Make sure to wear protective gear such as a mask, goggles, and gloves when blowing in insulation with a shop vac to avoid inhaling or getting the insulation fibers on your skin.
Read more: How To Use A Shop Vac For Water In Carpet
Step 4: Filling the Insulation
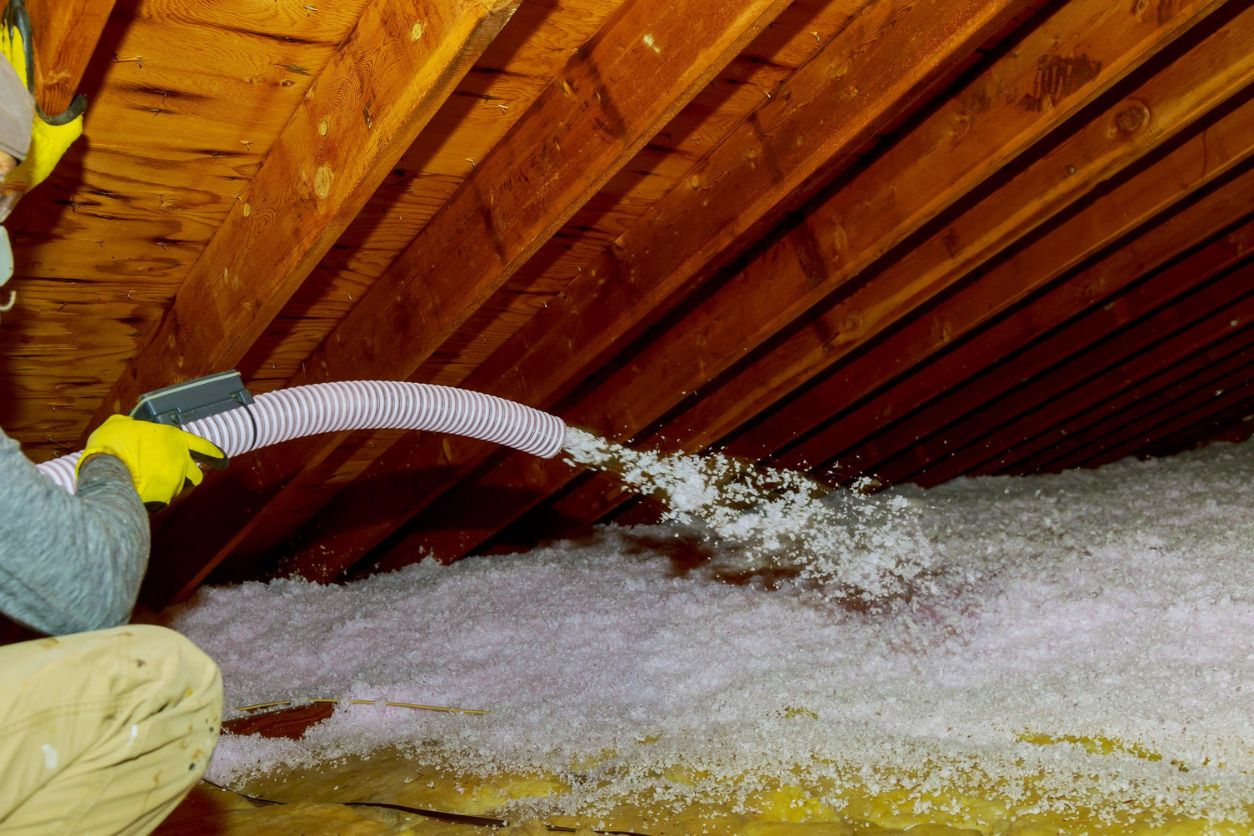
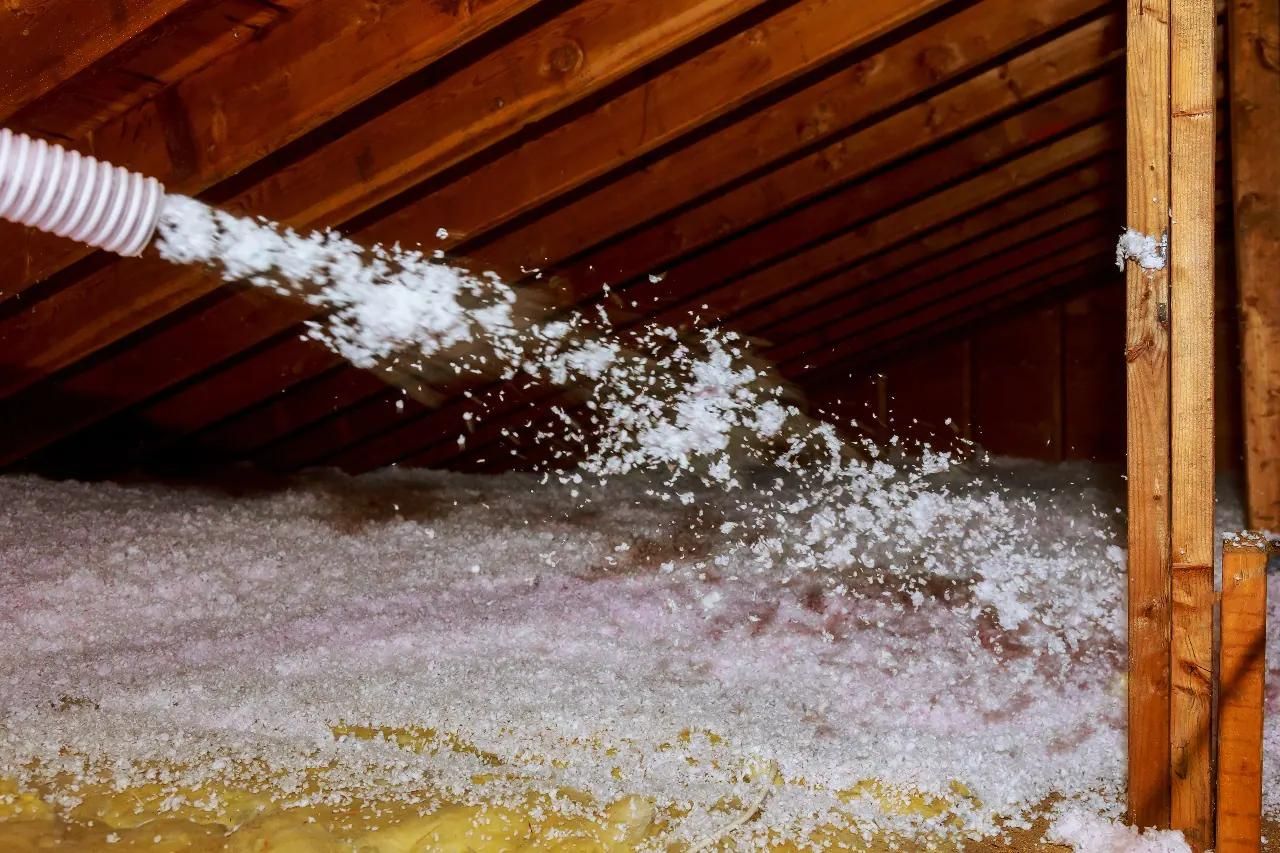
Now that your shop vac and hoses are connected, it’s time to start filling the insulation. This step involves introducing the loose-fill insulation material into the shop vac and ensuring a steady flow during the installation process. Follow these steps to fill the insulation: 1. Prepare the Insulation Material: If you are using loose-fill insulation, ensure that it is properly fluffed and free from any clumps or compacted areas. This will help ensure an even distribution of the insulation material. 2. Load the Insulation: Carefully load the insulation into the shop vac. Depending on the design of your shop vac, you may need to remove the filter to prevent it from becoming clogged with insulation material. Check the manufacturer’s instructions to ensure proper loading. 3. Start the Shop Vac: Turn on the shop vac and set it to the blower function. The suction generated by the shop vac will draw the insulation material into the airflow and propel it through the hose towards the intended area. 4. Feed the Insulation Material: Begin feeding the insulation material into the hose while the shop vac is running. It’s important to maintain a steady and consistent flow of insulation to ensure even distribution. Take care not to overload the shop vac to avoid clogging or reduced suction power. 5. Monitor the Insulation Level: Keep an eye on the level of insulation material in the shop vac canister. Refill as needed to maintain a continuous flow. Ensure that the insulation material is evenly distributed within the canister to prevent any blockages or air leaks. 6. Control the Flow Rate: Adjust the flow rate of the insulation material as needed. You can do this by manipulating the speed at which you feed the insulation into the hose. Experiment with different rates to find the optimal flow for your specific insulation project. As you fill the insulation, make sure to work methodically and cover the entire designated area evenly. Take breaks if needed to rest and allow the shop vac to cool down. Remember to prioritize safety by wearing appropriate protective gear and keeping a clean and organized work environment.
Step 5: Distributing the Insulation
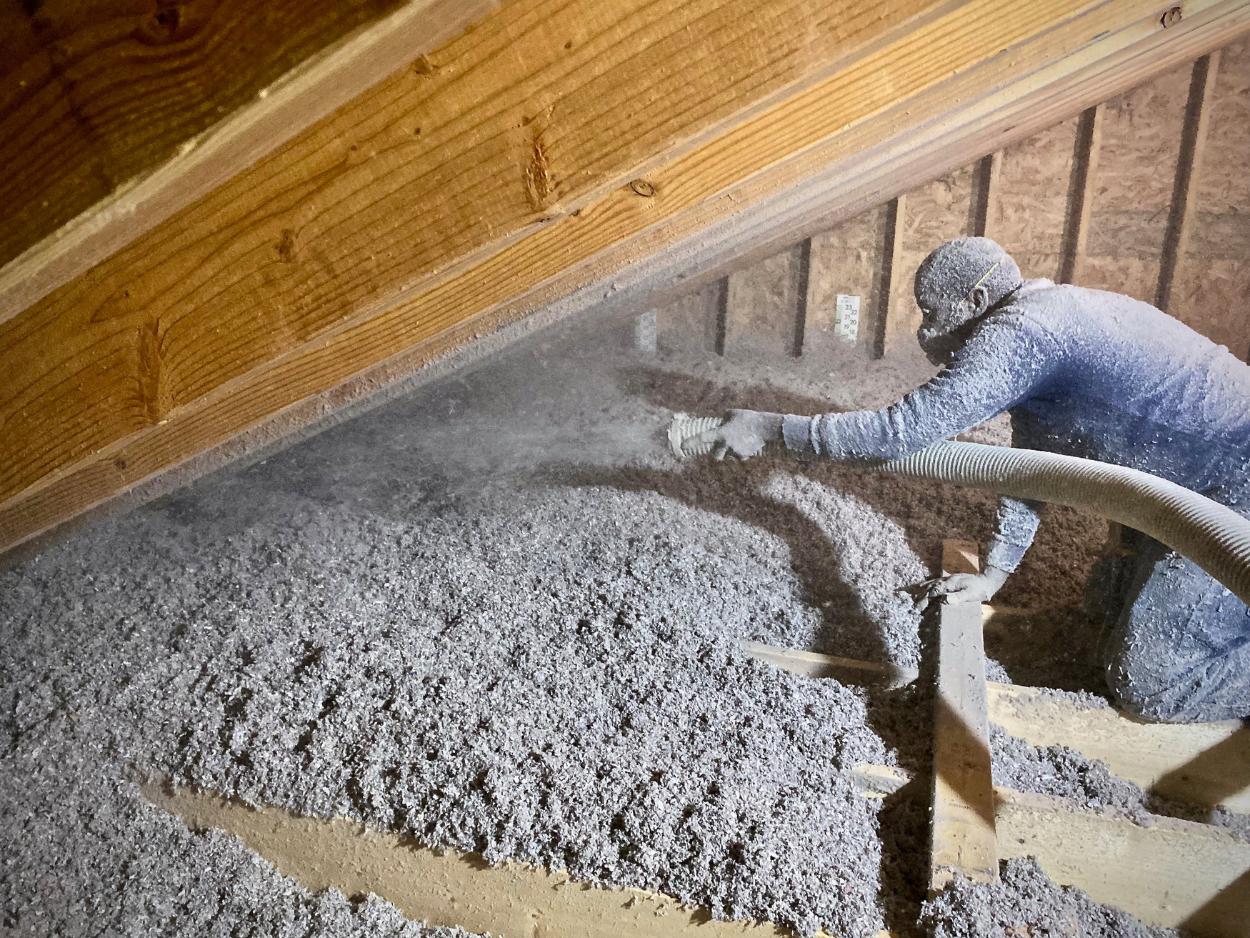
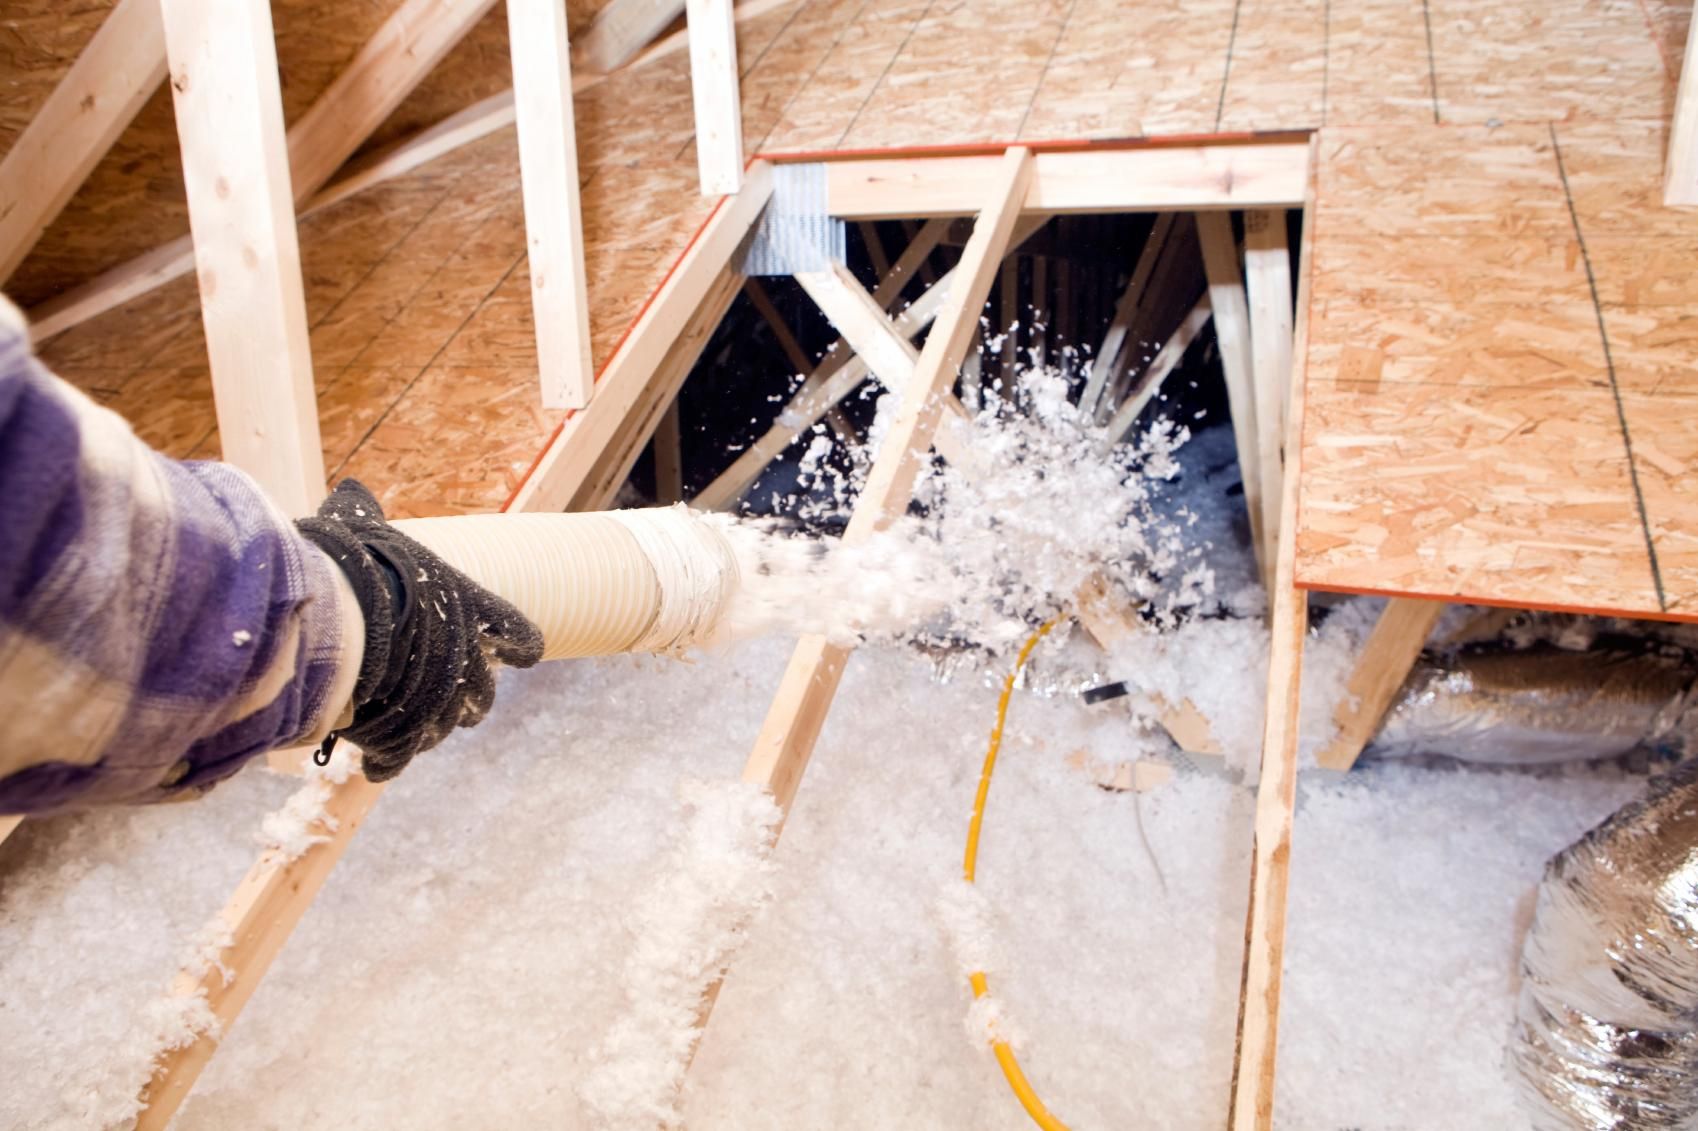
With the insulation material loaded into the shop vac, the next step is to distribute it evenly within the designated area. This step requires careful maneuvering of the hoses and a systematic approach to ensure thorough coverage. Follow these guidelines to effectively distribute the insulation: 1. Position the Hoses: Position the hoses near the access point, ensuring they reach all areas that need insulation. If necessary, use additional extension wands to reach tight or elevated spaces. Secure the hoses in place using tape, zip ties, or clamps to prevent them from moving during the distribution process. 2. Start at the Farthest Point: Begin distributing the insulation from the farthest point within the area you are insulating. This approach ensures that the insulation reaches all corners and nooks evenly. Work your way back towards the access point, gradually moving closer as the insulation fills the space. 3. Move in a Sweeping Motion: Using a sweeping motion, move the hose from side to side and up and down as you distribute the insulation. This movement helps ensure even coverage and prevents any areas from being missed. Take your time and pay attention to detail to achieve a uniform distribution. 4. Maintain a Consistent Flow: Keep a steady flow of insulation material throughout the distribution process. Avoid sudden bursts or pauses, as this can result in uneven application. If needed, adjust the flow rate by controlling the speed at which you feed the insulation into the hose. 5. Inspect as You Go: Continuously inspect the distributed insulation as you work. Look for any thin or bare spots that may require additional insulation. Use your judgment to determine the proper amount of insulation needed for each area, considering factors such as the desired R-value and the specific insulation material being used. 6. Repeat the Process: Repeat the distribution process for each section of the area needing insulation. Overlap the distribution paths slightly to ensure complete coverage, and make any necessary adjustments along the way to achieve a consistent and thorough application. By following these steps and taking your time to distribute the insulation properly, you will create an effective thermal barrier that enhances energy efficiency and comfort within the space. Remember to stay focused, take breaks if needed, and maintain a clean and safe working environment throughout the process.
Step 6: Cleaning Up
Once you have completed the distribution of insulation, it’s time to clean up the work area. Properly cleaning up ensures a neat and tidy space while also maintaining the efficiency of your shop vac. Follow these steps to effectively clean up: 1. Turn Off the Shop Vac: Turn off the shop vac and unplug it from the power source. This will prevent any accidental operation while you clean up the area. 2. Collect Excess Insulation: Gather any excess insulation material that may have spilled or accumulated in the work area. Use a dustpan, broom, or vacuum to collect the insulation. Place it in a bag or container for proper disposal or save it for future use, if applicable. 3. Remove and Empty the Canister: Remove the canister from the shop vac and empty its contents into a garbage bag or designated waste container. Dispose of the insulation material according to local regulations and guidelines. 4. Clean the Hoses: Disconnect the hoses from the shop vac and inspect them for any insulation material or debris. Use a brush or cloth to clean the interior and exterior of the hoses. If needed, rinse them with water and allow them to dry thoroughly before storing. 5. Clean the Shop Vac: Clean the shop vac thoroughly to remove any remaining insulation material or dust particles. Empty the collection canister, clean the filters, and wipe down the exterior of the shop vac with a damp cloth. 6. Store the Equipment: After everything is cleaned and dry, store the shop vac, hoses, and other accessories in a safe and organized manner. Keep them in a clean and dry place, away from extreme temperatures or humidity, to ensure their longevity. 7. Inspect the Insulated Area: Take a final look at the insulated area to ensure that the insulation is evenly distributed and there are no visible gaps or areas that need attention. Make any necessary touch-ups or adjustments to achieve the desired insulation coverage. By following these cleaning steps, you’ll leave the area clean and ready for use. Properly cleaning the shop vac and storing it correctly will prolong its lifespan and ensure it remains in good working condition for future projects.
Conclusion
Congratulations! You have successfully learned how to blow in insulation with a shop vac. By following the step-by-step guide outlined in this article, you have gained the knowledge and skills necessary to improve the energy efficiency and comfort of your home. Blowing in insulation with a shop vac offers a cost-effective and convenient solution for adding insulation to existing walls, attics, or crawl spaces. This method allows you to achieve even distribution of loose-fill insulation material, helping to regulate temperature, conserve energy, and enhance the overall comfort of your living space. Throughout the process, it’s important to prioritize safety by wearing protective gear, such as safety goggles, a dust mask, and gloves. Additionally, be sure to check the specific safety guidelines provided by the insulation material manufacturer. Remember to thoroughly prepare the area, connect the hoses properly, and fill and distribute the insulation material evenly. Take breaks when needed, and pay attention to detail to ensure a thorough and effective application. Cleaning up after the insulation installation is crucial to maintain a tidy workspace and the efficiency of your shop vac. Properly dispose of any excess insulation material and clean the equipment thoroughly before storing it in a safe place. By insulating your home, you are not only reducing energy consumption and lowering utility bills but also making a positive impact on the environment. The added insulation will provide increased comfort year-round, keeping your home cool in summer and warm in winter. Now that you have mastered the art of blowing in insulation with a shop vac, you can confidently tackle future insulation projects. Whether you are targeting specific areas or looking to insulate your entire home, this technique will serve you well. Remember, if you have any doubts or challenges during the process, consult with a professional insulation installer who can provide expert guidance and assistance. So go ahead, take pride in your newfound expertise, and enjoy the benefits of a properly insulated home!
Frequently Asked Questions about How To Blow-In Insulation With A Shop Vac
Was this page helpful?
At Storables.com, we guarantee accurate and reliable information. Our content, validated by Expert Board Contributors, is crafted following stringent Editorial Policies. We're committed to providing you with well-researched, expert-backed insights for all your informational needs.


0 thoughts on “How To Blow-In Insulation With A Shop Vac”