Articles
How To Turn A Shop Vac Into A Water Pump
Modified: August 31, 2024
Discover how to transform your shop vac into a powerful water pump with these informative articles. Explore step-by-step instructions and expert tips today!
(Many of the links in this article redirect to a specific reviewed product. Your purchase of these products through affiliate links helps to generate commission for Storables.com, at no extra cost. Learn more)
Introduction
Welcome to this guide on how to turn a shop vac into a water pump! Shop vacuums are useful tools for cleaning up messes, but did you know that they can also be repurposed into efficient water pumps? Whether you are faced with a flooded basement, a garden in need of watering, or any other water-related task, converting your shop vac into a water pump can come in handy.
In this article, we will walk you through the step-by-step process of converting your shop vac into a water pump. We will outline the materials you will need, the adjustments required to optimize your shop vac for pumping water, and provide helpful tips for maintaining your DIY water pump.
This project is not only cost-effective but also allows you to repurpose existing equipment. So, let’s dive in and learn how to transform your shop vac into a powerful water pump!
Key Takeaways:
- Transform your shop vac into a powerful water pump with a few simple adjustments and a conversion kit. Save money and repurpose existing equipment for efficient water pumping tasks.
- Follow safety precautions, perform regular maintenance, and test your DIY shop vac water pump before putting it to use. Enjoy the versatility and cost-effectiveness of repurposing your equipment for various water-related tasks.
Read more: How To Use A Shop Vac For Water In Carpet
Materials Needed
Before we begin, let’s gather the materials needed for this project. Most of these items can be easily obtained from a hardware store or online retailer:
- A shop vac: Ensure that it is in good working condition. Consider the size and power of the shop vac based on the intended use for the water pump.
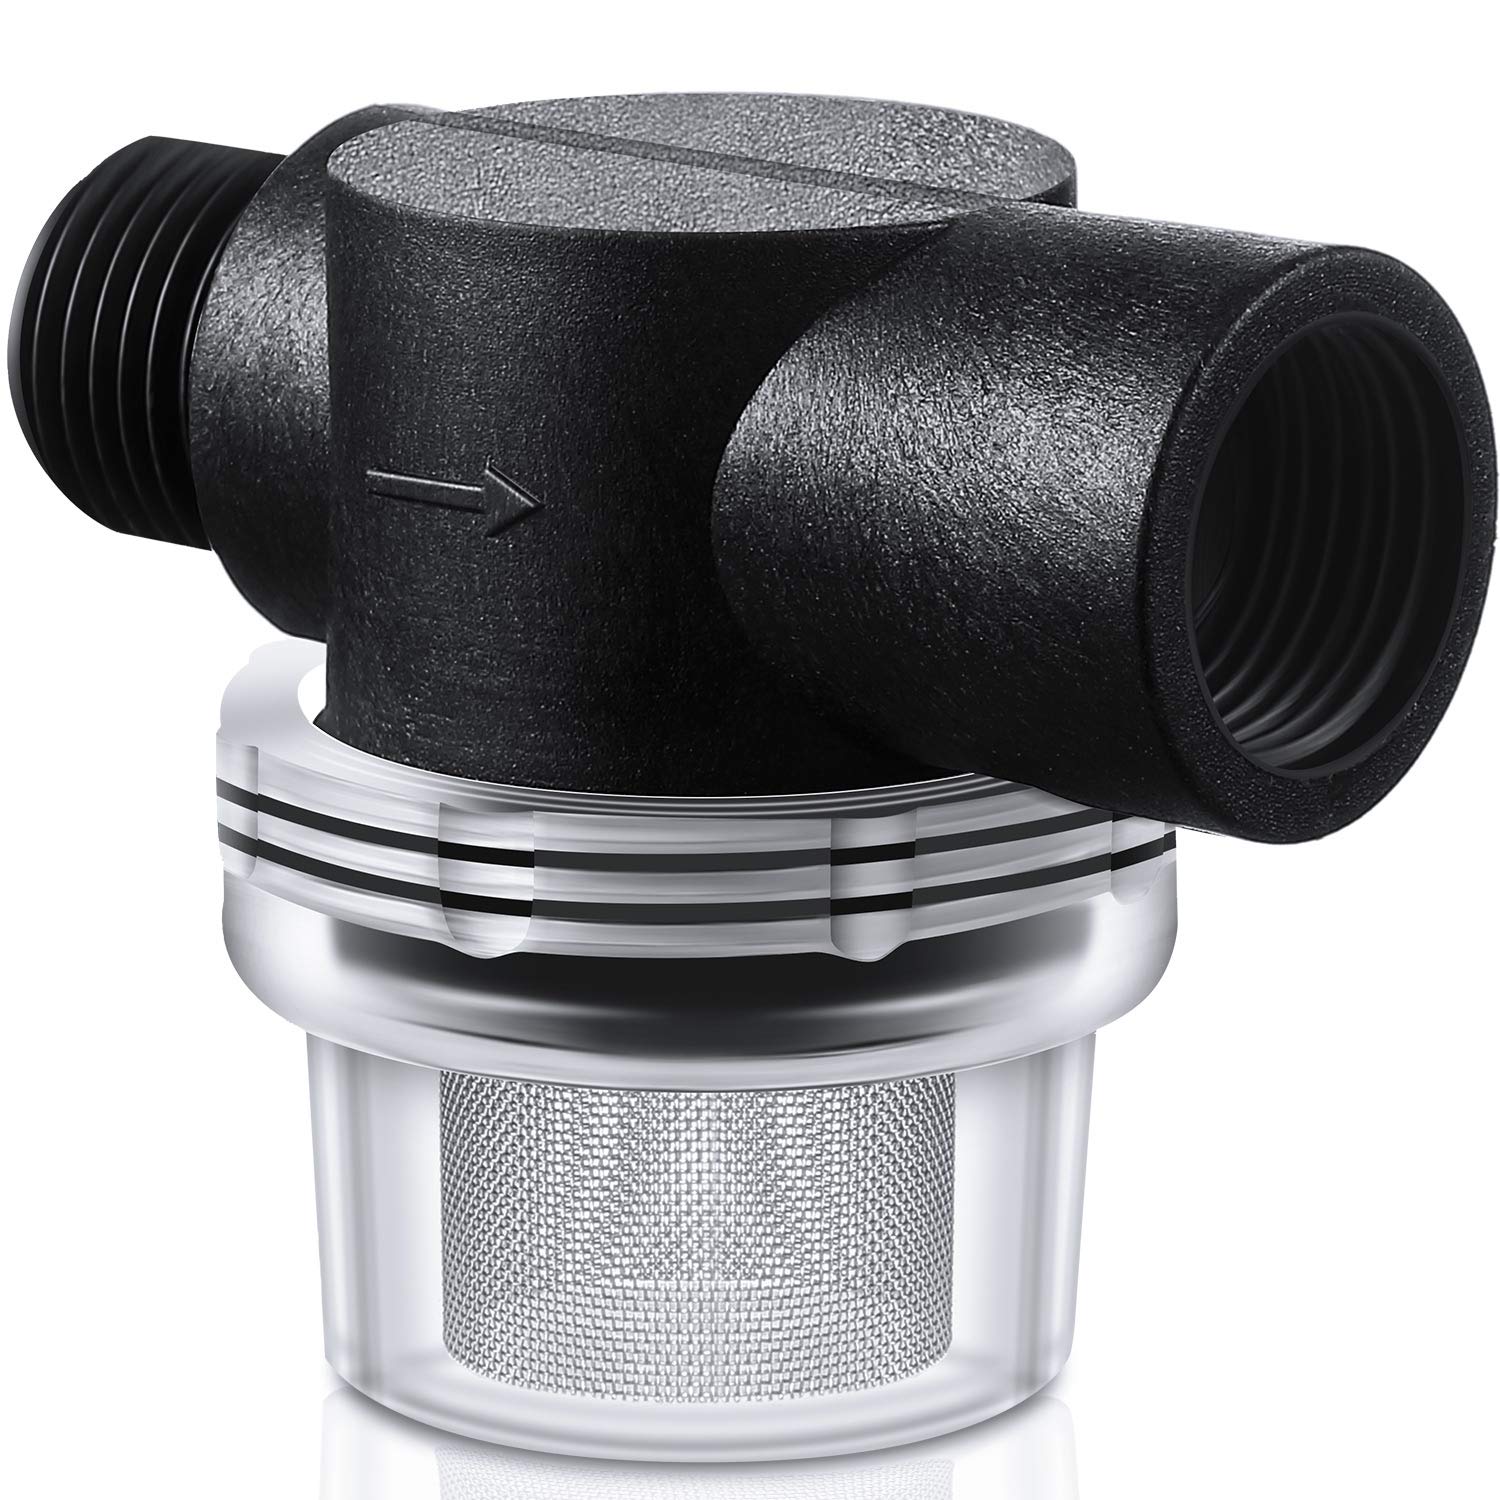
- A water pump conversion kit: Look for a conversion kit specifically designed for shop vacuums. These kits typically include a hose, inlet and outlet fittings, and a strainer.
- A garden hose: Choose a hose long enough to reach the desired water source or discharge location.
- A water source: This could be a pool, a flooded area, or any other water supply that needs to be pumped.
Once you have gathered these materials, you will be ready to transform your shop vac into a water pump.
Step 1: Preparation
Before you begin the conversion process, it is essential to take a few preparatory steps to ensure a smooth and successful project:
- Read the instructions: Each shop vac model may require slightly different modifications or have specific recommendations. Familiarize yourself with the manual or instructions that came with your shop vac.
- Choose a suitable location: Find a well-ventilated area with enough space to work comfortably. It is also important to have access to a power source and a nearby water supply.
- Gather your tools: In addition to the materials mentioned earlier, you may need basic tools such as pliers, a screwdriver, and Teflon tape to ensure a secure connection.
- Ensure safety: Switch off and unplug your shop vac before making any adjustments. Safety goggles and gloves are also recommended while handling tools and equipment.
Once you have completed these preparatory steps, you can move on to modifying your shop vac to function as a water pump. Remember to follow the instructions carefully to avoid any mishaps and ensure the best possible outcome.
Step 2: Adjusting the Shop Vac
Now that you are prepared, it’s time to make the necessary adjustments to your shop vac to enable water pumping. Follow these steps:
- Remove the filter: Start by removing the filter from your shop vac. Since we will be using it as a water pump, the filter is not necessary and could get damaged when exposed to water.
- Check for water compatibility: Ensure that your shop vac is compatible with water usage. Some models may not be suitable for pumping water, so it is essential to verify this information in the manual or instructions.
- Inspect the motor and electrical components: Take a close look at the motor and other electrical parts of your shop vac. Look for signs of damage or wear and tear. It is crucial to have a functioning and safe electrical system before proceeding.
- Seal any openings: Identify any openings or vents in the shop vac that might let water in. Use silicone caulk or waterproof tape to seal these openings. This step ensures that water is directed where it is intended, rather than leaking out through unwanted openings.
By completing these adjustments, you are now ready to move on to the next step of connecting the inlet and outlet fittings.
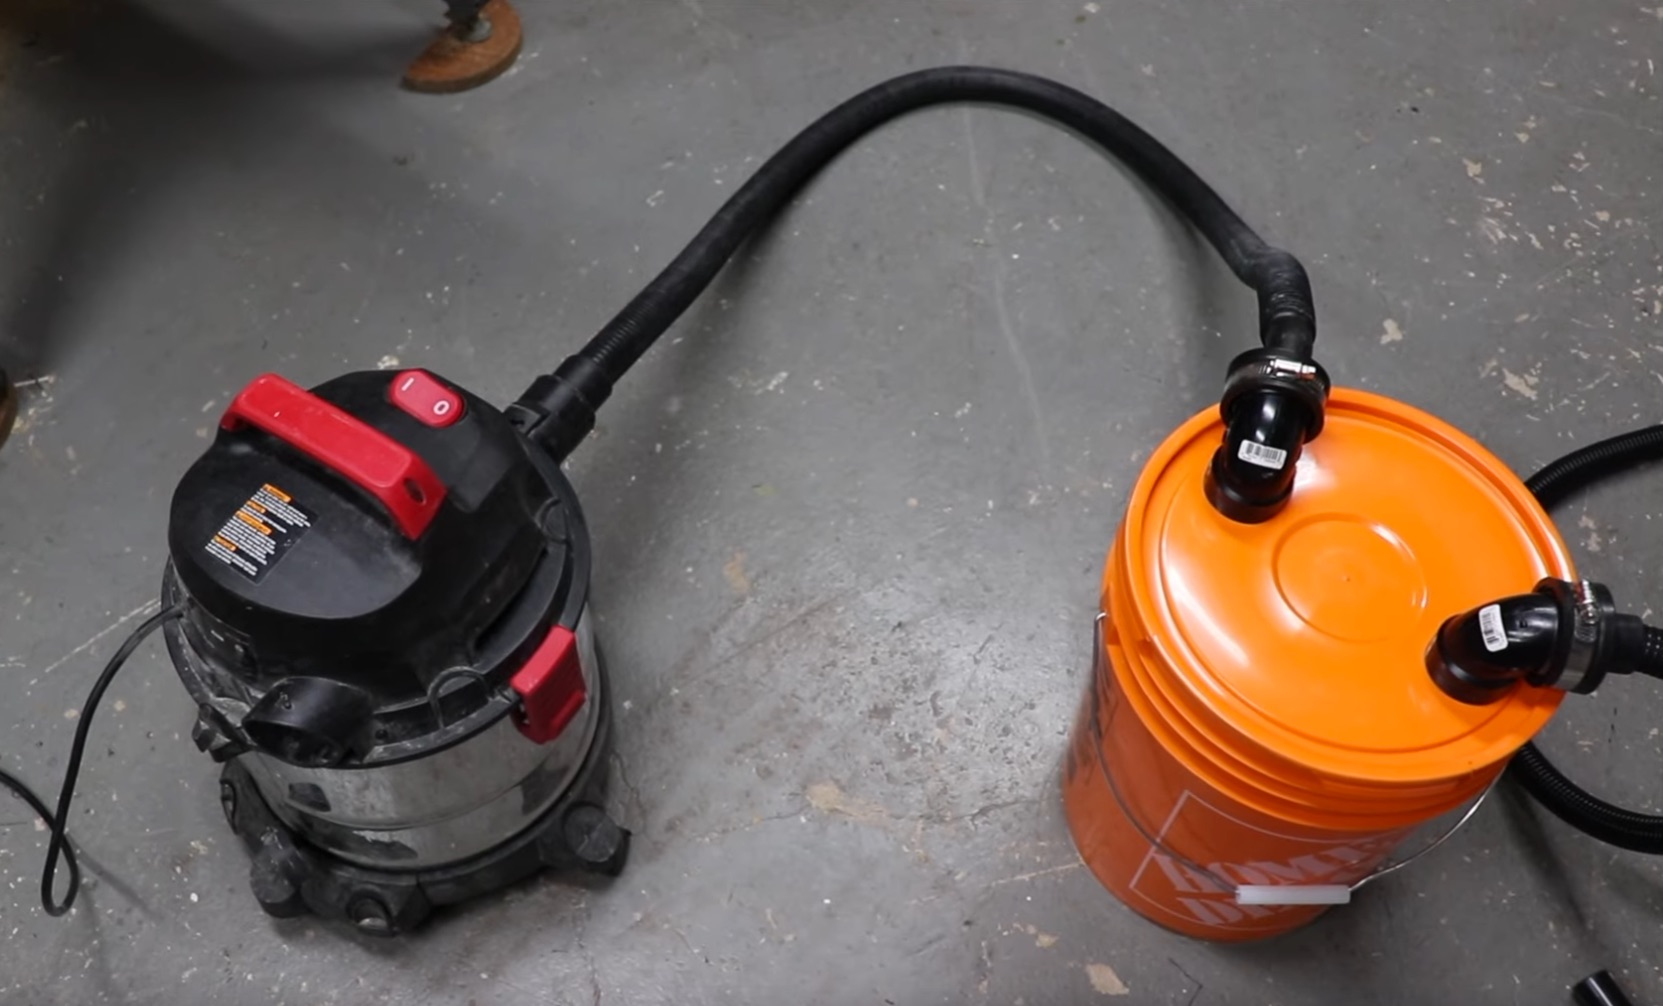
Step 3: Connecting the Inlet and Outlet
Connecting the inlet and outlet fittings is a crucial step in transforming your shop vac into a functional water pump. Follow these steps to ensure a secure and reliable connection:
- Locate the inlet and outlet ports: Identify the inlet and outlet ports on your shop vac. These are typically located on the sides or top of the unit.
- Attach the inlet fitting: Take one end of the provided hose from the conversion kit and connect it to the inlet port of the shop vac. Ensure a tight and secure fit.
- Secure the outlet fitting: Take the other end of the hose and attach the appropriate outlet fitting from the conversion kit. This fitting will allow you to connect a garden hose for water discharge.
- Use Teflon tape: Wrap Teflon tape around the threads of the fittings to provide a tight seal and prevent any water leakage.
- Tighten the connections: Use pliers or a wrench to tighten the connections without damaging the plastic housing. Ensure that the fittings are firmly attached and there are no loose parts.
Once you have completed these steps, you have successfully connected the inlet and outlet fittings, providing a clear pathway for water to enter and exit your shop vac-turned-water pump.
Make sure to use a shop vac with a wet/dry feature and a water pump attachment. Connect the attachment to the shop vac and use it to pump out water from flooded areas or to drain water from a pool or hot tub.
Read more: How To Blow-In Insulation With A Shop Vac
Step 4: Testing the Water Pump
Before you start pumping large amounts of water, it is essential to test your newly converted shop vac water pump to ensure it is working correctly. Follow these steps to conduct a simple test:
- Connect the garden hose: Attach one end of the garden hose to the outlet fitting of your shop vac water pump. Make sure it is securely fastened.
- Submerge the inlet in water: Place the inlet fitting into a container of water, such as a bucket, tub, or pool. Ensure that the inlet is fully submerged for the test.
- Power on the shop vac: Plug in your shop vac and turn it on. Observe the water flowing through the garden hose to ensure a steady and consistent stream.
- Check for leaks: Monitor the connections to ensure there are no water leaks. If you notice any leaks, double-check the tightness of the fittings and use Teflon tape if necessary.
- Assess the water flow: Observe the water flow rate and pressure. It should be sufficient for your intended application. If the flow is too weak, you may need to consider using a more powerful shop vac or adjusting the settings.
If the test is successful, and you do not encounter any issues or leaks, congratulations! Your shop vac water pump is ready to tackle the desired pumping tasks. However, if you encounter any problems or need to troubleshoot, refer to the manufacturer’s instructions or consult a professional for assistance.
Step 5: Pumping Water
Now that you have tested your shop vac water pump and ensured it is working effectively, it’s time to put it to use and start pumping water. Follow these steps:
- Select the water source: Determine where you need to pump the water from. It could be a flooded area, a pool, a rain barrel, or any other water source.
- Submerge the inlet: Place the inlet fitting of your shop vac water pump into the water source, ensuring that it is fully submerged. The pump will create suction and draw water into the system.
- Position the outlet: Choose a location where you want the pumped water to be discharged. Connect the other end of the garden hose to the outlet fitting and direct it to the desired location.
- Power on the shop vac: Plug in your shop vac and turn it on to start the pumping process. You will notice the water being drawn into the shop vac and pumped out through the garden hose.
- Monitor the pumping progress: Keep an eye on the water level in the source and the flow rate at the discharge location. Adjust the position of the inlet and outlet as needed to optimize the efficiency of the water pump.
- Continue until desired result: Pump the water until the desired result is achieved. Whether it’s draining a flooded area or watering your garden, your shop vac water pump will serve as a reliable solution.
Remember to take breaks if needed and not overload the shop vac with excessive water or debris. If you encounter any issues or notice a decrease in performance, refer back to the maintenance tips in the next step for troubleshooting.
Step 6: Maintenance Tips
Maintaining your shop vac water pump is essential to ensure its longevity and optimal performance. Follow these maintenance tips to keep your DIY water pump in great shape:
- Regularly clean the shop vac: After each use, clean out any debris or sediment that may have accumulated inside the shop vac. This will prevent clogs and maintain proper suction.
- Inspect and replace fittings if needed: Periodically check the fittings and connections for any signs of wear or damage. If you notice any leaks or deterioration, replace the fittings promptly to maintain a secure seal.
- Clean and dry the hose: After each use, drain excess water from the hose and hang it to dry. This will prevent any mold or mildew growth and ensure a clean and functional hose for future use.
- Keep the shop vac dry: Avoid allowing water to come into contact with the motor or electrical components of the shop vac. Dry it thoroughly after each use to prevent possible damage.
- Store properly: When not in use, store your shop vac water pump in a clean and dry environment. This will protect it from dust, moisture, and other elements that can affect its performance.
By following these maintenance tips, you can prolong the lifespan of your shop vac water pump and ensure that it remains in good working condition for future water pumping tasks.
Conclusion
Congratulations! You have successfully learned how to turn a shop vac into a water pump. By following the steps outlined in this guide, you have transformed your shop vac into a versatile tool that can efficiently pump water for various purposes.
Whether you need to remove excess water from a flooded area, water your garden, or tackle any other water-related task, your DIY shop vac water pump will prove to be a cost-effective and practical solution. Not only have you repurposed existing equipment, but you have also gained a valuable tool that can come in handy in numerous scenarios.
Remember to always follow safety precautions, read the manufacturer’s instructions, and perform regular maintenance to ensure your shop vac water pump remains in optimal working condition.
We hope this guide has been informative and helpful in guiding you through the process of converting your shop vac into a water pump. Now, go ahead and put your new DIY water pump to good use!
Now that you've mastered turning a shop vac into a water pump, why stop there? Dive into the world of self-made projects with our next feature, "What Is So Great About DIY Projects." You'll find out why crafting, fixing, and creating with your own hands isn't just rewarding but can also be a huge money saver. Discover the satisfaction of completing projects customized to your needs and taste. Handy tips and creative ideas await to keep you inspired and engaged in more DIY activities that enhance your surroundings and skills.
Frequently Asked Questions about How To Turn A Shop Vac Into A Water Pump
Was this page helpful?
At Storables.com, we guarantee accurate and reliable information. Our content, validated by Expert Board Contributors, is crafted following stringent Editorial Policies. We're committed to providing you with well-researched, expert-backed insights for all your informational needs.


0 thoughts on “How To Turn A Shop Vac Into A Water Pump”