
Articles
How To Blow-In Cellulose Insulation
Modified: January 23, 2024
Learn how to blow in cellulose insulation with these informative articles. Discover the benefits of cellulose insulation and expert tips for proper installation.
(Many of the links in this article redirect to a specific reviewed product. Your purchase of these products through affiliate links helps to generate commission for Storables.com, at no extra cost. Learn more)
Introduction
Welcome to our comprehensive guide on how to blow in cellulose insulation. If you are looking to improve the energy efficiency of your home and reduce your utility bills, adding insulation is a great place to start. Cellulose insulation is an eco-friendly and cost-effective option that can significantly increase the comfort levels in your home by reducing heat loss in the winter and heat gain in the summer.
In this article, we will walk you through the step-by-step process of blowing in cellulose insulation, from the necessary safety precautions to the final finishing touches. Whether you are a seasoned DIY enthusiast or a homeowner eager to take on a new project, this guide will provide you with all the information you need to successfully insulate your attic or walls with cellulose insulation.
Before we dive into the details, it’s important to note that safety should always be your top priority when undertaking any home improvement project. We recommend wearing protective clothing, such as goggles and a dust mask, to prevent irritation from the insulation material. Additionally, ensure that you are working in a well-ventilated area to avoid overexposure to dust particles.
Now, let’s gather the necessary equipment and materials before we get started with the insulation process.
Key Takeaways:
- Prioritize safety, proper preparation, and thorough cleanup when blowing in cellulose insulation. Attention to detail and adherence to safety guidelines ensure a successful and efficient insulation process.
- Insulating your home with cellulose insulation offers numerous benefits, including improved energy efficiency, lower utility bills, and enhanced comfort. Follow the comprehensive guide for a well-insulated and sustainable home.
Read more: What Is Cellulose Insulation
Safety Precautions
When working with cellulose insulation, it’s crucial to prioritize safety to protect yourself from potential hazards. Here are some key safety precautions to keep in mind:
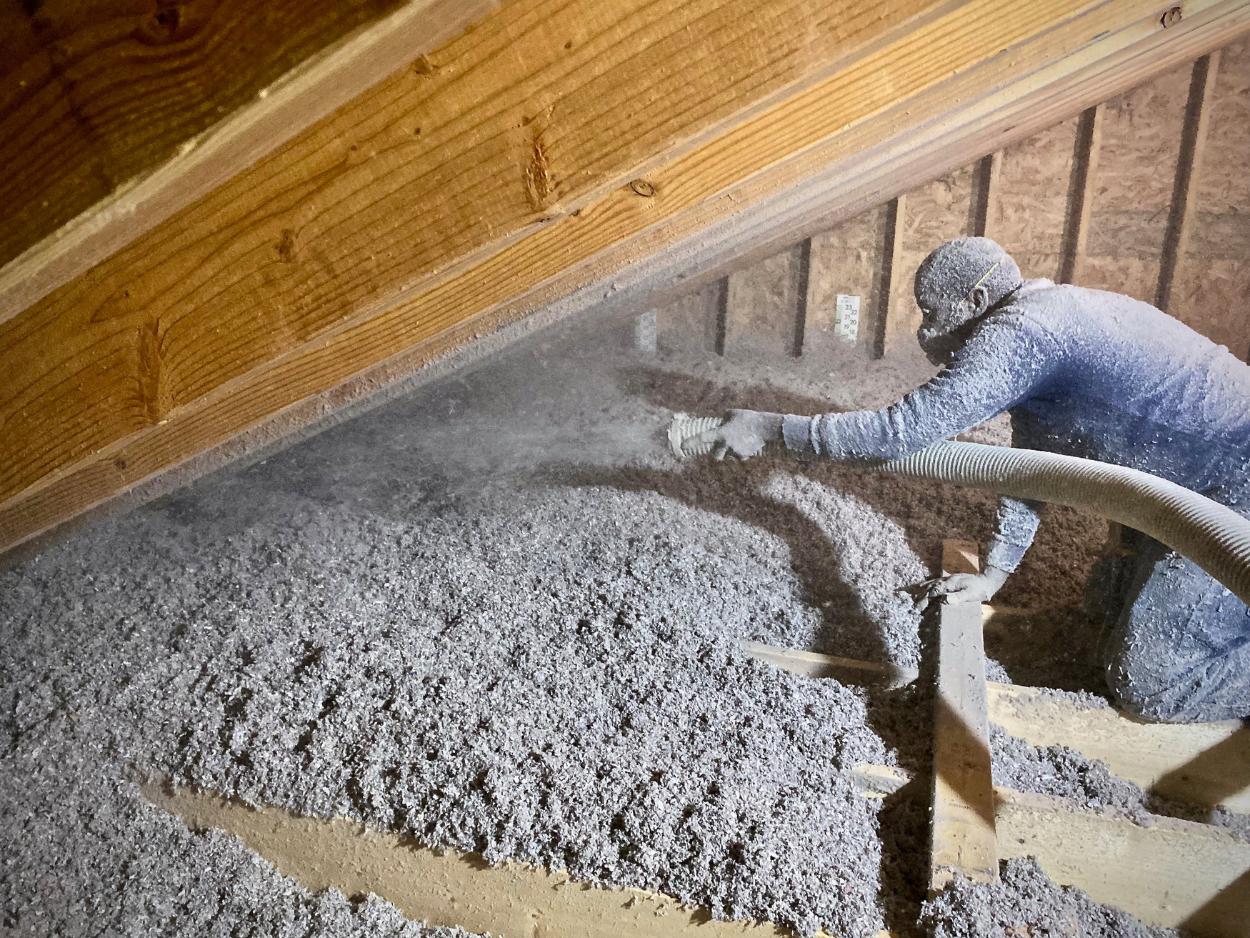
- Wear protective clothing and gear: Before you start handling the cellulose insulation, make sure to wear long sleeves, gloves, safety goggles, and a dust mask. This will help to prevent any irritation or allergic reactions caused by direct contact or inhalation of the insulation material.
- Work in a well-ventilated area: Proper ventilation is essential to minimize the concentration of dust particles in the air. Open windows or use fans to improve air circulation while you’re installing the cellulose insulation, especially in enclosed spaces like attics or crawl spaces.
- Use a respirator: In addition to wearing a dust mask, consider using a respirator with a HEPA filter to further protect yourself from inhaling fine dust particles. This is particularly important if you are working in an area with limited ventilation.
- Avoid contact with eyes and skin: Cellulose insulation fibers can cause irritation if they come into contact with your eyes or skin. If any insulation material gets on your skin or in your eyes, immediately rinse the affected area with clean water.
- Protect electrical fixtures and wiring: Take extra care to cover or shield electrical fixtures, outlets, and wiring in the areas you are insulating. This will prevent any insulation material from coming into contact with live electrical components.
- Use caution when working near recessed light fixtures: Cellulose insulation is flammable, so it’s important to avoid placing or covering it directly over recessed light fixtures. Ensure that there is proper clearance around the fixtures to prevent overheating and potential fire hazards.
- Be mindful of structural integrity: When blowing in cellulose insulation, be cautious of load-bearing structures, especially in attics or crawl spaces. Avoid placing excessive weight on the ceiling or floor joists and consult a professional if you have any concerns.
- Follow manufacturer instructions: Lastly, always refer to the manufacturer’s instructions and guidelines when working with cellulose insulation. Different brands may have specific recommendations for installation techniques and safety precautions, so ensure that you are familiar with the instructions before you begin.
By adhering to these safety precautions, you can minimize the risks associated with handling cellulose insulation and create a safe and healthy working environment. Now that we’ve covered the safety basics, let’s move on to the equipment and materials you’ll need for the insulation process.
Equipment and Materials Needed
Before you start blowing in cellulose insulation, gather the following equipment and materials:
- Cellulose insulation: Purchase enough cellulose insulation to cover the desired area. You can find cellulose insulation in compressed bags or loose-fill form. It’s important to choose a high-quality cellulose insulation product that meets your local building codes and has a high R-value for optimal thermal performance.
- Blower machine: A blower machine is necessary for distributing the cellulose insulation evenly and efficiently. You can either rent a blower machine from a local home improvement store or consider hiring a professional insulation contractor who will provide the equipment.
- Insulation hose: The insulation hose connects to the blower machine and allows you to direct the flow of cellulose insulation. Make sure the hose is long enough to reach all the areas you plan to insulate, whether it’s an attic, walls, or crawl spaces.
- Protective clothing and gear: As mentioned in the safety precautions section, wear long sleeves, gloves, safety goggles, and a dust mask to protect yourself from potential irritants and airborne particles.
- Measuring tape: Use a measuring tape to measure the dimensions of the space you are insulating. This will help you determine the amount of cellulose insulation you need to cover the area adequately.
- Utility knife: A utility knife is useful for cutting the bags of compressed cellulose insulation, as well as trimming any excess insulation in tight spaces.
- Extension cords: Depending on the location of the area you are insulating, you may need extension cords to connect the blower machine to a power source.
- Ladder: If you are insulating an attic, you will likely need a sturdy ladder to access the space safely. Choose a ladder that is appropriate for the height of your attic and ensure it is in good condition.
- Drop cloths or tarps: To protect your floors and furnishings from any debris or dust, lay down drop cloths or tarps in the work area.
- Caulk and sealant: Prior to insulation, inspect the space for any cracks, gaps, or air leaks. Use caulk and sealant to seal these openings, ensuring a more efficient insulation barrier.
- Flashlight: In dimly lit areas, a flashlight can come in handy to help you navigate and inspect the space during the insulation process.
Having these equipment and materials ready before you start the insulation process will ensure a smoother and more successful installation. With everything in place, we can move on to preparing the space for cellulose insulation.
Preparing the Space
Before you begin blowing in cellulose insulation, it’s important to properly prepare the space that you will be working in. Taking the time to prepare the area will not only ensure a more efficient insulation process but also help to achieve optimal results. Here are the steps to follow when preparing the space:
- Clean and declutter: Start by removing any items or debris from the area you plan to insulate. Clearing out the space will make it easier to access and distribute the cellulose insulation evenly.
- Seal air leaks and gaps: Inspect the space for any cracks, gaps, or air leaks that could undermine the effectiveness of the insulation. Use caulk or sealant to seal these openings, ensuring a more airtight and energy-efficient result.
- Protect electrical fixtures and wiring: Before you start blowing in insulation, take measures to protect electrical fixtures, outlets, and wiring. Use insulation baffles or cardboard to create a barrier around recessed light fixtures and install outlet box extenders to keep them clear of insulation.
- Provide access to the space: Ensure that you have a clear and safe pathway to the area you plan to insulate. This may involve setting up a sturdy ladder or creating a temporary walkway if you are insulating an attic or crawl space.
- Cover sensitive items: If there are any delicate or sensitive items in the area, such as electronics or valuables, consider covering them with plastic sheets or moving them temporarily to a different location. This will protect them from any potential dust or debris during the insulation process.
- Lay down drop cloths or tarps: To protect the floors and surrounding areas, lay down drop cloths or tarps before you start the insulation process. This will make the cleanup easier and prevent any damage or stains.
- Ensure proper ventilation: If you are working in an enclosed space, such as an attic or crawl space, ensure that there is adequate ventilation. Open windows or use fans to improve air circulation and reduce the buildup of dust particles.
- Check the weather conditions: It’s best to conduct the insulation process on a dry and calm day. Moisture or high winds can affect the performance of the cellulose insulation, so make sure to schedule the installation accordingly.
By following these preparation steps, you will create a clean and conducive environment for the cellulose insulation installation. Once the space is ready, you can move on to the next step, which is mixing the cellulose insulation.
Mixing the Cellulose Insulation
Before you can start blowing in the cellulose insulation, you will need to properly mix the material to ensure a consistent and effective distribution. The mixing process is important to break up any clumps or compacted fibers and create a loose and fluffy insulation material. Here are the steps to follow when mixing the cellulose insulation:
- Read the manufacturer’s instructions: Begin by familiarizing yourself with the manufacturer’s recommendations for mixing the cellulose insulation. Different brands may have specific instructions or guidelines, so it’s important to follow them for optimal results.
- Set up the blower machine: Position the blower machine in a convenient location near the space you are insulating. Ensure that it is securely grounded and connected to a power source. Refer to the machine’s manual for specific setup instructions.
- Open the bags of cellulose insulation: If you are using compressed bags of cellulose insulation, use a utility knife to carefully cut open the bags. Be cautious to avoid ripping or tearing the bags, as this may cause the insulation material to spill or clump together.
- Load the cellulose insulation into the blower machine: Depending on the design of your blower machine, you may need to load the cellulose insulation into a hopper or directly into the machine. Follow the manufacturer’s instructions to ensure proper loading and avoid overfilling the machine.
- Turn on the blower machine: Once the cellulose insulation is loaded, turn on the blower machine. The machine will agitate and blow air into the insulation, loosening the fibers and creating a fluffy consistency.
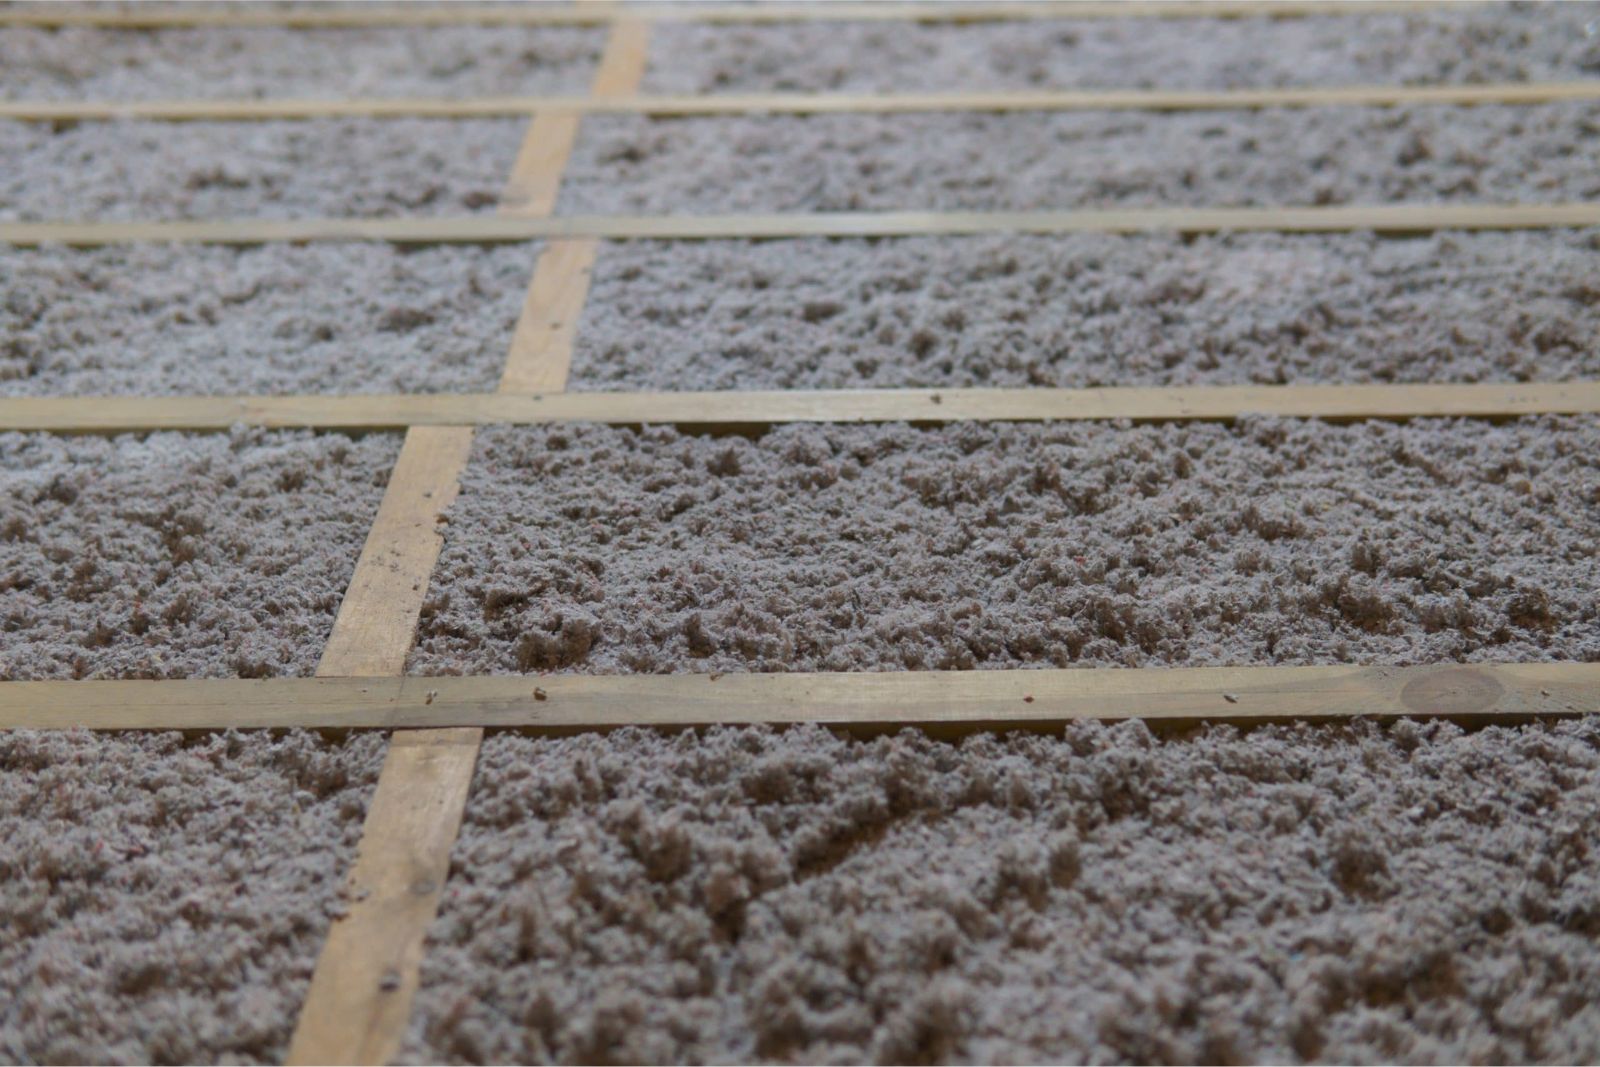
- Check the consistency of the insulation: As the machine is running, periodically check the consistency of the cellulose insulation. It should have a light and fluffy texture, with no clumps or compacted areas. If you notice any inconsistencies, adjust the machine settings or mix the insulation further to ensure a uniform texture.
- Monitor the flow rate: Pay attention to the flow rate of the cellulose insulation from the blower machine. It should be consistent and easily controllable. Adjust the machine settings as needed to achieve the desired flow rate and ensure an even distribution of insulation.
Properly mixing the cellulose insulation is essential for achieving optimal coverage and thermal performance. By following these steps and referring to the manufacturer’s instructions, you can ensure that the insulation material is well-prepared for the blowing process. Now that the cellulose insulation is ready, let’s move on to the next step: blowing in the insulation.
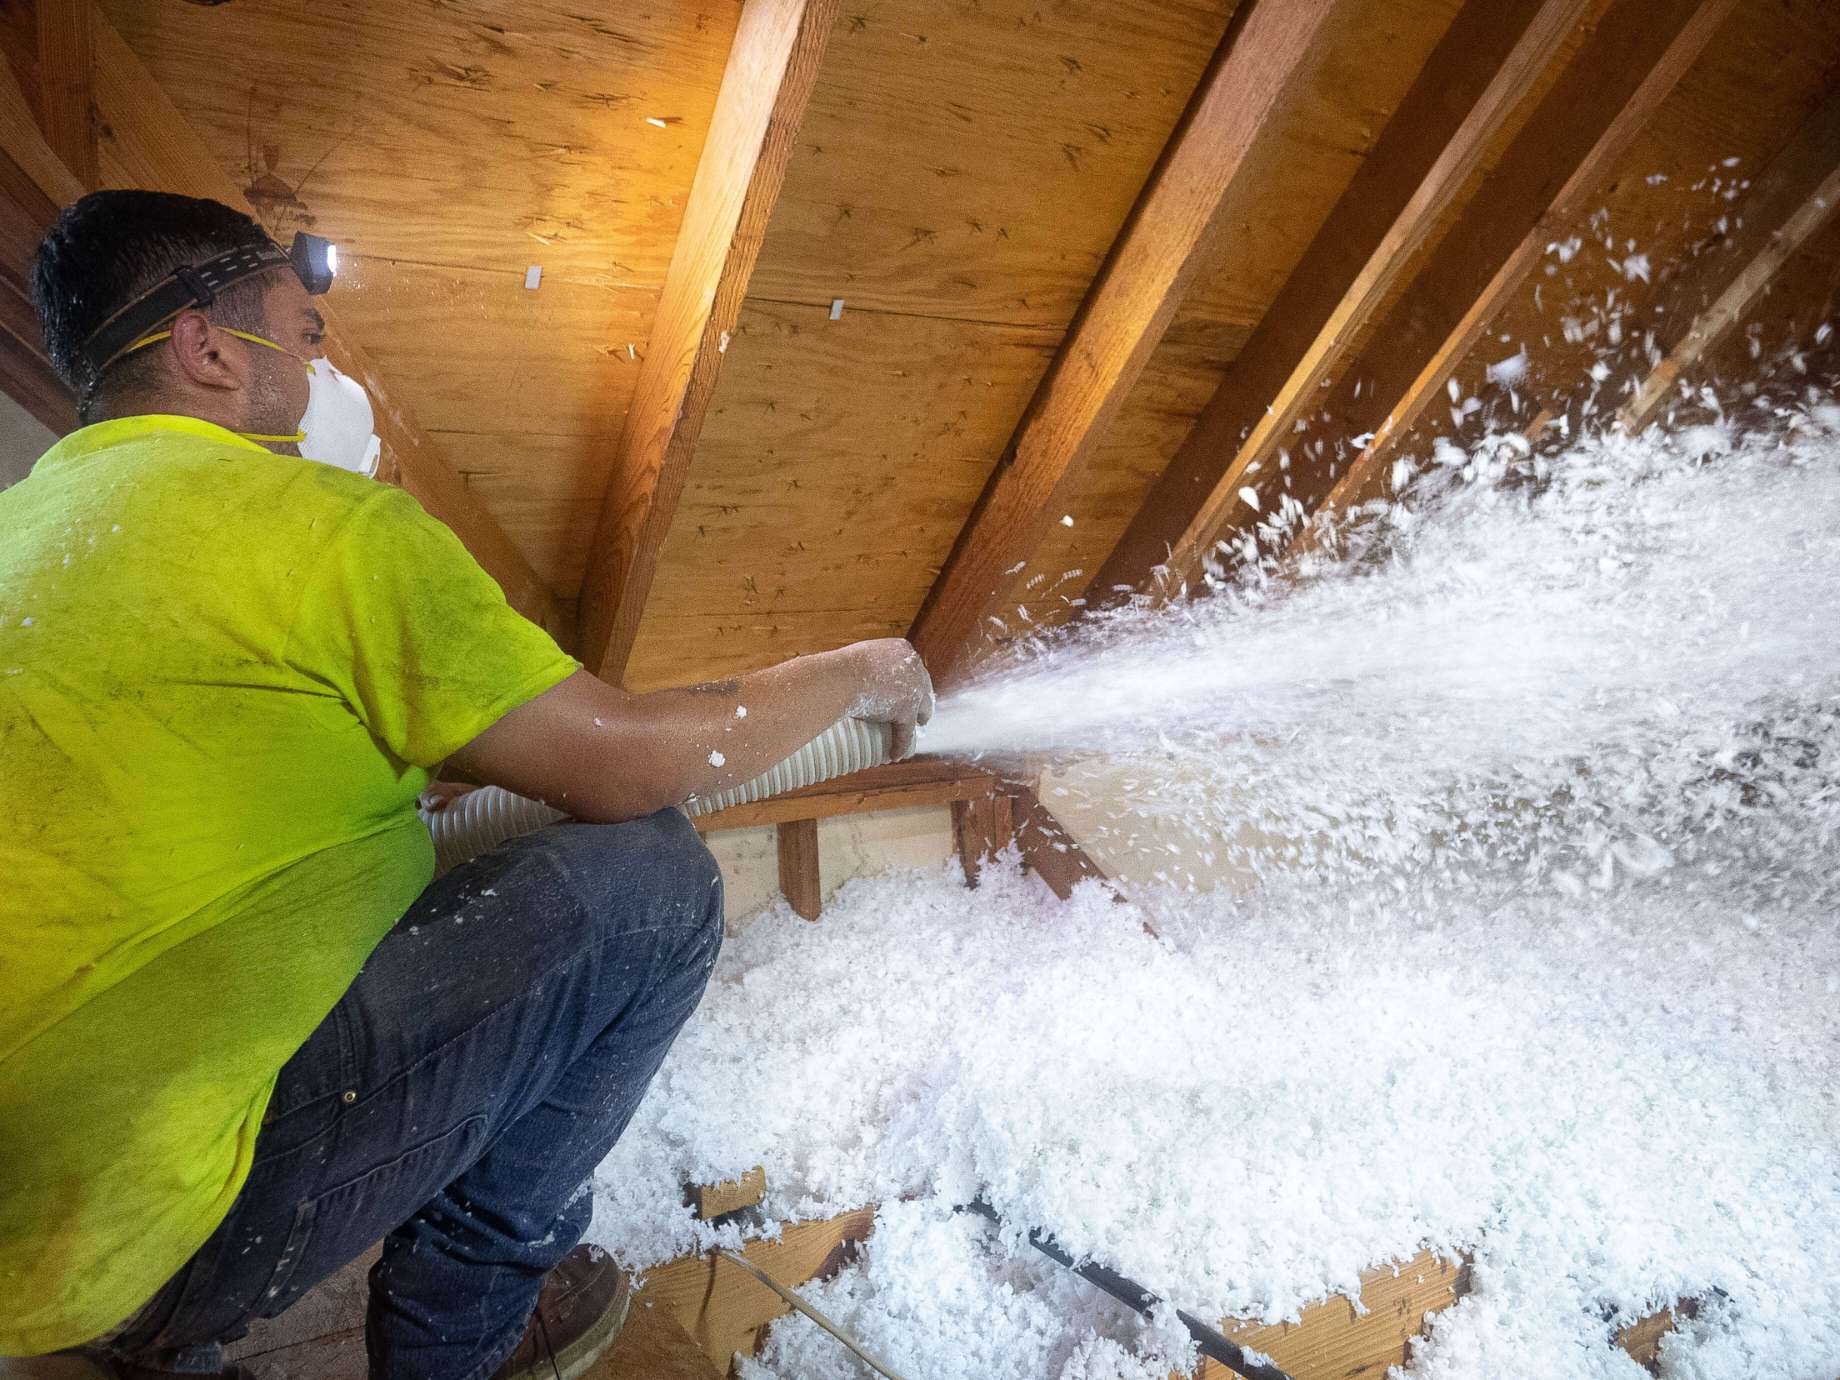
When blowing in cellulose insulation, make sure to wear a mask and goggles to protect yourself from inhaling the fibers. Keep the machine hopper filled to ensure a consistent application.
Read more: How To Do Blow-In Insulation
Blowing in the Cellulose Insulation
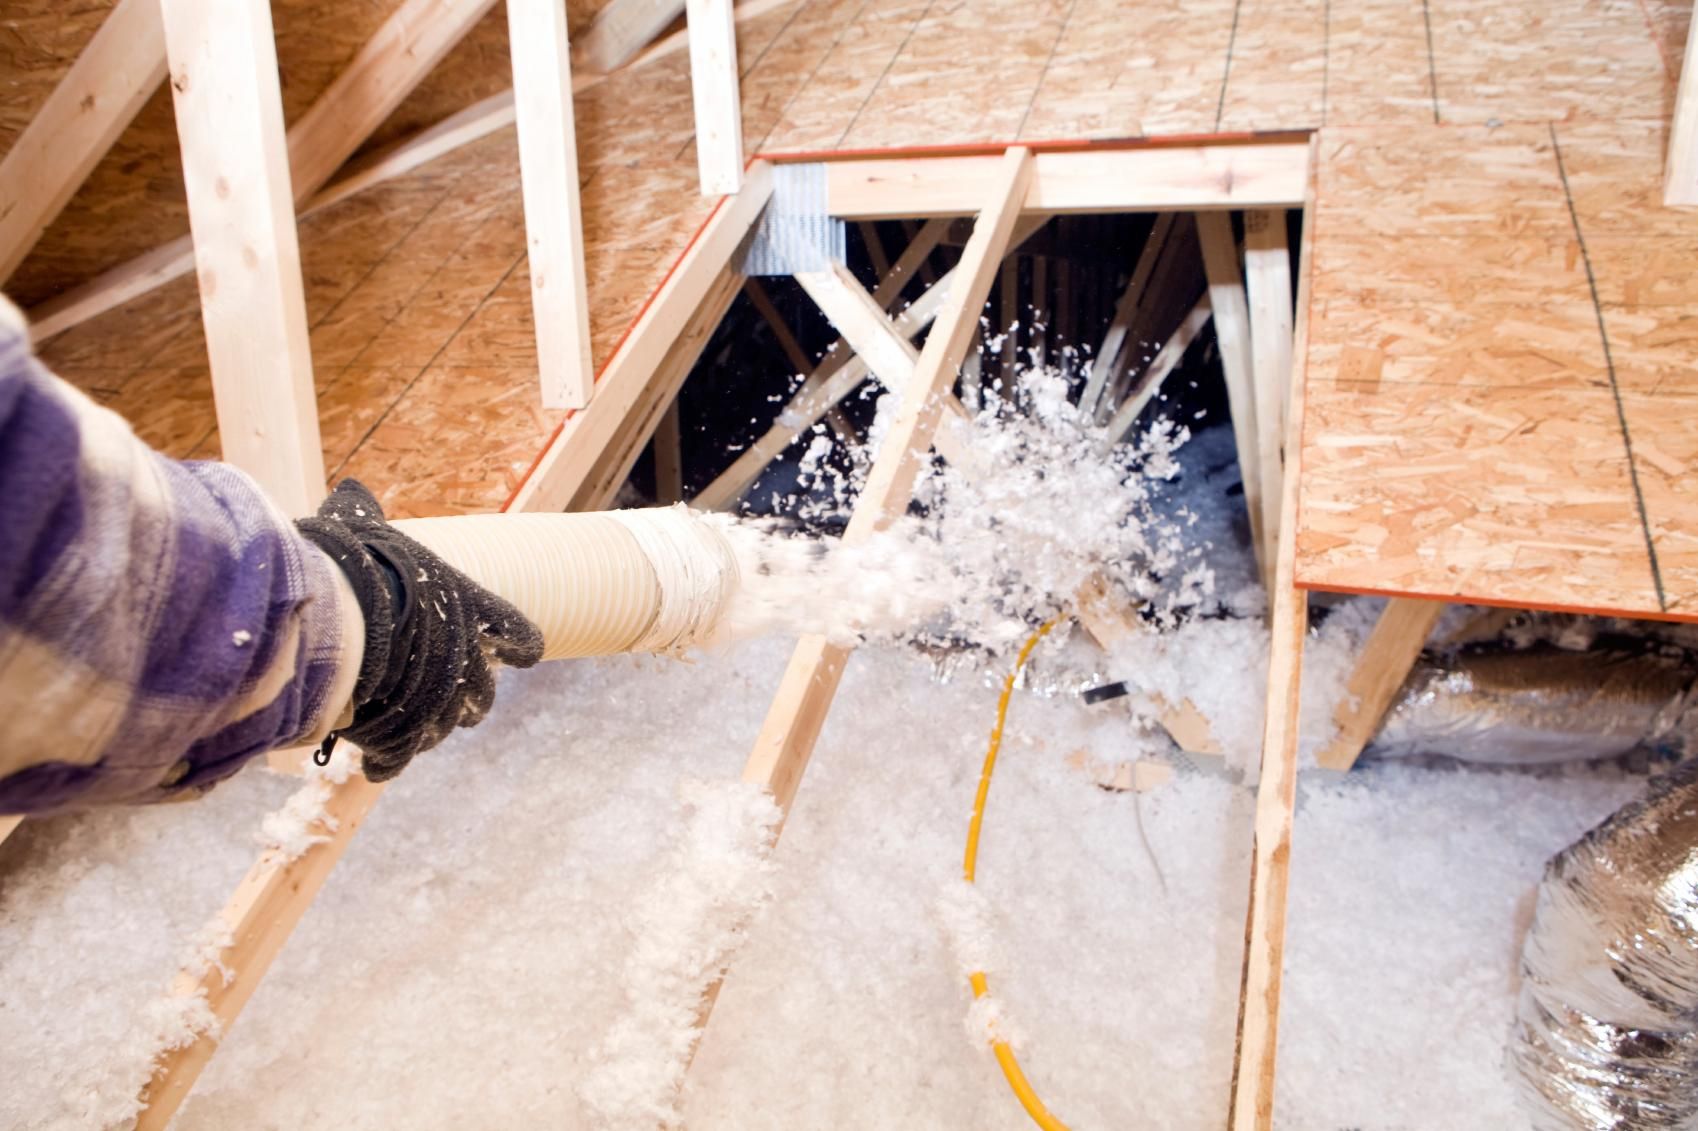
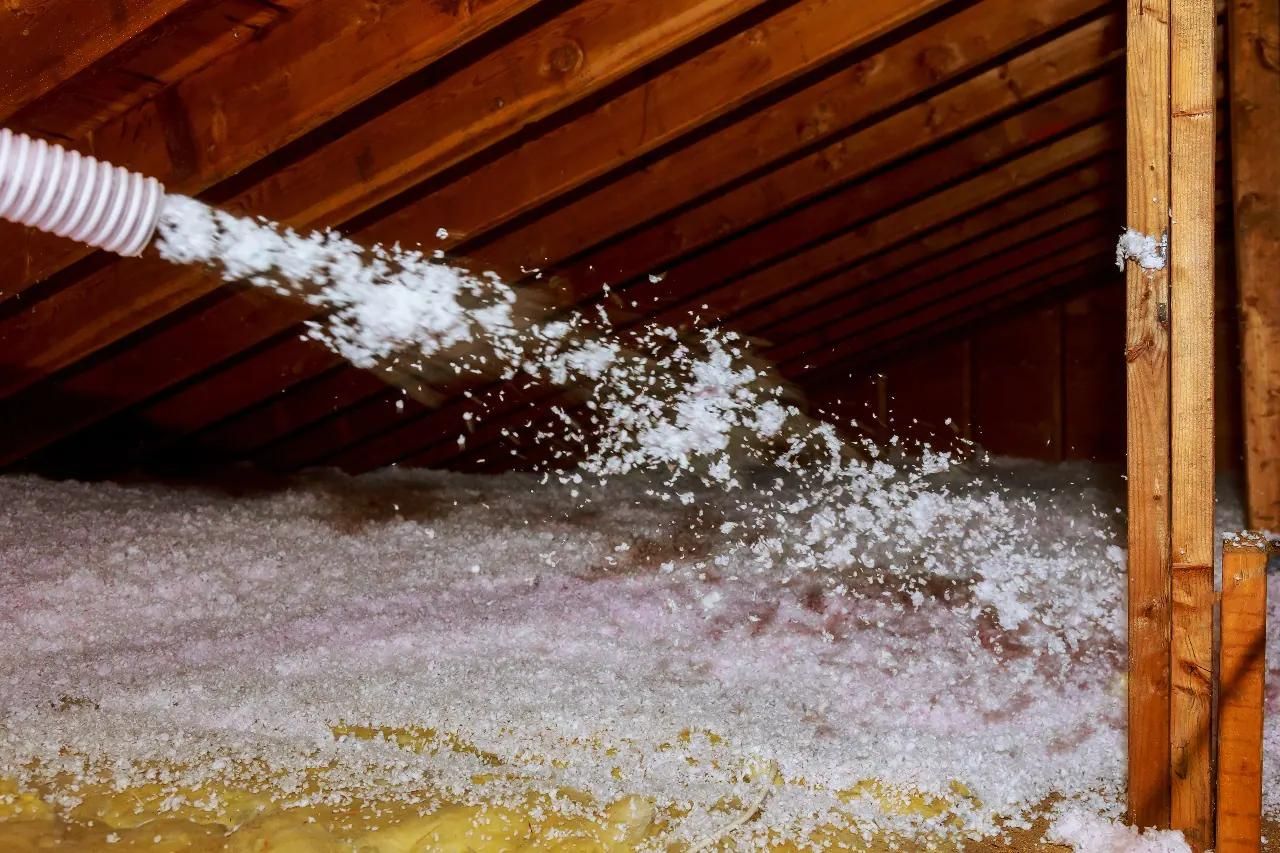
Now that you have prepared the space and mixed the cellulose insulation, it’s time to begin the process of blowing in the insulation. This step involves using the blower machine to distribute the cellulose insulation evenly throughout the target area. Follow these steps to ensure a successful and efficient installation:
- Start from the farthest corner: Begin the insulation process from the farthest corner of the space you are insulating. This will allow you to gradually work your way back towards the exit, ensuring complete coverage.
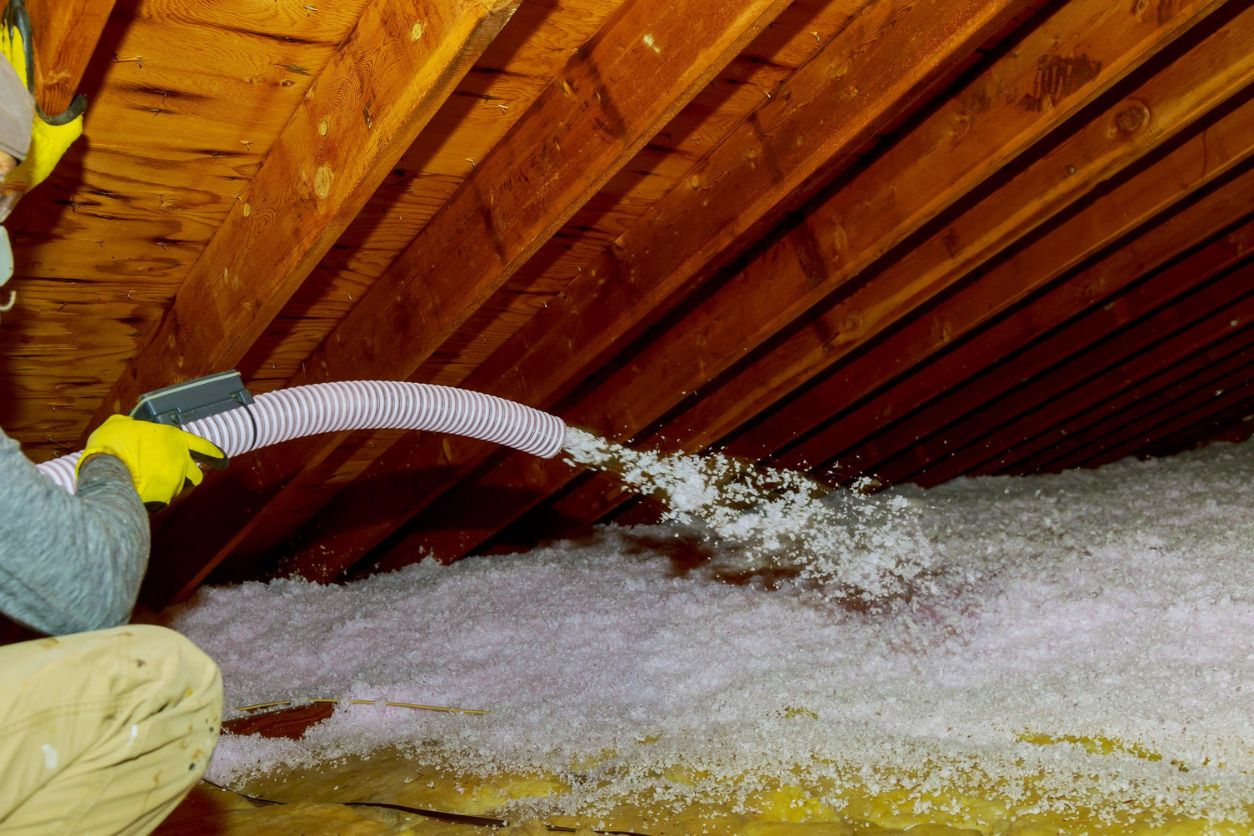
- Insert the insulation hose into the space: Connect the insulation hose to the blower machine and insert it into the area where you want to blow in the insulation. If you are insulating an attic, feed the hose through any access points and distribute it evenly in the attic space.
- Move the hose in a sweeping motion: As you start the blower machine, move the insulation hose in a sweeping motion to evenly distribute the cellulose insulation. Aim for a consistent layer of insulation, avoiding any thick or thin spots.
- Pay attention to corners and edges: Be thorough in covering all corners, edges, and hard-to-reach areas. These areas are often prone to heat loss or air leakage, so ensuring proper insulation coverage is crucial.
- Work in layers: To achieve the desired insulation thickness, work in layers. Once the first layer of cellulose insulation is blown in, go over the area again to add additional layers until the desired thickness is reached. Consult the manufacturer’s recommendations or your local building codes to determine the recommended insulation thickness for your climate.
- Maintain a steady flow rate: Throughout the insulation process, monitor the flow rate of the cellulose insulation from the blower machine. Avoid excessive or inconsistent flow rates, as this can result in uneven insulation and wasted material. Adjust the machine settings as needed to maintain a steady flow rate.
- Assess the coverage as you go: Continuously assess the coverage of the cellulose insulation as you progress. Look for any areas that may require additional insulation and ensure that the insulation is evenly distributed across the space.
- Work systematically: Maintain a systematic approach to ensure proper coverage and avoid missing any areas. Move methodically throughout the space, overlapping each pass to ensure a uniform layer of insulation.
- Take breaks as needed: Blowing in cellulose insulation can be physically demanding, especially if you are working in cramped spaces such as attics. Take breaks as needed to rest and ensure your safety and well-being during the process.
By following these steps and working carefully, you can effectively blow in the cellulose insulation and create a well-insulated space. Once you have completed this process, it’s time to move on to the final step of the insulation process: finishing touches.
Finishing the Insulation Process
After blowing in the cellulose insulation, there are a few final steps to complete the insulation process and ensure a professional finish. These finishing touches will help enhance the effectiveness and longevity of the insulation. Follow these steps to complete the insulation process:
- Inspect the insulation coverage: Take the time to inspect the entire area that you have insulated. Check for any gaps or areas that may require additional insulation. Use a flashlight to closely examine corners, edges, and hard-to-reach spots.
- Fill in gaps and low spots: If you notice any gaps or low spots in the insulation coverage, use additional cellulose insulation to fill them in. This will help ensure that there are no areas with inadequate insulation.
- Trim excess insulation: If there are any areas where the insulation extends beyond the desired coverage, use a utility knife to carefully trim and remove the excess insulation. This will create a neater and more professional appearance.
- Seal access points: If you had to create access points to install the insulation, such as attic hatches or crawl space openings, make sure to properly seal them. Use weatherstripping or insulation board to create an airtight seal, preventing any drafts or heat loss.
- Check for proper ventilation: Ensure that any ventilation systems, such as ridge vents or soffit vents, are not obstructed by the insulation. Proper ventilation is crucial for maintaining a healthy and efficient home environment.
- Reinstall insulation baffles: If you removed insulation baffles to access the space, remember to reinstall them. These baffles help maintain proper airflow and prevent the insulation from blocking soffit vents in an attic.
- Clean the work area: Before wrapping up the insulation process, take the time to clean up any debris or dust that may have accumulated during the installation. Remove drop cloths or tarps and ensure the area is left clean.
- Dispose of waste responsibly: Properly dispose of any waste materials, such as empty bags or excess insulation. Follow local regulations and guidelines for disposal to minimize environmental impact.
- Document insulation details: Keep a record of the insulation details, including the insulation type, thickness, and date of installation. This information can be valuable for future reference or if you ever need to provide proof of insulation for energy efficiency incentives or audits.
- Consider a post-insulation evaluation: After completing the insulation process, you may want to schedule a post-insulation evaluation or energy audit. This can help assess the effectiveness of the insulation and identify any areas that may require additional attention or upgrades.
By following these finishing touches, you can ensure that the insulation process is completed thoroughly and professionally. Your home will be well-insulated, providing improved energy efficiency and comfort for years to come.
Cleaning Up
Once you have finished the insulation process and the finishing touches, it’s important to clean up the work area properly. Follow these steps to ensure a thorough cleanup:
- Collect loose debris: Gather any loose insulation or debris that may have accumulated during the insulation process. Use a broom or vacuum cleaner to carefully collect and remove the debris.
- Dispose of waste: Dispose of any waste materials or empty bags according to local regulations. Insulation material may be recyclable, so consider recycling options in your area.
- Clean tools and equipment: Clean any tools and equipment you used during the insulation process. Remove any insulation residue or dust particles and store the tools properly for future use or rental return.
- Vacuum or sweep the area: Use a vacuum cleaner or broom to clean the area thoroughly, including the floors, walls, and any surfaces that may have collected insulation particles or dust.
- Inspect for leftover debris: After cleaning, inspect the area again to ensure that no insulation debris or dust remains. Pay attention to corners, crevices, and hard-to-reach areas where particles may accumulate.
- Dispose of cleaning materials responsibly: Dispose of any cleaning materials, such as vacuum bags or broom bristles, responsibly, following local waste management guidelines.
- Restore the space: Once the space is clean, return any furniture, belongings, or fixtures that were temporarily moved or protected during the insulation process.
By following these cleanup steps, you can leave the work area in a clean and tidy condition, ready to be enjoyed and appreciated. Congratulations, you have successfully completed the insulation process and taken an important step toward improving energy efficiency and comfort in your home!
Cleaning Up
After completing the insulation process and the finishing touches, it’s important to take the time to clean up the work area properly. Cleaning up ensures that your home is left in a tidy and safe condition. Follow these steps to effectively clean up after blow-in cellulose insulation:
- Collect loose debris: Use a broom, vacuum cleaner, or even a shop vac to collect any loose insulation or debris that may have accumulated during the insulation process. Pay attention to the floors, walls, and surrounding surfaces.
- Dispose of waste material: Gather any waste materials, such as empty bags or excess insulation, and dispose of them according to your local waste management guidelines. Insulation material can usually be recycled, so consider recycling options in your area.
- Clean tools and equipment: Thoroughly clean any tools and equipment used during the insulation process. Remove any insulation residue or dust particles and store the tools properly for future use or rental return.
- Vacuum or sweep the area: Use a vacuum cleaner or broom to clean the area thoroughly, including the floors, walls, and any surfaces that may have collected insulation particles or dust. Pay attention to corners, crevices, and hard-to-reach areas where particles may accumulate.
- Inspect for leftover debris: After cleaning, carefully inspect the area again to ensure that no insulation debris or dust remains. Check corners, light fixtures, vents, and other areas that may have accumulated particles during the insulation process.
- Dispose of cleaning materials responsibly: When disposing of cleaning materials, follow your local waste management guidelines. Properly dispose of vacuum bags, clean the vacuum if necessary, and discard broom bristles or any other cleaning materials used during the cleanup.
- Restore the space: Return any furniture, belongings, or fixtures that were temporarily moved or protected during the insulation process. Ensure that everything is back in its rightful place and make any necessary adjustments to restore the space to its previous state.
- Inspect for any damage: Once the cleanup is complete, inspect the area for any signs of damage. Check for any marks or dents on walls, furniture, or other surfaces that may have occurred during the insulation process, and address them as needed.
- Document the insulation process: Keep a record of the insulation details, including the type of insulation used, the thickness, and the date of installation. This documentation can serve as a reference for future maintenance or inspections.
By following these cleanup steps, you can leave the work area clean, organized, and free from any leftover debris. Cleaning up after blow-in cellulose insulation is essential for maintaining a safe and comfortable living environment. With the completion of the cleanup, you can now enjoy the benefits of your newly insulated space.
Read more: How To Blow Insulation In Walls
Conclusion
Congratulations on completing the process of blowing in cellulose insulation! By following the steps outlined in this guide, you have taken a significant step towards improving the energy efficiency and comfort of your home. Cellulose insulation is a cost-effective and eco-friendly option that provides excellent thermal performance when installed correctly.
We started by emphasizing the importance of prioritizing safety throughout the insulation process. Wearing appropriate protective gear, working in well-ventilated areas, and following manufacturer guidelines are crucial for your well-being.
Next, we discussed the equipment and materials needed for the insulation process. From cellulose insulation and a blower machine to safety gear and measuring tape, having the right tools is essential for a successful installation.
We then moved on to preparing the space, which involved cleaning and sealing areas to ensure optimal insulation performance. Attention to detail during the preparation stage helps create a clean and suitable environment for the blowing process.
With the space ready, we delved into the steps for mixing and blowing in the cellulose insulation. Proper mixing ensures a consistent and fluffy material, while the blowing process distributes the insulation evenly throughout the target area. Paying attention to coverage, corners, and working in layers ensures efficient insulation results.
After completing the insulation, we covered the crucial steps of finishing the process. Inspecting the coverage, trimming excess insulation, sealing access points, and restoring proper ventilation all contribute to a professional finish and enhanced insulation performance.
Finally, we discussed the importance of cleaning up after the insulation process. Collecting loose debris, disposing of waste properly, cleaning tools, and restoring the space ensure a clean and safe environment for you and your family.
By following this comprehensive guide, you have successfully completed the process of blowing in cellulose insulation. Properly insulating your home offers many benefits, including increased energy efficiency, lower utility bills, and improved comfort. Enjoy the benefits of your well-insulated space and take pride in making a positive impact on your home’s efficiency and sustainability.
Remember, if you ever have any questions or concerns, consult with professionals or experts in the field. Regular maintenance and periodic inspections will help ensure that your insulation continues to perform optimally for years to come.
Thank you for embarking on this insulation journey with us. Wishing you a well-insulated and comfortable home!
Frequently Asked Questions about How To Blow-In Cellulose Insulation
Was this page helpful?
At Storables.com, we guarantee accurate and reliable information. Our content, validated by Expert Board Contributors, is crafted following stringent Editorial Policies. We're committed to providing you with well-researched, expert-backed insights for all your informational needs.





0 thoughts on “How To Blow-In Cellulose Insulation”