Articles
How To Build A Deck Porch
Modified: October 21, 2024
Learn how to build a deck porch with our informative articles. Discover tips and techniques to create the perfect outdoor space for your home.
(Many of the links in this article redirect to a specific reviewed product. Your purchase of these products through affiliate links helps to generate commission for Storables.com, at no extra cost. Learn more)
Introduction
Welcome to the world of deck porch construction! Whether you’re looking to enhance the outdoor living space of your home or create a cozy spot to relax and enjoy the fresh air, building a deck porch is a fantastic project to undertake. Not only does it add value to your property, but it also provides a gathering place for family and friends to create lasting memories.
However, before you jump right into construction, it’s important to have a solid plan in place. This article will guide you through the step-by-step process of building a deck porch, providing valuable insights and tips to help you create a beautiful and functional space.
From the initial planning and design phase to obtaining permits and permissions, gathering materials and tools, preparing the site, constructing the deck frame, installing decking materials, building stairs and railings, and adding those finishing touches, we’ve got you covered.
So, grab your beverage of choice, put on your work gloves, and let’s explore the exciting world of deck porch construction!
Key Takeaways:
- Proper planning, obtaining permits, and gathering materials are crucial for building a structurally sound and visually appealing deck porch. Attention to detail and adherence to safety guidelines ensure a successful construction process.
- Adding finishing touches such as furniture, shade structures, lighting, and landscaping transforms a deck porch into a welcoming outdoor oasis. Personalizing the space creates a haven for relaxation and enjoyment.
Read more: How To Build A Porch Deck With Roof
Planning and Design
Before you start swinging a hammer, it’s crucial to carefully plan and design your deck porch project. This phase lays the foundation for a successful construction process and ensures that your deck porch meets your needs and complements your home’s architecture.
First, consider the purpose and function of your deck porch. Will it primarily be used for entertaining guests, hosting family gatherings, or simply as a private retreat? Understanding your desired use will help determine the size, layout, and features of your deck porch.
Next, take a close look at your home’s existing outdoor space. Consider the style and design elements of your home’s exterior and how your deck porch can seamlessly integrate with the overall aesthetic. Keeping the architectural integrity in mind will create a cohesive and visually pleasing result.
Additionally, think about the layout and orientation of your deck porch. Take into account factors such as sunlight exposure, wind direction, and privacy considerations. Depending on your location, you may want to position your deck porch to take advantage of stunning views or provide shade during hot summer afternoons.
In terms of size, be mindful of your available space and your budget. Measure your outdoor area to determine the ideal dimensions for your deck porch. Remember to leave sufficient room for furniture, walkways, and any additional features you plan to include, such as a grill or outdoor kitchen.
When it comes to design features, the options are endless. You may want to incorporate built-in seating, a pergola or awning for shade, or even a fire pit for cozy evenings outdoors. Sketch out your ideas or work with a professional designer to bring your vision to life.
Throughout the planning and design phase, remember to consider accessibility and safety. Ensure there are proper entry and exit points, and plan for features such as handrails and lighting to promote a secure environment for all users.
By carefully planning and designing your deck porch, you’ll set yourself up for a successful and rewarding construction process. So, take your time, explore different options, and create a space that you and your family will enjoy for years to come.
Obtaining Permits and Permissions
Before you begin construction on your deck porch, it’s essential to obtain the necessary permits and permissions from your local building authority. These permits ensure that your deck porch complies with local building codes and regulations, ensuring its structural integrity and safety.
Start by researching the specific requirements and regulations for deck porch construction in your area. Visit your local building department or check their website for information on the necessary permits, application processes, and any associated fees.
Typically, you will need to submit a detailed deck porch construction plan, including the dimensions, materials, and structural details. This plan will be reviewed by the building department to ensure compliance with local regulations, such as setback requirements, height restrictions, and load-bearing specifications.
In some cases, you may also need to provide additional documentation, such as property surveys or engineer’s stamps, depending on the complexity of your deck porch design.
Once you’ve gathered all the required paperwork, submit your permit application to the building department. The processing time may vary, but it’s important to allow for sufficient time to receive approval before starting construction.
While waiting for your permit, take the opportunity to review any additional guidelines or requirements related to deck porch construction. Ensure you are familiar with any safety regulations, such as proper railings, stair dimensions, or electrical wiring installations.
Once you’ve obtained your permit, display it prominently at the construction site as required by your local building authority. This will help avoid any potential issues during inspections and demonstrate that you’re in compliance with the law.
Throughout the construction process, you may be subject to inspections from the building department to ensure that the work is being done correctly and safely. Cooperate with the inspectors and address any necessary corrections or adjustments promptly.
Remember, obtaining the appropriate permits and permissions for your deck porch construction is not just a legal requirement; it also ensures that your deck porch is built to the highest standard of safety and quality. So, take the time to navigate the permit process properly, and you’ll have peace of mind knowing that your deck porch is in compliance with local regulations.
Gathering Materials and Tools
Now that you have your plan in place and the necessary permits in hand, it’s time to gather the materials and tools required for building your deck porch. Proper preparation and organization in this phase will save you time and ensure a smooth construction process.
Start by compiling a comprehensive list of all the materials needed for your deck porch. This may include lumber, decking boards, fasteners, concrete, gravel, and any additional features or accessories you plan to incorporate, such as lighting or railing systems. Visit your local home improvement store or lumberyard to gather all the necessary supplies.
When selecting materials, consider factors such as durability, maintenance requirements, and aesthetic appeal. Choose high-quality lumber suitable for outdoor use, such as pressure-treated or composite decking boards. Opt for fasteners that are resistant to corrosion and compatible with your chosen materials.
Along with the materials, you’ll need to gather an assortment of tools to facilitate the construction process. Basic tools such as a hammer, tape measure, level, and saw will be essential. Depending on the complexity of your design, you may also need power tools like a drill, circular saw, and reciprocating saw.
It’s important to have the right tools on hand to make the construction process efficient and accurate. If you don’t own all the necessary tools, consider borrowing or renting them from a local hardware store or asking friends and family for help.
Additionally, invest in personal protective equipment (PPE) for your safety. This may include safety goggles, gloves, a hard hat, and sturdy work boots. Protecting yourself during construction is vital to prevent accidents and ensure a successful and enjoyable building experience.
Once you have gathered all the materials and tools, organize them in a designated work area. This will help streamline the construction process, allowing you to easily access what you need when you need it.
Before starting construction, take some time to familiarize yourself with the materials and tools. Read the manufacturer’s instructions for proper usage and maintain a clean and organized workspace throughout the build.
Gathering the materials and tools ahead of time will save you numerous trips to the store and ensure a smooth construction process. So, gather your supplies, sharpen your tools, and get ready to bring your deck porch to life!
Preparing the Site
With your materials and tools in hand, it’s time to prepare the site for the construction of your deck porch. Proper site preparation is crucial for ensuring a stable and long-lasting structure.
Start by clearing the area where your deck porch will be built. Remove any vegetation, rocks, or debris from the site. This will provide a clean and level surface for construction.
Next, locate and mark any existing underground utilities, such as water, electrical, or gas lines. It’s important to know their location to avoid any accidental damage during construction. Contact your local utility companies if you’re unsure about the location of these utilities.
Once the area is cleared, measure the dimensions of your deck porch and mark the corners using stakes and string. This will serve as a guide for the layout of your deck porch and ensure accuracy during construction.
Take a closer look at the ground beneath your deck porch site. If the soil is soft or prone to erosion, it may be necessary to excavate and install a layer of gravel or compacted soil to create a stable foundation.
If your deck porch will be attached to your home, inspect the exterior wall for any signs of damage or rot. Repair any issues before proceeding with the construction to prevent further problems down the line.
Consider installing a weed barrier or landscape fabric to prevent weed growth underneath your deck porch. This will reduce maintenance and keep the area looking clean and well-maintained.
Depending on your local climate and ground conditions, you may need to install footings or support posts to ensure the structural integrity of your deck porch. Consult with a professional or local building codes to determine the appropriate foundation for your specific project.
Lastly, ensure proper drainage for your deck porch by creating a slight slope away from your home. This will prevent water from pooling and causing damage to your deck porch and your home’s foundation.
By taking the time to properly prepare the site, you’ll lay the groundwork for a stable and durable deck porch. So, roll up your sleeves, grab your tools, and get ready to move on to the exciting construction phase!
Read more: How To Build A Screened-In Porch On A Deck
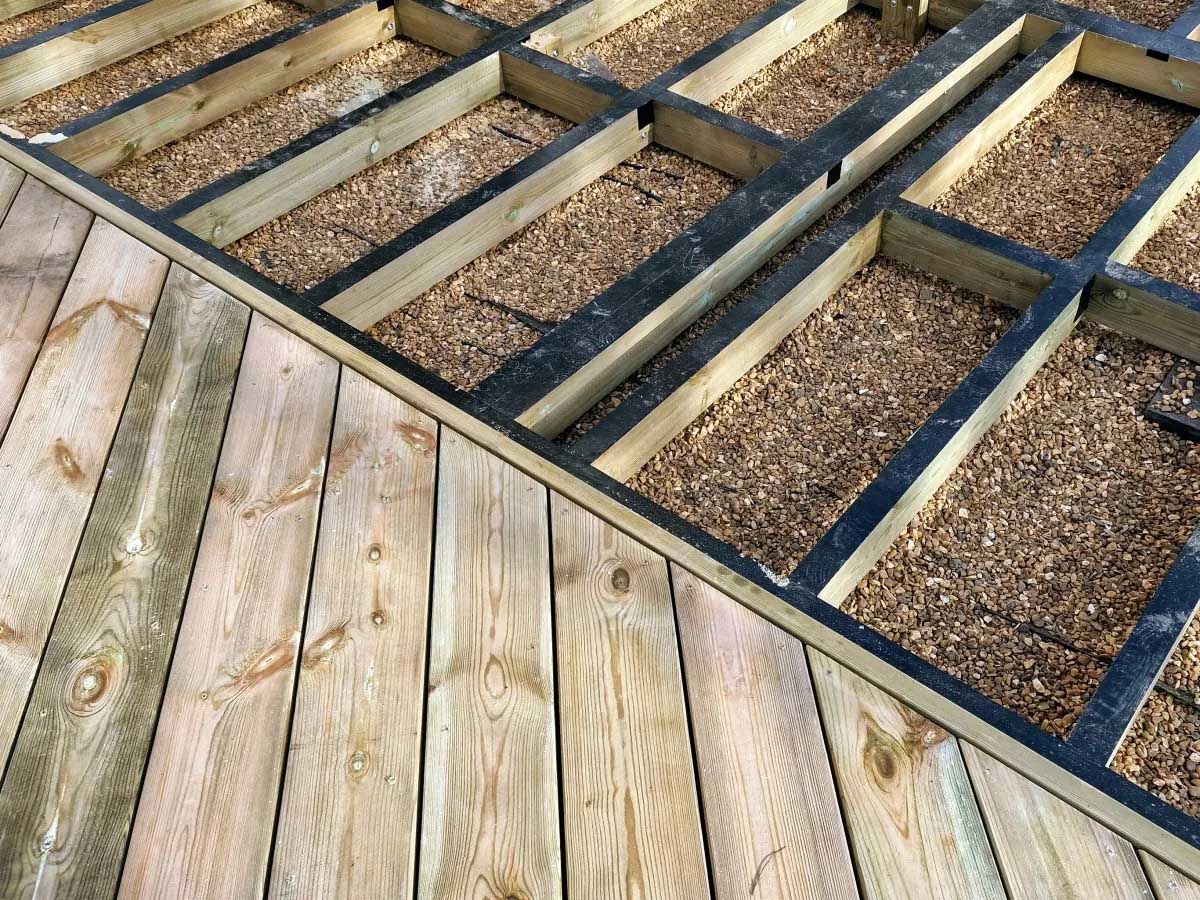
Laying the Foundation
With the site prepared, it’s time to lay the foundation for your deck porch. The foundation is a critical component that supports the weight of the structure and ensures its stability and longevity.
The specific method for laying the foundation will depend on factors such as the soil type, local building codes, and the design of your deck porch. Here are some common approaches to consider:
1. Concrete Footings: This method involves digging holes at specified intervals and pouring concrete into them. The size and depth of the footings will depend on the size and height of your deck porch. Use a post hole digger or a rented auger to excavate the holes and consult local building codes for required dimensions and reinforcement.
2. Deck Blocks: Deck blocks, also known as precast pier blocks, provide a quicker and less invasive alternative to concrete footings. These blocks are placed directly on the ground, and the deck’s support posts or beams are positioned on top of them. Ensure that the blocks are level and properly spaced to support the weight of your deck porch.
3. Sonotubes: Sonotubes are cardboard cylindrical forms that are used to create concrete footings. They are ideal for situations where you need deep footings, such as in regions with frost heave concerns. Dig holes according to the required dimensions, insert the sonotubes, and pour concrete. The cardboard form will stay in place as the concrete cures.
Regardless of the method you choose, it’s important to ensure that the footings or blocks are level and properly aligned. Use a level and string lines to maintain accuracy during installation, and brace the support posts while the concrete cures to prevent shifting.
Once the footings or blocks are in place, it’s time to install the support posts and beams. These structural elements will bear the weight of your deck porch, so it’s crucial to use high-quality, pressure-treated lumber that is suitable for ground contact.
Secure the support posts to the footings or blocks using post anchors or brackets. Make sure they are plumb and level, and check for any movement or instability. Attach the beams to the posts using appropriate fasteners, ensuring they are level and properly aligned.
Throughout the process, double-check measurements and consult your deck porch design plan to ensure accuracy. Taking the time to properly lay the foundation will provide a solid base for the rest of the construction process.
With the foundation in place, you’re ready to move on to the next step: constructing the deck frame. So, grab your tools and continue building your dream deck porch!
When building a deck porch, make sure to use pressure-treated lumber for the frame to prevent rot and decay. This will ensure the longevity of your porch.
Constructing the Deck Frame
With the foundation set, it’s time to move on to constructing the deck frame. The frame serves as the structural skeleton of your deck porch, supporting the decking materials and providing stability and durability.
Start by attaching the joists to the support beams of your deck porch. Joists are horizontal framing members that run perpendicular to the support beams and provide the framework for the decking boards.
Measure and cut the joists to the desired length, ensuring that they are evenly spaced and properly aligned. Use joist hangers or framing brackets to attach them securely to the beams. It’s important to follow the manufacturer’s instructions for proper installation and spacing.
Verify that the joists are level and make any necessary adjustments before proceeding. Use a level or a string line to ensure that the joists are uniformly positioned.
If your deck porch design includes additional features such as stairs or landings, this is the time to construct them. Follow the appropriate building codes and guidelines to ensure the safety and stability of these elements.
Once the joists and any additional features are in place, it’s time to install the ledger board. The ledger board attaches the deck porch structure to the side of your home. Make sure to use pressure-treated lumber and appropriate fasteners to secure the ledger board firmly to the exterior wall.
As you progress with the construction, periodically check the level of the deck frame to avoid any potential issues. Adjust as needed to ensure a level and sturdy base for your deck porch.
Consider adding additional support posts or piers along the perimeter of your deck porch, especially for larger structures or areas with heavy loads. These additional supports will enhance the strength and stability of your deck frame.
During the construction process, it’s important to keep safety in mind. Use appropriate safety equipment such as gloves, safety glasses, and knee pads. Secure the frame components properly using the recommended fasteners, and double-check for any loose or unstable connections.
Constructing the deck frame is a major milestone in your deck porch project. Take your time, follow the plans and guidelines, and ensure that the frame is solid and level.
Once the frame is complete, you’re one step closer to enjoying your outdoor oasis. In the next phase, we’ll explore installing the decking materials. So, keep up the good work, and soon you’ll be relaxing on your beautiful deck porch!
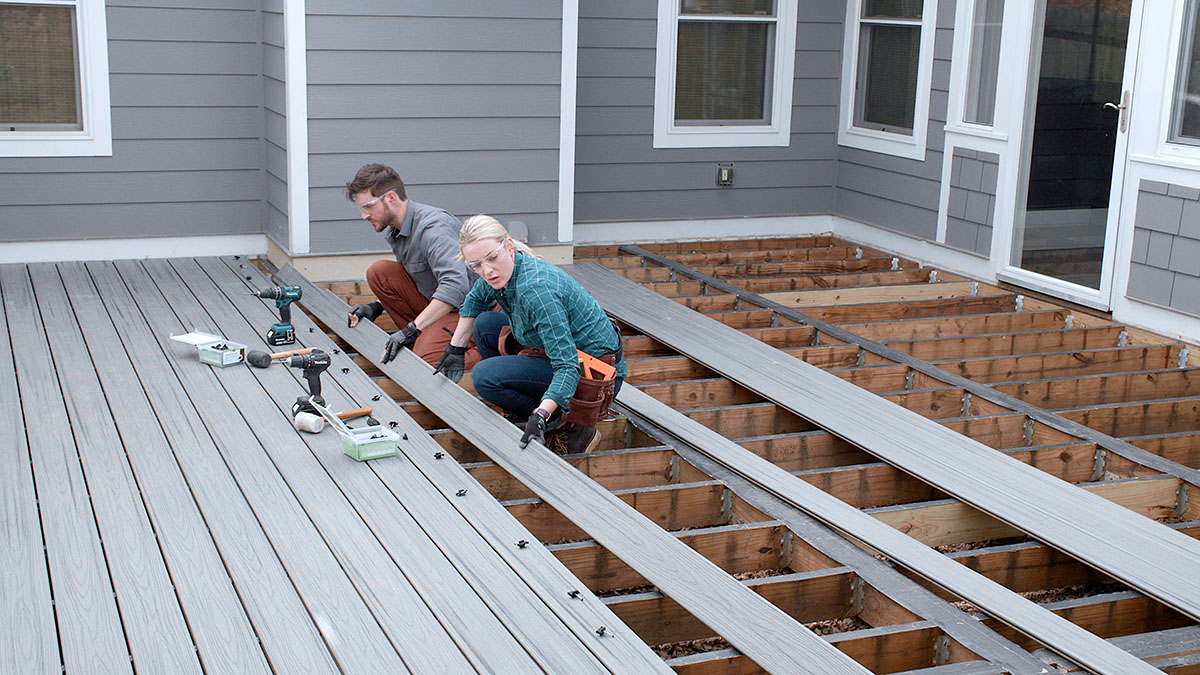
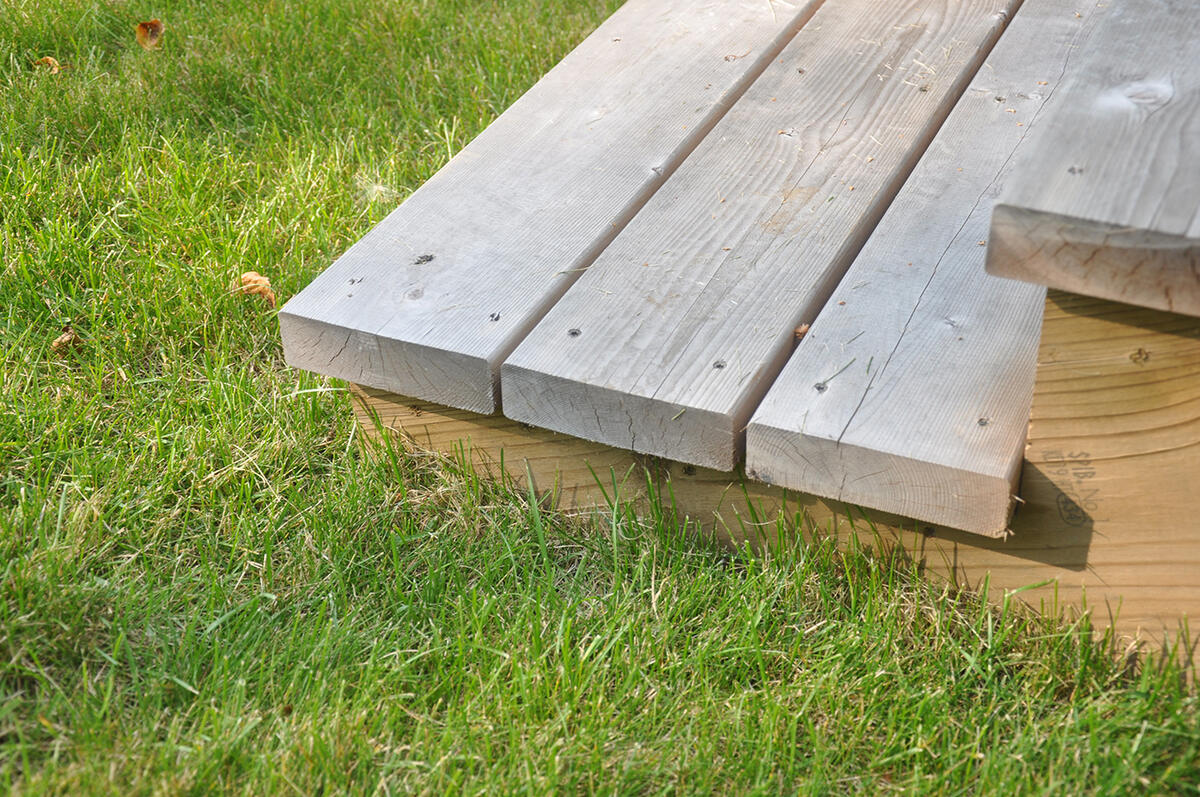
Installing Decking Materials
With the deck frame completed, it’s time to move on to one of the most exciting phases of building your deck porch: installing the decking materials. The decking is the visible surface of your deck porch and plays a crucial role in its appearance, functionality, and overall aesthetic appeal.
Before you begin installing the decking boards, carefully consider the material you’ve chosen. Popular options include pressure-treated wood, cedar, composite, or PVC decking. Each option has its own unique characteristics, including durability, maintenance requirements, and aesthetics. Choose the material that best suits your preferences, budget, and desired look.
Now, let’s dive into the process of installing the decking:
1. Start by laying the first decking board along the outer edge of the deck frame. Ensure that it is properly aligned with the frame and flush with the edges.
2. Secure the first board in place using appropriate fasteners, such as deck screws or hidden clips depending on the chosen material. Follow the manufacturer’s instructions to ensure correct installation.
3. Continue installing the remaining boards, working your way towards the center of the deck porch. Leave a small gap, around 1/8-inch, between each board to allow for expansion and contraction due to temperature and moisture changes.
4. Use a chalk line or a straight edge to ensure that the boards are perfectly aligned. This will create a clean and professional-looking deck surface.
5. If your decking material requires pre-drilling, be sure to do so to prevent splitting. Use a drill bit that is slightly smaller than the diameter of the screws or clips you’re using.
6. Depending on the design and size of your deck porch, you may need to cut some decking boards to fit along the edges or around obstacles. Use a circular saw or jigsaw to make these cuts and ensure accuracy.
7. As you progress with the installation, periodically check for any boards that may have shifted or become loose. Tighten any screws or replace any damaged or warped boards to maintain a sturdy and level surface.
Remember, proper maintenance is key to extending the lifespan of your decking materials. Follow the manufacturer’s guidelines for cleaning, sealing, and protecting the material to preserve its appearance and durability.
Installing the decking materials is a gratifying part of the construction process, as you see your deck porch’s beautiful surface take shape. So, take your time, pay attention to detail, and enjoy the transformative phase of your deck porch project!
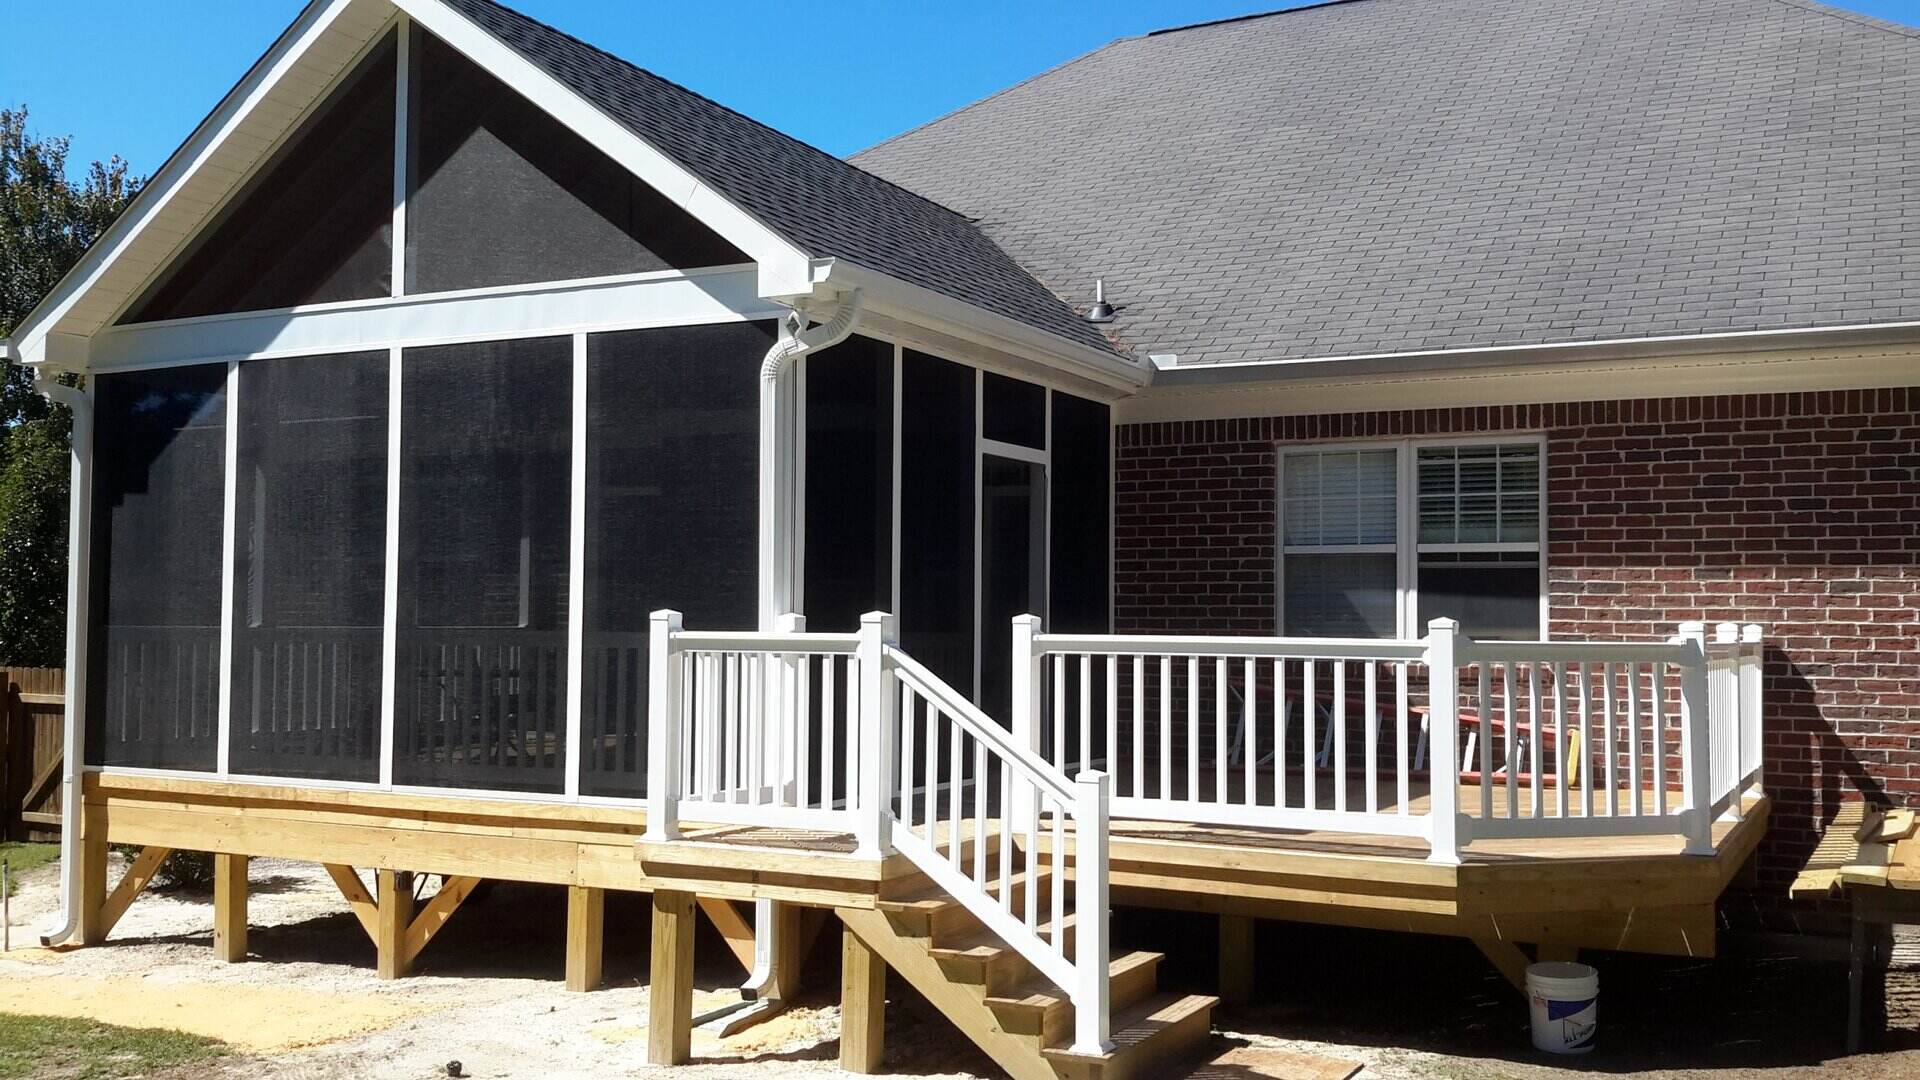
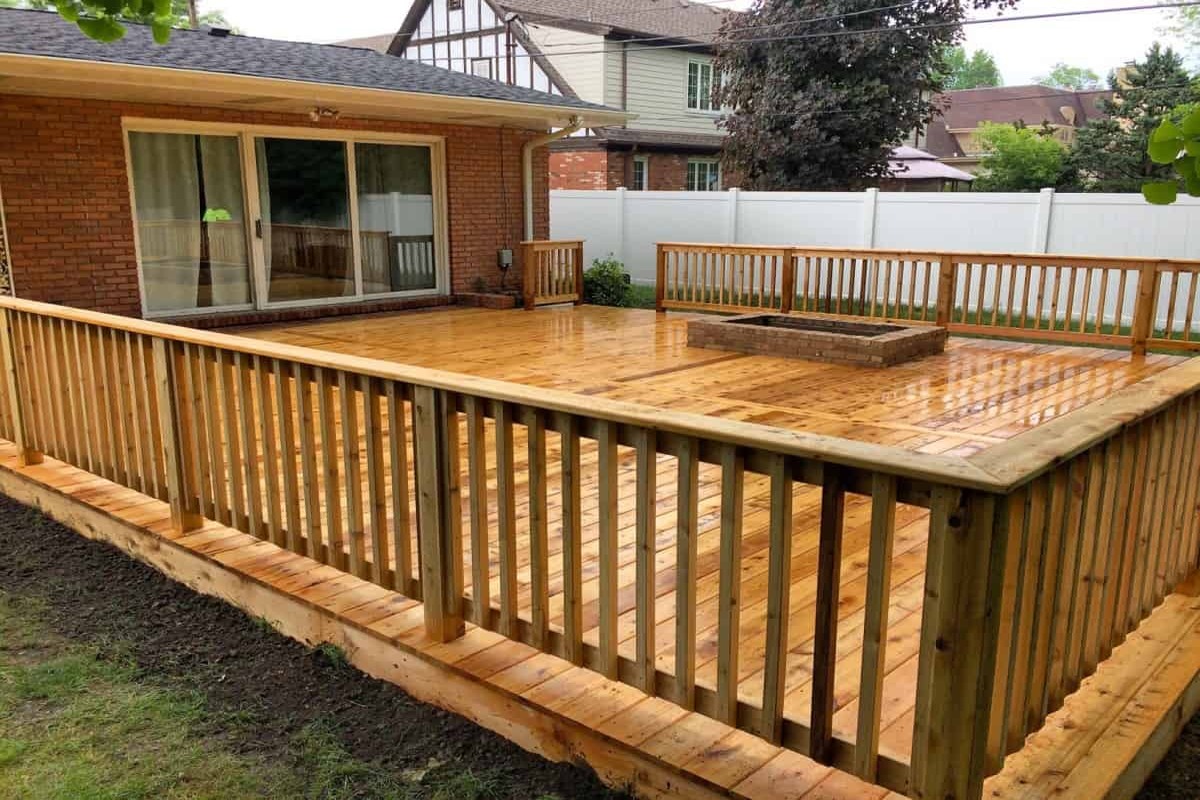
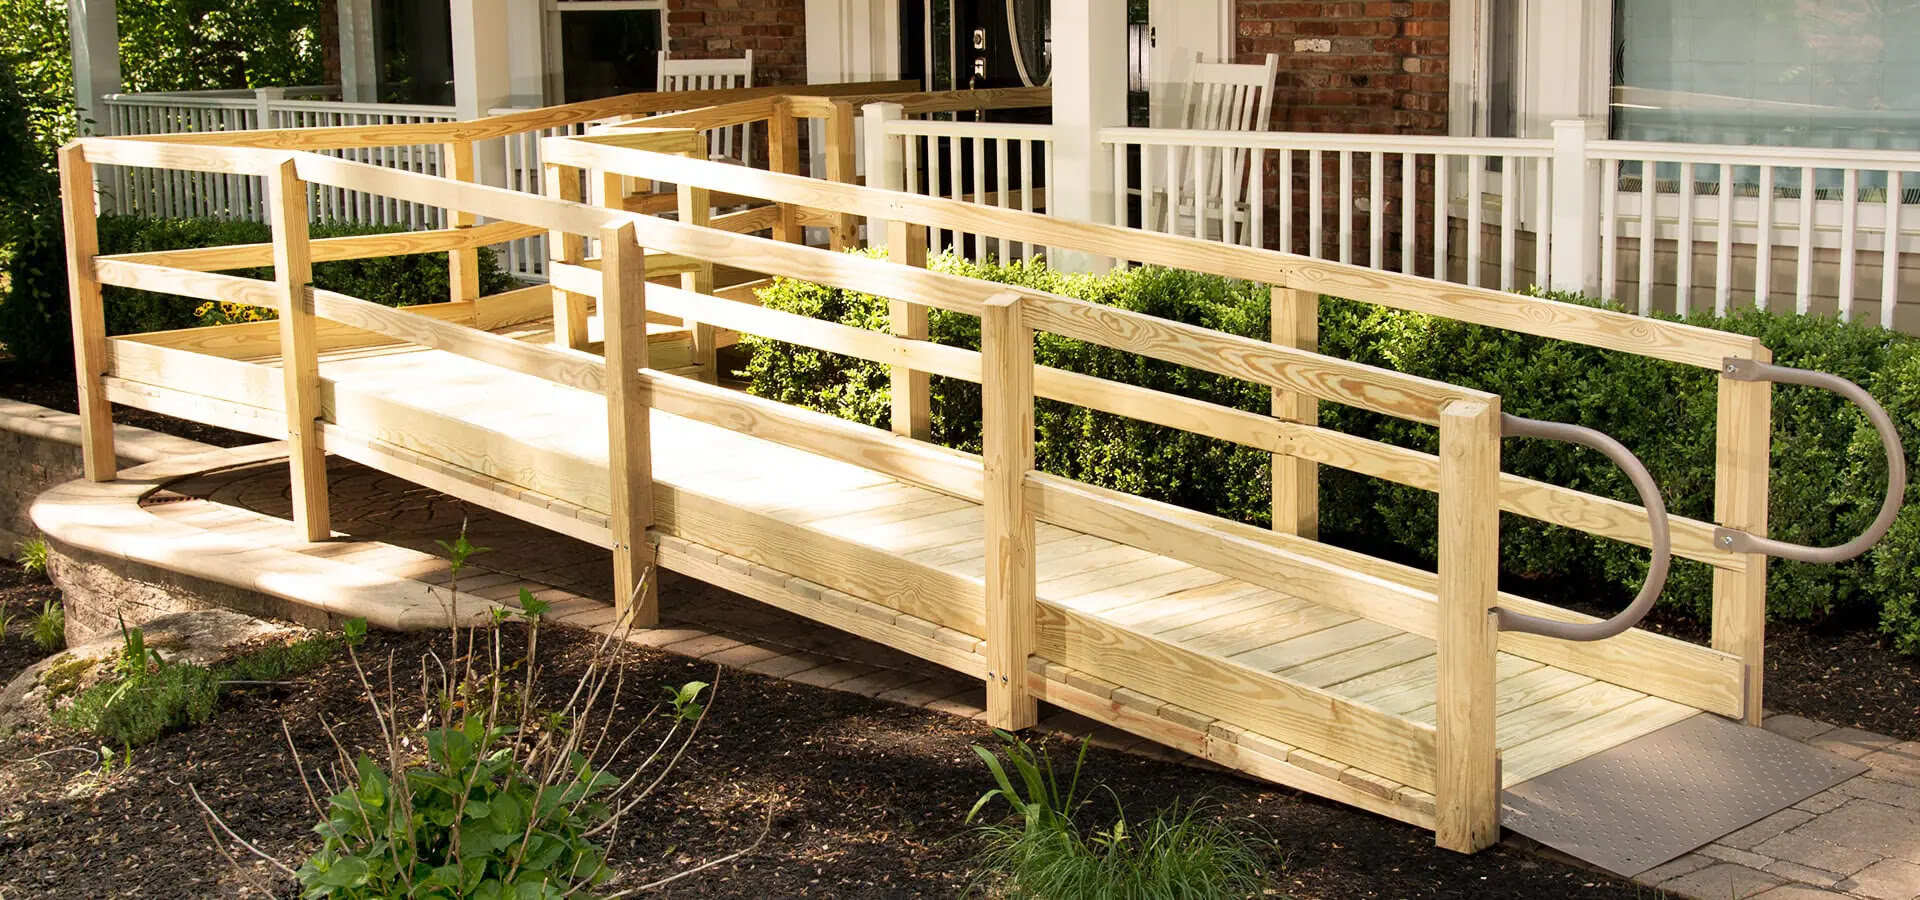
Building Stairs and Railings
The stairs and railings of your deck porch are not just functional elements; they also play a crucial role in enhancing safety and adding aesthetic appeal to your outdoor space. Building sturdy and visually appealing stairs and railings will provide easy access to your deck and create a welcoming and secure environment. Let’s explore the process of building stairs and railings:
Building Stairs:
1. Determine the number of steps needed based on the height of your deck porch. Follow your local building codes and guidelines to ensure the proper measurements for riser height and tread depth.
2. Cut the stringers, which are the angled supports that hold the steps, according to the calculated dimensions. Use a framing square and a circular saw to ensure accurate cuts.
3. Attach the stringers to the deck frame using metal brackets or joist hangers. Make sure they are securely fastened and level.
4. Install the stair treads by placing them on top of the stringers. Secure them by using screws or nails, ensuring they are evenly spaced and properly aligned.
5. Complete the staircase by adding risers between each step if desired. Risers are vertical boards that enclose the open space between the treads, providing a finished look and added safety.
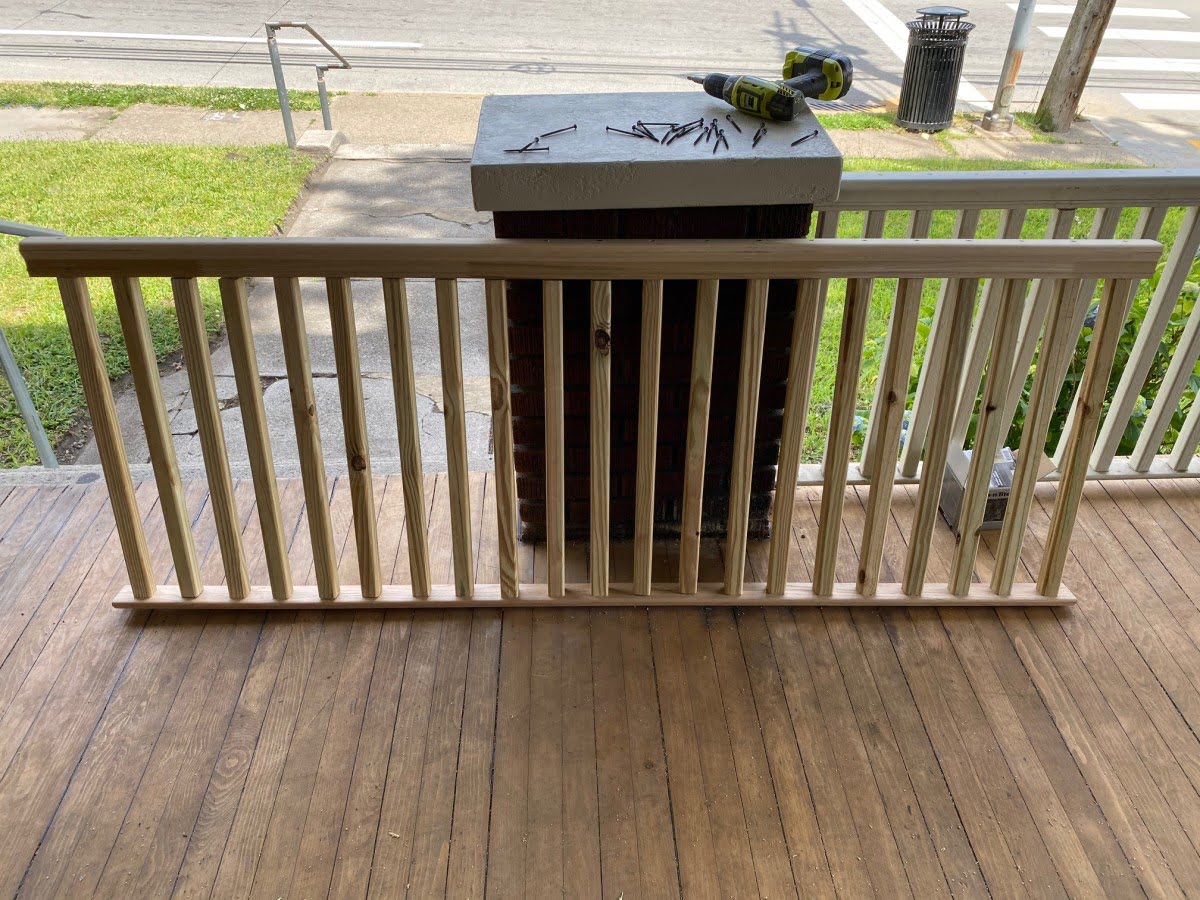
Installing Railings:
1. Determine the height and design of your railings. Follow your local building codes to ensure compliance with required railing heights, baluster spacing, and other safety guidelines.
2. Install the posts for the railings by attaching them securely to the deck frame. Use post anchors or brackets to ensure stability.
3. Attach the railing top and bottom rails to the posts using appropriate fasteners. Ensure they are level and properly aligned.
4. Install the balusters or spindles between the top and bottom rails. Balusters are the vertical supports that provide safety and aesthetics to your railing system. Secure them evenly spaced and at the recommended height to prevent accidental falls.
5. Finish off your railing system by adding a cap rail on top of the balusters for a polished look and added stability.
Remember, the safety of your stairs and railings is of utmost importance. Ensure that all components are securely fastened, and perform regular maintenance checks to keep them in optimal condition.
Building stairs and railings may require intermediate carpentry skills. If you’re unsure or inexperienced, it’s recommended to consult a professional to ensure proper construction and adherence to safety standards.
With the stairs and railings in place, your deck porch will not only be functional but also visually appealing. It’s time to move on to those exciting finishing touches to complete your outdoor oasis!
Read more: How To Paint A Deck And Porch
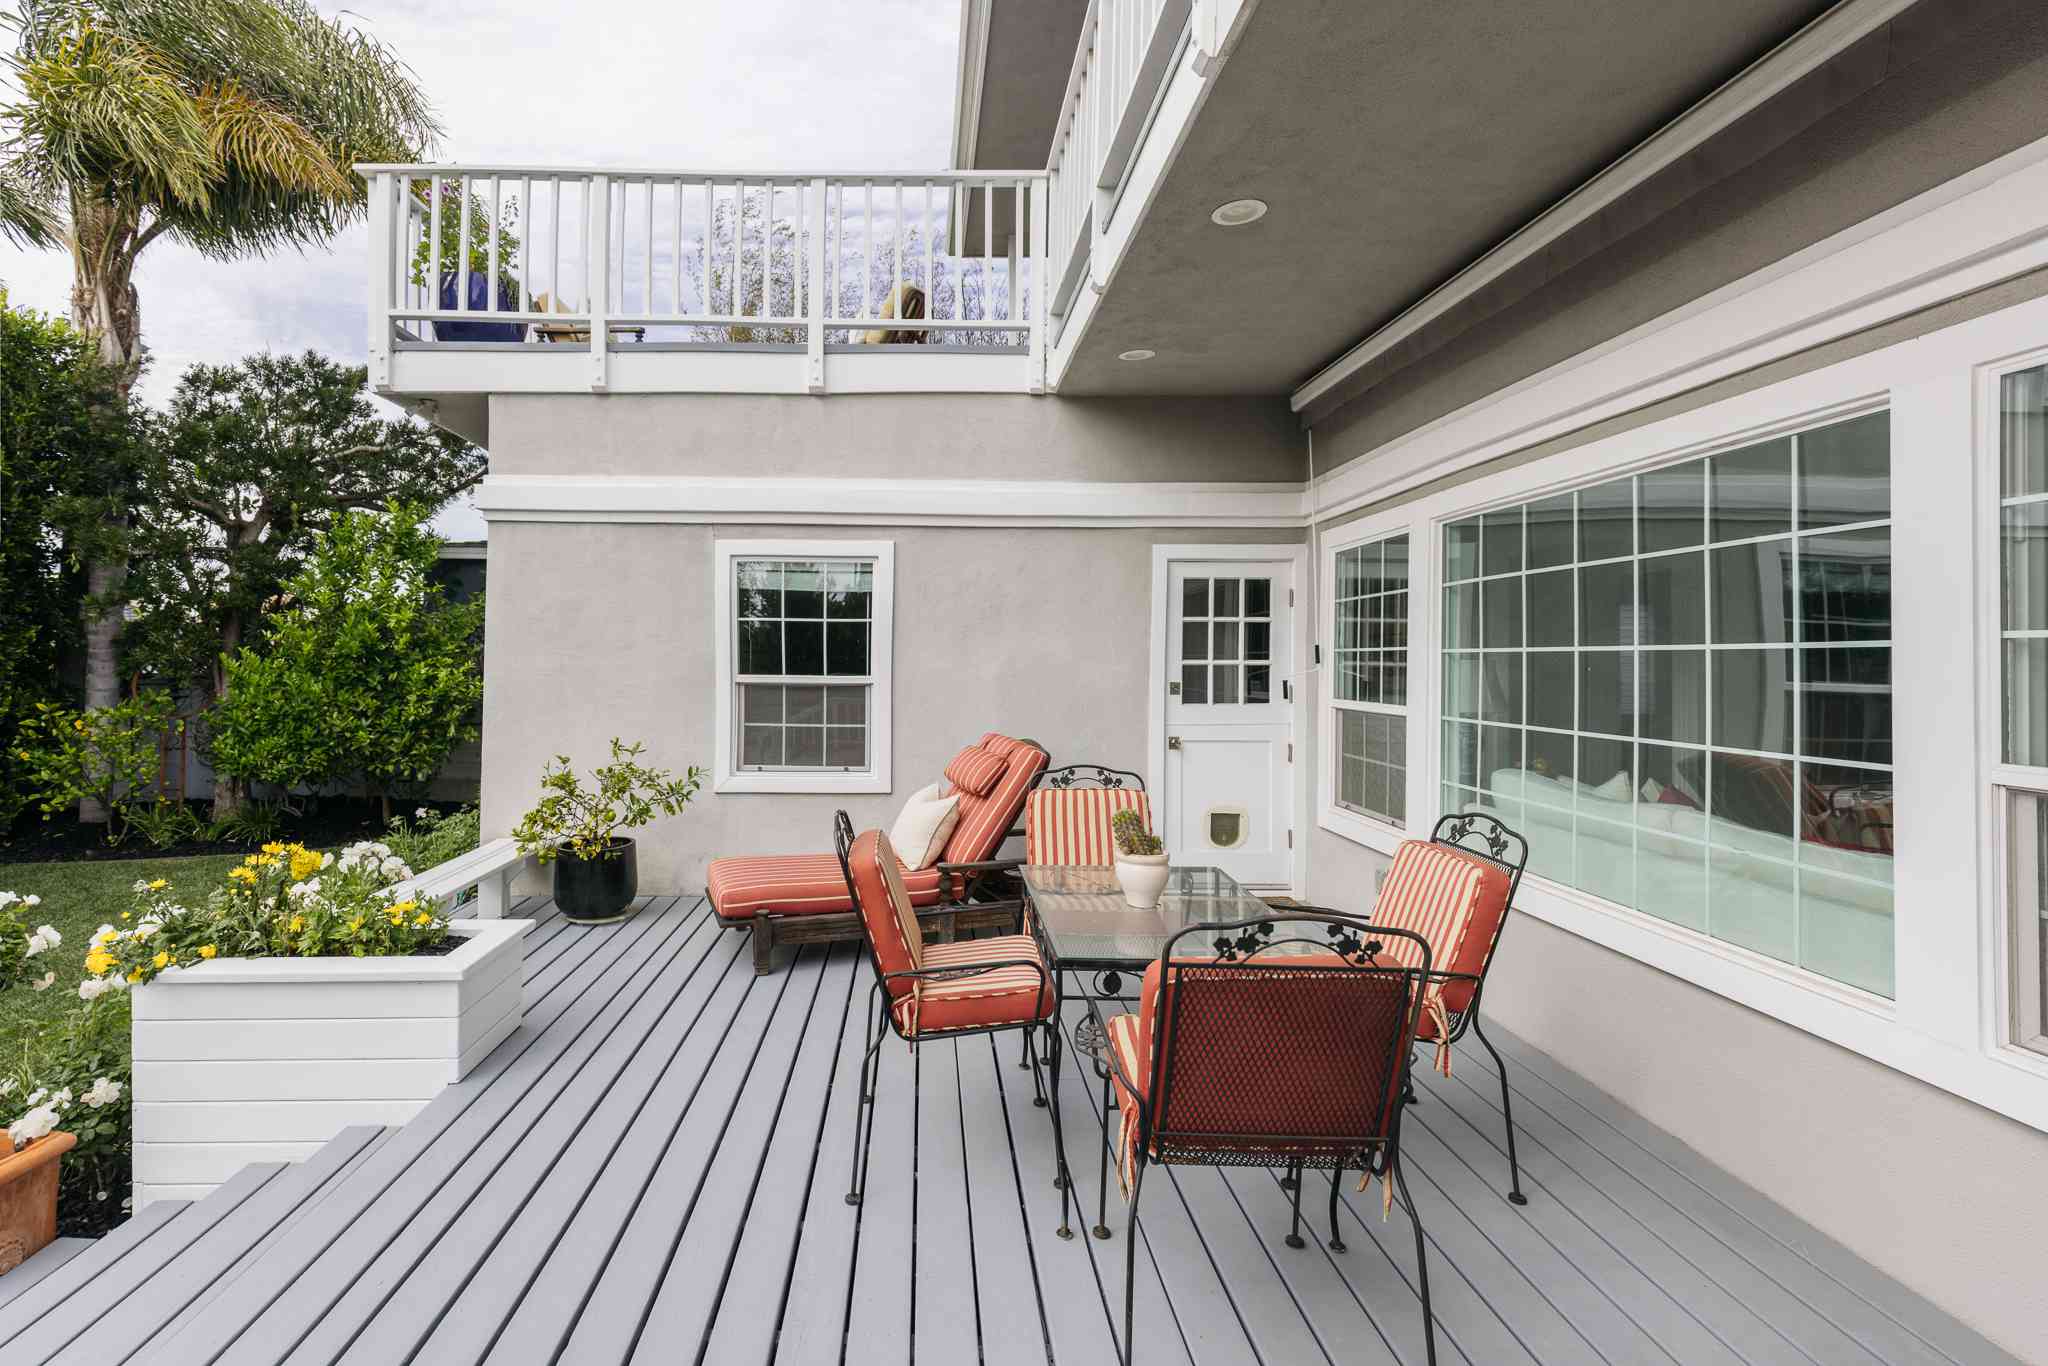
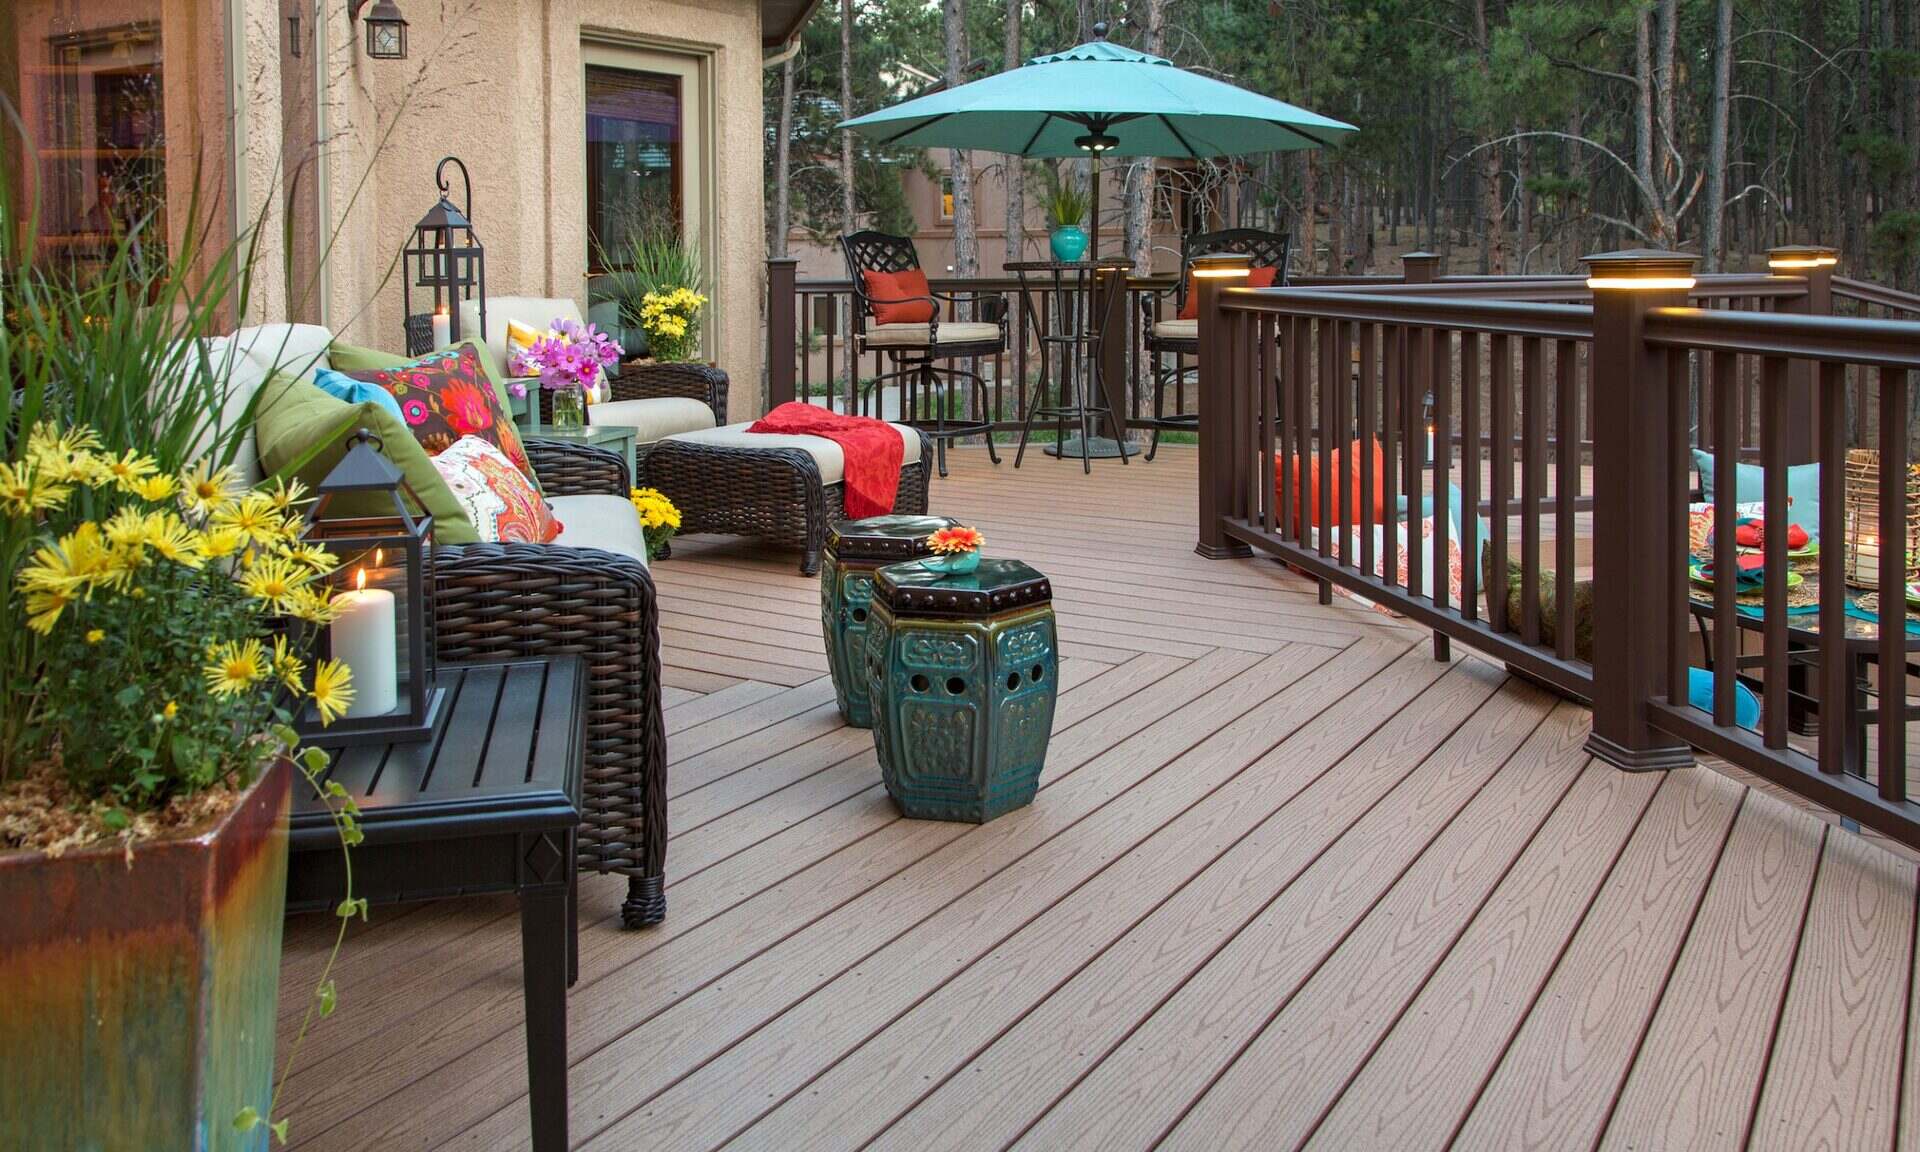
Adding Finishing Touches
With the major construction of your deck porch complete, it’s time to add those final finishing touches that will truly bring your outdoor space to life. These finishing touches will enhance the functionality, aesthetics, and comfort of your deck porch, transforming it into a welcoming and inviting oasis. Let’s explore some ideas for adding those special details:
Furniture and Accessories:
Choose outdoor furniture that suits your style and provides comfortable seating for relaxation and entertaining. Consider options such as lounge chairs, dining sets, and cozy seating areas. Don’t forget to include tables or side tables for holding drinks or snacks.
Add accessories that reflect your personal taste and style. This may include outdoor cushions, throw pillows, rugs, and decorative elements such as lanterns, planters, or artwork. These accessories will bring warmth and personality to your deck porch.
Shade and Privacy:
Install a shade structure to provide shelter from the sun’s rays and to create a comfortable outdoor environment. Options include pergolas, awnings, or umbrellas. These additions not only offer shade but also add visual interest and character to your deck porch.
Consider privacy solutions that provide a sense of seclusion and intimacy. This may involve installing privacy screens, trellises with climbing plants, or strategically placed landscaping elements. Privacy will enhance the relaxation and enjoyment of your deck porch.
Lighting:
Add outdoor lighting to extend the usability of your deck porch into the evening hours. Consider options such as string lights, path lights, or wall-mounted fixtures. Lighting will create a welcoming ambiance and ensure safety during nighttime use.
Outdoor Kitchen or Grill:
If you enjoy outdoor cooking and entertaining, consider adding an outdoor kitchen or grill area to your deck porch. This feature will allow you to prepare and enjoy meals right outside, making it convenient and enjoyable to entertain family and friends.
Landscaping:
Enhance the overall aesthetics of your deck porch by incorporating landscaping elements. This may include planting flower beds, installing potted plants or hanging baskets, or creating a small garden. Choose plants that thrive in your local climate and complement the style of your deck porch.
Remember to consider proper maintenance for all the finishing touches you incorporate. Regular cleaning, repair, and replacement will ensure that your deck porch remains in top condition over time.
By adding these finishing touches, you’ll create a deck porch that reflects your personal style and provides a welcoming outdoor retreat. Take your time in selecting the right furniture, accessories, and landscaping elements to truly make your deck porch an extension of your home.
With these final details in place, your deck porch project is complete. It’s time to sit back, relax, and enjoy the fruits of your hard work and creativity. Cheers to many beautiful moments spent on your stunning deck porch!
Conclusion
Congratulations! You have successfully journeyed through the process of building a deck porch, from the initial planning and design stages to adding the final finishing touches. Your deck porch is now a beautiful and functional outdoor space that enhances the value and enjoyment of your home.
Throughout this journey, you’ve learned the importance of careful planning and design, obtaining the necessary permits and permissions, gathering the right materials and tools, preparing the site, laying a solid foundation, constructing the deck frame, installing decking materials, building stairs and railings, and adding those special finishing touches.
By following the steps outlined in this article, you’ve ensured that your deck porch is not only visually appealing but also structurally sound and safe. You’ve created a space where you can relax, entertain family and friends, and make lasting memories.
Remember that maintenance is key to preserving the beauty and longevity of your deck porch. Regularly inspect and clean the decking materials, check for loose or damaged components, and keep up with any necessary repairs to keep your deck porch in optimal condition.
As you enjoy your deck porch, take the time to relish in the rewards of your hard work. Whether you’re sipping your morning coffee, hosting a barbecue, or simply unwinding with a book, your deck porch will serve as an outdoor haven that brings joy and tranquility to your life.
Lastly, we encourage you to personalize your deck porch to reflect your unique style and preferences. Add your personal touch with furniture, accessories, lighting, and landscaping, and make it a space that truly feels like home.
Thank you for joining us on this deck porch building journey. We hope this article has provided you with valuable insights and guidance. Now, it’s time for you to sit back, relax, and enjoy the beauty and serenity of your newly constructed deck porch!
Frequently Asked Questions about How To Build A Deck Porch
Was this page helpful?
At Storables.com, we guarantee accurate and reliable information. Our content, validated by Expert Board Contributors, is crafted following stringent Editorial Policies. We're committed to providing you with well-researched, expert-backed insights for all your informational needs.


0 thoughts on “How To Build A Deck Porch”