Home>Garden Essentials>Garden Storage>How To Build A Picket Fence With Gate To Enhance Your Yard
Garden Storage
How To Build A Picket Fence With Gate To Enhance Your Yard
Modified: August 27, 2024
Learn how to build a beautiful picket fence with a gate and improve your yard's storage capacity. Enhance your outdoor space with this practical DIY project.
(Many of the links in this article redirect to a specific reviewed product. Your purchase of these products through affiliate links helps to generate commission for Storables.com, at no extra cost. Learn more)
Introduction
Welcome to our comprehensive guide on how to build a picket fence with a gate to enhance your yard. A picket fence is not only a functional addition to your property but also adds charm and character to your outdoor space. Whether you’re looking to create a safe and secure enclosure or add a decorative touch to your yard, building a picket fence can be a rewarding DIY project.
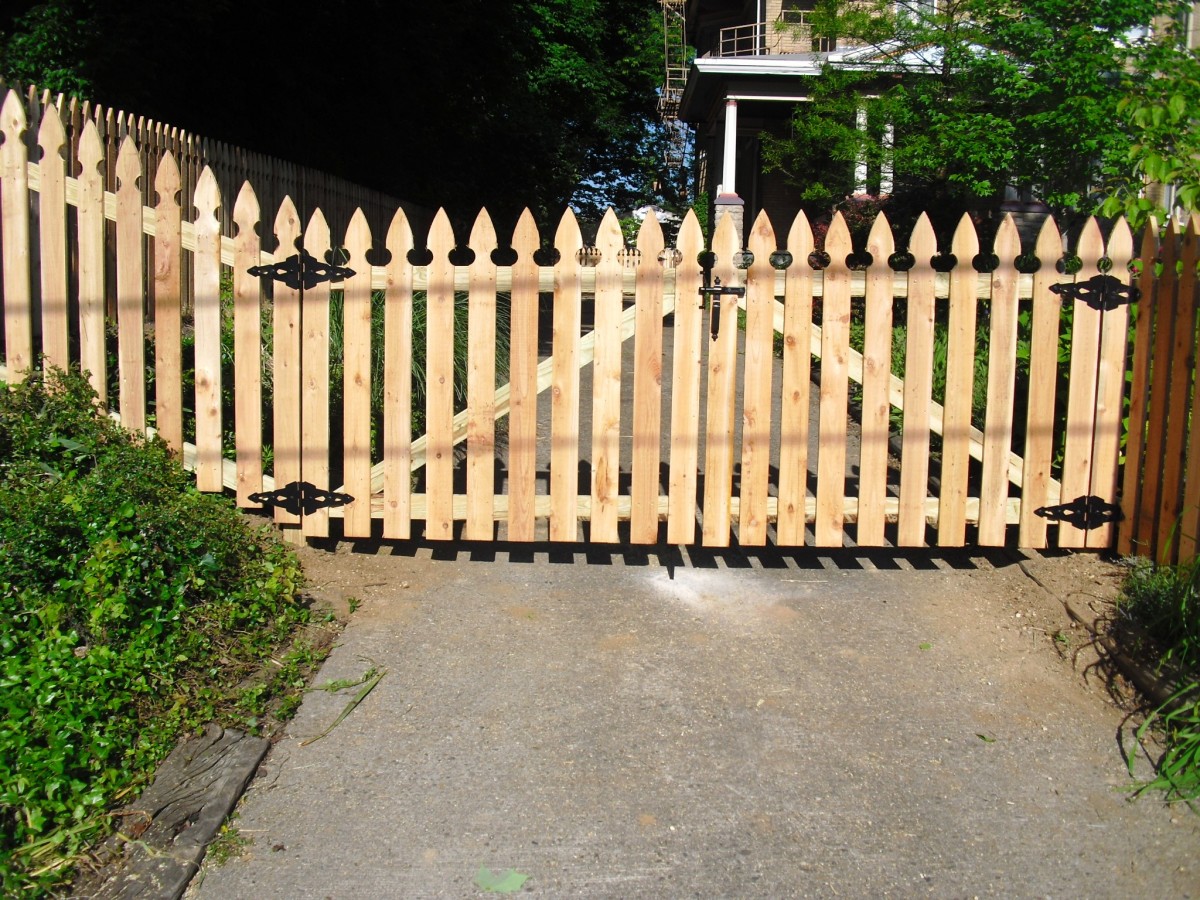
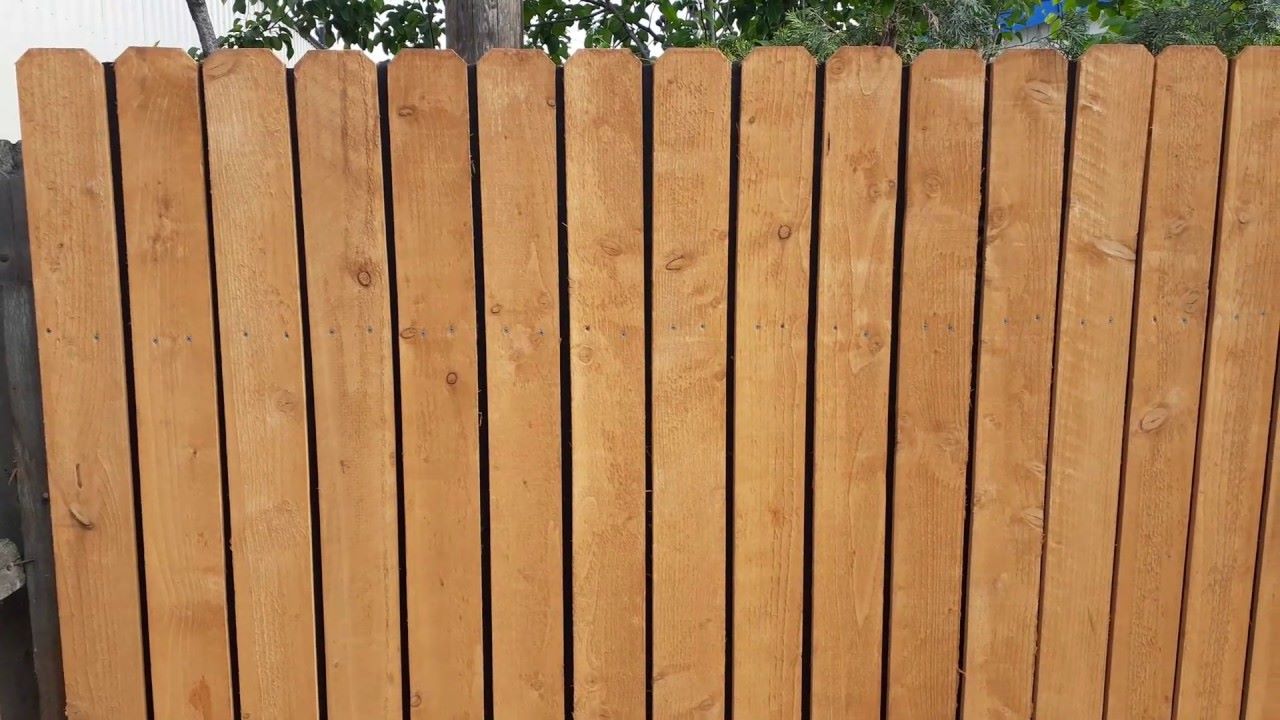
Before we dive into the step-by-step process, let’s first understand what a picket fence is. A picket fence is a type of fence made up of vertical pickets or slats that are evenly spaced and attached to horizontal rails. These fences are typically made of wood and have pointed or round tops, giving them a classic and timeless look.
Building your own picket fence allows you to customize its design and size to perfectly suit your needs and preferences. It also gives you the freedom to choose the type of wood, paint color, and overall style that aligns with your existing outdoor aesthetic.
In this guide, we will take you through each step of the process, from gathering the necessary tools and materials to adding the finishing touches. Whether you’re a seasoned DIY enthusiast or a novice looking to take on your first major outdoor project, our guide will provide you with the knowledge and confidence to build a beautiful picket fence with a gate.
So, roll up your sleeves, put on your work boots, and let’s get started on creating a stunning and functional picket fence that will enhance your yard!
Key Takeaways:
- Building a picket fence with a gate is a rewarding DIY project that adds charm and functionality to your yard. From measuring and marking to setting the posts in concrete, each step contributes to creating a stunning outdoor space.
- Regular maintenance, such as painting, sealing, and landscaping, is essential to ensure the longevity and beauty of your picket fence. Embrace the sense of pride and enjoyment that comes with creating a space for making beautiful memories.
Read more: How To Build A Vinyl Fence Gate
Step 1: Gather the necessary tools and materials
Before you begin building your picket fence with a gate, it’s important to gather all the necessary tools and materials. Having everything prepared ahead of time will make the construction process much smoother. Here’s a list of the tools and materials you’ll need:
- Measuring tape
- Chalk or pencil
- Level
- Post hole digger or shovel
- Mixing bucket
- Concrete mix
- Water source
- Wooden fence posts
- Horizontal rails
- Pickets
- Gates
- Hinges
- Latches
- Screwdriver
- Screws
- Nails
- Hammer
- Saw
- Paint or stain
Make sure to choose high-quality materials that are suitable for outdoor use. Pressure-treated wood is a popular choice for fence posts as it is resistant to rot and decay. It’s also important to consider the size and length of the fence posts and pickets based on the desired height and spacing of your picket fence.
Additionally, you’ll want to have the necessary safety gear, such as gloves and goggles, to protect yourself during the construction process.
By gathering all the required tools and materials upfront, you’ll save time and ensure you have everything you need to build your picket fence with a gate.
Step 2: Measure and mark the area for the fence
Once you have gathered all the necessary tools and materials, the next step in building your picket fence with a gate is to measure and mark the area where the fence will be installed. This step is crucial to ensure accuracy and precision in the construction process. Here’s how you can do it:
- Start by identifying the boundaries of your property. Use a measuring tape to determine the length of the area where the fence will be installed. Take note of any existing structures, trees, or obstacles that may affect the placement of the fence.
- Using chalk or a pencil, mark the corners of the fence line. Make sure the corners are square by using a level or measuring the diagonals of the marked area. Adjust the markings if needed to achieve a perfectly square enclosure.
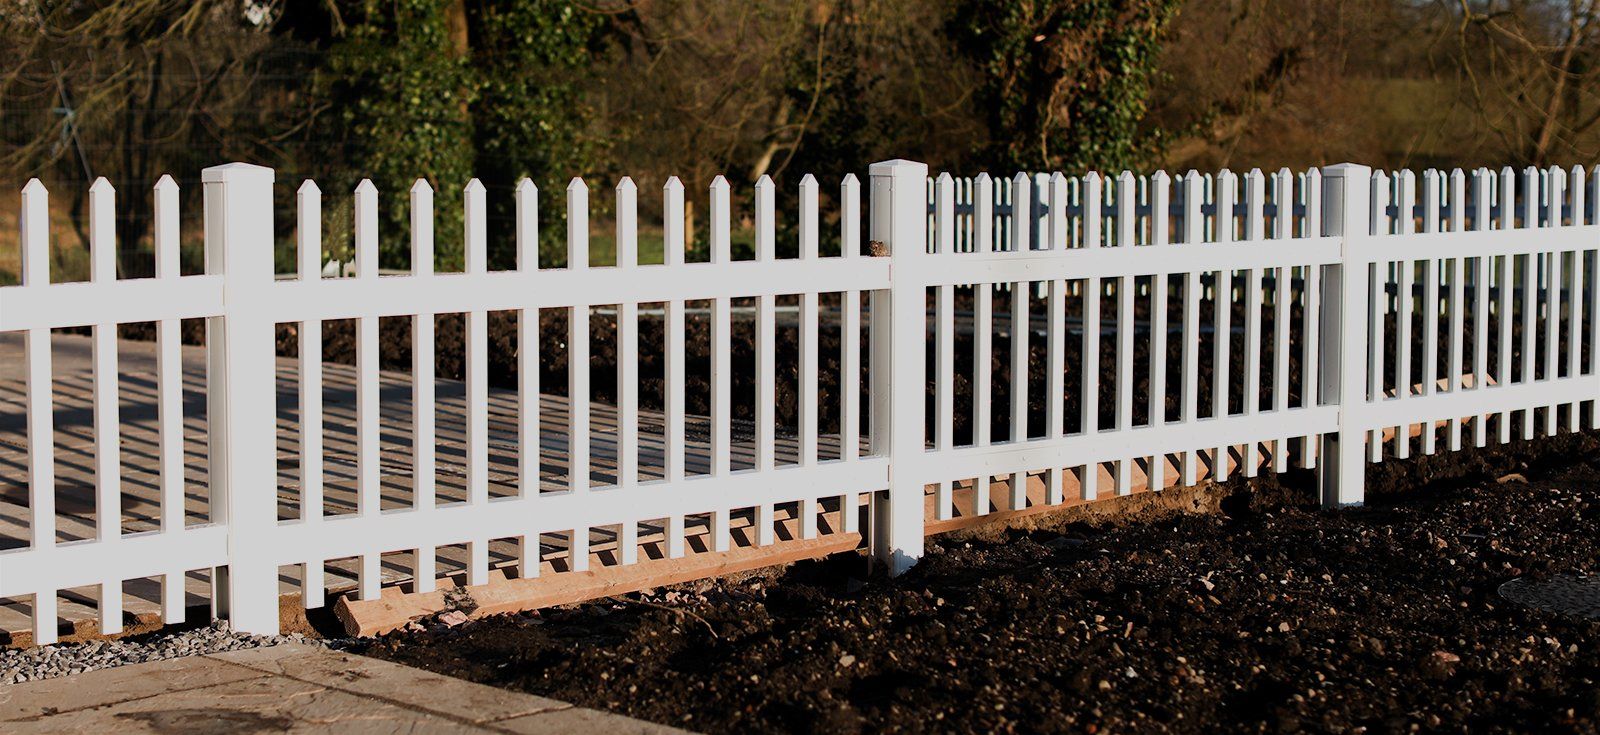
- Measure and mark the desired distance between each wooden fence post. Typically, 6 to 8 feet apart is a common spacing for picket fences. Make sure to maintain consistent spacing throughout the fence line.
- At this stage, you can also mark the location of the gate. Decide where you want the gate to be positioned for easy access to your yard. Mark the width of the gate and ensure it is wide enough to accommodate people, equipment, or anything you may need to move in or out of your yard.
Remember to double-check your measurements and make any necessary adjustments before moving on to the next step. Accuracy in marking the area for the fence will help ensure that your picket fence is straight, level, and aesthetically pleasing.
By taking the time to measure and mark the area for your picket fence, you will set the foundation for a successful and visually appealing fence installation.
Step 3: Dig the holes for the fence posts
With the area for your picket fence marked, it’s time to start digging the holes for the fence posts. The fence posts provide the structural support for the entire fence, so it’s important to dig the holes to the proper depth and alignment. Here’s how you can dig the holes for the fence posts:
- Using a post hole digger or shovel, start digging the first hole at one of the corner marks. The depth of the hole will depend on the height of your picket fence. As a general rule, the hole should be around one-third to one-half the height of the fence post.
- Continually check the depth of the hole with a tape measure or by inserting the fence post into the hole to ensure the proper depth. Make adjustments as needed.
- Once the first hole is dug and at the desired depth, move along the fence line and dig the remaining holes at the marked spots. Maintain a consistent distance between each hole to ensure a uniform look for your picket fence.
- After digging all the holes, check that they are evenly spaced and aligned by using a level and a string or chalk line. This will help ensure that your picket fence is straight and visually appealing.
- When all the holes are dug and properly aligned, remove any debris or excess dirt from the holes. This will create a clean and stable base for the fence posts.
It’s important to note that digging the holes may require some physical effort depending on the soil conditions. If the ground is particularly tough or rocky, you may need to use a post hole digger or other tools to break through the soil. Take your time and work methodically to avoid any unnecessary injuries.
By digging the holes for the fence posts accurately, you are laying the foundation for a sturdy and durable picket fence.
Step 4: Set the fence posts in concrete
Once you have dug the holes for the fence posts, the next step is to set them in concrete. This process ensures the stability and durability of your picket fence, especially in areas with varying weather conditions. Here’s how you can set the fence posts in concrete:
- Before adding the concrete, place a layer of gravel or crushed stone at the bottom of each hole. This will help with drainage and prevent water from pooling around the base of the fence posts.
- Prepare the concrete mix according to the manufacturer’s instructions, either by mixing it in a bucket or using a ready-to-use concrete mix.
- With the mixed concrete at the ready, position a fence post in the first hole, making sure it is plumb and level. You can use a level or a helper to assist you in this step.
- Pour the mixed concrete into the hole around the fence post, filling it up to a few inches below the surface. Use a stick or rod to consolidate the concrete mix and remove any air pockets.
- Continue this process with the remaining fence posts. Ensure each post is set at the desired height and alignment.
- Once all the fence posts are set in concrete, double-check their alignment using a level and adjust if necessary. Also, make sure that all the posts are the same height for a professional finish.
- Allow the concrete to cure according to the manufacturer’s instructions. This usually takes 24 to 48 hours. During this time, avoid placing any strain or pressure on the fence posts.
Setting the fence posts in concrete provides a solid foundation, ensuring that your picket fence will stand strong for years to come. The concrete secures the posts in place and helps prevent shifting and leaning over time.
Remember to follow appropriate safety precautions when working with concrete, such as wearing gloves and eye protection. Concrete can be caustic, so it’s important to handle it with care.
By properly setting the fence posts in concrete, you’re one step closer to completing your picket fence with a gate!
When building a picket fence with a gate, make sure to measure and mark the placement of the posts accurately to ensure a straight and sturdy structure. Use a level to ensure the posts are plumb before securing them in place.
Read more: How To Build A Chain Link Fence Gate
Step 5: Install the horizontal rails
With the fence posts securely set in concrete, it’s time to move on to installing the horizontal rails of your picket fence. These rails provide the framework that the pickets will be attached to, adding stability and structure to your fence. Here’s how you can install the horizontal rails:
- Measure and cut the horizontal rails to the appropriate length. The length will depend on the dimensions of your fence and the spacing between the fence posts.
- Starting at one end of the fence, position the first rail horizontally between two adjacent fence posts. Use a level to ensure it is straight and mark the spots where it will be attached to the fence posts.
- At the marked spots, pre-drill pilot holes to prevent the wood from splitting. Use a drill bit that is slightly smaller than the diameter of the screws or nails you’ll be using.
- Align the rail with the pre-drilled holes and attach it to the fence posts using screws or nails. Repeat this process for each horizontal rail, ensuring they are evenly spaced and level throughout the fence.
- For added stability, consider installing a middle rail between the top and bottom rails. This will provide additional support for the pickets and help prevent them from warping or sagging over time.
- Check the alignment and levelness of the rails periodically as you install them to ensure a straight and aesthetically pleasing fence.
When installing the horizontal rails, it’s important to use high-quality screws or nails that are suitable for outdoor use. This will help ensure the longevity and stability of your picket fence.
By installing the horizontal rails properly, you’re building the foundation for attaching the pickets and creating a beautiful and functional picket fence.
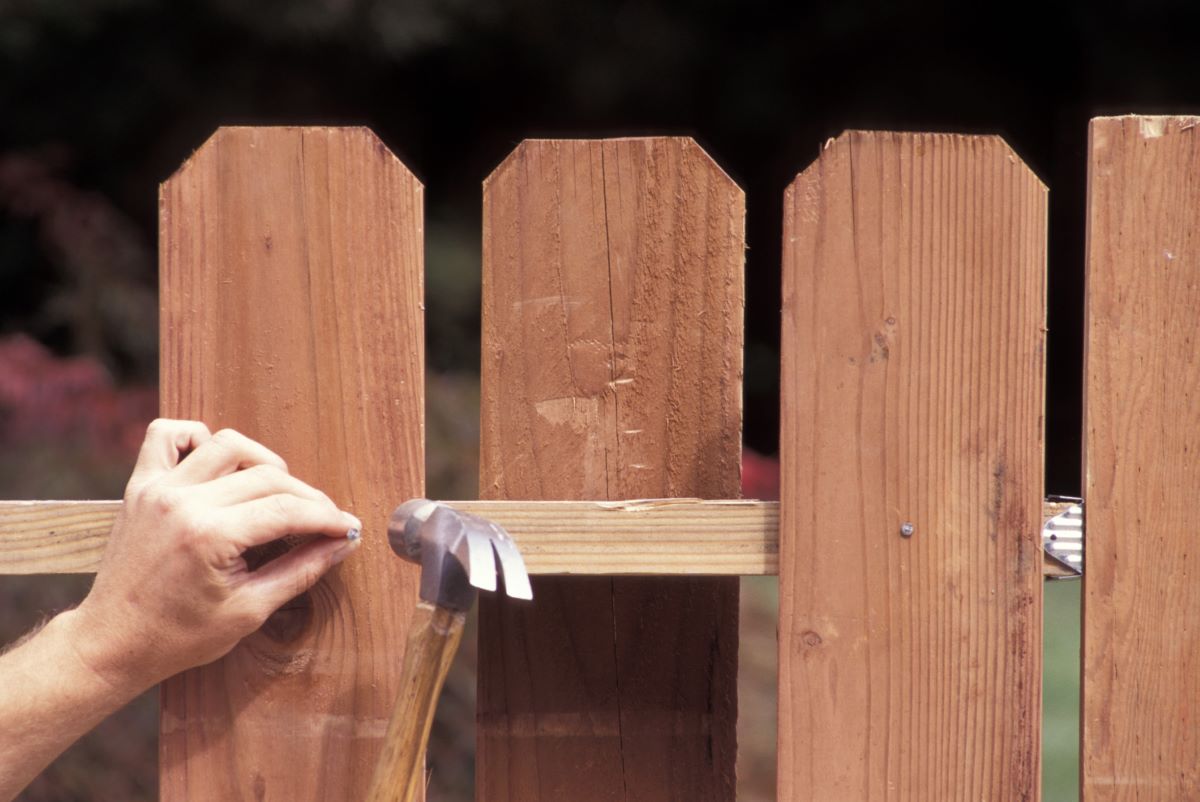
Step 6: Attach the pickets to the rails
Now that the horizontal rails are in place, it’s time to attach the pickets to create the characteristic look of a picket fence. The pickets are the vertical slats that give the fence its classic charm and serve as a barrier. Here’s how you can attach the pickets to the rails:
- Measure and cut the pickets to the desired length. The length will depend on the height of your picket fence and personal preference for the spacing between pickets.
- Starting at one end of the fence, position the first picket vertically against the first rail. Ensure it is aligned with the rail and level.
- Using screws or nails, attach the picket to the rail, making sure it is securely fastened. Repeat this process for each picket, ensuring they are evenly spaced and level throughout the fence.
- As you attach each picket, periodically check the alignment and use a level to ensure they are straight. Adjust as necessary to maintain a visually appealing and well-aligned picket fence.
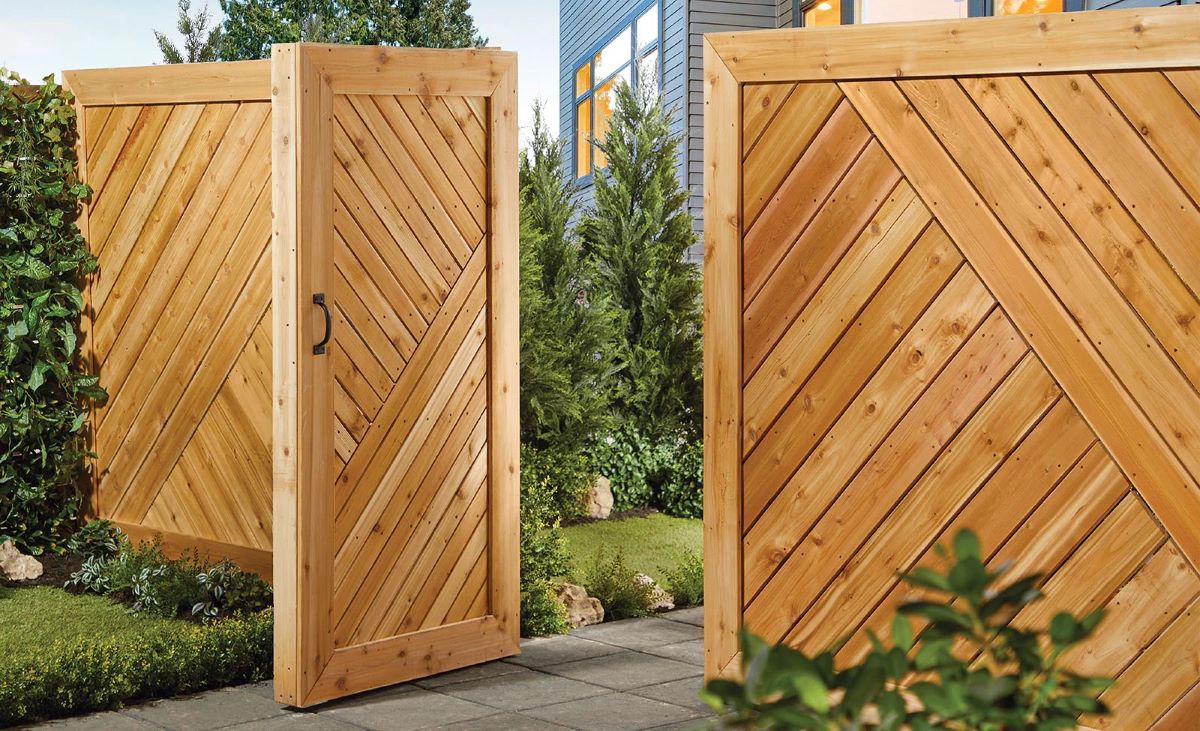
- For an added decorative touch, consider using a pattern or alternating different picket designs to create visual interest along the fence line.
- Continue attaching the pickets to the remaining rails until the entire fence is covered.
When attaching the pickets, it’s important to use screws or nails that are appropriate for outdoor use and capable of providing secure fastening. This will ensure the pickets remain in place and withstand the elements.
By attaching the pickets carefully and precisely, you’re shaping the look and character of your picket fence, adding a touch of charm and elegance to your outdoor space.
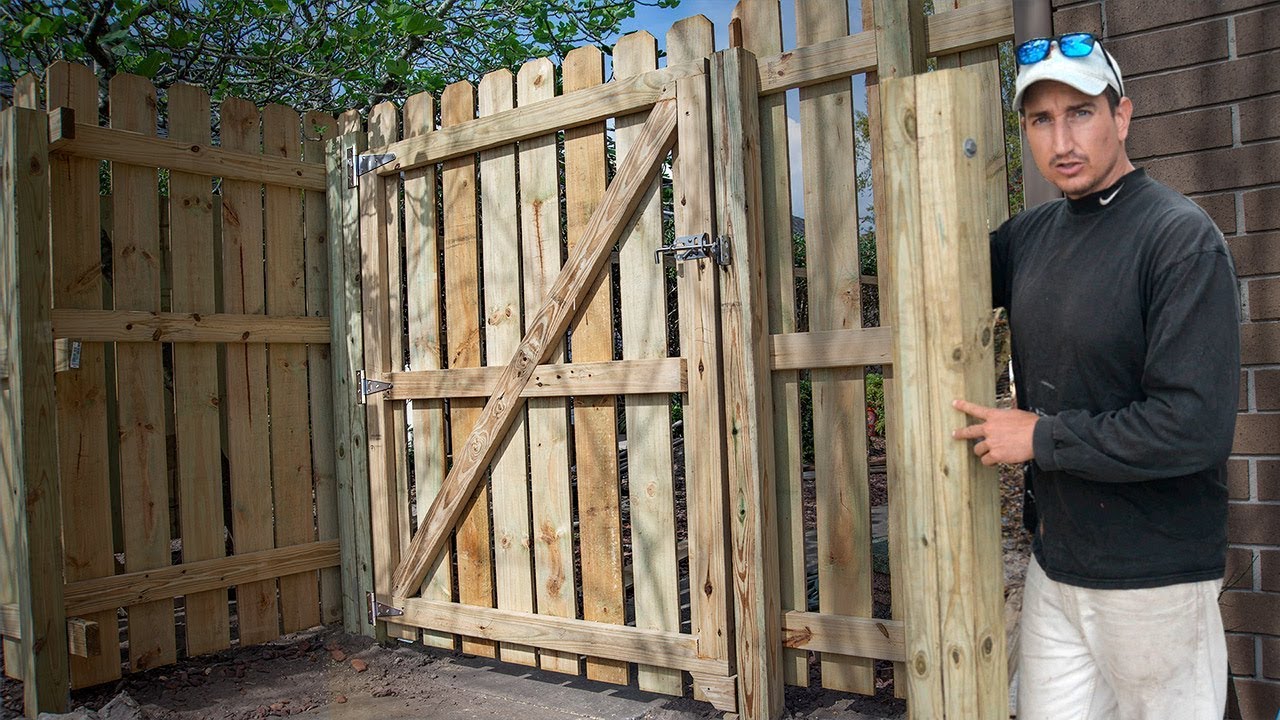
Step 7: Build and install the gate
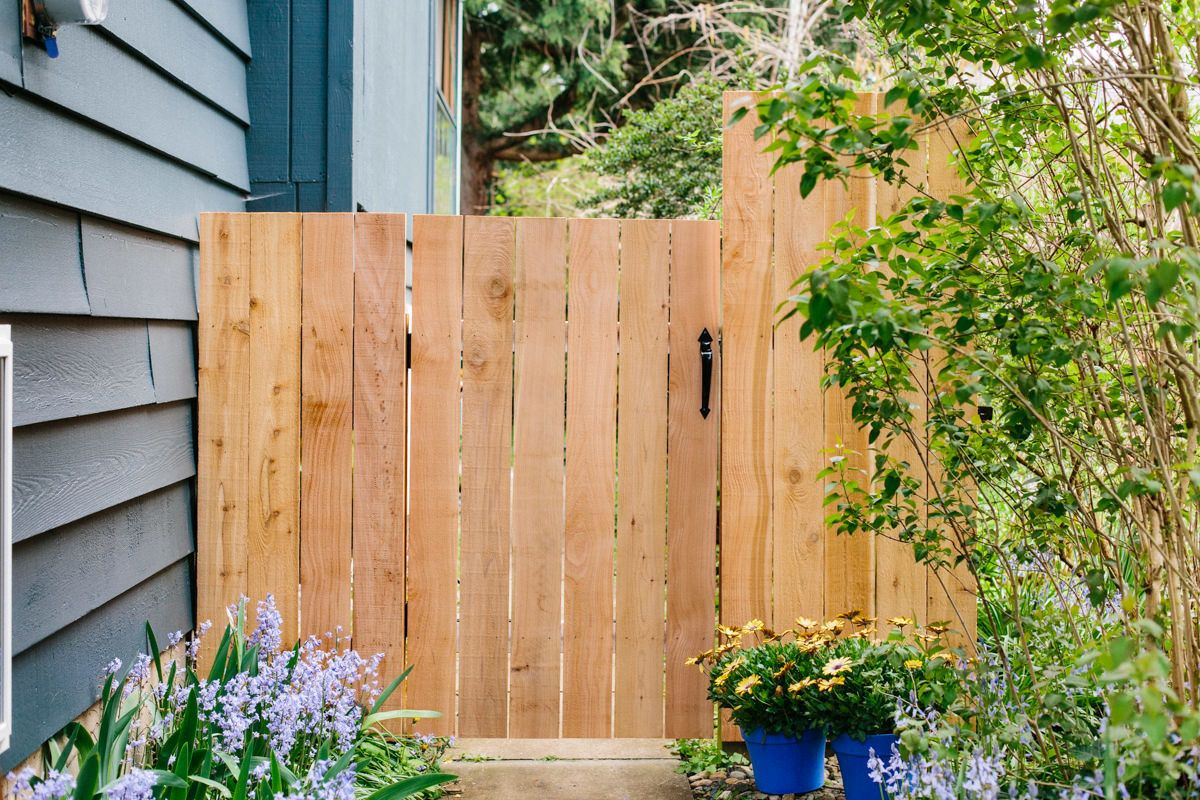
Now that you’ve built the main structure of your picket fence, it’s time to focus on building and installing the gate. The gate serves as the entry point to your yard and should be both functional and aesthetically pleasing. Here’s how you can build and install the gate:
- Measure and cut the gate frame pieces. These will typically consist of vertical and horizontal boards that will form the frame of the gate.
- Assemble the gate frame using screws or nails. Make sure the frame is square and sturdy.
- Measure and cut the pickets for the gate, similar to the pickets used on the rest of the fence.
- Attach the pickets to the gate frame vertically, leaving a small gap between each picket for visibility and airflow. Use screws or nails to secure them to the frame.
- Create and attach the gate hardware, including hinges and a latch, to both the gate and the adjacent fence post. Ensure they are installed securely and are properly aligned.
- Test the gate to make sure it opens and closes smoothly. Make any necessary adjustments to the hinges or latch to ensure proper functionality.
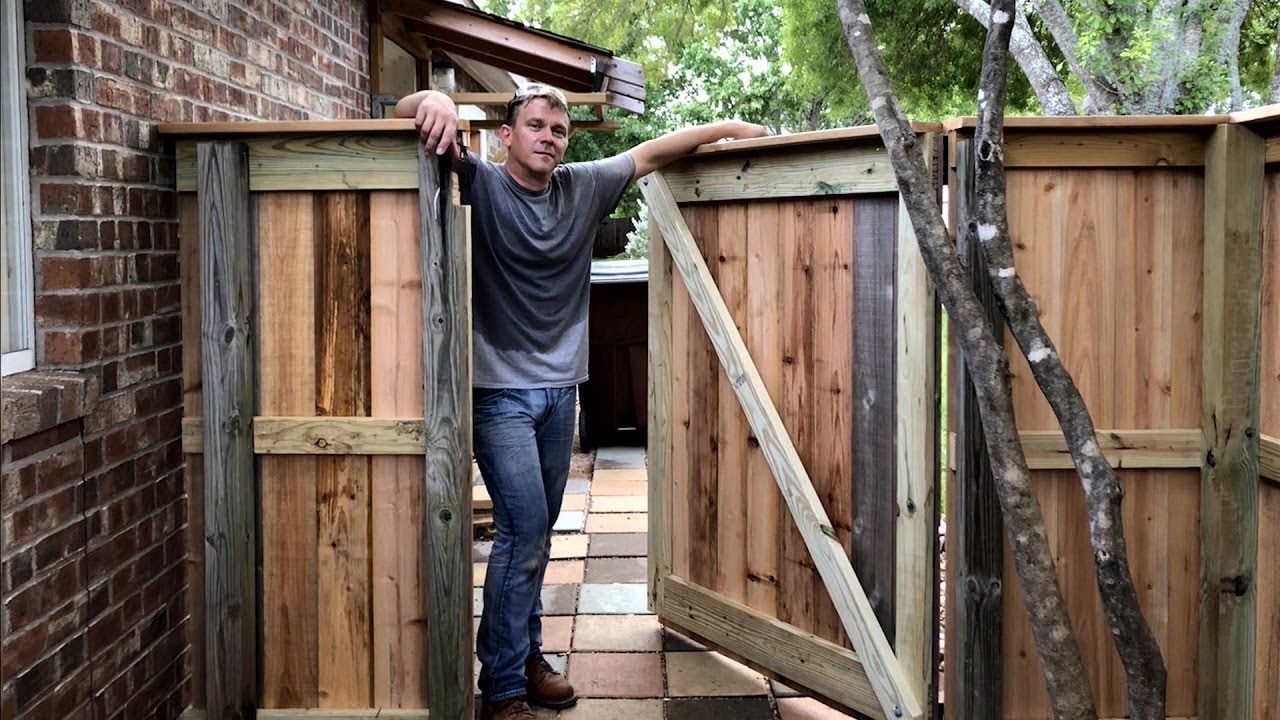
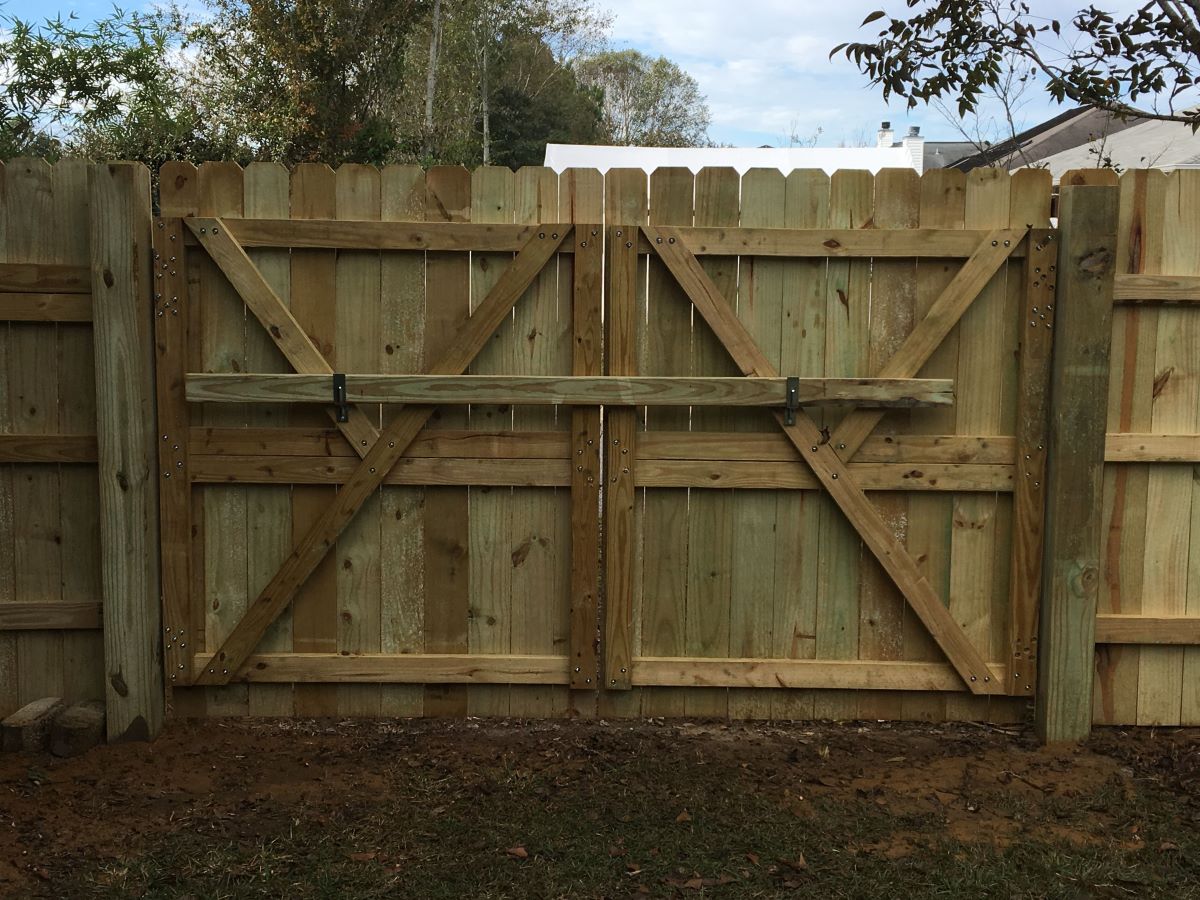
- Consider adding additional support to the gate, such as a diagonal brace, to enhance its stability and prevent sagging over time.
When building and installing the gate, it’s vital to use durable and weather-resistant materials to ensure its longevity. Additionally, pay attention to the alignment and levelness of the gate to ensure a seamless blend with the rest of the picket fence.
By carefully constructing and installing the gate, you’re completing the functionality and visual appeal of your picket fence, creating a beautiful entrance to your yard.
Step 8: Finishing touches and maintenance
With your picket fence and gate successfully installed, it’s time to add the finishing touches and ensure proper maintenance to keep your fence looking beautiful for years to come. Here are some final steps to consider:
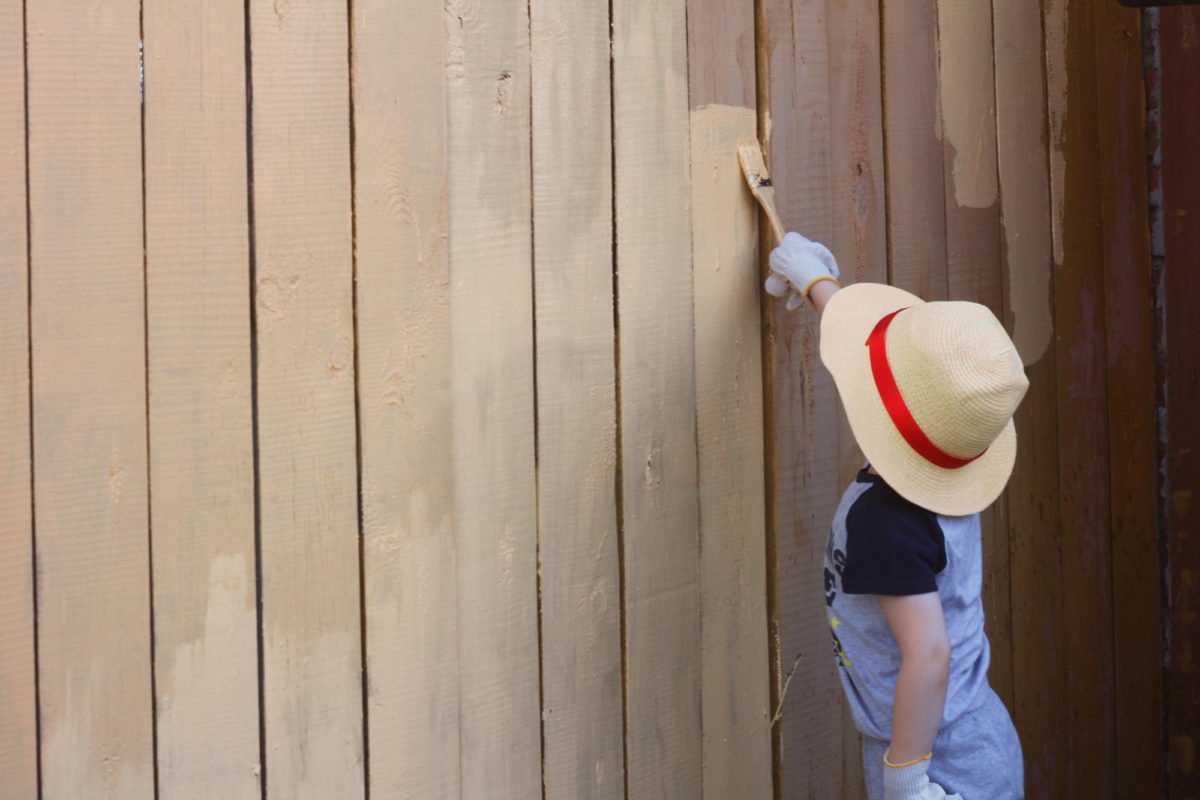
- Paint or stain the fence: Apply a coat of paint or stain to protect the wood from weathering and enhance its appearance. Choose a color that complements the overall aesthetic of your outdoor space. Follow the manufacturer’s instructions for proper application and drying times.
- Seal the wood (optional): If you want to further protect your fence from moisture and UV damage, consider applying a wood sealer or preservative. This will help prolong the life of the wood and maintain its natural beauty.
- Perform regular maintenance: Inspect your picket fence regularly for any damage, such as loose pickets or rails, and make repairs as needed. Trim any vegetation that may impede the fence or cause damage over time. Additionally, clean the fence periodically to remove dirt, dust, and debris.
- Reapply protective coatings: Over time, the paint or stain on your picket fence may fade or wear off. Keep up with regular maintenance by periodically reapplying protective coatings to keep the wood protected and looking its best.
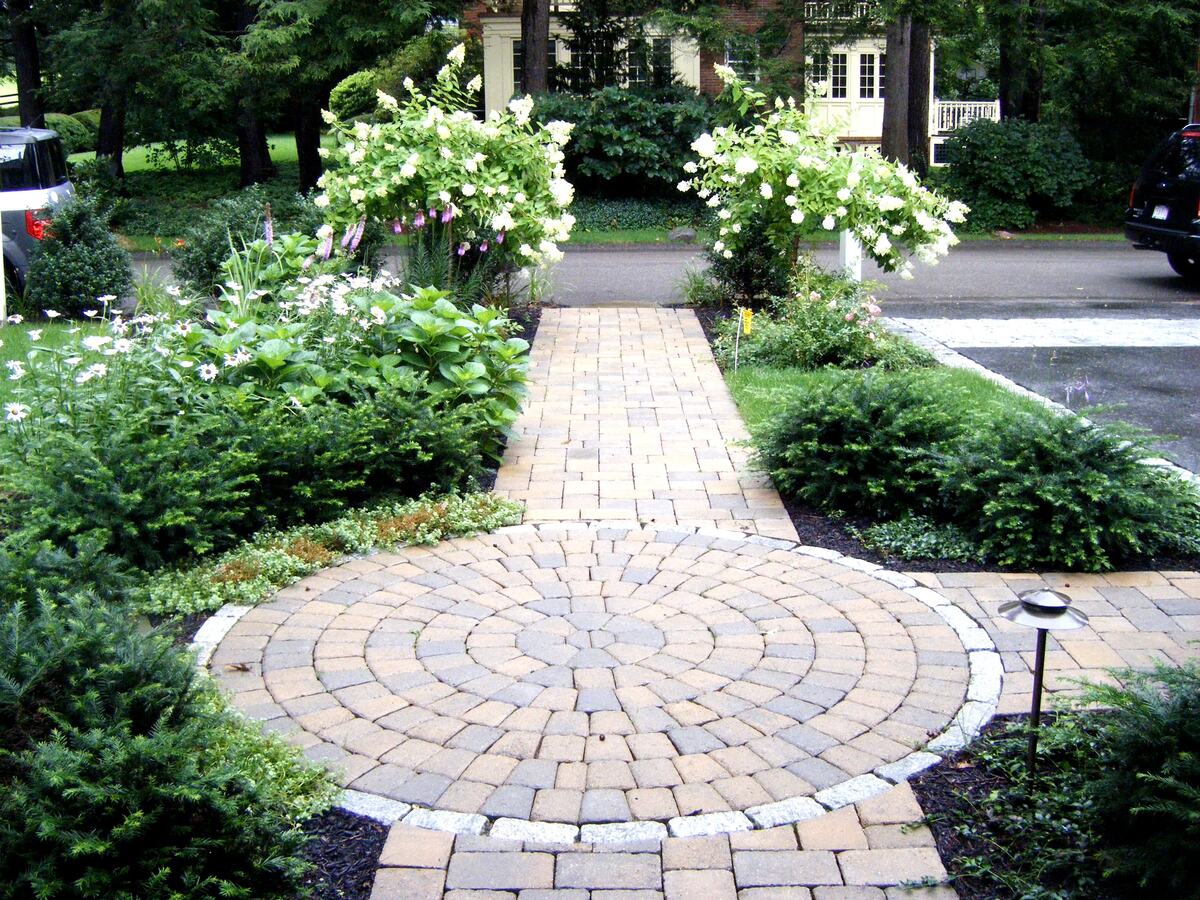
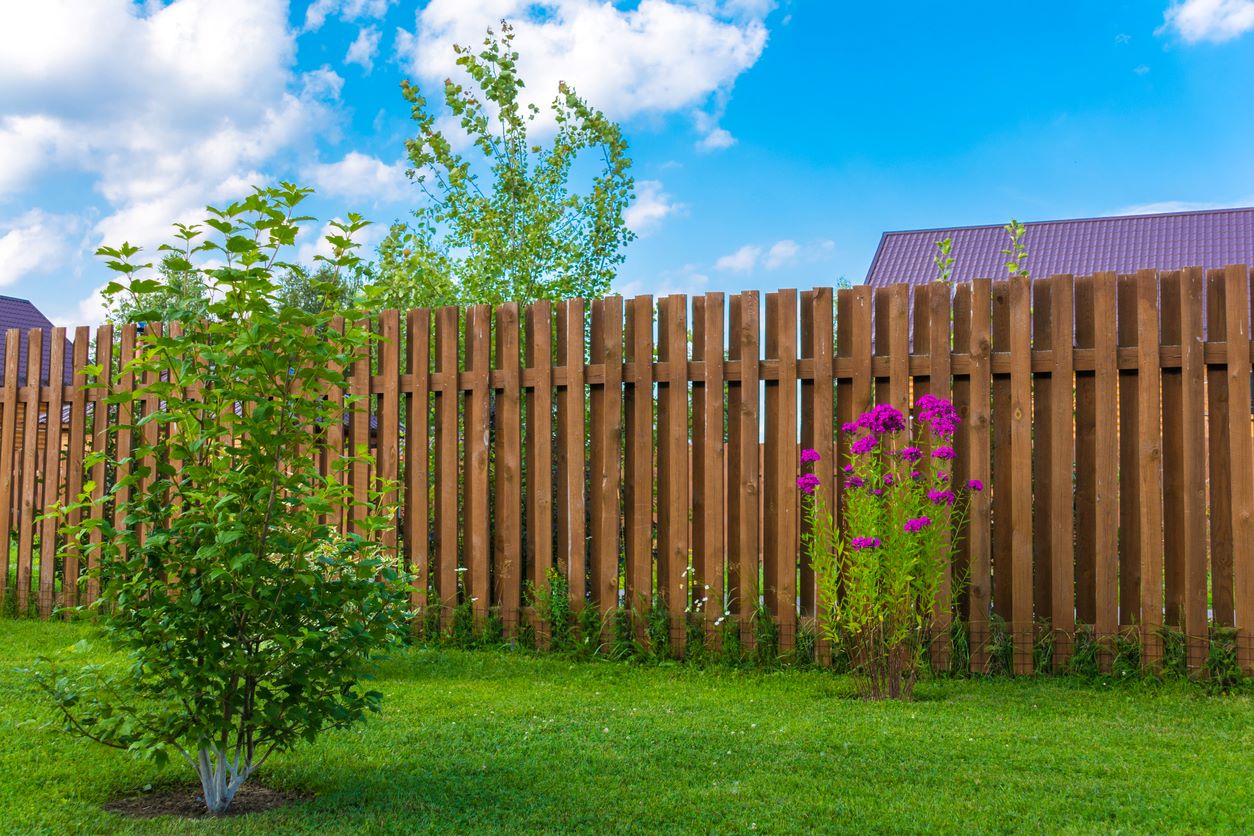
- Consider landscaping around the fence: Enhance the aesthetics of your picket fence by adding landscaping elements around it. Planting flowers, shrubs, or climbing vines can add a touch of beauty and soften the lines of the fence.
By performing regular maintenance and taking care of your picket fence, you can enjoy its charm and functionality for many years. Remember to follow any specific care instructions provided by the manufacturer of the materials you used for your fence.
Congratulations! You have successfully completed building your picket fence with a gate and added the final touches to create a stunning addition to your yard.
Read more: What Is A Fence Picket
Conclusion
Congratulations on completing your journey to build a picket fence with a gate! By following the steps outlined in this guide, you have created a beautiful and functional addition to your yard that enhances its charm and character.
A picket fence adds more than just a physical boundary to your property; it creates a sense of privacy, safety, and adds curb appeal. Your newly built fence not only provides a secure enclosure but also adds a touch of timeless elegance to your outdoor space.
Remember, building a picket fence is not just a one-time project; it requires regular maintenance to ensure its longevity. Regular inspections, repairs, and reapplication of protective coatings will help keep your fence looking its best for years to come.
As you gaze upon your finished picket fence, take a moment to appreciate the hard work and dedication you put into this project. Not only have you built a physical structure, but you’ve also created a space that fosters a sense of pride and enjoyment.
Now, it’s time to sit back, relax, and relish in the enchanting ambiance that your picket fence has brought to your yard. So gather your loved ones, invite your friends over, and start making beautiful memories in your newly transformed outdoor space.
Thank you for joining us on this fulfilling journey of building a picket fence with a gate. We hope this guide has provided you with the knowledge and inspiration to embark on your own DIY project. Happy fencing!
Now that you've tackled building a picket fence with a gate, why not dive deeper into crafting with our latest insights on woodworking? Our guide offers creative and practical advice to refine your skills. If you're eager for more hands-on projects, check out numerous inspiring outdoor projects. Both resources are brimming with ideas to transform any space, ensuring every DIY enthusiast finds something to spark their interest.
Frequently Asked Questions about How To Build A Picket Fence With Gate To Enhance Your Yard
Was this page helpful?
At Storables.com, we guarantee accurate and reliable information. Our content, validated by Expert Board Contributors, is crafted following stringent Editorial Policies. We're committed to providing you with well-researched, expert-backed insights for all your informational needs.


0 thoughts on “How To Build A Picket Fence With Gate To Enhance Your Yard”