Articles
How To Clean A Chimney Yourself
Modified: August 22, 2024
Learn how to clean a chimney yourself with these helpful articles. Remove built-up soot and ensure optimal performance in just a few simple steps.
(Many of the links in this article redirect to a specific reviewed product. Your purchase of these products through affiliate links helps to generate commission for Storables.com, at no extra cost. Learn more)
Introduction
Cleaning a chimney may seem like a daunting task best left to the professionals. However, with the right knowledge, equipment, and safety precautions, you can successfully clean your chimney yourself. Regular chimney maintenance is essential for the efficient and safe operation of your fireplace or wood-burning stove, as well as for minimizing the risk of chimney fires and carbon monoxide poisoning.
In this guide, we will walk you through the step-by-step process of cleaning a chimney yourself. From gathering the necessary equipment to ensuring your safety, inspecting the chimney, and removing creosote buildup, we will provide you with all the information you need to tackle this task with confidence.
Before we dive into the cleaning process, it’s important to note that if you are unsure or uncomfortable with any part of this process, it is always best to consult a professional chimney sweep. They have the expertise and specialized equipment to handle more complex chimney cleaning tasks.
Now, let’s gather our equipment and get started on cleaning your chimney!
Key Takeaways:
- Regular chimney maintenance is essential for safety and efficiency. With proper equipment and precautions, you can successfully clean your chimney yourself, but always prioritize safety and consider consulting a professional if needed.
- Prioritize safety, inspect thoroughly, and clean responsibly. By following the step-by-step guide, you can maintain a safe and efficient chimney, but always seek professional help if uncomfortable or unsure.
Read more: How To Clean Chimney Filter
Necessary Equipment
Before you begin cleaning your chimney, it’s important to gather all the necessary equipment to ensure a safe and effective job. Here are the items you’ll need:
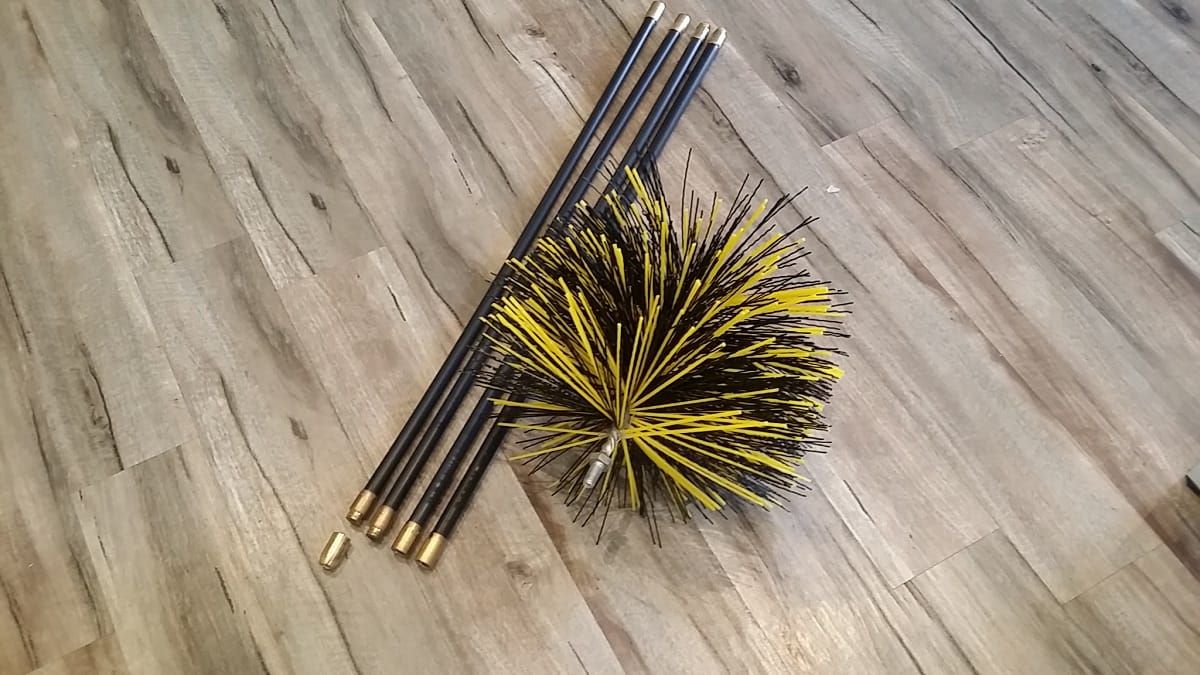
- Chimney brush: Choose a brush specifically designed for your type of chimney. Different brushes are available for metal, masonry, or tile-lined chimneys. Make sure the brush is the appropriate size and shape for your chimney dimensions.
- Extension rods: These rods are used to attach the chimney brush and extend its reach. Depending on the height of your chimney, you may need multiple rods to reach the full length.
- Drop cloth or tarp: Place a drop cloth or tarp around the fireplace or stove area to catch any debris that falls during the cleaning process.
- Dust mask: Protect your lungs from dust, debris, and any potential allergens by wearing a dust mask or respirator.
- Goggles: Shield your eyes from debris and falling particles with a pair of safety goggles.
- Gloves: Wear heavy-duty gloves to protect your hands while handling chimney brush and debris.
- Flashlight: A flashlight will help you see inside the chimney and identify any blockages or areas that need cleaning.
- Dustpan and brush: These tools are handy for cleaning up any loose debris that falls into the fireplace or stove area.
- Ladder and roof safety anchors: You’ll need a sturdy ladder to access the roof safely. Roof safety anchors or harnesses can provide additional security while working at heights.
- Trash bags or buckets: Use these containers to collect and dispose of the debris and creosote that you remove from the chimney.
By ensuring you have all the necessary equipment, you’ll be prepared to tackle the task of cleaning your chimney effectively and safely.
Safety Precautions
When it comes to cleaning a chimney, safety should always be your top priority. Chimney cleaning can be a hazardous task, so it’s important to take the necessary precautions to protect yourself and your home. Here are some safety guidelines to follow:
- Inform others: Let family members or roommates know that you’ll be cleaning the chimney to avoid any accidents or interference during the process.
- Choose the right weather: It’s best to clean your chimney during dry weather conditions. Rain or wind can make the roof slippery and increase the risk of accidents.
- Wear protective gear: Put on a dust mask, safety goggles, and heavy-duty gloves to protect yourself from dust, debris, and any potential hazards.
- Use a sturdy ladder: Ensure that the ladder you use is stable, properly positioned, and capable of supporting your weight. It’s advisable to have someone hold the base of the ladder for added stability.
- Secure the roof: Install roof safety anchors or use a safety harness to secure yourself while working on the roof. This will help prevent falls and injuries.
- Clear the area: Remove any furniture, decorations, or objects around the fireplace or stove area to create a clear workspace. Cover the flooring with a drop cloth or tarp to catch any debris that falls during cleaning.
- Check for obstructions: Before starting the cleaning process, make sure there are no birds’ nests, animal nests, or other blockages in the chimney. Use a flashlight to inspect the chimney from the bottom before proceeding.
- Take breaks if needed: Chimney cleaning can be physically demanding. Take regular breaks to avoid muscle strain or fatigue.
- Have a fire extinguisher nearby: It’s always wise to have a fire extinguisher handy in case of any unexpected accidents or emergencies.
- Know your limits: If at any point you feel uncomfortable or unsure about completing the cleaning process, it’s better to call a professional chimney sweep. They have the experience and expertise to handle more complex chimney cleaning tasks.
By following these safety precautions, you can minimize the risks associated with chimney cleaning and ensure a safer environment for yourself and your home.
Step 1: Clear the Area
The first step in cleaning a chimney is to clear the surrounding area to create a safe and clutter-free workspace. Follow these steps:
- Remove any furniture or decorations near the fireplace or wood-burning stove. This includes rugs, curtains, and any other items that could obstruct your access to the chimney.
- Place a drop cloth or tarp on the floor around the fireplace or stove area. This will protect your flooring from debris and make cleanup easier.
- Use a dustpan and brush to sweep away any loose ashes or debris in the firebox or stove. Dispose of the debris in a trash bag or bucket.
- If you have pets, make sure they are safely kept away from the work area during the cleaning process. Lock them in a separate room or have someone watch over them to prevent accidents.
- Ensure that there is adequate lighting in the area. If necessary, use a portable work light or flashlight to improve visibility.
Clearing the area before you start cleaning the chimney will help you work more efficiently and reduce the risk of accidents or damage to your belongings.
Step 2: Wear Protective Gear
Protective gear is essential when it comes to chimney cleaning. Wearing the proper equipment will shield you from dust, debris, and any potential hazards. Follow these steps to ensure your safety:
- Put on a dust mask or respirator to prevent breathing in harmful particles. This is particularly important as chimney cleaning can release dust, soot, and other airborne contaminants.
- Wear safety goggles to protect your eyes from debris and falling particles. This is especially important when using a chimney brush or removing creosote buildup.
- Invest in a pair of heavy-duty work gloves to protect your hands. These gloves will provide a barrier between your skin and any sharp edges or potentially hot surfaces inside the chimney.
- Wear clothing that covers your arms and legs to avoid direct contact with soot or other substances. Choose clothes that you won’t mind getting dirty, as chimney cleaning can be a messy job.
- Consider wearing a hat or a hood to keep your hair clean and prevent any debris from falling onto your head.
- Ensure that you are wearing sturdy, non-slip footwear to provide stability while climbing ladders and walking on the roof, if necessary.
By wearing the appropriate protective gear, you’ll minimize the risk of injury and maintain a safe working environment.
Read more: How To Start A Chimney Cleaning Business
Step 3: Remove the Chimney Cap
To begin the chimney cleaning process, you’ll need to remove the chimney cap. The chimney cap is typically located at the top of the chimney and serves as a protective covering to prevent debris, animals, and rainwater from entering the chimney. Follow these steps to remove the chimney cap:
- Put on your protective gear, including gloves and safety goggles, before you start working on the chimney cap.
- Inspect the chimney cap to determine the method of removal. Some chimney caps may have screws that need to be loosened, while others may simply twist off or lift off.
- If there are screws holding the chimney cap in place, use a screwdriver or a wrench to loosen them. Be sure to keep the screws in a safe place so they don’t get lost during the cleaning process.
- If the chimney cap twists off, grip it firmly and turn it counterclockwise until it comes loose. Take care not to force it, as excessive force could damage the chimney or the cap itself.
- If the chimney cap lifts off, carefully lift it straight up to avoid knocking it against the chimney or roof. The chimney cap may be heavy, so use caution when removing it.
- Set aside the chimney cap in a safe location away from the work area to prevent it from getting damaged or interfering with the cleaning process.
Removing the chimney cap allows for better access to the chimney and facilitates the cleaning process. Keep the chimney cap in a secure place so that it can be reattached later.
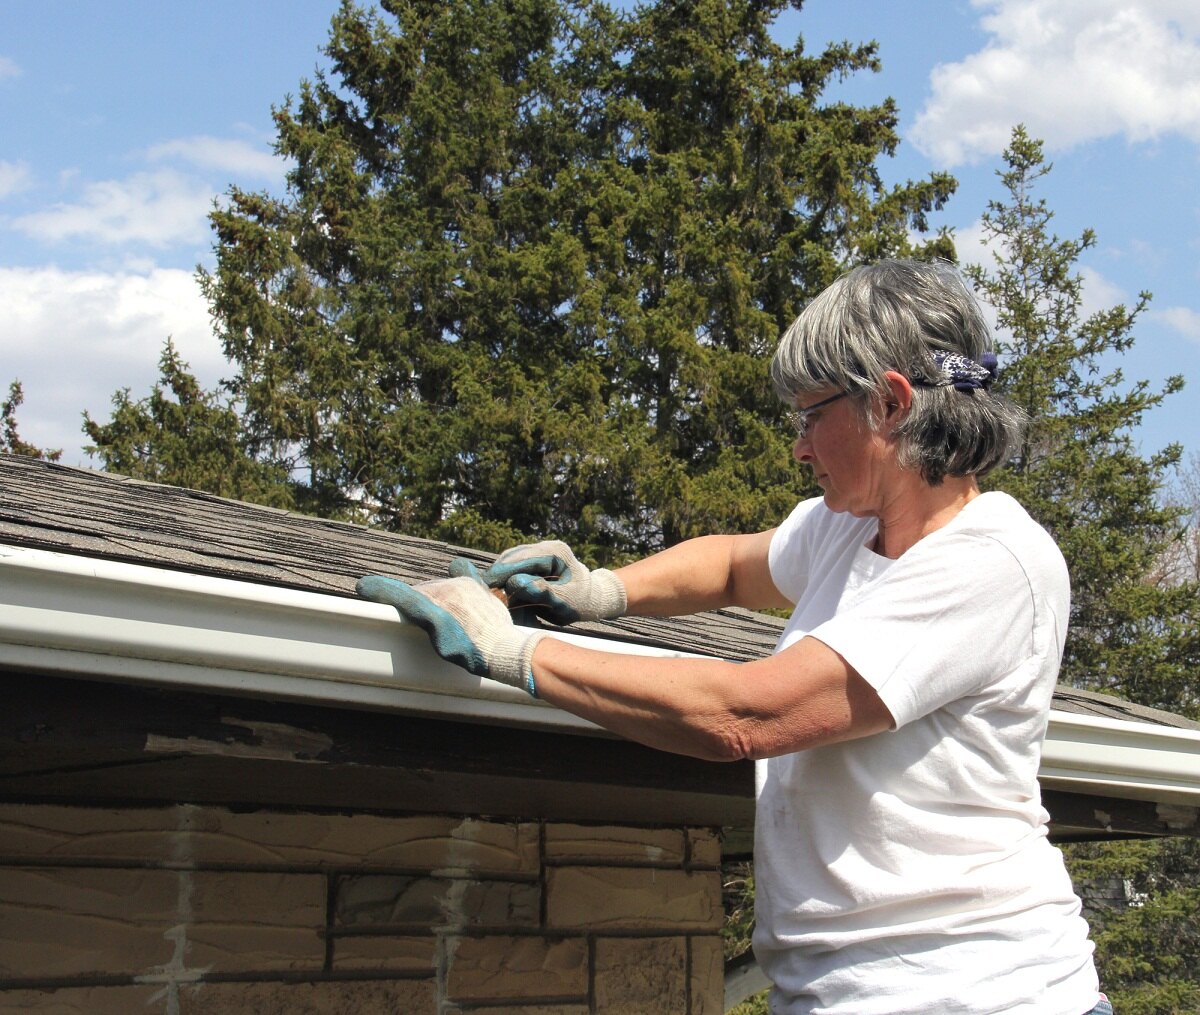
Step 4: Set Up the Ladder and Roof Safety Anchors
Before you can proceed with cleaning the chimney, it’s crucial to set up a sturdy ladder and roof safety anchors to ensure your safety while working at heights. Follow these steps to set up the ladder and roof safety anchors:
- Select a ladder that is appropriate for the height of your roof. Ensure that the ladder is stable, in good condition, and capable of supporting your weight.
- Place the ladder on a flat, stable surface, such as solid ground or a stable platform. Make sure the ladder is positioned at an appropriate angle, usually a 75-degree angle or slightly more.
- Secure the base of the ladder to prevent it from slipping. You can use ladder stabilizers, ladder mitts, or have someone hold the ladder’s base for added stability.
- Attach roof safety anchors or harnesses to secure yourself while working on the roof. These anchors can be securely fastened to structural elements of your roof, such as roof trusses or rafters.
- Ensure that the roof safety anchors are properly installed and can bear your weight. If you are unsure of how to install them correctly, consult a professional to avoid accidents or damage to your roof.
- Test the stability of the ladder and roof safety anchors before climbing up. Give the ladder a gentle shake to ensure it’s secure, and check the roof safety anchors for any signs of wear or looseness.
- Double-check that you have all the necessary equipment with you before climbing the ladder. This includes your chimney brush, extension rods, flashlight, and any other tools or supplies you may need.
Setting up the ladder and roof safety anchors properly is crucial for your safety when working on the roof. Always take the time to ensure that everything is secure and stable before climbing up.
Step 5: Inspect the Chimney from the Bottom
Before you begin the actual cleaning process, it’s important to inspect the chimney from the bottom to assess its condition and identify any potential issues. Follow these steps to inspect the chimney:
- Put on your protective gear, including gloves, safety goggles, and a dust mask, before starting the inspection.
- Open the damper fully to allow better visibility and airflow during the inspection.
- Shine a flashlight up the chimney to examine the interior. Look for any signs of damage, such as cracks, loose mortar, or deteriorating brickwork.
- Check for any blockages or obstructions, such as bird nests, animal nests, or debris. Use the flashlight to get a clear view of the entire chimney.
- Examine the area around the chimney for any signs of water damage, including water stains or chipped paint. This could indicate a leaking chimney or flashing issue.
- Inspect the chimney cap, ensuring that it is in good condition and securely attached. Look for any signs of damage, such as rust, cracks, or missing parts.
- Once you have completed the inspection, take note of any observations or problems that need attention. This will help you address any issues during the cleaning process or when scheduling repairs.
Inspecting the chimney from the bottom allows you to visually assess its condition and identify any potential problems that may need to be addressed. These observations will help you determine the appropriate cleaning methods and any additional steps required during the process.
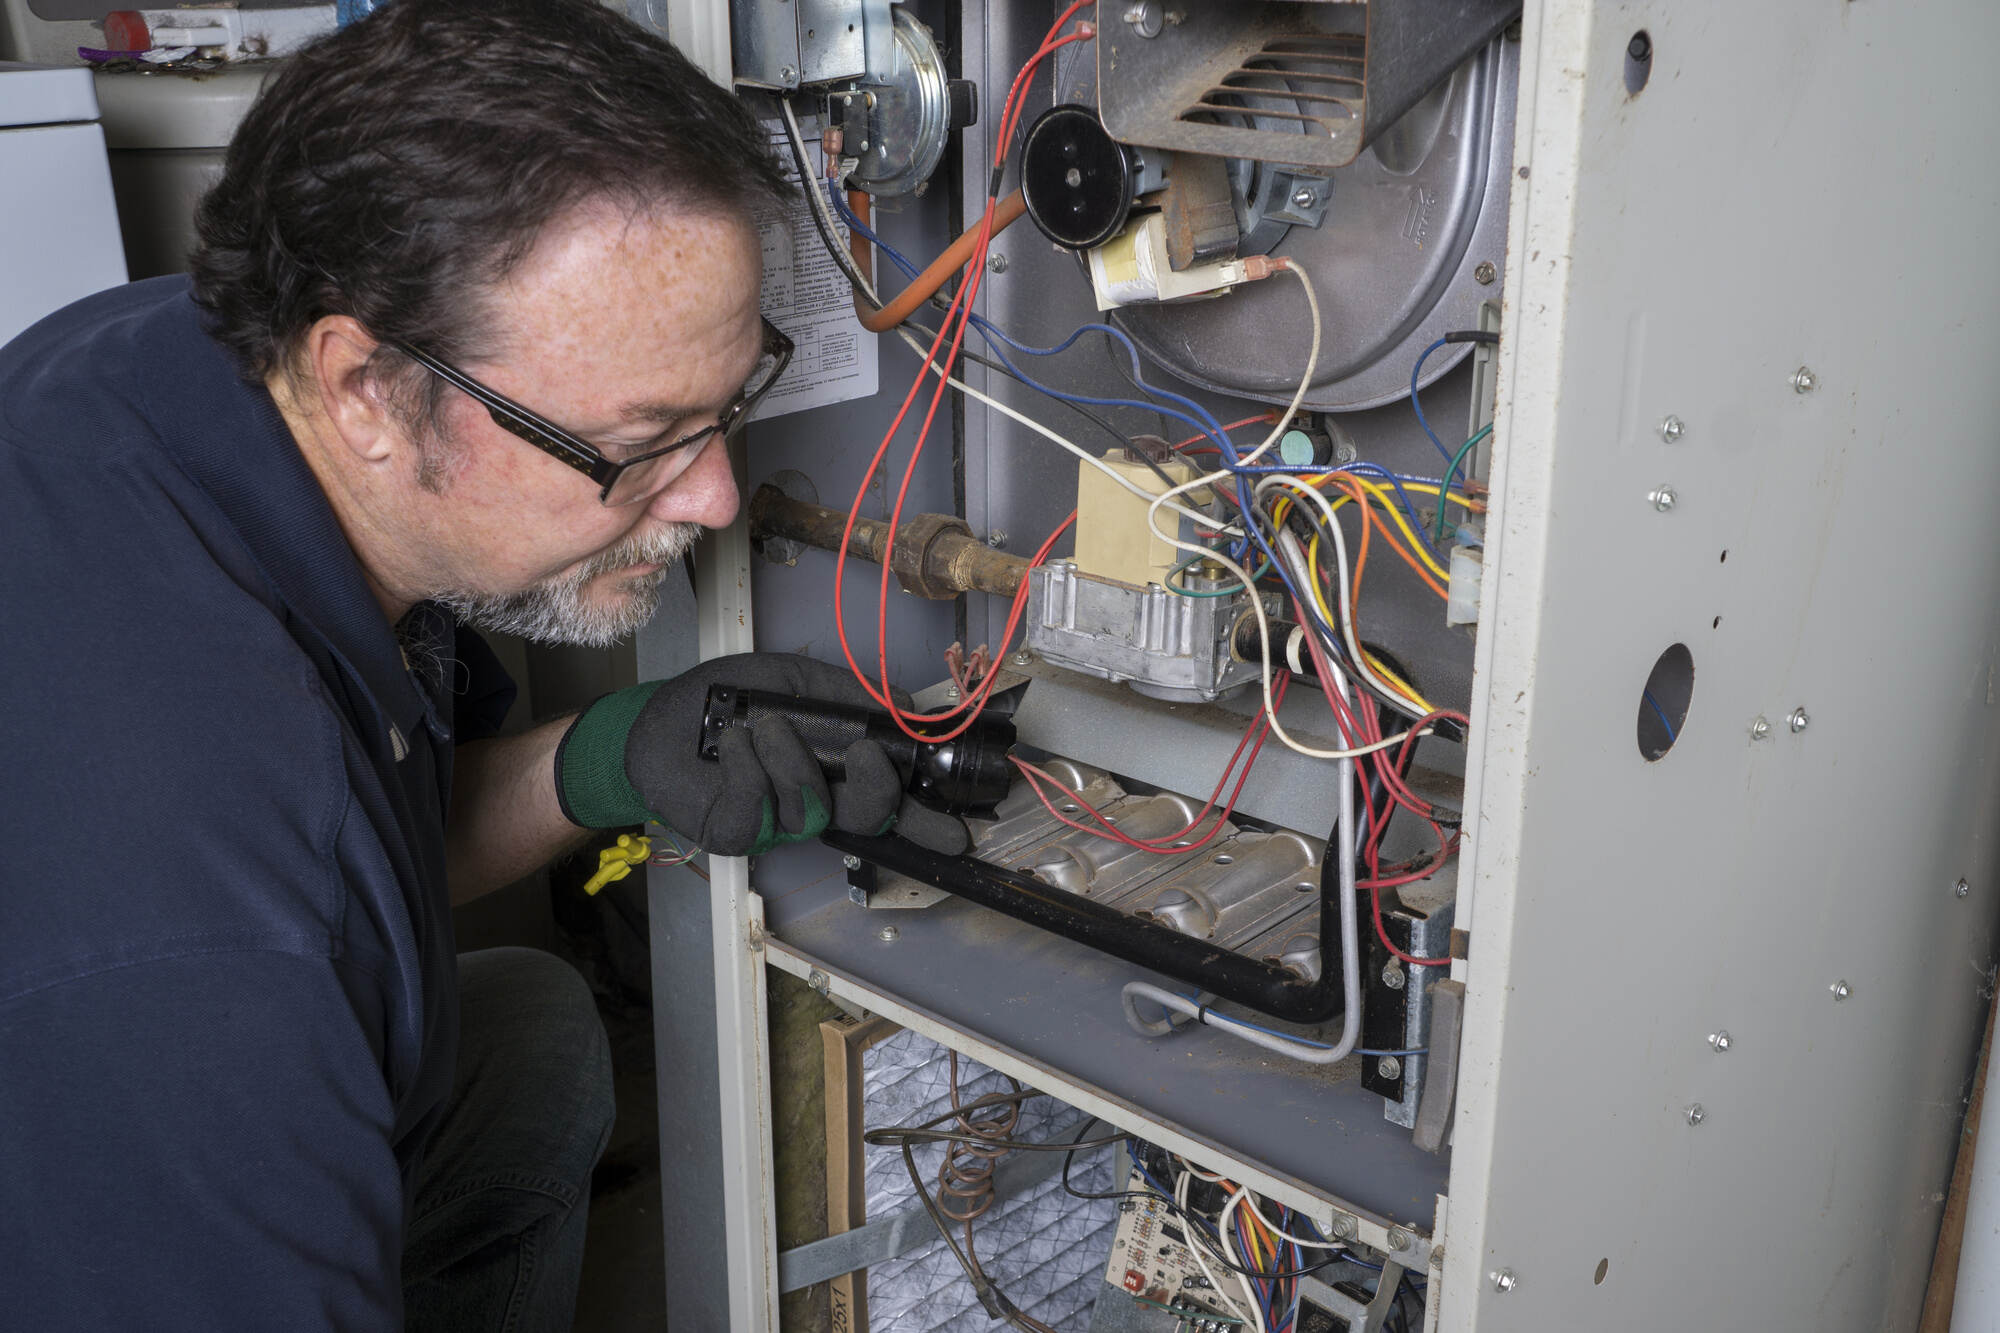
Before cleaning your chimney yourself, make sure to wear protective gear such as gloves and goggles to prevent any debris from getting into your eyes or skin. Always use a chimney brush and rod to thoroughly clean the inside of the chimney.
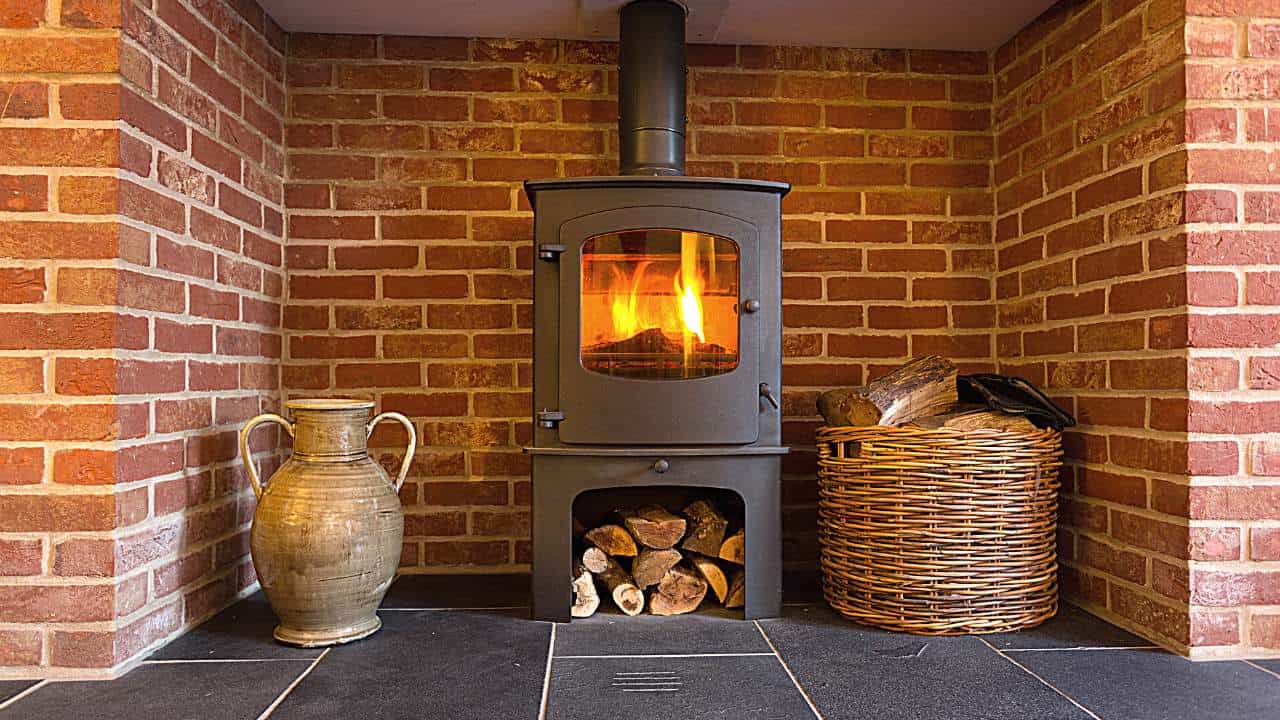
Step 6: Clean the Firebox
Now that you have inspected the chimney and identified any issues, it’s time to clean the firebox. The firebox is the area where the fire burns, and it can accumulate ash, soot, and debris over time. Follow these steps to clean the firebox:
- Ensure that the fireplace or wood-burning stove is completely cool before starting the cleaning process. This will prevent any accidental burns or injuries.
- Put on your protective gear, including gloves and a dust mask, to protect yourself from dust and debris.
- Place a drop cloth or tarp in front of the firebox to catch any loose debris or ash.
- Use a dustpan and brush to carefully sweep out any loose ashes and debris from the firebox. Dispose of the collected debris in a trash bag or bucket.
- Inspect the firebox for any signs of damage, such as cracks or loose bricks. If you notice any issues, it’s advisable to consult a professional for repairs.
- Wipe down the interior walls of the firebox using a damp cloth or sponge. This will remove any soot or residue buildup.
- If you notice stubborn stains or heavy buildup, you can use a fireplace cleaner or mild detergent mixed with water. Apply the cleaner to a cloth and scrub the affected areas gently.
- Rinse the cloth or sponge thoroughly and wipe down the walls with clean water to remove any cleaning residue.
- Allow the firebox to dry completely before proceeding with the next steps of the chimney cleaning process.
Cleaning the firebox not only ensures a cleaner look but also improves the efficiency and safety of your fireplace or wood-burning stove. By removing ashes and debris, you create a better environment for optimal heating and minimize the risk of chimney fires.
Read more: How Much Does It Cost To Clean A Chimney
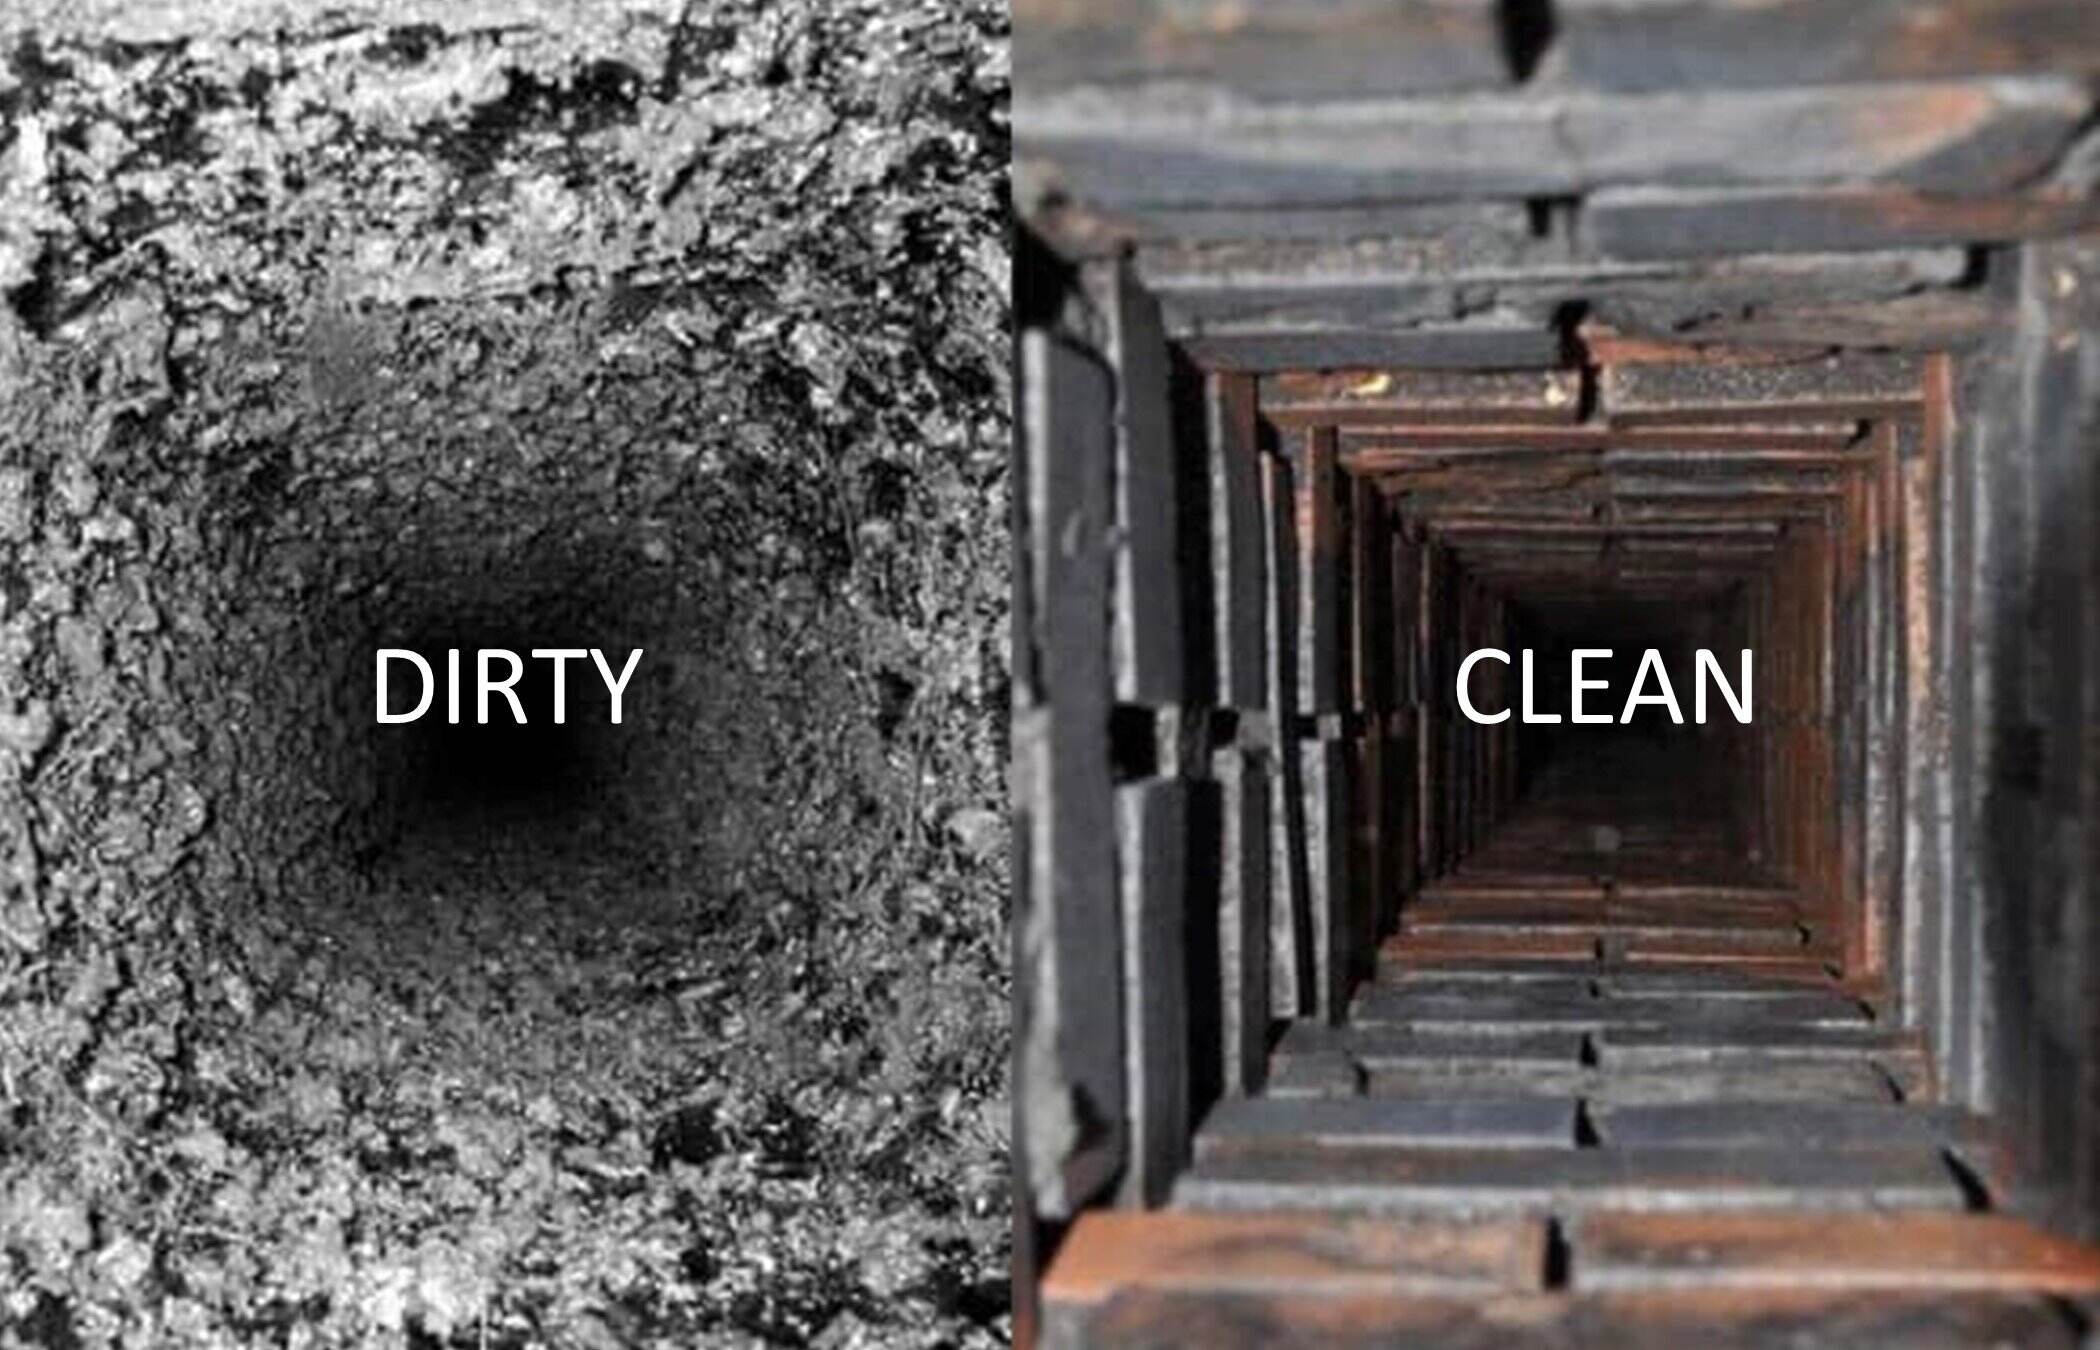
Step 7: Remove Creosote Buildup from Flue Liner
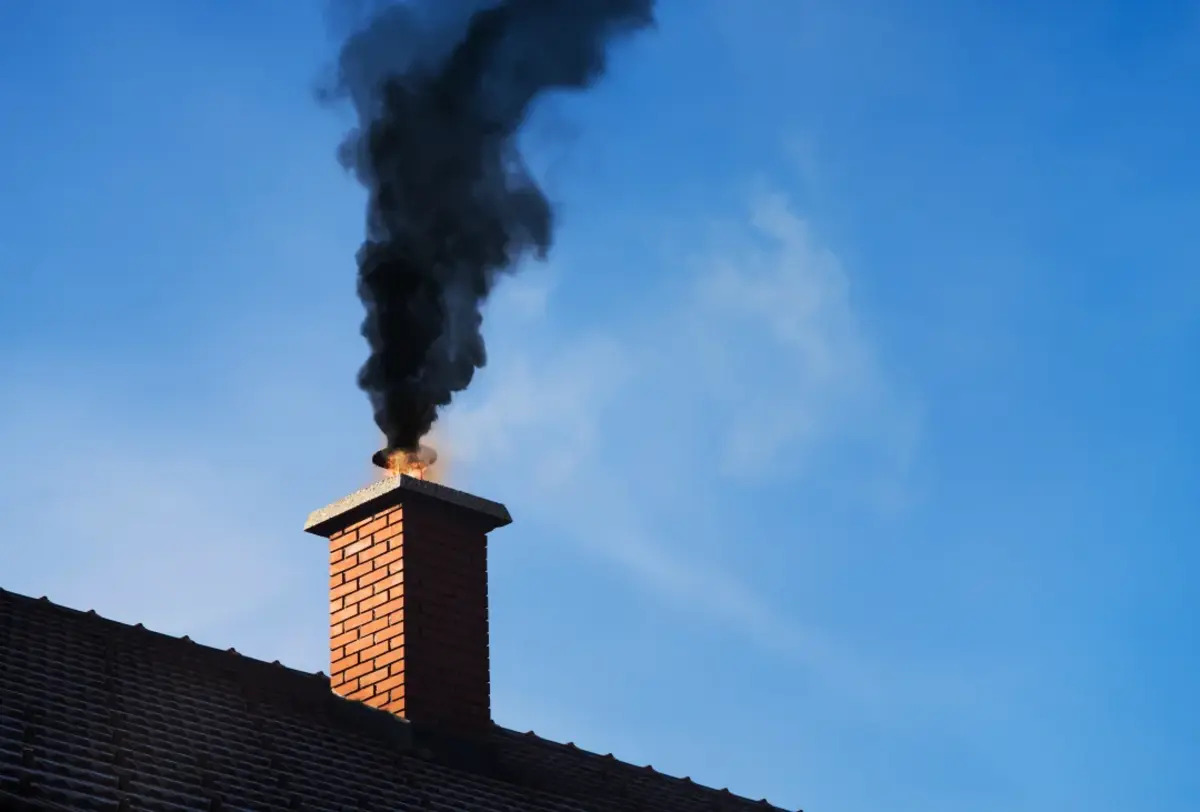
One of the most critical steps in chimney cleaning is removing the creosote buildup from the flue liner. Creosote is a highly flammable substance that forms when wood or fossil fuels are burned. It can accumulate inside the flue liner and increase the risk of chimney fires. Follow these steps to remove creosote buildup:
- Put on your protective gear, including gloves, safety goggles, and a dust mask, to protect yourself from creosote particles.
- Attach the appropriate-sized chimney brush to one or more extension rods, depending on the height of your chimney. Make sure the brush fits snugly inside the flue liner.
- Insert the brush into the flue liner, starting at the bottom and working your way up. Use a twisting or pushing motion to scrub the walls of the flue liner.
- Continue brushing the flue liner, moving the brush up and down to cover all sides thoroughly. Pay extra attention to areas with visible creosote buildup or stubborn deposits.
- Pull the brush out of the flue liner and remove any loosened creosote or debris. Collect the debris in a trash bag or bucket for proper disposal.
- Inspect the flue liner to ensure that the creosote buildup has been effectively removed. If necessary, repeat the brushing process until the flue liner is clean.
- Once the flue liner is clean, use a flashlight to double-check for any remaining creosote or debris. Make sure the entire flue liner is clear before proceeding.
- Dispose of the collected creosote and debris in a safe and responsible manner. Creosote should never be disposed of in regular household waste.
Removing creosote buildup is crucial for maintaining a safe and efficient chimney. Regularly cleaning the flue liner helps prevent chimney fires and ensures proper ventilation for your fireplace or wood-burning stove.
Step 8: Clean the Chimney Damper
The chimney damper plays an important role in regulating the airflow and preventing drafts when the fireplace or wood-burning stove is not in use. Over time, the damper can accumulate dirt, debris, and soot, hindering its functionality. Follow these steps to clean the chimney damper:
- Ensure that the damper is fully closed before you start cleaning. This will prevent any debris from falling into the firebox or stove.
- Put on your protective gear, including gloves and safety goggles, to keep yourself protected while cleaning the damper.
- If possible, access the damper from inside the fireplace or wood-burning stove by removing the grate or accessing the ash pit. This will allow easier access to the damper assembly.
- Use a small brush or a vacuum cleaner with a brush attachment to gently remove any dust, dirt, or soot from the damper assembly. Pay attention to both the top and bottom sides of the damper.
- If the damper is heavily coated with soot or stubborn buildup, mix a mild detergent with warm water. Dampen a cloth or sponge with the solution and carefully wipe down the damper surfaces. Rinse the cloth or sponge frequently and continue until the damper is clean.
- Inspect the damper for any signs of damage, such as rust or warping. If you notice any issues, it may be necessary to consult a professional for repairs or replacement.
- Allow the damper to dry completely before operating the fireplace or wood-burning stove.
- Once the damper is clean and dry, test its functionality by opening and closing it a few times. Make sure it moves smoothly and securely seals when closed.
Cleaning the chimney damper ensures proper ventilation and efficient operation of the fireplace or wood-burning stove. By removing dirt and debris, you can maintain the functionality and longevity of the damper.
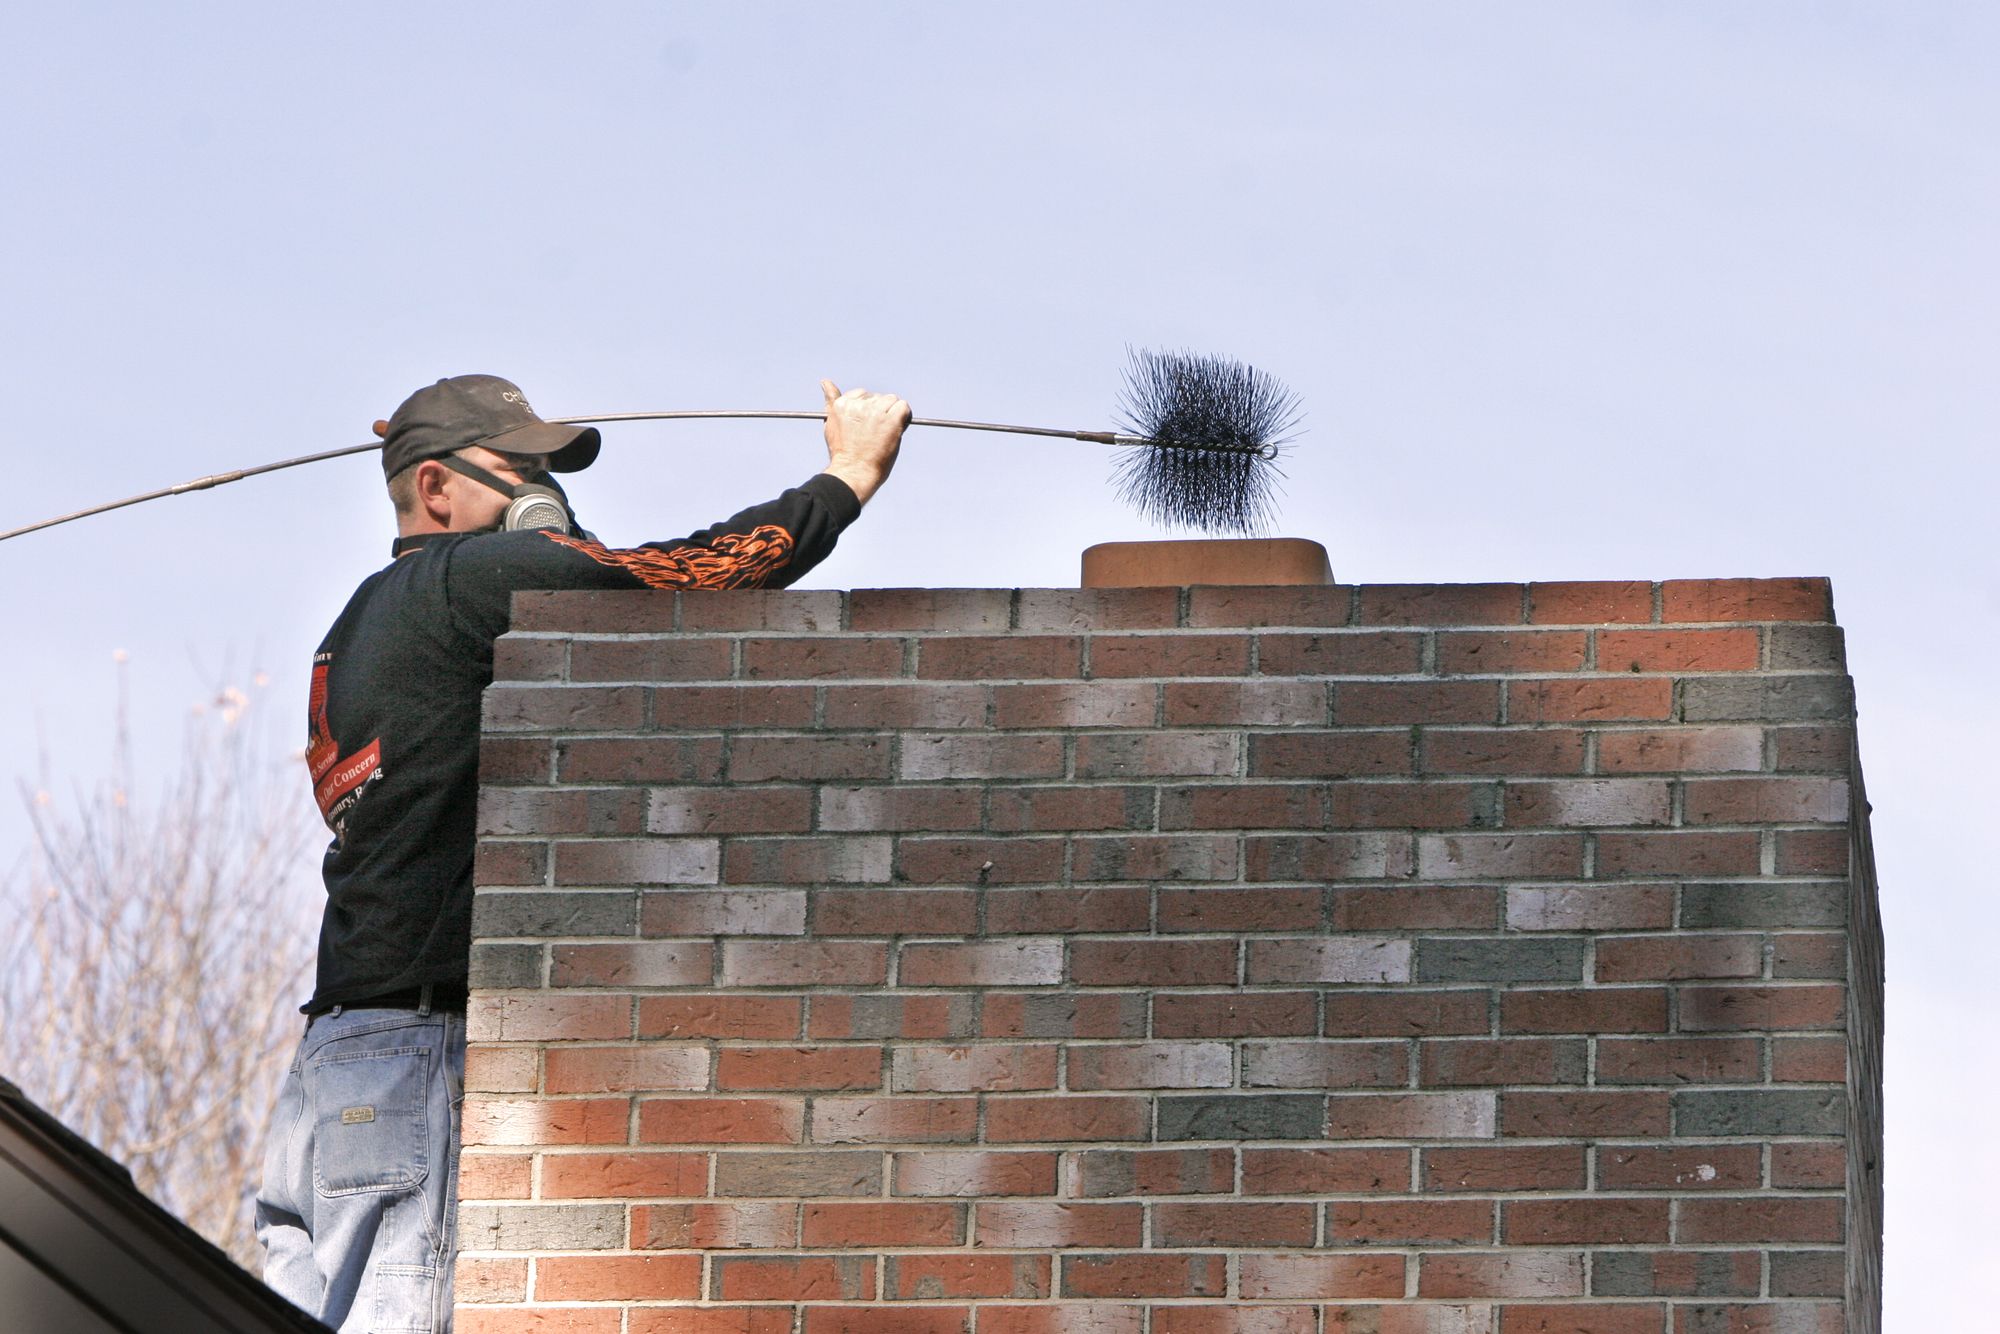
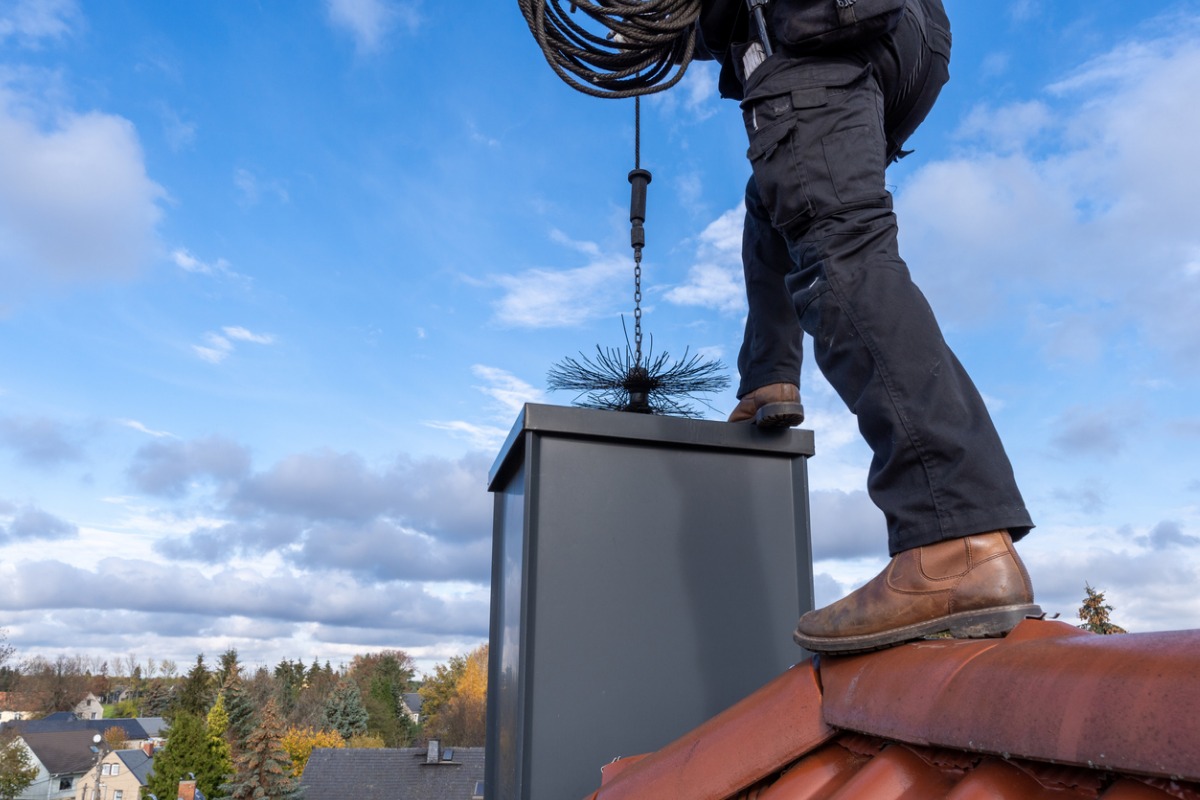
Step 9: Brush the Chimney Walls
Brushing the chimney walls is a crucial step in removing any remaining soot, debris, or creosote buildup that may have accumulated. By effectively brushing the chimney walls, you improve the overall cleanliness and safety of your chimney. Follow these steps to brush the chimney walls:
- Put on your protective gear, including gloves, safety goggles, and a dust mask, to protect yourself from debris and soot.
- Attach the appropriate-sized chimney brush to the extension rods. Ensure that the brush fits snugly inside the chimney and matches the diameter of your flue liner.
- Starting from the bottom of the chimney, insert the brush and extension rods into the flue liner. Use a twisting motion to scrub the chimney walls thoroughly.
- Slowly and steadily move the brush up and down, making sure to cover the entire circumference of the flue liner. Apply moderate pressure to ensure effective scrubbing.
- Continue brushing the chimney walls, gradually moving upward until you reach the top of the chimney. Be careful not to dislodge or damage any components or chimney caps along the way.
- If you encounter any stubborn areas with heavy buildup, spend extra time and effort to thoroughly clean those sections. Repeat the brushing motion until the walls feel smooth and free of debris.
- Periodically remove the brush from the chimney to remove dislodged soot, debris, or creosote. Collect the debris in a bucket or trash bag for proper disposal.
- Once you reach the top of the chimney, carefully remove the brush and extension rods from the flue liner.
- Inspect the chimney walls using a flashlight to ensure that they are clean and free of any remaining residue or buildup.
Brushing the chimney walls helps remove soot, debris, and creosote, reducing the risk of chimney fires and improving the overall performance of your chimney system. Make sure to take your time and be thorough during this step for best results.
Step 10: Check for Any Blockages
Checking for blockages in the chimney is a crucial step in maintaining proper ventilation and preventing potential hazards. Blockages can obstruct the airflow and increase the risk of smoke backdrafts or chimney fires. Follow these steps to check for any blockages in your chimney:
- Put on your protective gear, including gloves and safety goggles, to protect yourself from any debris that may dislodge during this process.
- Inspect the chimney from the bottom to the top, both from inside your home and outside on the roof. Use a flashlight to help you see inside the chimney and identify any potential blockages.
- Look for signs of nesting materials or animal debris, such as twigs, leaves, or animal droppings. These can indicate the presence of animals or birds nesting in your chimney.
- Check for any obstructions or debris that may have fallen into the chimney, such as tree branches, leaves, or loose mortar. These blockages can restrict the airflow and hinder the performance of your chimney system.
- If you identify any blockages, it’s best to consult a professional chimney sweep to safely remove them. Attempting to remove blockages on your own can be dangerous and may cause further damage to your chimney.
- Make a note of any blockages or issues you found during the inspection. This will help you communicate with a professional or chimney sweep and address any concerns during the cleaning or maintenance process.
Checking for blockages in your chimney is an important step in ensuring proper airflow and the safe operation of your fireplace or wood-burning stove. If you identify any blockages, it’s essential to seek professional assistance to address the issue.
Read more: How Often To Clean Gas Fireplace Chimney
Step 11: Clean Chimney Cap and Reattach
After completing the cleaning process, it’s important to clean the chimney cap and securely reattach it to ensure proper functioning and protection against debris and animals. Follow these steps to clean the chimney cap and reattach it:
- Put on your protective gear, including gloves and safety goggles, to protect yourself from any debris or dirt on the chimney cap.
- Inspect the chimney cap for any buildup of dirt, soot, or other debris. Use a brush or cloth to gently remove any loose particles from the cap’s surface.
- If the chimney cap is dirty or stained, you can mix a mild detergent with warm water. Dampen a cloth or sponge with the soapy solution and carefully scrub the cap to remove any stubborn stains or grime.
- Rinse the chimney cap thoroughly with clean water to remove any soap residue. Ensure that all traces of soap are completely washed away.
- Allow the chimney cap to air dry fully before reattaching it to the chimney. Avoid using any heat source to expedite the drying process, as it may cause damage to the cap.
- Carefully position the chimney cap back onto the chimney opening. Ensure that it is properly aligned and securely attached.
- If there are screws or fasteners securing the chimney cap, tighten them to ensure a firm and stable fit. Take care not to overtighten and risk damaging the cap or chimney.
- Double-check that the chimney cap is properly secured and can withstand external forces such as wind or animal activity.
Cleaning the chimney cap and reattaching it is essential to maintain a functional and protected chimney. A clean cap helps prevent debris, animals, and water from entering the chimney and affecting its performance.
Step 12: Clean Up and Dispose of Debris
As you near the end of the chimney cleaning process, it’s important to clean up and properly dispose of the debris, soot, and creosote that you have removed from the chimney. Follow these steps to clean up and dispose of the debris:
- Gather all the tools, equipment, and cleaning materials that you have used during the chimney cleaning process.
- Remove the drop cloth or tarp that you placed around the fireplace or wood-burning stove. Carefully fold or roll it up to contain all the debris.
- If you used a vacuum cleaner during the cleaning process, empty the debris collection bag or canister into a trash bag. Seal the bag tightly to prevent any dust or debris from escaping.
- Collect any loose debris, ashes, or soot that may have accumulated in the firebox or stove area. Use a dustpan and brush to sweep up the debris and dispose of it in a trash bag or bucket.
- If you have collected creosote or other hazardous materials, check local regulations for proper disposal methods. Some areas may have specific guidelines for disposing of such materials.
- Seal the trash bag or bucket containing the debris securely to prevent any spillage or leakage. If necessary, double bag the debris to ensure it is contained properly.
- Wipe down and clean any surfaces that may have come into contact with dust, debris, or cleaning solutions, such as the firebox, surrounding area, or tools.
- Dispose of the debris and cleaning waste according to local regulations. If possible, contact your local waste management facility or a professional chimney sweep to inquire about proper disposal methods.
- Store your chimney cleaning tools and equipment in a clean and dry area, ready for future maintenance or chimney cleaning tasks.
Properly cleaning up and disposing of the debris generated during the chimney cleaning process is crucial for maintaining cleanliness and preventing any potential hazards. Follow local regulations and guidelines to ensure responsible disposal of waste materials.
Conclusion
Cleaning your chimney yourself can be a rewarding and cost-effective task when done with the right knowledge, equipment, and safety precautions. By following the step-by-step guide outlined in this article, you can successfully clean your chimney and maintain its efficiency and safety.
Throughout the process, it is essential to prioritize safety. Wear protective gear, such as gloves, safety goggles, and a dust mask, to protect yourself from the dust, debris, and potentially hazardous substances. Take the necessary precautions when setting up the ladder and working at heights, ensuring stability and using roof safety anchors for added security.
Inspecting the chimney from the bottom and checking for blockages allows you to identify potential issues that may require professional attention or repairs. Removing creosote buildup from the flue liner and brushing the chimney walls helps prevent chimney fires and ensures proper ventilation. Cleaning the firebox and chimney damper contributes to the efficiency of your fireplace or wood-burning stove. Finally, cleaning the chimney cap and properly reattaching it protects the chimney from debris, animals, and water intrusion.
Remember to clean up and dispose of the debris responsibly, adhering to local regulations and guidelines. Proper maintenance and regular chimney cleaning will not only prolong the lifespan of your chimney but also ensure a safe and efficient heating system for years to come.
If you ever feel uncomfortable or unsure about any part of the chimney cleaning process, it is always best to seek the assistance of a professional chimney sweep. They have the expertise, specialized equipment, and experience to handle more complex chimney cleaning tasks.
Now that you have the knowledge and steps required to clean your chimney, you can begin the process with confidence, knowing that you are promoting a safer and healthier environment in your home.
Frequently Asked Questions about How To Clean A Chimney Yourself
Was this page helpful?
At Storables.com, we guarantee accurate and reliable information. Our content, validated by Expert Board Contributors, is crafted following stringent Editorial Policies. We're committed to providing you with well-researched, expert-backed insights for all your informational needs.

0 thoughts on “How To Clean A Chimney Yourself”