Articles
How To Clean A Brick Chimney
Modified: February 24, 2024
Discover effective tips and techniques for cleaning a brick chimney. Read our informative articles to maintain the longevity and safety of your chimney.
(Many of the links in this article redirect to a specific reviewed product. Your purchase of these products through affiliate links helps to generate commission for Storables.com, at no extra cost. Learn more)
Introduction
A brick chimney can add charm and functionality to a home, providing warmth and a focal point for gathering around during cold winter nights. However, over time, chimneys can become dirty and filled with soot and debris, which can pose a fire hazard and impair their efficiency. That’s why it’s important to regularly clean and maintain your brick chimney to ensure it operates safely and efficiently.
Cleaning a brick chimney may seem like a daunting task, but with the right materials and tools, along with a step-by-step process, you can easily tackle this project yourself. In this guide, we will walk you through the process of cleaning a brick chimney effectively.
Before getting started, it’s essential to gather all the necessary materials and tools. This will make the cleaning process smoother and ensure you have everything you need within reach. Let’s take a look at what you’ll need to complete this task:
Key Takeaways:
- Regularly cleaning and maintaining your brick chimney is essential for safety and efficiency. Follow the step-by-step guide to create a safe workspace, remove debris, clean the flue, inspect for damage, and ensure proper reassembly and testing.
- Thoroughly inspecting your chimney for damage and addressing issues promptly will ensure its longevity and the safety of your home. Regular maintenance and testing are crucial for a safe and efficient fireplace.
Read more: How To Build A Brick Chimney
Materials and Tools Required
Before you begin cleaning your brick chimney, gather the following materials and tools:
- Chimney brush: Look for a brush specifically designed for chimney cleaning. It should have stiff bristles that can effectively remove creosote buildup.
- Drop cloth or plastic sheet: Use a drop cloth or plastic sheet to protect the area around the fireplace from soot and debris.
- Bucket and scrub brush: These will be handy for cleaning the exterior of the chimney.
- Safety goggles and gloves: Protect your eyes and hands from debris and chemicals by wearing safety goggles and gloves.
- Protective mask: A mask will help filter out harmful particles and dust while cleaning the chimney.
- Ladder: Depending on the height of your chimney, you may need a ladder to access the flue from the roof.
- Flashlight: A flashlight will be useful for inspecting the chimney interior for any damage or blockages.
- Creosote remover: Consider using a creosote remover to break down and remove stubborn creosote buildup inside the chimney.
- Chimney cap: If your chimney does not have a cap, you may want to install one after cleaning to prevent rain, debris, and animals from entering the chimney.
- Chimney sealant: A chimney sealant can be used to repair any cracks or gaps in the chimney exterior, preventing water damage and improving insulation.
Gather these materials and tools before you start the chimney cleaning process. Having everything ready will save time and ensure a smoother cleaning experience.
Step 1: Preparing the Area
Before you begin cleaning your brick chimney, it’s important to take some steps to protect the surrounding area and make it easier to clean up afterwards. Here’s how to prepare the area:
- Clear the immediate area: Remove any furniture, objects, or decorations that are near the fireplace or chimney. This will create enough space to work and prevent any accidental damage or obstructions.
- Lay down a drop cloth or plastic sheet: Place a drop cloth or plastic sheet on the floor in front of the fireplace to catch any falling debris or soot during the cleaning process. This will make cleanup much easier afterwards.
- Close openings: Close all openings, such as doors or windows, in the room to prevent drafts that may blow soot or debris into the living area.
- Protect nearby surfaces: Cover any nearby surfaces, like furniture or flooring, with additional drop cloths or plastic sheets to shield them from potential damage or stains.
- Seal off air vents: If there are air vents in the room, make sure to close or seal them to prevent soot or debris from circulating throughout the house.
- Open the damper: Ensure that the fireplace damper is fully open to allow proper ventilation and airflow during the cleaning process.
By taking these precautionary measures and preparing the area beforehand, you will minimize the mess and make the cleaning process much more efficient.
Step 2: Removing Debris and Ashes
Before you can start cleaning the chimney flue and exterior, it’s important to remove any debris and ashes that may have accumulated inside the fireplace. Follow these steps to remove debris and ashes:
- Put on protective gear: Before handling any debris, put on safety goggles, gloves, and a mask to protect yourself from dust and particles.
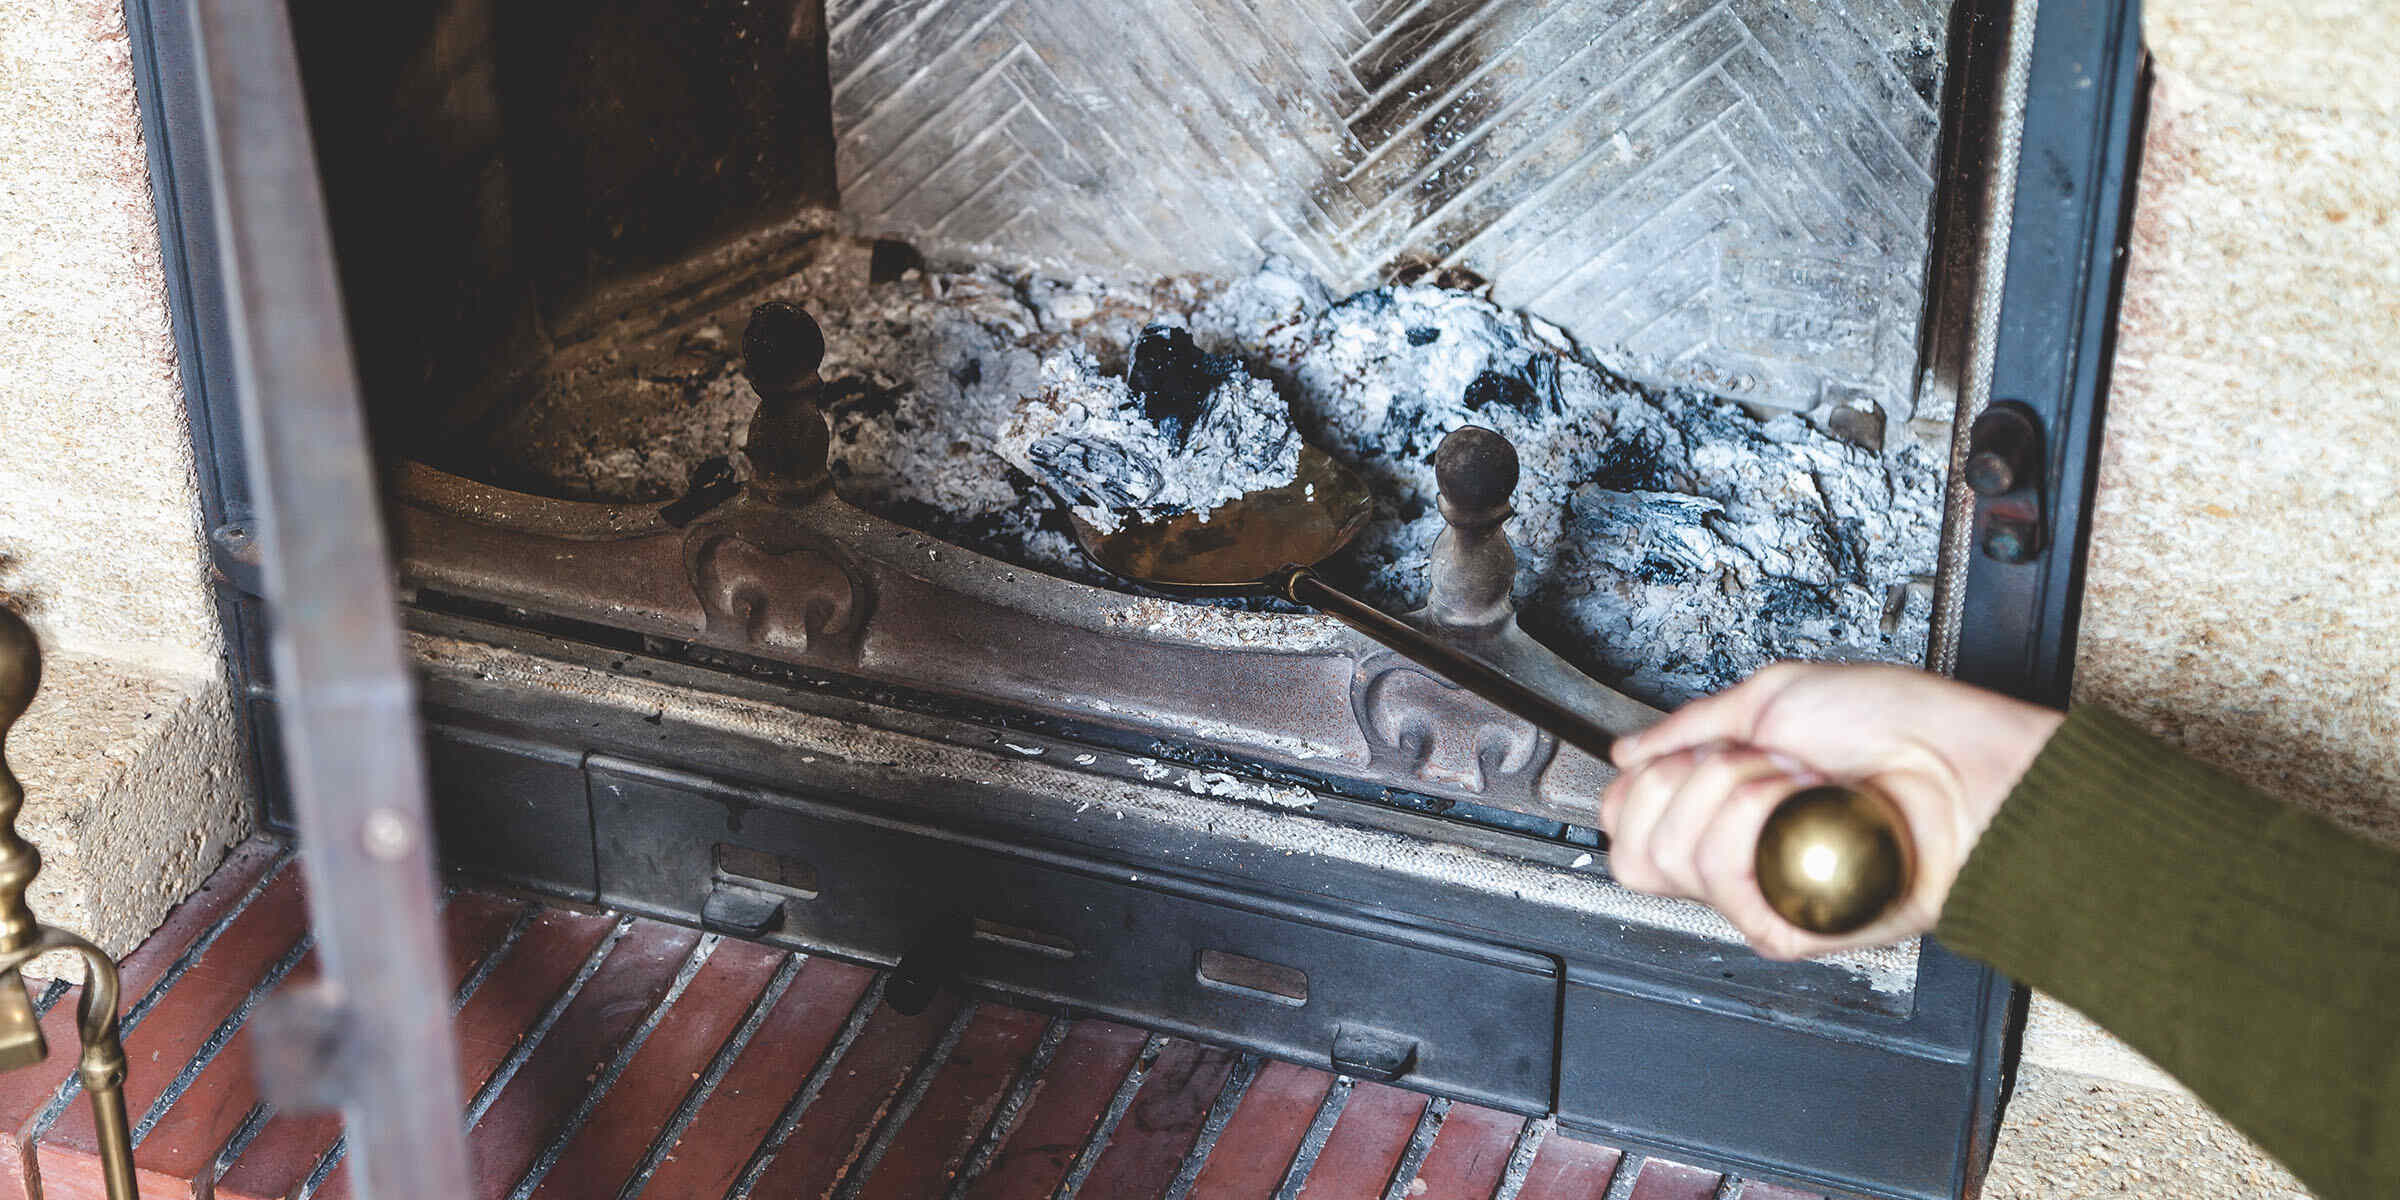
- Clear out the fireplace: Using a small shovel or brush, carefully scoop out any loose ashes, soot, or debris from the fireplace floor. Place them in a metal bucket or bag for disposal.
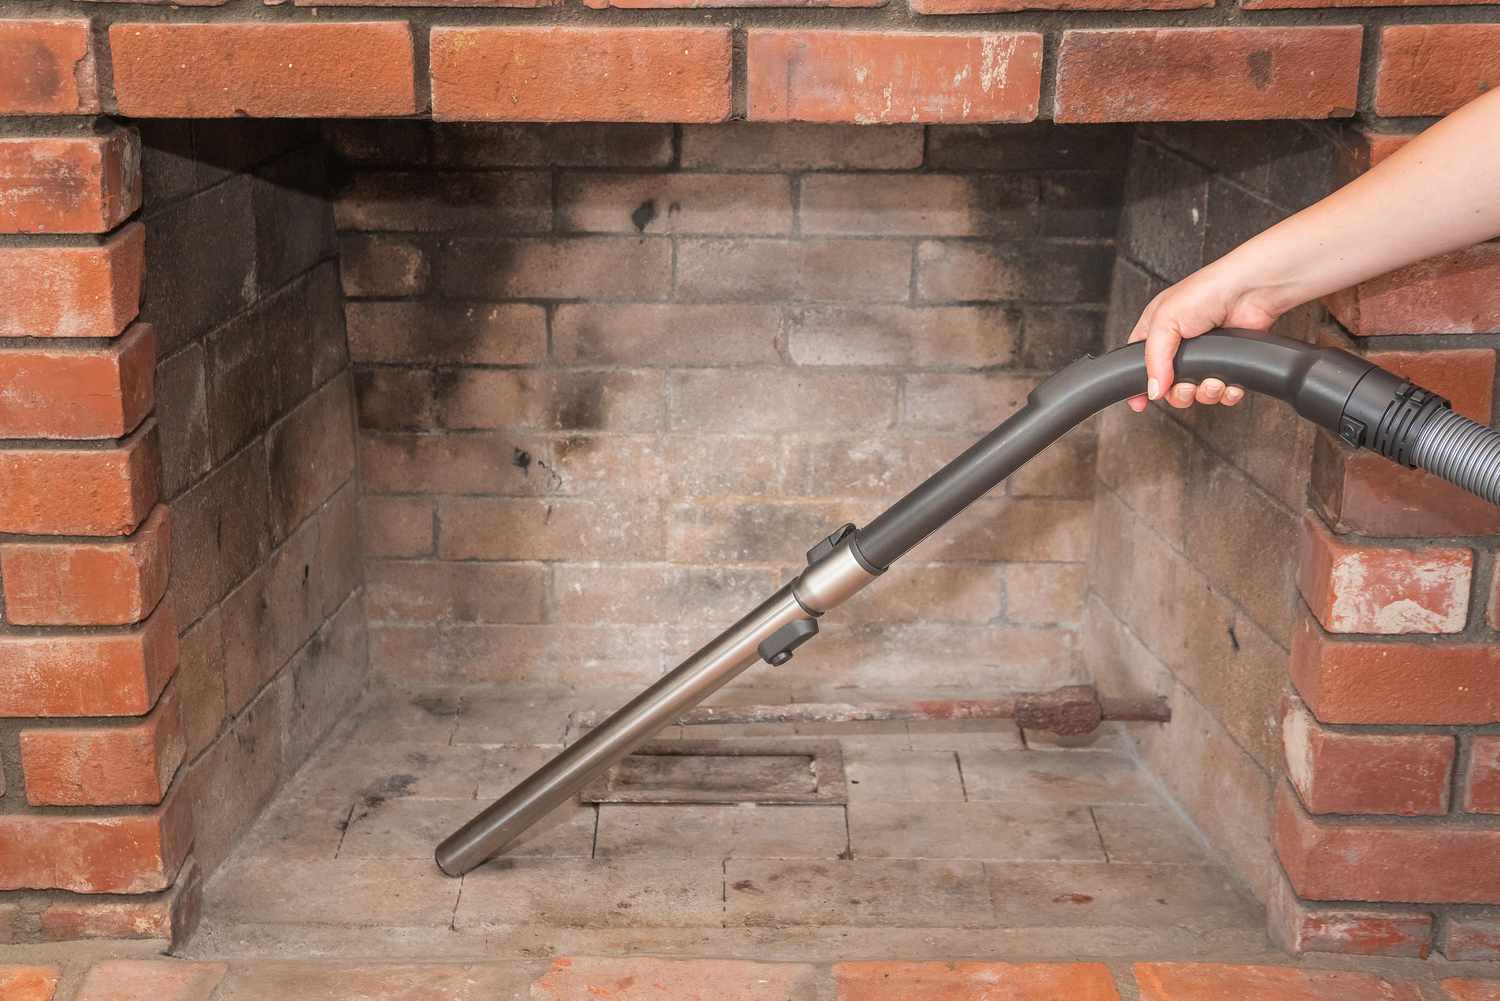
- Inspect the damper and smoke shelf: Check the fireplace damper and smoke shelf for any accumulation of debris or soot. Use a brush or vacuum to remove any loose material.
- Remove the grate: If your fireplace has a grate, remove it and clean off any ash or debris that may have settled on it. You can use a brush or vacuum to remove the buildup.
- Empty the ash pit: Some fireplaces have an ash pit located underneath the firebox. Empty the ash pit by scooping out the ashes and debris into a metal bucket or bag. Be cautious as ashes may still be hot, so let them cool down before handling.
- Dispose of the debris: Once you have cleared out the debris and ashes, transfer them to a metal bucket or bag for disposal. Make sure to safely dispose of them according to local regulations and guidelines.
By thoroughly removing debris and ashes from the fireplace, you will create a clean and safe environment to proceed with the chimney cleaning process.
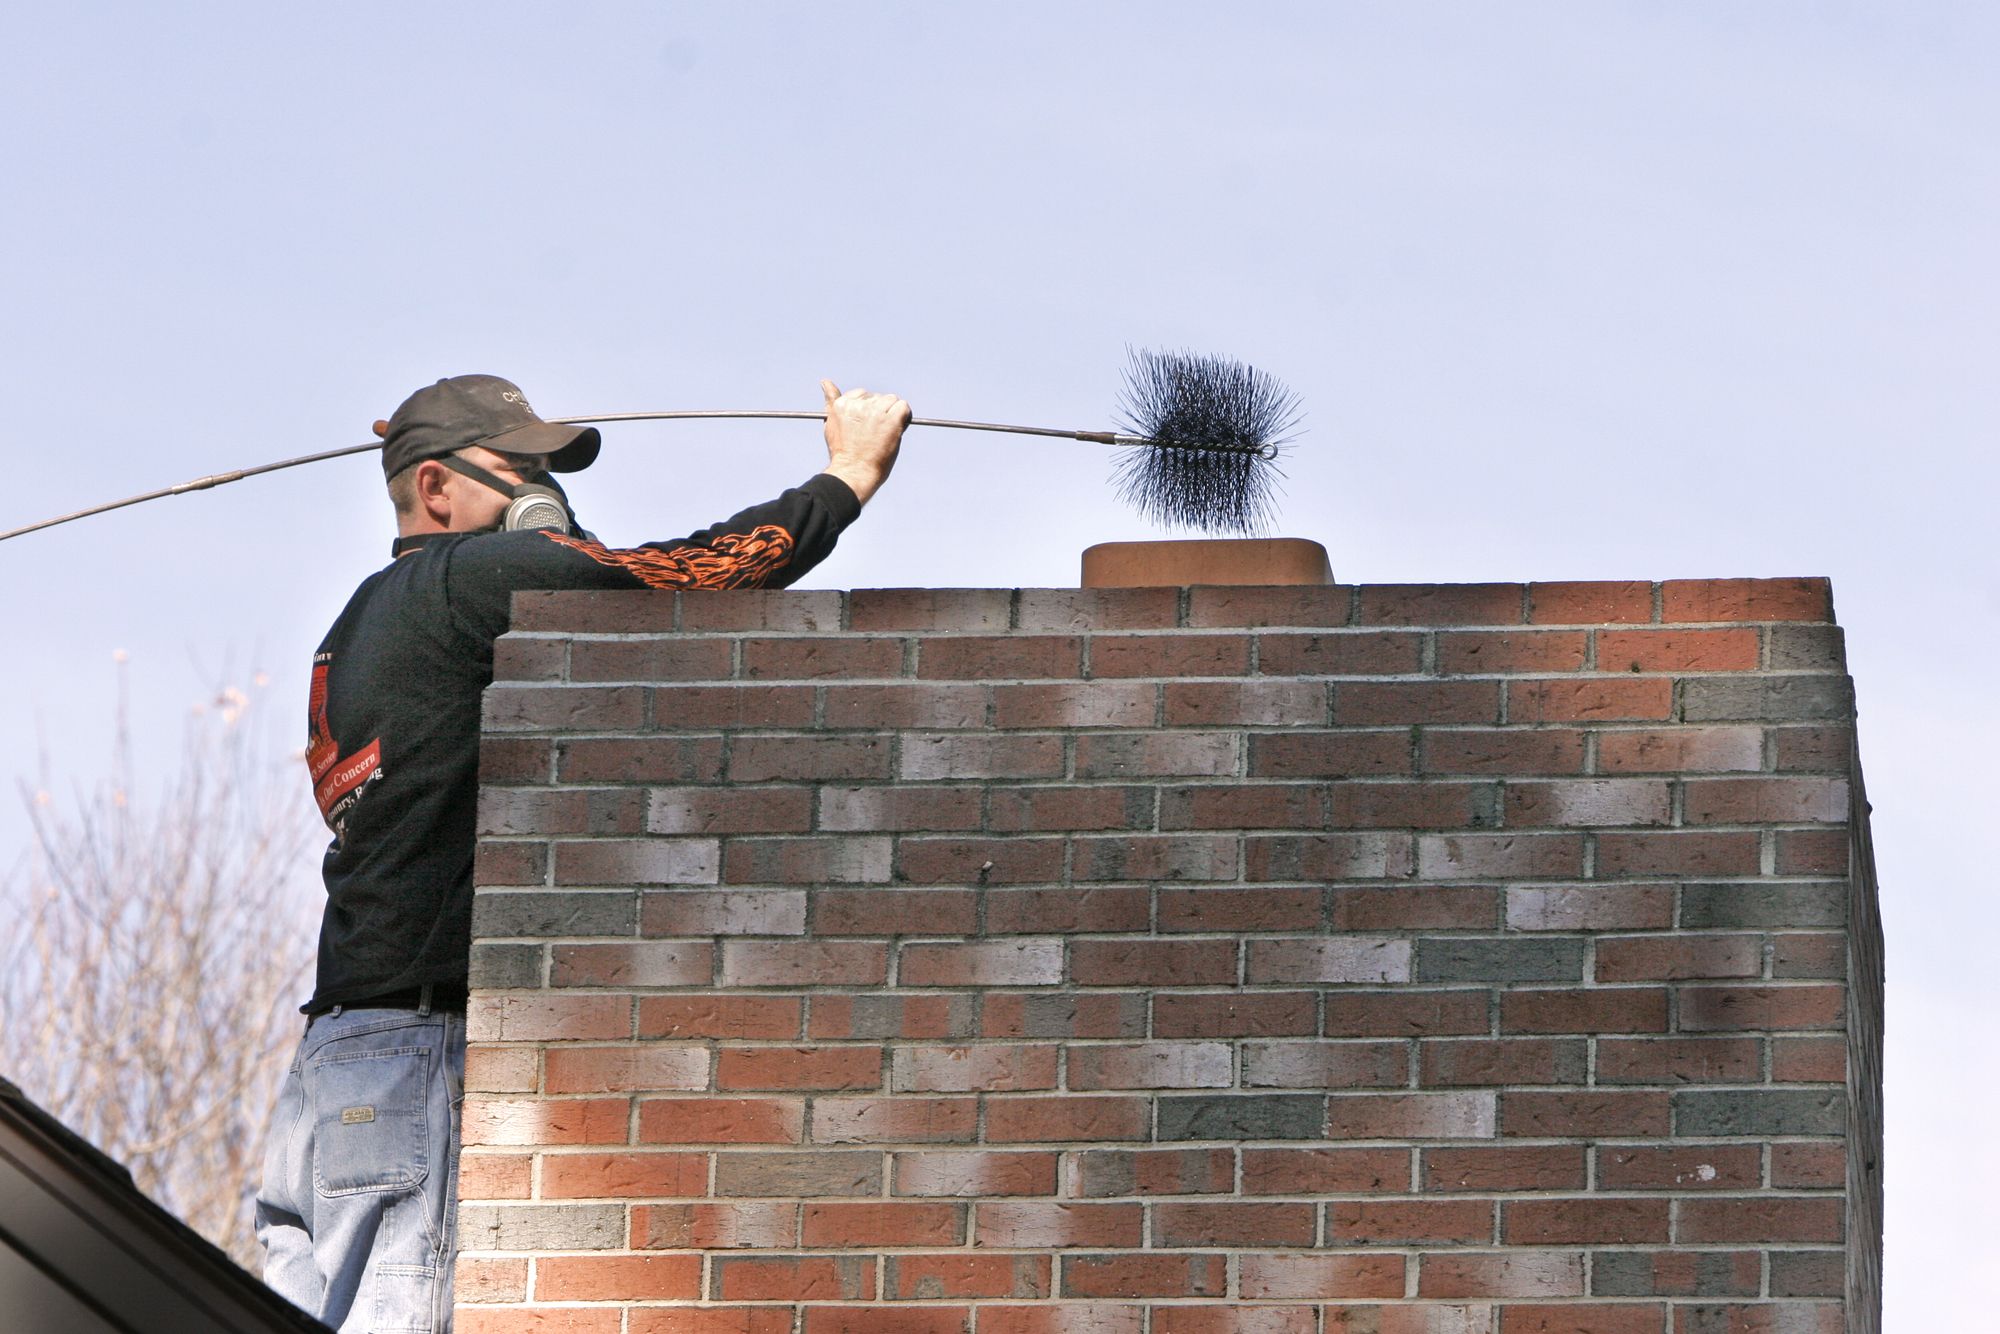
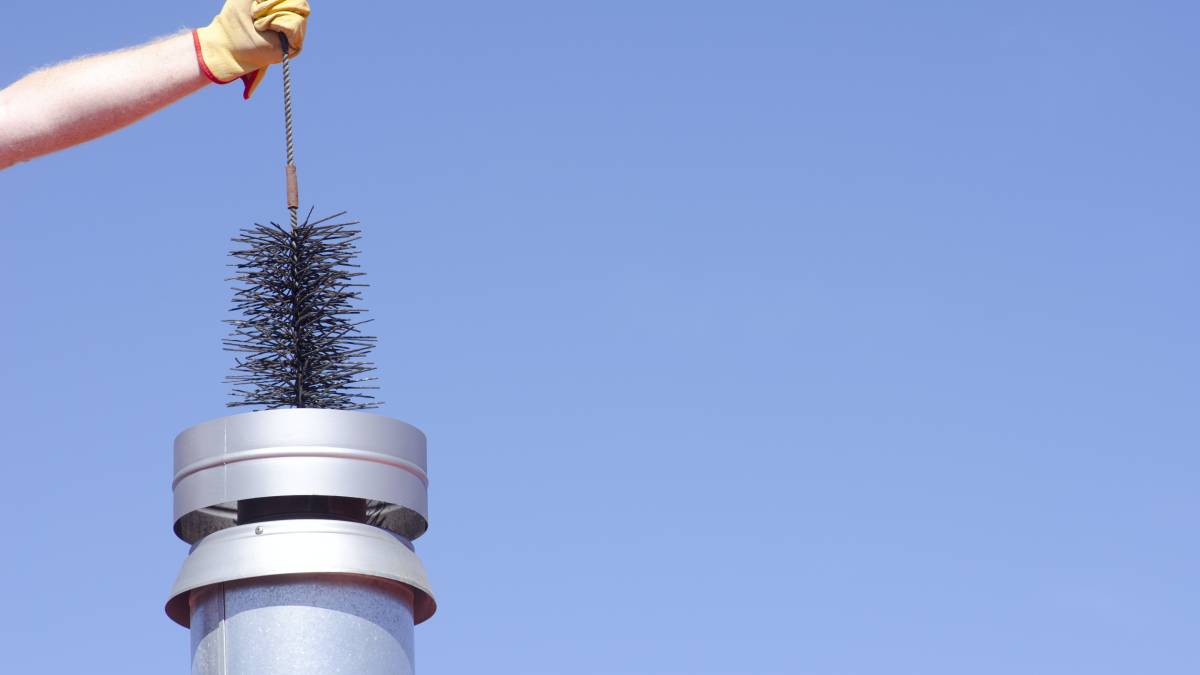
Step 3: Cleaning the Chimney Flue
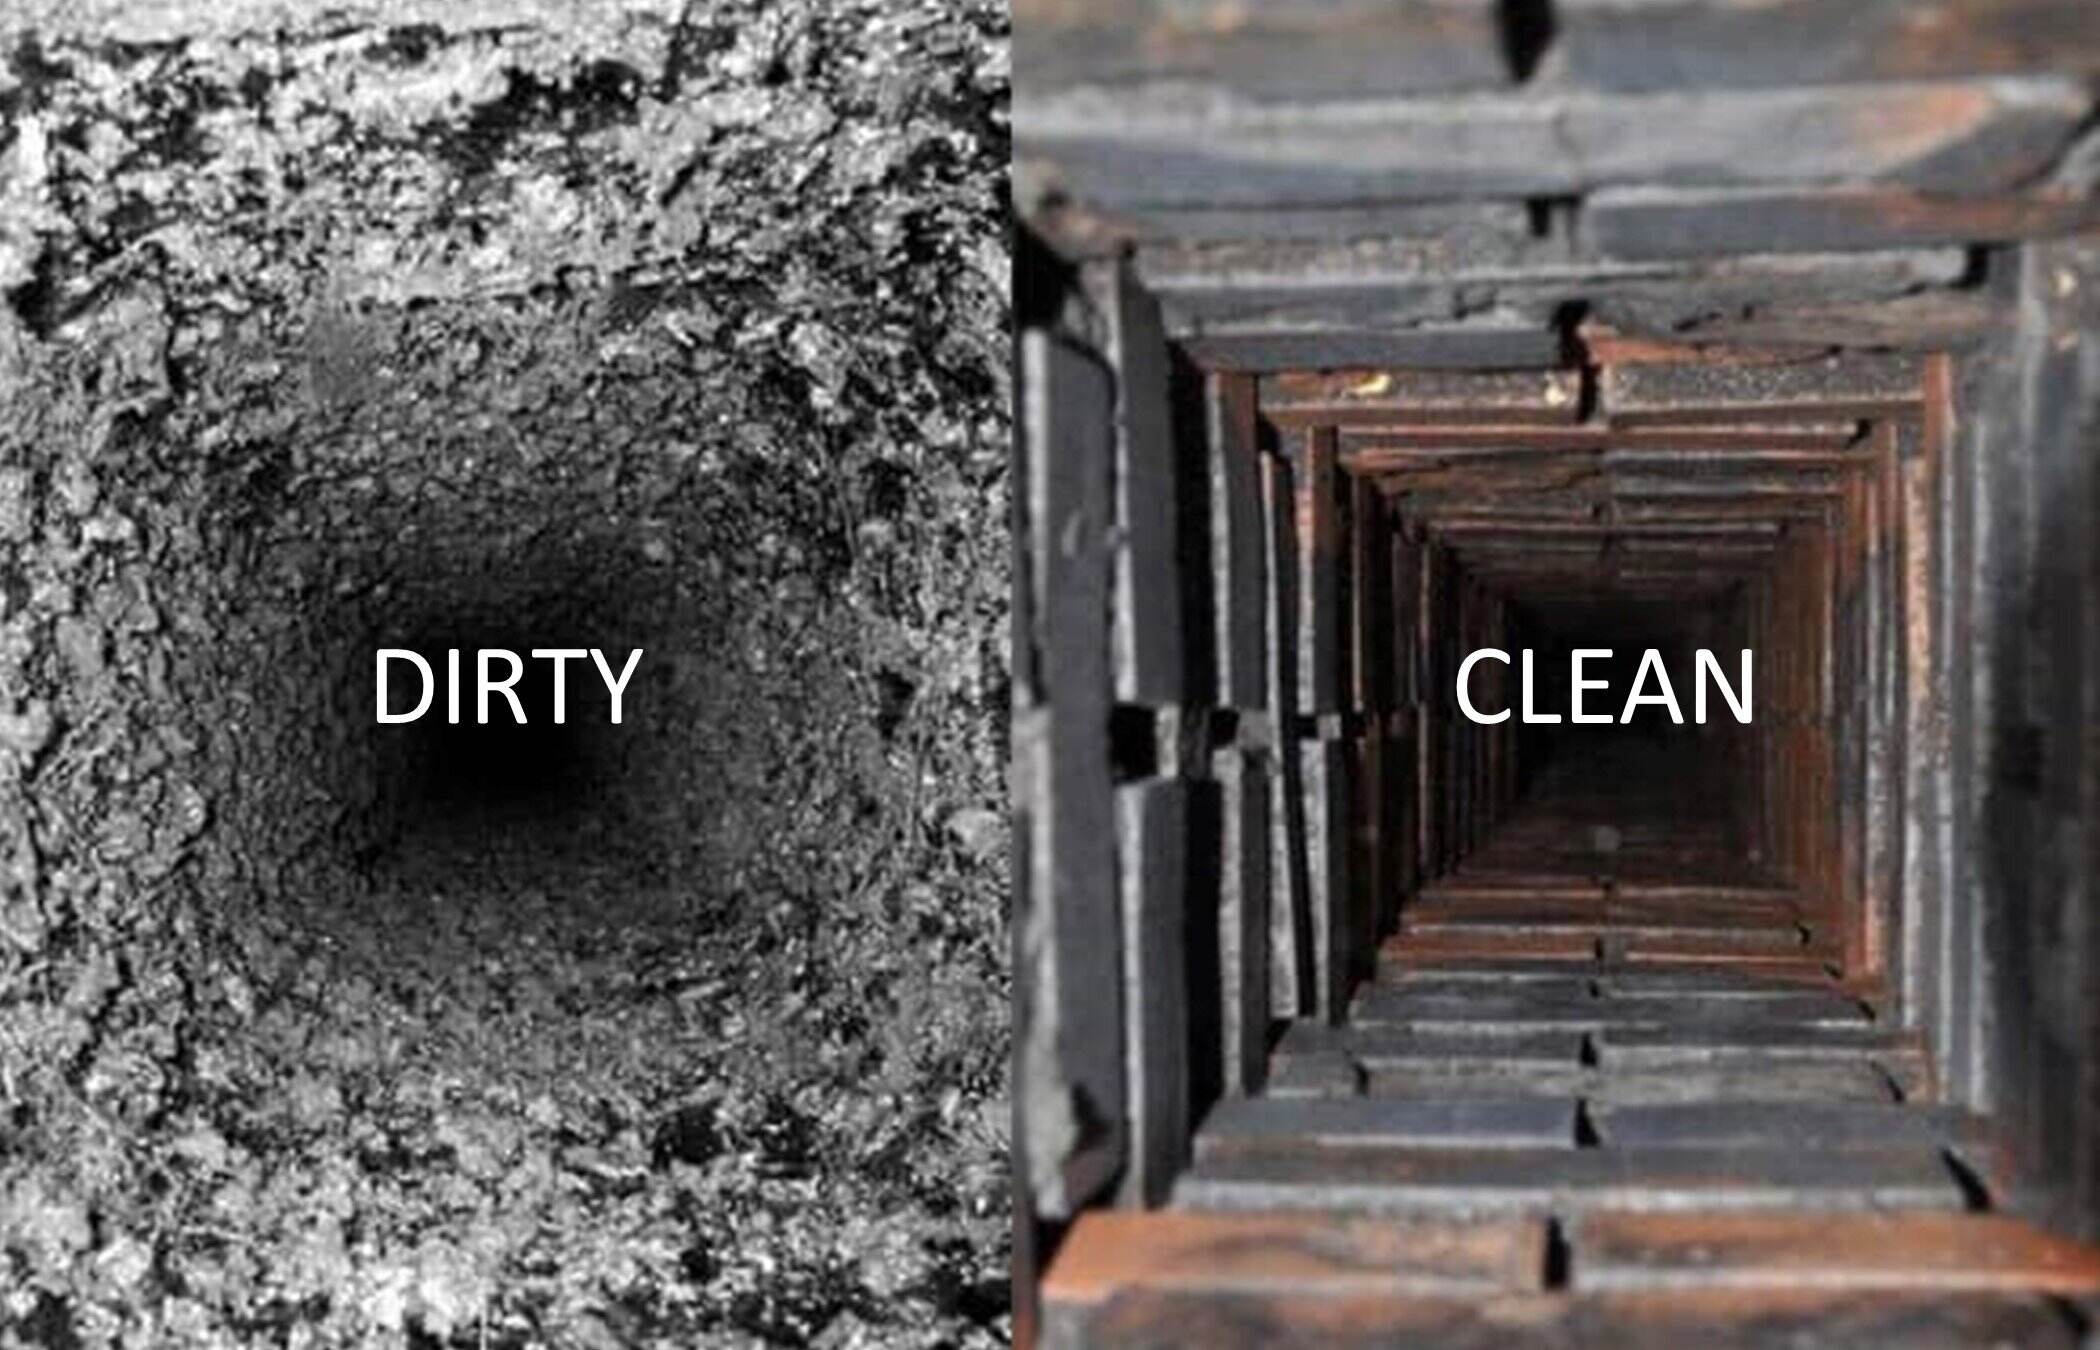
Cleaning the chimney flue is the most important step in maintaining a safe and efficient chimney. The flue is the passageway where smoke and gases escape, and it can become clogged with creosote, soot, and debris over time. Here’s how to clean the chimney flue:
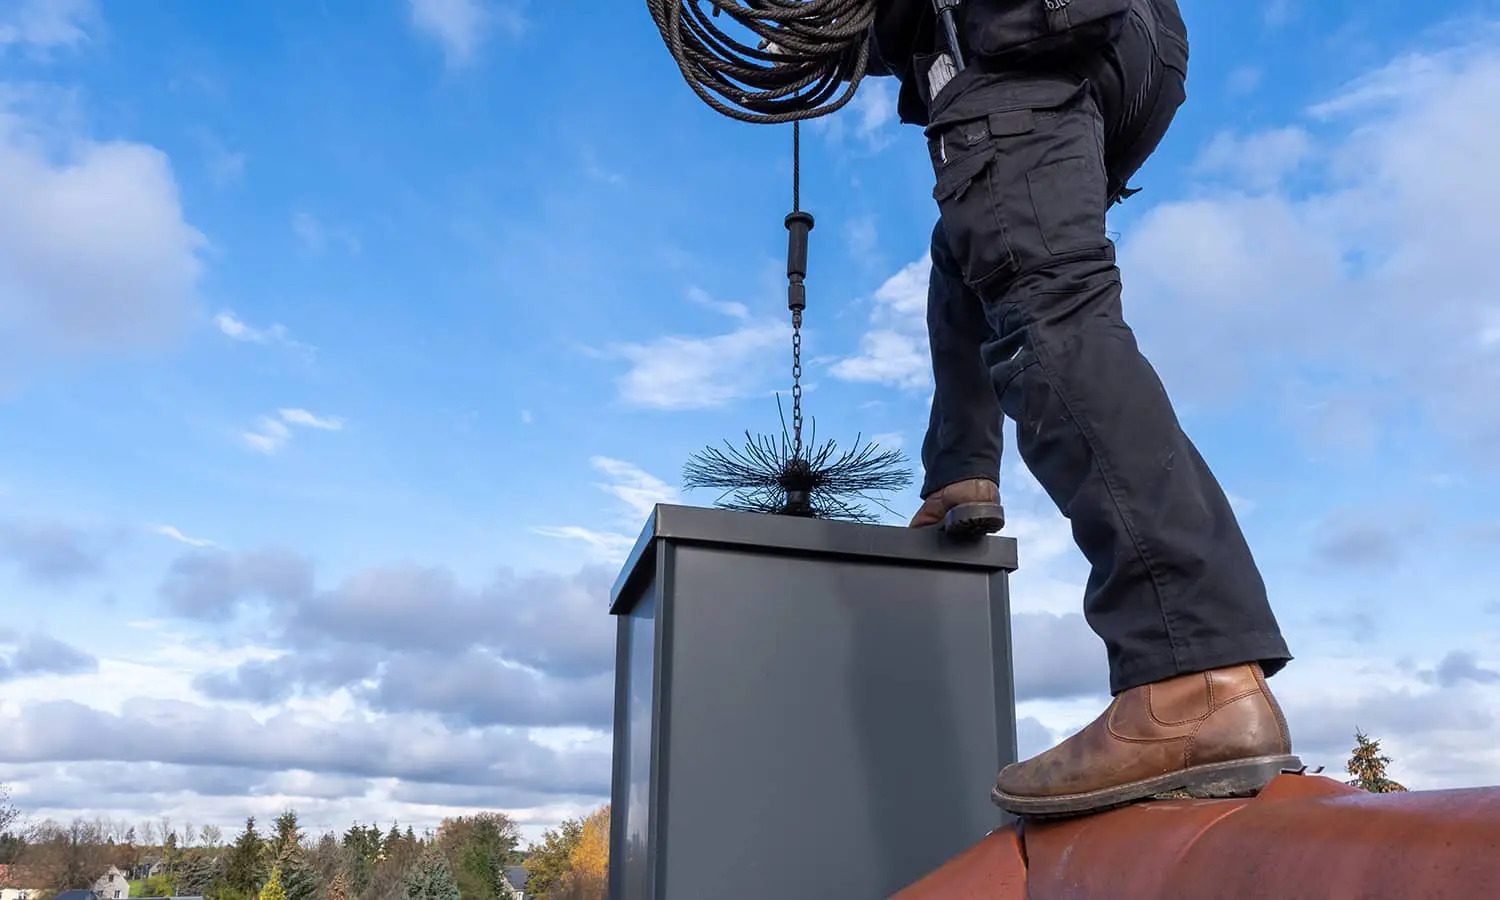
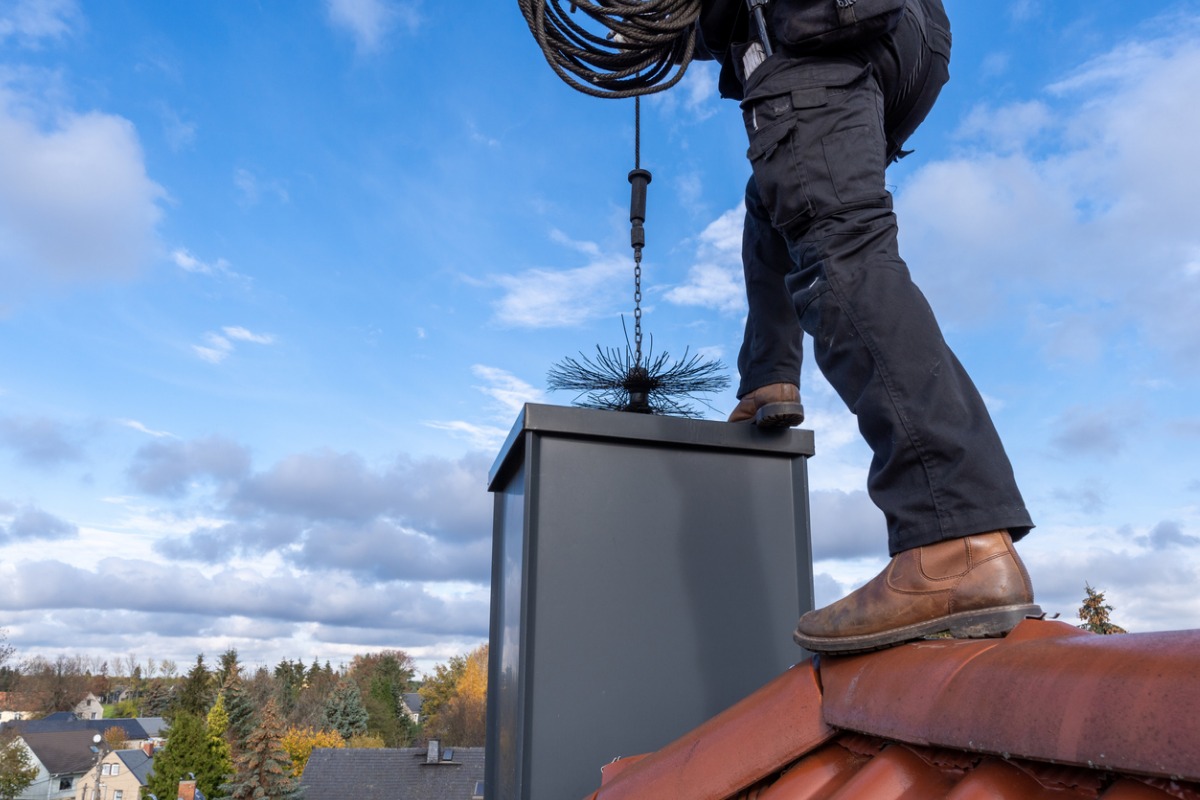
- Set up a ladder: Ensure that the ladder is secure and stable before climbing up to access the chimney flue. Make sure someone is nearby to assist if needed.
- Attach the chimney brush: Choose a chimney brush that matches the size of your flue. Attach the brush securely to a flexible rod or extension pole, allowing for easy movement within the chimney.
- Start from the bottom: Insert the chimney brush into the flue from the fireplace. Use gentle up-and-down and side-to-side motions to loosen and dislodge any buildup along the walls of the flue.
- Scrub the chimney walls: Gradually work your way up, extending the rod or pole as needed, while continuing to scrub the chimney walls with the brush. Be thorough in your cleaning to remove as much creosote and residue as possible.
- Remove the accumulated debris: As you clean, debris may fall down into the fireplace. Use a brush or vacuum to remove any loose debris and ash from the fireplace floor.
- Repeat the process if necessary: Depending on the level of buildup and the size of your chimney, you may need to repeat the brushing process multiple times to ensure a thorough cleaning.
- Inspect for creosote buildup: After cleaning, inspect the flue for any remaining creosote buildup. If significant residue remains, you may need to use a specialized creosote remover to break it down and remove it effectively.
Remember to work slowly and carefully when cleaning the chimney flue, as excessive force or hastiness could lead to damage. Regularly cleaning the flue will help maintain optimal chimney performance and reduce the risk of chimney fires or blockages.
Regularly clean your brick chimney by using a chimney brush to remove soot and debris. Make sure to wear protective gear and cover the fireplace opening to prevent mess.
Read more: How To Repair Brick Chimney
Step 4: Cleaning the Chimney Exterior
Cleaning the chimney exterior not only improves its appearance but also helps prevent any potential damage caused by dirt, moss, or other debris. Here’s how to clean the chimney exterior:
- Inspect the chimney exterior: Before you begin cleaning, carefully inspect the chimney exterior for any visible damage or signs of wear. Look for cracks, loose bricks, or mortar, as these may require repair.
- Remove loose debris: Use a stiff brush or broom to sweep away any loose debris, leaves, or spider webs from the chimney walls. Start from the top and work your way down, ensuring you cover all sides of the chimney.
- Mix a cleaning solution: Prepare a cleaning solution by diluting a mild detergent or chimney cleaning solution in a bucket of warm water. Follow the manufacturer’s instructions for the correct dilution ratio.
- Clean the chimney: Dip a scrub brush into the cleaning solution and begin scrubbing the chimney walls. Focus on areas with noticeable dirt or stains. Use gentle, circular motions to avoid damaging the brick or mortar.
- Pay attention to stubborn stains: For tougher stains or moss buildup, consider using a mixture of equal parts water and white vinegar. Apply this solution to the affected areas and scrub with a brush. Rinse with clean water afterwards.
- Rinse the chimney: After cleaning, use a garden hose or a bucket of clean water to rinse off the chimney walls. Make sure to remove all traces of the cleaning solution and any loosened dirt.
- Allow the chimney to dry: Let the chimney air dry completely before proceeding with the next steps. This will ensure a clean and dry surface for any necessary repairs or sealing.
Cleaning the chimney exterior not only enhances its appearance but also allows for a closer inspection of its condition. If you notice any significant damage or issues during the cleaning process, you may need to consult a professional chimney inspector or repair specialist.
Step 5: Inspecting for Damage or Issues
Performing a thorough inspection of your chimney is crucial to identify any potential damage or issues that may require repair. Here’s how to inspect your chimney for damage:
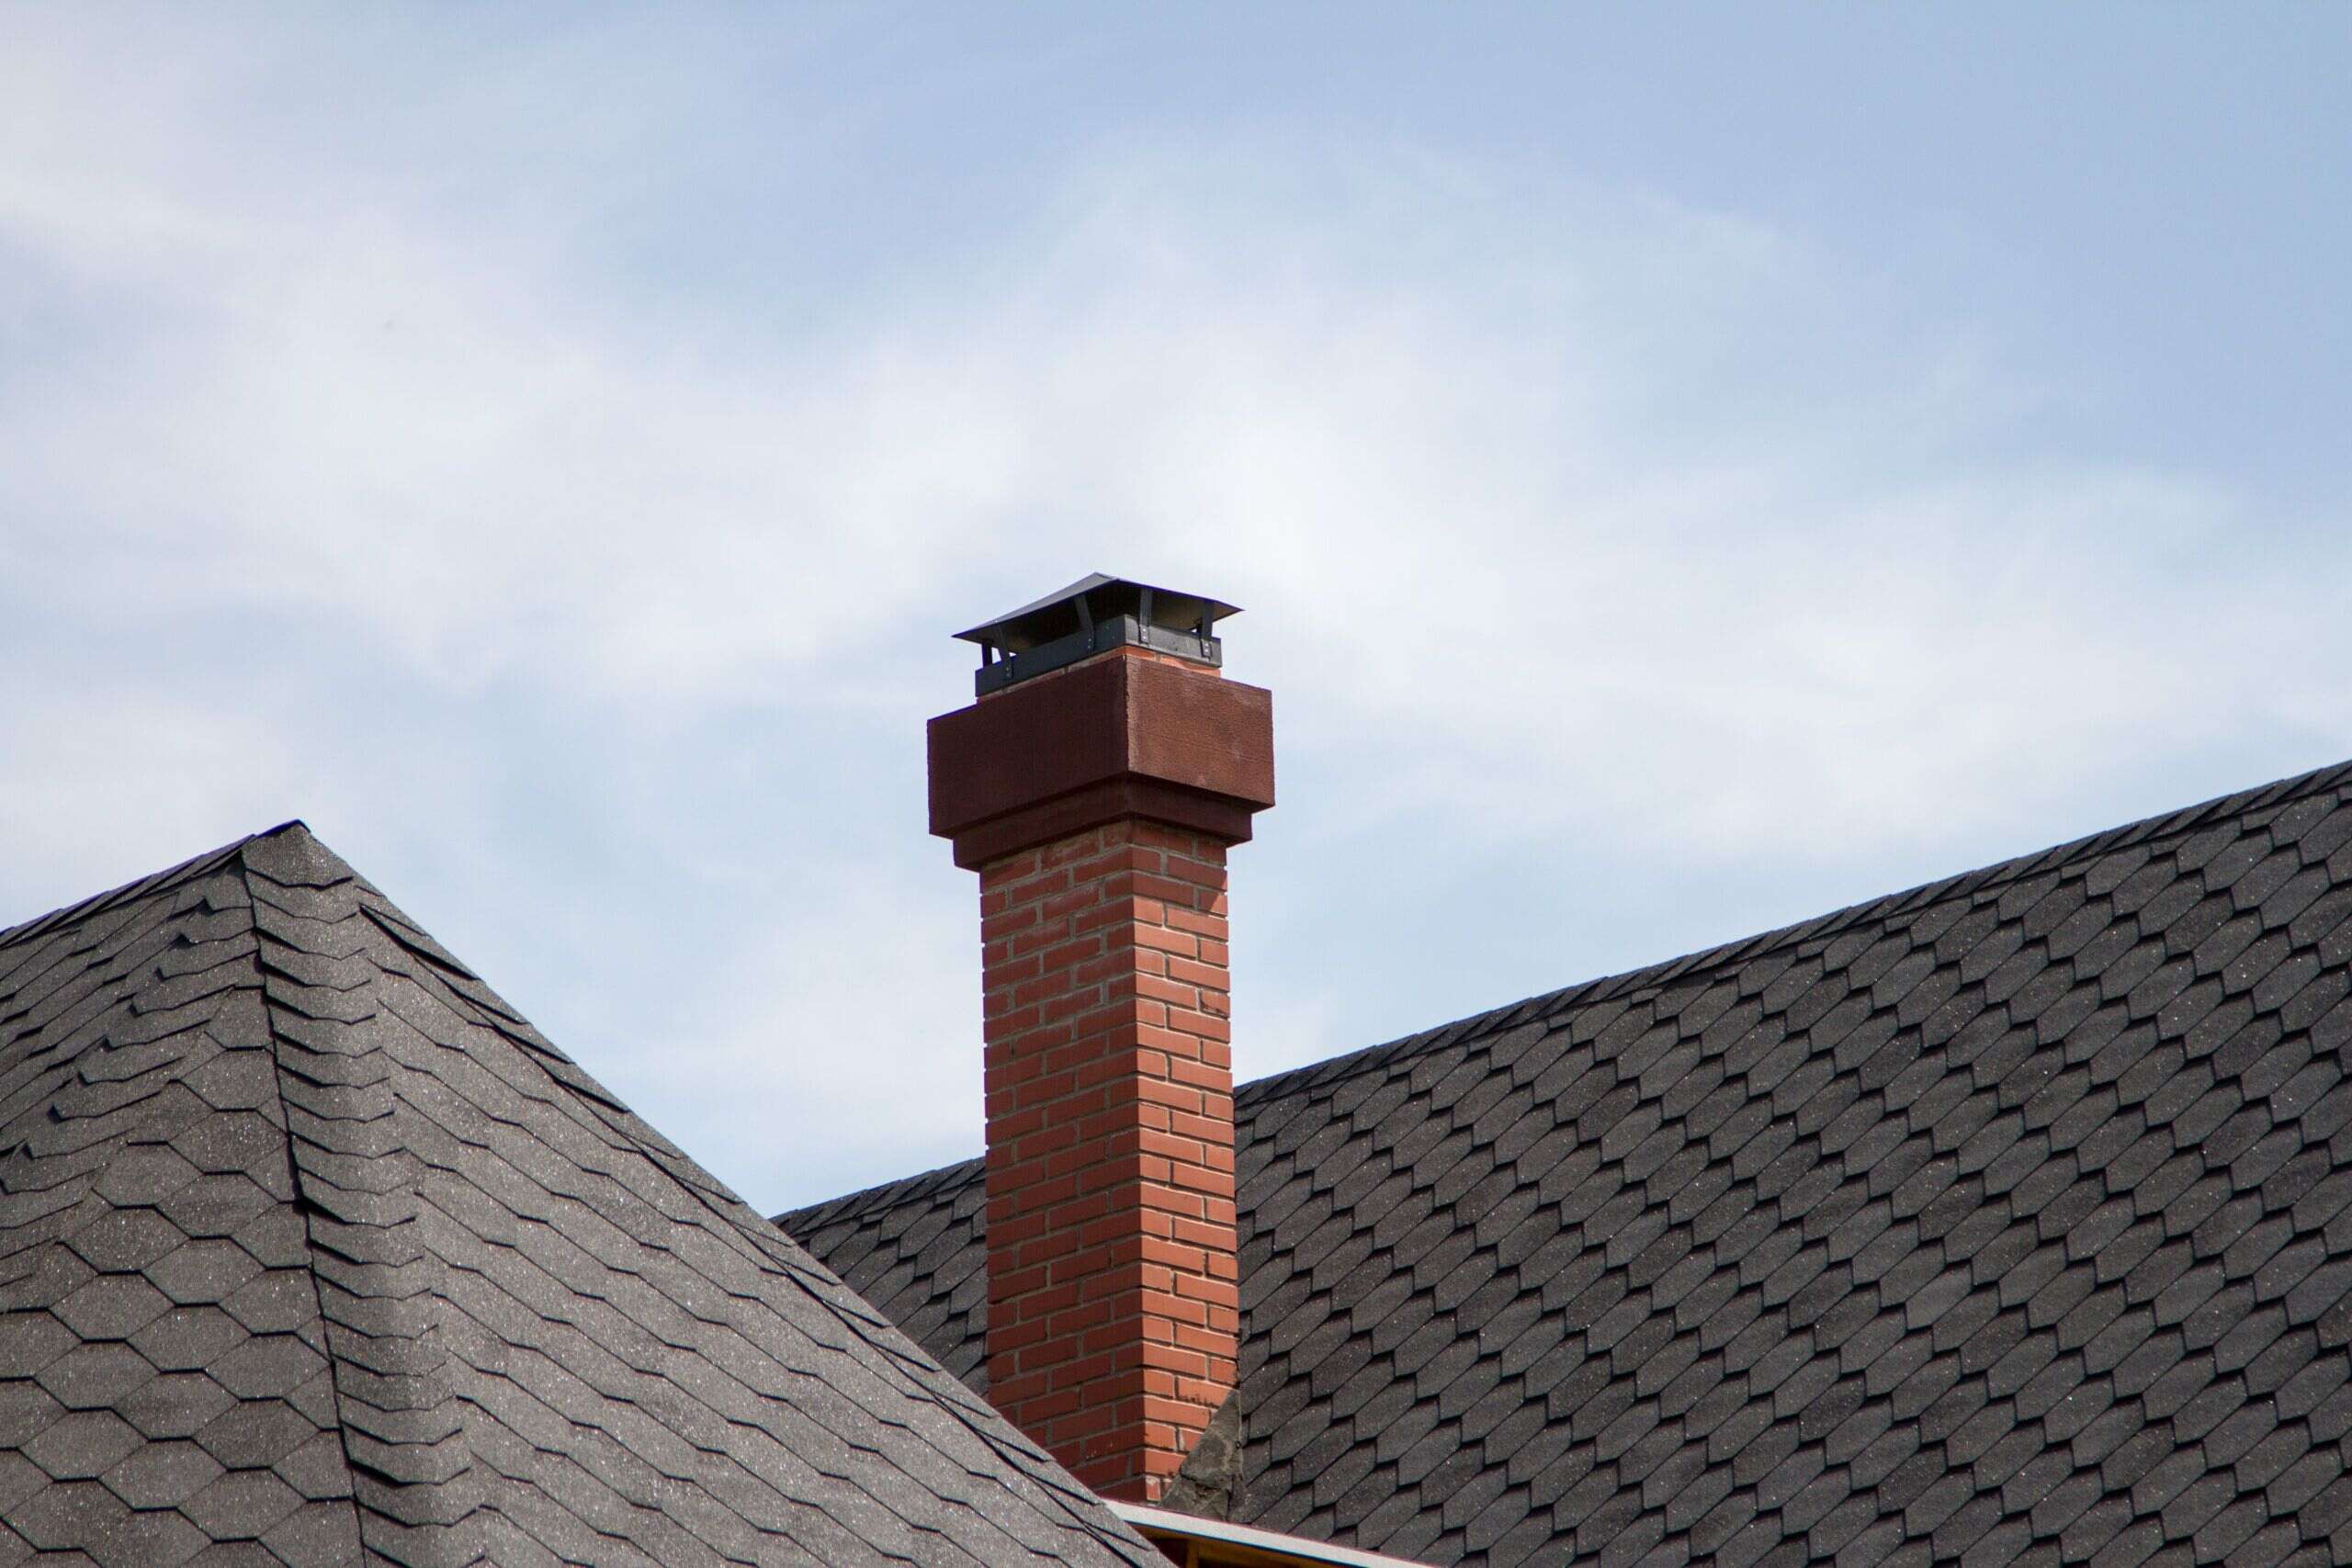
- Examine the chimney from the ground: Take a step back and visually inspect the chimney from the ground. Look for any visible signs of damage such as cracks, loose bricks, or leaning sections. Pay attention to the chimney cap and flashing as well.
- Inspect the chimney crown: Check the chimney crown for cracks or signs of deterioration. The crown should be in good condition to prevent water from entering the chimney structure.
- Check the chimney cap: Inspect the chimney cap for any damage or missing parts. The cap plays a vital role in preventing rain, debris, and animals from entering the chimney.
- Examine the flashing: Inspect the flashing, which is the metal seal between the chimney and roof. Look for any signs of wear, gaps, or rust that could lead to water leaks or further damage.
- Look for signs of creosote buildup: Check the chimney flue for signs of excessive creosote buildup. Creosote is highly flammable and poses a fire hazard. If there is a significant amount, it may be wise to consult a chimney professional for cleaning.
- Inspect the interior of the chimney: Use a flashlight to inspect the interior of the chimney from the fireplace. Look for any obstructions, such as bird nests or debris, that may hinder proper airflow or ventilation.
- Check for loose mortar or bricks: Examine the mortar joints and bricks for any looseness or deterioration. Loose bricks or mortar could be a sign of structural issues that require attention.
- Document and address any issues: Take note of any damage or issues you observe during the inspection. If you notice significant damage or are unsure about any findings, it’s best to consult a professional chimney inspector or repair specialist.
Regularly inspecting your chimney for damage or issues allows you to address them promptly, ensuring the safety and efficiency of your chimney for years to come.
Step 6: Reassembling and Testing the Chimney
After cleaning and inspecting your chimney, it’s time to reassemble it and perform a final test to ensure everything is in proper working order. Follow these steps to reassemble and test your chimney:
- Replace the chimney cap: If you removed the chimney cap during cleaning or inspection, make sure to securely reattach it. The cap helps keep out rain, debris, and animals, protecting your chimney.
- Reinstall the grate: If you removed the grate from the fireplace, place it back in its original position. Ensure it fits securely and level in the firebox.
- Remove the drop cloth or plastic sheet: Carefully remove the drop cloth or plastic sheet that was placed around the fireplace and dispose of any collected debris or soot.
- Prioritize safety: Before starting a fire, ensure you have taken all necessary safety precautions. Check that your smoke detectors are working properly, and keep a fire extinguisher nearby as a precaution.
- Prime the flue: Light a small fire using kindling to prime the flue before adding larger logs. This helps establish proper airflow and chimney draft. Ensure that the damper is fully open to allow for proper ventilation.
- Monitor the fire and chimney performance: Once the fire is burning, closely monitor the flame and smoke movement. Look for steady and consistent airflow up the chimney.
- Check for smoke leakage: While the fire is burning, inspect the area around the chimney for any signs of smoke leakage. If you notice smoke escaping into the room or detect a strong odor, stop using the fireplace immediately and consult a professional chimney sweep or inspector.
- Regularly test your chimney: It’s essential to regularly repeat this testing process to ensure your chimney continues to function safely and efficiently. Test the chimney at the beginning of each heating season or after any significant repairs or changes.
By following these steps and performing a final test, you can be confident that your chimney is reassembled correctly and working as intended. Regularly maintaining and testing your chimney will help ensure its longevity and the safety of your home.
Conclusion
Cleaning and maintaining your brick chimney is essential for both the safety and efficiency of your fireplace. By following the step-by-step process outlined in this guide, you can effectively clean your chimney and address any potential issues that may arise.
Starting with preparing the area and gathering the necessary materials and tools, you can create a safe and organized workspace. Removing debris and ashes from the fireplace sets the stage for a thorough cleaning of the chimney flue, where creosote and buildup can accumulate over time.
Cleaning the chimney exterior not only improves its appearance but also helps prevent damage caused by dirt, moss, or debris. This step also allows for a close inspection of the chimney’s condition, identifying any cracks, loose bricks, or other issues that may require repair.
It’s important to take the time to inspect your chimney for damage regularly. By checking the chimney from the ground, examining the crown, flashing, and chimney cap, and inspecting the interior, you can address any issues early on, ensuring the continued safety and durability of your chimney.
Finally, reassembling the chimney and performing a thorough test ensures that everything is in proper working order. By following these steps and regularly maintaining your chimney, you can enjoy a safe and efficient fireplace for years to come.
However, if you are uncertain about any aspect of chimney cleaning or encounter significant damage, it is recommended to consult a professional chimney sweep or inspector. Their expertise will guarantee that your chimney receives the necessary care and attention it deserves.
Remember, a well-maintained chimney is not only a functional element of your home but also a cozy centerpiece during those cold winter months. Take the time to keep it clean and properly maintained for a warm and inviting atmosphere for you and your loved ones.
Frequently Asked Questions about How To Clean A Brick Chimney
Was this page helpful?
At Storables.com, we guarantee accurate and reliable information. Our content, validated by Expert Board Contributors, is crafted following stringent Editorial Policies. We're committed to providing you with well-researched, expert-backed insights for all your informational needs.


0 thoughts on “How To Clean A Brick Chimney”