Articles
How To Clean Antique Hand Tools
Modified: October 20, 2024
Learn the best techniques and methods for cleaning antique hand tools with our informative articles. Preserve the beauty and functionality of your cherished tools.
(Many of the links in this article redirect to a specific reviewed product. Your purchase of these products through affiliate links helps to generate commission for Storables.com, at no extra cost. Learn more)
Introduction
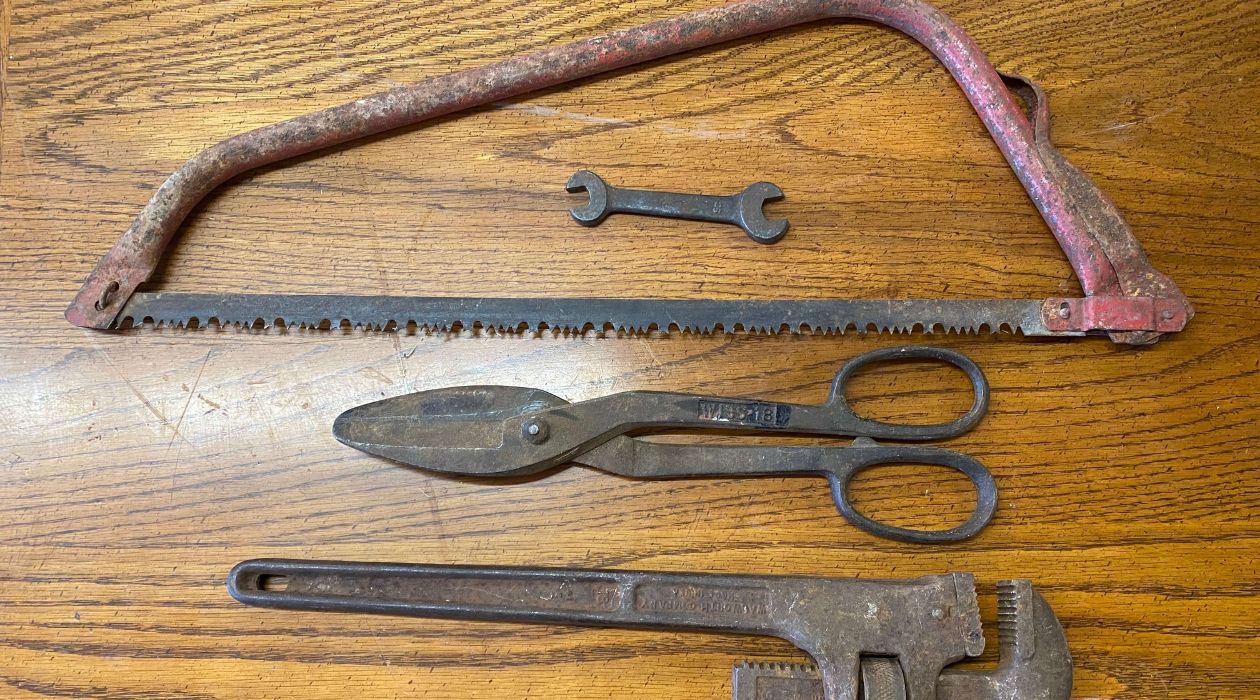
Welcome to the world of antique hand tools! These timeless pieces carry a rich history and are often treasured by collectors and enthusiasts alike. However, over time, these tools may accumulate dirt, rust, and other signs of age. Properly cleaning and maintaining them is essential to preserve their beauty and functionality.
In this article, we will guide you through the process of cleaning and maintaining antique hand tools. From gathering the necessary supplies to storing them properly, we will provide you with useful tips and techniques to ensure that your tools shine bright and stand the test of time.
So roll up your sleeves, dust off those old heirlooms, and let’s get started!
Key Takeaways:
- Preserve the Legacy: Cleaning and maintaining antique hand tools is a labor of love, preserving their history and craftsmanship for future generations to appreciate.
- Restore and Protect: With the right supplies and techniques, you can effectively remove dirt and rust, restore shine, and safeguard antique hand tools for years to come.
Read more: Where To Get Antique Hand Tools
Gathering the Necessary Supplies
Before you embark on the journey of cleaning your antique hand tools, it’s important to gather the necessary supplies. Having the right tools at your disposal will make the cleaning process more efficient and effective. Here are some essential supplies you’ll need:
- Gloves: Protect your hands from chemicals and dirt by wearing a pair of durable gloves.
- Mild Soap: Choose a non-abrasive soap that will effectively clean without causing damage.
- Soft Brushes: Use soft-bristled brushes to gently scrub away dirt and grime from the tool’s surfaces.
- Rust Remover: Depending on the severity of rust, you may need a rust remover. Look for a product specifically designed for removing rust from metal surfaces.
- Microfiber Cloth: Opt for a lint-free and non-abrasive cloth for drying and buffing the tools.
- Protective Coating: Consider applying a protective coating, such as beeswax or mineral oil, to prevent further rusting and corrosion.
Once you have gathered all the necessary supplies, you are now ready to proceed with cleaning your antique hand tools. Remember, it’s important to use these supplies with care, ensuring that you do not cause any damage to the tools or compromise their historical integrity.
Cleaning the Tools
Now that you have all the necessary supplies, it’s time to start cleaning your antique hand tools. Follow these steps to effectively remove dirt and grime:
- Inspect the Tools: Start by examining each tool for any visible dirt, debris, or loose particles. Use a soft brush or a compressed air canister to gently remove any loose material without damaging the tool’s surface.
- Prepare a Cleaning Solution: Fill a bucket or basin with warm water and add a small amount of mild soap. Mix the solution until it’s well combined.
- Soak the Tools: Submerge the tools into the cleaning solution, ensuring they are fully immersed. Allow them to soak for a few minutes to loosen any stubborn dirt.
- Gently Scrub: Take a soft-bristled brush and gently scrub the surface of each tool. Pay attention to intricate details and hard-to-reach areas. Avoid using excessive force as it may damage the tool’s finish.
- Remove Stubborn Stains: For stubborn stains or dirt, apply some mild soap directly to the affected area and gently scrub until the stain is lifted.
- Rinse Thoroughly: Once you have cleaned each tool, rinse them under running water to remove any soap residue. Ensure that all surfaces are thoroughly rinsed to prevent any residual soap from causing damage over time.
- Dry the Tools: Pat the tools dry using a soft, lint-free cloth. Make sure to remove all excess moisture to prevent the risk of rusting.
Remember, when cleaning antique hand tools, it’s crucial to handle them with care and avoid using harsh chemicals or abrasive materials that can damage their delicate surfaces. Take your time and be gentle in your approach to preserve the tool’s original condition.
Removing Rust from the Tools
Over time, antique hand tools may develop rust, which not only affects their appearance but also compromises their functionality. Fortunately, there are effective methods for safely removing rust and restoring your tools to their former glory:
- Vinegar Soak: Fill a container with white vinegar and submerge the rusty tools. Let them soak for several hours or overnight. The acidity of vinegar helps to break down rust. After soaking, scrub the tools with a soft brush to remove any remaining rust residue. Rinse and dry thoroughly.
- Baking Soda Paste: Create a paste by mixing baking soda with water until it forms a thick consistency. Apply the paste to the rusted areas and let it sit for a few hours. Then, scrub the tools with a soft brush and rinse with water. Dry completely.
- Wire Brush: If the rust is stubborn and requires more aggressive removal, you can use a wire brush to gently scrub the affected areas. Be careful not to apply too much pressure, as it may scratch or damage the tool’s surface. Afterward, rinse and dry the tools thoroughly.
- Electrolysis: For severely rusted tools, electrolysis can be an effective method. This process involves setting up a small electrolysis tank with a mild electrolyte solution, such as baking soda or washing soda. Place the rusty tools into the tank, making sure they are not touching each other. Connect a battery charger to create a low current, and let the tools soak for a few hours. Electrolysis will gradually remove the rust. After the process is complete, rinse and dry the tools thoroughly.
Remember to exercise caution and follow proper safety measures when using any rust removal method. Always wear gloves and eye protection, work in a well-ventilated area, and dispose of any chemicals responsibly.
By using these techniques, you can effectively remove rust and restore the original beauty of your antique hand tools. With a little patience and effort, your tools will once again shine bright and be ready to be admired and used.
To clean antique hand tools, use a mixture of equal parts white vinegar and water to remove rust and dirt. Soak the tools for a few hours, then scrub with a wire brush and dry thoroughly. Apply a light coat of oil to prevent future rust.
Polishing and Protecting the Tools
Once you have successfully cleaned and removed rust from your antique hand tools, it’s time to give them a polished finish and protect them from future damage. Here are some tips to help you achieve a final touch of shine:
- Polishing Compound: Apply a small amount of metal polishing compound to a soft cloth. Gently rub the cloth onto the metal surfaces of the tools in circular motions. This will help remove any remaining tarnish and bring out the natural shine of the metal.
- Protective Coating: To prevent future rust or corrosion, consider applying a protective coating to the tools. Beeswax or mineral oil can be used as effective natural protectants. Apply a thin layer of the chosen coating to the metal surfaces, allowing it to penetrate and create a barrier against moisture and oxidation.
- Wooden Handles: If your antique hand tools have wooden handles, it’s important to care for them as well. Clean the handles with a damp cloth and mild soap. Once dry, apply a coat of wood oil or beeswax to moisturize and protect the wood.
- Buffing: After applying the protective coating, use a clean, soft cloth to gently buff the tools. This will help remove any excess residue and enhance their overall appearance.
Remember to allow the tools to dry completely before applying any protective coatings or buffing. This will ensure that the surfaces are free from moisture, which can lead to rusting.
By following these steps, your antique hand tools will not only be clean but also have a beautiful shine that showcases their craftsmanship. The protective coating will help maintain their condition and minimize the risk of future damage.
However, it’s important to note that some collectors choose to keep their antique tools in their original, aged condition as a reflection of their history and authenticity. If you prefer to preserve the patina and age on your tools, simply skip the polishing and protective coating steps.
Read more: How To Clean Hand Tools
Storing the Tools Properly
After cleaning, removing rust, and polishing your antique hand tools, it’s crucial to store them properly to maintain their condition and prevent any further damage. Here are some guidelines to follow when it comes to storing your tools:
- Clean and Dry: Ensure that the tools are completely dry before storing them. Any residual moisture can lead to rust formation over time. Use a clean, dry cloth to remove any remaining moisture before storing.
- Avoid Humidity: Choose a storage location that is dry and free from excessive humidity. High humidity levels can promote rust and deterioration of the tools. Consider using a dehumidifier or silica gel packs to maintain optimal humidity levels in the storage area.
- Individual Wrapping: Wrap each tool individually with soft, lint-free cloths or archival-grade paper. This will provide a protective layer and prevent the tools from scratching or damaging each other.
- Keep Away from Sunlight: Exposure to direct sunlight can cause fading or discoloration of the tools. Find a storage location away from windows or areas with direct sunlight to preserve their original appearance.
- Organize and Label: Group similar tools together and label them accordingly. This will make it easier to find and retrieve specific tools when needed, minimizing the risk of accidentally damaging others in the process.
- Secure Storage: If possible, invest in a sturdy tool chest, toolbox, or storage cabinet to protect your tools from dust, moisture, and accidental damage. Ensure that the storage unit has proper padding or compartments to prevent any movement or rattling of the tools.
- Regular Maintenance: Periodically inspect your stored tools to ensure they remain clean and free from rust. If you notice any signs of rust or deterioration, address them promptly to prevent further damage.
By following these storage practices, you can help preserve the quality and integrity of your antique hand tools for years to come. Remember to handle them with care when retrieving or returning them to their storage location to avoid any accidental damage.
Conclusion
Cleaning and maintaining antique hand tools is not only essential for their aesthetic appeal but also for their functionality and longevity. With the right supplies and techniques, you can bring these timeless tools back to life and ensure their preservation for future generations to appreciate.
By gathering the necessary supplies, including gloves, soap, brushes, and rust removers, you can effectively clean your tools and remove accumulated dirt and grime. Gentle scrubbing and thorough rinsing will help restore their original shine.
In cases where rust has formed, various methods such as vinegar soaks, baking soda pastes, wire brushes, or electrolysis can be used to safely remove the rust and bring back the tool’s pristine condition.
Polishing the tools with a metal polishing compound and applying a protective coating like beeswax or mineral oil will not only enhance their appearance but also safeguard them against future rust and corrosion. Additionally, caring for wooden handles by cleaning and moisturizing them will contribute to the overall longevity of the tools.
Proper storage is equally important to maintain the quality of your antique hand tools. Keeping them clean, dry, and away from sunlight and humidity will prevent deterioration and further damage. Individual wrapping, organization, and secure storage units will further protect the tools from scratches and accidental harm.
Remember, each antique hand tool has its own unique story, and by taking the time to clean, restore, and care for them, you are preserving a piece of history and craftsmanship. Whether you are an avid collector or simply treasure a few heirloom tools, following these cleaning and maintenance practices will ensure that your tools continue to shine and serve as a testament to their timeless appeal.
So, invest some time, patience, and the necessary supplies to keep your antique hand tools in top-notch condition. Not only will you be rewarded with beautifully restored tools, but you will also contribute to their longevity and the appreciation of their historical significance.
Now, go ahead and cherish those antique hand tools, knowing that you have the knowledge and techniques to keep them looking their best for years to come!
Frequently Asked Questions about How To Clean Antique Hand Tools
Was this page helpful?
At Storables.com, we guarantee accurate and reliable information. Our content, validated by Expert Board Contributors, is crafted following stringent Editorial Policies. We're committed to providing you with well-researched, expert-backed insights for all your informational needs.


0 thoughts on “How To Clean Antique Hand Tools”