Articles
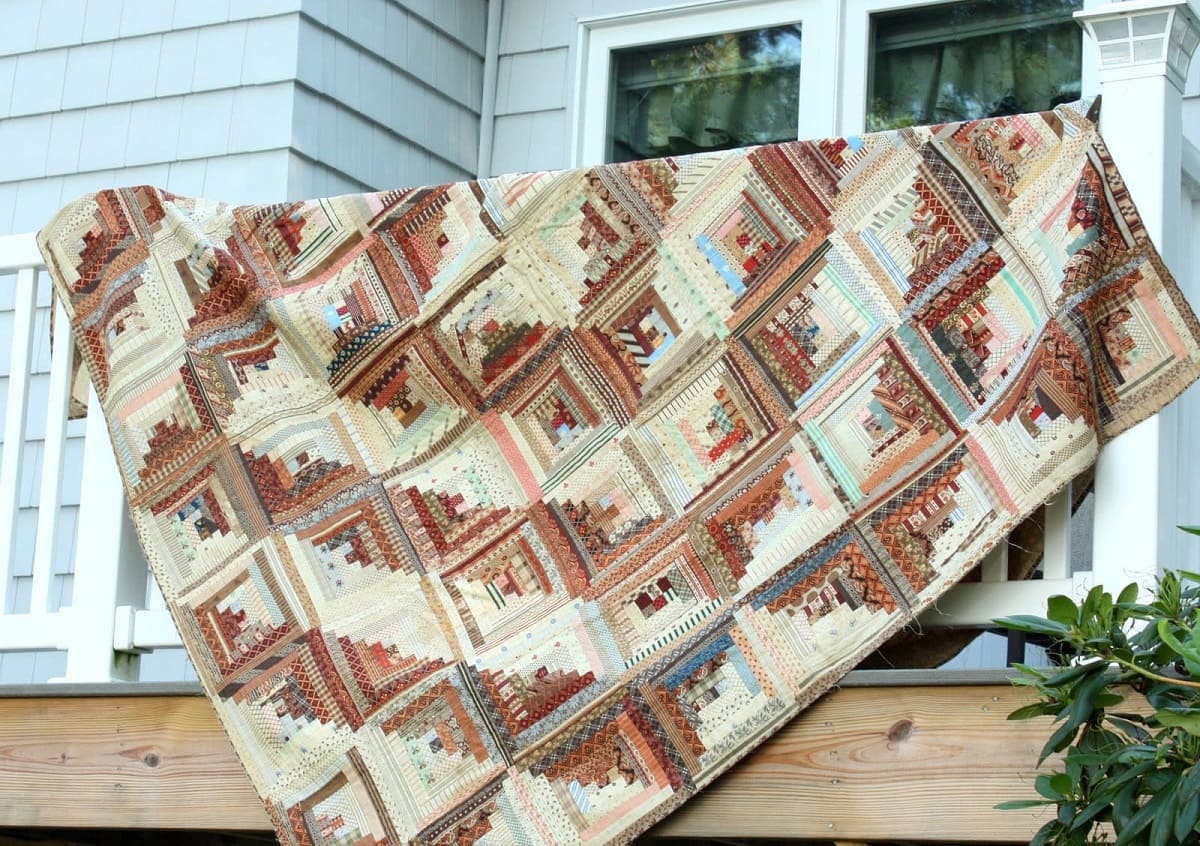
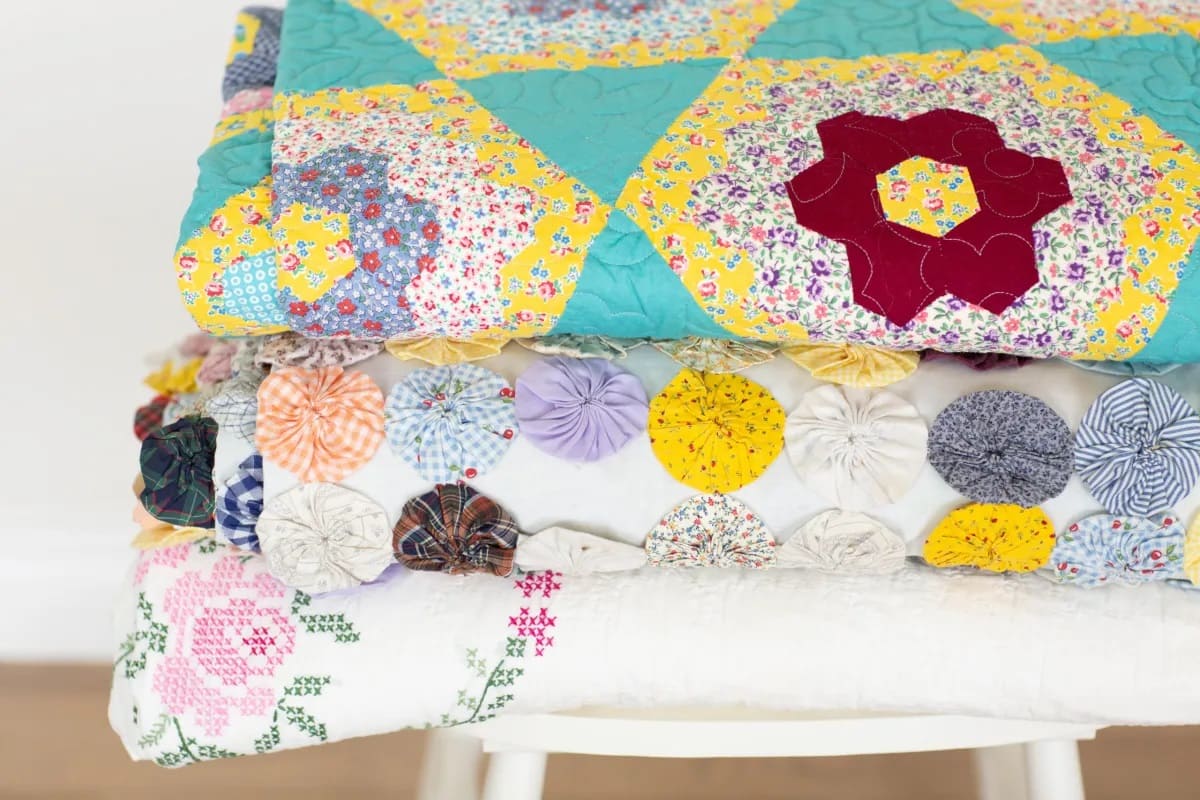
How To Clean An Antique Quilt
Modified: October 20, 2024
Learn how to clean and preserve your antique quilt with our informative articles. Discover expert tips and tricks to maintain its beauty and value.
(Many of the links in this article redirect to a specific reviewed product. Your purchase of these products through affiliate links helps to generate commission for Storables.com, at no extra cost. Learn more)
Introduction
Welcome to the world of antique quilts! These beautiful and intricate creations hold a special place in our hearts, representing the craftsmanship and history of a bygone era. However, to keep them in pristine condition, it’s important to properly clean and care for them.
Cleaning an antique quilt requires a delicate touch and a deep understanding of the materials and techniques used. This article will guide you through the process, providing step-by-step instructions on how to clean your beloved antique quilt without causing any damage.
Before we begin, it’s important to note that cleaning an antique quilt should be done sparingly and only when absolutely necessary. Over-cleaning can cause irreparable harm to the fabric and delicate stitching. It’s always recommended to seek professional advice if you’re uncertain about the best course of action for your quilt.
In the following sections, we will cover various cleaning methods, from dusting and vacuuming to spot cleaning, washing, and drying. We will also discuss important considerations for storing and displaying your antique quilt.
So, let’s dive in and learn how to properly clean and care for your precious antique quilt!
Key Takeaways:
- Preserve the beauty and history of antique quilts by using gentle cleaning methods, proper drying and ironing techniques, and thoughtful storage and display practices.
- Approach antique quilt care with caution, using mild cleaning agents, avoiding direct heat and sunlight, and seeking professional assistance for extensive restoration needs.
Read more: How To Store Antique Quilts
Preparing for Cleaning
Before you begin the cleaning process, it’s essential to prepare your workspace and gather the necessary materials. This will ensure a smooth and effective cleaning experience without any unnecessary interruptions.
First, find a clean and spacious area where you can lay out the quilt. It’s best to choose a spot away from direct sunlight, as prolonged exposure to sunlight can fade the colors and weaken the fabric fibers over time. Using a clean bedsheet or a large clean fabric as a protective layer underneath the quilt is highly recommended to prevent any potential damage.
Next, you’ll need to gather some basic supplies for the cleaning process. Here’s a list of the essentials:
- A soft-bristle brush or a clean, lint-free cloth
- A vacuum cleaner with a brush attachment
- Mild detergent specifically formulated for delicate fabrics
- A large tub or basin (if washing is necessary)
- Lukewarm water
- Soft towels or a drying rack
- An iron (set to the lowest heat setting)
- Acid-free tissue paper or muslin cloth (for storing and packing)
Once you have everything ready, it’s time to move on to the next steps of the cleaning process, which involve dusting and vacuuming the quilt. These initial steps will help remove loose dirt, debris, and surface-level stains.
Note: Before proceeding with any cleaning method, it’s important to test it on a small, inconspicuous area of the quilt to ensure it doesn’t cause any damage or discoloration.
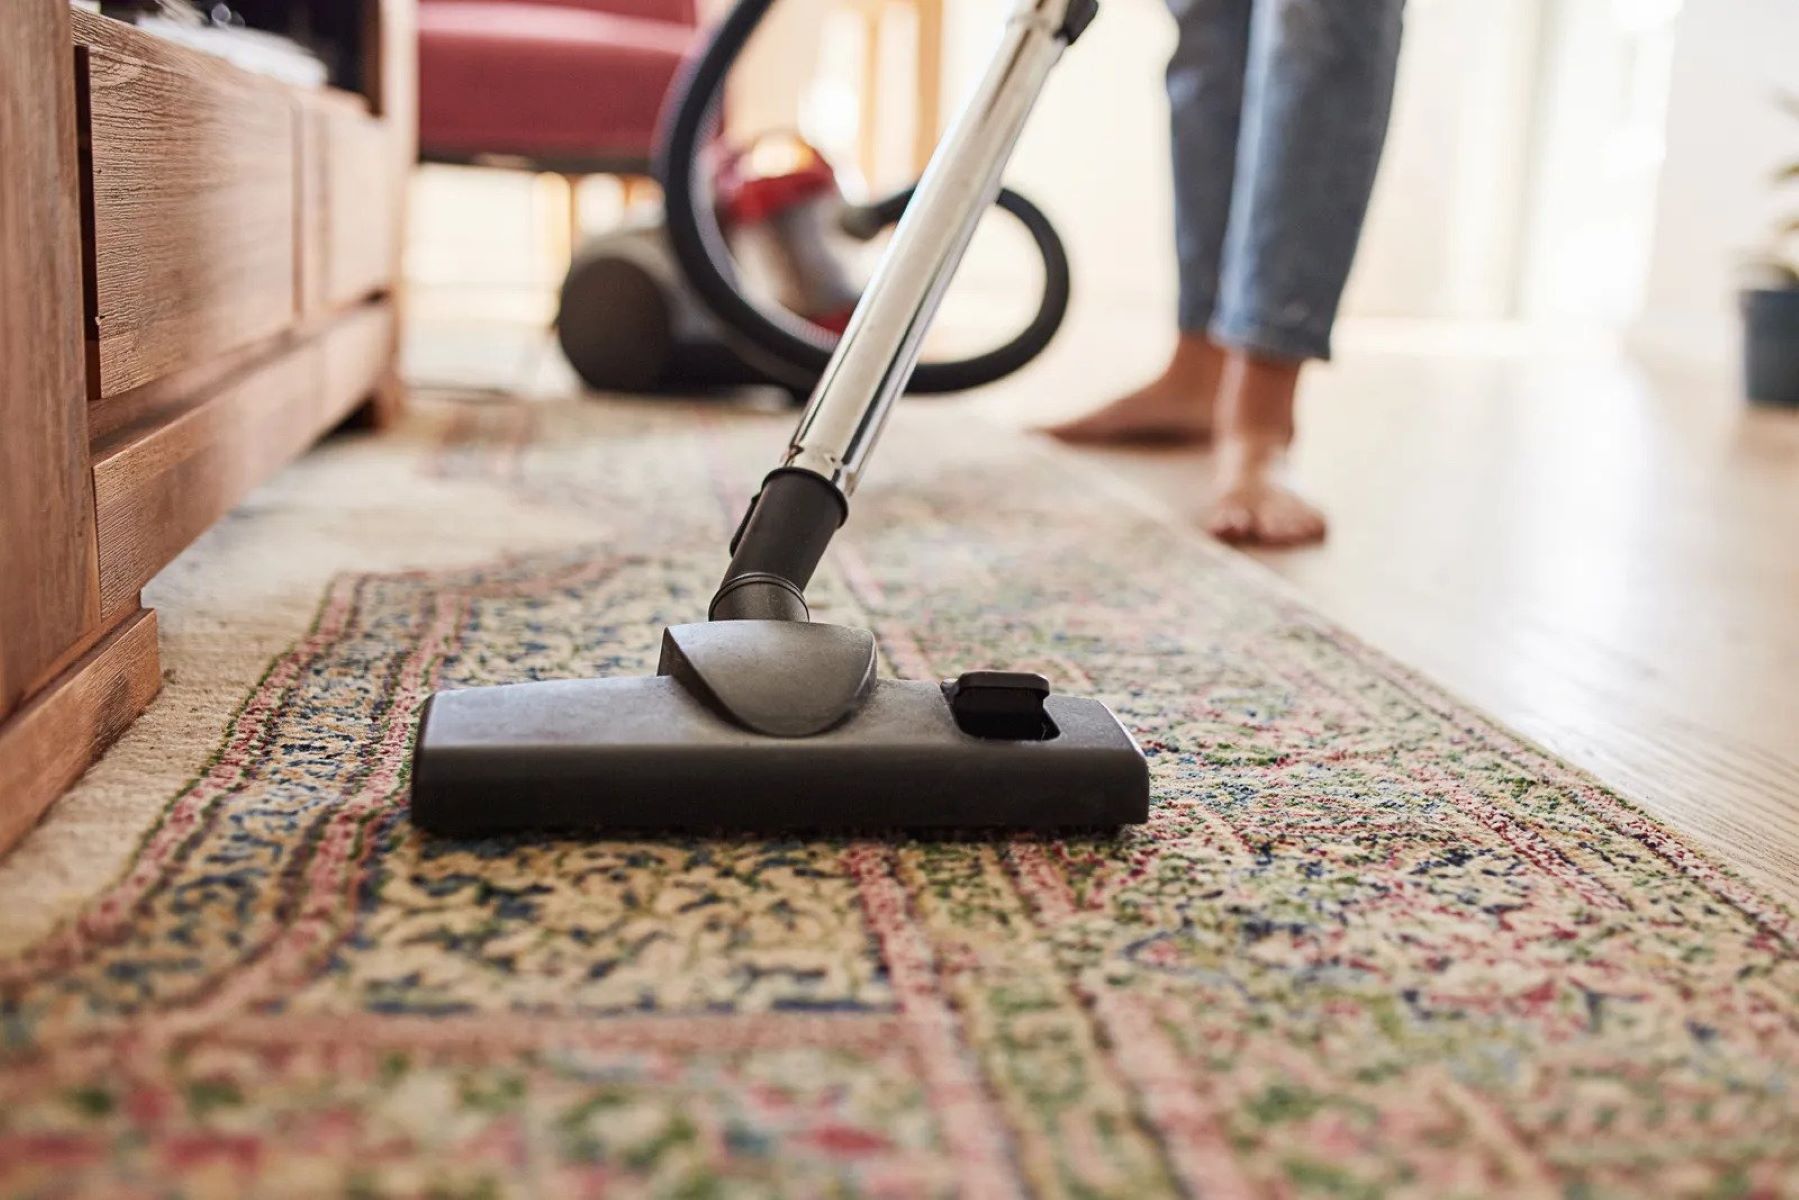
Dusting and Vacuuming
The first step in cleaning an antique quilt is to remove any loose dust and debris that may have accumulated over time. Dusting and vacuuming will help eliminate surface-level dirt and prevent it from embedding further into the fabric.
To begin, gently lay the quilt flat on a clean and smooth surface. Use a soft-bristle brush or a clean, lint-free cloth to lightly dust the quilt’s surface. Be sure to work in small, gentle strokes to avoid exerting too much pressure on the fabric. This will help dislodge any loose dirt and particles without causing any damage.
Next, it’s time to use a vacuum cleaner with a brush attachment to further remove dust and debris. Set the vacuum to a low suction setting, as high suction may pull at the quilt and damage delicate stitching or fabric fibers. Carefully run the brush attachment over the entire surface of the quilt, moving in straight lines or in a gentle circular motion. Take your time and be thorough, paying attention to any areas that may have accumulated more dust or dirt.
While vacuuming, be cautious of any loose threads or delicate embellishments on the quilt. Avoid vacuuming directly over them, as it may cause damage. If necessary, use your hand or a soft cloth to lightly hold these areas in place while vacuuming around them.
It’s important to note that if you’re dealing with a particularly fragile or delicate quilt, it’s best to skip the vacuuming step altogether. In such cases, dusting with a soft-bristle brush or a clean, lint-free cloth should suffice to remove surface-level dirt.
Once you’ve completed the dusting and vacuuming process, take a moment to assess the quilt. If there are any visible stains or spots that require further cleaning, we’ll move on to the spot cleaning method in the next section. If the quilt appears relatively clean with no noticeable stains, you may proceed to the drying and ironing steps.
Spot Cleaning
If you come across any stains or spots on your antique quilt during the cleaning process, spot cleaning is a gentle and targeted method to address them without subjecting the entire quilt to a full wash.
Before attempting spot cleaning, it’s crucial to identify the type of stain you’re dealing with. Different stains require different treatments, and using the wrong cleaning method may worsen the stain or damage the fabric. Here are some common types of stains and how to tackle them:
- Food and beverage stains: Mix a small amount of mild detergent with lukewarm water. Dampen a clean, white cloth with the solution and gently blot the stain, working from the outer edges towards the center. Avoid rubbing the fabric vigorously, as it may cause the stain to spread. Rinse the cloth and continue blotting until the stain is no longer visible.
- Ink stains: Place a clean, white cloth underneath the stained area to prevent the ink from spreading. Apply a small amount of rubbing alcohol or stain remover specifically formulated for delicate fabrics to a clean cloth and gently dab the stain. Be cautious and test the solution on a small, inconspicuous area first to ensure it doesn’t cause any discoloration. Blot until the stain is lifted, then rinse the cloth thoroughly and blot again to remove any residue.
- Mildew stains: Mildew stains can be challenging to remove and may require professional assistance. If the stain is minor, you can try mixing a solution of equal parts water and white vinegar. Dab the solution onto the stain using a clean cloth, then gently blot until the stain fades. Rinse the cloth thoroughly and blot again to remove any residual vinegar smell.
- Blood stains: It’s best to tackle blood stains promptly, as they can be more difficult to remove once they set. Start by mixing cold water and a mild detergent to create a solution. Dampen a clean cloth with the solution and gently blot the stain, being careful not to spread it. Rinse the cloth and continue blotting until the stain is no longer visible. If the stain persists, you can try using hydrogen peroxide on a clean, white cloth to further lift the stain. Always test the hydrogen peroxide solution on a small, inconspicuous area first.
Remember to always blot the stains rather than rubbing them, as rubbing can push the stain deeper into the fabric or cause it to spread. Additionally, make sure to rinse the cloth frequently during the spot cleaning process to avoid transferring the stain back onto the quilt.
Once the stain has been successfully treated, gently blot the area with a clean, damp cloth to remove any remaining cleaning solution. Allow the quilt to air-dry completely before proceeding to the next steps.
If you encounter a stubborn or particularly challenging stain that you’re unsure how to handle, it’s always best to consult a professional conservator or textile specialist for guidance.
When cleaning an antique quilt, avoid using harsh chemicals or washing machines. Instead, gently vacuum the quilt with a soft brush attachment to remove dust and debris. If necessary, spot clean with a mild detergent and cold water, then air dry flat.
Washing and Soaking
If your antique quilt requires a more thorough cleaning beyond spot treatments, washing and soaking may be necessary. However, it is important to proceed with caution, as improper washing techniques can cause irreversible damage to the delicate fabric and stitching.
Before proceeding with washing or soaking, determine if the quilt is structurally stable enough to withstand the process. Examine the seams, stitches, and overall condition of the quilt. If you notice any weak or damaged areas, it is advisable to seek professional assistance before attempting to wash the quilt.
When preparing to wash an antique quilt, keep the following guidelines in mind:
- Use mild detergent: Choose a mild, pH-neutral detergent specifically formulated for delicate fabrics. Avoid using harsh detergents, bleach, or strong cleaning agents, as they can cause discoloration or damage to the fabric.
- Hand-washing is preferred: Hand-washing is generally the safest method for cleaning antique quilts. Fill a clean bathtub, sink, or a large basin with lukewarm water and add the recommended amount of mild detergent. Gently swish the water to create a soapy solution.
- Submerge with care: Lower the quilt into the water, making sure to support its weight fully. Avoid agitating or wringing the quilt, as this can cause the fabric to stretch or tear. Allow the quilt to soak for about 10-15 minutes to loosen dirt and stains.
- Be gentle when cleaning: After the soaking period, use your hands to gently agitate the water around the quilt, focusing on stained or soiled areas. Avoid scrubbing, rubbing, or twisting the fabric. For stubborn stains, you can lightly dab the area with a soft cloth or brush.
- Rinse thoroughly: Once the quilt has been gently cleaned, drain the soapy water and refill the tub or basin with fresh lukewarm water. Rinse the quilt several times, gently pressing the fabric to remove any residual soap. Continue rinsing until the water runs clear.
- Remove excess water carefully: To remove excess water, lift the quilt carefully and allow it to drain without wringing or twisting. Avoid using a machine spin cycle, as the rapid movement can cause stress on the fabric and stitching.
After washing, lay the quilt flat on a clean towel or a drying rack to air-dry. Avoid direct sunlight or heat sources, as they can fade or damage the fabric. Flip the quilt periodically to ensure even drying and prevent any mildew from forming. Be patient, as drying may take several days.
Once the quilt is completely dry, assess its condition. If the washing process has revived the colors and removed stains, you can proceed to the next steps of drying and ironing. If the quilt still requires additional cleaning or stain removal, consider seeking professional assistance before proceeding.
Note: Some antique quilts may be too fragile or delicate to be washed at home. In such cases, consulting a professional conservator or textile specialist is strongly recommended.
Read more: How To Clean Antique Linens And Clothing
Drying and Ironing
After washing an antique quilt, proper drying and ironing techniques are crucial to ensure its longevity and maintain its original beauty. However, it’s important to handle the drying and ironing process with care to avoid causing any damage to the delicate fabric and intricate stitching.
Here are some steps to follow for effective drying and ironing:
- Air-drying: After washing, remove the quilt from the water and gently squeeze out excess water without twisting or wringing the fabric. Lay the quilt flat on a clean, dry towel or a drying rack. Avoid hanging the quilt, as the weight of the wet fabric can cause stretching or distortion. Allow the quilt to air-dry completely, flipping it periodically to ensure even drying. This may take several days, so exercise patience during the drying process.
- Avoid direct heat and sunlight: When drying the quilt, keep it away from direct heat sources like radiators or heating vents, as excessive heat may cause the fabric to shrink or weaken. Additionally, avoid exposing the quilt to direct sunlight, as prolonged exposure can fade the colors and damage the fabric fibers over time.
- Ironing: Once the quilt is completely dry, you can proceed with ironing. Set your iron to the lowest heat setting and avoid using steam. Place a clean, white cloth between the iron and the quilt to act as a barrier and protect the fabric. Gently iron the quilt in straight motions, working section by section. Do not press down too hard, as excessive pressure can flatten the batting and distort the quilt’s shape. Be mindful of any delicate appliques, embroidery, or trims, and iron around them to prevent damage.
- Store the quilt flat or rolled: After ironing, it’s important to store the quilt properly to maintain its condition. Lay the quilt flat on a clean surface, ensuring it is completely dry and free from any moisture. Alternatively, you can roll the quilt and store it in a clean, acid-free tissue paper or muslin cloth to protect it from dust and light exposure. Avoid folding the quilt for extended periods, as this can create creases that may become permanent over time.
Remember, when handling an antique quilt, always use clean hands or wear cotton gloves to prevent transferring dirt or oils onto the fabric. Avoid placing heavy objects on top of the quilt, as this can cause unnecessary stress and compression on the delicate fibers.
By following these proper drying and ironing techniques, you can help preserve the integrity and beauty of your antique quilt for years to come.
Storing and DisplayingProper storage and display techniques are crucial to protect your antique quilt from damage caused by light, dust, pests, and other environmental factors. Whether you’re storing the quilt for long-term preservation or displaying it as a cherished piece of art, following these guidelines will help maintain its condition and extend its lifespan.
Here are some important considerations for storing and displaying your antique quilt:
- Use acid-free materials: When storing or displaying your quilt, it’s crucial to use acid-free materials to prevent any chemical reactions that may damage the fabric. Acid-free tissue paper or an unbleached muslin cloth can be used to wrap the quilt. Avoid using plastic bags or containers, as they can trap moisture and lead to mildew or mold growth. However, a cotton pillowcase can be used if necessary.
- Choose a cool and dry environment: The storage area should be cool, dry, and well-ventilated. Avoid areas prone to humidity, such as basements or attics. Extreme temperature and humidity fluctuations can cause the fabric to expand or contract, leading to irreversible damage. Ideally, the temperature should range between 65-75 degrees Fahrenheit (18-24 degrees Celsius) with a relative humidity of around 50 percent.
- Avoid direct sunlight: When displaying your quilt, avoid placing it in direct sunlight as prolonged exposure can fade the colors and weaken the fabric. Instead, choose a location away from windows or use UV-filtering window film or blinds to protect the quilt from harmful UV rays.
- Rotate displays: If you plan to display the quilt for an extended period, consider rotating its position every few months to prevent prolonged exposure to light and other environmental factors.
- Protect against pests: To protect your quilt from pests such as moths or silverfish, periodically inspect the storage area and use natural deterrents like lavender sachets or cedar blocks. Alternatively, you can place the quilt in a cotton pillowcase and freeze it for a few days to kill any potential pests. Ensure the quilt is completely dry before freezing.
- Avoid excessive handling: Minimize handling the quilt as much as possible, as the oils and dirt from your hands can transfer to the fabric and cause staining or deterioration over time. If you need to handle the quilt, wear clean, cotton gloves.
- Consider professional restoration: If your antique quilt requires extensive repair or restoration, it’s best to consult a professional conservator or textile specialist who has experience working with delicate and fragile fabrics. They can assess the condition of the quilt and recommend the appropriate restoration treatments.
Remember, the proper care and maintenance of your antique quilt will help preserve its beauty and historical significance for future generations to appreciate. By following these guidelines, you can ensure that your quilt remains in pristine condition for years to come.
Conclusion
Caring for an antique quilt involves a delicate balance of preserving its historical value while maintaining its aesthetic beauty. By following the proper cleaning, drying, storing, and displaying techniques outlined in this article, you can ensure that your cherished quilt remains in excellent condition for years to come.
Remember, always approach the cleaning process with caution and conduct thorough research or consult professionals if you’re unsure about the best approach for your specific quilt. Each quilt is unique and may require personalized care and attention based on its materials, age, and condition.
From dusting and vacuuming to spot cleaning, washing, and drying, each step in the cleaning process should be carried out with a gentle touch and an understanding of the quilt’s fragility. Avoid using harsh chemicals, excessive heat, or abrasive techniques that can cause irreparable damage to the fabric and stitching.
When storing or displaying your quilt, prioritize the use of acid-free materials, choose a cool and dry environment, protect against pests, and limit excessive handling. Taking these precautions will help minimize the risk of fading, staining, or other forms of deterioration over time.
Ultimately, the goal is to preserve the craftsmanship, historical significance, and sentimental value of your antique quilt for generations to come. With proper care and attention, your quilt can continue to be admired and cherished as a testament to the artistry of the past.
So go ahead, immerse yourself in the world of antique quilts, and enjoy the process of caring for these precious heirlooms. With a little knowledge, patience, and love, your antique quilt will continue to tell its unique story and bring joy to your life for many years to come.
Frequently Asked Questions about How To Clean An Antique Quilt
Was this page helpful?
At Storables.com, we guarantee accurate and reliable information. Our content, validated by Expert Board Contributors, is crafted following stringent Editorial Policies. We're committed to providing you with well-researched, expert-backed insights for all your informational needs.


0 thoughts on “How To Clean An Antique Quilt”