Articles
How To Connect Coffee Machine To Water Line
Modified: August 23, 2024
Learn how to easily connect your coffee machine to a water line with our informative articles. Upgrade your brewing experience today!
(Many of the links in this article redirect to a specific reviewed product. Your purchase of these products through affiliate links helps to generate commission for Storables.com, at no extra cost. Learn more)
Introduction
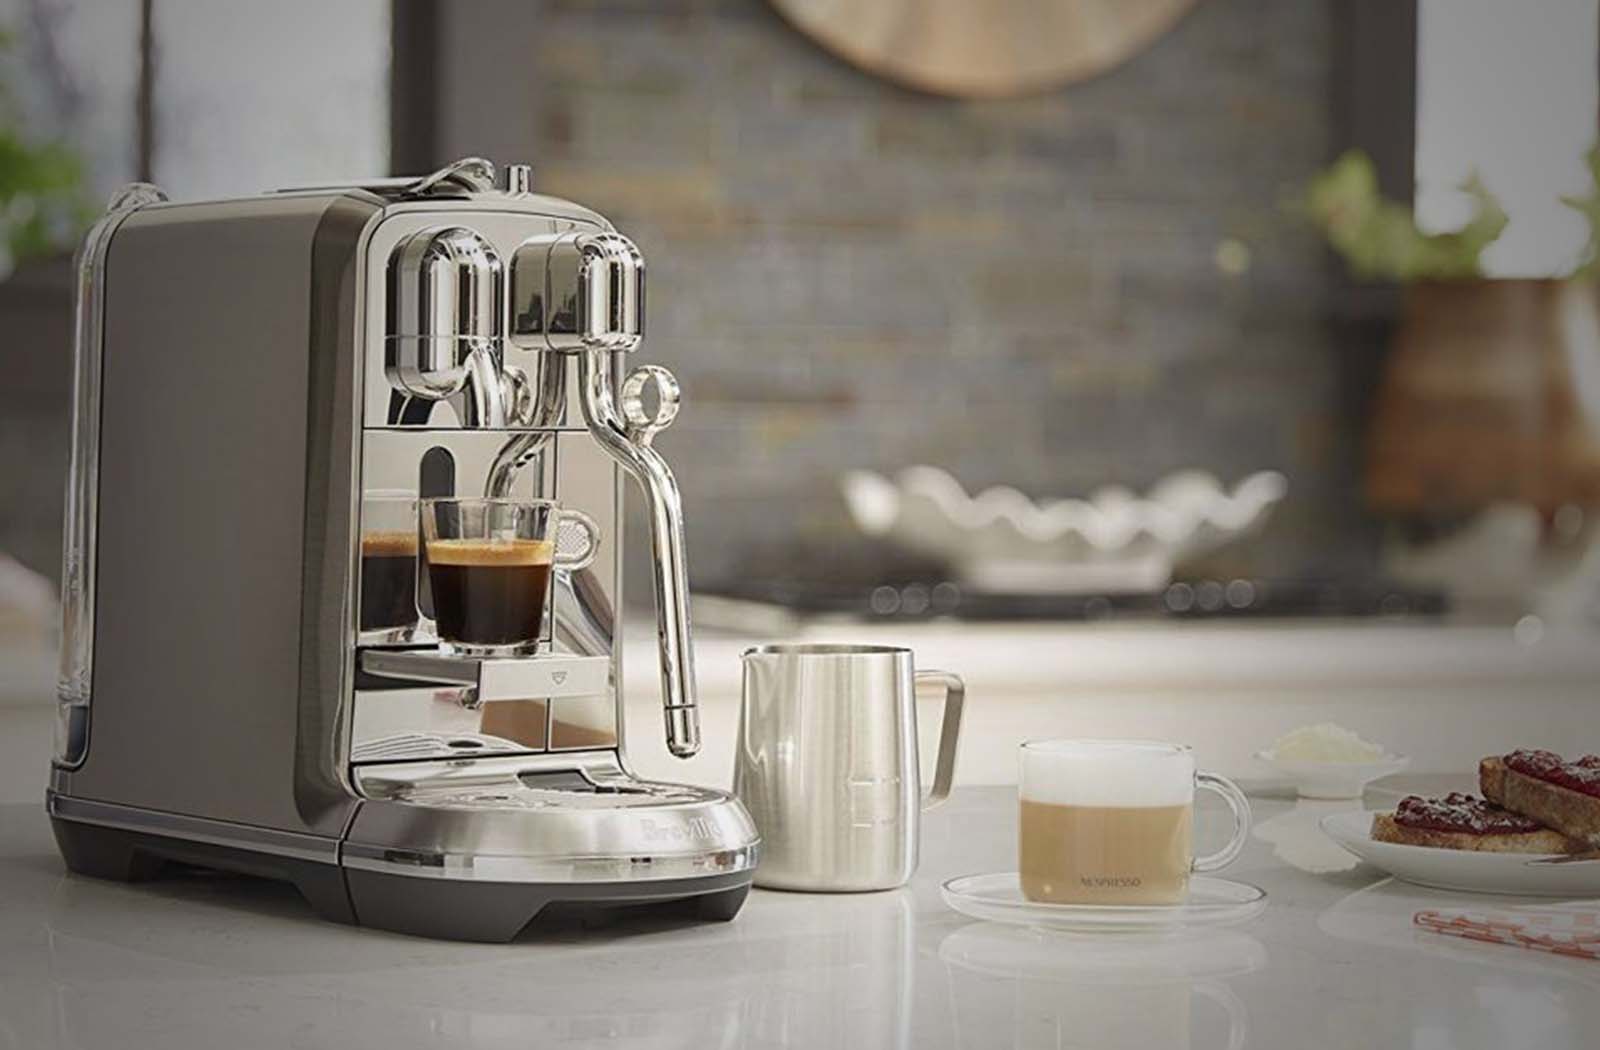
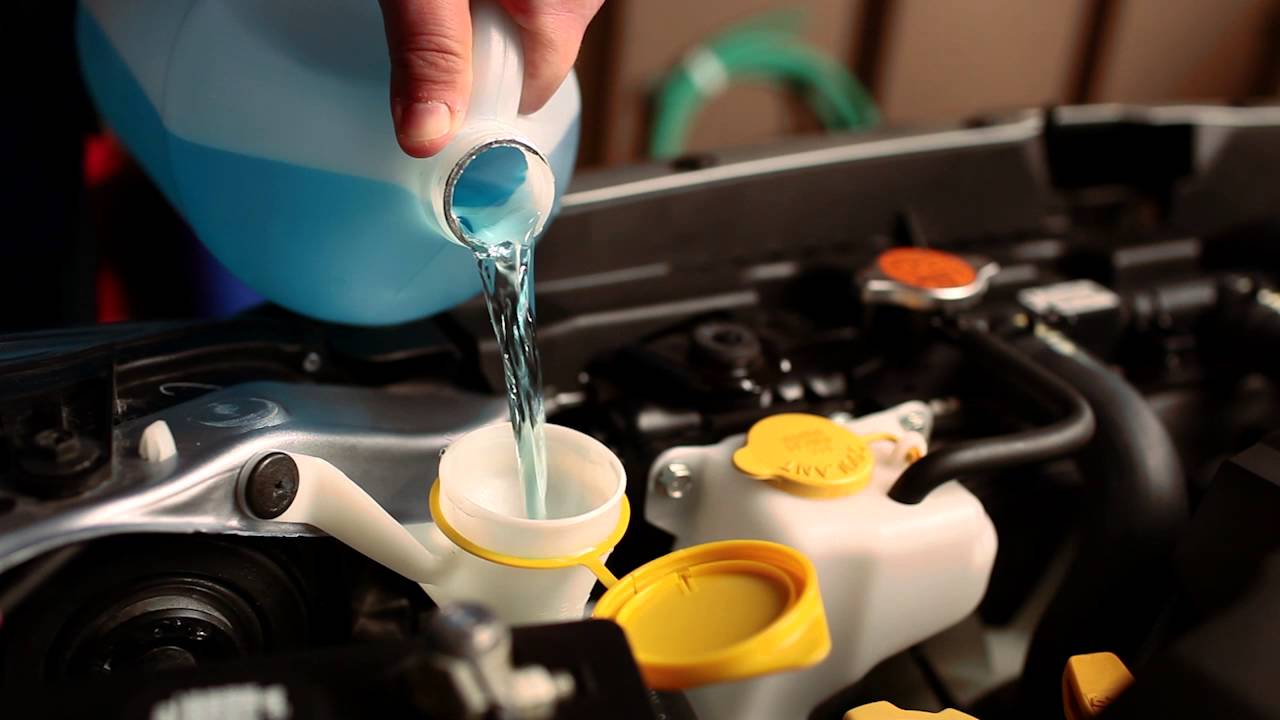
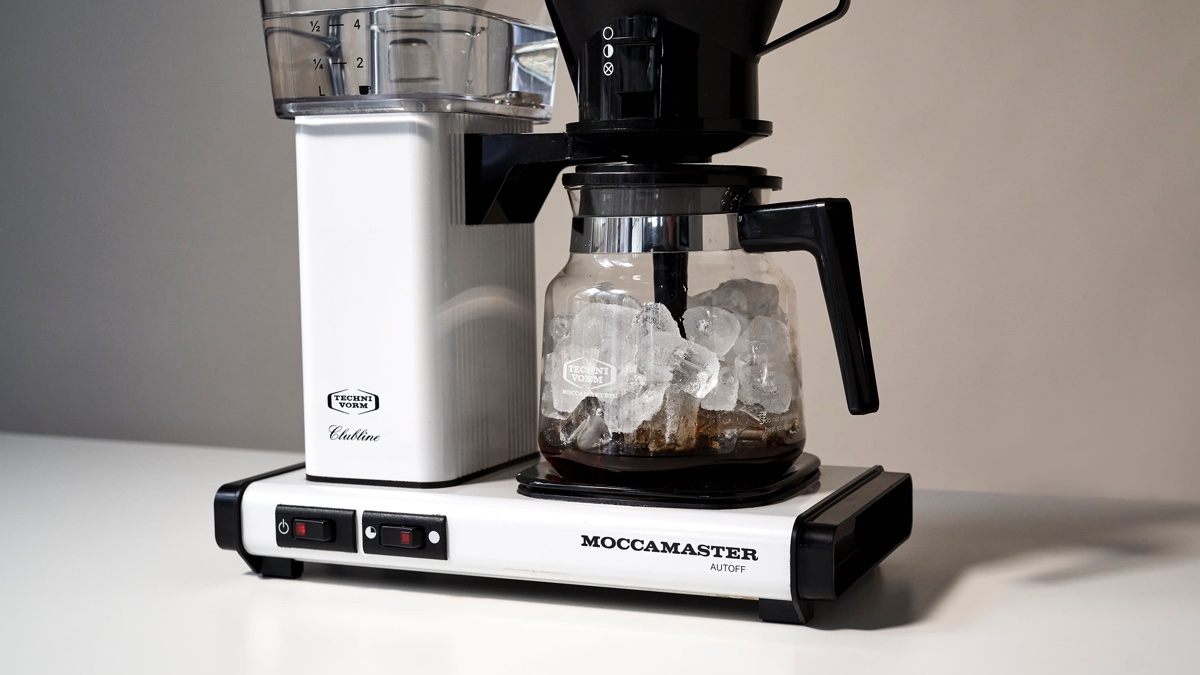
Welcome to the world of coffee aficionados! If you’re a coffee lover, you know that the key to a perfect cup of coffee lies not only in the quality of the beans but in the brewing process as well. One way to elevate your coffee experience is by connecting your coffee machine to a water line. By doing so, you can enjoy a continuous supply of fresh water without the hassle of constantly refilling the reservoir.
In this article, we will guide you through the process of connecting your coffee machine to a water line. We’ll discuss the benefits of this setup, the necessary equipment and tools, and provide step-by-step instructions to ensure a successful installation. So, grab your favorite mug, sit back, and let’s dive into the world of streamlined coffee brewing!
Connecting your coffee machine to a water line offers several benefits. Firstly, it eliminates the need to manually refill the water reservoir, saving you time and effort. This is especially convenient in commercial settings such as cafes or offices where there is high demand for coffee throughout the day. Additionally, a direct water connection ensures a consistent flow of water, leading to more consistent brewing results. Say goodbye to variations in taste and strength caused by fluctuating water levels!
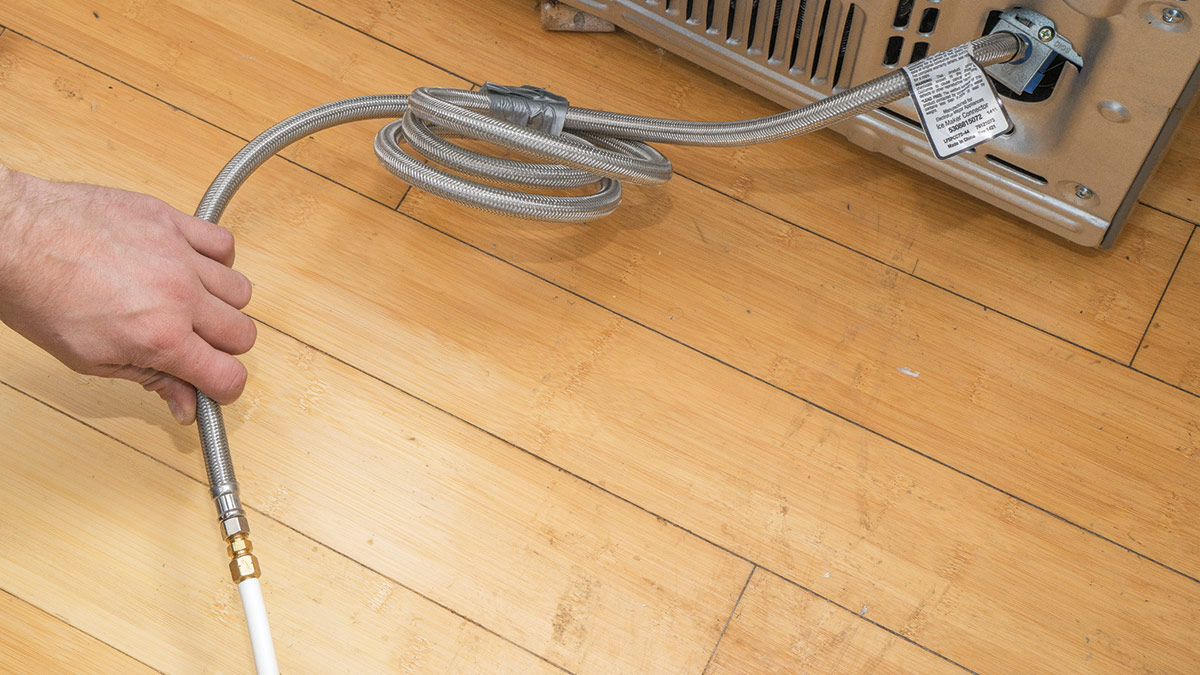
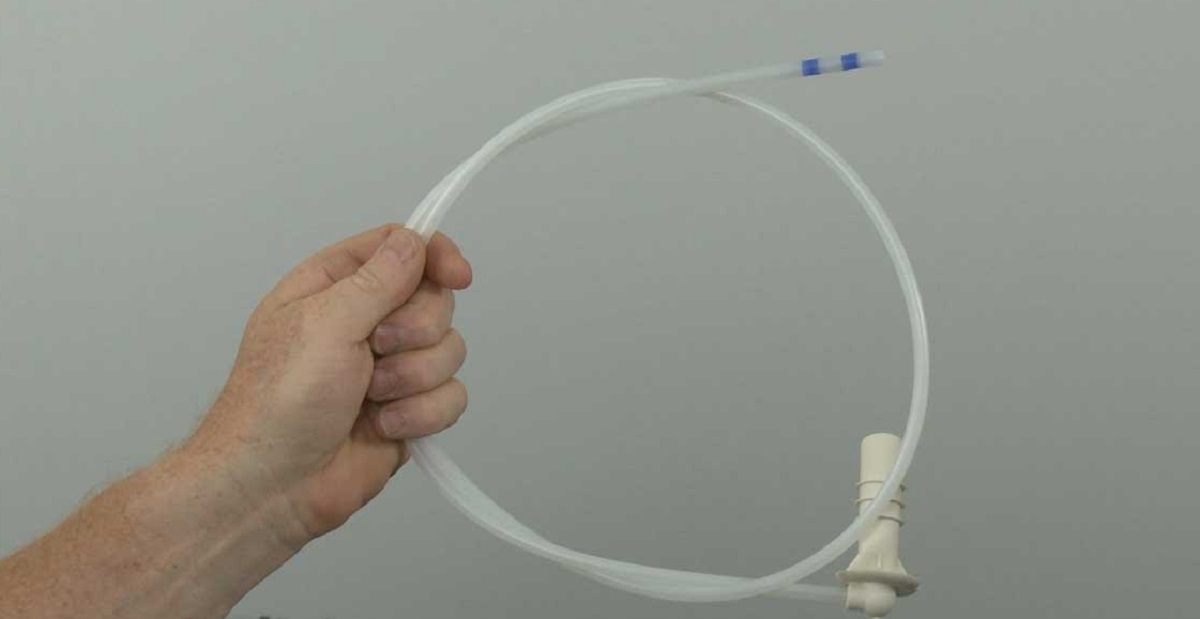
When it comes to connecting your coffee machine to a water line, you’ll need a few key equipment and tools. Firstly, you’ll need a water line kit, which typically includes a braided hose, a water line valve, and any necessary fittings. Make sure to choose a kit that is compatible with your coffee machine model. Additionally, you’ll need a drill, a wrench, plumber’s tape, and a water shut-off valve.
Before you begin the installation process, it’s important to choose the right location for your coffee machine. Ideally, the machine should be placed near a water source, such as a sink or a water line. Consider factors such as accessibility, convenience, and proximity to electrical outlets. Keep in mind that the machine will require some space for maintenance and cleaning purposes.
Next, you’ll need to ensure that your water supply meets the necessary requirements. Ideally, the water should be clean, filtered, and free from impurities that can affect the taste of your coffee. If your water source does not meet these criteria, consider installing a water filtration system to improve the quality of the water.
Before you start the installation process, it’s crucial to shut off the water supply to avoid any leaks or water damage. Locate the main water valve in your building or home and turn it off. This will ensure a safe and successful installation process. Remember to drain any excess water from the pipes to further prevent leaks.
Key Takeaways:
- Elevate your coffee experience by connecting your machine to a water line for convenience, consistent brewing, and improved taste. Say goodbye to manual refills and enjoy a seamless coffee brewing process.
- Ensure a successful installation by choosing the right location, meeting water supply requirements, and following step-by-step instructions. Enjoy the benefits of time and labor savings, reduced maintenance, and a continuous supply of delicious coffee.
Read more: How Does A Coffee Machine Heat Water
Benefits of Connecting Coffee Machine to a Water Line
Connecting your coffee machine to a water line offers a range of benefits that can greatly enhance your coffee brewing experience. Let’s explore some of the advantages:
- Convenience and Efficiency: One of the biggest advantages of connecting your coffee machine to a water line is the convenience and efficiency it provides. With a direct water connection, you no longer need to worry about constantly refilling the water reservoir. This is particularly beneficial in high-traffic settings such as cafes, offices, or restaurants, where a large volume of coffee is needed throughout the day. Instead of repeatedly pausing to refill the reservoir, you can focus on brewing a steady supply of delicious coffee.
- Consistent Water Supply: A direct water connection ensures a consistent and reliable supply of water to your coffee machine. This eliminates the risk of running out of water in the middle of brewing and avoids interruptions in the brewing process. With a continuous flow of water, you can expect consistent brewing results every time. No more worrying about variations in taste and strength caused by fluctuating water levels.
- Improved Taste and Flavor: The quality of water used in brewing coffee plays a crucial role in the final taste and flavor of the beverage. By connecting your coffee machine to a water line, you can ensure a clean and filtered water supply, free from impurities that can affect the taste of your coffee. This results in a consistently delicious cup of coffee with improved clarity and flavor profile.
- Time and Labor Savings: With a direct water connection, you can save significant time and effort that would otherwise be spent on manually refilling the water reservoir. This is particularly beneficial in busy environments where every second counts. By eliminating the need for manual refills, you can streamline your coffee brewing process and focus on other tasks without compromising on the quality of the coffee.
- Reduced Maintenance: Connecting your coffee machine to a water line can help reduce the maintenance required for the machine. With a continuous water supply, there is less chance of mineral buildup and scale formation in the internal components of the machine. This can lead to longer machine lifespan and reduced maintenance costs over time.
Overall, connecting your coffee machine to a water line offers a range of benefits, including convenience, efficiency, consistent brewing, improved taste, time and labor savings, and reduced maintenance. Whether you’re a coffee shop owner, a busy office worker, or simply a coffee enthusiast, this setup can elevate your coffee brewing experience and ensure a consistent supply of delicious coffee. Say goodbye to the hassle of refilling the water reservoir and enjoy a seamless and flavorful coffee brewing process!
Necessary Equipment and Tools
Before you can connect your coffee machine to a water line, it’s essential to gather the necessary equipment and tools. Here’s a list of what you’ll need:
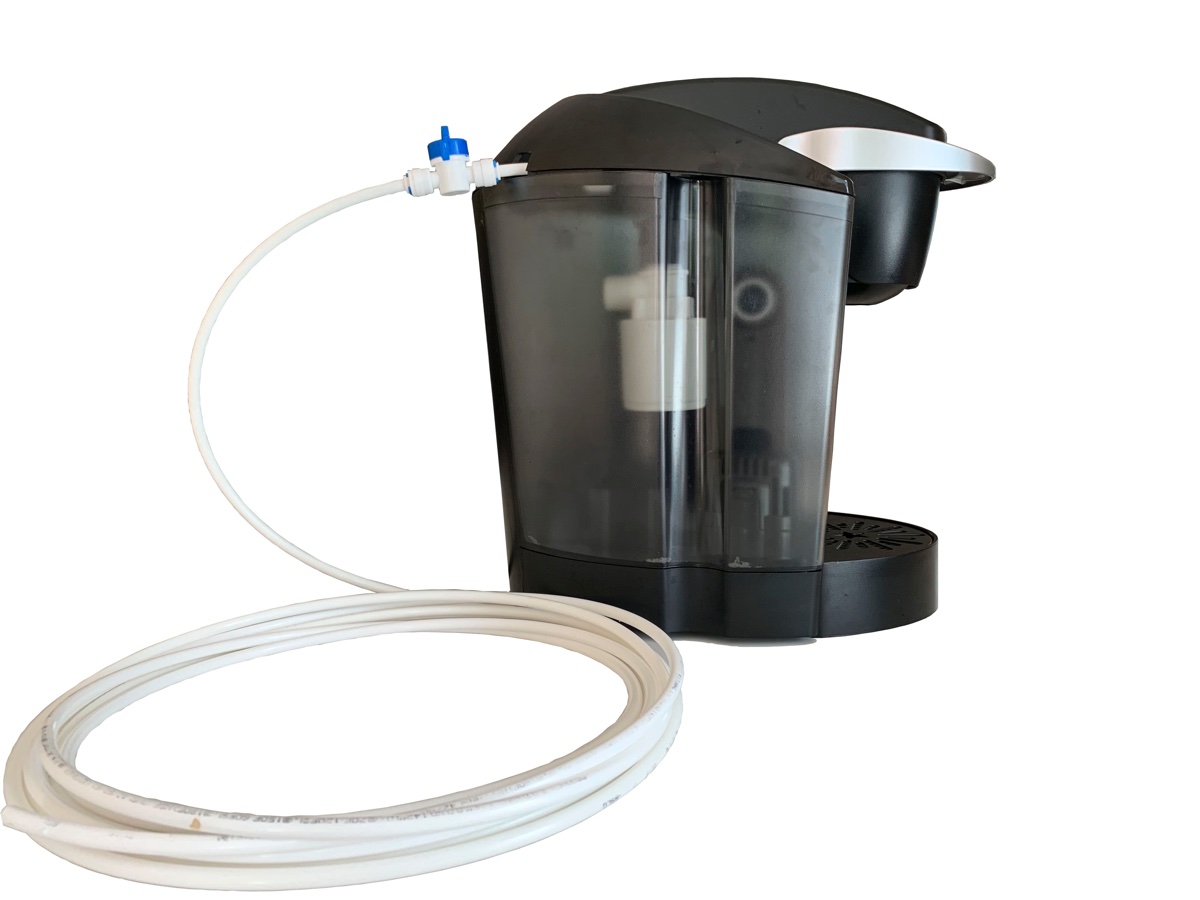
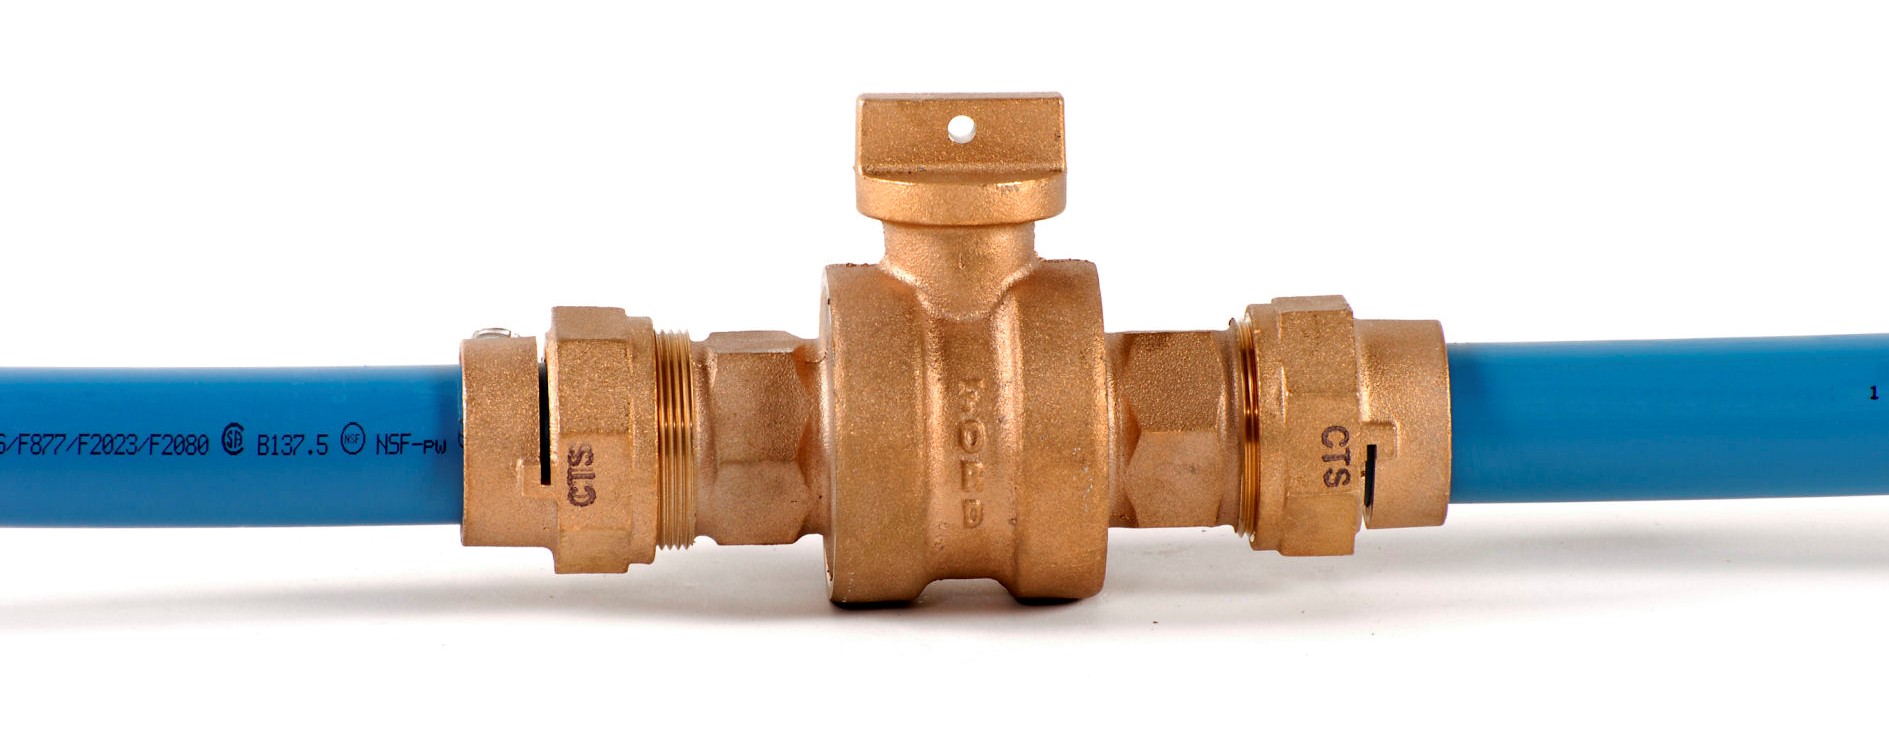
- Water Line Kit: A water line kit is a crucial component for connecting your coffee machine to a water line. It typically includes a braided hose, a water line valve, and fittings. Make sure to choose a kit that is compatible with your coffee machine model. You can find these kits at most hardware stores or online retailers.
- Drill: You’ll need a drill to make a hole in the wall or countertop where the water line will pass through. Make sure to use an appropriate drill bit size for the diameter of the water line and follow safety precautions while drilling.
- Wrench: A wrench will be needed to secure the water line fittings. Choose a wrench that matches the size of the fittings to ensure a tight and leak-free connection.
- Plumber’s tape: Plumber’s tape, also known as thread seal tape, is used to create a watertight seal between the fittings and the coffee machine. Wrap a few layers of plumber’s tape around the threads of each fitting before attaching them.
- Water shut-off valve: Before starting the installation process, it’s important to have a water shut-off valve readily available. This valve will allow you to conveniently shut off the water supply during the installation or in case of any maintenance needs.
- Measuring tape: A measuring tape will help you accurately determine the distance between the coffee machine and the water source. This will assist in positioning the water line correctly and choosing the appropriate length for the braided hose.
- Bucket or towels: It’s always a good idea to have a bucket or towels nearby to catch any water that may spill during the installation process. This will help minimize any potential mess and make the cleanup easier.
By gathering these equipment and tools, you’ll be well-prepared to connect your coffee machine to a water line. Ensure that you have everything on hand before you begin the installation process to avoid any delays or complications. Remember to follow the manufacturer’s instructions and guidelines for both your coffee machine and the water line kit to ensure a successful installation.
Choosing the Right Location
When connecting your coffee machine to a water line, choosing the right location is crucial for optimal functionality and convenience. Here are some factors to consider when selecting the perfect spot:
- Proximity to Water Source: Ideally, your coffee machine should be placed in close proximity to a water source, such as a sink or a dedicated water line. This ensures easy access to a continuous supply of water, minimizing the need for long hoses or complex installations.
- Accessibility: Consider the accessibility of the chosen location. You want to ensure that the coffee machine is easily reachable for regular maintenance tasks such as cleaning or descaling. Select a spot that allows ample space around the machine for easy maneuvering and servicing.
- Convenience: Think about the convenience of the location in terms of your workflow. If you’re installing the coffee machine in a commercial setting like a café or an office, choose a spot that allows easy access for both staff and customers. The goal is to create a seamless and efficient brewing experience.
- Electrical Outlet: Ensure that the chosen location has a nearby electrical outlet to power the coffee machine. Avoid using extension cords or power strips whenever possible, as they can pose safety hazards and potentially affect the performance of the machine.
- Space: Consider the space required for the coffee machine and any additional equipment, such as a grinder or a milk frother. Ensure that there is enough room to accommodate these components comfortably. Depending on the size of your setup, you may need to allocate adequate counter space or consider installing the coffee machine on a dedicated cart or station.
- Aesthetics: Take into account the visual aesthetics of the chosen location. Coffee machines often serve as focal points in kitchens or coffee shops, so choose a spot that complements the overall design and ambiance of the space. Consider factors such as color scheme, style, and placement in relation to other elements in the room.
By carefully considering these factors, you can choose the optimal location for your coffee machine. Remember that the chosen spot should not only provide easy access to a water source but also offer convenience, accessibility, and visual appeal. Take your time to assess different options and envision how the placement will impact the overall functionality and aesthetics of your coffee brewing setup.
Water Supply Requirements
When connecting your coffee machine to a water line, it’s important to ensure that your water supply meets certain requirements to ensure the best brewing results. Here are some key considerations:
- Clean Water: The quality of water plays a significant role in the taste and aroma of your brewed coffee. Ideally, the water used should be clean and free from impurities or contaminants that can affect the flavor. If your tap water has a noticeable taste or odor, it’s advisable to use a water filtration system to improve its quality.
- Water Hardness: The hardness of your water, which measures the mineral content, can impact the performance and maintenance of your coffee machine. Hard water can lead to mineral deposits and scale buildup within the machine, affecting its efficiency and longevity. If you have hard water, consider using a water softening system or a descaling solution to minimize mineral buildup.
- Water Pressure: The water pressure in your water line is another important consideration. The ideal water pressure for coffee machines typically ranges between 1 and 5 bar (15-73 PSI). Low water pressure can result in slower brewing times and weaker extraction, while high water pressure can cause issues such as leaks or over-extraction. It’s recommended to consult the manufacturer’s guidelines for your specific coffee machine to determine the optimal water pressure range.
- Water Temperature: The temperature of the water used for brewing also significantly affects the flavor and extraction of the coffee. Most coffee brewing methods require water to be heated between 195°F and 205°F (90°C-96°C). While some coffee machines have built-in temperature controls, others rely on the water supply temperature. Ensure that the water supplied to your coffee machine falls within the recommended range for optimal brewing results.
- Water Filtration: To further enhance the quality of your coffee, consider using a water filtration system. This helps remove impurities, chlorine, and other chemicals that can affect the taste and aroma of your brew. There are various types of water filtration systems available, including faucet-mounted filters, pitcher filters, and under-sink filters. Choose a system that suits your needs and budget.
By paying attention to these water supply requirements, you can ensure that your coffee machine produces the best-tasting brews. Clean water, appropriate water hardness, optimal water pressure, and the right water temperature are all important factors that contribute to a superior coffee drinking experience. Consider investing in water filtration systems or softeners if necessary to maintain the quality and longevity of your coffee machine.
Make sure to turn off the water supply before connecting the coffee machine to the water line. Use a food-grade water hose to make the connection and check for any leaks before turning the water back on.
Read more: How To Connect Pipes To Old Lines
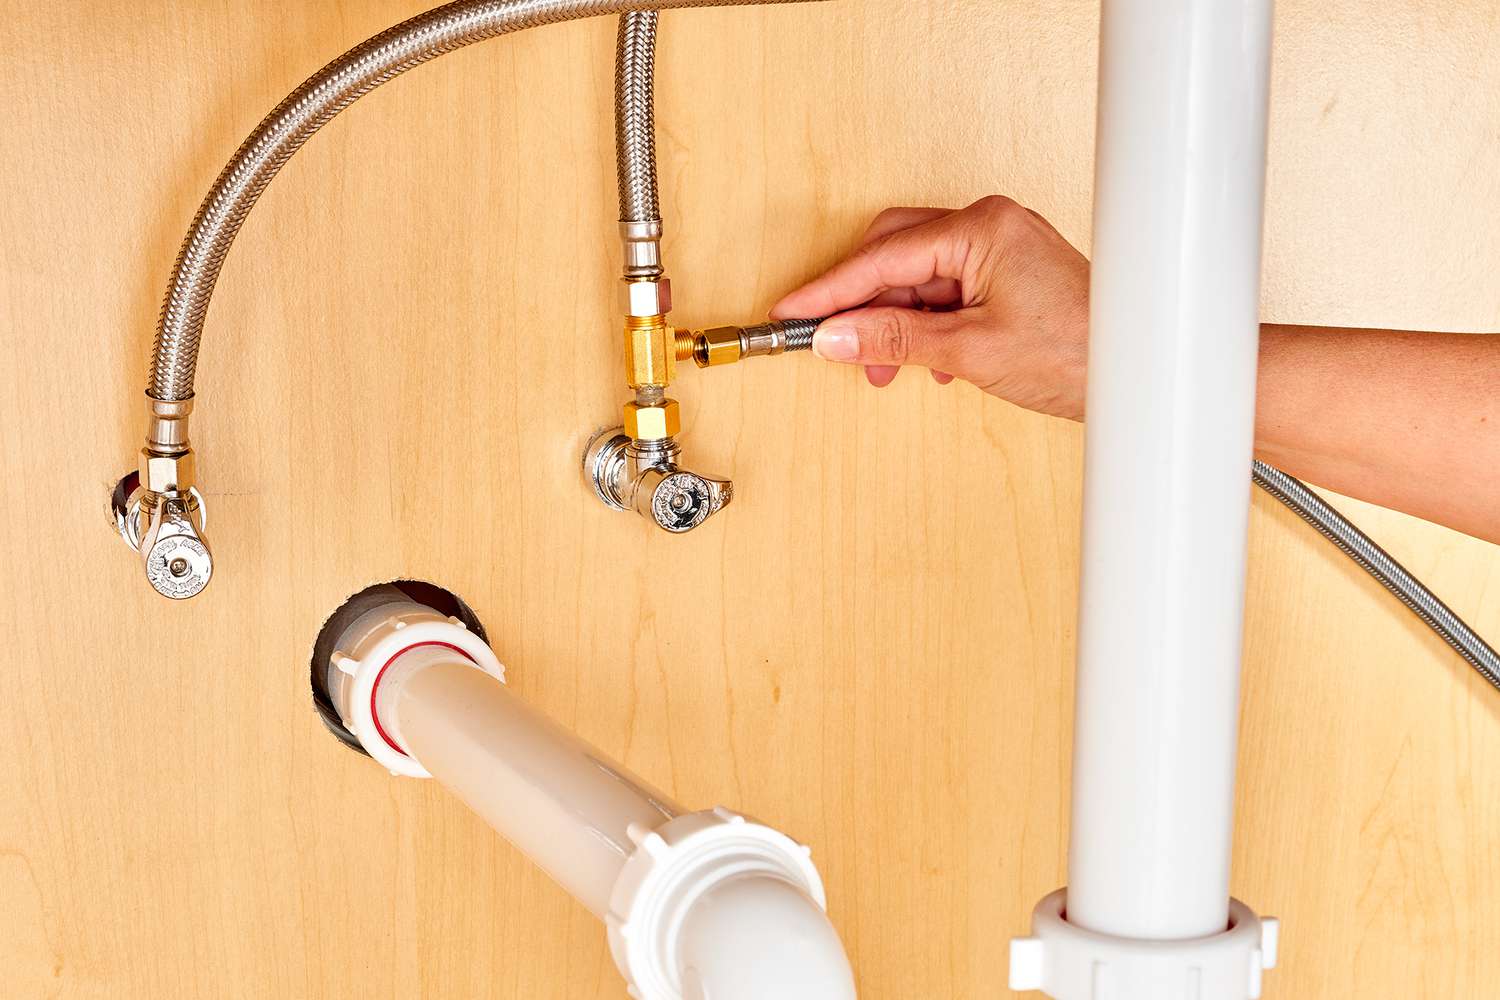
Shutting Off the Water Supply
Before you begin the process of installing a water line for your coffee machine, it’s crucial to shut off the water supply. This step is essential to prevent any leaks, water damage, or interruption during the installation process. Here’s how to shut off the water supply effectively:
- Locate the Main Water Valve: The main water valve is typically located near the water meter or where the water line enters your building. Depending on your location, it could be in the basement, utility room, or outside near the meter. Locate the valve and ensure you have clear access to it.
- Familiarize Yourself with the Valve: Take a moment to familiarize yourself with the main water valve. It’s usually a wheel-type valve that can be turned clockwise to shut off the water flow. In some cases, it may be a lever-style valve that needs to be flipped to the off position. Make sure you know the mechanism of your valve before proceeding.
- Turn Off the Water Supply: Using a wrench or your hand, turn the main water valve clockwise (or flip the lever-style valve) until it is completely closed. This will shut off the water supply to your entire building. Verify that the valve is tightly closed by checking for any water flow at faucets or fixtures in your home or building.
- Drain Excess Water: To further minimize the risk of leaks during the installation process, it’s a good idea to drain any excess water from the plumbing system. Do this by opening faucets on the lowest level of the building to allow the water to drain out. You may also want to flush toilets and run any outdoor spigots to ensure all water is drained.
- Verify the Water Supply is Off: Once you have turned off the main water valve and drained any excess water, double-check to ensure that the water supply is fully shut off. Look for any signs of water flow or leaks in the plumbing system. It’s crucial to confirm that the water is completely turned off before proceeding with the installation.
By following these steps, you can safely and effectively shut off the water supply before connecting your coffee machine to a water line. Remember, it’s important to exercise caution and take necessary precautions to prevent any potential water damage or accidents during the installation process. Once the water supply is shut off and verified, you can proceed with confidence to the next step of installing the water line and connecting your coffee machine.
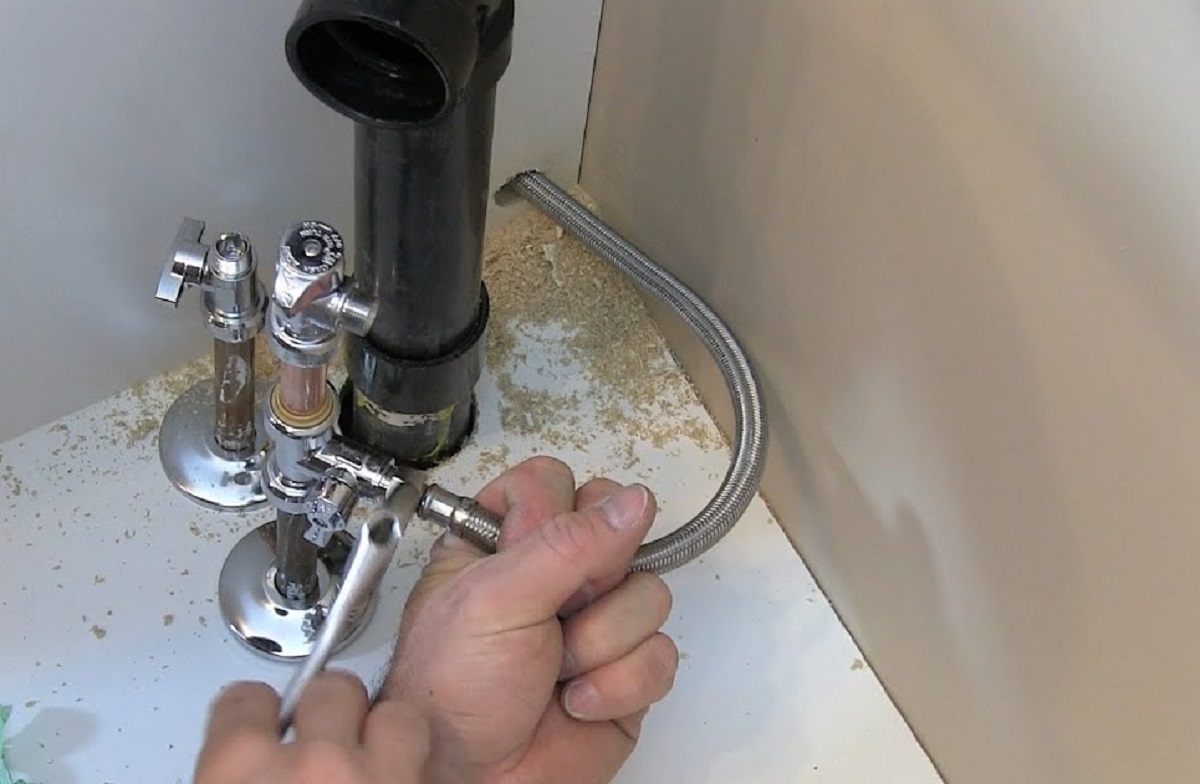
Installing the Water Line
Installing the water line for your coffee machine is a crucial step in connecting it to a direct water source. Follow these step-by-step instructions to ensure a successful installation:
- Choose the Right Connection Point: Identify the appropriate connection point on your coffee machine where the water line will be attached. This is usually located on the back or bottom of the machine. Refer to the manufacturer’s instructions or user manual for specific guidance.
- Prepare the Water Line: Measure the distance between the water source and the coffee machine connection point. Cut the water line to the appropriate length, allowing a little extra for flexibility. Use a sharp utility knife or a pipe cutter to ensure a clean and precise cut.
- Attach the Fittings: Attach the necessary fittings to each end of the water line. Follow the instructions provided with your water line kit to ensure a proper connection. Ensure that all fittings are secure and tight, but be cautious not to overtighten, as this can cause damage or leaks.
- Apply Plumbers Tape: Wrap a few layers of plumber’s tape (thread seal tape) around the threads of each fitting to create a watertight seal. This will help prevent any potential leaks and ensure a secure connection. Smooth out the tape to ensure it adheres properly.
- Drill a Hole: If necessary, drill a hole in the wall or countertop where the water line will pass through. Ensure that the hole is the appropriate size for the water line to fit through securely. Be cautious of any electrical wiring or other obstructions in the area before drilling.
- Thread the Water Line: Carefully thread the water line through the drilled hole, ensuring that it is properly aligned and free from any kinks or twists. Be gentle to avoid damaging the line or the surrounding surfaces.
- Connect the Water Line: Connect one end of the water line to the water source, such as a water line valve or a plumbing fixture. Again, refer to the manufacturer’s instructions to ensure the proper connection method. Tighten the fitting securely but avoid overtightening.
- Connect the Coffee Machine: Finally, connect the other end of the water line to the designated connection point on your coffee machine. Ensure a secure and tight connection to prevent any leaks or water flow issues. Double-check that the water line is properly aligned and free from any obstructions.
- Open the Water Valve: Once the water line is securely connected at both ends, slowly open the water supply valve. This will allow the water to flow into the coffee machine. Keep an eye on the connections for any signs of leaks and promptly address them if necessary.
By following these step-by-step instructions, you can successfully install the water line for your coffee machine. Remember to refer to the specific instructions provided with your coffee machine and water line kit for any additional guidance or precautions. Once the water line is properly installed and the connections are secure, you can proceed to the next step of testing and troubleshooting.
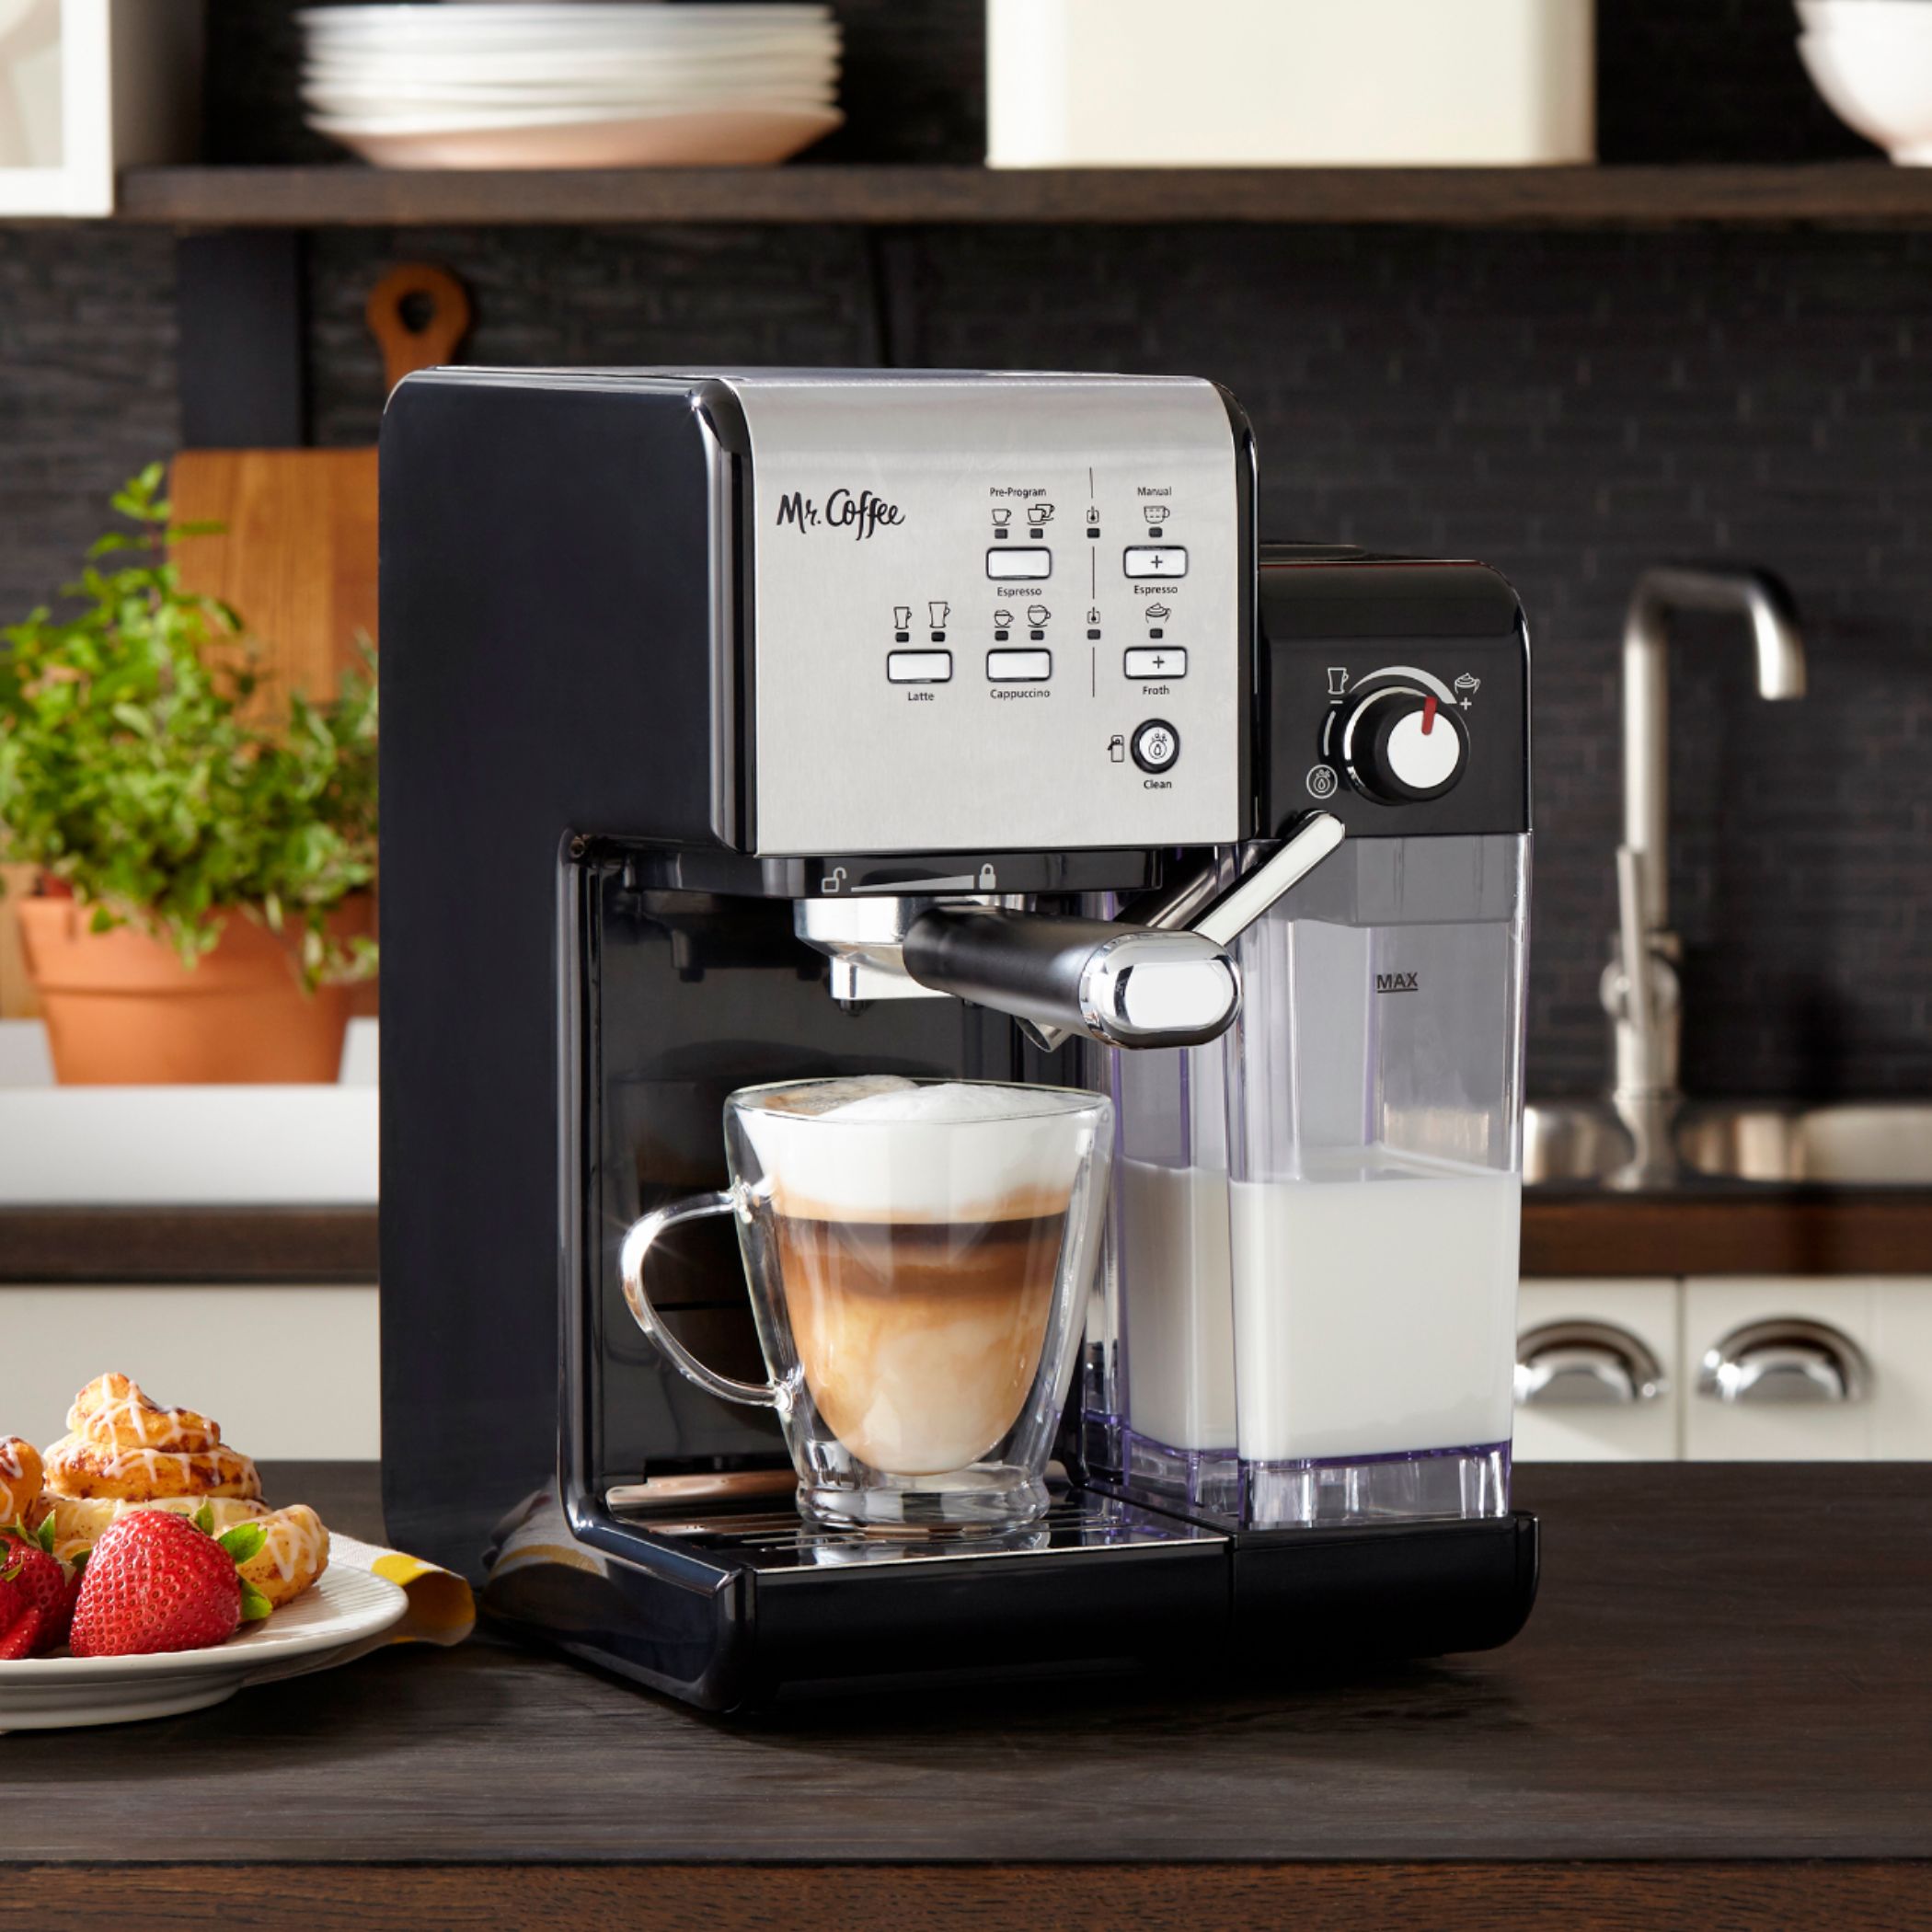
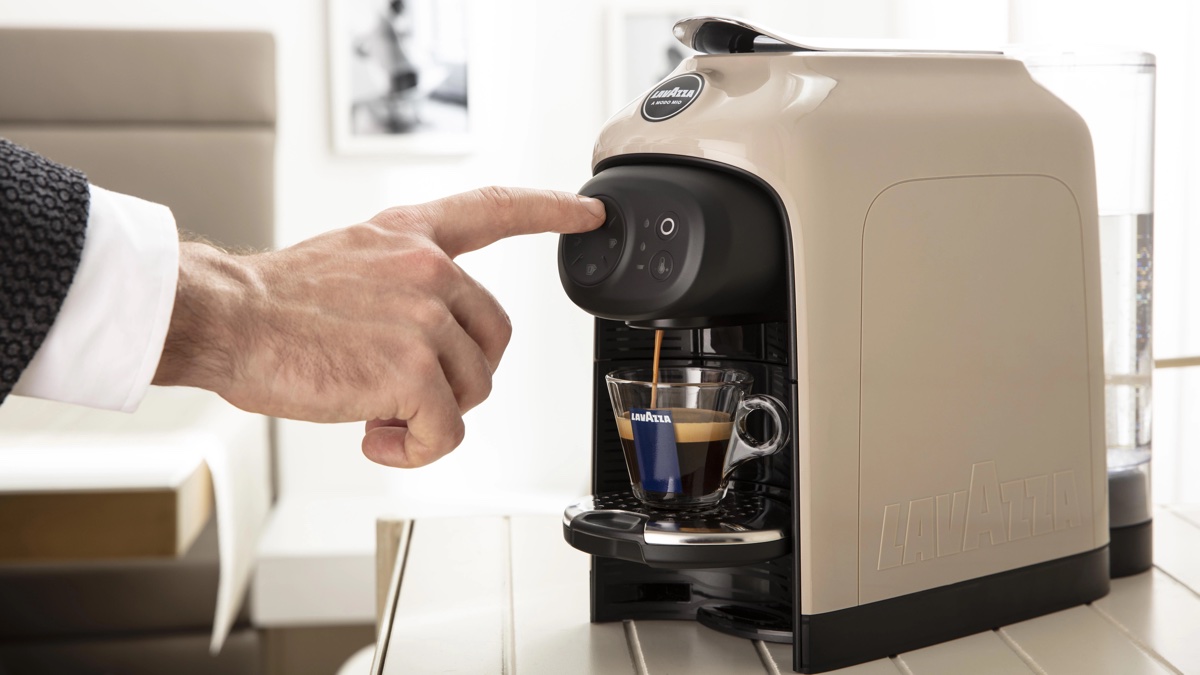
Connecting the Coffee Machine
Now that you have installed the water line, it’s time to connect your coffee machine to the water supply. Follow these steps to ensure a seamless connection:
- Prepare the Coffee Machine: Before connecting the coffee machine, ensure that it is powered off and unplugged for safety. Refer to the manufacturer’s instructions for any specific preparations required for your particular model.
- Locate the Water Line Connection Point: Look for the designated connection point on your coffee machine, usually located at the back or bottom. It may be labeled or indicated in the user manual. Ensure that the connection point is easily accessible for the water line.
- Attach the Water Line: Take the end of the water line connected to the water source and attach it securely to the designated connection point on the coffee machine. Align the fittings properly and tighten them to ensure a snug and watertight connection. Avoid overtightening, as it can damage the fittings or cause leaks.
- Check for Leaks: Once the water line is connected, carefully check for any signs of leaks around the connection point. Pay attention to both the fittings and the coffee machine itself. If you notice any leaks, immediately shut off the water supply and address the issue by adjusting the fittings or applying more plumber’s tape.
- Power On and Test: After confirming that there are no leaks, plug in the coffee machine and power it on. Depending on your machine, there may be specific instructions for priming the water line or initializing the water flow. Consult the user manual or follow the manufacturer’s guidelines to ensure proper setup.
- Run a Water Test Cycle: It’s essential to run a water test cycle to ensure that the water is flowing through the coffee machine correctly. Follow the instructions provided by the manufacturer for your specific machine to initiate the test cycle. Monitor the water flow and check for consistent and steady water supply throughout the brewing process.
- Adjust and Fine-tune: Once the water test cycle is complete, assess the brewing results and make any necessary adjustments to achieve the desired coffee strength and taste. Consult the user manual for guidance on adjusting variables such as grind size, brew time, and water flow rate to optimize the brewing process for your specific machine.
By following these steps, you can successfully connect your coffee machine to the water line and ensure a steady supply of water for brewing. It’s important to carefully follow the manufacturer’s instructions for your coffee machine model and to be vigilant for any leaks during the installation and testing process. With the machine properly connected, you can now enjoy the convenience of a continuous water supply for your coffee brewing needs.
Testing and Troubleshooting
After connecting your coffee machine to the water line, it’s crucial to test its functionality and address any potential issues that may arise. Follow these steps for testing and troubleshooting:
- Water Flow Test: Start by running a water flow test to ensure that water is flowing smoothly through the connected water line. Check for any leaks, obstructions, or irregular water flow. If you notice any issues, double-check the connections and tighten any loose fittings. If the problem persists, consider seeking professional assistance or contacting the manufacturer for further guidance.
- Brewing Test: Once the water flow is confirmed, proceed to perform a brewing test. Follow the standard brewing procedure for your coffee machine, taking note of the brewing time, coffee strength, and overall taste. Assess if the brewing process is consistent and if there are any variations or abnormalities in the final brew. Make adjustments as necessary based on your preferences and the specific instructions provided by the manufacturer.
- Temperature Test: Check the temperature of the brewed coffee to ensure that it falls within the desired range. Use a thermometer to measure the temperature of the coffee immediately after brewing. If the temperature is consistently too high or too low, consult the manufacturer’s instructions to determine if there are any temperature settings that need to be adjusted or if there may be an issue with the machine’s heating element.
- Leak Detection: Regularly inspect the connections and the coffee machine itself for any signs of leaks. Look for water puddles, drips, or moist areas around the water line and the coffee machine. Address any leaks by tightening the fittings, replacing faulty components, or applying additional plumber’s tape to create a watertight seal.
- Maintenance and Cleaning: Adhere to the recommended maintenance and cleaning schedule provided by the manufacturer. Regularly descale and clean the coffee machine, paying special attention to the water line and related components. This will help prevent clogs, mineral buildup, and other issues that can affect the performance of the machine and the quality of your coffee.
If you encounter persistent issues or are unsure about the testing and troubleshooting process, don’t hesitate to consult the user manual or contact the manufacturer’s customer support for assistance. They can provide specific instructions and guidance tailored to your coffee machine model.
Remember, proper maintenance and regular testing are key to ensuring the optimal performance and longevity of your coffee machine. By addressing any issues promptly and following the recommended maintenance practices, you can continue to enjoy a seamless coffee brewing experience with your connected water line.
Read more: How To Disconnect A Refrigerator Water Line
Conclusion
Congratulations! You have successfully connected your coffee machine to a water line, unlocking a world of convenience and consistent coffee brewing. By eliminating the need to manually refill the water reservoir, you can enjoy a continuous supply of fresh water, saving time and effort.
Throughout this article, we discussed the benefits of connecting your coffee machine to a water line, such as increased convenience, consistent water supply, improved taste, time and labor savings, and reduced maintenance. We also covered the necessary equipment and tools required for the installation, choosing the right location, water supply requirements, shutting off the water supply, installing the water line, connecting the coffee machine, and testing and troubleshooting.
Remember to always follow the manufacturer’s instructions and guidelines specific to your coffee machine model. Proper installation, regular maintenance, and testing will ensure the optimal performance and longevity of your coffee machine. Keep an eye out for any leaks, irregular water flow, or temperature issues, and address them promptly to prevent further complications.
With your coffee machine connected to a water line, you can enjoy a seamless and efficient coffee brewing experience. Say goodbye to constantly refilling the water reservoir and enjoy a consistent supply of delicious coffee whenever you desire. Whether you’re a coffee shop owner, a busy office worker, or a passionate home barista, connecting your coffee machine to a water line elevates your coffee brewing game.
So, sit back, relax, and savor the rich aroma and delightful flavors of your freshly brewed coffee. Cheers to a perfectly brewed cup every time!
Frequently Asked Questions about How To Connect Coffee Machine To Water Line
Was this page helpful?
At Storables.com, we guarantee accurate and reliable information. Our content, validated by Expert Board Contributors, is crafted following stringent Editorial Policies. We're committed to providing you with well-researched, expert-backed insights for all your informational needs.
0 thoughts on “How To Connect Coffee Machine To Water Line”