Articles
How To Cook Ham On Stove Top
Modified: August 17, 2024
Learn how to cook ham on the stove top with our informative articles. Discover delicious recipes and step-by-step instructions for perfectly cooked ham.
(Many of the links in this article redirect to a specific reviewed product. Your purchase of these products through affiliate links helps to generate commission for Storables.com, at no extra cost. Learn more)
Introduction
Welcome to the delicious world of cooking ham on the stove top! Whether you’re hosting a special gathering or simply craving a tasty ham dinner, this guide will walk you through the steps of preparing and cooking ham on your stove top. With a few simple techniques and some flavorful seasoning, you’ll be able to create a tender and juicy ham that will impress your family and friends.
Before we dive into the cooking process, it’s important to note that safety is a key consideration when handling and cooking ham. Always follow proper hygiene practices, such as washing your hands thoroughly before and after handling raw meat. Additionally, make sure to cook the ham to the recommended internal temperature to ensure it is safe to eat.
Now that we’ve covered the basics, let’s begin our journey to mastering the art of cooking ham on the stove top!
Key Takeaways:
- Prioritize safety, choose the right ham, and master the art of seasoning to create a tender and succulent ham on the stove top. Patience, attention, and proper preparation are key to a mouthwatering outcome.
- Cooking ham on the stove top requires careful monitoring of internal temperature, allowing the ham to rest, and carving and serving it with precision. Enjoy the flavorful results and impress your guests with a beautifully presented centerpiece.
Read more: How To Bake On The Stove Top
Safety Precautions
When it comes to cooking ham on the stove top, it’s important to prioritize safety to ensure a healthy and enjoyable dining experience. Here are some essential safety precautions to keep in mind:
- Wash Your Hands: Before handling any food, particularly raw meat like ham, it’s crucial to wash your hands thoroughly with soap and warm water. This helps to prevent the transfer of bacteria and maintain a hygienic cooking environment.
- Clean Utensils and Surfaces: Ensure that your cooking utensils, cutting boards, and counters are clean and sanitized before and after handling the ham. This helps to avoid cross-contamination and the spread of harmful bacteria.
- Proper Storage: If you’re using pre-packaged ham, make sure to follow the storage instructions provided on the packaging. Keep the ham refrigerated until you’re ready to cook it, and avoid leaving it at room temperature for an extended period.
- Temperature Control: Cooking ham requires maintaining proper temperature control to prevent the growth of bacteria. Keep the heat on your stove top at a consistent level and use a food thermometer to monitor the internal temperature of the ham throughout the cooking process.
- Cook Thoroughly: It’s essential to cook ham thoroughly to eliminate any bacteria or pathogens. Follow the suggested cooking times and internal temperature guidelines recommended by reputable sources to ensure that the ham is safe to eat.
- Handle Hot Surfaces and Utensils: When working with a stove top, remember that the burners and cookware can become extremely hot. Always use oven mitts or heat-resistant gloves when handling hot surfaces or utensils to avoid burns or injuries.
- Proper Ventilation: Cooking ham on the stove top can create steam and smoke. Ensure that your kitchen is well-ventilated by turning on your exhaust fan or opening windows to prevent the accumulation of smoke or strong odors.
By following these safety precautions, you can minimize the risk of foodborne illnesses and enjoy a safe and delicious ham cooked on the stove top.
Choosing the Right Ham
When it comes to cooking ham on the stove top, selecting the right type of ham is crucial for achieving the best results. Here are a few factors to consider when choosing a ham:
- Ham Type: There are different types of ham available, such as whole, bone-in, boneless, smoked, or cured. Decide on the type of ham you prefer based on your taste preferences and the recipe you plan to follow.
- Ham Size: Consider the number of people you’ll be serving and the portion sizes you desire. The size of the ham will determine the cooking time and the amount of seasoning you’ll need.
- Freshness: Opt for a fresh ham if you prefer a more flavorful and moist cut of meat. Fresh hams are not cured or smoked and will require longer cooking times compared to pre-cooked hams.
- Quality: Look for hams that are labeled as high-quality or from reputable brands. Consider purchasing hams from local butcher shops or trusted sources for the best flavor and quality.
- Read Labels: Take the time to read the labels on the packaging before buying a ham. Look for information about the meat’s origin, additives, and suggested cooking instructions to ensure you’re making an informed choice.
- Consider Budget: Hams come in a range of prices, so consider your budget while selecting one. Keep in mind that higher-quality hams may be more expensive but can offer superior flavor and texture.
Remember that personal preferences, budget, and the recipe you plan to follow will play a significant role in your decision-making process. Whether you choose a bone-in ham for added flavor or a boneless ham for ease of carving, the most important factor is selecting a ham that meets your needs and tastes delicious when cooked on the stove top.
Preparing the Ham
Before you begin cooking the ham on the stove top, it’s essential to properly prepare it. Here are the steps to follow:
- Defrosting: If you’re using a frozen ham, ensure it is completely defrosted before cooking. Thaw the ham in the refrigerator, following the guidelines provided on the packaging. Allow ample time for the ham to thaw properly to ensure even cooking.
- Trimming: Assess the ham and trim off any excess fat, if desired. Leaving a thin layer of fat can add moisture and flavor to the ham, but you can remove any larger or uneven pieces of fat as per your preference.
- Rinsing: Rinse the ham under cold water to remove any surface impurities or brine. Pat it dry with paper towels to remove excess moisture.
- Score the Skin: Using a sharp knife, make shallow cuts in a diamond or crisscross pattern across the skin of the ham. This helps the seasonings penetrate the meat and adds an attractive presentation when cooked.
- Marinade or Brine: You can choose to marinate or brine the ham to enhance its flavor. This is optional but can add depth to the overall taste. Consider using a marinade or brine that complements the flavors you wish to infuse into the ham.
- Allow Time to Rest: After marinating or brining, allow the ham to rest at room temperature for about 30 minutes. This allows the flavors to penetrate the meat and ensures even cooking.
By following these preparation steps, you’ll be ready to move on to the next phase of seasoning and cooking the ham on the stove top. Taking the time to properly prepare the ham will help ensure a flavorful and enjoyable dining experience.
Seasoning the Ham
Now that you’ve prepared the ham, it’s time to infuse it with delicious flavors that will tantalize your taste buds. Here’s how to season the ham to perfection:
- Basic Seasoning: Start by applying a simple seasoning blend to enhance the natural flavors of the ham. A combination of salt, pepper, and garlic powder is a classic choice. Sprinkle the seasoning evenly over the entire surface of the ham.
- Sweet and Savory Glaze: For a more pronounced flavor, consider applying a glaze to the ham. This can be a combination of ingredients such as brown sugar, honey, mustard, maple syrup, or pineapple juice. Mix the glaze ingredients together and brush it onto the surface of the ham.
- Herbs and Spices: Experiment with herbs and spices to add depth and complexity to the flavor profile of the ham. Consider using a combination of rosemary, thyme, paprika, or smoked paprika. Sprinkle these seasonings over the ham or incorporate them into the glaze.
- Citrus Zest: For a burst of freshness, grate the zest of citrus fruits like orange, lemon, or lime. Sprinkle the zest over the ham or mix it into the glaze. The citrus notes will provide a bright and tangy element to the overall flavor.
- Allow Time to Marinate: Let the ham marinate with the seasonings for at least 30 minutes, or even overnight in the refrigerator if time allows. This allows the flavors to fully penetrate the meat, resulting in a more flavorful and delicious ham.
Remember, the seasoning choices are entirely customizable based on your preferences. Experiment with different flavor profiles to create a ham that suits your taste. Whether you prefer a sweet and tangy glaze or a savory and herby rub, the key is to ensure that the seasonings are evenly distributed and the flavors complement the natural taste of the ham.
Now that you’ve seasoned the ham, it’s time to move on to the next step: cooking it on the stove top.
Read more: How To Cook Okra On Stove Top
Setting up the Stove
Before you begin cooking the ham on the stove top, it’s important to set up your stove properly to ensure even heat distribution and a successful cooking process. Here’s how to get the stove ready:
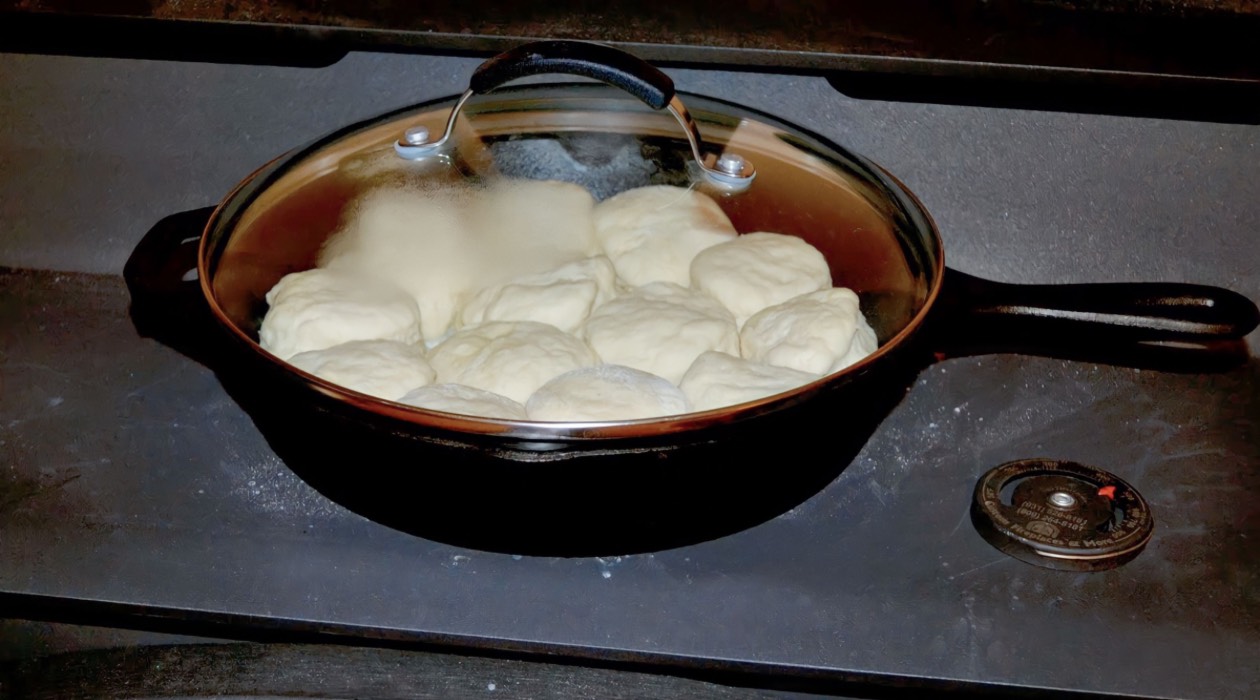
- Choose the Right Pan: Select a large, heavy-bottomed pan or Dutch oven that can comfortably accommodate the size of your ham. Make sure the pan has a tight-fitting lid to retain moisture during cooking.
- Preheat the Pan: Place the pan on the stove over medium heat and allow it to preheat for a few minutes. Preheating the pan will help ensure that the ham cooks evenly and prevents sticking.
- Add Cooking Fat: Add a small amount of cooking fat or oil to the preheated pan to prevent the ham from sticking. You can use olive oil, vegetable oil, or cooking spray. Coat the bottom of the pan evenly to create a nonstick surface.
- Heat Control: Adjust the heat on your stove top to medium or medium-low. It’s important to maintain a consistent heat level throughout the cooking process to prevent the ham from burning or drying out.
- Prepare Pan Rack or Trivet: If you have a pan rack or trivet, place it inside the pan before adding the ham. This helps to elevate the ham slightly, allowing for better heat circulation and even cooking.
- Arrange the Ham: Carefully place the seasoned ham in the pan, ensuring it is centered and not touching the sides of the pan. If using a bone-in ham, make sure the bone is facing down in the pan.
- Cover with Lid: Once the ham is in the pan, cover it tightly with the lid. This helps to trap the steam and heat, creating a moist cooking environment for the ham.
By following these steps, you’ll have your stove set up and ready to cook the ham. The proper setup will ensure that the ham cooks evenly and retains its moisture, resulting in a flavorful and tender end result.
Now that the stove is ready, let’s move on to the next step: cooking the ham on the stove top.
When cooking ham on the stove top, make sure to use a heavy-bottomed pan to prevent burning and to maintain even heat distribution. This will help ensure that the ham cooks evenly and stays juicy.
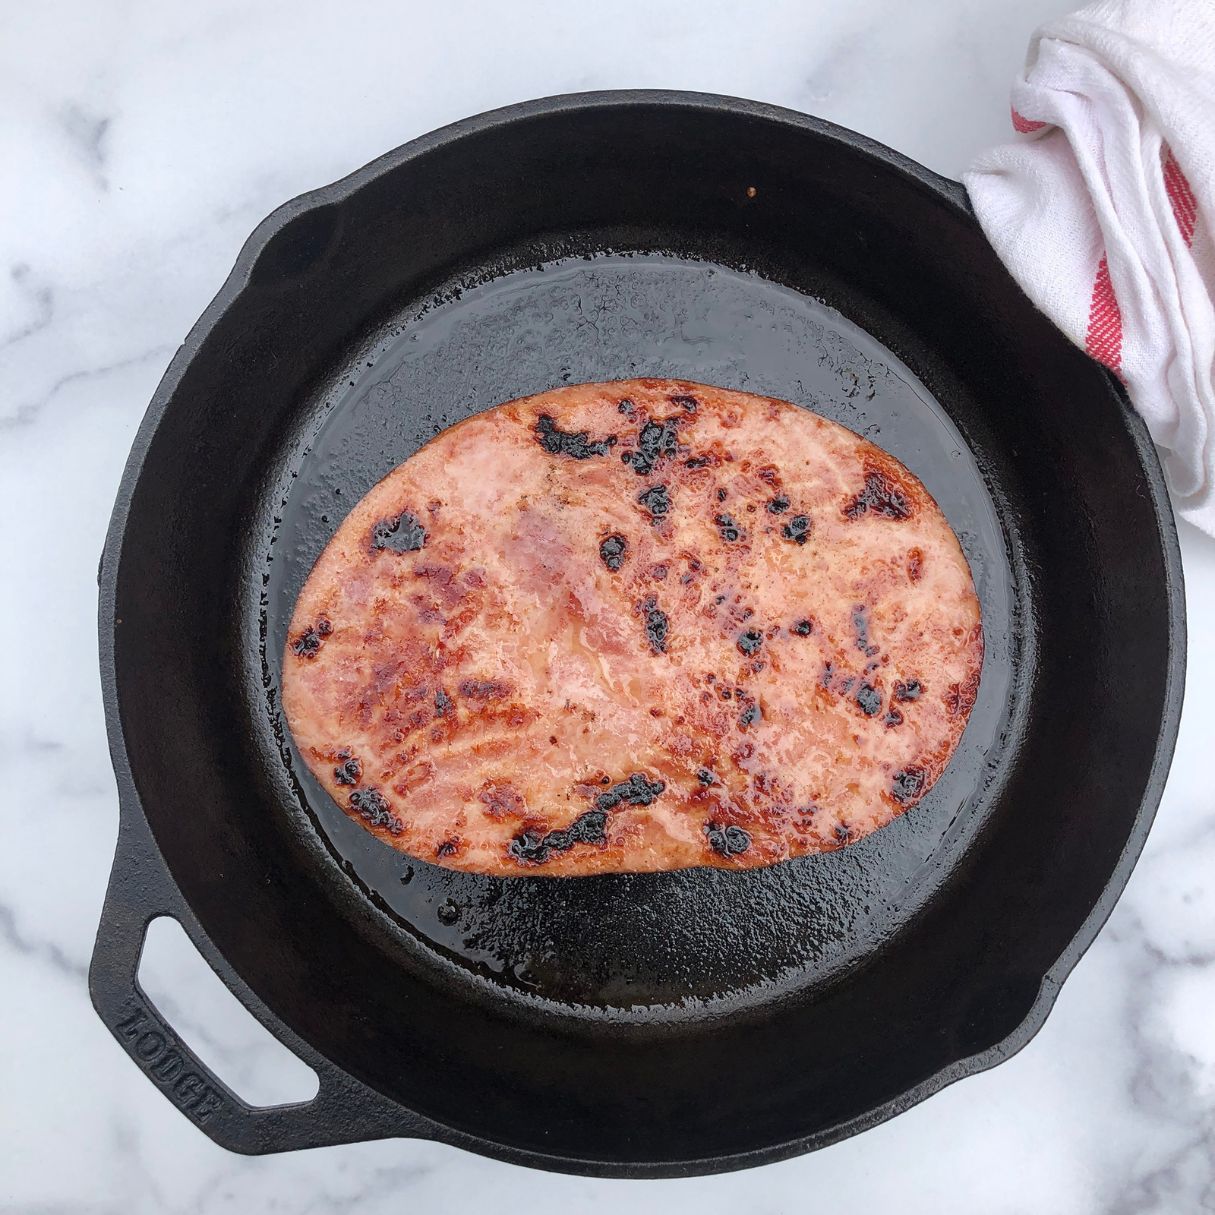
Cooking the Ham on Stove Top
Now comes the exciting part – cooking the ham on the stove top! Follow these steps to achieve a perfectly cooked and flavorful ham:
- Heat the Pan: Place the pan with the ham on the stove over medium heat. Allow the ham to cook for a few minutes without touching or moving it. This helps to develop a nice sear on the surface.
- Lower the Heat: Once the ham has seared for a few minutes, reduce the heat to low or medium-low. This allows the ham to cook gently and evenly without the risk of burning.
- Baste the Ham: As the ham cooks, periodically baste it with its own juices or the glaze you applied earlier. Use a spoon or a basting brush to coat the ham with the juices, ensuring it stays moist and flavorful throughout the cooking process.
- Cover and Simmer: Cover the pan with a tight-fitting lid to create a simmering environment. This helps to retain moisture and infuse the flavors into the ham. Simmer the ham for the recommended time based on its weight and type.
- Turn the Ham: About halfway through the cooking time, carefully flip the ham over using tongs or a large spatula. This ensures even cooking and allows the flavors to distribute evenly throughout the meat.
- Continue Basting: While the ham cooks, continue basting it every 15 to 20 minutes to keep it moist and to enhance the flavor. This step is crucial for achieving a juicy and delectable ham.
Throughout the cooking process, it’s important to monitor the heat level, ensuring that it remains constant and doesn’t exceed the desired temperature. This will prevent the ham from overcooking or drying out.
Remember, cooking times may vary depending on the type and size of the ham. Refer to the instructions provided with your ham or consult reliable sources for specific cooking times and temperatures.
Now that the ham is cooking beautifully on the stove top, let’s move on to the next step: checking the internal temperature.
Checking the Internal Temperature
Checking the internal temperature of the ham is crucial to ensure it is cooked to perfection and safe to eat. Here’s how to determine the internal temperature:
- Use a Meat Thermometer: Insert a meat thermometer into the thickest part of the ham without touching the bone. Make sure the thermometer is positioned in the center of the meat for an accurate reading.
- Check for Doneness: Different types of hams have different recommended internal temperatures. For a fully cooked ham, such as a pre-packaged one, the internal temperature should reach 140°F (60°C). For fresh hams that need thorough cooking, the internal temperature should reach 160°F (71°C).
- Check Multiple Areas: If your ham is large or irregularly shaped, it may be beneficial to check the internal temperature in multiple areas to ensure even cooking. Take readings at different spots to ensure that the entire ham has reached the desired temperature.
- Avoid Overcooking: Be careful not to overcook the ham as it can result in a dry and tough texture. Once the ham has reached the recommended internal temperature, remove it from the heat source promptly to prevent any further cooking.
By monitoring the internal temperature, you can ensure that the ham is cooked to the perfect level of doneness, ensuring both safety and optimal flavor.
If the ham has not reached the desired temperature, continue cooking it on the stove top, periodically checking the internal temperature until it reaches the recommended range.
Once your ham has reached the appropriate internal temperature, it’s time to move on to the next step: letting the ham rest.
Letting the Ham Rest
Allowing the ham to rest after cooking is a crucial step that allows the juices to redistribute and the flavors to intensify. Here’s why and how to let the ham rest:
- Retain Juiciness: Resting the ham helps to retain its juiciness by allowing the meat fibers to relax and reabsorb the flavorful juices that may have migrated during the cooking process. This results in a more tender and succulent ham.
- Temperature Equilibrium: During the rest, the temperature inside the ham will even out. The outer layers may be slightly hotter than the inner portions due to residual heat. Allowing the ham to rest helps the heat to distribute evenly, ensuring that each slice is cooked to perfection.
- Cover the Ham: After removing the ham from the stove top, transfer it to a cutting board or serving platter. Tent the ham loosely with aluminum foil. This helps to preserve the heat and prevents it from escaping too rapidly, allowing the ham to stay warm during the resting period.
- Resting Time: Let the ham rest for about 15 to 20 minutes. This allows the flavors to develop and the juices to redistribute throughout the meat. Use this time to prepare any side dishes, garnishes, or carving utensils.
- Retain Moisture: Resting the ham helps to retain its moisture. Slicing the ham immediately after cooking can cause the juices to escape, resulting in a drier end product. Allowing the ham to rest ensures that the moisture remains trapped within the meat, resulting in a more succulent texture.
During the resting period, it’s important to resist the temptation to carve into the ham. Patience will be rewarded with a more flavorful and tender ham.
Now that the ham has had its well-deserved rest, it’s time to move on to the final step: carving and serving the ham.
Read more: How To Cook Kabobs On Stove Top
Carving and Serving the Ham
Now that your ham has rested, it’s time to carve and serve it. Follow these steps for a beautiful presentation:
- Choose the Right Knife: Select a sharp carving knife with a long, thin blade. This will allow you to make precise and smooth cuts through the ham.
- Position the Ham: Place the rested ham on a stable cutting board or serving platter. Position it with the bone side facing down, if it is a bone-in ham. This will make it easier to carve and provide stability.
- Slicing Technique: Start by making horizontal slices across the ham. Begin at the thicker end of the ham and work your way towards the thinner end. Aim for uniform and thin slices for an attractive presentation.
- Bone-In Ham: If you’re carving a bone-in ham, keep in mind that the bone can make carving a little trickier. Use the bone as a guide and cut along its contours to carve neat slices. You can also separate the bone from the meat and slice each portion separately.
- Serving Presentation: Arrange the slices on a platter, overlapping them slightly. This not only looks visually appealing but also makes it easier for guests to pick up individual slices. Pour any remaining pan juices or glaze over the slices for added flavor and moisture.
- Garnish and Accompaniments: To enhance the presentation, consider garnishing the platter with fresh herbs or citrus slices. Serve the ham with your choice of side dishes such as roasted vegetables, mashed potatoes, or a fresh salad.
Make sure to serve the carved ham while it is still warm to enjoy its delicious flavors fully. Encourage guests to help themselves and enjoy the fruits of your labor.
Remember to store any leftover ham properly in the refrigerator promptly. It can be used for sandwiches, salads, or incorporated into other recipes for a delicious leftover meal.
Now that the ham is beautifully carved and presented, it’s time to sit back, relax, and enjoy the mouthwatering results of your stove top cooking adventure!
Conclusion
Cooking ham on the stove top is a flavorful and convenient way to prepare this beloved meat. By following the steps outlined in this guide, you can create a tender and succulent ham that will impress your family and friends.
Remember to prioritize safety by practicing proper hygiene, handling the ham with care, and cooking it to the recommended internal temperature. This ensures a safe and enjoyable dining experience.
Choosing the right ham, preparing it properly, seasoning it with delicious flavors, and setting up the stove correctly are essential steps to achieve a delectable outcome. Cooking the ham on the stove top requires patience, attention, and periodic basting to help retain moisture and enhance the flavor profile.
Checking the ham’s internal temperature is essential to ensure it is cooked to perfection. Allowing the ham to rest after cooking promotes tenderness and redistributes the juices, resulting in a more flavorful end product.
Finally, carving and serving the ham give you the opportunity to present a beautiful and mouthwatering centerpiece to your guests. Take your time to carve thin and uniform slices, and don’t forget to garnish the platter for an inviting presentation.
Now that you have all the tools and knowledge to cook ham on the stove top, it’s time to put them into practice. Whether you’re preparing a holiday feast or simply craving a delicious ham dinner, enjoy the process and savor the tasty results. Happy cooking!
Frequently Asked Questions about How To Cook Ham On Stove Top
Was this page helpful?
At Storables.com, we guarantee accurate and reliable information. Our content, validated by Expert Board Contributors, is crafted following stringent Editorial Policies. We're committed to providing you with well-researched, expert-backed insights for all your informational needs.


0 thoughts on “How To Cook Ham On Stove Top”