
Articles
How To Determine Pitch Of Roof
Modified: October 18, 2024
Learn how to determine the pitch of a roof with our informative articles. Gain insights and expert tips for accurate roof measurements.
(Many of the links in this article redirect to a specific reviewed product. Your purchase of these products through affiliate links helps to generate commission for Storables.com, at no extra cost. Learn more)
Introduction
When it comes to roofing projects, one important aspect that needs to be determined is the pitch of the roof. The roof pitch refers to the steepness or slope of the roof. It plays a crucial role in determining the types of materials that can be used, the efficiency of water drainage, and the overall design of the roof.
In this article, we will provide you with a comprehensive guide on how to determine the pitch of a roof. Whether you are planning to undertake a roof replacement project, install a new roof, or simply curious about the pitch of your existing roof, understanding the process of determining roof pitch can prove to be invaluable.
By accurately determining the roof pitch, you can ensure the selection of appropriate roofing materials, estimate the amount of materials needed, and even make informed decisions about the design and functionality of your roof. So, let’s dive into the world of roof pitch and learn how to measure it!
Key Takeaways:
- Accurately determining the pitch of a roof is crucial for selecting appropriate materials, ensuring proper water drainage, and maintaining the overall functionality and aesthetics of the roof.
- Prioritizing safety, double-checking measurements, and seeking professional assistance when needed are essential for accurately determining the pitch of a roof and embarking on successful roofing projects.
Read more: How To Build A Pitched Roof Pergola
Overview of Roof Pitch
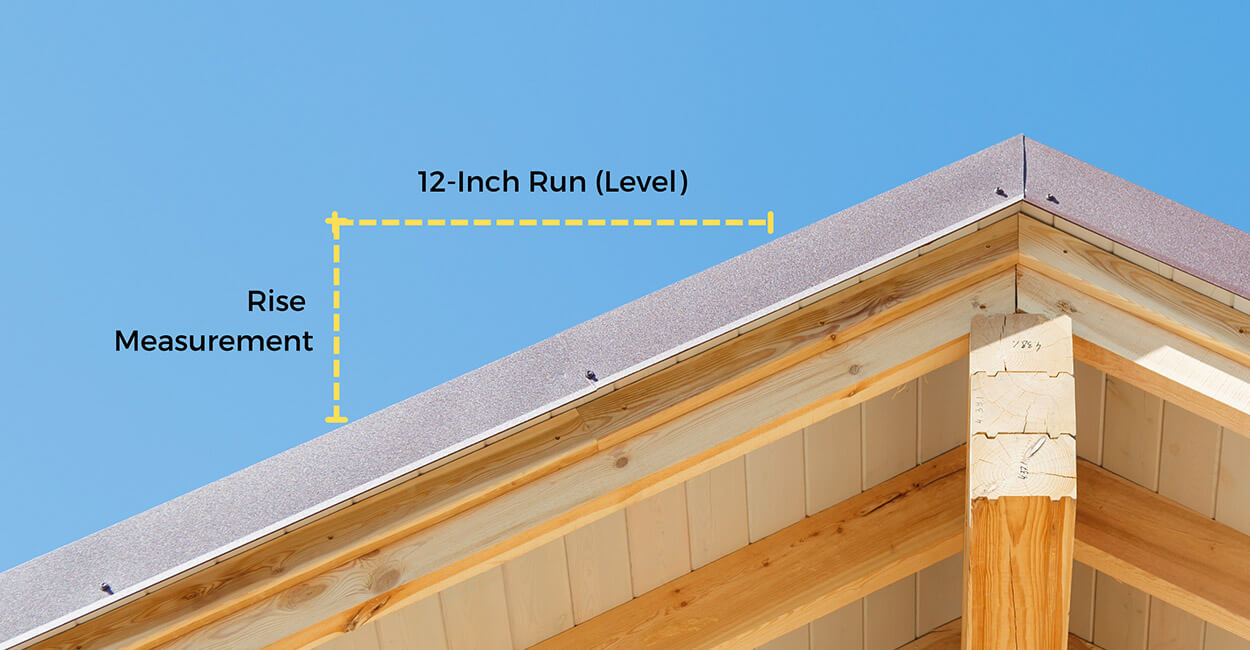
Roof pitch, also known as roof slope, refers to the angle at which a roof rises in relation to its horizontal base. It is typically expressed as a ratio or fraction, such as 4:12 or 1/4. The first number represents the vertical rise, while the second number indicates the horizontal run.
The roof pitch determines the style, appearance, and functionality of a roof. Different roof pitches are suited for specific purposes, climates, and architectural styles. It affects important factors such as water drainage, snow load capacity, and the type of roofing material that can be used.
Roofs can have varying degrees of pitch, ranging from low-slope roofs with gentle inclines to steep-pitch roofs with a more dramatic angle. Low-pitch roofs are commonly found on modern homes, commercial buildings, and industrial structures, while steep-pitch roofs are often seen on traditional or historical buildings.
Roof pitch also has an impact on the aesthetics of a building. A steep-pitch roof can create a visually striking appearance, adding depth and character to the overall design, while a low-pitch roof offers a more contemporary and streamlined look.
Understanding the roof pitch is crucial when it comes to selecting the appropriate roofing materials. Certain materials, such as slate or clay tiles, require a steeper pitch to ensure proper water runoff and prevent leaks. On the other hand, low-pitch roofs may be better suited for materials like metal or asphalt shingles.
Knowing the roof pitch can also be useful for estimating the amount of materials needed during a roofing project. Contractors and homeowners can accurately calculate the quantity of roofing materials, such as shingles or rolls of roofing membrane, based on the roof pitch and dimensions.
Overall, having a clear understanding of roof pitch is essential for anyone involved in roofing projects or maintenance. It enables better decision-making, ensures the longevity and functionality of the roof, and contributes to the overall design and aesthetics of the building.
Importance of Determining Roof Pitch
Accurately determining the roof pitch is crucial for several reasons. It has a significant impact on the overall performance, functionality, and longevity of the roof. Here are a few reasons why determining roof pitch is important:
1. Selection of Materials: Different roofing materials are suitable for different roof pitches. Determining the pitch allows you to choose the appropriate materials that will provide optimal performance and durability. For example, steep-pitched roofs may require materials like slate or clay tiles, while low-pitched roofs may be better suited for asphalt shingles or metal roofing.
2. Water Drainage: The pitch of the roof plays a vital role in ensuring proper water drainage. A steeper pitch allows water to run off quickly, minimizing the chances of water pooling or leaks. On the other hand, a low-pitched roof needs to have a proper slope to prevent water from accumulating and causing damage.
3. Snow Load Capacity: In regions with heavy snowfall, the roof pitch becomes even more crucial. Steeper pitches allow snow to slide off the roof more easily, reducing the risk of excessive weight and potential structural issues. The pitch of the roof is directly related to its snow load capacity.
4. Aesthetics and Architecture: Roof pitch plays a significant role in the overall aesthetics and architectural style of a building. It can enhance the unique character and charm of a structure, whether it’s a traditional or contemporary design. Determining the pitch ensures that the roof complements the overall architectural vision.
5. Energy Efficiency: The roof pitch can also impact energy efficiency. Steeper pitches can provide better ventilation, allowing hot air to escape and reducing the need for excessive cooling. Additionally, the angle of sunlight on the roof can affect the efficiency of solar panels, so knowing the roof pitch is essential for installing solar systems.
6. Estimating Costs: Determining the roof pitch is essential for accurately estimating the costs of a roofing project. It helps in calculating the quantity of materials required, labor costs, and even potential engineering considerations. Having this information upfront saves time and prevents any surprises during the project.
By understanding the importance of determining roof pitch, you can make informed decisions about the design, materials, and functionality of your roof. Whether you are planning a new roof installation or a roof replacement, accurately measuring the roof pitch ensures a successful and long-lasting roofing project.
Tools and Materials Needed
To determine the pitch of a roof, you will need a few essential tools and materials. Here is a list of what you will need:
1. Pitch Gauge: A pitch gauge is a specialized tool designed to measure and determine the roof pitch accurately. It consists of a level and a sliding gauge that can be adjusted to match the angle of the roof. The pitch gauge provides precise readings and is an essential tool for this task.
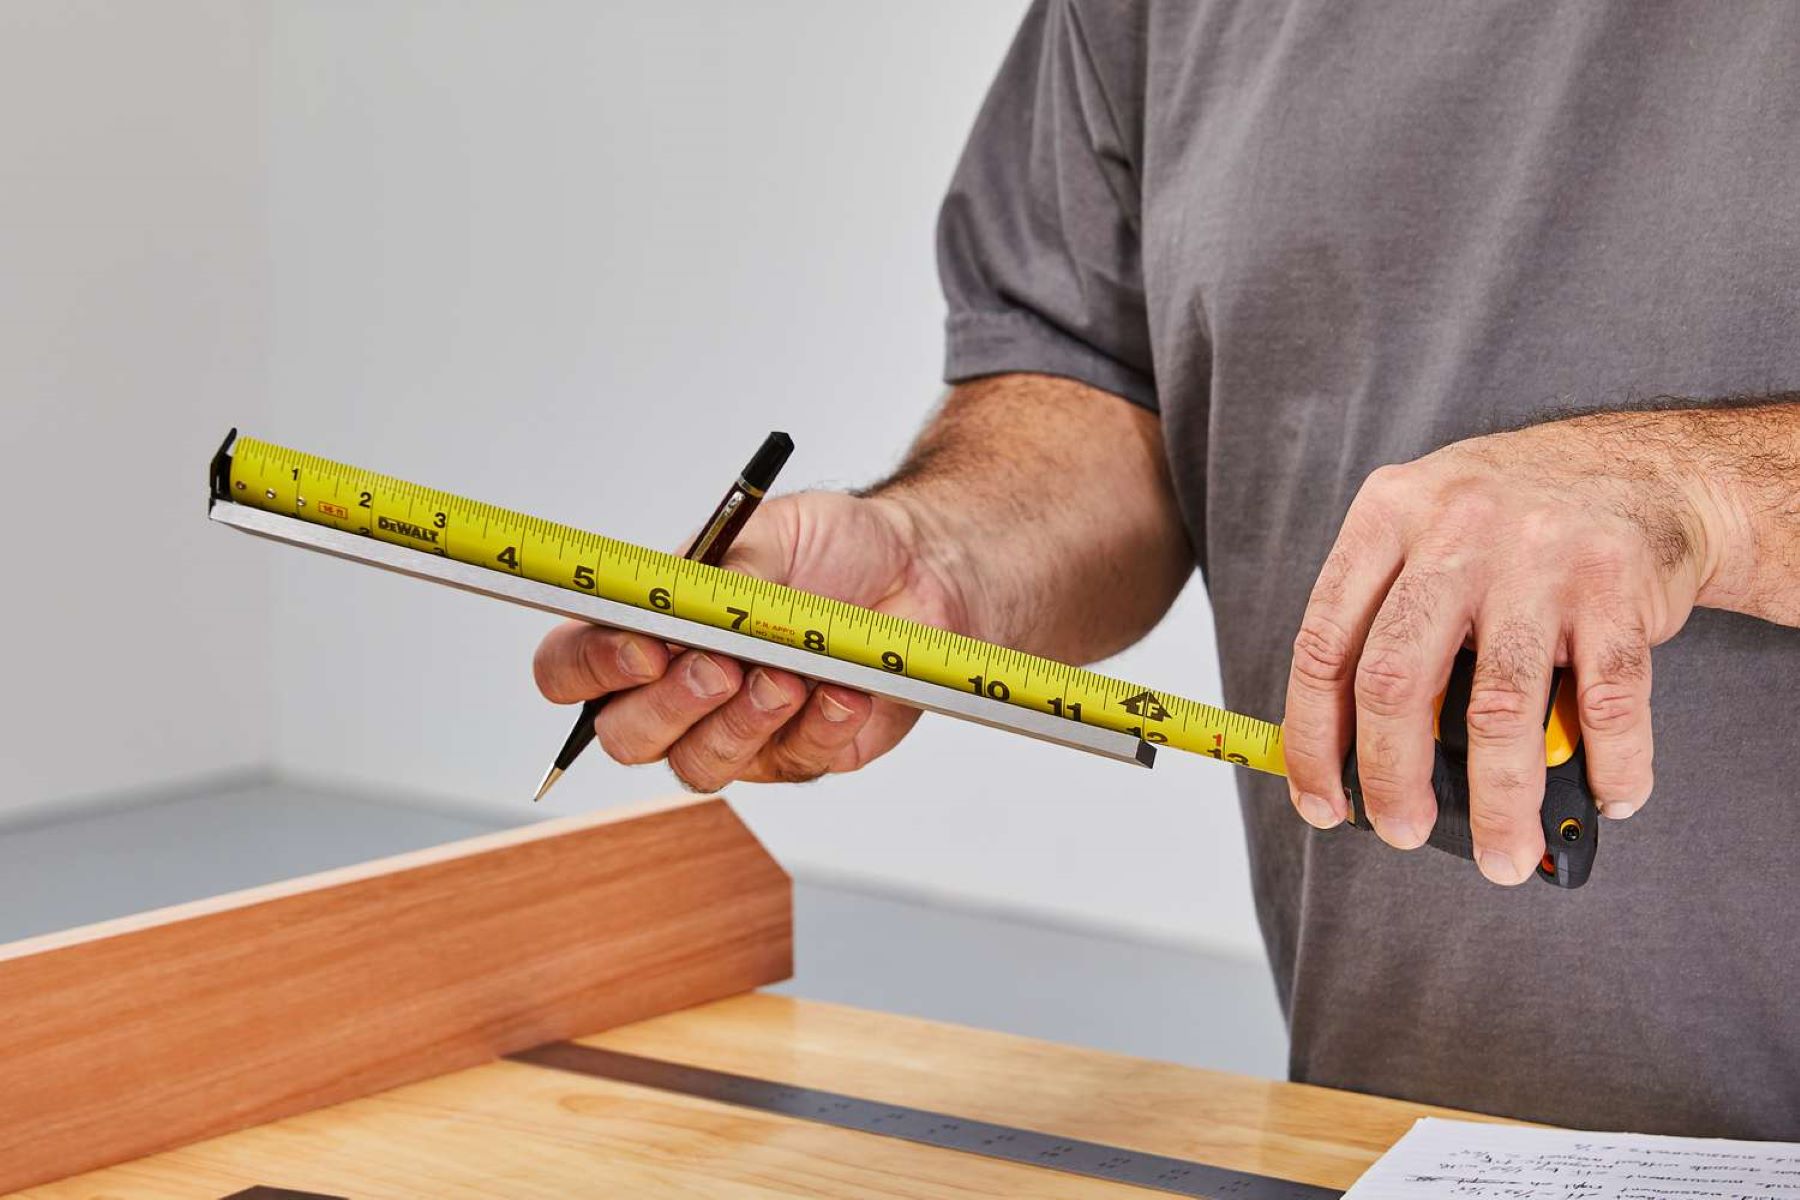
2. Tape Measure: A tape measure is essential for measuring the length and width of the roof. It is used to gather the necessary information to calculate the pitch ratio or to determine the rise and run of the roof.
3. Level: A traditional bubble level or a digital level is needed to ensure accuracy during the measurement process. It helps in confirming that the pitch gauge and other measurements are level and aligned correctly.
4. Ladder: Safety is crucial when working on roofs. A sturdy ladder is essential for accessing the roof safely and comfortably. Make sure the ladder is the appropriate height and in good condition.
5. Safety Gear: Roof work can be hazardous, so it’s important to have the necessary safety gear. This includes gloves, safety glasses, a hard hat, and appropriate footwear with good traction.
6. Notebook and Pen: Keeping detailed notes and measurements is crucial for future reference. Use a notebook and pen to jot down measurements, calculations, and any additional details you might need.
7. Calculator: A calculator comes in handy for performing any necessary mathematical calculations, such as determining roof pitch ratios or converting measurements.
8. Helper: It can be beneficial to have someone assist you during the measurement process. They can help hold the tape measure, double-check measurements, and ensure your safety while working on the roof.
These tools and materials are essential for accurately determining the pitch of a roof. It’s important to gather all the necessary items before starting the measurement process to ensure a smooth and accurate assessment. Safety should always be a priority, so make sure to use appropriate safety gear and take necessary precautions when working on the roof.
Step-by-Step Guide to Determine Roof Pitch
Determining the pitch of a roof requires careful measurement and calculation. Follow this step-by-step guide to accurately determine the pitch of your roof:
1. Safety First: Before you begin, ensure that you have taken the necessary safety precautions. Use a sturdy ladder, wear appropriate safety gear, and be cautious when working on the roof.
2. Choose your Method: There are several methods you can use to determine the roof pitch. The most common methods include using a pitch gauge, measuring roof angles with a protractor or digital inclinometer, or using a level and tape measure. Choose the method that works best for you and the resources you have available.
3. Start with a Level Base: Place your ladder on a stable and level surface. Ensure that the ladder is securely positioned before climbing up to the roof.
4. Prepare your Tools: Gather the necessary tools and materials mentioned earlier, such as a pitch gauge, tape measure, level, and calculator. Have them easily accessible for the measurement process.
5. Measure the Run: Begin by measuring the horizontal distance (run) of the roof using a tape measure. Start from the bottom edge of the roofline and measure horizontally a certain distance, typically 12 inches or 1 foot.
6. Measure the Rise: Use the pitch gauge or other method to determine the vertical rise of the roof. Place the pitch gauge or inclinometer at the starting point of the run measurement and align it with the roof surface. Take note of the angle or measurement provided.
7. Calculate the Pitch: Use the measurements you obtained to calculate the pitch of the roof. Depending on the method used, you may need to convert the measurements into a pitch ratio or use the angle measurement directly. Refer to specific instructions of your chosen method for the calculation process.
8. Record the Pitch: Write down the calculated pitch for future reference. It can be helpful when selecting roofing materials, estimating costs, or communicating with contractors.
9. Double-check the Measurements: Once you have determined the initial pitch, double-check your measurements to ensure accuracy. Re-measure the run and rise if needed and recalculate the pitch to confirm consistency.
10. Repeat the Process: If your roof has varying sections or complex angles, repeat the measurement process for each section separately. Note any differences in pitch between different areas of the roof.
11. Consult Professionals: If you are unsure about measuring the pitch or need precise measurements, consider consulting a professional roofing contractor or architect. They have the expertise and tools to provide accurate measurements and advice.
By following these steps, you will be able to determine the pitch of your roof accurately. Remember to take your time, double-check measurements, and prioritize safety throughout the process.
Use a pitch gauge or a level to measure the angle of the roof. The pitch is typically expressed as a ratio, such as 4:12, which means the roof rises 4 inches for every 12 inches of horizontal run.
Read more: What Is A Good Pitch For A Shed Roof
Method 1: Using a Pitch Gauge
Using a pitch gauge is one of the easiest and most accurate methods to determine the pitch of a roof. A pitch gauge is a specialized tool that combines a level and a sliding gauge to provide precise measurements. Follow these steps to use a pitch gauge:
1. Ensure Safety: Before climbing up to the roof, make sure you have taken appropriate safety precautions, including using a sturdy ladder, wearing safety gear, and being cautious when working at heights.
2. Prepare the Pitch Gauge: Familiarize yourself with the pitch gauge and its components. It typically consists of a level or bubble vial and a sliding gauge that can be adjusted to match the angle of the roof.
3. Choose a Reference Point: Start by selecting a reference point on the roof where you will begin your measurements. It could be the edge of the roof or any other easily identifiable point.
4. Place the Pitch Gauge: Position the pitch gauge flat on the roof surface, aligning it with the reference point you chose. Ensure that the level or bubble vial is perfectly level.
5. Adjust the Sliding Gauge: Slide the adjustable gauge of the pitch gauge until it matches the angle of the roof surface. The sliding gauge will move along a scale that indicates the pitch ratio.
6. Read the Pitch Ratio: Once the sliding gauge is aligned with the roof’s angle, take note of the pitch ratio indicated on the scale. This ratio will represent the slope or pitch of your roof.
7. Record the Measurement: Write down the pitch ratio for future reference. This measurement will help determine the appropriate roofing materials and provide information for estimating costs.
8. Double-check the Measurement: To ensure accuracy, double-check your measurement by repositioning the pitch gauge and confirming that the level is still perfectly level. Adjust the sliding gauge if needed and verify the pitch ratio again.
9. Repeat as Needed: If your roof has multiple sections or varying angles, repeat the process by selecting a new reference point and using the pitch gauge to measure each section separately.
10. Consult a Professional: If you are unsure about using a pitch gauge or need precise measurements, consider seeking assistance from a professional roofing contractor or architect. They have the expertise and tools to provide accurate measurements and advice.
By following these steps and using a pitch gauge, you can determine the pitch of your roof accurately. Remember to prioritize safety throughout the process and double-check your measurements for consistency.
Method 2: Measuring Roof Angles
If you don’t have access to a pitch gauge, another method to determine the pitch of a roof is by measuring the roof angles. This method requires a protractor, digital inclinometer, or a similar measuring tool. Follow these steps to measure the roof angles:
1. Ensure Safety: Before attempting to measure the roof angles, ensure that you have taken proper safety precautions. Use a sturdy ladder, wear appropriate safety gear, and exercise caution when working at heights.
2. Choose a Reference Point: Start by selecting a reference point on the roof where you will begin your measurements. It could be the edge of the roof or any other easily identifiable point.
3. Position the Measuring Tool: Place the measuring tool, whether it’s a protractor, digital inclinometer, or other device, against the roof surface at the reference point. Make sure the measuring tool is level and aligned with the roof.
4. Read the Angle Measurement: Once the measuring tool is properly positioned, read and record the angle measurement displayed on the tool. This measurement represents the angle or slope of the roof.
5. Continue Measuring: Move along the roof surface, using the measuring tool to measure the angles at different points. Take measurements at regular intervals, such as every few feet, to ensure accuracy.
6. Note any Variations: If your roof has varying angles or sections with different slopes, take note of the variations in your measurements. This information will be useful when estimating materials or planning for repairs or renovations.
7. Calculate the Pitch Ratio: Once you have gathered all the angle measurements, you can calculate the pitch ratio of your roof. Convert each angle measurement into a slope ratio or fraction, such as 6/12 or 1/4. This ratio represents how much the roof rises for every 12 inches or unit of horizontal run.
8. Record the Measurements: Write down the angle measurements and the corresponding pitch ratios for future reference. These measurements will help determine the appropriate roofing materials and assist in estimating costs.
9. Consult a Professional: If you are unsure about measuring the roof angles or need precise measurements, consider consulting a professional roofing contractor or architect. They have the expertise and tools to provide accurate measurements and advice.
Using the roof angle measurement method, you can determine the pitch of your roof accurately. Remember to take necessary safety precautions and double-check your measurements for consistency.
Method 3: Using a Level and Tape Measure
If you don’t have access to specialized tools like a pitch gauge or measuring device, you can still determine the pitch of a roof using a level and tape measure. This method involves measuring the roof’s rise and run to calculate the pitch ratio. Follow these steps to use a level and tape measure:
1. Ensure Safety: Before attempting to measure the roof using a level and tape measure, ensure that you have taken proper safety precautions. Use a sturdy ladder, wear appropriate safety gear, and exercise caution when working at heights.
2. Choose a Reference Point: Start by selecting a reference point on the roof where you will begin your measurements. It could be the edge of the roof or any other easily identifiable point.
3. Measure the Run: Using a tape measure, measure the horizontal distance (run) from the reference point along the roof’s surface. This measurement represents the length across the roof.
4. Place the Level: Position a level in a horizontal position against the roof surface, starting at the reference point you chose. Make sure the level is perfectly level by checking the bubble indicator.
5. Measure the Rise: With the level in place, measure the vertical distance (rise) from the roof surface up to the level. This measurement represents the height or incline of the roof.
6. Calculate the Pitch Ratio: Use the measurements of the run and rise to calculate the pitch ratio of the roof. Divide the rise measurement by the run measurement and express it as a ratio or fraction, such as 1/4 or 6/12. This ratio represents the slope or pitch of the roof.
7. Record the Measurement: Write down the pitch ratio for future reference. It will be helpful when selecting roofing materials, estimating costs, or communicating with contractors.
8. Double-check the Measurements: To ensure accuracy, double-check your measurements by repositioning the level and confirming that it is perfectly level. Adjust the measurements if necessary and calculate the pitch ratio again.
9. Repeat as Needed: If your roof has multiple sections or varying angles, repeat the measurement process by selecting a new reference point and measuring each section separately.
10. Consult a Professional: If you are unsure about using a level and tape measure or need precise measurements, consider consulting a professional roofing contractor or architect. They have the expertise and tools to provide accurate measurements and advice.
Using a level and tape measure, you can determine the pitch of your roof without specialized tools. Remember to prioritize safety during the measurement process and double-check your measurements for consistency.
Tips for Accuracy
Accurately determining the pitch of a roof is essential for various roofing projects. To ensure accurate measurements, here are some tips to consider:
1. Use a Steady and Level Surface: Before measuring the roof pitch, make sure the surface you are standing on, such as a ladder or rooftop, is steady and level. This will help prevent any potential measurement errors caused by an unstable base.
2. Take Multiple Measurements: To ensure accuracy, take multiple measurements at different points along the roof’s surface. This will help account for any variations or inconsistencies in the slope or pitch of the roof.
3. Double-Check Alignment: When using tools like pitch gauges, levels, or measuring devices, double-check that they are properly aligned and level before taking measurements. A slight deviation can lead to inaccurate results.
4. Measure in Ideal Weather Conditions: Choose a day with clear skies and minimal wind to measure the roof pitch. Wind and poor weather conditions can affect accuracy, especially when using devices that rely on precise alignment.
5. Seek Assistance if Needed: If you are unsure about the measurement process or have difficulty obtaining accurate readings, consider seeking assistance from a professional roofing contractor or architect. They have the expertise and tools to provide precise measurements.
6. Record Measurements and Calculations: Keep a detailed record of all the measurements and calculations you make. This will help ensure consistency and accuracy throughout the process. You can refer back to the records when needed.
7. Regular Maintenance and Inspection: It’s important to conduct regular roof maintenance and inspections to identify any potential issues that may impact the roof pitch. Addressing any problems early can help maintain the accuracy of the roof pitch measurement.
8. Consider Safety Precautions: Safety should always be a priority when measuring the roof pitch. Use appropriate safety equipment, such as gloves, safety glasses, and a hard hat. Work carefully and avoid taking unnecessary risks.
9. Consult Building Plans or Documentation: If available, refer to the original building plans or documentation for information on the roof pitch. This can serve as a helpful reference point and provide insights into the intended design and specifications.
10. Use a Combination of Methods: If possible, use multiple methods to determine the roof pitch. By cross-checking the measurements obtained from different methods, you can ensure greater accuracy and confidence in the results.
By following these tips, you can improve the accuracy of your roof pitch measurements. Remember to prioritize safety, double-check measurements, and seek professional assistance when needed. Accurate measurements are essential for proper roofing projects and maintenance.
Conclusion
Determining the pitch of a roof is a crucial step in various roofing projects, from installations to repairs and replacements. It plays a significant role in selecting the appropriate materials, ensuring proper water drainage, and maintaining the overall functionality and aesthetics of the roof.
In this article, we explored three methods to determine roof pitch: using a pitch gauge, measuring roof angles, and using a level and tape measure. Each method offers its own advantages and can be used depending on the availability of tools and personal preference.
Accurate roof pitch measurements are essential for making informed decisions about the roof design, selecting appropriate materials, estimating costs, and ensuring the longevity and efficiency of the roof. It is also essential for complying with local building codes and regulations.
When measuring the roof pitch, it’s crucial to prioritize safety and take necessary precautions when working at heights. Double-checking measurements and seeking professional assistance if needed can further ensure accuracy.
By determining the roof pitch accurately, homeowners, contractors, and architects can make informed choices that lead to successful roofing projects. Whether you are planning a new roof installation, replacing an existing roof, or simply wanting to understand your current roof’s characteristics, knowing the roof pitch is a valuable piece of information.
Remember to regularly maintain and inspect your roof to ensure the accuracy of the initial measurement over time. Proper maintenance and addressing any issues promptly can help preserve the integrity and performance of the roof.
In conclusion, understanding and determining the pitch of a roof allows for better decision-making, enhances the functionality and design of the roof, and contributes to the overall quality of a building. By following the methods and tips outlined in this article, you can confidently determine the pitch of your roof and embark on successful roofing projects.
Frequently Asked Questions about How To Determine Pitch Of Roof
Was this page helpful?
At Storables.com, we guarantee accurate and reliable information. Our content, validated by Expert Board Contributors, is crafted following stringent Editorial Policies. We're committed to providing you with well-researched, expert-backed insights for all your informational needs.


0 thoughts on “How To Determine Pitch Of Roof”