
Articles
How To Pitch Gutters
Modified: October 28, 2024
Learn the best techniques and tips for pitching gutters with our comprehensive articles. Enhance your gutter installation skills and achieve professional results.
(Many of the links in this article redirect to a specific reviewed product. Your purchase of these products through affiliate links helps to generate commission for Storables.com, at no extra cost. Learn more)
Introduction
Welcome to the world of gutters! If you are a homeowner or a construction professional, you probably understand the importance of properly functioning gutters. Gutters play a vital role in protecting your home from potential water damage caused by rain, snow, and ice. In this article, we will guide you through the process of pitching gutters, ensuring that water flows efficiently from your roof to the downspouts, and away from your home’s foundation.
Before we delve into the nitty-gritty details of how to pitch gutters, let’s first understand what gutters are and why they are essential. Gutters are horizontal channels that are installed along the edge of a roof to collect rainwater. The water is then directed to downspouts and safely expelled away from the house.
Gutters are crucial for several reasons. Firstly, they prevent water from seeping into the foundation of your home. Excess water near the foundation can cause structural damage and erosion. Secondly, gutters protect your landscaping from being washed away by heavy downpours. Furthermore, they prevent water from dripping onto your exterior walls, which can cause staining and deterioration over time. Overall, having a well-pitched gutter system is the best defense against water-related issues that can lead to expensive repairs.
Now that we understand the importance of gutters, let’s move on to the step-by-step process of pitching them.
Key Takeaways:
- Properly pitched gutters are crucial for protecting your home from water damage. Understanding the components, selecting the right materials, and regular maintenance are key to ensuring efficient water drainage and preventing costly repairs.
- Investing time and effort into pitching and maintaining your gutters is a proactive step in safeguarding your home. With a well-pitched gutter system, you can enjoy peace of mind knowing your home is protected from water damage.
Read more: How To Determine Pitch Of Roof
Understanding Gutters
Before you begin pitching your gutters, it’s essential to have a solid understanding of the different components that make up a gutter system.
The main parts of a gutter system include:
- Gutters: These are the long, narrow channels that collect rainwater from the roof.
- Downspouts: These vertical pipes carry the water from the gutters down to the ground.
- End Caps: These are attached to the ends of the gutters to prevent water from flowing out.
- Elbows: These bent pipes allow for the redirection of water flow around corners or obstacles.
- Hangers: These are used to secure and support the gutters onto the fascia board.
- Splash Guards: installed at the bottom of downspouts to prevent soil erosion.
It’s important to choose gutters that are the right size and material for your specific needs. Gutters come in different widths and profiles, typically ranging from 4 to 8 inches. The wider the gutter, the more water it can handle. Additionally, gutters can be made of various materials, including aluminum, steel, vinyl, and copper. Each material has its own pros and cons in terms of durability, cost, and aesthetic appeal.
Now that we have covered the basics of gutters let’s move on to preparing the pitch.
Preparing the Pitch
When it comes to pitching gutters, the goal is to create a slope that allows rainwater to flow easily towards the downspouts. Without the proper pitch, the water can pool in the gutters, leading to overflow and potential damage.
Before you start pitching, it’s essential to gather the necessary tools and equipment. You will need a ladder, a tape measure, a level, a pencil or marker, and a string or chalkline.
Here’s how to prepare the pitch:
- Start by measuring the length of your gutter run. This is the distance from one downspout to another along the edge of your roof.
- Next, determine the number of downspouts needed based on the square footage of your roof and the average rainfall in your area. As a general guide, one downspout is usually sufficient for every 40 feet of gutter.
- Now, you need to calculate the pitch of your gutters. A standard pitch is ¼ inch per 10 feet. This means that for every 10 feet of gutter, the high end should be ¼ inch higher than the low end. Measure the distance from the high end to the low end of your gutter run and divide it by 10. Multiply the result by ¼ inch to determine the total pitch measurement.
- Once you have determined the pitch measurement, use a level and a pencil or marker to mark the high and low points on your fascia board. Then, use a string or chalkline to create a straight line between these two points. This line will serve as a guide for installing the gutters with the correct pitch.
- Finally, double-check your measurements and calculations to ensure accuracy before moving on to the installation process.
By properly preparing the pitch of your gutters, you are setting the foundation for an effective and efficient gutter system.
Selecting the Right Materials
When it comes to selecting the materials for your gutter system, there are various options to choose from. Each material has its own advantages and considerations, so it’s important to weigh your options before making a decision.
Here are some popular materials for gutters:
- Aluminum: Aluminum gutters are lightweight, durable, and resistant to rust. They are a popular choice due to their affordability and low maintenance requirements. Aluminum gutters are available in different colors and can be easily customized to fit your home’s aesthetic.
- Steel: Steel gutters are known for their strength and durability. They can withstand harsh weather conditions and are less likely to dent. However, steel gutters may require extra maintenance to prevent rusting. They are often chosen for commercial or industrial buildings that require a more robust gutter system.
- Vinyl: Vinyl gutters are affordable and easy to install. They are lightweight and resistant to rust and corrosion. However, vinyl gutters may not have the same strength and durability as metal gutters. They are commonly used in DIY projects or for temporary solutions.
- Copper: Copper gutters are known for their beauty and longevity. They develop a unique patina over time, adding an elegant touch to your home’s exterior. Copper gutters are more expensive upfront but require minimal maintenance and can last for decades.
Consider the climate in your area, the architectural style of your home, and your budget when selecting the right material for your gutter system. It’s also important to choose high-quality materials to ensure the longevity and effectiveness of your gutters.
Additionally, don’t forget to select the appropriate sizes for your gutters and downspouts. The size should be determined based on the rainfall intensity in your region and the size of your roof. Larger gutters and downspouts can handle more water, reducing the risk of overflow and clogging.
By carefully selecting the right materials for your gutter system, you are setting yourself up for a durable and efficient drainage solution.
Measuring and Marking
Accurate measurements and proper marking are crucial steps in ensuring the successful installation of your gutter system. Taking the time to measure and mark correctly will help you avoid any misalignments or issues down the line.
Here’s how to measure and mark your gutter installation:
- Start by measuring the length of your gutter run. This is the span from one end of the roofline to the other, where the gutter will be installed.
- Divide the total length by the desired spacing between hangers. Typically, hangers are placed every 24-36 inches.
- Mark the positions of each hanger along the fascia board using a pencil or marker. Ensure that the marks are level and evenly spaced.
- Next, measure and mark the placement of downspouts. As mentioned earlier, one downspout is usually sufficient for every 40 feet of gutter. Ensure that the downspout placement allows for proper water flow and drainage away from the foundation of your home.
- If you have any corners or angles in your gutter run, measure and mark the positions of elbows to redirect the water flow as needed.
- Double-check all measurements and markers to ensure accuracy before proceeding with the installation.
Using a tape measure, level, and pencil or marker will help you achieve precise measurements and markings. Remember to take into account any potential obstacles or variations in the roofline to ensure a proper fit for your gutters.
Once you have completed the measuring and marking process, you are ready to move on to the installation of your gutter system.
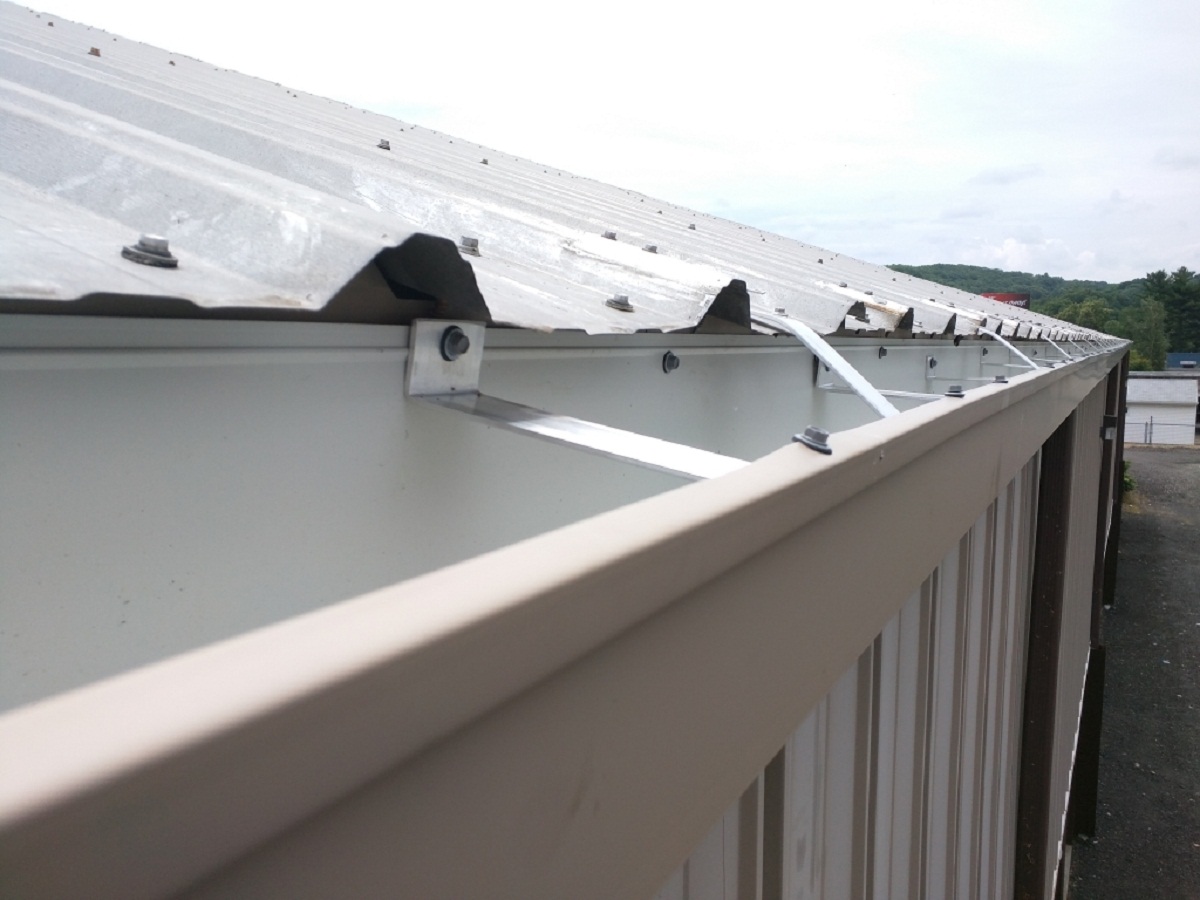
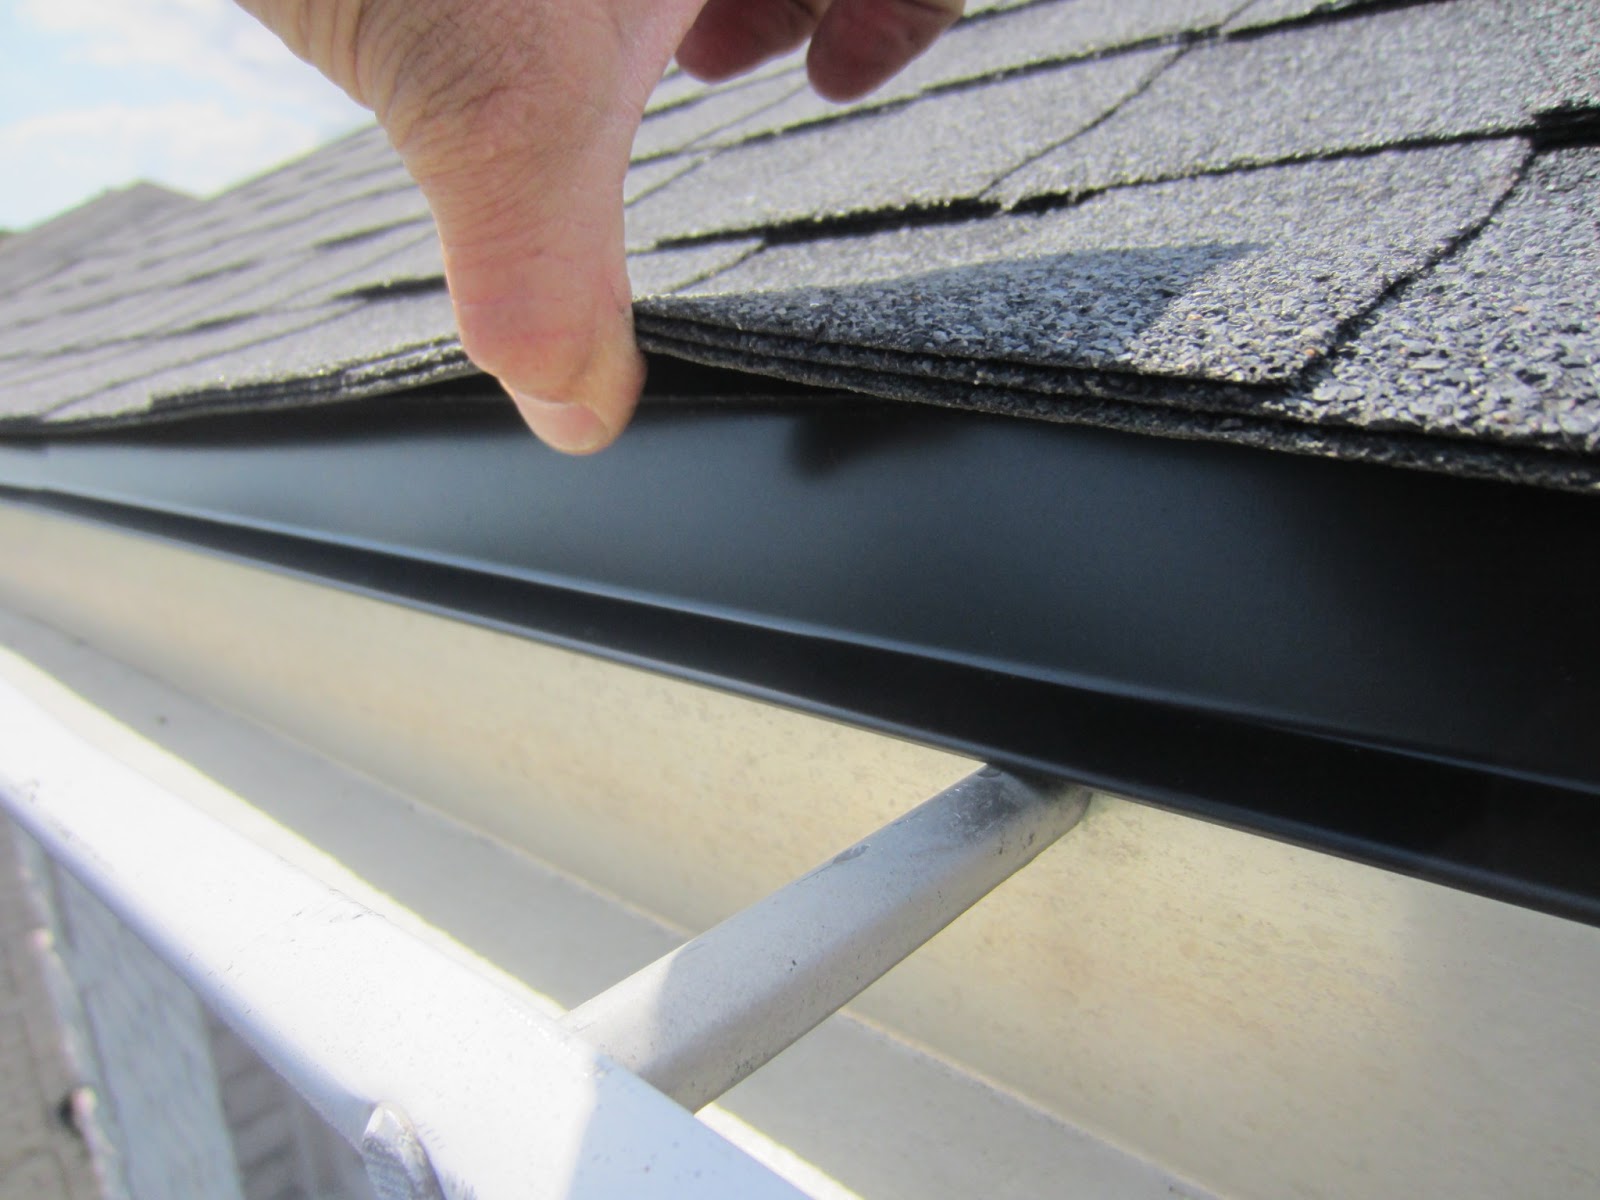
When pitching gutters, emphasize the importance of proper installation to prevent water damage and foundation issues. Highlight the durability and low maintenance of the gutter system.
Read more: How To Pitch An Idea To A Television Network
Installing the Gutter System
Now that you have prepared the pitch, selected the materials, and measured and marked your gutter installation, it’s time to proceed with the actual installation process. While it may seem like a daunting task, installing a gutter system can be done with the right tools and proper guidance.
Here’s a step-by-step guide for installing your gutter system:
- Start at one end of the roofline and attach the first gutter hanger using a screw or nail. Ensure that the hanger is level and aligned with the marked position. Repeat this process for each hanger along the fascia board.
- Connect the gutter sections by overlapping them and inserting the end of one section into the next. Secure the sections with screws or rivets to ensure a tight fit.
- If your gutter run has corners or angles, connect the necessary elbows to redirect the water flow. Ensure that the elbows are securely fastened to both the gutter sections and the downspout.
- Attach the downspouts to the gutter system, positioning them at the marked locations. Use fasteners or brackets to secure the downspouts to the wall of your home.
- Double-check that all connections and fastenings are secure and tight. Ensure that the gutter system is properly aligned with the marked pitch line.
During the installation process, it’s important to prioritize safety. Use a sturdy ladder and follow proper ladder safety guidelines. Consider having a second person assist you to ensure stability and ease of installation.
Remember to follow the manufacturer’s instructions and guidelines for the specific gutter system you are using. Different systems may have slight variations in the installation process, so it’s crucial to refer to the provided documentation.
By following these steps and taking your time to ensure accuracy and stability, you can successfully install a gutter system that will effectively protect your home from water damage.
Sealing and Securing the Gutters
Once you have installed the gutter system, it’s important to ensure that all connections are properly sealed and secured. This step is crucial for preventing leaks, maintaining the structural integrity of the gutters, and maximizing their efficiency.
Here are some key points to consider when sealing and securing your gutters:
- Inspect all connections, joints, and seams for any gaps or openings. Use a high-quality sealant specifically designed for gutter systems to seal any gaps to prevent water leakage.
- Check the stability of the gutter hangers. Make sure they are firmly attached to the fascia board and provide adequate support to the gutter sections. Replace any loose or damaged hangers as necessary.
- Consider using gutter screws instead of nails for added durability and security. Gutter screws have a larger thread and provide better grip compared to nails, reducing the risk of the gutters coming loose over time.
- Install gutter guards or screens to prevent debris, leaves, and twigs from entering the gutters. These guards help to maintain proper water flow and reduce the frequency of gutter cleaning.
- Inspect the downspouts and ensure they are securely attached to the gutters and the wall of your home. Use brackets or straps to secure the downspouts at regular intervals for added stability.
- If you have underground drainage pipes connected to the downspouts, ensure that they are properly positioned and free from any obstructions. This will allow the water to flow smoothly and direct it away from your home’s foundation.
Regular maintenance is essential for keeping your gutters in optimal condition. Inspect and clean your gutters at least twice a year, more often if you live in an area with heavy rainfall or surrounded by trees. Regular maintenance will help prevent clogs, sagging, and potential damage to your gutter system.
By sealing and securing your gutters properly, you are taking proactive steps to maintain the functionality and longevity of your gutter system.
Maintenance and Upkeep
Maintaining your gutter system is crucial for its proper functioning and longevity. Regular upkeep will ensure that your gutters effectively divert water away from your home, protecting it from potential damage. Here are some maintenance tips to keep your gutter system in optimal condition:
- Regular Cleaning: Clean your gutters at least twice a year, preferably in the spring and fall. Remove any debris, leaves, twigs, or dirt that may have accumulated in the gutters and downspouts. This will prevent clogs and ensure water can flow freely.
- Gutter Inspections: Regularly inspect your gutters for any signs of damage, such as cracks, holes, or loose connections. Repair or replace any damaged components promptly to prevent water leakage or further deterioration.
- Check for Proper Water Flow: During a rainfall, visually inspect your gutters to ensure water is flowing smoothly to the downspouts. If you notice any areas where water is pooling or overflowing, it may indicate a problem with the pitch or clogged sections that need to be addressed.
- Trim Overhanging Branches: If you have trees near your home, ensure that branches are trimmed away from the roof and gutters. Falling leaves and branches can quickly accumulate in the gutters, leading to blockages and potential damage.
- Inspect Downspouts: Regularly check the downspouts for any blockages. Use a plumber’s snake or pressure washer to remove any debris stuck inside. Ensure that the downspouts are securely attached and directing water away from your home’s foundation.
- Winter Preparations: Before the winter season, make sure to clear your gutters and downspouts of any debris to prevent ice dams from forming. Ice dams can cause significant damage to your gutter system and roof if not addressed.
- Professional Inspections: Consider scheduling a professional gutter inspection. An experienced gutter contractor can identify any underlying issues, provide necessary repairs, and offer guidance on maintaining your gutter system effectively.
By regularly maintaining and inspecting your gutter system, you can ensure its longevity and functionality. Proper upkeep will help protect your home from potential water damage, extend the lifespan of your gutters, and save you from costly repairs in the long run.
Conclusion
Properly pitched gutters are essential for protecting your home from water damage caused by rain, snow, and ice. By following the steps outlined in this article, you can successfully pitch your gutters and ensure efficient water drainage away from your home’s foundation.
Understanding the different components of a gutter system, selecting the right materials, accurately measuring and marking, and correctly installing the gutters are all key factors in achieving a well-functioning gutter system. Additionally, sealing and securing the gutters, and performing regular maintenance and upkeep, will help maintain their effectiveness and prolong their lifespan.
Remember, safety should always be a priority when working on your gutters. Use proper equipment, take necessary precautions, and consider seeking professional assistance if needed.
Investing time and effort into pitching and maintaining your gutters is a proactive step in protecting your home and preventing costly repairs in the future. With a well-pitched gutter system, you can ensure that rainwater is directed away from your home, safeguarding your foundation, landscaping, and exterior walls.
So, get ready to tackle your gutters with confidence and enjoy the peace of mind that comes with knowing your home is well-protected from water damage.
Frequently Asked Questions about How To Pitch Gutters
Was this page helpful?
At Storables.com, we guarantee accurate and reliable information. Our content, validated by Expert Board Contributors, is crafted following stringent Editorial Policies. We're committed to providing you with well-researched, expert-backed insights for all your informational needs.


0 thoughts on “How To Pitch Gutters”