Articles
How To Use A Laser Level To Determine Slope
Modified: October 27, 2024
Learn how to use a laser level to accurately determine slope and ensure precise measurements. Read our informative articles for expert tips and guidance.
(Many of the links in this article redirect to a specific reviewed product. Your purchase of these products through affiliate links helps to generate commission for Storables.com, at no extra cost. Learn more)
Introduction
Welcome to the world of construction and DIY projects, where precision is key. Whether you’re building a deck, installing a fence, or planning a landscaping project, accurately determining the slope of the ground is crucial for achieving desired results. One tool that can greatly assist you in this task is a laser level.
Slope, also known as gradient or incline, refers to the steepness or angle of a surface in relation to the horizontal plane. It is an essential measurement to ensure proper water drainage, level foundations, and smooth surfaces. Traditionally, measuring slope involved manual calculations and physical levels, which can be time-consuming and prone to errors. However, with the advent of laser technology, the process has become simplified and more accurate.
A laser level is a device that emits a laser beam to create a straight and level reference line or plane. It is widely used in construction, surveying, and various home improvement projects. Combining precision and convenience, laser levels have revolutionized how slope determination is done.
In this article, we will guide you through the process of using a laser level to determine slope, including setting it up, calibrating it, and taking accurate measurements. Along the way, we will share some tips and potential challenges to help you achieve the best possible results.
So, whether you’re a seasoned professional or a DIY enthusiast, let’s dive into the world of laser levels and learn how to properly and effectively determine slope for your projects.
Key Takeaways:
- Laser levels simplify slope determination by providing precise reference lines or planes, enhancing accuracy and efficiency in construction and DIY projects. Understanding slope and following proper setup and calibration procedures are essential for achieving accurate results.
- To ensure accurate slope determination with a laser level, choose the right model, set it up correctly, and consider visibility, environmental factors, and safety precautions. Regular calibration and troubleshooting techniques can further enhance accuracy and reliability.
Read more: How To Set Slope With Laser Level
Understanding Slope
Before we delve into using a laser level to determine slope, it’s important to have a clear understanding of what slope actually is. In the context of construction and landscaping, slope refers to the degree of slant or inclination of a surface, typically expressed as a ratio or a percentage.
For example, a slope of 1:10 means that for every horizontal unit, there is a vertical rise or drop of 1/10th of that unit. If you have a 10-foot distance, the vertical change would be 1 foot. Alternatively, a slope of 10% means that there is a 10-unit vertical change for every 100 units of horizontal distance.
Slope is an important consideration in various applications. It determines the flow of water, ensures proper drainage, and contributes to the stability and safety of structures. Understanding slope is particularly crucial for projects such as building driveways, constructing retaining walls, and installing underground drainage systems.
Measuring slope accurately is vital to avoid issues like water pooling or structural instability. Improper or inaccurate slope determination can lead to costly repairs and compromises the functionality and longevity of your project.
Now that you have a basic understanding of slope, let’s move on to exploring the laser level, a powerful tool that can simplify the slope determination process.
What is a Laser Level?
A laser level is a precision instrument that emits a beam of laser light, providing a straight and level reference line or plane. It is an essential tool in construction and other industries where accurate measurements are crucial.
At its core, a laser level consists of a laser diode, which produces a narrow and highly focused beam of light. The emitted light is then projected onto a surface, creating a visible line or dot. Laser levels can be categorized into two main types: line laser levels and rotary laser levels.
Line laser levels emit a laser beam that forms a straight line. They are commonly used for tasks such as installing tiles, setting up shelving, aligning cabinets, and hanging picture frames. Some line laser levels have additional features, such as multiple lines or adjustable angles, to accommodate various applications.
Rotary laser levels, on the other hand, emit a laser beam that rotates 360 degrees, creating a horizontal plane. These are often used for larger-scale construction projects, such as grading a site, leveling foundations, or setting up alignment for pouring concrete. Rotary laser levels can be more expensive and typically require a tripod for stability.
Modern laser levels come with advanced features and options to enhance usability. Many models offer self-leveling capabilities, automatically adjusting the laser line or plane to ensure accuracy. Some laser levels also have the option to project vertical lines, allowing for more comprehensive measurements and alignments.
It’s worth noting that laser levels come in a range of sizes and power options. While smaller handheld models are suitable for simple household tasks, larger and more powerful laser levels are utilized in professional settings, demanding higher precision and durability.
Overall, a laser level is an indispensable tool for anyone involved in construction, surveying, or DIY projects. Its ability to project a straight and level reference line or plane makes it an invaluable assistant in determining slope and ensuring precision in various applications.
Setting Up the Laser Level
Setting up a laser level properly is essential for obtaining accurate slope measurements. Follow these steps to ensure a successful setup:
- Choose the right location: Begin by selecting a suitable location for your laser level setup. It should be a stable and flat surface that is close to the area where you will be measuring slope. Avoid areas with excessive vibrations, as they can affect the accuracy of the readings.
- Secure the laser level: Depending on the type and size of your laser level, you may need to secure it to a tripod or a mounting bracket. Ensure that the laser level is firmly attached to the chosen support to prevent it from moving during operation.
- Check the battery or power source: Make sure that the laser level has sufficient power to operate. If it is battery-powered, check for any low battery indications and replace or recharge the batteries if necessary. If it is powered by an external source, ensure that it is properly connected and functioning.
- Level the laser: Most laser levels have a self-leveling mechanism, but it’s important to verify that it is functioning correctly. Some models may require manual leveling using built-in bubble vials or leveling screws. Refer to the user manual of your laser level for specific instructions on how to level it.
- Activate the laser: Once the laser level is securely positioned and leveled, turn it on and activate the laser beam or line projection. Depending on the model, you may have options to adjust the brightness, line thickness, or other settings. Take note of any controls or adjustments available to fine-tune the laser output.
- Ensure visibility: Check the visibility of the laser line or dot, especially if you are working outdoors or in bright lighting conditions. Some laser levels come with enhancement glasses or target plates to improve visibility. Adjust the laser’s settings or position as needed to ensure proper visibility of the reference line or dot.
By following these steps, you can set up your laser level correctly and prepare it for measuring slope accurately. Remember to consult the user manual provided with your specific laser level model for any additional setup instructions or precautions.
Calibrating the Laser Level
Calibrating your laser level is an important step to ensure accurate slope measurements. Calibration helps to align the laser beam or line with the desired reference point or plane. Here’s how you can calibrate your laser level:
- Choose a reference point: Select a reference point on the surface where you want to measure slope. It can be a fixed point such as a mark on a wall or a temporary marker that you can easily remove later.
- Aim the laser at the reference point: Adjust the position of your laser level so that the laser beam or line is aimed directly at the chosen reference point. Make sure that the laser is perfectly aligned with the reference point, as any deviation can lead to inaccurate slope measurements.
- Secure the laser in place: Once the laser is aimed at the reference point, secure it in position. This can be done by tightening the tripod or mounting bracket, or by using additional clamps or supports if necessary. The goal is to ensure that the laser remains fixed and does not move during calibration.
- Verify the alignment: Now, check whether the laser line or beam aligns with the reference point. If the laser is accurately calibrated, the projected line or dot should match or intersect with the reference point. If there is any misalignment, you may need to adjust the position or angle of the laser for better alignment.
- Make necessary adjustments: Some laser levels have built-in adjustments to fine-tune their calibration. Consult the user manual of your laser level to identify any calibration mechanisms, such as sensitivity controls or leveling screws. Use these adjustments to align the laser output with the reference point as accurately as possible.
- Confirm calibration: Once you have made the necessary adjustments, recheck the alignment between the laser and the reference point. If the laser line or dot matches the reference point accurately, your laser level is now properly calibrated.
It’s important to note that calibration may vary depending on the specific model and manufacturer of your laser level. Always refer to the user manual for detailed instructions and guidelines on calibrating your particular laser level.
Proper calibration ensures that the laser level provides accurate slope measurements, allowing you to achieve precise results in your construction or DIY projects.
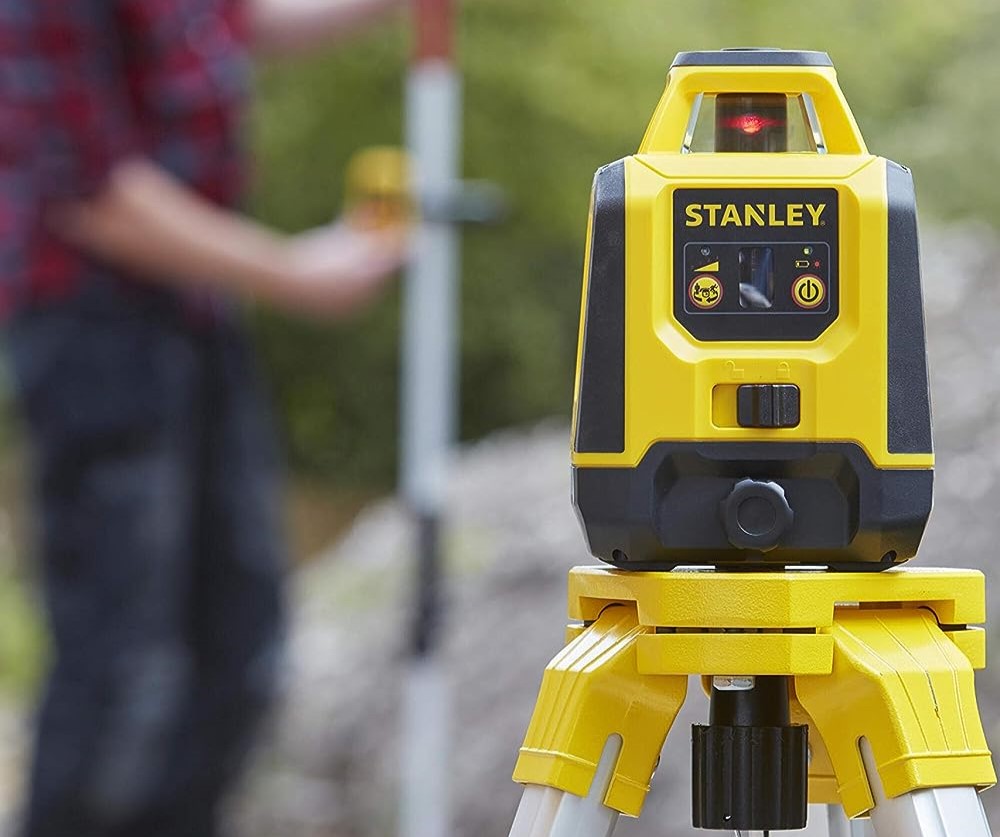
When using a laser level to determine slope, make sure to set up the level on a stable surface and adjust the laser to the desired slope angle. Use the laser line as a guide to mark the slope on the surface you are working on.
Read more: How To Use A Laser Level
Measuring Slope with a Laser Level
Now that your laser level is set up and calibrated, you’re ready to measure slope. Follow these steps to accurately determine the slope using your laser level:
- Choose a starting point: Select a starting point on the surface where you want to measure the slope. This can be at the lowest or highest point, depending on the direction of your desired slope measurement.
- Aim the laser towards the endpoint: Position the laser level so that the laser beam or line is aimed towards the endpoint where you want to measure the slope. Ensure that the laser is aligned with the direction of the desired slope measurement.
- Take a measurement: Use a measuring tape or ruler to measure the vertical distance from the starting point to the laser line or dot. This measurement represents the rise or drop in elevation between the starting and endpoint.
- Measure the horizontal distance: Next, measure the horizontal distance between the starting point and the endpoint. This can be done using a measuring tape or a measuring wheel, depending on the length of the distance.
- Calculate the slope: To calculate the slope, divide the vertical distance (rise or drop) by the horizontal distance. The result is the slope ratio or percentage. For example, if you have a vertical distance of 2 feet and a horizontal distance of 10 feet, the slope ratio is 2:10 or 1:5, and the slope percentage is 20%.
- Repeat as needed: If you need to measure slope at multiple points or along a continuous line, repeat the above steps for each section. This will help you get a comprehensive understanding of the overall slope profile.
By following these steps, you can accurately measure the slope using your laser level. Remember to take precise measurements and record them for future reference if needed.
It’s important to note that the accuracy of your slope measurements can be affected by various factors, such as the quality of your laser level, the visibility of the laser line or dot, and the stability of the surface. Always double-check your measurements and make any necessary adjustments to ensure accuracy.
Now that you know how to measure slope with a laser level, you can confidently proceed with your construction or landscaping projects, knowing that you have the tools to achieve precise and professional results.
Tips for Accurate Slope Determination
To ensure accurate slope determination using a laser level, consider the following tips:
- Choose the right laser level: Select a laser level that is suitable for your specific project requirements. Consider factors such as the working range, accuracy, and additional features like self-leveling or multiple line projections.
- Ensure proper setup: Take the time to set up your laser level correctly. Choose a stable surface, secure the laser level properly, and ensure that it is leveled before taking measurements.
- Check visibility: Make sure that the laser line or dot is clearly visible on the surface. Adjust the laser’s settings or positioning to improve visibility, especially in bright lighting conditions or outdoor environments.
- Double-check measurements: Take measurements carefully and double-check them for accuracy. Use precise measuring tools and record the measurements if needed for future reference.
- Work with a partner: Having a second person to assist you can be helpful in ensuring the laser level is positioned and aligned accurately. They can also help with taking measurements to reduce errors.
- Consider safety precautions: When working with a laser level, be mindful of safety precautions. Avoid looking directly into the laser beam, and use protective eyewear if necessary. Keep the laser level away from children and follow all safety instructions provided by the manufacturer.
- Account for environmental factors: Be aware of any environmental factors that can impact slope determination, such as wind or uneven surfaces. Take additional precautions or make adjustments as needed to maintain accuracy.
- Regularly calibrate your laser level: A properly calibrated laser level is essential for accurate slope measurements. Regularly check and calibrate your laser level according to the manufacturer’s recommendations to ensure ongoing accuracy.
By following these tips, you can enhance the accuracy and reliability of your slope determination using a laser level. Remember that practice and experience will also contribute to improved accuracy over time.
If you encounter challenges or difficulties during the slope determination process, refer to the troubleshooting section or seek guidance from the manufacturer’s support or user manual for specific solutions.
By employing these tips and maintaining attention to detail, you can confidently use a laser level to determine slope accurately and achieve the desired results in your projects.
Potential Challenges and Troubleshooting
While using a laser level for slope determination can simplify the process, you may encounter some challenges along the way. Here are a few potential challenges you might face and some troubleshooting tips to help you overcome them:
- Poor visibility: In certain lighting conditions or outdoor environments, the laser line or dot may appear faint or difficult to see. To improve visibility, try adjusting the laser’s brightness settings, using enhancement glasses or target plates, or working in a shaded area.
- Interference from obstacles: Objects like walls, trees, or other structures can obstruct the laser beam or line, creating inaccuracies in slope measurements. To overcome this issue, reposition the laser level to avoid obstacles or consider using a target plate to redirect the laser line.
- Instability during setup: If your laser level is not securely positioned or leveled properly, it can result in inaccurate slope measurements. Ensure that the laser level is mounted securely on a stable surface and accurately leveled before taking measurements.
- Reflection or refraction: Reflective or transparent surfaces can interfere with the laser beam, causing misleading slope measurements. To mitigate this issue, place a non-reflective target plate or use a different measuring method, such as a physical level, when working with such surfaces.
- Environmental conditions: Factors like wind, vibrations, or uneven surfaces can affect the stability and accuracy of your laser level. Consider taking measurements during calmer periods, using additional supports or clamps, or making manual adjustments to compensate for environmental factors.
- Power issues: If your laser level is powered by batteries, low battery levels can affect its performance and accuracy. Always check and replace batteries if necessary to ensure consistent power supply. If your laser level is plugged into an external power source, verify the connection and switch to a different outlet if needed.
If you encounter persistent challenges or issues that you cannot troubleshoot on your own, consult the user manual provided with your laser level or reach out to the manufacturer’s customer support for further assistance.
Remember, practice makes perfect when it comes to using a laser level for slope determination. With experience, you’ll become more proficient in troubleshooting and navigating any challenges that arise during the process.
Conclusion
Using a laser level for slope determination can greatly simplify and improve the accuracy of your construction and DIY projects. By following the steps outlined in this article, you can effectively set up and calibrate your laser level, measure slope accurately, and achieve precise results.
We discussed the importance of understanding slope and how it impacts various applications. Slope measurement is vital for proper water drainage, level foundations, and the stability of structures. Laser levels provide a convenient and reliable method for determining slope, offering precise reference lines or planes to guide your project.
Throughout the article, we provided tips and troubleshooting suggestions to help you achieve accurate slope determination. From choosing the right laser level and properly setting it up, to addressing visibility challenges and environmental factors, these tips can contribute to successful slope measurements and project outcomes.
Remember to regularly calibrate your laser level and follow safety precautions to ensure the ongoing accuracy and reliability of your measurements. Keep in mind that practice and experience will improve your proficiency in using a laser level for slope determination.
Whether you’re a construction professional or a DIY enthusiast, incorporating a laser level into your toolkit will significantly enhance your ability to achieve precise and professional results in your projects. So, embrace the power of laser technology and confidently embark on your next construction or DIY venture.
Now, armed with the knowledge and guidance provided in this article, you are well-equipped to harness the potential of a laser level for accurate slope determination. So go ahead and make your projects level, stable, and successful!
Now that you've mastered using a laser level for slope determination, why not take your outdoor skills further? Beautifying your space can be fun and rewarding. Dive into our latest article for inspiring garden fence ideas that will transform your garden into a stunning retreat, perfect for any landscaping enthusiast. Also, if you're itching for more hands-on activities, check out our insights on the joys of DIY projects, packed with practical advice to enhance your home creations.
Frequently Asked Questions about How To Use A Laser Level To Determine Slope
Was this page helpful?
At Storables.com, we guarantee accurate and reliable information. Our content, validated by Expert Board Contributors, is crafted following stringent Editorial Policies. We're committed to providing you with well-researched, expert-backed insights for all your informational needs.


0 thoughts on “How To Use A Laser Level To Determine Slope”