Articles
How To Finish Knitting A Blanket
Modified: October 19, 2024
Learn the step-by-step process of finishing a knitting blanket with our comprehensive articles. Enhance your knitting skills and complete your projects with confidence.
(Many of the links in this article redirect to a specific reviewed product. Your purchase of these products through affiliate links helps to generate commission for Storables.com, at no extra cost. Learn more)
Introduction
Welcome to the wonderful world of knitting! There’s nothing quite as satisfying as creating a cozy blanket with your own two hands. Whether you’re a knitting novice or a seasoned pro, this article will guide you through the process of finishing a knitted blanket.
Knitting a blanket can be a labor of love, but the end result is well worth the effort. Not only is it a great way to showcase your knitting skills, but it also provides a warm and comforting accessory for your home or a heartfelt gift for a loved one.
In this article, we’ll cover everything you need to know to complete your knitted blanket project. From choosing the right needles and yarn to casting on stitches, knitting the main body, creating an edging, and binding off stitches, we’ll take you step-by-step through the process. We’ll also discuss blocking and finishing touches to give your blanket that professional touch.
So grab your knitting needles, cozy up in your favorite chair, and let’s dive into the world of finishing a knitted blanket!
Key Takeaways:
- Choosing the right needles and yarn, casting on stitches, knitting the main body, adding an edging, binding off stitches, and finishing touches are essential steps to complete a knitted blanket project. Each step contributes to the overall success and professional finish of the blanket.
- The process of finishing a knitted blanket is a labor of love that requires attention to detail, patience, and creativity. From selecting materials to adding personal touches, each step adds to the unique beauty and warmth of the finished blanket.
Read more: How To Wash A Knitted Blanket
Getting Started
Before you dive into knitting your blanket, it’s important to gather all the necessary materials and familiarize yourself with the basic techniques.
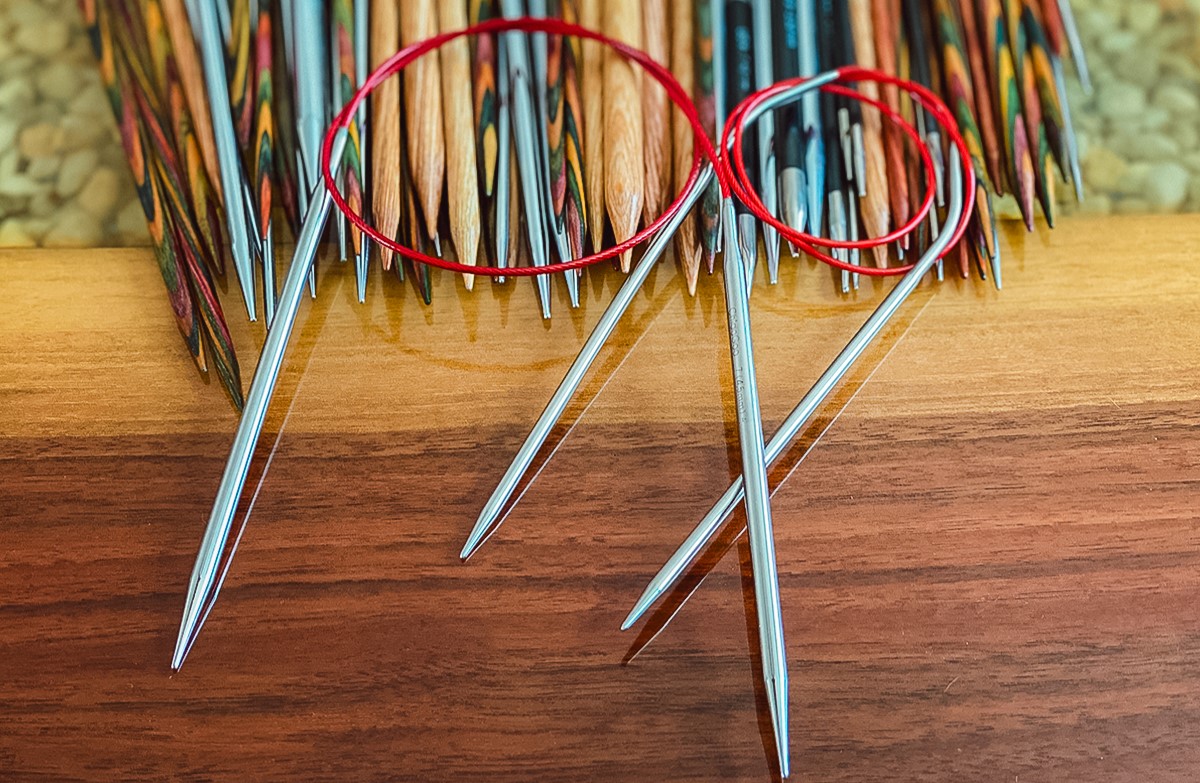
First, make sure you have the right knitting supplies. You will need a pair of knitting needles, typically sized between US 8-10 (5-6 mm) for a blanket project. If you prefer circular needles, make sure they are long enough to accommodate the width of your blanket. Additionally, choose a yarn that is suitable for a blanket. Opt for a soft and durable yarn that will provide warmth and comfort.
Once you have your supplies ready, it’s time to refresh your knitting skills. If you’re a beginner, start by practicing basic knitting stitches such as the knit stitch and the purl stitch. You can find many online tutorials and instructional videos that will guide you through these fundamental techniques. As you become more comfortable, practice knitting larger swatches to get a feel for the knitting process.
It’s also helpful to have a knitting pattern or design in mind for your blanket. This will give you a sense of direction and help you determine the size and stitch pattern you want to use. If you’re feeling adventurous, you can even experiment with different stitch patterns and color combinations to create a unique and personalized blanket.
Now that you have your supplies and skills in check, it’s time to dive into the actual knitting process. In the next section, we’ll discuss how to choose the right needles and yarn for your blanket project.
Choosing the Right Needles and Yarn
When it comes to knitting a blanket, choosing the right needles and yarn is crucial for the success of your project. The size and type of needles, as well as the weight and fiber content of the yarn, will determine the overall look and feel of the finished blanket.
First, consider the size of the needles. A larger-sized needle, such as US 8-10 (5-6 mm), is ideal for knitting blankets as it creates a looser and more drapey fabric. This will result in a blanket that is not only warm but also has a nice drape when laid over a couch or bed.
Next, think about the yarn. The weight of the yarn refers to its thickness, and it’s important to choose a weight that matches your desired outcome. For a lightweight and airy blanket, opt for a fingering or sport weight yarn. If you prefer a chunkier and more cozy blanket, consider a worsted or bulky weight yarn.
In addition to the weight, consider the fiber content of the yarn. Acrylic yarn is a popular choice for blankets as it is affordable, easy to care for, and comes in a wide range of colors. If you’re looking for a luxurious option, consider natural fibers such as wool or alpaca, which provide excellent warmth and softness.
Before starting your project, it’s a good idea to swatch with your chosen yarn and needles to ensure that you achieve the desired gauge. This refers to the number of stitches and rows per inch. Swatching will help you determine if you need to adjust your needle size to achieve the correct gauge and ensure that your finished blanket turns out the way you envision.
Lastly, consider the color palette for your blanket. Whether you prefer bold and vibrant hues or soft and neutral tones, choose colors that reflect your personal style and match your home décor. Take into account the recipient’s preferences if you’re making the blanket as a gift.
By choosing the right needles and yarn for your project, you set yourself up for knitting success. In the next section, we’ll cover how to cast on stitches to get started on your blanket.
Casting On Stitches
Now that you have your knitting needles and yarn ready, it’s time to cast on stitches to begin your blanket project. Casting on is the process of creating the initial row of stitches on your knitting needles.
There are several methods you can use to cast on stitches, but the most common method for blankets is the long-tail cast on. This method creates a neat and flexible edge that is ideal for the beginning of your blanket.
To start, leave a long tail of yarn (approximately three times the width of your finished blanket) and make a slipknot. Insert one needle through the slipknot and hold it in your right hand. With your left hand, grab the yarn attached to the ball and place it over your thumb and index finger, creating a “V” shape.
Bring the needle over the yarn on your thumb and under the yarn on your index finger. Then, bring the needle under both strands of yarn and back up through the center of the “V”. Gently pull the yarn to tighten the stitch on your needle.
Repeat this process to cast on the desired number of stitches for your blanket. Keep in mind that the number of stitches will depend on the size of your blanket and the stitch pattern you’re using. You can refer to your chosen pattern or use a stitch calculator to determine the correct number of stitches.
As you cast on each stitch, make sure to keep your tension even and not too tight. You want the stitches to be snug on the needle but still able to move freely.
Once you have cast on all your stitches, you’re ready to start knitting the main body of your blanket. In the next section, we’ll guide you through the process of knitting the main body, stitch by stitch.
Knitting the Main Body of the Blanket
Now that you have your stitches cast on, it’s time to start knitting the main body of your blanket. This is where the fun really begins!
The stitch pattern you choose for your blanket will largely depend on your personal preference and the desired outcome. You can keep it simple with basic knit and purl stitches for a classic look, or you can experiment with more intricate stitch patterns to create texture and visual interest.
If you’re a beginner, practicing the knit stitch and purl stitch will give you a solid foundation to start with. The knit stitch creates a smooth and flat surface, while the purl stitch creates a bumpy texture. By combining these two stitches in different patterns, you can create a wide range of designs.
As you knit each row, remember to keep track of your progress by counting your stitches. This will help ensure that your blanket maintains the correct width and that your pattern emerges as intended. Using stitch markers can be helpful, especially if you’re working with a complex stitch pattern.
Knitting a blanket is a long-term project, so it’s important to pace yourself and find a comfortable rhythm. Set aside regular knitting sessions to make progress on your blanket, but also take breaks when needed to rest your hands and avoid strain.
As you work on the main body of your blanket, periodically pause to check the dimensions and overall look of your project. This will give you a chance to assess if you’re on track and make any necessary adjustments. Remember that knitting is a flexible craft, and you have the freedom to modify the pattern or size of your blanket as you go.
Continue knitting row by row until you reach your desired length. Keep in mind that the length of your blanket will depend on your personal preference and the intended use. Whether you want a lap blanket or a full-sized throw, make sure to measure periodically to ensure you’re happy with the progress.
Once you’ve completed the main body of your blanket, it’s time to move on to the next step: creating an edging. In the following section, we’ll explore different options for adding a beautiful and finished border to your blanket.
When finishing a knitted blanket, make sure to carefully weave in the loose ends using a tapestry needle to secure them and prevent unraveling. This will give your blanket a polished and professional look.
Read more: How To Start Knitting A Baby Blanket
Creating an Edging
Adding an edging to your knitted blanket is a wonderful way to give it a polished and finished look. The edging not only adds a decorative touch but also helps to stabilize the edges and prevent curling.
There are several options when it comes to choosing an edging for your blanket. Here are a few popular choices:
Ribbing: One of the most common edging choices is to create a ribbed border. This involves alternating knit and purl stitches to create a stretchy and textured edge. Ribbing helps to maintain the shape of the blanket while providing a visually appealing finish.
Garter Stitch Border: Another popular option is a garter stitch border. The garter stitch is created by knitting every row, resulting in a textured and slightly bumpy edge. This simple and easy-to-achieve edging complements a variety of blanket designs.
Lace Edging: For a more intricate and delicate look, consider adding a lace edging to your blanket. Lace patterns can create a beautiful and airy border that adds a touch of elegance to your finished project. There are countless lace stitch patterns available, ranging from simple to complex.
I-Cord Edge: If you prefer a clean and structured edge, you might choose to add an I-cord border. This involves knitting a narrow tube of stitches that are attached to the edges of your blanket. The I-cord creates a neat and professional finish that stands out.
When selecting your edging, consider the overall style and design of your blanket. Choose an option that complements the stitch pattern and enhances the aesthetic appeal of your project.
To add the edging, simply continue knitting the desired stitch pattern around the edges of your blanket. Depending on the edging style you choose, you may need to pick up stitches along the side of your blanket or use a separate set of needles.
Remember to take your time and maintain even tension as you work on the edging. Take breaks to double-check your progress to ensure that the edges are looking symmetrical and well-executed.
Once you’ve completed the edging, it’s time for the final step: binding off your stitches. In the next section, we’ll guide you through this process and discuss the importance of binding off correctly.
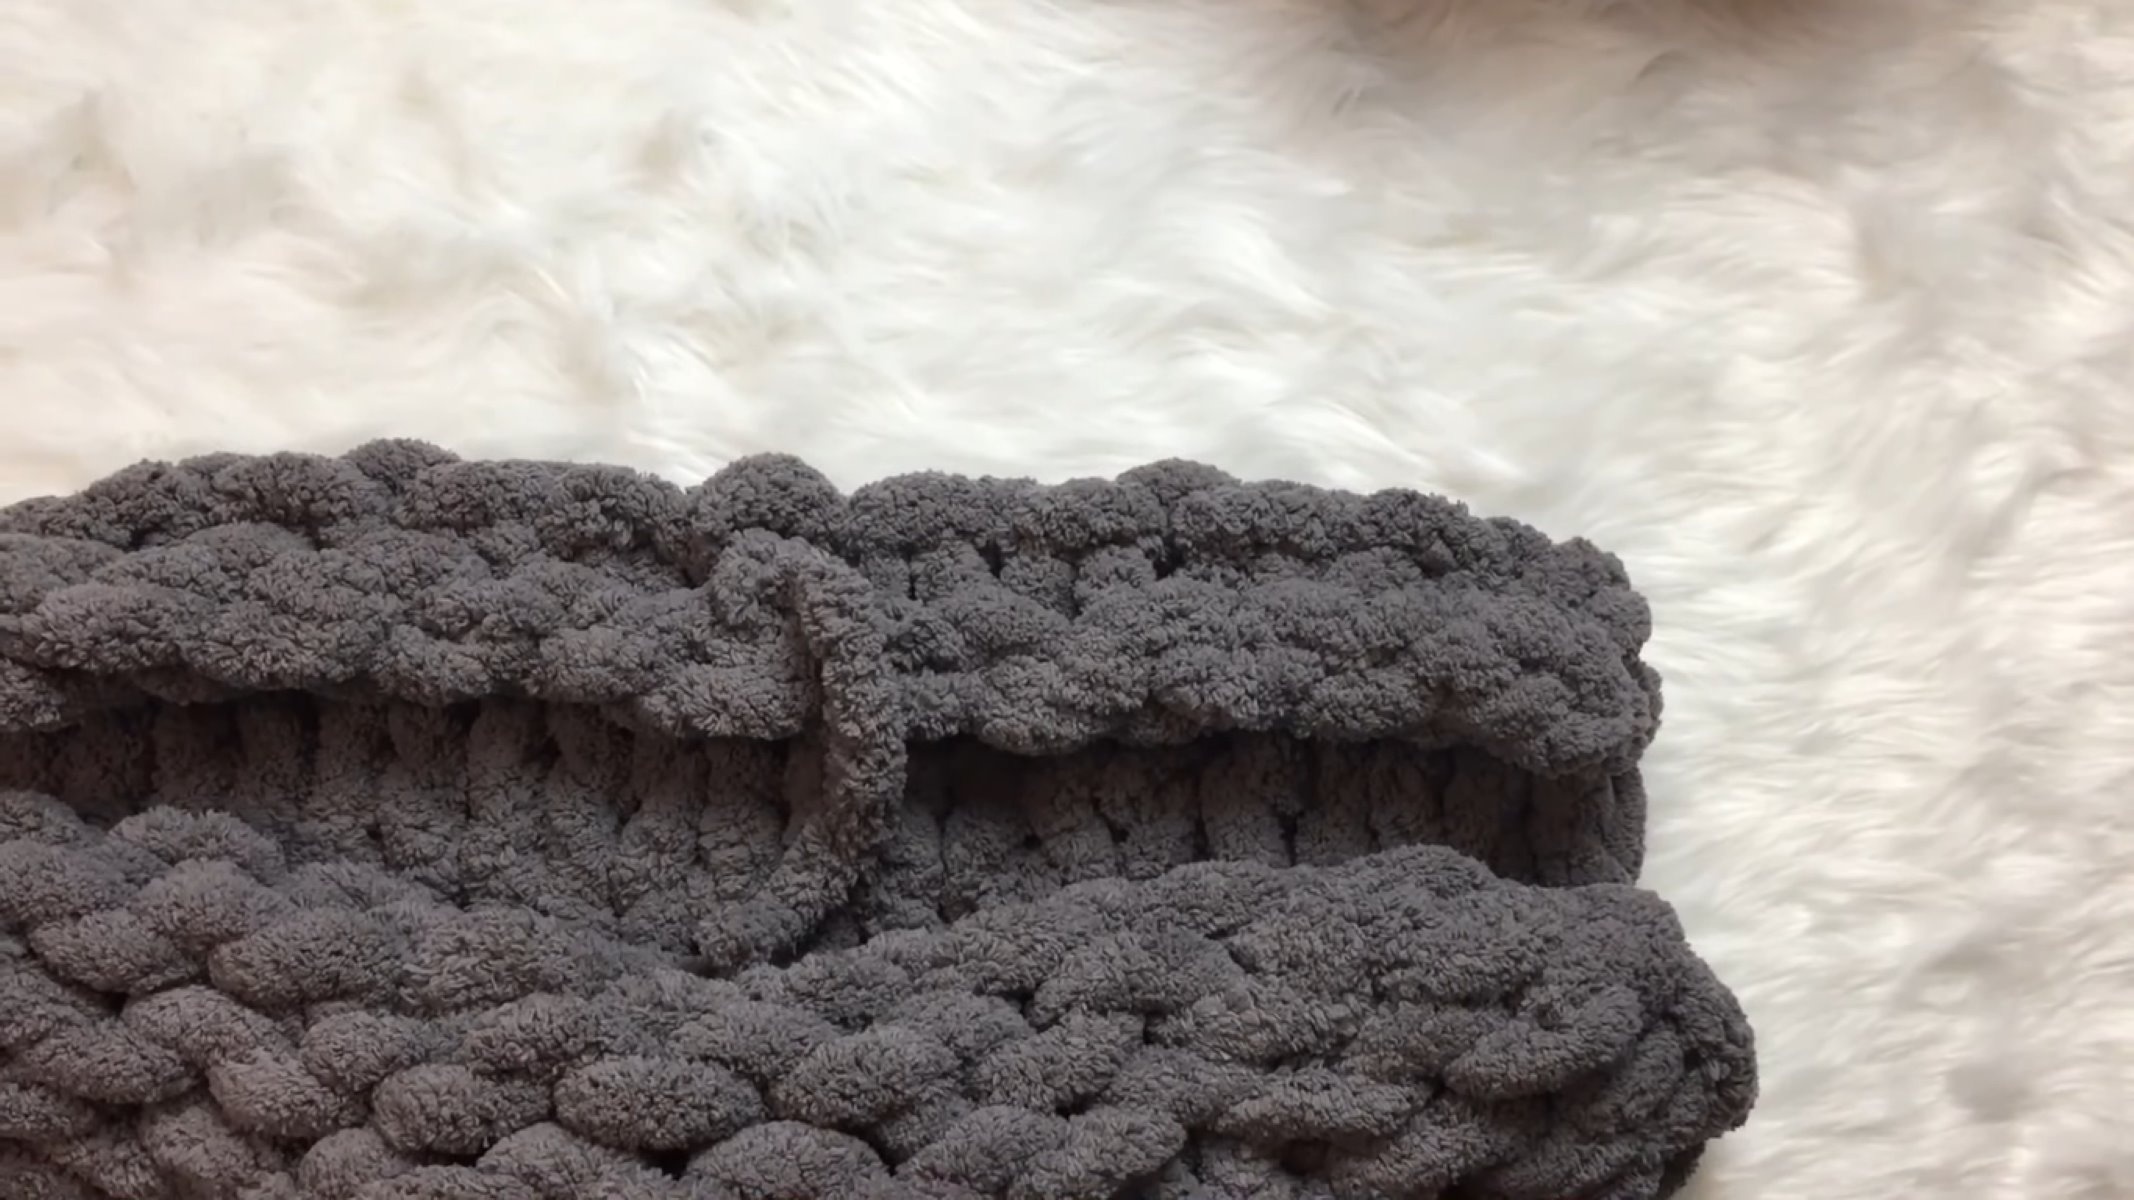
Binding Off Stitches
After putting in all the hard work of knitting your blanket, it’s time to bind off the stitches. Binding off, also known as casting off, is the process of finishing the last row of knitting and securing the stitches, creating a clean and final edge.
To start binding off, knit the first two stitches of your row as you normally would. Then, using your left-hand needle, lift the first stitch over the second stitch and over the tip of the right-hand needle, effectively dropping it off the needle. This creates one bound-off stitch.
Continue knitting the next stitch and repeating the process of lifting the previous stitch over the current stitch until you reach the end of the row. As you bind off, make sure not to pull the yarn too tightly, as you want the edge to remain flexible and not become excessively tight.
Once you have reached the last stitch, cut the yarn, leaving a tail of about 6 inches (15 cm). Thread the tail through the last stitch and pull it tight to secure the edge.
Binding off is an essential step in finishing your blanket because it prevents the stitches from unraveling and gives your project a clean and professional look. Take care to maintain consistent tension as you bind off to ensure that the edge remains even and neat.
After you’ve bound off all the stitches, give your blanket a gentle stretch to even out the edges and promote a smooth finish. This will help to eliminate any unevenness in the bound-off row.
Once your stitches are bound off, you have successfully completed the knitting portion of your blanket! In the next section, we’ll discuss the importance of blocking and provide some tips on how to do it effectively to give your blanket that final touch.
Blocking and Finishing Touches
Blocking is a crucial step in the finishing process of any knitted project, including blankets. It involves wetting or steaming the blanket to relax the fibers and even out the stitches, resulting in a more polished and professional-looking final product.
To block your blanket, start by filling a clean sink or basin with lukewarm water. Gently submerge the blanket, allowing it to soak for about 15-20 minutes. Take care not to agitate or wring the fabric, as this can cause stretching or distortion.
After the soaking period, carefully lift the blanket from the water and gently squeeze out the excess moisture. Avoid twisting or wringing the fabric, as this can damage the delicate fibers. Lay the blanket flat on a clean towel and roll it up, pressing down to remove even more moisture.
Next, it’s time to lay out the blanket for blocking. Find a clean, flat surface, such as a blocking board or an empty bed, and spread out a clean sheet or blocking mat. Lay the blanket on top, gently shaping it to your desired dimensions. Pin the edges in place using rust-proof T-pins, making sure to stretch and shape the fabric as needed.
If your blanket has lace or textured patterns, use blocking wires or additional pins to open up and emphasize the design. Carefully adjust the tension and shape of the fabric as you pin, correcting any unevenness or distortion.
Leave the blanket to dry completely, which can take anywhere from 24 to 48 hours. Avoid moving or disturbing the blanket during this time to ensure that it maintains its shape and dries evenly.
Once the blanket is fully dry, remove the pins and gently shake out any remaining stiffness. Give it a final inspection, checking for any loose ends or stitches that may need to be secured. Weave in any loose ends using a tapestry needle, making sure to do so discreetly on the wrong side of the fabric.
Now that your blanket is blocked and all loose ends are secured, it’s time for the finishing touches. Take a moment to inspect the overall appearance of your blanket and make any necessary adjustments. Trim any excess yarn tails, ensuring that all ends are neatly tucked away.
If desired, you can add personal touches to your blanket, such as attaching a decorative border or adding embellishments like pom-poms or tassels. These final touches can enhance the visual appeal of your blanket and make it truly unique.
With the blocking and finishing touches complete, your knitted blanket is now ready to be enjoyed and cherished. Whether you keep it for yourself or gift it to someone special, your finished blanket is a testament to your knitting skills and creativity.
Congratulations on completing your knitted blanket project! We hope it brings you warmth, comfort, and joy for years to come.
Conclusion
Finishing a knitted blanket is a rewarding accomplishment that allows you to showcase your knitting skills and creativity. Throughout this article, we’ve explored the essential steps to complete your blanket project, from choosing the right needles and yarn to casting on stitches, knitting the main body, adding an edging, binding off stitches, and finishing with blocking and final touches.
By selecting the appropriate materials, such as the right needles and yarn, you set yourself up for a successful project. The casting on process establishes the foundation of your blanket, while knitting the main body allows you to showcase your chosen stitch pattern or design.
The addition of an edging brings a finishing touch to your blanket, enhancing its appearance and providing stability. Binding off stitches creates a clean edge, ensuring that your hard work remains intact.
Don’t forget the importance of blocking and the final touches to elevate your blanket to its full potential. Blocking smooths out the fabric, evens out stitches, and gives your blanket a professional finish. Adding personal touches, such as decorative borders or embellishments, allows you to customize your blanket and add a touch of individuality.
Remember that knitting is both an art and a labor of love. Take your time, enjoy the process, and embrace the beauty of imperfections that make handmade items unique. With each stitch, your creativity and passion are interwoven into the fabric of your blanket.
Now that you have completed your knitted blanket, it’s time to relish in the warmth and comfort it provides. Whether you cozy up under it on a chilly evening or gift it to a loved one, your finished blanket is sure to bring joy and comfort to those who experience its embrace.
Congratulations on your knitting journey and the completion of your knitted blanket project. May it bring you endless warmth, satisfaction, and a sense of achievement.
Frequently Asked Questions about How To Finish Knitting A Blanket
Was this page helpful?
At Storables.com, we guarantee accurate and reliable information. Our content, validated by Expert Board Contributors, is crafted following stringent Editorial Policies. We're committed to providing you with well-researched, expert-backed insights for all your informational needs.

0 thoughts on “How To Finish Knitting A Blanket”