Articles
How To Fix A Bent Garage Door
Modified: October 28, 2024
Learn how to fix a bent garage door with these helpful articles. Find step-by-step instructions and expert tips to get your door back in shape.
(Many of the links in this article redirect to a specific reviewed product. Your purchase of these products through affiliate links helps to generate commission for Storables.com, at no extra cost. Learn more)
Introduction
Garage doors are an essential part of our homes, providing convenience and security. However, accidents can happen, and one common issue many homeowners face is a bent garage door. A bent garage door not only affects the functionality of the door but also poses a safety risk.
Whether it’s due to accidental impact, extreme weather conditions, or wear and tear over time, a bent garage door can be a frustrating issue to deal with. But fear not, as in this article, we will guide you through the process of fixing a bent garage door, enabling you to restore its functionality and appearance.
Before diving into the steps, let’s first understand some of the common causes of a bent garage door. This knowledge will help in preventing future damage and addressing the root cause of the issue.
When it comes to bent garage doors, one of the most common causes is accidental impact. This can occur when a vehicle collides with the garage door or when heavy objects are accidentally dropped on it. Extreme weather conditions, such as strong winds or hailstorms, can also lead to garage door damage.
Another potential cause of a bent garage door is poor maintenance. Lack of regular maintenance, such as lubricating moving parts or tightening loose hardware, can cause the door to become misaligned or put excess strain on certain components, resulting in bending or warping.
Now that we have a better understanding of the causes, let’s move on to the tools and materials you’ll need to fix a bent garage door. Having the right equipment will make the process easier and ensure the best results.
Key Takeaways:
- Proper maintenance, including regular inspection, lubrication of moving parts, and tightening of loose hardware, can prevent garage door bending issues. Addressing minor problems promptly can save time and money in the long run.
- When fixing a bent garage door, safety should always be a top priority. Releasing tension on the springs, assessing damage, and seeking professional assistance for severe damage are crucial steps in ensuring a safe repair process.
Read more: How To Fix Garage Door
Common Causes of a Bent Garage Door
A bent garage door can be a frustrating problem to deal with, but understanding the common causes can help prevent future damage. Here are some of the main reasons why a garage door may become bent:
1. Accidental Impact: One of the most common causes of a bent garage door is accidental impact. This can occur when a vehicle collides with the door while entering or exiting the garage. Sometimes, a driver may misjudge the distance or have a momentary lapse in concentration, resulting in a collision. Additionally, accidental impact can happen if heavy objects, such as ladders or bicycles, are leaned against the door and cause it to bend.
2. Extreme weather conditions: Another common cause of a bent garage door is extreme weather conditions. Hailstorms, strong winds, and heavy snowfall can exert significant force on the door, causing it to bend or warp. Over time, repeated exposure to these conditions can weaken the door’s structure, making it more susceptible to damage.
3. Improper use or maintenance: Improper use and lack of regular maintenance can also lead to a bent garage door. For instance, if the door is not operated correctly, such as slamming it shut forcefully, it can put excessive strain on the panels and tracks, causing them to bend. Additionally, neglecting routine maintenance tasks like lubricating moving parts or tightening loose hardware can result in misalignment and bending over time.
4. Aging and wear and tear: Like any other component of a house, garage doors are subject to wear and tear over time. The constant opening and closing, exposure to the elements, and daily use can take a toll on the door’s structural integrity. As the door ages, the metal panels may become weakened and more susceptible to bending or warping.
5. Poor installation: A poorly installed garage door can also contribute to bending issues. If the door was not properly aligned during installation or if the tracks are not straight and secure, it can cause the door to bind or come off the tracks, leading to bending or damage.
Understanding the common causes of a bent garage door can help homeowners take preventive measures and minimize the risk of damage. By practicing safe usage, performing regular maintenance, and ensuring proper installation, you can help prolong the lifespan of your garage door and prevent bending issues.
Tools and Materials You’ll Need
Before embarking on the journey to fix a bent garage door, it’s crucial to gather the necessary tools and materials. Having the right equipment on hand will make the process smoother and more efficient. Here are the tools and materials you’ll need:
1. Safety Gear: Safety should always be a top priority when working on a garage door. Make sure to wear protective gear, such as safety goggles, work gloves, and sturdy work boots, to keep yourself safe from any potential hazards.
2. Adjustable Wrench: An adjustable wrench will come in handy for tightening any loose nuts and bolts during the repair process. Make sure to choose one that can accommodate various sizes.
3. Pliers: Pliers are essential for gripping and twisting wires or other small objects. They can be useful when working with garage door springs or aligning misaligned rollers.
4. Hammer: A hammer is a versatile tool that can be useful for various tasks, such as tapping out minor dents or adjusting and securing hardware. Choose a hammer with a rubber or plastic handle to avoid causing damage to delicate surfaces.
5. Pry Bar: A pry bar can be useful when removing panels or adjusting components of the garage door. Look for a pry bar with a comfortable grip and a flat edge for more control.
6. C-Clamps: C-clamps are essential for securing the garage door in an open position while working on it. They help prevent the door from unexpectedly closing and causing injury.
7. Lubricant: A high-quality garage door lubricant is necessary to keep the moving parts of the door well-maintained. Choose a lubricant specifically designed for garage doors to ensure smooth operation and prevent rust and corrosion.
8. Replacement Panels or Tracks (if needed): Depending on the severity of the bending or damage, you may need to replace certain panels or tracks. Make sure to measure the dimensions accurately and purchase replacements that match your garage door.
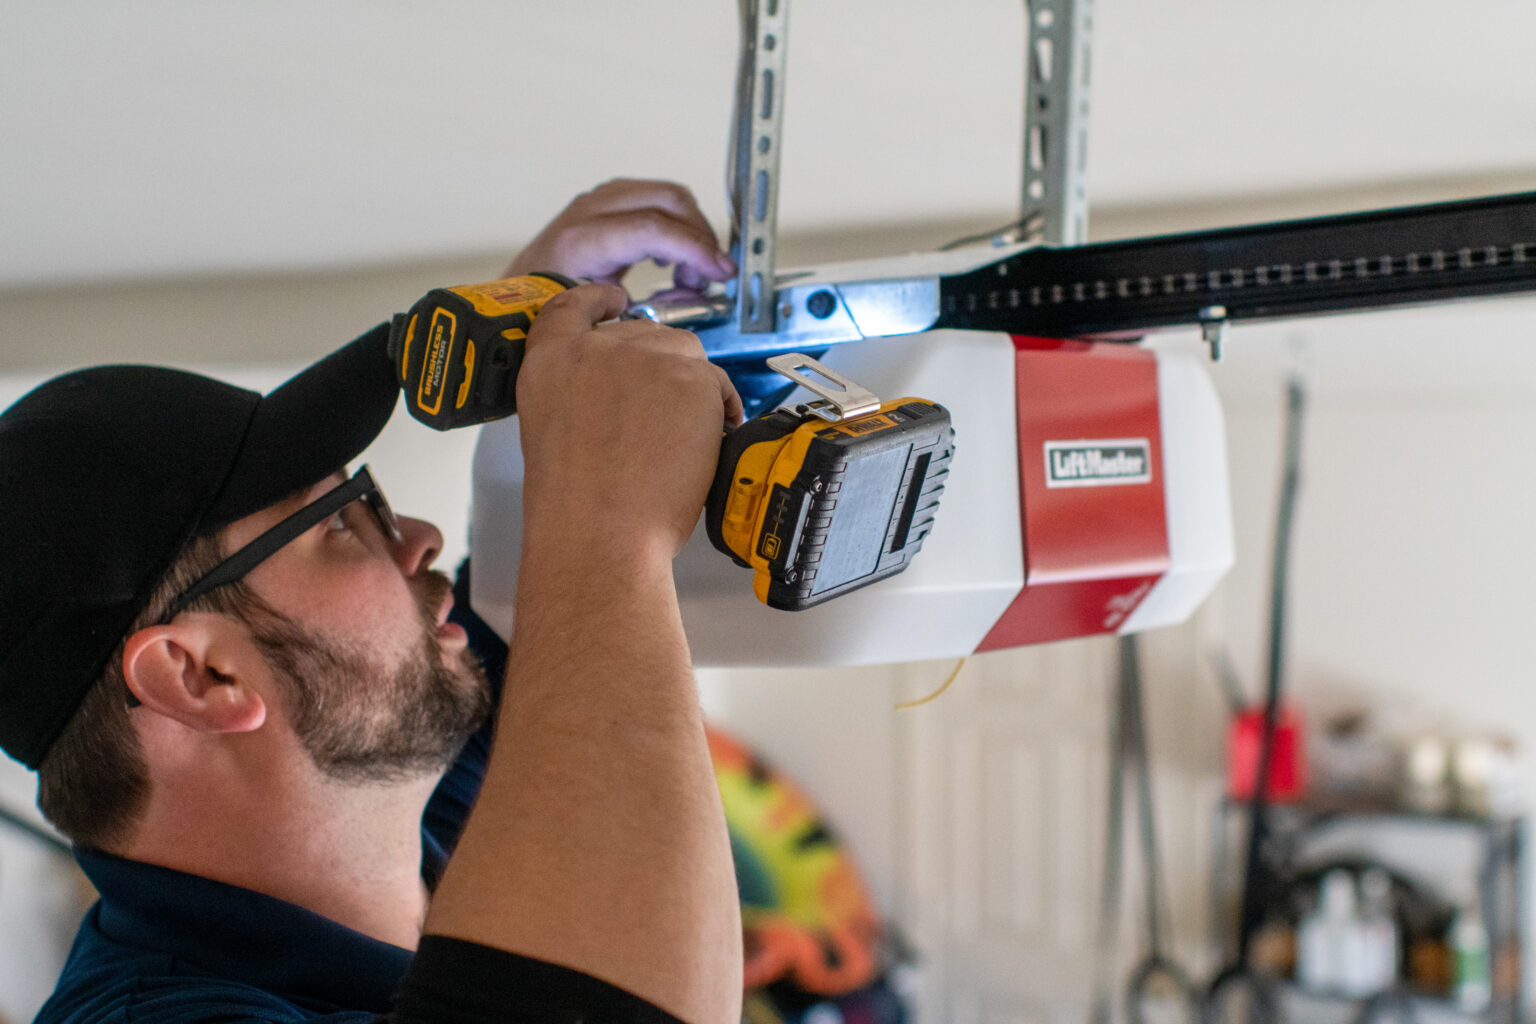
9. Safety Cables (if applicable): If your garage door is equipped with extension springs, it’s important to have safety cables installed. Safety cables help prevent injuries in the event that a spring breaks, so make sure to have them on hand if your door requires them.
By gathering these tools and materials before starting the repair process, you’ll be well-equipped to tackle the task of fixing a bent garage door efficiently and safely.
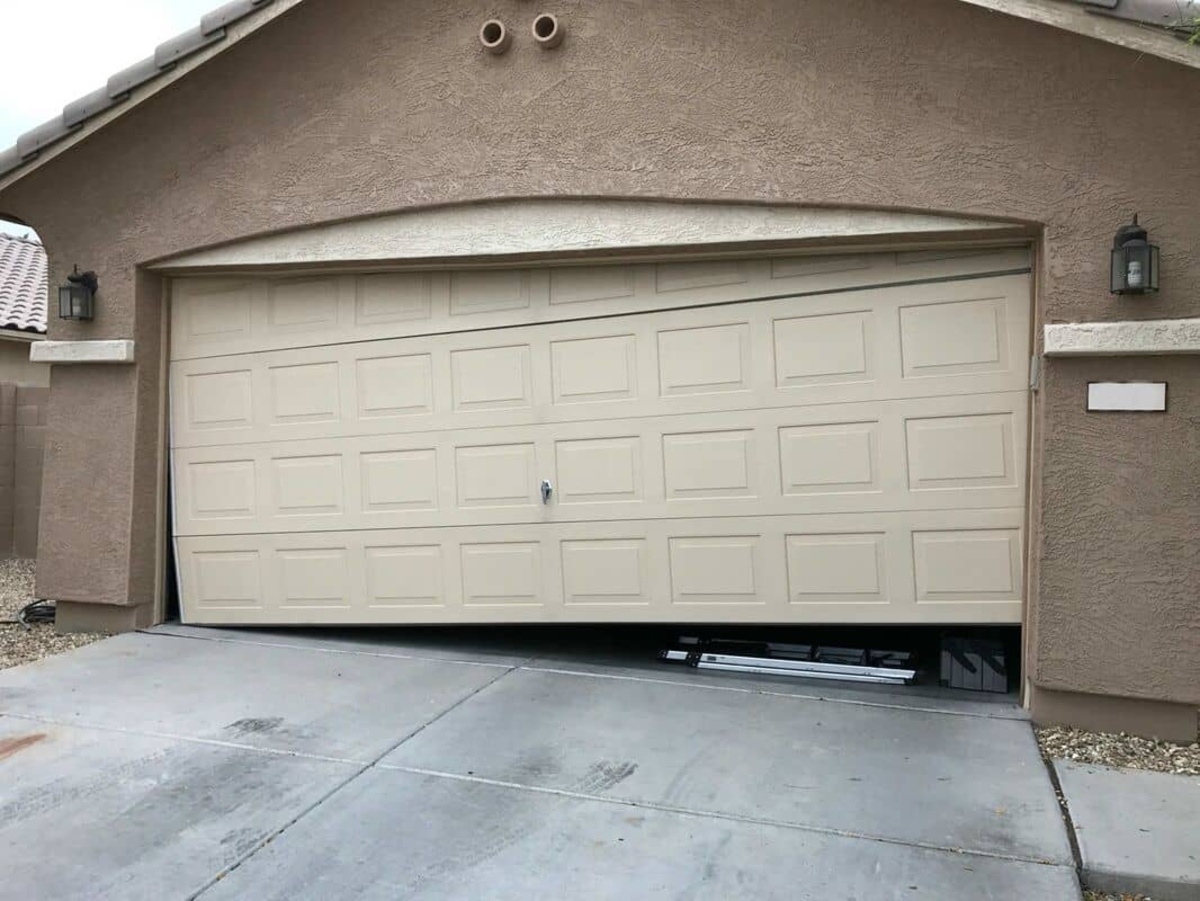
Step 1: Assessing the Damage
Before you begin the repair process, it is essential to assess the damage to your bent garage door. By carefully examining the extent of the damage, you will be able to determine the appropriate steps needed to fix it.
Here are some key points to consider when assessing the damage:
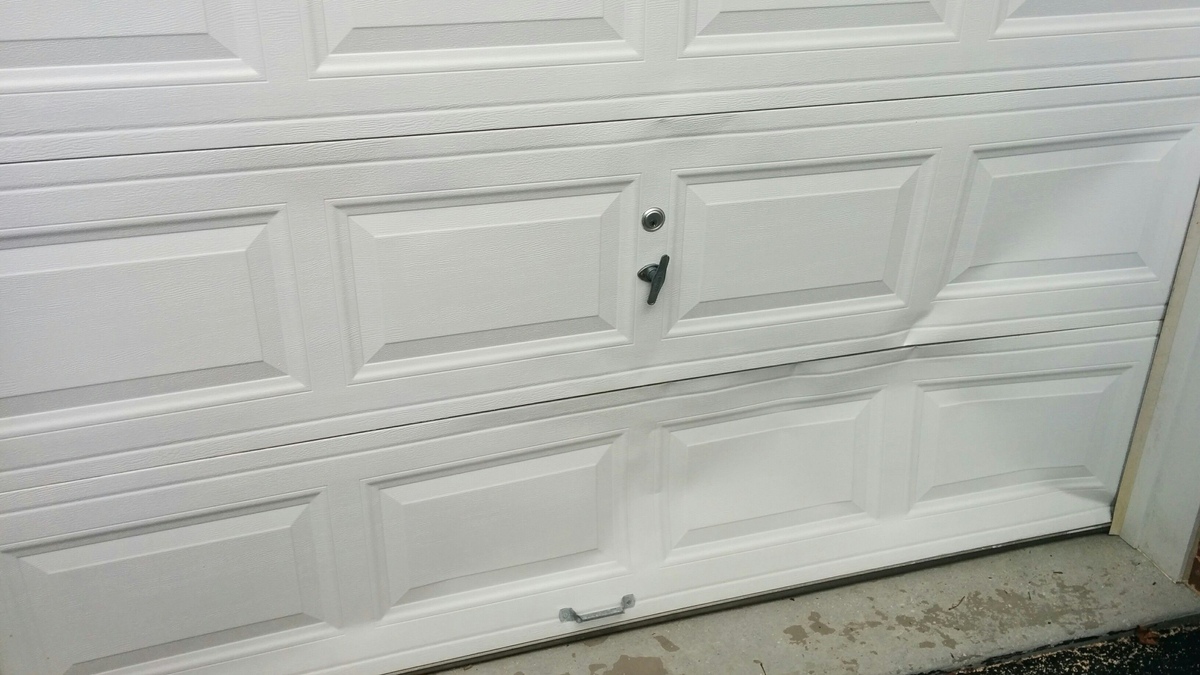
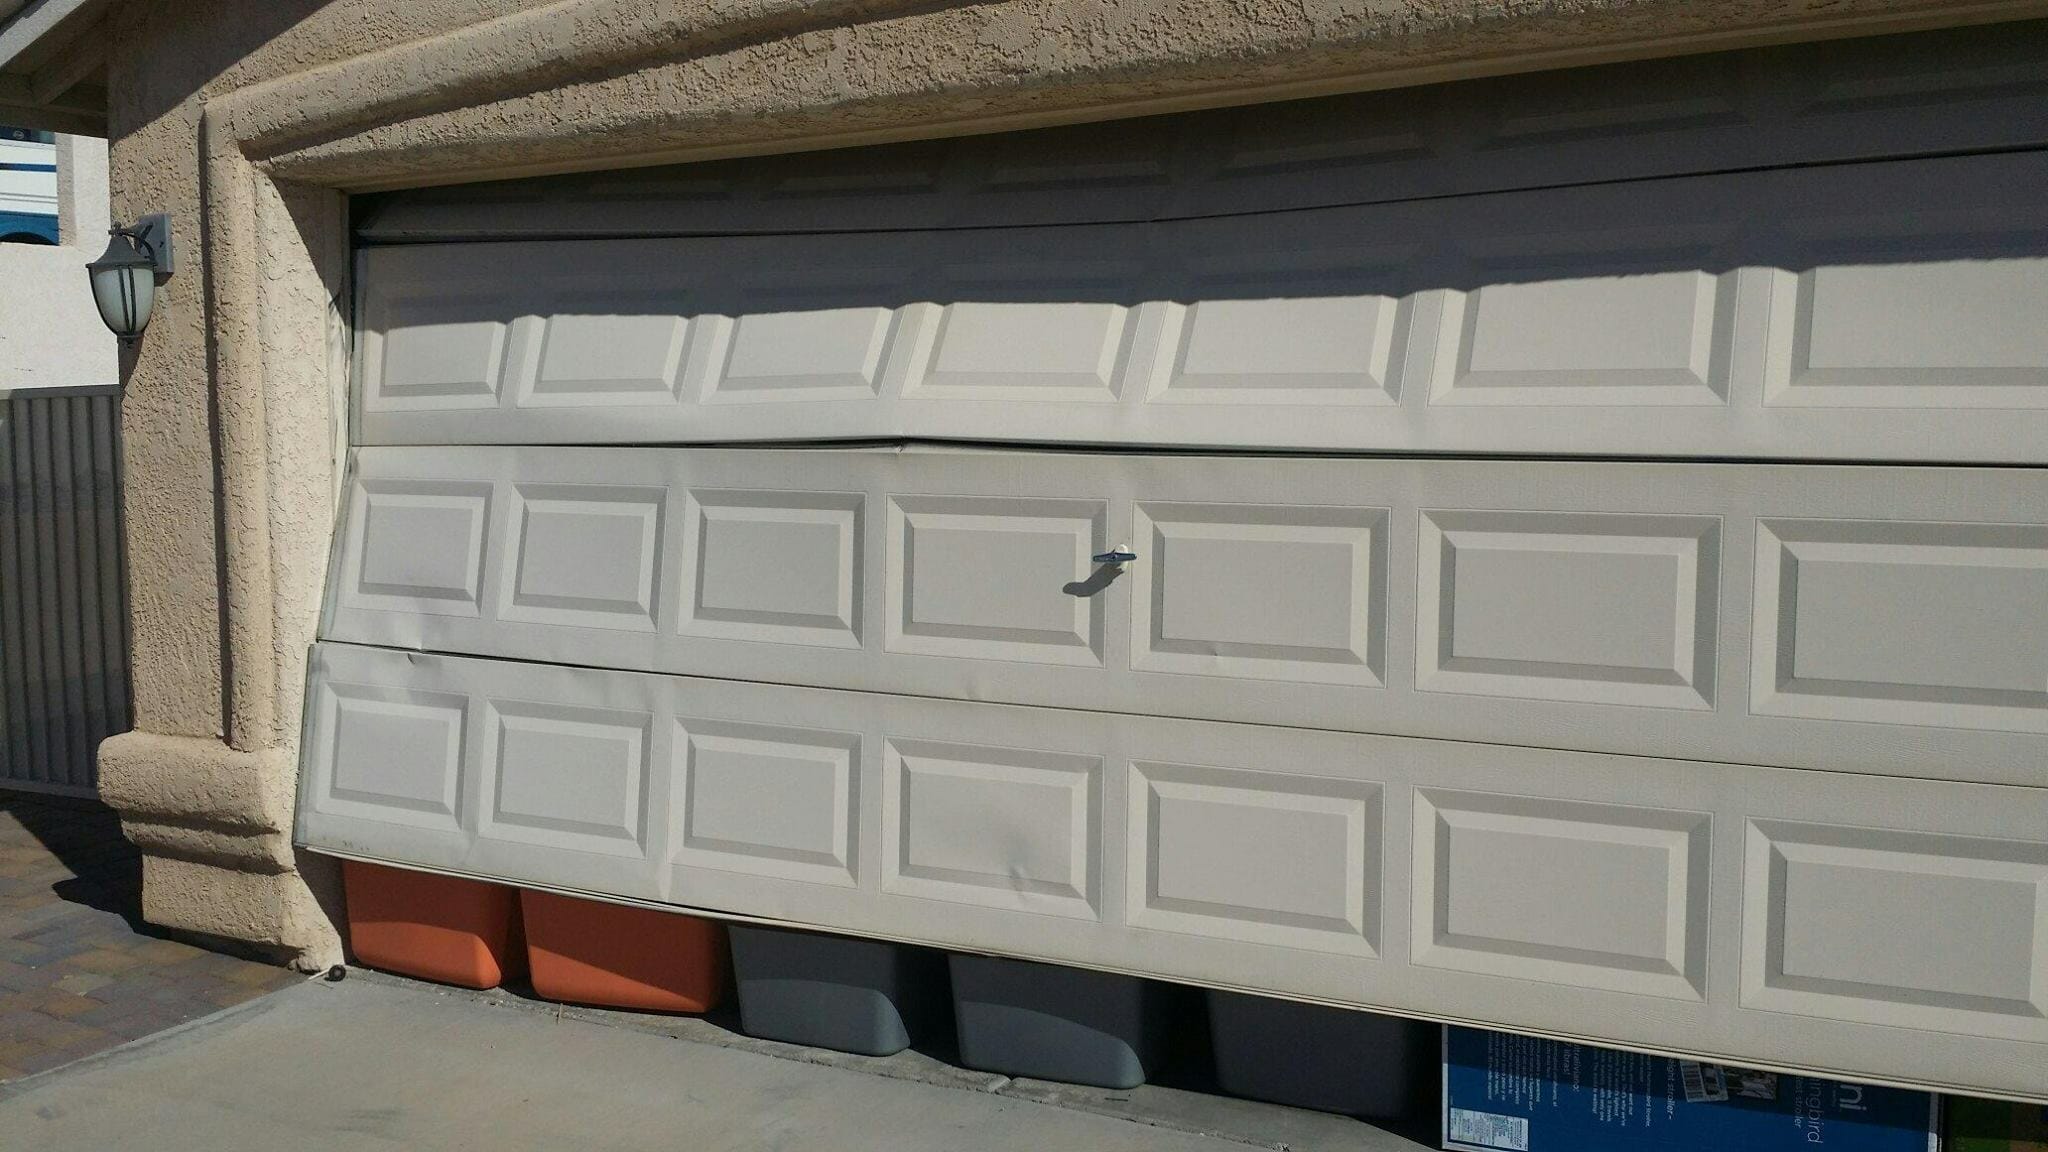
1. Visual Inspection: Start by visually inspecting the garage door panels, tracks, rollers, and hardware. Look for any visible signs of bending, warping, or misalignment. Note the areas that seem most affected by the damage.
2. Functional Assessment: Test the operation of the garage door by opening and closing it several times. Pay attention to any unusual noises, resistance, or difficulty in movement. These can indicate underlying problems caused by the bending.
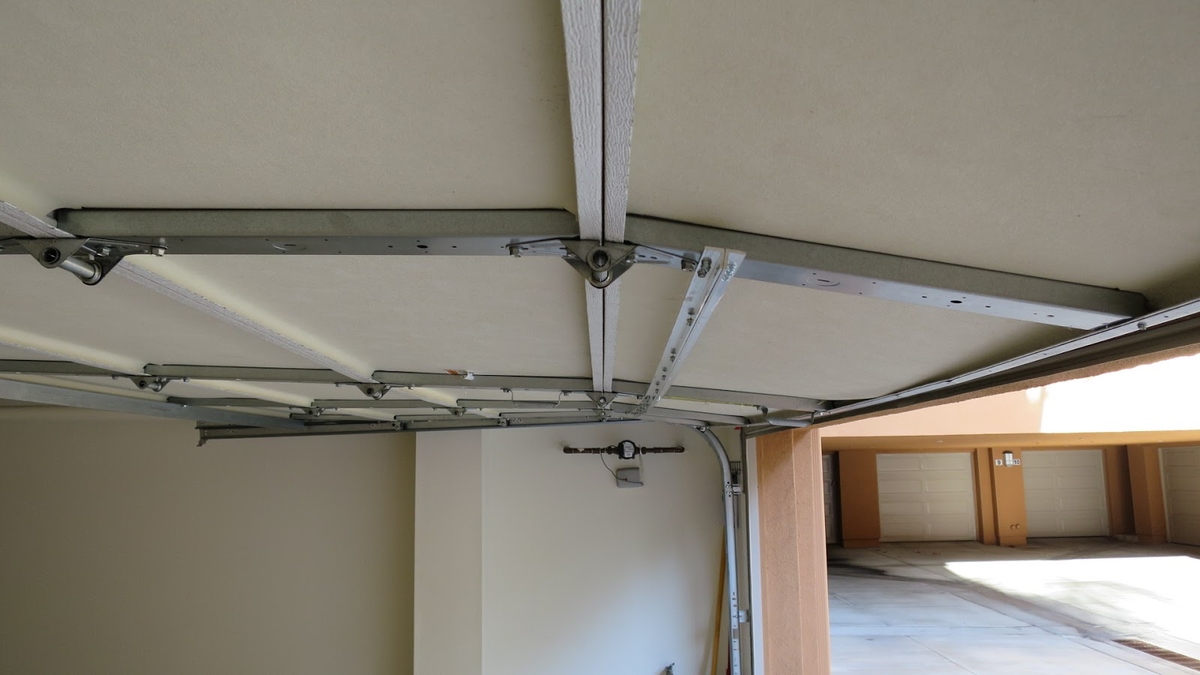
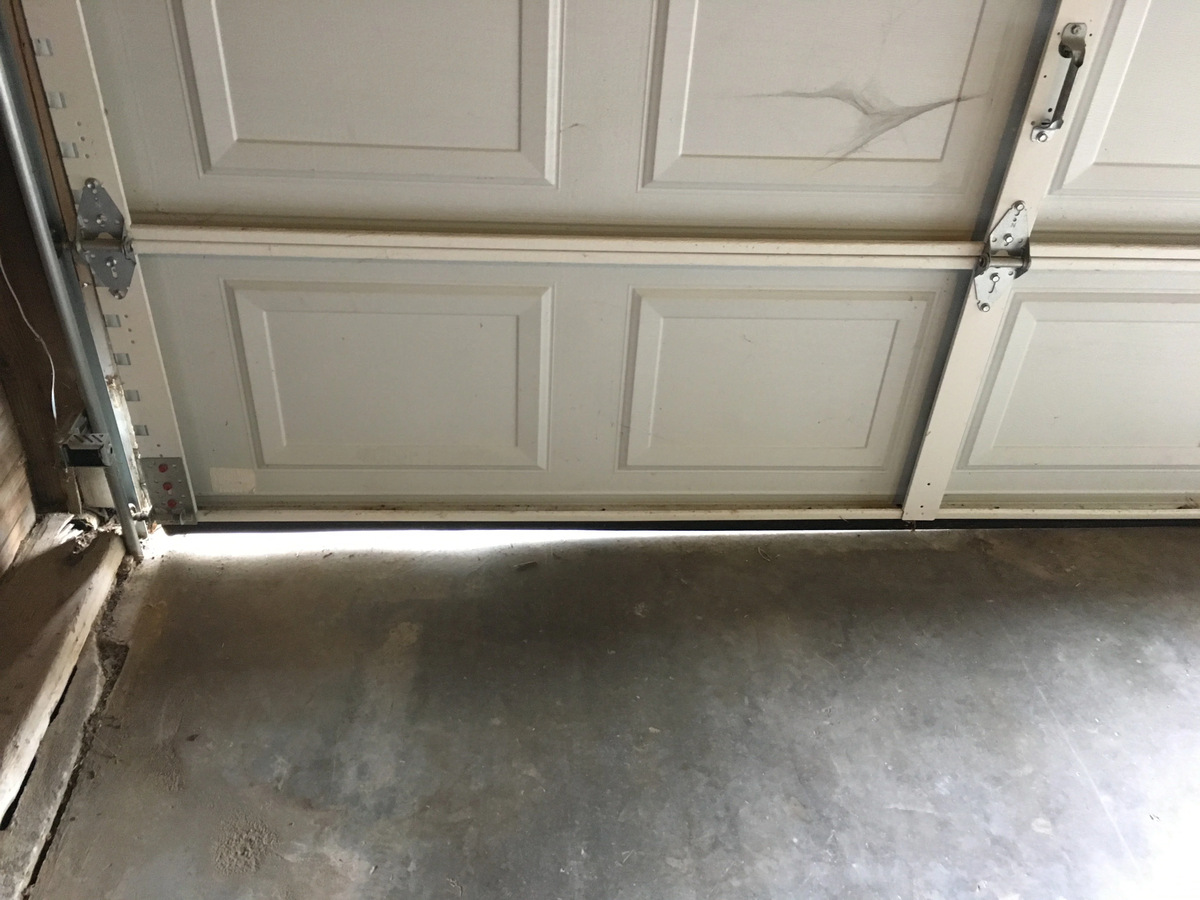
3. Check the Tracks: Examine the tracks carefully to determine if they are straight and properly aligned. Bent or misaligned tracks can cause the garage door to malfunction. Look for any dents, twists, or gaps in the tracks. If the damage is severe, you may need to replace the tracks.
4. Inspect the Panels: Assess the individual panels of the garage door for any visible signs of bending or warping. If the bend is minor, it may be possible to straighten the panel. However, severe damage may require panel replacement.
5. Evaluate the Rollers: Check the condition of the rollers that allow the garage door to move along the tracks. Look for signs of wear, damage, or misalignment. Misaligned or damaged rollers can contribute to bending or warping of the door. Replace any rollers that are in poor condition.
6. Examine the Hardware: Inspect the hinges, brackets, and other hardware components of the garage door. Look for loose screws, bolts, or brackets that may be contributing to the bending. Tighten any loose hardware to ensure stability and prevent further damage.
During the assessment, take note of the areas that require immediate attention and those that can be addressed later. This will help prioritize the repair process and ensure that critical issues are resolved first.
Remember, if you are unsure about the extent of the damage or feel uncomfortable making the repairs on your own, it is always best to consult a professional garage door repair technician. They have the expertise and experience to accurately assess the damage and provide the necessary solutions.
Once you have completed the assessment, you can move on to the next step – gathering the safety gear necessary for the repair process.
Step 2: Gather Safety Gear
Before starting any repair work on your bent garage door, it is important to prioritize safety. Gathering the necessary safety gear will ensure that you can work on the door with confidence and minimize the risk of accidents or injuries. Here are the essential safety gear items you should have:
1. Safety Glasses: Protect your eyes from debris, flying particles, or any potential hazards by wearing safety glasses. They will shield your eyes from any unexpected accidents or impact while working on the garage door.
2. Work Gloves: Wear a pair of sturdy work gloves to protect your hands from sharp edges, pinch points, or any potential injuries. They will provide added grip and prevent cuts or scrapes while handling tools and materials.
3. Work Boots: Use a pair of sturdy work boots with slip-resistant soles to prevent slips, trips, and falls during the repair process. The boots should have good ankle support and offer protection against heavy objects that might accidentally fall.
4. Long-Sleeved Clothing: Wear long-sleeved clothing to protect your arms from scratches, cuts, or any contact with rough surfaces. This will also help prevent any irritation or allergic reactions from coming into contact with certain materials.
5. Knee Pads: If you anticipate spending a significant amount of time kneeling or working on your knees while repairing the garage door, consider using knee pads. They will provide cushioning and protect your knees from strain or injury.
6. Hearing Protection: If you’re using power tools or working in a noisy environment, it’s important to protect your hearing. Use earplugs or earmuffs to reduce the risk of noise-induced hearing damage.
7. Respirator or Dust Mask: If you’re working with dusty or debris-filled areas, wear a respirator or dust mask to protect your lungs from airborne particles. This is especially important if you’ll be sanding or cutting materials during the repair process.
8. First Aid Kit: Keep a first aid kit nearby in case of any minor injuries or accidents. Make sure the first aid kit is fully stocked with bandages, antiseptic ointment, gauze pads, and other basic medical supplies.
By gathering and wearing the appropriate safety gear, you’ll create a safer work environment and reduce the risk of injuries while working on your bent garage door. Remember to always prioritize safety and take precautions to protect yourself throughout the repair process.
With your safety gear in place, you’re now ready to move on to the next step – releasing the tension on the garage door springs.
Read more: How To Fix A Bent Bed Frame
Step 3: Release the Tension on the Garage Door Springs
Before attempting any repairs on your bent garage door, it is crucial to release the tension on the garage door springs. The springs hold a significant amount of tension, and if not properly released, they can cause serious injuries. Follow these steps to safely release the tension:
1. Disconnect the Power: Start by disconnecting the power to the garage door opener. This will prevent any accidental activation while you are working on the springs.
2. Identify the Type of Springs: There are two main types of garage door springs – torsion springs and extension springs. Both types hold a tremendous amount of tension, but the process of releasing the tension differs between the two. Identify which type of spring your garage door has before proceeding.
3. Release Tension on Torsion Springs: For torsion springs, locate the winding cone at the end of the spring shaft. Insert a winding bar into one of the holes in the winding cone and secure it firmly with a vice grip or adjustable wrench. Slowly and carefully, turn the winding bar in the opposite direction of the winding cone to release the tension. Repeat this process for each winding cone on the torsion spring.
4. Release Tension on Extension Springs: Extension springs are located above the horizontal tracks on each side of the garage door. To release tension on extension springs, use a pair of pliers or a winding tool to remove the tension from the cables attached to the bottom brackets. Carefully remove the cables from the brackets, one at a time, while keeping a firm grip on them to prevent them from snapping back.
5. Test the Tension: Verify that the tension has been fully released by slowly and carefully manually lifting the garage door. The door should remain in an open position without any resistance. If the door still feels heavy or difficult to lift, there may be residual tension that needs to be released. In such cases, consult a professional to avoid any potential safety hazards.
By releasing the tension on the garage door springs, you minimize the risk of injury while working on your bent garage door. Always exercise caution and follow the specific instructions for your particular type of springs. If you are unsure about handling the springs or feel uncomfortable with this step, it is strongly advised to seek the assistance of a professional garage door technician.
Once you have safely released the tension on the springs, you can proceed to the next step – correcting small bends in the panels.
Step 4: Correcting Small Bends in Panels
If you have identified small bends in the panels of your garage door, you can attempt to correct them yourself. Small dents or bends are often fixable with some basic tools and techniques. Follow these steps to correct small bends in the panels:
1. Clean the Area: Start by cleaning the affected area of the garage door panel. Use a mild detergent or automotive cleaner and a soft cloth to remove any dirt, debris, or grease. This will ensure a clean surface for the repair process.
2. Apply Heat: Using a heat source such as a hairdryer or heat gun, gently warm the area with the small bend. Move the heat source back and forth over the dent, but avoid concentrating the heat in one spot for too long. The heat will help soften the metal, making it more malleable and easier to reshape.
3. Use a Mallet or Hammer: Once the area is warmed up, you can carefully reshape the small bend by lightly tapping it with a rubber mallet or a wooden block and hammer. Start from the outer edges of the dent and work your way toward the center, gradually applying more force if necessary. Take your time and make small adjustments, checking the progress as you go.
4. Check for Alignment: While reshaping the panel, periodically check for alignment with the other adjacent panels. The goal is to make the repaired area blend seamlessly with the rest of the door. Continue tapping and adjusting until the panel appears straight and aligned with the surrounding panels.
5. Inspect and Refine: Once you have reshaped the panel, inspect the area for any remaining imperfections or small dents. If needed, repeat the process by applying heat and tapping gently to correct any remaining deformities.
6. Paint Touch-up: Depending on the material and finish of your garage door, you may need to touch up the paint to restore the panel’s appearance. Use a matching paint color and apply it to the repaired area according to the manufacturer’s instructions. Allow the paint to dry completely before operating the garage door.
It’s important to note that these techniques are suitable for small bends in panels, and the success of the repair may vary based on the severity of the damage. If the dents or bends are too large or the panel is severely damaged, it may be necessary to replace the entire panel or seek professional assistance.
By following these steps, you can attempt to correct small bends in the panels of your garage door. Remember, patience and precision are key in achieving the best results. Proceed to the next step only if you have successfully corrected the small bends in the panels.
Inspect the tracks for any bends or obstructions. Use a rubber mallet to gently tap the track back into place. If the bend is severe, consider calling a professional for repair.
Step 5: Fixing Severe Damage or Bent Tracks
If you have identified severe damage or bent tracks in your garage door, it is crucial to address these issues promptly. Severe damage can affect the overall functionality and safety of the door. Follow these steps to fix severe damage or bent tracks:
1. Safety First: Before attempting any repairs, make sure to disconnect the power to the garage door opener to prevent any accidental activation. Wear appropriate safety gear, including gloves and safety glasses, for protection.
2. Identify the Severity of the Damage: Assess the severity of the damage and determine whether the tracks can be repaired or if they need to be replaced. If the tracks are severely bent, cracked, or warped, it may be necessary to replace them entirely.
3. Secure the Garage Door: If the tracks are severely bent, it is essential to secure the garage door in the open position to prevent it from falling or causing further damage. Use sturdy C-clamps or locking pliers to secure the door to the tracks or use a locking mechanism if available.
4. Unscrew the Damaged Tracks: Using a screwdriver or power drill, unscrew the bolts or screws that hold the damaged tracks in place. Make sure to keep track of the hardware for reinstallation.
5. Remove the Damaged Tracks: Carefully remove the damaged tracks from the garage door frame. If the tracks are severely warped or damaged, you may need to use pliers or a pry bar to loosen and remove them.
6. Install New Tracks: If the tracks are beyond repair, it is recommended to replace them with new ones. Purchase replacement tracks of the same size and style as the original ones. Follow the manufacturer’s instructions for proper installation, ensuring that the tracks are securely attached to the frame.
7. Check Alignment: Once the new tracks are installed, check their alignment with the rollers. They should be straight, parallel, and properly aligned. Adjust the track’s position if necessary.
8. Lubricate the Tracks: Apply a generous amount of garage door lubricant or silicone spray to the tracks. This will ensure smooth movement of the rollers along the tracks and prevent unnecessary friction.
9. Test the Garage Door: After completing the track repair or replacement, cautiously test the garage door’s movement by manually opening and closing it a few times. Ensure that the door operates smoothly and without any obstructions or resistance.
Fixing severe damage or bent tracks may require some technical skills and expertise. If you are unsure of your abilities or encounter difficulties during the repair process, it is always recommended to seek professional assistance. A trained garage door technician can safely and efficiently diagnose and repair severe damage to ensure the optimal functioning of your garage door.
Once you have successfully fixed severe damage or bent tracks, you can move on to the next step – realigning misaligned rollers.
Step 6: Realigning Misaligned Rollers
Misaligned rollers can cause your garage door to operate improperly or create unnecessary noise during opening and closing. Realigning the rollers is a crucial step in ensuring smooth and efficient garage door functionality. Follow these steps to realign misaligned rollers:
1. Safety First: Before starting any repair work, disconnect the power to the garage door opener to prevent any accidental activation. Ensure you are wearing appropriate safety gear, such as gloves and safety glasses.
2. Locate the Misaligned Rollers: Inspect all the rollers on both sides of the garage door to identify any misaligned ones. Look for rollers that are not sitting correctly in the track or appear to be out of alignment.
3. Loosen the Roller Brackets: Using a screwdriver or wrench, loosen the screws or bolts that hold the roller brackets in place. This will allow you to adjust the position of the misaligned rollers.
4. Align the Rollers: Gently push or pull the misaligned rollers back into the appropriate position within the track. Make sure the rollers are sitting evenly in the track and are properly aligned with the surrounding rollers.
5. Tighten the Roller Brackets: Once the rollers are aligned, tighten the screws or bolts on the roller brackets. Ensure that the brackets are securely fastened, but be careful not to overtighten.
6. Test the Garage Door: After realigning the rollers, test the garage door’s movement by manually opening and closing it. Ensure that the door moves smoothly along the track without any obstructions or resistance.
7. Lubricate the Rollers: Apply a generous amount of garage door lubricant or silicone spray to the rollers. This will ensure smooth rotation and reduce friction within the track.
8. Inspect the Track: While working on the misaligned rollers, take the opportunity to inspect the track for any debris or obstructions. Remove any dirt or debris that may hinder the smooth movement of the rollers.
9. Regular Maintenance: To prevent future roller misalignment, regularly inspect and lubricate the rollers as part of your garage door maintenance routine. This will help ensure smooth and efficient operation.
Realigning misaligned rollers is generally a straightforward process, but if you encounter any difficulties or the problem persists, it is advisable to seek professional assistance. A trained garage door technician can accurately evaluate roller alignment issues and provide appropriate solutions, ensuring the optimal functioning of your garage door.
With the misaligned rollers realigned, you can now proceed to the next step – tightening loose hardware on the garage door.
Read more: How To Fix Crooked Garage Door
Step 7: Tightening Loose Hardware
Over time, the constant movement of a garage door can cause the hardware to loosen, leading to noise, vibration, and potential door misalignment. Tightening loose hardware is an important step in maintaining the stability and proper functioning of your garage door. Follow these steps to tighten loose hardware:
1. Safety First: Before starting any work, disconnect the power to the garage door opener to prevent any accidental activation. Always wear the appropriate safety gear, such as gloves and safety glasses.
2. Inspect the Hardware: Begin by examining the various hardware components of your garage door, such as hinges, brackets, bolts, screws, and nuts. Look for any visible signs of loose or missing hardware.
3. Use a Wrench or Screwdriver: Using an appropriate wrench or screwdriver, carefully tighten any loose bolts, screws, or nuts that you find. Take care not to overtighten them, as this may damage the hardware or strip the threads.
4. Focus on Hinges and Brackets: Pay particular attention to the hinges and brackets, as they are often prone to loosening. Make sure all hinges are securely fastened to both the door and the track. Check brackets that attach the tracks to the wall or ceiling and tighten them as necessary.
5. Check the Rollers: Verify that the rollers are securely attached to the hinges and that the rollers themselves are in good condition. If any rollers are loose, tighten the bolts or screws that hold them in place. Also, make sure the rollers move freely along the track without any obstructions.
6. Lubricate Moving Parts: While you’re checking and tightening hardware, it’s a good time to lubricate any moving parts, such as hinges and rollers. Apply a high-quality garage door lubricant to ensure smooth operation and minimize friction.
7. Inspect Cables and Springs: While conducting the hardware check, examine the cables and springs for any signs of fraying, rust, or damage. If you notice any significant issues, it is advised to seek the help of a professional technician for repairs or replacement as these components are under high tension.
8. Test the Garage Door: After tightening the loose hardware, test the garage door’s operation by manually opening and closing it. Ensure that the door moves smoothly and without any unusual noises or resistance.
9. Regular Maintenance: To prevent future loosening of hardware, incorporate regular maintenance into your routine. This includes periodically checking for tightness in the hardware, lubricating moving parts, and addressing any issues promptly.
By regularly inspecting and tightening loose hardware, you can extend the lifespan of your garage door and maintain its smooth and efficient operation. If you encounter any challenges or the issue persists, it is recommended to consult a professional garage door technician for assistance.
With the loose hardware tightened, proceed to the next step – lubricating moving parts of the garage door.
Step 8: Lubricating Moving Parts
Lubricating the moving parts of your garage door is an essential step in maintaining its smooth operation and prolonging its lifespan. Over time, these parts can become dry, leading to friction, noise, and potential damage. Follow these steps to properly lubricate the moving parts of your garage door:
1. Safety First: Before starting any work, disconnect the power to the garage door opener to prevent any accidental activation. Make sure you wear the appropriate safety gear, such as gloves and safety glasses.
2. Identify the Moving Parts: Take a moment to identify the various moving parts that require lubrication. These typically include hinges, rollers, springs, tracks, and pivot points.
3. Clean the Parts: Before applying any lubricant, it is important to clean the moving parts to remove any dirt, debris, or old lubricant that may have accumulated. Use a cloth or a soft-bristle brush to gently wipe or brush away any residue.
4. Choose the Right Lubricant: Select a high-quality garage door lubricant that is specifically designed for the purpose. Avoid using general-purpose lubricants like WD-40, as they may attract dirt and cause more harm than good. Consult with your garage door’s manufacturer or a professional technician for recommended lubricants.
5. Apply Lubricant to Hinges: Apply a small amount of lubricant to each hinge’s pivot points. Move the door slightly to allow the lubricant to work its way into the hinges. Be careful not to overapply, as excessive lubricant can attract dirt.
6. Lubricate Rollers: Apply lubricant to the rollers, ensuring that each one is coated evenly. Roll the door up and down a few times to distribute the lubricant thoroughly. Avoid lubricating the tracks, as it can cause them to become slippery and affect the door’s balance.
7. Coat Springs: Apply a light coating of lubricant to the springs, focusing on the coils and contact points. Springs are under tension, so exercise caution when working near them. If you are unsure, consult a professional for assistance.
8. Lubricate Pivot Points: Identify any other pivot points on your garage door, such as the points where the opener arm connects to the door or where the tracks curve. Apply lubricant to these pivot points to reduce friction and ensure smooth movement.
9. Test the Garage Door: After lubricating the moving parts, test the door’s operation by manually opening and closing it. Listen for any unusual noises or resistance. If the operation feels smoother and quieter, you have effectively lubricated the moving parts.
Remember to periodically inspect and reapply lubricant to the moving parts of your garage door to maintain optimal performance. Regular lubrication is especially important in regions with extreme temperatures or high humidity.
With the moving parts properly lubricated, you’re now ready to move on to the final step – testing the garage door’s functionality.
Step 9: Testing the Garage Door
After completing the necessary repairs and maintenance, it is important to thoroughly test the functionality of your garage door. Testing ensures that all the components are working properly and that any issues have been successfully addressed. Follow these steps to test your garage door:
1. Reconnect the Power: If you had disconnected the power to the garage door opener during the repair process, reconnect it to restore power.
2. Clear the Area: Ensure that the area around the garage door is clear of any obstructions or objects that could interfere with its movement. This includes vehicles, tools, or any other items that may be blocking the path of the door.
3. Test the Remote Control: Use your garage door opener’s remote control to operate the door. Press the appropriate button to open and close the door. Observe the door’s movement and listen for any unusual noises or resistance. The door should operate smoothly and without any hesitation or jerking motion.
4. Test the Wall Switch: Next, test the garage door using the wall switch. Press the button to open and close the door. Again, pay attention to the door’s movement and any sounds it may make.
5. Check Safety Sensors: Modern garage doors are equipped with safety sensors that detect objects or people in the door’s path. Ensure that the sensors are properly aligned and free from any obstructions. Use an object such as a broom or a cardboard box to block the sensors’ path while the door is closing. The door should stop and reverse its movement immediately upon detecting the obstruction.
6. Observe Balance and Alignment: As the door opens and closes, observe its balance and alignment. The door should move smoothly along the tracks without any tilting or shaking. If you notice any imbalance or misalignment, consult a professional garage door technician to address the issue.
7. Listen for Unusual Noises: Pay attention to any unusual noises, such as grinding, scraping, or banging sounds, during the operation of the door. Unusual noises could indicate underlying issues that need to be addressed, such as loose hardware or misaligned components.
8. Repeat the Tests: Repeat the tests a few times to ensure consistent results. If you encounter any problems or notice any issues during the testing process, make a note of them for further inspection or professional assistance.
By thoroughly testing your garage door after repairs and maintenance, you can verify its functionality and ensure safe and reliable operation. Regular testing and maintenance will help prevent future issues and extend the lifespan of your garage door.
If you encounter persistent problems or have concerns about the functionality of your garage door, it is advisable to consult a professional garage door technician for a thorough inspection and necessary repairs.
With the testing complete, you can now enjoy the peace of mind that comes with a properly functioning garage door.
Conclusion
Fixing a bent garage door may seem like a daunting task, but with the right knowledge, tools, and approach, you can tackle this repair successfully. By following the steps outlined in this guide, you can address common causes of a bent garage door and restore its functionality and appearance.
Start by assessing the damage, identifying the root cause, and gathering the necessary tools and safety gear. Release the tension on the garage door springs before proceeding with the repair process. Correct small bends in the panels, fix severe damage or bent tracks, and realign misaligned rollers.
Tighten loose hardware to ensure stability and prevent further damage. Lubricate the moving parts to minimize friction and promote smooth operation. Finally, thoroughly test the garage door to ensure it is functioning properly and safely.
While these steps provide a general framework for fixing a bent garage door, it is important to remember that every situation is unique. If you are unsure or encounter challenges during the repair process, it is always wise to seek professional assistance.
Regular maintenance and periodic inspection of your garage door can help prevent bending and other issues from occurring in the first place. Perform routine checks, lubricate moving parts, and keep an eye out for signs of wear and tear. Addressing minor problems promptly can save you time, money, and potential headaches in the long run.
By taking the time to repair your bent garage door, you are investing in the safety, functionality, and aesthetics of your home. A properly functioning garage door not only provides convenience but also enhances the security of your property.
Remember, your garage door is a complex system with various components working together. If you are unsure about any aspect of the repair process or if the damage requires extensive repairs, it is recommended to consult a professional garage door technician. They have the expertise and knowledge to address complex issues and ensure the longevity and proper functioning of your garage door.
With determination, patience, and the right guidance, you can successfully fix a bent garage door and enjoy its benefits for years to come.
Frequently Asked Questions about How To Fix A Bent Garage Door
Was this page helpful?
At Storables.com, we guarantee accurate and reliable information. Our content, validated by Expert Board Contributors, is crafted following stringent Editorial Policies. We're committed to providing you with well-researched, expert-backed insights for all your informational needs.


0 thoughts on “How To Fix A Bent Garage Door”