
Articles
How To Fix Garage Door
Modified: August 27, 2024
Discover helpful and informative articles on how to fix your garage door. Get expert advice and step-by-step guides for troubleshooting common issues with your garage door.
(Many of the links in this article redirect to a specific reviewed product. Your purchase of these products through affiliate links helps to generate commission for Storables.com, at no extra cost. Learn more)
Introduction
A garage door is an essential component of any home. It provides security, convenience, and protection for your vehicles and other belongings. However, like any mechanical device, garage doors can experience problems and malfunctions over time. From noisy operations to stuck doors, these issues can be frustrating and disruptive to your daily routine.
In this article, we will guide you through the process of fixing common garage door problems. Whether you are dealing with a misaligned track, a faulty opener, or worn-out springs, we have got you covered. By following these step-by-step instructions, you can save time and money by troubleshooting and resolving the issue on your own.
Before we dive into the repairs, it’s important to note that safety should always be a top priority. Be sure to disconnect the power to your garage door opener before attempting any repairs. Additionally, if you are uncomfortable or unsure about any steps, it is recommended to seek professional assistance.
Now, let’s assess the problem and gather the necessary tools and materials to get started with fixing your garage door.
Key Takeaways:
- Regular maintenance and prompt repairs are crucial for ensuring the smooth and safe operation of your garage door. By addressing issues promptly, you can prevent further damage and avoid costly repairs in the future.
- Safety should always be a top priority when working on your garage door. Follow proper guidelines, disconnect the power when necessary, and seek professional help if unsure or uncomfortable with any steps.
Read more: How To Fix A Bent Garage Door
Assessing the Problem
Before jumping into the repairs, it’s crucial to properly assess the problem to determine the root cause. This will help you take the necessary steps to fix your garage door effectively. Here are some common issues to look out for:
- Noisy Operation: If your garage door is making creaking, grinding, or squeaking sounds, it may be due to worn-out rollers, loose hardware, or lack of lubrication.
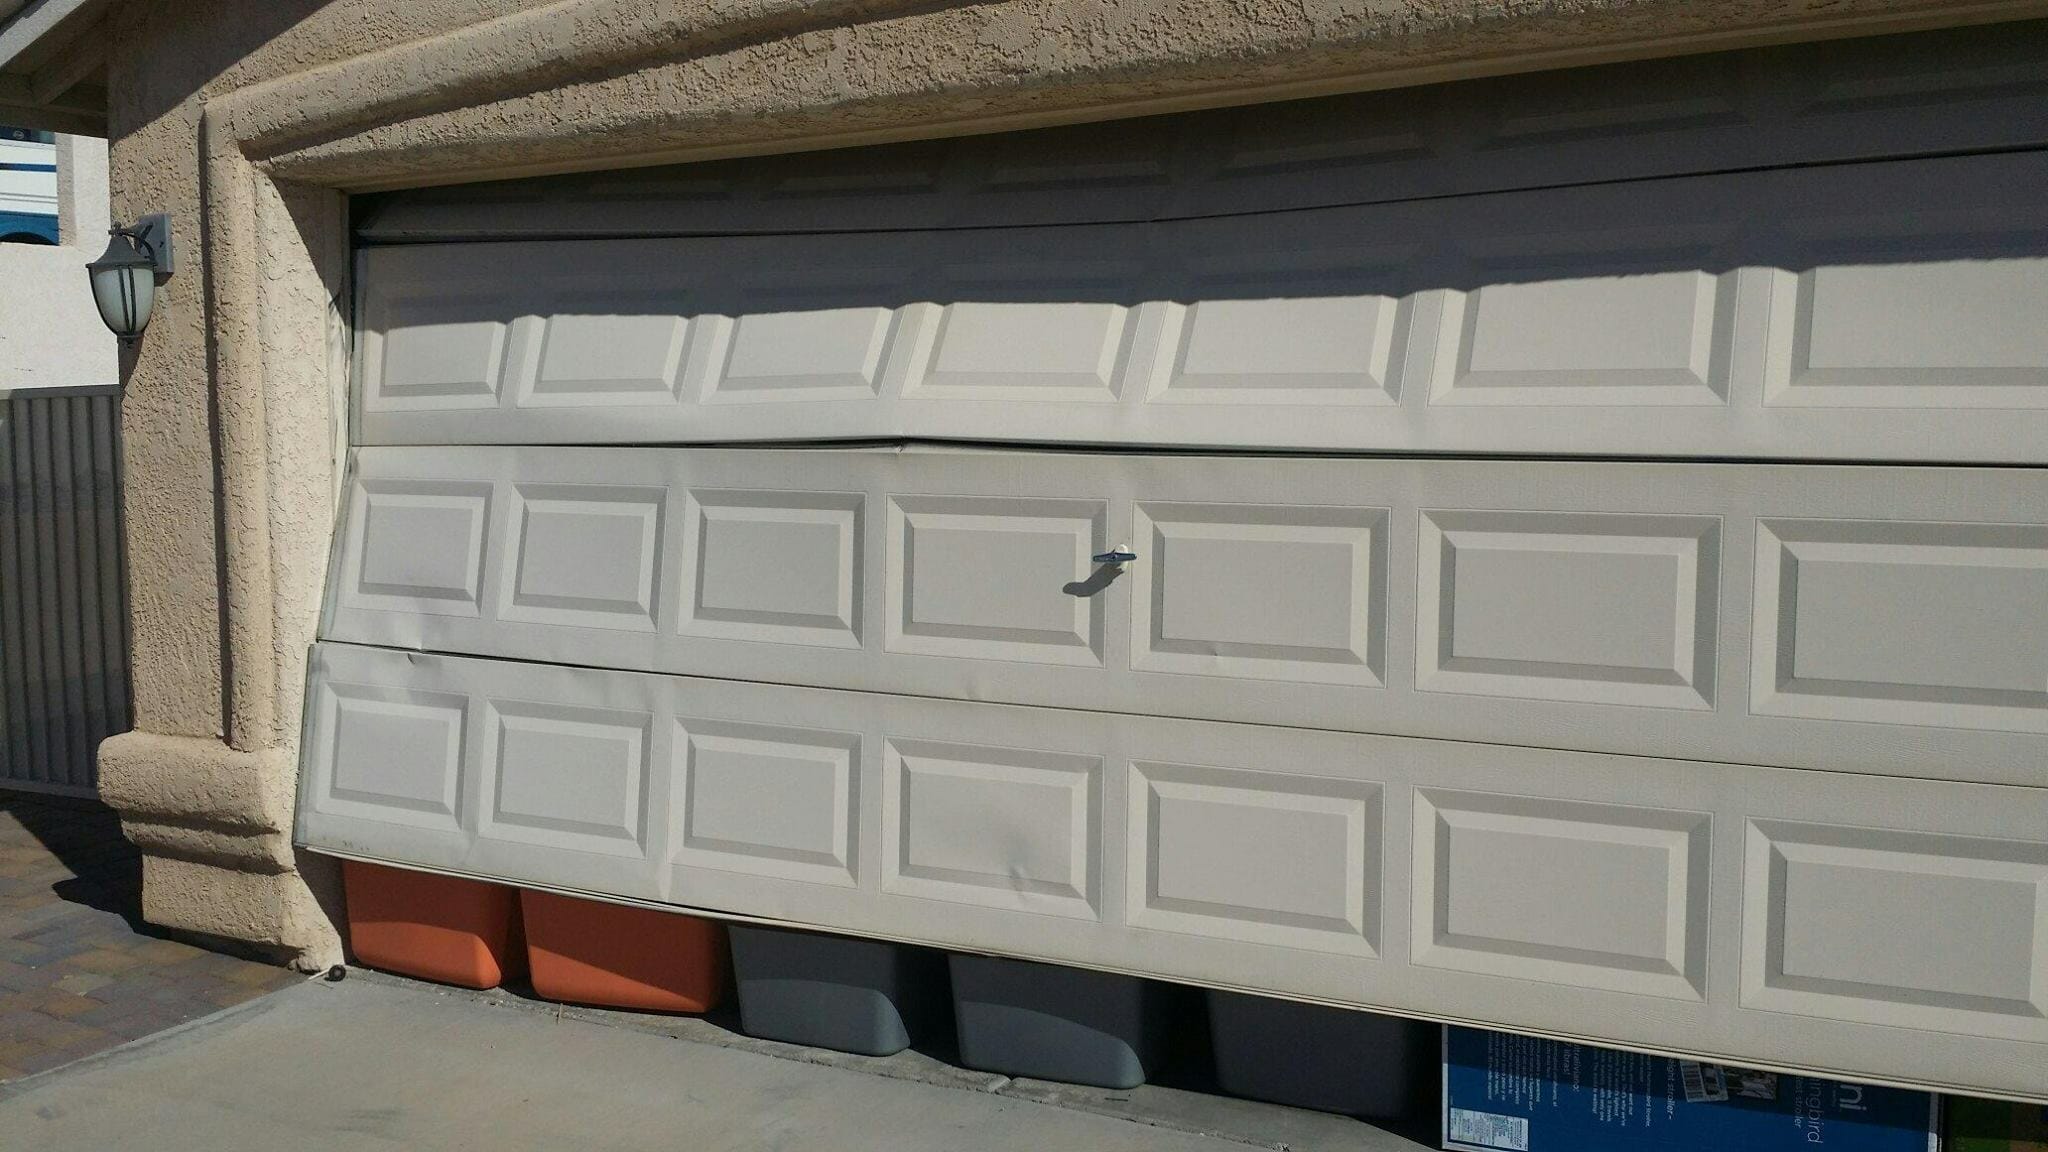
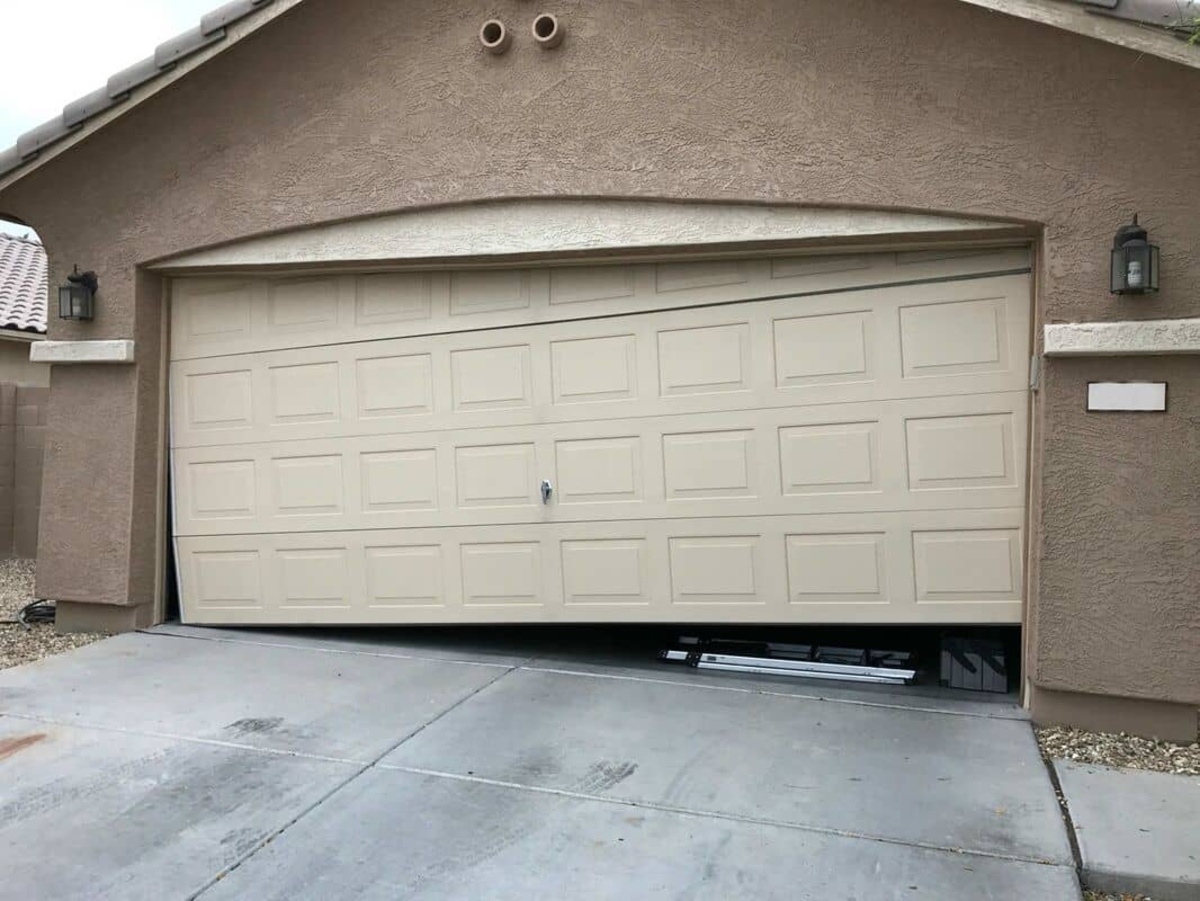
- Stuck or Misaligned Door: If your garage door is not opening or closing smoothly, it could be due to a misaligned track, bent rails, or an obstruction.
- Faulty Garage Door Opener: If your opener is not responding to the remote or wall button, it could be due to electrical issues, dead batteries, or malfunctioning sensors.
- Tension Spring Issues: If your garage door is difficult to open manually or is imbalanced, it could be due to stretched or broken tension springs.
- Worn-out Weather Stripping: If you notice drafts, water leakage, or pests entering your garage, it may be time to replace the weather stripping around the door.
By carefully assessing the problem, you can narrow down the potential causes and focus on the specific repairs needed. This will help you avoid unnecessary steps and ensure you address the root issue efficiently.
Once you have assessed the problem, it’s time to gather the necessary tools and materials to proceed with the repairs. Let’s take a look at what you will need.
Tools and Materials Needed
Before you start fixing your garage door, make sure you have the following tools and materials on hand:
- Adjustable wrench
- Screwdriver set (including both flathead and Phillips head)
- Pliers (both regular and needle-nose)
- Cordless drill
- Hammer
- Lubricant (such as silicone-based spray)
- Tape measure
- Safety goggles
- Gloves
- Step ladder
- Replacement parts (such as rollers, springs, and weather stripping) – if necessary
Having these tools readily available will ensure that you can tackle a wide range of repairs efficiently. It’s important to use the correct tools for each task to avoid any potential damage or injury.
Now that you have gathered the necessary tools and materials, let’s move on to the step-by-step instructions to fix your garage door.
Step-by-Step Instructions
Follow these step-by-step instructions to fix your garage door:
- Inspect the Tracks and Rollers: Start by examining the tracks for any signs of damage, dents, or misalignment. Use a level to ensure they are properly aligned. Inspect the rollers and replace any worn-out or damaged ones.
- Check the Springs: Carefully inspect the tension springs, which are located above the garage door. Look for signs of stretching or breakage. If you notice any issues, it’s best to seek professional help for repairs or replacements, as working with garage door springs can be dangerous.
- Test the Garage Door Opener: Check the batteries in your remote and wall button. If they are dead, replace them. Make sure the opener is receiving power. If not, check the electrical connections. If the problem persists, the opener may need to be repaired or replaced.
- Lubricate Moving Parts: Apply lubricant, such as a silicone-based spray, to the rollers, hinges, tracks, and springs. This will help reduce friction and ensure smooth operation.
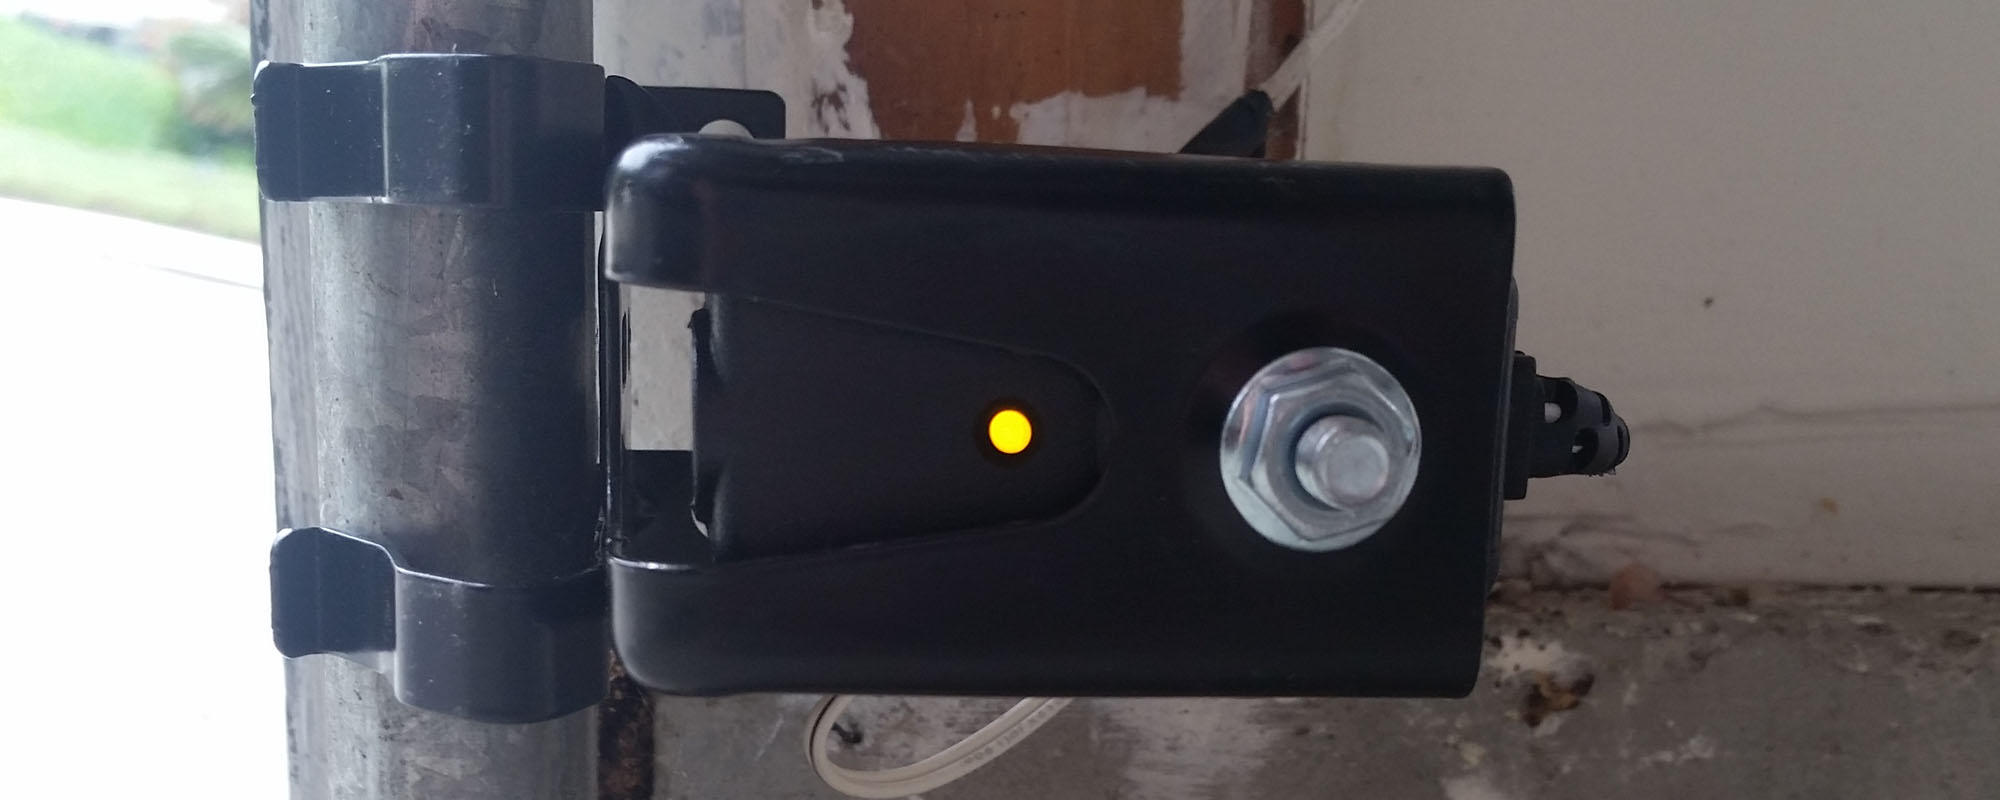
- Adjust the Garage Door Sensors: Inspect the safety sensors located near the bottom of the garage door tracks. Ensure they are properly aligned and free from dirt or debris. Adjust the sensors if necessary to ensure they are facing each other and the LED lights are lit solid.
- Replace Broken or Damaged Parts: If you identify any broken or damaged parts during your inspection, such as hinges, cables, or weather stripping, it’s important to replace them. Follow the manufacturer’s instructions or consult a professional if needed.
- Test the Garage Door Operation: After completing the repairs, it’s time to test the garage door’s functionality. Close and open the door several times to ensure smooth operation. Pay attention to any unusual noises or jerky movements, which may indicate further issues that need to be addressed.
By following these step-by-step instructions, you will be able to troubleshoot and fix common garage door problems. However, it’s important to note that some repairs may require professional assistance, especially when dealing with complex electrical or spring-related issues. Safety should always be a top priority, so if you are unsure or uncomfortable with any step, it’s best to seek professional help.
By properly maintaining and addressing any issues promptly, you can ensure your garage door remains in optimal condition, providing you with security and convenience for years to come.
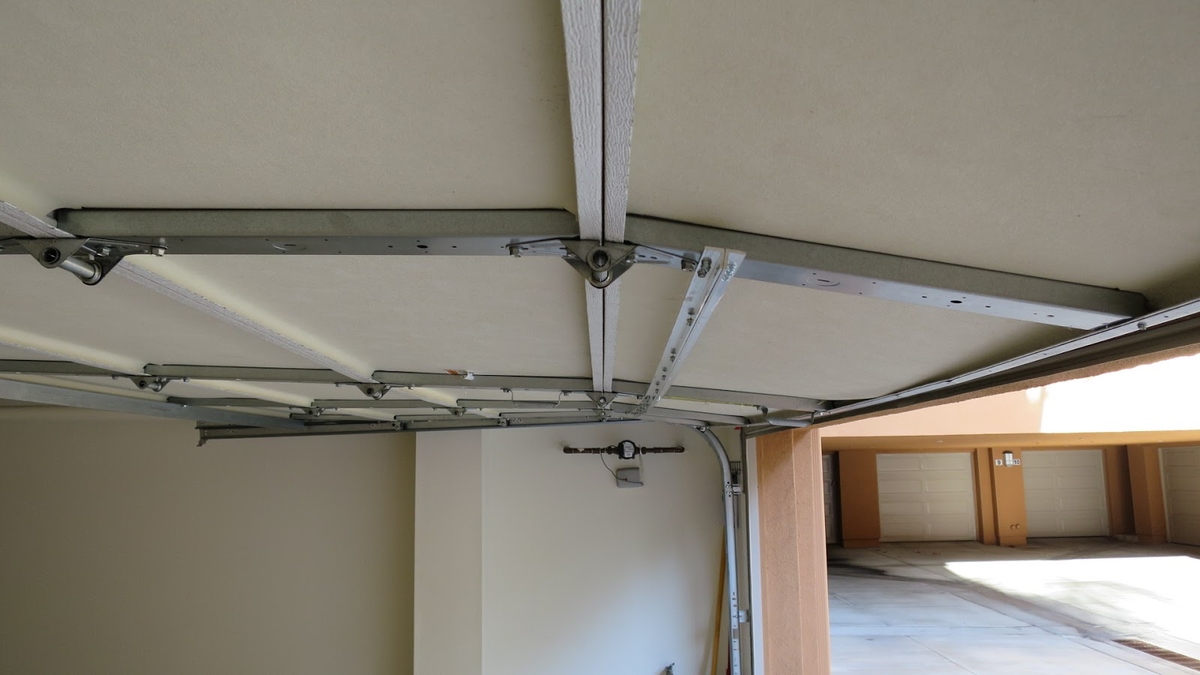
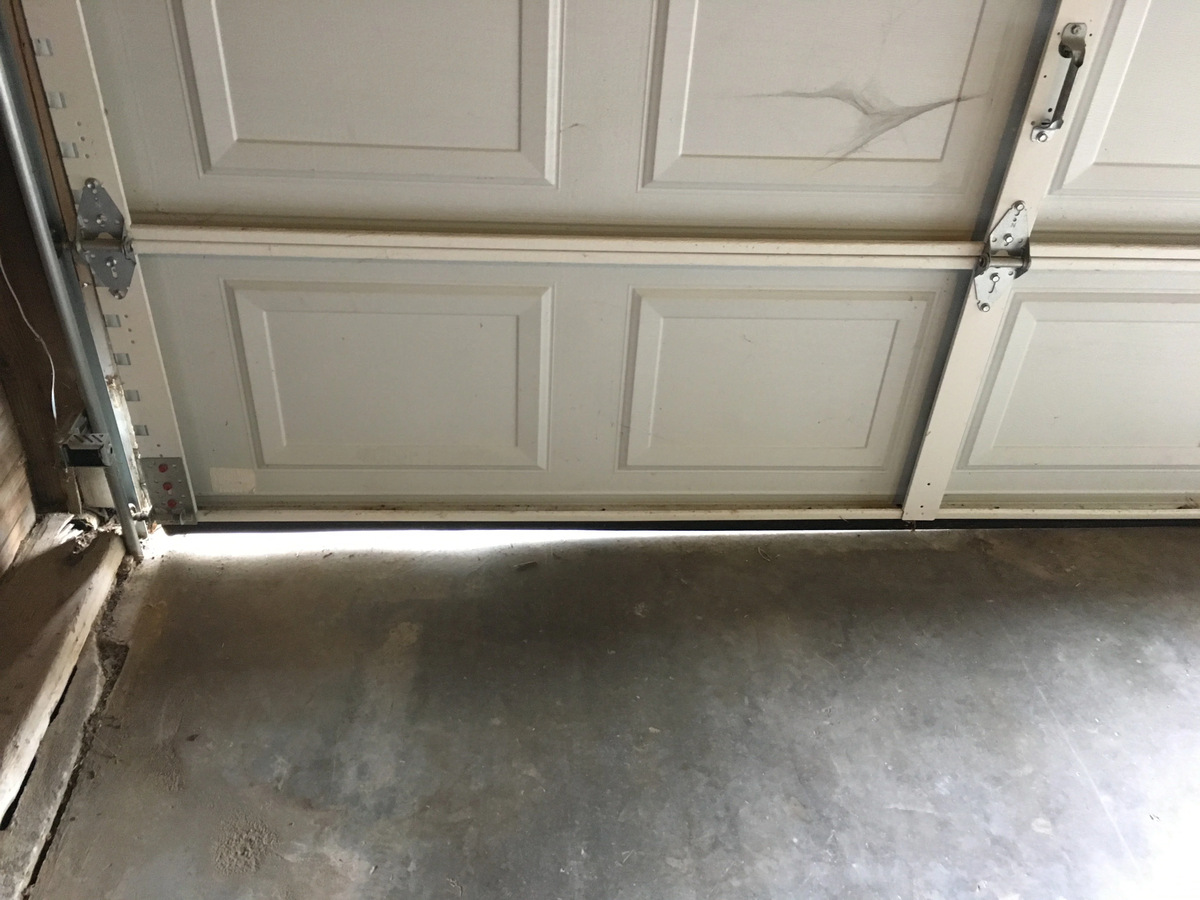
Inspect the Tracks and Rollers
The tracks and rollers are crucial components of your garage door system. Over time, they can become misaligned, worn out, or accumulate dirt and debris, which can affect the smooth operation of your door. Inspecting and maintaining these parts regularly is essential to prevent any major issues.
To inspect the tracks and rollers:
- Visual Inspection: Examine the tracks for any signs of damage, dents, or misalignment. Look for any loose or missing screws or bolts and tighten them if necessary.
- Check for Debris: Clear away any dirt, debris, or obstructions that may be blocking the tracks. Use a brush or a cloth to clean the tracks thoroughly.
- Align the Tracks: Use a level to ensure that the tracks are properly aligned. If you notice any misalignment, use a rubber mallet to gently tap the tracks back into place.
- Inspect the Rollers: Carefully examine the rollers for any signs of wear or damage. Look for cracked or chipped rollers, as they will need to be replaced. Ensure that the rollers are seated properly in the track and move smoothly along it.
- Lubricate the Rollers: Apply a small amount of lubricant, such as a silicone-based spray, to the rollers. This will help reduce friction and ensure smooth operation. Be cautious not to over-lubricate as excessive lubrication can attract dirt and debris.
Regularly inspecting and maintaining the tracks and rollers will not only keep your garage door operation smooth but also extend the lifespan of these components. If you notice any major damage or issues during the inspection, it’s recommended to consult a professional for further assessment and repairs.
Now that you have inspected the tracks and rollers, let’s move on to the next step: checking the springs.
Read more: How To Fix Crooked Garage Door
Check the Springs
The springs are critical components of your garage door system as they counterbalance the weight of the door, making it easier to open and close. Over time, springs can become worn out or break, causing issues with the operation of your garage door. Checking the springs regularly is essential to ensure their proper functioning.
To check the springs:
- Disconnect the Power: Before inspecting the springs, make sure to disconnect the power to your garage door opener to prevent any accidents or injuries.
- Visual Inspection: Take a close look at the springs and inspect them for any signs of damage, such as rust, stretching, or visible wear. If you notice any issues, it’s best to seek professional assistance, as working with garage door springs can be dangerous.
- Balance Test: If you suspect an issue with the springs, perform a balance test to check if they are properly balanced. Close the garage door and disconnect it from the opener by pulling the release cord. Lift the door manually, about halfway up. If it stays in place, the springs are balanced correctly. However, if the door rises or quickly falls, the springs may need adjustment or replacement.
It’s important to note that adjusting or replacing garage door springs should be done by a trained professional. These springs are under high tension and can cause serious injuries if mishandled. Hiring a professional technician ensures the proper adjustment or replacement of the springs, guaranteeing your safety.
If you notice any issues or suspect a problem with the springs, it’s best to contact a reputable garage door repair service. They have the expertise and specialized tools to safely handle and resolve any spring-related issues.
With the springs checked, let’s move on to the next step: testing the garage door opener.
Regularly lubricate the moving parts of your garage door, such as the rollers, hinges, and tracks, to ensure smooth operation and prevent wear and tear.
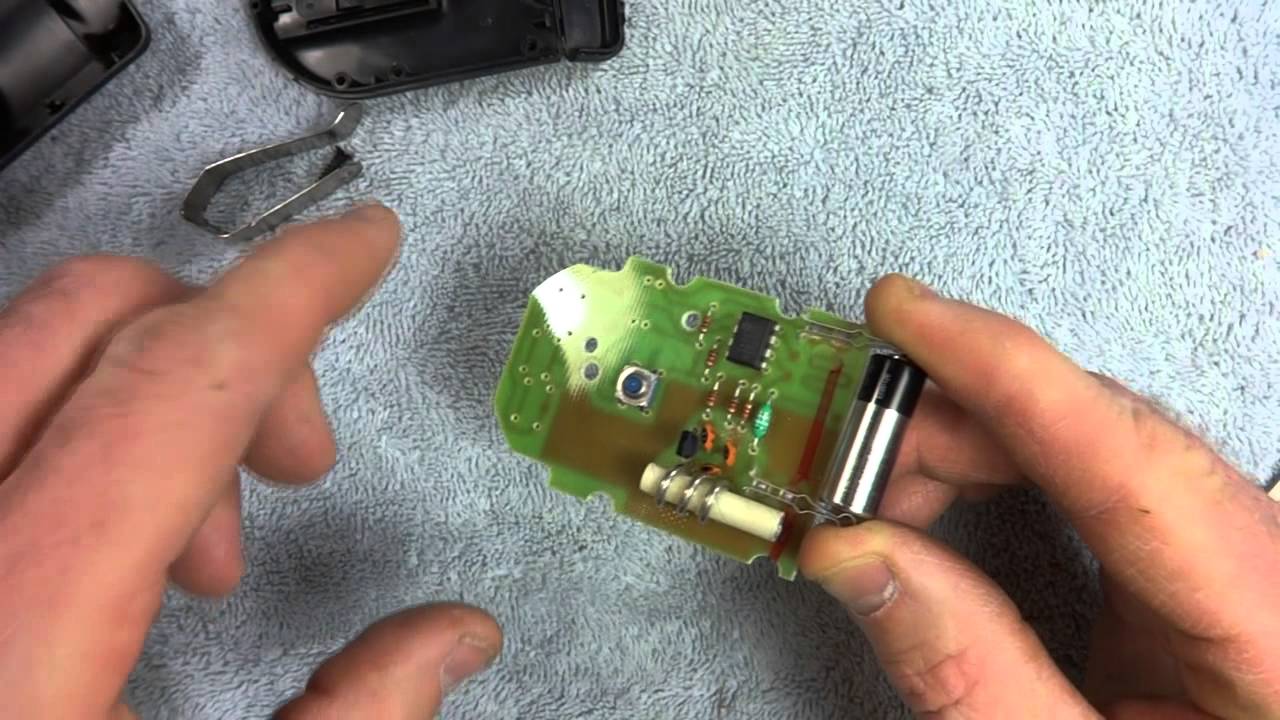
Test the Garage Door Opener
The garage door opener is responsible for the automated operation of your garage door. If you’re experiencing issues with your opener, such as it not responding to the remote or the wall button, it’s important to troubleshoot the problem before considering any major repairs or replacements.
To test the garage door opener:
- Check the Power: Ensure that the opener is receiving power. Check if the outlet is working properly and if the power cord is securely plugged in.
- Inspect the Sensors: The garage door opener is equipped with safety sensors located near the bottom of the door tracks. Make sure the sensors are aligned properly, clean, and free from any debris. Check if the LED lights on the sensors are lit solid, indicating proper functioning.
- Replace Batteries: If your garage door opener uses batteries, check if they are still functional. Replace the batteries if they’re dead or low.
- Reset the Opener: Try resetting the opener by unplugging it from the power source for a few minutes, then plugging it back in. This can help resolve minor electrical issues that may be causing the problem.
- Test the Remote: Press the buttons on your remote to check if the signal is being transmitted. If the remote doesn’t work, try replacing the batteries or reprogramming it according to the manufacturer’s instructions.
- Test the Wall Button: Press the wall button to see if the opener responds. If it doesn’t, there may be an issue with the wiring or the button itself, which might require professional attention.
If, after performing these tests, you’re still experiencing problems with your garage door opener, it may need further inspection or repair. In such cases, it’s recommended to contact a professional for assistance.
Testing the garage door opener is an important step in troubleshooting any issues you may be facing. By identifying the cause of the problem, you can determine whether it can be easily fixed or if it requires professional expertise.
Next, we’ll move on to step 4: lubricating the moving parts of your garage door.
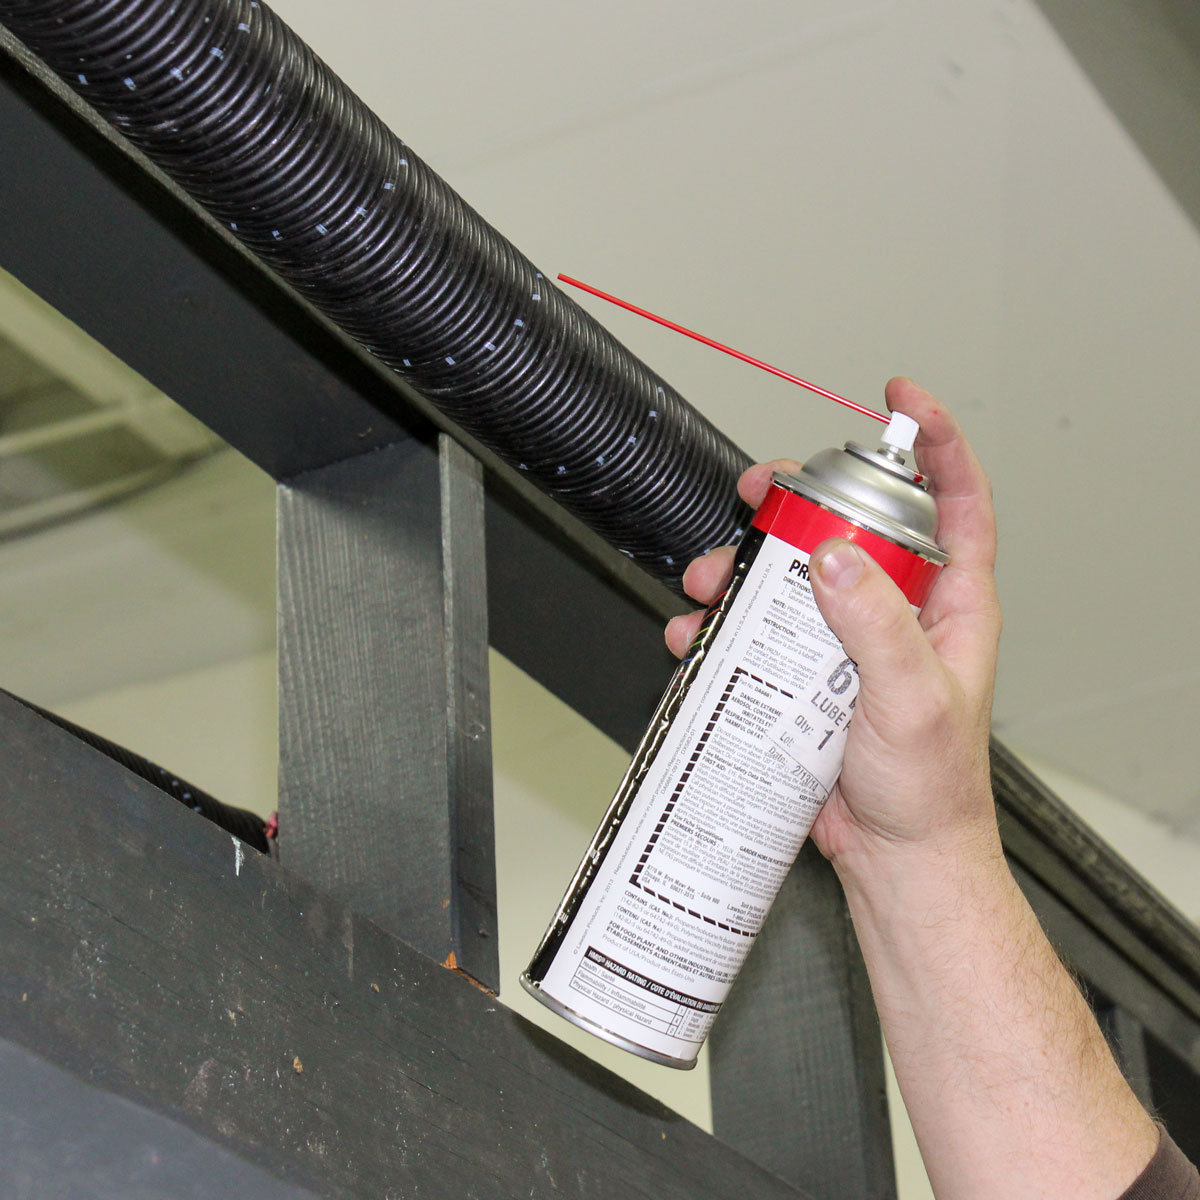
Lubricate Moving Parts
Lubricating the moving parts of your garage door is crucial for its smooth operation. Over time, these parts can become dry, causing friction and eventually leading to wear and tear. Regular lubrication helps reduce friction, prevent rust, and extend the lifespan of your garage door components.
To lubricate the moving parts:
- Clean the Parts: Before applying any lubricant, make sure to clean the moving parts of your garage door. Remove any dirt, dust, or debris that may have accumulated.
- Choose the Right Lubricant: Select a high-quality, silicone-based lubricant specifically designed for garage doors. Avoid using WD-40 or other solvent-based lubricants as they can attract dirt and cause more harm than good.
- Apply Lubricant: Apply a small amount of lubricant to the hinges, springs, rollers, and tracks. Focus on the areas where metal parts meet or slide against each other. Be sure to lubricate both sides of the hinges and the rollers.
- Operate the Door: Open and close the garage door several times to distribute the lubricant evenly across the moving parts. This will help ensure smooth operation.
- Wipe off Excess Lubricant: After lubricating the parts, use a clean cloth or rag to wipe off any excess lubricant. This will prevent it from collecting dirt and debris.
Regularly lubricating the moving parts of your garage door is a simple yet important maintenance task. It helps keep the components running smoothly and reduces the risk of premature wear and tear. Aim to lubricate your garage door at least once a year or if you notice any signs of dryness or increased friction during operation.
With the moving parts lubricated, let’s move on to the next step: adjusting the garage door sensors.
Adjust the Garage Door Sensors
The garage door sensors play a crucial role in ensuring the safety and proper functioning of your garage door system. They are responsible for detecting obstructions in the door’s path and preventing the door from closing if something is blocking it. If your garage door is not closing or opening properly, there may be an issue with the sensors that requires adjustment.
To adjust the garage door sensors:
- Check Sensor Alignment: Inspect the sensors, located near the bottom of the garage door tracks, to ensure they are properly aligned. They should be facing each other directly.
- Clean the Sensors: Clean the sensors and remove any dirt, dust, or debris that may be obstructing their view. Use a soft, clean cloth or a mild cleaner to gently wipe the sensors.
- Tighten Mounting Brackets: Check the mounting brackets that hold the sensors in place. Make sure they are securely tightened and not loose or wobbly.
- Adjust Sensor Alignment: If the sensors are misaligned, gently adjust them so that they face each other directly. Use a level if necessary to ensure they are perfectly aligned.
- Test Sensor Function: Once the sensors are aligned, test their functionality by closing the garage door. Place an object in the door’s path, about six inches off the ground. The door should stop and reverse its direction if the sensors are working correctly.
- Check Sensor Lights: Check the LED lights on the sensors. They should be solid and not blinking. If the lights are not lit or blinking, there may be an issue with the wiring or the sensors themselves that requires professional attention.
Properly adjusted garage door sensors are essential for safe and efficient operation. Regularly inspecting and maintaining them will help prevent accidents and ensure your garage door functions as intended.
If you’ve followed these steps and the garage door sensors are still not working properly, it may be necessary to call a professional garage door technician to diagnose and repair any underlying issues.
With the sensors properly adjusted, let’s move on to step 6: replacing broken or damaged parts.
Read more: How To Fix Garage Door Opener
Replace Broken or Damaged Parts
Over time, certain components of your garage door system may become worn out, broken, or damaged. It’s important to replace these faulty parts promptly to ensure the smooth and safe operation of your garage door.
To replace broken or damaged parts:
- Identify the Problematic Parts: Thoroughly inspect your garage door and its components to identify any broken or damaged parts. Common items that may require replacement include rollers, hinges, cables, weather stripping, and springs.
- Order Replacement Parts: Once you have identified the specific parts that need replacing, order them from a reputable supplier or contact a professional garage door repair service for assistance. Ensure that you get the correct parts that are compatible with your specific make and model of garage door.
- Disconnect the Power: Before starting any replacement work, disconnect the power to your garage door opener to prevent accidental activation.
- Follow Manufacturer’s Instructions: Carefully follow the manufacturer’s instructions for replacing the specific parts. Each component may have its own unique installation process. Make sure to use the appropriate tools and techniques recommended by the manufacturer.
- Exercise Caution: When replacing components such as springs or cables, ensure you take necessary safety precautions. These parts are under high tension and can cause injury if mishandled. If you are unsure about replacing certain parts, it’s best to seek professional assistance.
- Test the Door: Once the new parts are installed, test the operation of your garage door to ensure that it functions smoothly. Open and close the door several times, paying attention to any unusual noises or irregular movements.
Regularly inspecting and addressing broken or damaged parts of your garage door system is crucial for maintaining its performance and safety. Timely replacements can prevent further damage and more extensive repairs down the line.
If you’re unsure about any aspect of replacing parts or encounter difficulties during the process, don’t hesitate to seek professional help. Garage door repair experts have the necessary knowledge and experience to safely and efficiently replace any faulty components.
With the broken or damaged parts replaced, it’s time to move on to step 7: testing the garage door operation.
Test the Garage Door Operation
After completing the necessary repairs and replacements, it’s crucial to test the operation of your garage door to ensure that everything is functioning as expected. This final step will help verify that your efforts have successfully resolved any issues and that your garage door is operating smoothly and safely.
To test the garage door operation:
- Reconnect the Power: Once you have completed all repairs and replacements, reconnect the power to your garage door opener.
- Clear the Area: Make sure the area around the garage door is clear of any obstructions, vehicles, or objects.
- Open the Door: Use the garage door opener or press the wall button to open the door. Observe its movement as it opens, checking for any unusual noises or jerky movements.
- Close the Door: Next, close the door using the opener or the wall button. Again, pay attention to its movement and listen for any abnormal sounds.
- Observe Sensor Function: If your garage door is equipped with safety sensors, test their functionality by placing an object in the door’s path as it closes. The door should automatically stop and reverse if the sensors are functioning correctly.
- Listen for Noise: Listen for any unusual or excessive noise during the opening and closing process. Grinding, scraping, or squeaking sounds may indicate the need for further adjustments or maintenance.
- Ensure Proper Balance: Check if the garage door opens and closes smoothly without any resistance or imbalances. It should stay in place when partially opened and not fall or rise unexpectedly.
If you notice any issues during the testing phase, such as unusual noises, improper balance, or sensor malfunction, it may be necessary to revisit the respective repair steps or seek professional help for further diagnoses and adjustments.
By thoroughly testing the garage door operation, you can have peace of mind knowing that your repairs and replacements have been successful and that your garage door is functioning properly.
With the final step completed, you have now successfully fixed your garage door! Regular maintenance, periodic inspections, and prompt repairs will help keep your garage door in optimal condition, prolonging its lifespan and minimizing potential issues in the future.
Remember, if you encounter any difficulties or feel uncomfortable performing any repairs, it’s always best to consult a professional garage door technician for assistance.
Conclusion
Fixing common garage door problems can be a challenging task but with the right knowledge and tools, you can tackle them successfully. By following the step-by-step instructions outlined in this article, you can address issues such as misaligned tracks, faulty springs, malfunctioning openers, and worn-out parts.
Regular maintenance and prompt repairs are essential for ensuring the smooth and safe operation of your garage door. By addressing problems promptly, you can prevent further damage, extend the lifespan of your garage door, and avoid costly repairs in the future.
Remember to always prioritize safety when working on your garage door. Follow proper guidelines and precautions, disconnect the power when necessary, and seek professional help if you are unsure or uncomfortable with any steps.
By taking care of your garage door and addressing any issues in a timely manner, you can enjoy the convenience, security, and reliability it provides for years to come.
With the comprehensive knowledge and step-by-step instructions provided here, you are now equipped to fix garage door problems and maintain the optimal performance of your garage door.
Good luck with your garage door repairs and may your garage door continue to serve you well!
Frequently Asked Questions about How To Fix Garage Door
Was this page helpful?
At Storables.com, we guarantee accurate and reliable information. Our content, validated by Expert Board Contributors, is crafted following stringent Editorial Policies. We're committed to providing you with well-researched, expert-backed insights for all your informational needs.


0 thoughts on “How To Fix Garage Door”