
Articles
How To Fix Ryobi Weed Wacker
Modified: December 7, 2023
Learn how to fix your Ryobi Weed Wacker with articles that provide step-by-step instructions and troubleshooting tips.
(Many of the links in this article redirect to a specific reviewed product. Your purchase of these products through affiliate links helps to generate commission for Storables.com, at no extra cost. Learn more)
Introduction
Welcome to this comprehensive guide on how to fix your Ryobi Weed Wacker. Whether your trimmer is not starting, lacking power, or experiencing other issues, we’ve got you covered. Ryobi is a trusted brand known for their reliable and high-performance outdoor tools, including their weed wackers. However, even the best tools can encounter problems over time. Fortunately, many common issues with the Ryobi Weed Wacker can be easily resolved with a few simple steps.
In this guide, we will walk you through a step-by-step process to diagnose and fix common problems with your Ryobi Weed Wacker. Before we dive in, it’s important to prioritize safety. Always wear protective gear, such as goggles, gloves, and long pants, when operating or working on power tools. Ensure that the trimmer is turned off and disconnected from the power source before attempting any troubleshooting or repairs.
Before we get started, let’s take a moment to gather the necessary tools and materials you’ll need for the repair process.
Key Takeaways:
- Regular maintenance and troubleshooting of your Ryobi Weed Wacker can be easily accomplished by following the step-by-step guide provided. By addressing common issues such as power source checks, trimmer head inspections, and fuel system examinations, you can ensure optimal performance and longevity of your trimmer.
- Prioritizing safety, proper tool preparation, and thorough testing after repairs are essential for a successful troubleshooting process. By following these guidelines, you can confidently address and resolve various problems with your Ryobi Weed Wacker, ensuring a seamless trimming experience.
Read more: How To Start Ryobi Weed Wacker
Safety Precautions
When working with any power tool, including the Ryobi Weed Wacker, it’s essential to prioritize safety. Follow these precautions to prevent accidents or injuries:
- Wear protective gear: Always wear goggles or safety glasses to protect your eyes from debris or flying objects. Use gloves to protect your hands and long pants to cover your legs.
- Turn off the power: Before inspecting or repairing the weed wacker, make sure it is turned off and disconnected from the power source. This will prevent any accidental starts or electric shocks.
- Keep a safe distance: Ensure that there are no bystanders or pets near your work area. Maintain a safe distance from others to prevent accidents.
- Use a stable work surface: When performing maintenance or repairs, place the weed wacker on a stable and level surface. This will help prevent it from tipping over during the process.
- Inspect the power cord: If your Ryobi Weed Wacker is corded, inspect the power cord for any damages or frayed wires. Do not use the trimmer if the cord is damaged, as it poses a safety hazard.
- Avoid overexertion: Do not push the weed wacker beyond its recommended capacity. Excessive force can lead to strain or injury.
- Read the user manual: Familiarize yourself with the safety guidelines provided in the user manual. This will help you understand the proper operation and precautions specific to your Ryobi Weed Wacker model.
By following these safety precautions, you can ensure a safer working environment while working on your Ryobi Weed Wacker.
Tools and Materials Needed
Before you start troubleshooting and fixing your Ryobi Weed Wacker, gather the following tools and materials:
- Wrench or socket set: Depending on your specific model, you may need a wrench or socket set to loosen and tighten certain components of the trimmer.
- Screwdriver: A flathead or Phillips screwdriver will be needed to remove screws or access internal parts of the weed wacker.
- Needle-nose pliers: Pliers can be handy for gripping and manipulating small parts or wires within the trimmer.
- Air compressor or compressed air canister: This is useful for cleaning debris and dust from various parts of the weed wacker, such as the air filter or spark plug.
- Replacement parts: Depending on the specific issue you are facing, you may need to have replacement parts on hand, such as a new spark plug, air filter, or cutting line.
- Clean cloth: A soft, clean cloth will be useful for wiping away dirt, grease, or debris from the trimmer.
- Cleaning solution: Prepare a mild cleaning solution, such as a mixture of soap and water, to clean the trimmer and its components.
- Fuel: If you suspect a fuel-related issue, ensure you have fresh fuel available to test the trimmer after troubleshooting.
Having these tools and materials ready will ensure that you can efficiently diagnose, fix, and maintain your Ryobi Weed Wacker without any unnecessary delays.
Step 1: Assess the Problem
The first step in fixing your Ryobi Weed Wacker is to assess the problem. This involves identifying the specific issue or symptom that the trimmer is experiencing. Here are a few common problems you may encounter:
- The weed wacker won’t start
- The weed wacker starts but lacks power
- The cutting line doesn’t advance properly
- The trimmer head is jammed
- There is excessive vibration during operation
- The engine runs rough or stalls
- The trimmer emits excessive smoke
By carefully observing the weed wacker’s behavior, you can narrow down the potential causes and proceed with the appropriate troubleshooting steps. For example, if the weed wacker won’t start at all, the issue might be related to the fuel system, spark plug, or ignition coil. On the other hand, if the weed wacker starts but lacks power, there may be a problem with the air filter, carburetor, or fuel mixture.
Take note of any unusual sounds, smells, or visible damage as you assess the problem. This information will help you later in the troubleshooting process. It’s also a good idea to consult the user manual for your specific Ryobi Weed Wacker model. The manual may have troubleshooting tips and diagrams that can aid in the assessment and repair process.
Once you have identified the specific problem or symptom, you can move on to the next steps in troubleshooting and fixing your Ryobi Weed Wacker.
Step 2: Check the Power Source
When your Ryobi Weed Wacker is not starting or experiencing power-related issues, it’s important to check the power source. Here are the steps to follow:
- Check the power cord (if corded): If your trimmer is corded, inspect the power cord for any damages or frayed wires. A damaged cord can prevent power from reaching the weed wacker. If you find any issues, it’s crucial to replace the cord before proceeding.
- Test the power outlet: Ensure that the power outlet you are using is working properly. Plug in another device or tool to verify if the outlet is supplying electricity. If the outlet is not functioning, try using a different outlet or consider resetting the circuit breaker.
- Check the battery (if cordless): If your Ryobi Weed Wacker is cordless, ensure that the battery is fully charged and properly inserted into the trimmer. If the battery is old or not holding a charge, it may need to be replaced.
- Clean the battery terminals (if applicable): If corrosion is present on the battery terminals, use a wire brush or a cloth soaked in vinegar to remove the buildup. This can improve the connection between the battery and the trimmer.
By completing these checks, you can troubleshoot and eliminate power-related issues that may be preventing your Ryobi Weed Wacker from starting or functioning properly. If the power source is not the cause of the problem, it’s time to move on to the next troubleshooting step.
Read more: How To Load Ryobi Weed Wacker
Step 3: Inspect the Trimmer Head
The trimmer head of your Ryobi Weed Wacker is an essential component that houses the cutting line. If you are experiencing issues with the cutting line not advancing properly or the trimmer head getting jammed, follow these steps to inspect and address the problem:
- Turn off the trimmer: Before inspecting the trimmer head, ensure that the weed wacker is turned off and disconnected from the power source. This will prevent any accidental starts or injuries.
- Inspect the trimmer head: Look for any signs of damage, such as cracks, excessive wear, or debris accumulation. If the trimmer head is damaged, it may need to be replaced. Clean out any debris or tangled cutting line that may be causing the jam, as this can impede the line from advancing correctly.
- Check the cutting line: Examine the cutting line to ensure it is properly wound and not tangled. If the line is worn out or broken, replace it with the appropriate size and type recommended by the manufacturer.
- Reassemble and test: Once you have inspected the trimmer head and addressed any issues, reassemble it and reattach it to the weed wacker. Test the trimmer to confirm that the cutting line advances smoothly and the trimmer head rotates without any obstructions. Make any necessary adjustments to ensure proper functionality.
By inspecting and maintaining the trimmer head, you can prevent issues with the cutting line and ensure smooth operation of your Ryobi Weed Wacker. If the problem persists or you encounter other issues, it’s time to move on to the next troubleshooting step.
Step 4: Clean or Replace the Spark Plug
A fouled or malfunctioning spark plug can cause your Ryobi Weed Wacker to have difficulties starting or running smoothly. Follow these steps to clean or replace the spark plug:
- Turn off the trimmer: Ensure that the weed wacker is turned off and disconnected from the power source.
- Locate the spark plug: The spark plug is typically located near the engine. Refer to your user manual for the exact location and specifications of the spark plug for your Ryobi Weed Wacker model.
- Remove the spark plug: Use a wrench or socket to carefully remove the spark plug from the trimmer. Be cautious not to damage the spark plug or surrounding components.
- Inspect the spark plug: Examine the spark plug for signs of damage, such as a worn electrode, carbon deposits, or fouling. If the spark plug appears dirty or damaged, it is recommended to replace it with a new one.
- Clean the spark plug (if applicable): If the spark plug is dirty but still in good condition, you can clean it using a wire brush or a spark plug cleaner. Gently brush off any carbon deposits or debris, being careful not to damage the electrode. Make sure the spark plug is completely dry before reinstalling it.
- Replace the spark plug: If the spark plug is damaged, worn out, or cleaning doesn’t improve its condition, it’s best to replace it with a new one. Install the new spark plug, tightening it securely but not excessively.
- Reassemble and test: Once the spark plug is cleaned or replaced, reassemble any components that were removed. Restart the weed wacker and observe if the issue has been resolved. If the problem persists, proceed to the next troubleshooting step.
By cleaning or replacing the spark plug, you can ensure a strong and reliable spark, facilitating the proper ignition of the fuel-air mixture in the engine of your Ryobi Weed Wacker. This can significantly improve its starting and running performance.
When fixing a Ryobi weed wacker, start by checking the spark plug, air filter, and fuel system for any clogs or damage. Clean or replace as needed to ensure proper engine function.
Step 5: Clean or Replace the Air Filter
The air filter in your Ryobi Weed Wacker plays a crucial role in preventing dirt, debris, and other contaminants from entering the engine. Over time, the air filter can become clogged, restricting airflow and affecting the performance of the weed wacker. Follow these steps to clean or replace the air filter:
- Turn off the trimmer: Before proceeding, ensure that the weed wacker is turned off and disconnected from the power source.
- Locate the air filter: Refer to your user manual to locate the air filter. It is typically situated near the carburetor or air intake system.
- Remove the air filter: Depending on the design of your trimmer, you may need to unscrew or unlatch a cover to access the air filter. Carefully remove the air filter from its housing.
- Inspect the air filter: Evaluate the condition of the air filter. If it appears dirty, clogged, or damaged, it is recommended to replace it. A severely clogged air filter may not be salvageable even with cleaning.
- Clean the air filter (if reusable): If the air filter is reusable and not excessively damaged, you can clean it using either compressed air or by gently rinsing it with warm soapy water. Allow the air filter to fully dry before reinstalling it.
- Replace the air filter (if necessary): If the air filter is no longer functional or cleaning doesn’t restore its effectiveness, it’s best to replace it with a new filter that matches the specifications of your Ryobi Weed Wacker.
- Reassemble and test: Once the air filter is cleaned or replaced, carefully reinsert it into its housing and secure any cover or latch. Start the weed wacker and observe if the performance has improved. If the issue persists, proceed to the next troubleshooting step.
By regularly cleaning or replacing the air filter, you can ensure proper airflow to the engine and maintain the optimal performance of your Ryobi Weed Wacker. A clean air filter will help minimize engine strain and prolong the life of the trimmer.
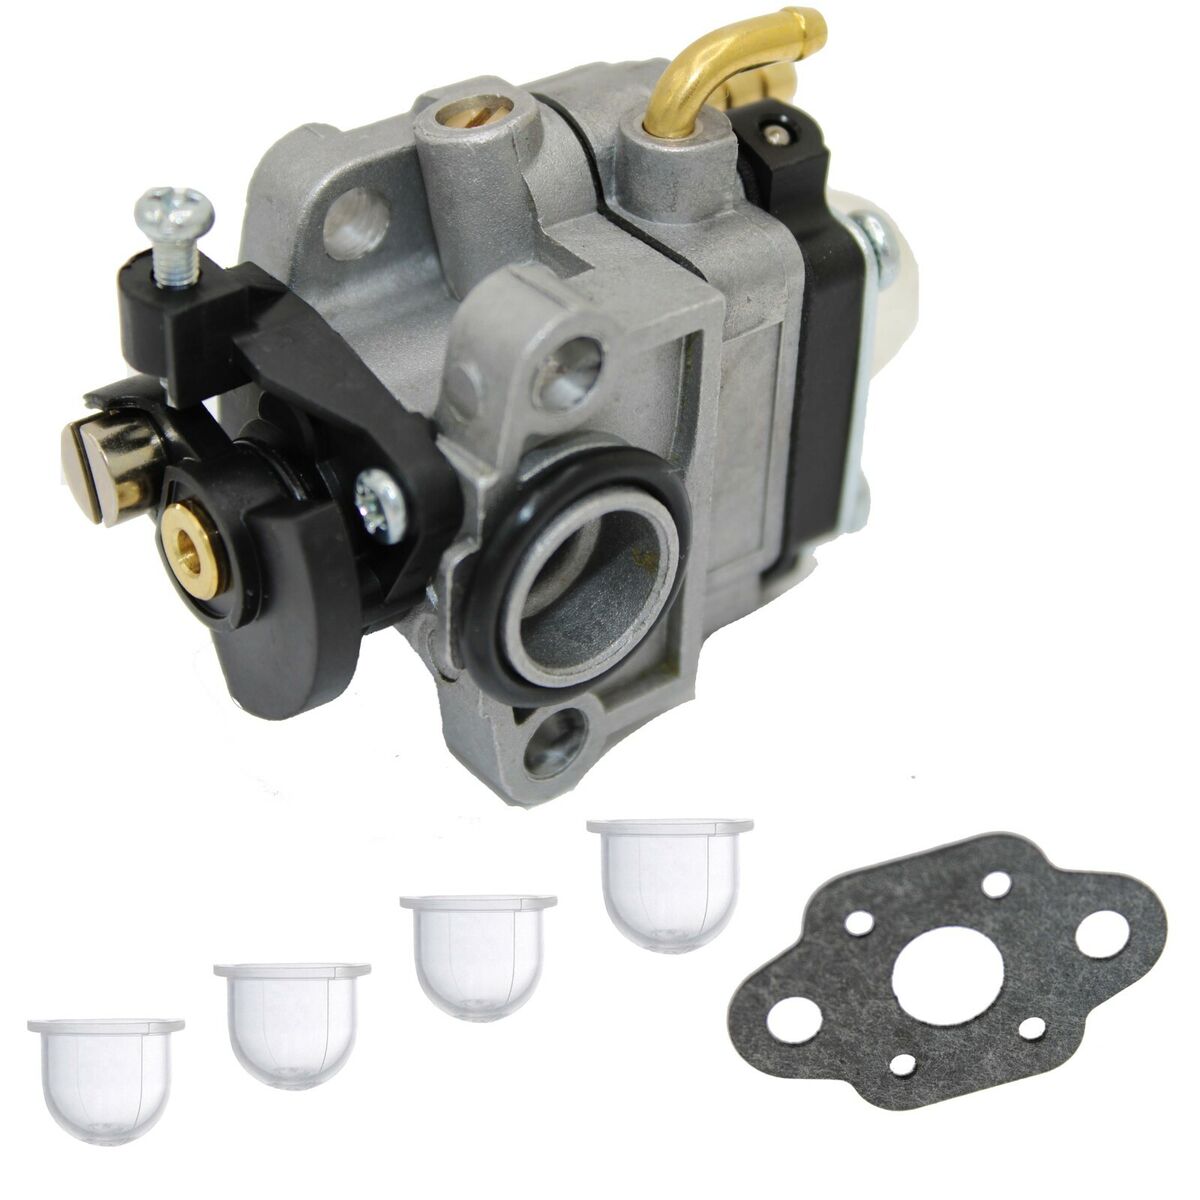
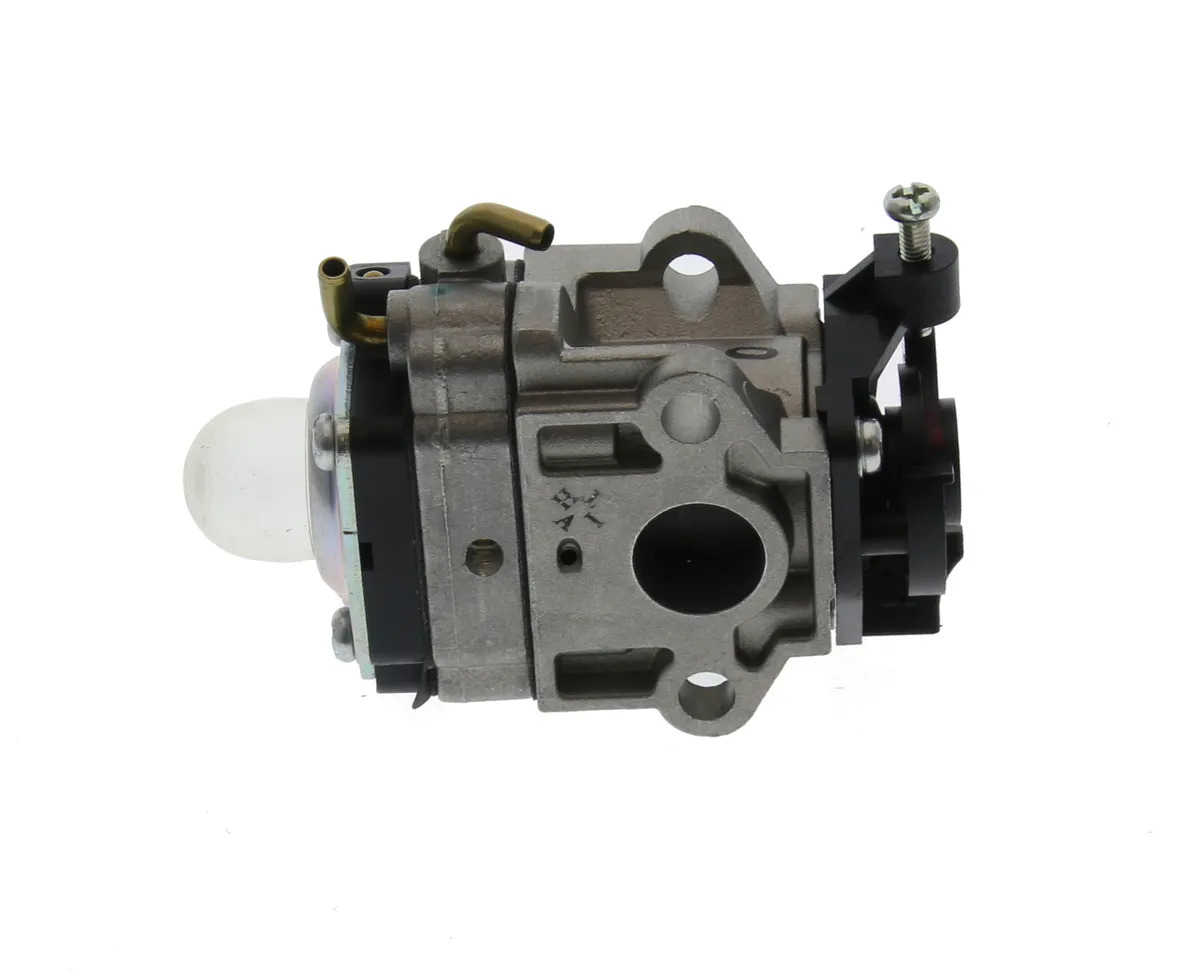
Step 6: Check the Fuel System
Issues with the fuel system can cause your Ryobi Weed Wacker to experience starting problems, poor performance, or stalling. To address any fuel-related issues, follow these steps:
- Turn off the trimmer: Before inspecting the fuel system, make sure the weed wacker is turned off and disconnected from the power source.
- Inspect the fuel tank: Check the fuel tank for any signs of contamination, such as dirt, water, or old fuel. If the fuel is contaminated or has been sitting for an extended period, it’s best to drain the tank and refill it with fresh fuel.
- Inspect the fuel lines: Examine the fuel lines for any cracks, leaks, or blockages. A damaged or clogged fuel line can interfere with the fuel flow. If necessary, replace any damaged or deteriorated fuel lines with the appropriate replacements.
- Check the fuel filter: Locate the fuel filter, which is typically attached to the end of the fuel line inside the fuel tank. If the fuel filter is dirty or clogged, it can restrict the fuel flow. Clean the filter or replace it with a new one, depending on its condition.
- Inspect the carburetor: The carburetor is responsible for mixing fuel and air for combustion. If the weed wacker is experiencing performance issues, the carburetor may be clogged or not functioning correctly. It is recommended to clean the carburetor thoroughly or consult a professional for assistance.
- Check the fuel cap: Ensure that the fuel cap is properly tightened. A loose or faulty fuel cap can cause fuel to leak or not allow sufficient pressure buildup in the fuel system.
- Reassemble and test: Once you have inspected and addressed any issues with the fuel system components, carefully reassemble the trimmer and test its performance. If the problem persists, move on to the next troubleshooting step.
By checking and maintaining the fuel system, you can ensure the proper flow of fuel to the engine, resulting in improved starting and overall performance of your Ryobi Weed Wacker.
Read more: How To Change Spool In Ryobi Weed Wacker
Step 7: Examine the Cutting Line
The cutting line in your Ryobi Weed Wacker is subjected to wear and tear during operation, and it’s important to ensure it is in good condition for optimal performance. Follow these steps to examine and address any issues with the cutting line:
- Turn off the trimmer: Before examining the cutting line, ensure that the weed wacker is turned off and disconnected from the power source.
- Inspect the cutting line: Examine the cutting line for any signs of wear, damage, or breakage. Look for frayed ends, excessive wear, or a shorter-than-normal line length. If the cutting line is damaged or worn out, it’s best to replace it.
- Replace the cutting line: If the cutting line needs to be replaced, follow the instructions in your user manual for the appropriate replacement line size and type. Carefully remove the old line and install the new line, ensuring it is securely in place.
- Properly wind the cutting line: If the cutting line is intact but not advancing properly, it may be improperly wound on the trimmer head. Make sure the line is properly wound according to the manufacturer’s instructions.
- Adjust the line length: If the cutting line is too short, it may not effectively trim vegetation. Adjust the line length according to your needs by feeding out more line, if possible, using the trimmer head’s mechanism.
- Clean the trimmer head: Remove any debris, grass clippings, or tangled line from the trimmer head. A clean trimmer head will ensure smooth operation and effective cutting.
- Reassemble and test: Once the cutting line is properly examined, replaced, and the trimmer head is cleaned, reassemble any components that were removed. Start the weed wacker and test its performance. If you still encounter issues, proceed to the next troubleshooting step.
By examining and maintaining the cutting line, you can ensure effective cutting performance and extend the life of your Ryobi Weed Wacker. A well-maintained cutting line will help you achieve clean and precise trimming results.
Step 8: Lubricate the Trimmer Head
Lubricating the trimmer head of your Ryobi Weed Wacker is an important step in ensuring smooth operation and prolonging the lifespan of the trimmer. Follow these steps to lubricate the trimmer head:
- Turn off the trimmer: Before lubricating the trimmer head, make sure the weed wacker is turned off and disconnected from the power source.
- Clean the trimmer head: Use a clean cloth or brush to remove any dirt, debris, or grass clippings from the trimmer head. A clean trimmer head allows for better lubrication and prevents buildup that may impede its rotation.
- Apply lubricant: Choose a lubricant specifically designed for trimmer heads or general-purpose lubricant such as silicone lubricant. Apply a small amount of lubricant to the moving parts of the trimmer head, such as the spindle or gears. Be careful not to over-apply, as excessive lubricant can attract more debris and cause buildup.
- Rotate the trimmer head: Manually rotate the trimmer head a few times to distribute the lubricant evenly and ensure all moving parts are adequately coated. This will help reduce friction and minimize wear during operation.
- Wipe off excess lubricant: Use a clean cloth to wipe off any excess lubricant from the trimmer head. Leaving excess lubricant can attract dirt and debris, which may affect the trimmer’s performance over time.
- Perform regular maintenance: Lubricate the trimmer head periodically, based on the manufacturer’s recommendations or as needed. Regular maintenance will keep the trimmer head running smoothly and help prevent premature wear or damage.
- Reassemble and test: Once the trimmer head is lubricated and excess lubricant is wiped off, reassemble any components that were removed. Test the trimmer to ensure the lubrication has improved its performance. If the issue persists, move on to the next troubleshooting step.
By lubricating the trimmer head, you can maintain smooth operation and reduce friction, leading to improved cutting performance and a longer lifespan for your Ryobi Weed Wacker.
Step 9: Test the Weed Wacker
After completing the previous steps of troubleshooting and fixing your Ryobi Weed Wacker, it’s time to test the trimmer to see if the issues have been resolved. Follow these steps to properly test the weed wacker:
- Prepare the trimmer: Ensure that the trimmer is fully assembled, all components are securely in place, and any covers or latches are properly closed.
- Connect the power source: If your Ryobi Weed Wacker is corded, connect it to a power outlet. If it is cordless, ensure that the battery is fully charged and properly inserted into the trimmer.
- Turn on the trimmer: Start the weed wacker according to the manufacturer’s instructions. This may involve pressing a power switch, pulling a recoil starter rope, or engaging the throttle trigger.
- Observe the operation: Pay close attention to the performance of the trimmer. Check for smooth operation, proper cutting line advancement, and consistent power output. Listen for any unusual sounds or vibrations.
- Test different functions: Engage the different functions of the trimmer, such as increasing or decreasing the speed, activating the line advance mechanism, or adjusting the cutting height. Ensure that all functions are working correctly and smoothly.
- Check for any remaining issues: If you notice any lingering problems or issues with the trimmer, refer back to the corresponding troubleshooting steps to identify and address the underlying cause. It may be necessary to repeat certain steps or seek further assistance.
- Perform regular maintenance: Even after successfully testing the weed wacker, it is crucial to perform regular maintenance tasks such as cleaning, lubricating, and inspecting the trimmer. This will help prevent future issues and maintain the trimmer’s optimal performance.
By properly testing your Ryobi Weed Wacker after troubleshooting and making necessary repairs, you can ensure that it is functioning correctly and ready for use. Regular maintenance will help keep your trimmer in peak condition and extend its lifespan.
Conclusion
Congratulations! You have successfully learned how to troubleshoot and fix common issues with your Ryobi Weed Wacker. By following the step-by-step guide in this article, you should now have the knowledge and skills to address various problems that may arise with your trimmer.
Throughout the troubleshooting process, we covered important steps such as assessing the problem, checking the power source, inspecting the trimmer head, cleaning or replacing the spark plug, cleaning or replacing the air filter, checking the fuel system, examining the cutting line, lubricating the trimmer head, and finally, testing the weed wacker.
Remember, safety should always be a priority when working with power tools. Always wear protective gear, turn off the trimmer, and disconnect it from the power source before attempting any troubleshooting or repairs. If you are ever unsure or uncomfortable with the repair process, it is recommended to seek professional assistance.
Regular maintenance and preventive care are essential for keeping your Ryobi Weed Wacker in top shape. Clean the trimmer regularly, replace worn-out parts as needed, and follow the manufacturer’s guidelines for maintenance intervals.
We hope that this guide has helped you resolve the issues with your Ryobi Weed Wacker and improve its performance. With a properly functioning trimmer, you can enjoy seamless trimming, precise cutting, and efficient operation for all your landscaping needs.
Thank you for reading, and happy trimming!
Frequently Asked Questions about How To Fix Ryobi Weed Wacker
Was this page helpful?
At Storables.com, we guarantee accurate and reliable information. Our content, validated by Expert Board Contributors, is crafted following stringent Editorial Policies. We're committed to providing you with well-researched, expert-backed insights for all your informational needs.


0 thoughts on “How To Fix Ryobi Weed Wacker”