Articles
How To Adjust A Ryobi Carburetor
Modified: February 27, 2024
Learn how to adjust a Ryobi carburetor with this informative article. Find step-by-step instructions and troubleshooting tips to ensure optimal performance of your Ryobi power tool.
(Many of the links in this article redirect to a specific reviewed product. Your purchase of these products through affiliate links helps to generate commission for Storables.com, at no extra cost. Learn more)
Introduction
Having a Ryobi carburetor that is properly adjusted is essential for optimal engine performance. The carburetor is responsible for mixing air and fuel in the right proportions, allowing the engine to run smoothly and efficiently. Over time, carburetors can become out of adjustment due to factors like wear and tear, changes in fuel quality, or environmental conditions.
In this article, we will guide you through the process of adjusting a Ryobi carburetor to ensure that it is functioning at its best. Proper adjustments will not only improve the engine’s performance but also increase fuel efficiency and reduce emissions.
Before we dive into the adjustment process, it’s important to understand the basics of how the Ryobi carburetor operates.
Key Takeaways:
- Properly adjusting a Ryobi carburetor is crucial for optimal engine performance, fuel efficiency, and reduced emissions. Understanding the components and following a step-by-step adjustment process will ensure smooth and reliable engine operation.
- By using the right tools, preparing the engine, and making incremental adjustments, you can fine-tune the idle speed and high-speed screws of your Ryobi carburetor. Thorough testing and verification will result in improved engine performance and fuel efficiency.
Read more: How To Clean Ryobi Weed Eater Carburetor
Understanding the Ryobi Carburetor
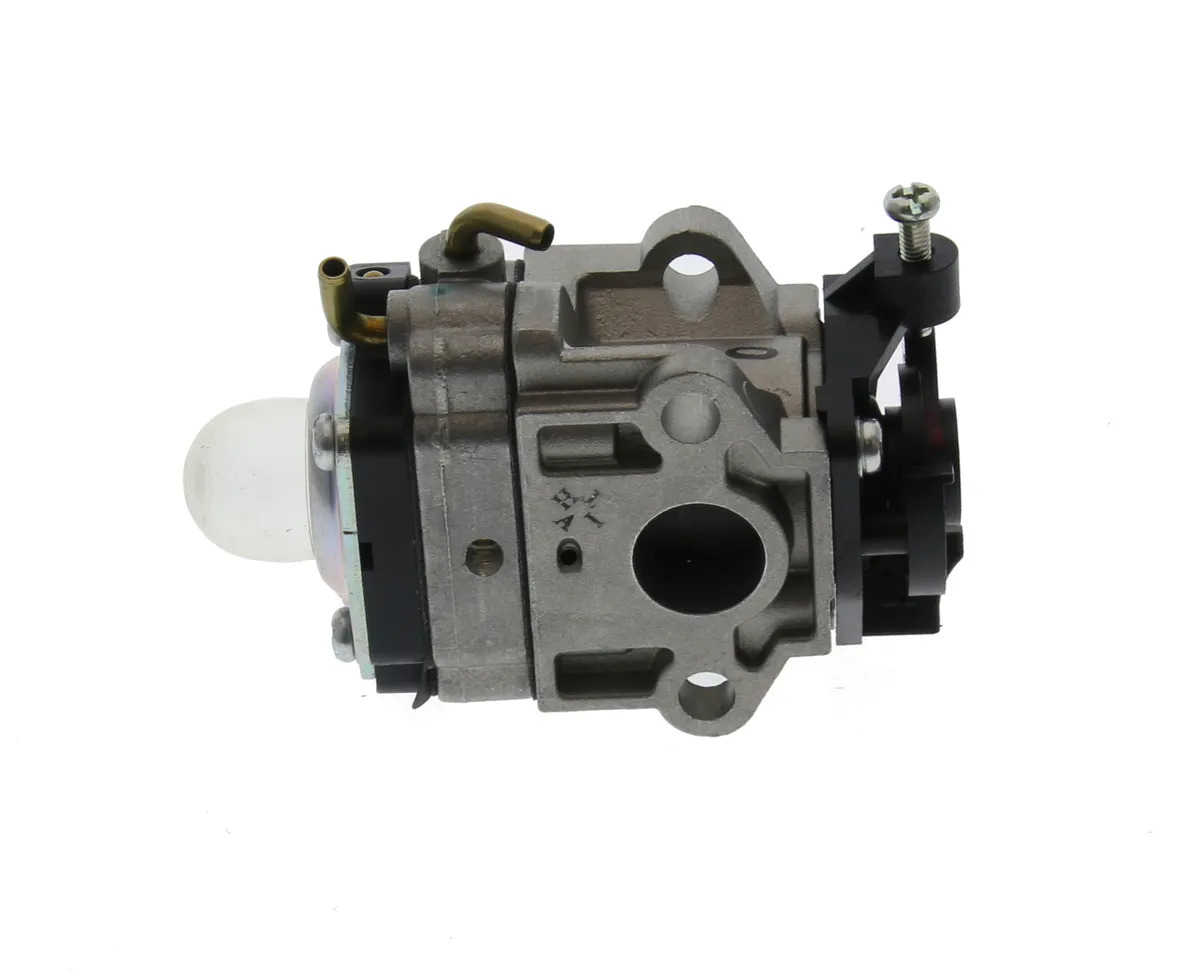
The Ryobi carburetor is a crucial component of the engine’s fuel system. It works by mixing air and fuel in the correct proportions to create a combustible mixture that powers the engine. Understanding the different parts and their functions will help you better adjust the carburetor.
Key components of the Ryobi carburetor include:
- Main Jet: This screw controls the fuel flow rate in the carburetor’s main circuit. Turning it clockwise will decrease fuel flow, while turning it counterclockwise will increase fuel flow.
- Idle Speed Screw: This screw controls the idle rpm of the engine. Adjusting it correctly is important for a smooth and consistent idle speed.
- High Speed Screw: This screw regulates the fuel-air mixture at high engine speeds. It is responsible for the engine’s power output during full throttle operation.
- Choke: The choke is used to enrich the fuel-air mixture during cold starts. It restricts the airflow, creating a richer mixture that is easier to ignite in cold weather.
Having a clear understanding of these components will make the adjustment process smoother and more effective. It’s also important to note that the exact location and design of these components may vary depending on the specific model of the Ryobi carburetor you have.
Now that you are familiar with the key components, let’s move on to the tools and materials you will need for adjusting the carburetor.
Tools and Materials Needed
Before you can start adjusting the Ryobi carburetor, it’s important to gather the necessary tools and materials. Having everything you need at hand will make the process more efficient and ensure that you can complete the adjustment properly.
Here are the tools and materials you will need:
- Screwdriver Set: A set of screwdrivers with different sizes and types will be required to access and adjust the screws on the carburetor.
- Tachometer: A tachometer is a device used to measure the engine’s speed in revolutions per minute (RPM). It will help you monitor and adjust the idle and high-speed settings accurately.
- Protective Gloves: It’s always a good idea to wear protective gloves to keep your hands safe from any sharp edges or hot surfaces.
- Shop Towel or Rag: Having a towel or rag on hand will help you clean any debris or excess fuel that may be present during the adjustment process.
- Fresh Fuel: It’s recommended to have fresh fuel in the tank to ensure accurate adjustments. Stale or contaminated fuel can affect the carburetor’s performance.
By gathering these tools and materials before starting the adjustment process, you will save time and ensure that you have everything you need to make the necessary adjustments to your Ryobi carburetor.
Now that you have everything ready, let’s move on to the step-by-step process of adjusting the carburetor.
Step 1: Preparation
Before diving into the adjustment process, it’s crucial to take a few preparatory steps to ensure a smooth and successful carburetor adjustment.
1. Read the Manual: Familiarize yourself with the Ryobi user manual for your specific model. The manual will provide important information on the carburetor adjustment procedure and any specific nuances or considerations for your particular model.
2. Ensure Safety: It’s important to work in a well-ventilated area and ensure that the engine is turned off and cool before starting any adjustments. This will prevent any accidents or injuries during the process.
3. Clean the Carburetor: Inspect the carburetor for any dirt, debris, or clogs that may affect its performance. Clean it using a carburetor cleaner and a soft brush. Make sure all the passages and jets are clear and free of obstructions.
4. Set the Initial Adjustment: Begin by setting the initial adjustment for both the idle speed screw and high-speed screw. Turn them clockwise until they are gently seated, being careful not to overtighten. Then, turn them counterclockwise as specified in the user manual, usually between 1 to 1.5 turns.
By following these preparatory steps, you will ensure that you have a clean and well-maintained carburetor, as well as an initial adjustment to work with. Now that you are prepared, let’s move on to locating the adjustment screws in the next step.
Step 2: Locating the Adjustment Screws
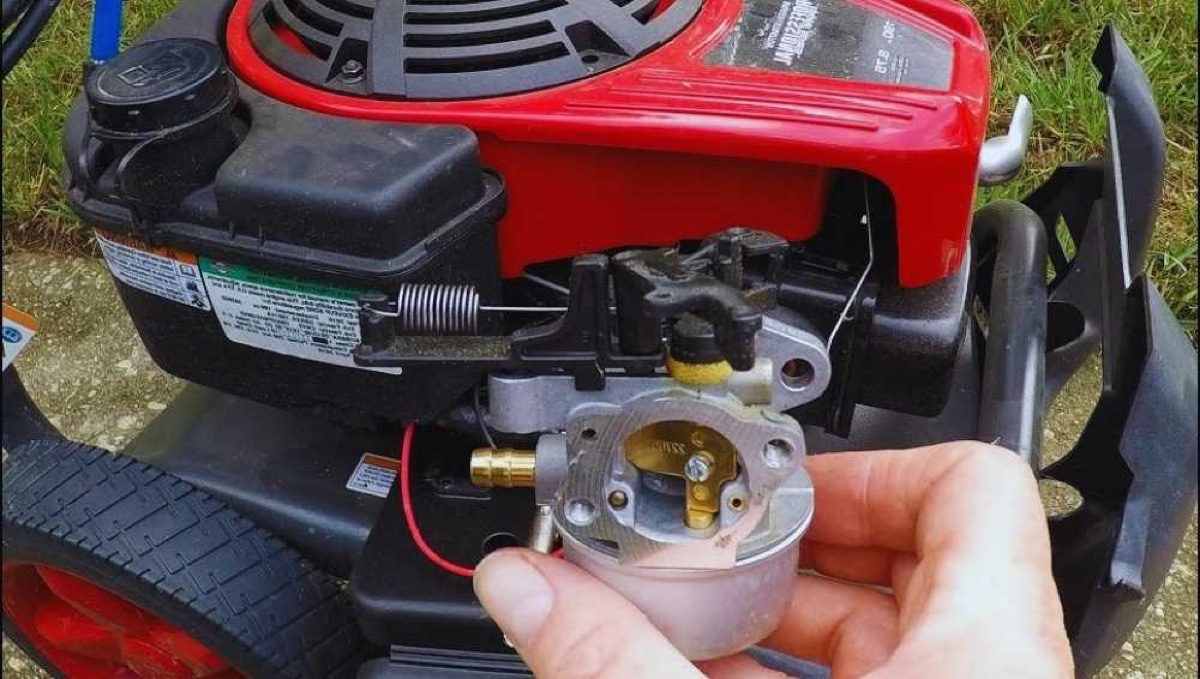
In order to adjust the Ryobi carburetor, it’s important to locate the adjustment screws. These screws control the flow of fuel and air within the carburetor, allowing you to fine-tune its performance. The location of these screws may vary depending on the specific model of your Ryobi carburetor, but they are typically found on the side or bottom of the carburetor.
Here’s how to locate the adjustment screws:
- Consult the User Manual: Refer to the user manual for your Ryobi carburetor to determine the exact location of the adjustment screws. The manual will provide detailed instructions and illustrations specific to your model.
- Inspect the Carburetor: Take a close look at the carburetor body to identify any small screw heads. These screws are usually made of brass and may be labeled with “L,” “H,” and “T” for the low-speed, high-speed, and idle adjustment screws.
- Check the Side or Bottom: The adjustment screws are typically located on the side or bottom of the carburetor. Look for small openings or holes that provide access to the screws.
- Use a Flashlight, If Needed: If the screws are difficult to see or access, you can use a flashlight to illuminate the carburetor and help locate the openings or holes.
Once you have located the adjustment screws, you are ready to move on to the next step of the carburetor adjustment process. In the following step, we will focus on adjusting the idle speed screw.
When adjusting a Ryobi carburetor, always start by cleaning the air filter and checking for any clogs in the fuel system. This can often solve performance issues without needing to adjust the carburetor.
Read more: How To Adjust Ryobi Miter Saw
Step 3: Adjusting the Idle Speed Screw
In this step, we will focus on adjusting the idle speed screw of your Ryobi carburetor. The idle speed screw controls the engine’s idle speed, which is the speed at which the engine runs when it is not under load. It’s essential to set the idle speed correctly to ensure smooth operation and prevent stalling.
Here’s how you can adjust the idle speed screw:
- Locate the Idle Speed Screw: Refer to the user manual or the previous step to locate the idle speed screw on your carburetor. It is typically labeled with the letter “T” or “IDLE.”
- Warm Up the Engine: Start the engine and let it warm up for a few minutes. This will ensure that the engine is at its operating temperature.
- Turn the Screw: Use a screwdriver to gently turn the idle speed screw clockwise to increase the idle speed or counterclockwise to decrease it. Make small adjustments, turning the screw 1/8 of a turn at a time.
- Observe the Engine: As you make adjustments, listen to the engine’s sound and observe the RPM on a tachometer. Aim for a smooth and steady idle speed of around 800 to 1000 RPM, depending on your specific model.
- Test and Fine-Tune: Once you have made an adjustment, allow the engine to idle for a few moments and observe its behavior. If necessary, make further adjustments until you achieve the desired idle speed.
Remember, it’s important to make small adjustments to the idle speed screw and give the engine time to respond before making additional changes. This will help you achieve a precise and stable idle speed for your Ryobi carburetor.
Next, we will move on to adjusting the high-speed screw to optimize the engine’s performance under load.
Step 4: Adjusting the High Speed Screw
In this step, you will learn how to adjust the high-speed screw on your Ryobi carburetor. The high-speed screw controls the fuel-air mixture at high engine speeds, ensuring optimal performance under load. Proper adjustment of this screw is crucial for achieving maximum power output and preventing engine damage.
Here’s a step-by-step guide on adjusting the high-speed screw:
- Locate the High-Speed Screw: Refer to the user manual or the previous steps to identify the high-speed screw on your Ryobi carburetor. It is usually labeled with the letter “H” or “HI.”
- Run the Engine at Full Throttle: Get the engine running at full throttle by slowly pressing the throttle lever to the maximum position. This will simulate a high-load condition, allowing you to adjust the high-speed screw accurately.
- Turn the Screw: Use a screwdriver to turn the high-speed screw clockwise to lean the fuel-air mixture or counterclockwise to enrich it. Start by making small adjustments, turning the screw 1/8 of a turn at a time.
- Observe the Engine’s Response: As you make adjustments, pay attention to how the engine responds. You are aiming for crisp acceleration, smooth running, and maximum power output.
- Perform a Load Test: Once you have made an adjustment, load the engine by engaging the cutting attachment or any other high-load accessory. Observe the engine’s behavior and make further adjustments if needed.
- Fine-Tune as Necessary: Continuously evaluate the engine’s performance and make small adjustments to the high-speed screw until you achieve optimal power and a smooth running engine under load.
It’s important to note that the high-speed screw adjustment should be approached with caution, as an overly lean mixture can cause engine damage. Take your time, make small adjustments, and carefully observe the engine’s response throughout the process.
Now that you have adjusted both the idle speed screw and high-speed screw, it’s time to move on to fine-tuning the carburetor in the next step.
Step 5: Fine-Tuning the Carburetor
In this step, we will focus on fine-tuning the carburetor of your Ryobi engine. Fine-tuning involves making minor adjustments to the idle and high-speed screws to achieve optimal performance, fuel efficiency, and smooth operation across different operating conditions.
Follow these steps to fine-tune your Ryobi carburetor:
- Run the Engine: Start the engine and let it warm up for a few minutes. Ensure that the engine is at its operating temperature.
- Monitor the Engine: Observe the engine’s behavior, paying attention to the idle speed, acceleration, and overall performance. Note any irregularities or issues that may need adjustment.
- Adjust the Idle Speed Screw: Make small adjustments to the idle speed screw, turning it clockwise or counterclockwise as needed to achieve a smooth and steady idle. Aim for an idle speed of around 800 to 1000 RPM, but refer to the user manual for specific recommendations.
- Adjust the High-Speed Screw: Fine-tune the high-speed screw by making small adjustments, turning it clockwise or counterclockwise to optimize the fuel-air mixture for maximum power and performance under load.
- Test Across Different Loads: Throughout the fine-tuning process, test the engine’s performance under different loads and operating conditions. This can include varying the throttle position, engaging different accessories, and simulating real-life usage scenarios.
- Listen to the Engine: Pay attention to the sound of the engine. A well-tuned carburetor will produce a smooth and consistent running sound without any hesitation, bogging, or abnormal noise.
- Make Incremental Adjustments: Fine-tuning requires patience and making small, incremental adjustments to ensure precise tuning. Keep a record of the adjustments you make and their effects on the engine’s performance to track your progress.
By taking the time to fine-tune your carburetor, you’ll ensure that your Ryobi engine is operating optimally and delivering the desired performance. Remember, it may take a few iterations of adjustments to achieve the perfect tuning, so be patient and systematic.
In the next step, we will move on to testing and verifying the adjustments made to your Ryobi carburetor.
Step 6: Testing and Verifying Adjustments
In this final step, we will focus on testing and verifying the adjustments made to your Ryobi carburetor. This step is crucial to ensure that the engine is running smoothly, efficiently, and at its optimal performance level.
Follow these steps to test and verify the adjustments:
- Start the Engine: Start the engine and let it warm up to its operating temperature.
- Observe the Idle Speed: Check the idle speed and ensure that it remains stable and consistent. It should be within the recommended range specified in the user manual.
- Accelerate and Decelerate: Test the engine’s response to throttle inputs. Accelerate and decelerate gradually and quickly to assess the engine’s performance and ensure a smooth transition between different speeds.
- Load the Engine: Engage the cutting attachment or any other high-load accessory to put the engine under load. Observe its performance, checking for any hesitation, bogging, or abnormal noise.
- Check Fuel Efficiency: Monitor the fuel consumption of the engine. The adjustments made should result in improved fuel efficiency and reduced fuel consumption.
- Listen for Abnormalities: Pay attention to any unusual engine noises or vibrations. A well-adjusted carburetor should result in a smooth-running engine without any unusual sounds.
- Make Further Adjustments, if Necessary: If you notice any issues or discrepancies during the testing process, you may need to make additional adjustments to fine-tune the carburetor further. Refer to the previous steps and consult the user manual for guidance.
By thoroughly testing and verifying the adjustments, you can ensure that your Ryobi carburetor is performing optimally. Remember that each engine is unique, and it may take some trial and error to achieve the perfect tuning. Keep track of the adjustments made and the results to better understand your engine’s performance characteristics.
With the adjustment process complete, you can enjoy the benefits of a well-tuned Ryobi carburetor, including improved engine performance, fuel efficiency, and overall reliability.
Congratulations on successfully adjusting your Ryobi carburetor! With proper maintenance and regular inspections, your engine will continue to deliver optimal performance for years to come.
Read more: How To Clean A Lawnmower Carburetor
Conclusion
Adjusting a Ryobi carburetor is an essential part of maintaining optimal engine performance. By properly adjusting the idle speed screw and high-speed screw, you can ensure that your engine runs smoothly, efficiently, and reliably.
Throughout this step-by-step guide, we’ve covered the necessary tools, preparation, and adjustment procedures to fine-tune your Ryobi carburetor. From understanding the components of the carburetor to locating and adjusting the necessary screws, you’ve been equipped with the knowledge to keep your engine running at its best.
Remember to consult the user manual for your specific Ryobi carburetor model for any unique considerations or specifications. Proper preparation, taking safety precautions, and understanding the specific requirements of your engine are key to a successful carburetor adjustment.
Through careful observation, incremental adjustments, and thorough testing, you can achieve ideal settings for the idle speed and fuel-air mixture of your Ryobi carburetor. This will result in optimal engine performance, improved fuel efficiency, and a smoother engine operation under different loads and conditions.
Regular maintenance, including periodic carburetor adjustments, will help ensure that your Ryobi engine continues to provide reliable power for your various applications. Don’t forget to follow the manufacturer’s maintenance schedule and guidelines to keep your engine in top shape.
We hope that this guide has provided you with the knowledge and confidence to adjust your Ryobi carburetor effectively. Remember, if you are unsure or uncomfortable with the process, it’s always best to seek the assistance of a qualified professional to avoid any potential damage to your engine.
Enjoy the benefits of a well-tuned Ryobi carburetor and happy landscaping or power tool operation!
Frequently Asked Questions about How To Adjust A Ryobi Carburetor
Was this page helpful?
At Storables.com, we guarantee accurate and reliable information. Our content, validated by Expert Board Contributors, is crafted following stringent Editorial Policies. We're committed to providing you with well-researched, expert-backed insights for all your informational needs.


0 thoughts on “How To Adjust A Ryobi Carburetor”