Articles
How To Use Ryobi Planer
Modified: December 7, 2023
Discover helpful articles on how to effectively use the Ryobi Planer for all your woodworking projects. Enhance your skills and achieve professional results.
(Many of the links in this article redirect to a specific reviewed product. Your purchase of these products through affiliate links helps to generate commission for Storables.com, at no extra cost. Learn more)
Introduction
Welcome to this comprehensive guide on how to use the Ryobi Planer. The Ryobi Planer is a versatile tool that helps in creating smooth, even surfaces on wood, making it an essential tool for woodworking projects. Whether you are a professional carpenter or a beginner woodworker, understanding how to properly use the Ryobi Planer is crucial to achieving optimal results.
In this article, we will walk you through the process of using the Ryobi Planer, from understanding its features and functions to setting it up, adjusting the depth of cut, operating it, changing planer blades, and maintaining it for long-lasting performance. By the end of this guide, you will have a solid foundation on how to effectively use the Ryobi Planer for your woodworking projects.
Before we dive into the details, let’s take a closer look at what the Ryobi Planer is and why it is a popular choice among woodworkers.
Key Takeaways:
- Master the art of woodworking with the Ryobi Planer by understanding its features, adjusting the depth of cut, and operating it safely. Achieve professional-level results with confidence and precision.
- Keep your Ryobi Planer in top condition by following maintenance guidelines, troubleshooting common issues, and prioritizing safety. Unleash your creativity and enjoy the satisfaction of woodworking with confidence.
Read more: How To Use Ryobi Router
Understanding the Ryobi Planer
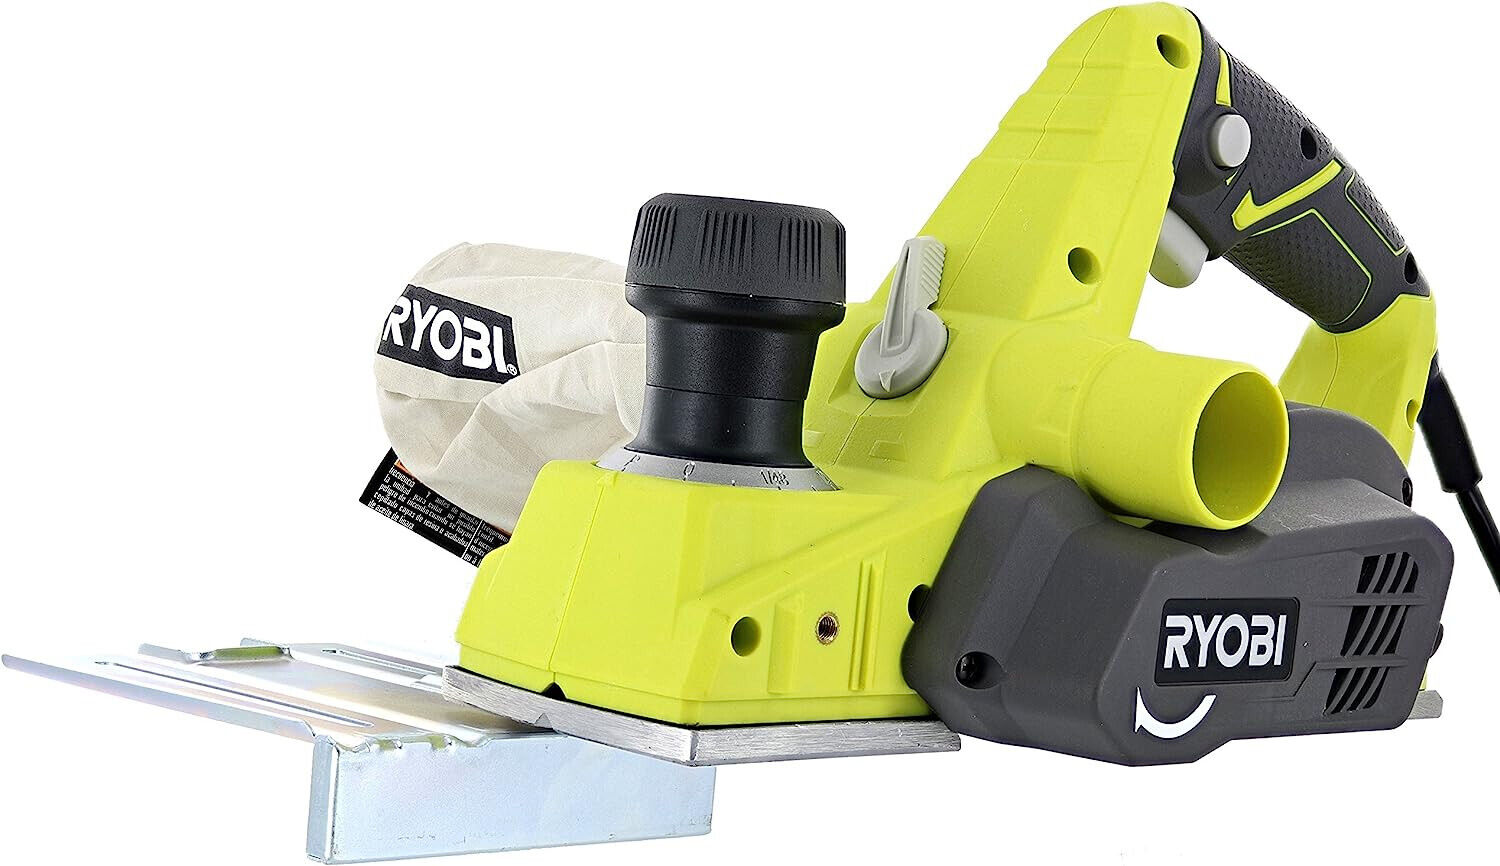
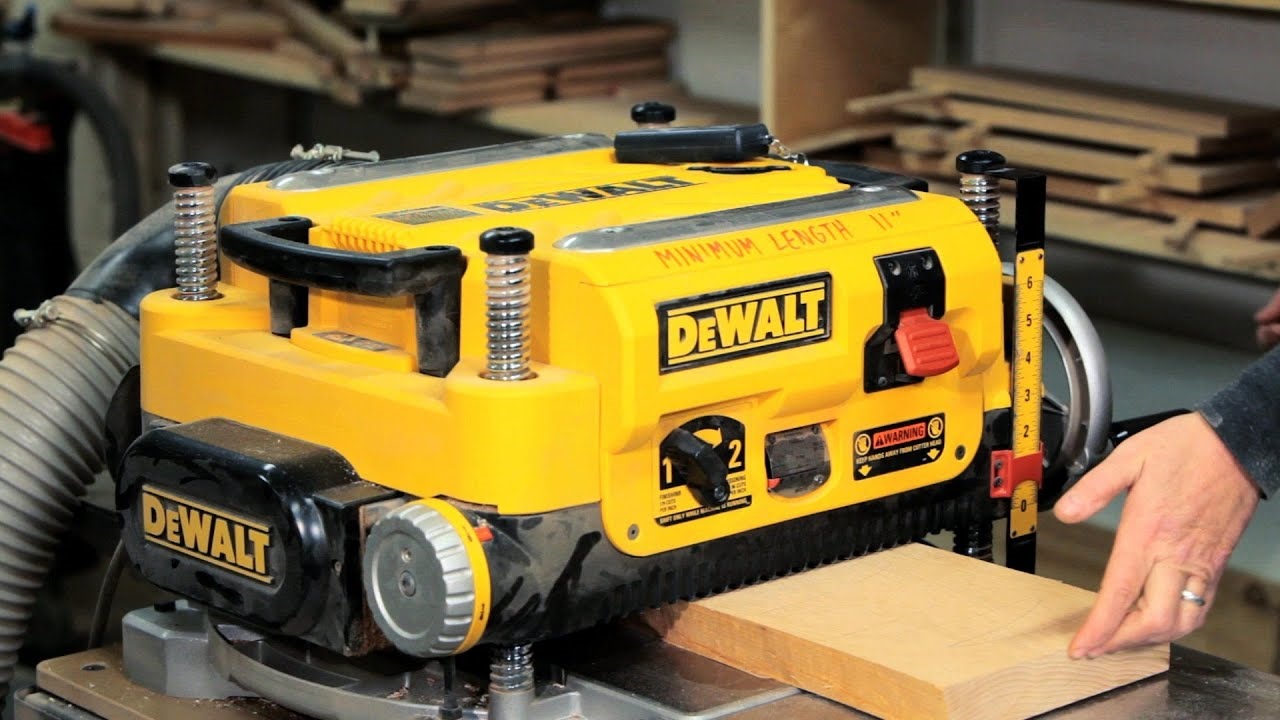
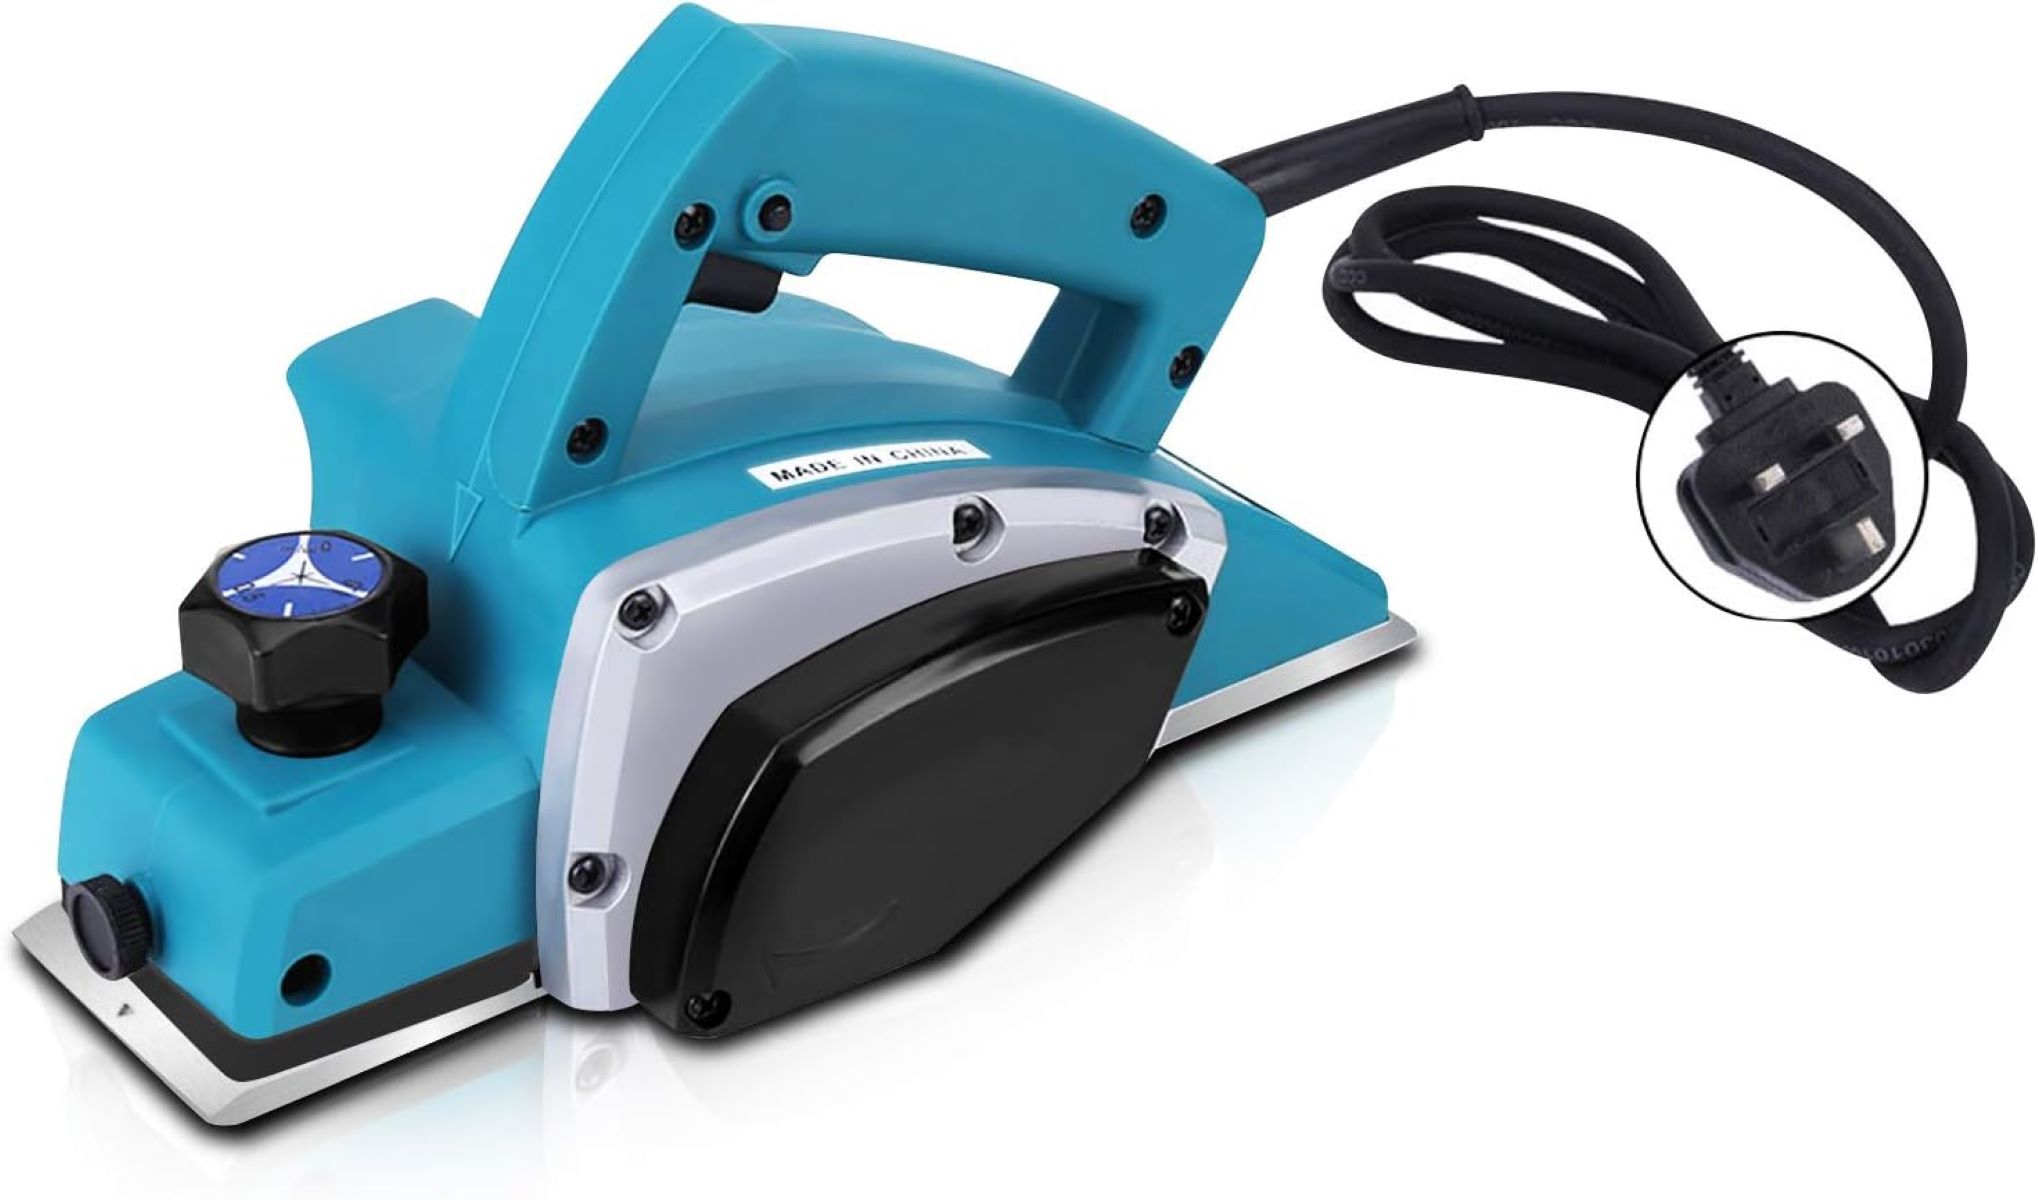
The Ryobi Planer is a power tool designed for smoothing and leveling wooden surfaces. It features a rotating cutter head with two or more blades that remove thin layers of wood with each pass. The planer’s depth of cut can be adjusted to control the amount of material removed, allowing for precise and controlled planing. Ryobi, a reputable brand in the power tool industry, offers a range of planer models suitable for various woodworking applications.
Ryobi Planers are characterized by their durability, reliability, and affordability. They are equipped with features that enhance user convenience and safety. Some common features found in Ryobi Planers include a comfortable grip handle, a dust collection bag or port to minimize mess, a lock-off button to prevent accidental start-up, and a depth adjustment knob for easy control of the planing depth.
When selecting a Ryobi Planer, consider the maximum planing width and depth capacity to ensure it meets your project requirements. Different models may come with varying motor power and RPM (rotations per minute), affecting the planer’s performance and cutting speed. Additionally, check if the planer has a reversible blade design, which allows you to flip the blades for extended use before needing to be replaced.
Understanding the features and specifications of the Ryobi Planer will help you make an informed decision when purchasing and using the tool for your woodworking projects. With proper knowledge of its capabilities, you can unleash the full potential of the Ryobi Planer and achieve professional-level results in your woodworking endeavors.
Setting Up the Ryobi Planer
Setting up the Ryobi Planer properly is essential for efficient and safe operation. Follow these steps to ensure a smooth setup:
- Choose a suitable work area: Select a well-lit, spacious area with a sturdy workbench or table to set up your Ryobi Planer. Ensure there is enough clearance around the planer for easy movement and proper ventilation.
- Inspect the planer: Before setting up, carefully inspect the planer for any damage or loose components. Check for any debris in the planer’s cutting area and remove it.
- Secure the planer: Place the planer on the workbench or table and ensure it is stable and secure. Use clamps or screws to firmly secure the planer if necessary.
- Connect the dust collection system: If your Ryobi Planer comes with a dust collection bag or a dust port, connect it to a suitable dust extraction system. This will help minimize dust and keep your work area clean.
- Position the material: Place your wooden material on the planer’s feed table, ensuring it is flat and free from any obstructions. Make sure the material is aligned with the planer’s cutting head for even planing.
- Check the planing depth: Set the desired depth of cut by adjusting the planer’s depth adjustment knob. Start with a shallow depth if you are unsure and gradually increase it until you achieve the desired result.
- Secure yourself and wear protective gear: Before turning on the planer, make sure you are wearing appropriate safety gear, including safety glasses, ear protection, and a dust mask. Avoid loose clothing or accessories that could get caught in the planer.
Following these steps will help you properly set up your Ryobi Planer and ensure a safe and efficient woodworking experience. Once the planer is set up, you can proceed to adjust the depth of cut and start planing your wooden material with confidence.
Adjusting the Depth of Cut
Adjusting the depth of cut is a crucial step in using the Ryobi Planer effectively. The depth of cut determines how much material is removed from the wooden surface with each pass of the planer. Follow these steps to adjust the depth of cut:
- Power off and unplug the planer: Before making any adjustments, ensure that the planer is powered off and unplugged from the power source. Safety should always be a top priority.
- Locate the depth adjustment knob: The depth adjustment knob is usually located on the side or top of the planer. It is marked with increments to indicate the depth of cut.
- Turn the depth adjustment knob: Rotate the depth adjustment knob in either direction to increase or decrease the depth of cut. Refer to the markings on the knob to accurately set the desired depth.
- Start with a shallow depth: If you are unsure of the appropriate depth for your project, start with a shallow depth setting. You can make several passes, gradually increasing the depth, until you achieve the desired result.
- Consider the type of wood: Different types of wood may require different depths of cut. Softer woods may require a shallower cut, while harder woods may tolerate a deeper cut. Experiment and make adjustments accordingly.
- Make test cuts: Before planing the entire piece of wood, it is advisable to make a test cut on a scrap piece of the same material. This allows you to ensure the depth of cut is appropriate and make any necessary adjustments before working on your project piece.
- Secure the wooden material: Ensure the wooden material is firmly secured on the planer’s feed table during the planing process. This helps in achieving consistent and accurate results.
- Inspect and readjust as needed: As you begin planing the wooden material, pay attention to the surface quality. If the planer is removing too much material or leaving marks, adjust the depth of cut accordingly.
By following these steps and considering the type of wood and project requirements, you can effectively adjust the depth of cut on your Ryobi Planer. This ensures optimal planing results, bringing your woodworking projects to perfection.
Operating the Ryobi Planer
Operating the Ryobi Planer requires proper technique and attention to safety. Follow these steps to operate the planer effectively:
- Put on protective gear: Before starting the planer, make sure you are wearing safety glasses, ear protection, and a dust mask. This will protect you from flying debris and excessive noise.
- Ensure the workpiece is secure: Place your wooden material on the planer’s feed table, ensuring it is flat and securely held in place. Misalignment or movement during planing can result in poor results or accidents.
- Power on the planer: Plug in the planer and turn on the power switch. Allow the planer’s cutter head to reach full speed before making contact with the wood.
- Feed the material: Gently pass the wood over the cutter head and onto the feed table. Apply even pressure and maintain a consistent speed throughout the process. Avoid pushing the material too forcefully, as it can result in uneven planing.
- Control the planing speed: Maintain a steady and controlled pace when feeding the material through the planer. Avoid rushing or slowing down abruptly, as it can affect the quality of the planed surface.
- Support the wood: When planing longer pieces of wood, use an auxiliary support or roller stands to prevent sagging or bowing, which may impact the accuracy of the planing and the safety of the operation.
- Inspect the workpiece: After each pass, inspect the planed surface for desired results. If necessary, make adjustments to the depth of cut or technique to achieve the desired smoothness and thickness.
- Collect dust: If your planer is equipped with a dust collection bag or port, ensure it is connected and functioning properly. This keeps your work area clean and helps maintain visibility and air quality.
- Power off and unplug the planer: Once you have completed the planing process, power off the planer and unplug it from the power source. This ensures safety during blade changes or any other adjustments you may need to make.
By following these steps and exercising caution, you can safely and effectively operate the Ryobi Planer. Remember to always prioritize safety, maintain proper technique, and periodically check the planed surface for desired results. With practice, you will master the operation of the Ryobi Planer and achieve professional-level woodworking outcomes.
When using a Ryobi planer, always make sure to properly secure the workpiece and adjust the depth of cut gradually to avoid tear-out and ensure a smooth finish.
Read more: How To Use Ryobi Sander
Changing Planer Blades
Over time, the blades on your Ryobi Planer will become dull and need to be replaced. Changing the planer blades is a straightforward process that can be done in a few simple steps:
- Power off and unplug the planer: Before starting any blade replacement, ensure that the planer is powered off and unplugged from the power source. Safety should always be a top priority.
- Remove the blade cover: Locate the blade cover on your Ryobi Planer and remove it. It is usually held in place by screws or clips. Use a screwdriver or the appropriate tool to carefully remove the cover.
- Access the blades: Once the blade cover is removed, you will have access to the planer blades. Take note of their position and orientation before proceeding.
- Remove the old blades: Using a wrench or the provided tool, loosen and remove the screws holding the old blades in place. Carefully lift the blades out of the planer, being mindful of any sharp edges.
- Install the new blades: Take the new blades and align them with the blade holders in the planer. Ensure they are properly seated and positioned according to the manufacturer’s instructions.
- Tighten the screws: With the new blades in place, use the wrench or provided tool to securely tighten the screws. Be cautious not to overtighten, as it may damage the blades or the planer.
- Replace the blade cover: Once the new blades are installed and secured, carefully replace the blade cover. Ensure that it is properly aligned and fastened to the planer.
- Perform a test run: Before using the planer on your project, run a test piece of wood through the planer to ensure that the new blades are functioning properly and producing the desired results.
Always refer to the manufacturer’s manual for specific instructions on changing the blades of your Ryobi Planer, as different models may have slight variations in the process. It is also recommended to wear protective gloves during blade replacement to minimize the risk of injury from sharp edges.
By following these steps and exercising caution, you can easily change the planer blades on your Ryobi Planer. Regularly replacing the blades ensures optimal performance and helps you achieve smooth and precise planing results in your woodworking projects.
Maintaining and Cleaning the Ryobi Planer
Maintaining and cleaning your Ryobi Planer is essential for its longevity and optimal performance. Regular maintenance helps prevent issues and ensures smooth operation. Follow these guidelines to properly maintain and clean your planer:
- Power off and unplug the planer: Before performing any maintenance or cleaning, always ensure that the planer is powered off and unplugged from the power source.
- Remove dust and debris: After each use, use a brush or compressed air to remove dust and debris from the planer’s housing and feed table. This prevents accumulation and maintains proper airflow and ventilation.
- Inspect the blades: Regularly inspect the planer blades for any damage, dullness, or excessive wear. If needed, sharpen or replace the blades according to the manufacturer’s recommendations.
- Check the planing bed: Ensure that the planing bed is clean and free from any debris or foreign objects that may interfere with the planer’s performance. Use a soft cloth or brush to clean the surface.
- Lubricate moving parts: Apply a small amount of lubricant, such as machine oil or silicone spray, to the moving parts of the planer. This helps reduce friction and ensures smooth operation.
- Inspect the power cord: Regularly check the power cord for any signs of damage or fraying. If any issues are detected, replace the power cord immediately to avoid safety hazards.
- Store the planer properly: When not in use, store the planer in a clean and dry location away from moisture and extreme temperatures. Use the provided storage case or cover to protect it from dust and debris.
- Follow the manufacturer’s guidelines: Always refer to the manufacturer’s manual for specific maintenance instructions and recommended cleaning products. Different models may have unique maintenance requirements.
- Periodic professional servicing: Depending on usage, consider sending your Ryobi Planer for periodic professional servicing. This ensures that internal components are inspected, adjusted, and maintained by experts, extending the lifespan of your planer.
By following these maintenance and cleaning practices, you can prolong the life of your Ryobi Planer and ensure it operates at its peak performance. Remember, regular maintenance not only results in better woodworking outcomes but also enhances safety during use. Treat your planer with care and it will serve you well for years to come.
Troubleshooting Common Issues
While Ryobi Planers are reliable and efficient tools, occasional issues may arise during use. Here are some common problems you may encounter and how to troubleshoot them:
- Uneven planing: If the planed surface appears uneven or wavy, ensure that the wooden material is flat and properly secured on the feed table. Check that the planer blades are sharp and properly aligned. Make sure to apply consistent pressure and maintain a steady feed rate.
- Poor surface finish: If the planed surface exhibits tear-out or roughness, ensure that the planer blades are sharp. Consider reducing the depth of cut for a shallower pass, which can help minimize tear-out. Testing the planer on a scrap piece of wood before proceeding with your project can also help troubleshoot surface finish issues.
- Excessive vibration or noise: If the planer is producing excessive vibration or noise during operation, check that all bolts and screws are securely tightened. Inspect the planer blades for any damage or misalignment. If the issue persists, consider contacting the manufacturer for further assistance.
- Inadequate dust collection: If the dust collection system is not effectively removing dust and debris, ensure that the dust collection bag or port is properly connected and not clogged. Consider using a more powerful dust extraction system or regularly emptying the dust collection bag to maintain optimal dust collection.
- Planer not powering on: If the planer does not power on, ensure that it is properly plugged into a functioning power outlet. Check the power switch to ensure it is in the “on” position. If the problem persists, try using a different power cord or contact the manufacturer for further assistance.
- Blade dullness or damage: If the planer blades become dull or damaged, they may produce unsatisfactory results. Sharpen or replace the blades according to the manufacturer’s instructions. Refer to the previous section on changing planer blades for detailed steps.
- Excessive snipe: Snipe refers to a slight depression at the beginning or end of the planed piece. To reduce snipe, use auxiliary support at the infeed and outfeed ends of the planer, such as roller stands or wooden supports. Ensure the wooden material is properly supported throughout the planing process.
If you encounter any issues that cannot be resolved through troubleshooting, it is recommended to consult the manufacturer’s manual or reach out to the manufacturer’s customer support for further assistance. They will have the expertise to address specific issues related to your Ryobi Planer and provide necessary guidance.
By familiarizing yourself with common issues and their troubleshooting methods, you can effectively resolve any problems that may arise during the use of your Ryobi Planer, ensuring smooth and successful woodworking projects.
Conclusion
Congratulations on completing this comprehensive guide on how to use the Ryobi Planer. We have covered a wide range of topics, from understanding the features of the Ryobi Planer to setting it up, adjusting the depth of cut, operating it, changing planer blades, and maintaining it for optimal performance.
The Ryobi Planer is a versatile tool that can help you achieve smooth and even surfaces on your woodworking projects. By following the steps outlined in this guide, you can confidently use the planer to tackle various woodworking tasks.
Remember to prioritize safety throughout the entire process. Always wear appropriate protective gear and adhere to the manufacturer’s recommendations for safe operation. Regular maintenance and cleaning are necessary to keep your planer in top condition, ensuring its longevity and the quality of your woodworking results.
If you encounter any difficulties or have specific questions that were not addressed in this guide, consult the manufacturer’s manual or reach out to their customer support for further assistance. They will have the expertise to provide guidance tailored to your Ryobi Planer model.
Now that you are equipped with the knowledge and skills, it’s time to unleash your creativity and embark on your woodworking projects with confidence. Embrace the versatility and precision of the Ryobi Planer and enjoy the satisfaction of creating beautiful pieces of craftsmanship.
Happy woodworking with your Ryobi Planer!
Frequently Asked Questions about How To Use Ryobi Planer
Was this page helpful?
At Storables.com, we guarantee accurate and reliable information. Our content, validated by Expert Board Contributors, is crafted following stringent Editorial Policies. We're committed to providing you with well-researched, expert-backed insights for all your informational needs.


0 thoughts on “How To Use Ryobi Planer”