
Articles
How To Get Foam Insulation Off Clothes
Modified: September 1, 2024
Learn effective methods to remove foam insulation from clothes in this comprehensive article. Expert tips and step-by-step instructions to tackle stubborn stains.
(Many of the links in this article redirect to a specific reviewed product. Your purchase of these products through affiliate links helps to generate commission for Storables.com, at no extra cost. Learn more)
Introduction
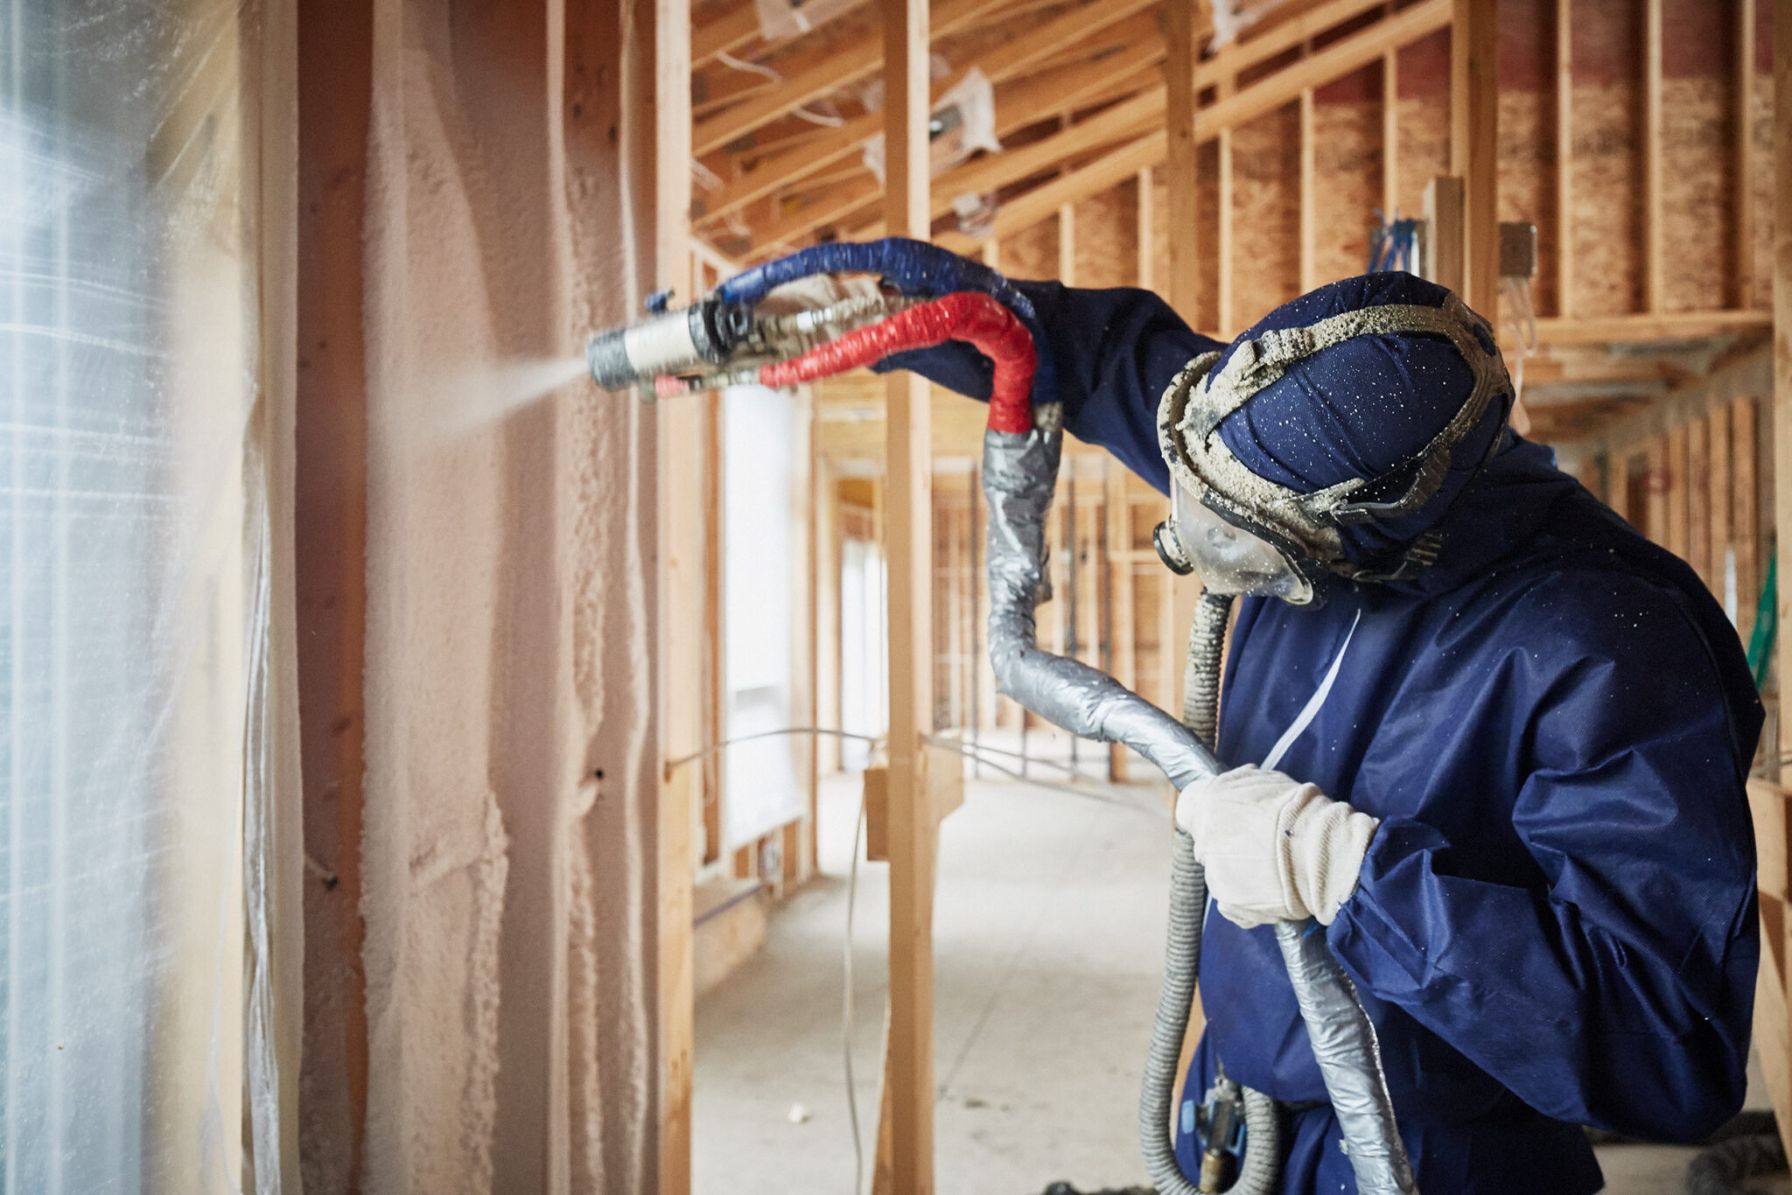
Welcome to our guide on how to get foam insulation off clothes. Accidents happen, and sometimes that means getting foam insulation on your favorite outfit. Foam insulation, also known as spray foam, is a versatile and effective insulation material commonly used in construction projects. However, its sticky nature and expanding properties can make it challenging to remove from clothing.
In this article, we will walk you through a step-by-step process to safely and effectively remove foam insulation from your clothes. By following these instructions and using the right techniques, you can salvage your garments and avoid having to replace them.
Before we dive into the removal process, it’s important to note that the specific methods and solutions mentioned in this article are general recommendations. It’s always best to check the care instructions on your clothing label and perform a spot test on a small, inconspicuous area before applying any solvents or scrubbing. This will help ensure that the removal process does not cause any damage or discoloration to your clothing.
Now, let’s get started with step 1: assessing the garment.
Key Takeaways:
- Safely remove foam insulation from clothes by assessing the garment, shaking off excess foam, spot testing, applying a solvent, gently scrubbing, rinsing, washing, and air drying. Follow these steps to salvage your favorite outfits without causing damage.
- Different fabrics may require specific removal techniques, so always check care instructions and perform a spot test. If unsure, seek professional advice. With patience and the right approach, you can successfully restore your clothes to their original condition.
Read more: How Long Does Spray Foam Insulation Off Gas
Step 1: Assess the garment
Before attempting to remove foam insulation from your clothes, it’s important to assess the garment and understand the extent of the damage. Take a close look at the affected area and determine if the foam insulation has fully dried or if it’s still wet. This will help you choose the most appropriate method for removal.
If the foam insulation is still wet, avoid rubbing or scrubbing the area as this can spread the foam and potentially push it deeper into the fabric fibers. Instead, gently blot the excess foam with a clean cloth or paper towel. This will help absorb as much of the wet foam as possible before proceeding to the next steps.
If the foam insulation has already dried, you may notice that it has hardened and become more difficult to remove. Don’t worry! There are still effective methods for getting it off your clothes, which we’ll cover in the following steps.
It’s also essential to consider the fabric type of the garment. Different fabrics may require different removal techniques to avoid damage. Delicate materials like silk or lace may need more gentle treatment, while sturdy fabrics like denim or cotton can withstand more vigorous cleaning methods.
By carefully assessing the garment, you can determine the appropriate steps to take in order to successfully remove the foam insulation without causing further damage to your clothing.
Step 2: Shake off excess foam
After assessing the garment and determining whether the foam insulation is wet or dry, the next step is to shake off any excess foam. This will help remove as much of the foam as possible before moving on to the removal process.
Start by taking the garment outside or finding a suitable area where you can safely shake off the foam without making a mess. Give the article of clothing a gentle shake, allowing the loose or dried foam particles to fall off. You can also lightly tap or flick the fabric to dislodge any clinging foam.
If the foam insulation is wet, avoid vigorous shaking as it may cause the foam to spread and stick to other parts of the fabric. Instead, use a soft cloth or paper towel to gently blot the area, absorbing as much of the wet foam as possible.
For dried foam insulation that may have hardened on the fabric, you can use a brush with soft bristles to lightly brush away the foam particles. Be careful not to apply too much pressure or scrub vigorously, as this can damage the fabric.
By shaking off or gently brushing away the excess foam, you are priming the garment for the next steps in the removal process. This simple action can significantly reduce the amount of foam that needs to be treated, making the removal process more effective.
Step 3: Spot test a small area
Before proceeding with any solvents or cleaning agents, it’s crucial to perform a spot test on a small, inconspicuous area of the garment. This step is essential to ensure that the removal process does not cause any damage or discoloration to the fabric.
Choose a discreet area of the clothing, such as an inside seam or hem, and apply a small amount of the selected solvent or cleaning agent. If you’re unsure which solvent to use, you can start with a mild option like dish soap or laundry detergent mixed with water.
Gently rub the solution onto the spot using a clean cloth or sponge, and then blot the area with a dry cloth. Check for any adverse reactions, such as color bleeding, fabric fading, or fabric damage. If you notice any negative effects, stop immediately and try a different removal method or seek professional help.
If the spot test is successful, meaning there are no adverse effects, you can proceed with confidence to the next steps. Remember, it’s important to spot test even if you’re using solvents or cleaning agents that are generally considered safe for fabric, as each garment and fabric type may react differently.
By spot testing a small area, you can ensure that the foam insulation removal process will not cause any unexpected damage to your clothes. This step adds an extra layer of precaution and allows you to proceed with peace of mind.
Step 4: Apply a solvent
Once you have completed the spot test and determined that the solvent or cleaning agent you have chosen is safe for your garment, it’s time to apply it to the foam insulation stain. Solvents are effective in breaking down the adhesive properties of the foam and loosening it from the fabric fibers.
There are different solvents you can use depending on the type of foam insulation and the fabric of your clothing. Common solvents for removing foam insulation stains include rubbing alcohol, acetone, mineral spirits, or even a mild dish soap diluted in water.
Take caution to read the instructions on the solvent bottle and follow any suggested safety precautions, such as using gloves or working in a well-ventilated area.
Apply a small amount of the chosen solvent directly to the foam insulation stain. You can use a clean cloth, sponge, or cotton swab to gently dab or rub the solvent onto the affected area. Avoid rubbing too vigorously, as this can push the foam deeper into the fabric.
Let the solvent sit on the stain for a few minutes to allow it to penetrate and dissolve the foam. This will make it easier to remove in the next step. Keep in mind that the drying time may vary depending on the solvent used and the type of fabric.
If you’re planning to use acetone or any solvent containing acetone, make sure to avoid using it on fabrics containing acetate, rayon, or triacetate, as acetone can damage these materials. Instead, opt for a more gentle solvent suitable for the specific fabric.
By applying a solvent to the foam insulation stain, you are breaking down the adhesive properties of the foam and preparing it for removal. The solvent will help loosen the foam from the fabric, making it easier to clean in the subsequent steps.
Use a dull knife or spoon to gently scrape off as much foam insulation as possible. Then, apply a pre-wash stain remover or liquid detergent to the affected area and let it sit for a few minutes before washing the clothes as usual.
Read more: How To Paint Insulation Foam
Step 5: Gently scrub the affected area
After allowing the solvent to sit on the foam insulation stain for a few minutes, it’s time to gently scrub the affected area. The goal is to loosen the foam particles from the fabric fibers and lift them away.
Using a soft-bristled brush or a clean cloth, lightly scrub the stained area in a circular motion. Be gentle to avoid damaging the fabric or spreading the foam to unaffected areas. Focus on the immediate spot of the stain and work outward gradually.
Continue scrubbing until you start to see the foam insulation breaking apart and coming off the fabric. If necessary, apply more solvent to keep the area moist and assist in the removal process.
For stubborn or dried foam insulation, you may need to apply a bit more pressure while scrubbing. However, be cautious not to overdo it, as excessive scrubbing can damage delicate fabrics.
If you notice that the foam is not coming off easily, consider using a plastic scraper or your fingernail to gently lift and scrape away the remnants. Again, take care not to exert too much pressure or scrape too vigorously, as this can cause fabric damage.
It’s important to work patiently and not rush this step. Instead, take your time and continue scrubbing until the foam insulation is completely removed from the fabric.
By gently scrubbing the affected area, you’re actively breaking apart the foam insulation and detaching it from the fabric. This step is crucial in ensuring that all remnants of the foam are lifted and separated from the clothing fibers.
Step 6: Rinse the garment
Once you have successfully removed the foam insulation from the fabric, it’s important to rinse the garment to remove any remaining solvent or cleaning agent. This step will help ensure that no residue is left behind, which could potentially damage the fabric or cause skin irritation.
Take the garment to a clean sink or basin and run cool water over the affected area. Make sure the water is not too hot, as high temperatures can set stains or shrink certain fabrics. Allow the water to gently flow over the fabric, rinsing away any remnants of the solvent or cleaning agent.
You can also gently squeeze the fabric while rinsing to help flush out any residual foam particles or cleaning solution. Continue rinsing until you no longer see any foam or soapy residue in the water.
It’s important to be thorough during this step to ensure that all traces of the foam insulation and cleaning agent are completely rinsed away. Pay close attention to the stained area, as well as the surrounding fabric, ensuring that all foam remnants are removed.
Once rinsed, gently press the fabric against the side of the sink or basin to remove excess water. Avoid wringing or twisting the garment, as this can cause unnecessary stress on the fabric fibers.
After rinsing, inspect the fabric to ensure that the foam insulation stain is completely gone. If there are still remnants or discoloration, you may need to repeat some of the previous steps or try an alternative cleaning method.
Rinsing the garment thoroughly is essential in preventing any residue from causing damage to the fabric or causing skin irritation. This step ensures that the fabric is clean, fresh, and ready for the final cleaning process.
Step 7: Wash the garment
After rinsing the garment to remove any remaining foam insulation and cleaning agents, it’s time to wash the garment. Washing the clothing will further cleanse the fabric, eliminate any lingering odors, and restore its freshness.
Refer to the care instructions on the garment’s label to determine the appropriate washing method. Many garments can be safely washed in a washing machine, while others may require hand washing or dry cleaning.
If the care instructions permit machine washing, prepare the garment for the washing process by turning it inside out. This helps protect the fabric and minimize any potential damage during the washing cycle.
Select a gentle cycle and use a mild laundry detergent that is suitable for the fabric type. Avoid using fabric softeners or bleach, as these can have adverse effects on the garment and may further set any remaining stains.
Place the garment in the washing machine and start the cycle. Ensure that you’re washing the garment separate from other clothing items to prevent any color transfer or damage.
For garments that require hand washing, fill a basin or sink with cool water and add the appropriate amount of mild detergent. Gently agitate the water to create a soapy solution. Submerge the garment and swish it around in the water, being careful not to scrub or stretch the fabric excessively.
Let the garment soak for a few minutes to allow the detergent to penetrate the fabric fibers and lift away any remaining traces of the foam insulation. Rinse the garment thoroughly until the water runs clear.
Once the garment has been washed, follow the care instructions for drying. Some fabrics may be safe to tumble dry on low heat, while others may require air drying. Avoid exposing the garment to direct sunlight, as this can cause fabric fading.
Washing the garment completes the cleaning process, ensuring that all traces of the foam insulation and any cleaning agents have been removed. This step helps restore the fabric to its original cleanliness and removes any remaining odors.
Step 8: Air dry the garment
After washing the garment, it’s important to properly dry it to maintain its shape and prevent potential fabric damage. Air drying is often the safest and recommended method for most clothing items.
Start by gently wringing out any excess water from the garment. Avoid twisting or wringing too forcefully, as this can cause stretching or damage to the fabric fibers.
Lay a clean, dry towel on a flat surface and place the garment on top of it. Gently reshape the garment to its original form, smoothing out any wrinkles or folds.
Avoid hanging the garment to dry, as this can cause stretching or distortion of the fabric. Instead, let the garment air dry naturally on the towel. Choose a well-ventilated area, away from direct sunlight or heat sources, to prevent color fading or fabric damage.
Allow the garment to air dry completely before wearing or storing it. Depending on the fabric type and moisture level, this may take several hours or even overnight.
Check the garment to ensure it is thoroughly dry before removing it from the towel. Test the fabric by touching it to make sure there is no dampness or moisture remaining.
If necessary, iron the garment on the appropriate heat setting to smooth out any wrinkles or creases. Make sure to follow the ironing instructions for the specific fabric to avoid scorching or damaging the garment.
Air drying the garment is a gentle and effective method to preserve its integrity and shape. This step allows the fabric to dry naturally without subjecting it to excessive heat or stress, helping to prolong the lifespan of the clothing item.
Conclusion
Removing foam insulation from clothes can be a daunting task, but with the right approach and techniques, it is possible to salvage your garments and restore them to their original condition. By following the step-by-step guide we’ve provided, you can effectively remove foam insulation stains from your clothes without causing any damage or discoloration.
Remember to assess the garment, shake off excess foam, spot test a small area, apply a solvent, gently scrub the affected area, rinse the garment, wash it according to the care instructions, and air dry it properly. Each step is crucial in the removal process, and taking the time to follow them carefully will yield the best results.
It’s important to note that different fabrics may react differently to solvents and cleaning agents. Always check the care instructions on your clothing label and perform a spot test before applying any products or methods to ensure compatibility and avoid any mishaps or damage.
If you’re uncertain about the best approach or if the foam insulation stain persists, it’s advisable to consult a professional cleaner or seek specialized advice for your specific garment and situation.
By taking the necessary precautions and investing a little effort, you can successfully remove foam insulation from your clothes and extend the lifespan of your favorite garments. Remember, accidents happen, but with the right knowledge and techniques, you can overcome them and keep your clothes looking fresh and clean.
Now that you've mastered removing foam insulation from clothes, why stop there? Enhance your home's cleanliness with our cleaning tips on refreshing every nook and cranny of your refrigerator. Or perhaps you're tackling tougher challenges? Our stain removal guide offers practical advice for pristine toilet seats. Looking ahead, consider upgrading your home's efficiency with our roundup of the foam insulation best suited for 2024's needs. Each guide promises handy advice to keep your living space spotless and efficient.
Frequently Asked Questions about How To Get Foam Insulation Off Clothes
Was this page helpful?
At Storables.com, we guarantee accurate and reliable information. Our content, validated by Expert Board Contributors, is crafted following stringent Editorial Policies. We're committed to providing you with well-researched, expert-backed insights for all your informational needs.


0 thoughts on “How To Get Foam Insulation Off Clothes”