Articles
How To Hold Insulation In Place
Modified: December 7, 2023
Learn how to hold insulation in place with these helpful articles. Find tips and techniques for proper installation and secure insulation for maximum energy efficiency.
(Many of the links in this article redirect to a specific reviewed product. Your purchase of these products through affiliate links helps to generate commission for Storables.com, at no extra cost. Learn more)
Introduction
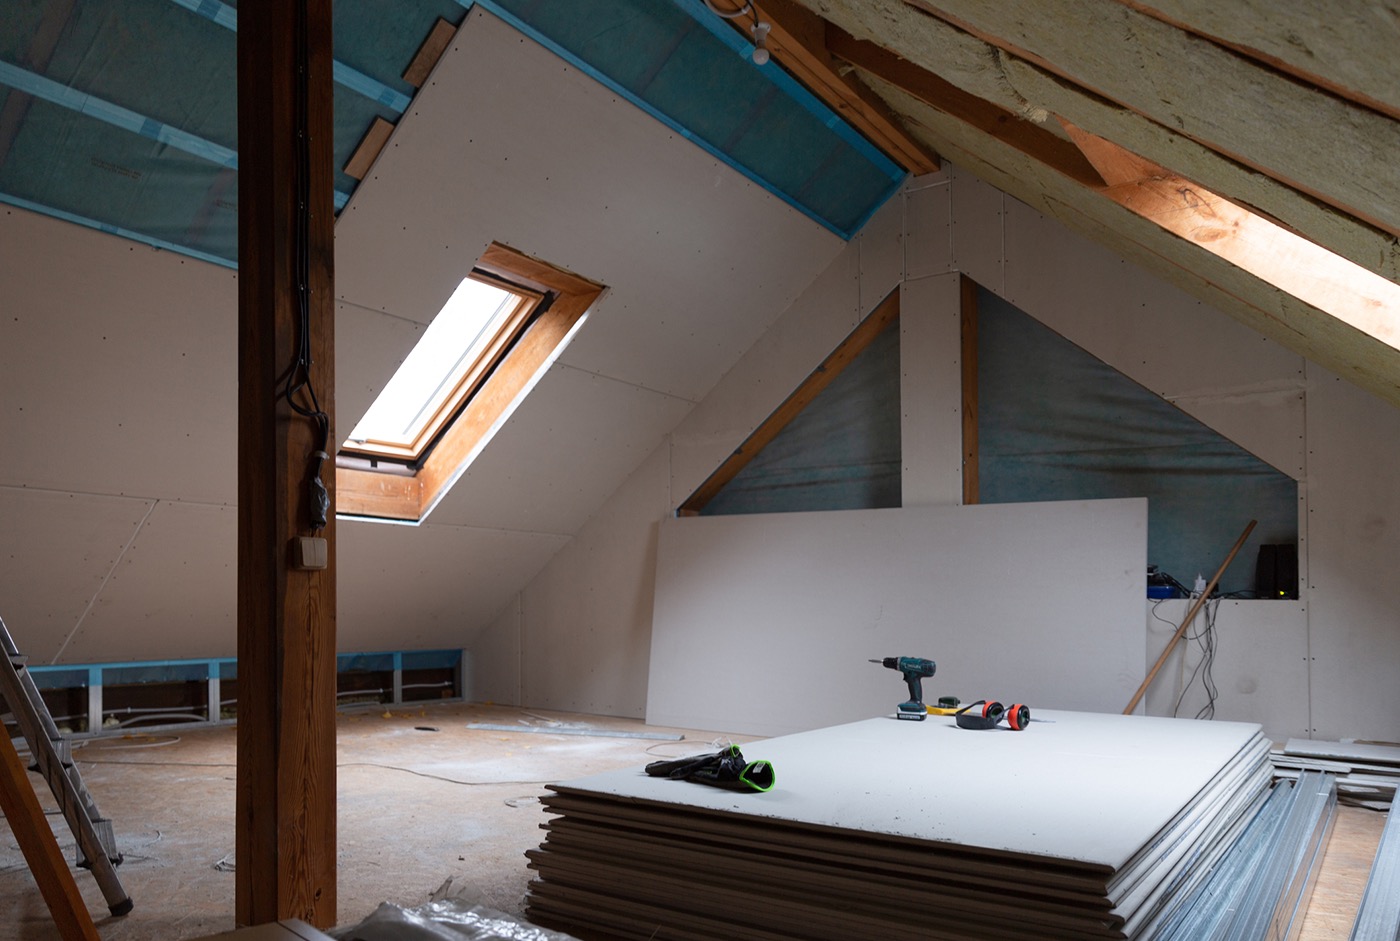
Insulating a building or a home is essential for maintaining comfortable temperatures and reducing energy costs. However, simply installing insulation isn’t enough; it must also be properly held in place to ensure its effectiveness. There are several methods that can be employed to hold insulation firmly in place, each with its own benefits and considerations.
In this article, we will explore five effective methods for holding insulation in place. Whether you are working on a DIY project or a professional insulation installation, these methods will help ensure that the insulation stays securely in position, maximizing its thermal efficiency.
Before diving into the methods, it’s important to note that the specific materials and techniques used will depend on the type of insulation being installed. For example, fiberglass insulation may require different methods compared to rigid foam insulation. Always consult the manufacturer’s guidelines and follow best practices for the specific insulation type being used.
Now, let’s explore the different methods that can be utilized to hold insulation in place effectively.
Key Takeaways:
- Properly holding insulation in place is essential for maximizing its effectiveness and ensuring optimal energy efficiency. Whether using stapling, taping, hangers, adhesive, or wire/twine, choose the method that suits your insulation type and installation needs.
- When holding insulation in place, always prioritize safety and follow the specific guidelines and recommendations of the insulation manufacturer. By using the right method, you can ensure that the insulation remains securely positioned, maximizing its thermal efficiency and reducing energy costs.
Read more: How To Hold Rugs In Place
Materials Needed
Before attempting any of the methods mentioned in this article, it’s important to gather the necessary materials. Having the right tools and supplies on hand will make the process much smoother and more efficient. The materials required may vary depending on the specific method being utilized, but here are some common items you may need:
- Insulation: This is the primary material you will be working with. Ensure that you have enough insulation to cover the desired area.
- Staple gun and staples: A staple gun is crucial for the stapling method, as it allows for secure fastening of the insulation to the desired surface. Make sure you have an appropriate stapler and an ample supply of staples.
- Tape: Depending on the method you choose, you may need various types of tape. This can include duct tape, foil tape, or insulation tape. Make sure you have the appropriate type of tape for your specific insulation and installation needs.
- Insulation hangers: If you plan to use insulation hangers, make sure you have enough hangers to securely hold the insulation in place. These hangers can be found at most home improvement stores.
- Adhesive: If you opt for the adhesive method, you will need an appropriate adhesive, such as construction adhesive or spray adhesive. Select an adhesive that is compatible with your insulation type and recommended by the manufacturer.
- Wire or twine: For the wire or twine method, gather enough wire or twine to create a secure support system for the insulation. Ensure that the wire or twine is strong enough to bear the weight of the insulation.
It’s important to note that these are general materials that are commonly used for holding insulation in place. The specific materials needed may vary based on the insulation type and the method you choose. Always refer to the manufacturer’s guidelines and recommendations for the most appropriate materials to use.
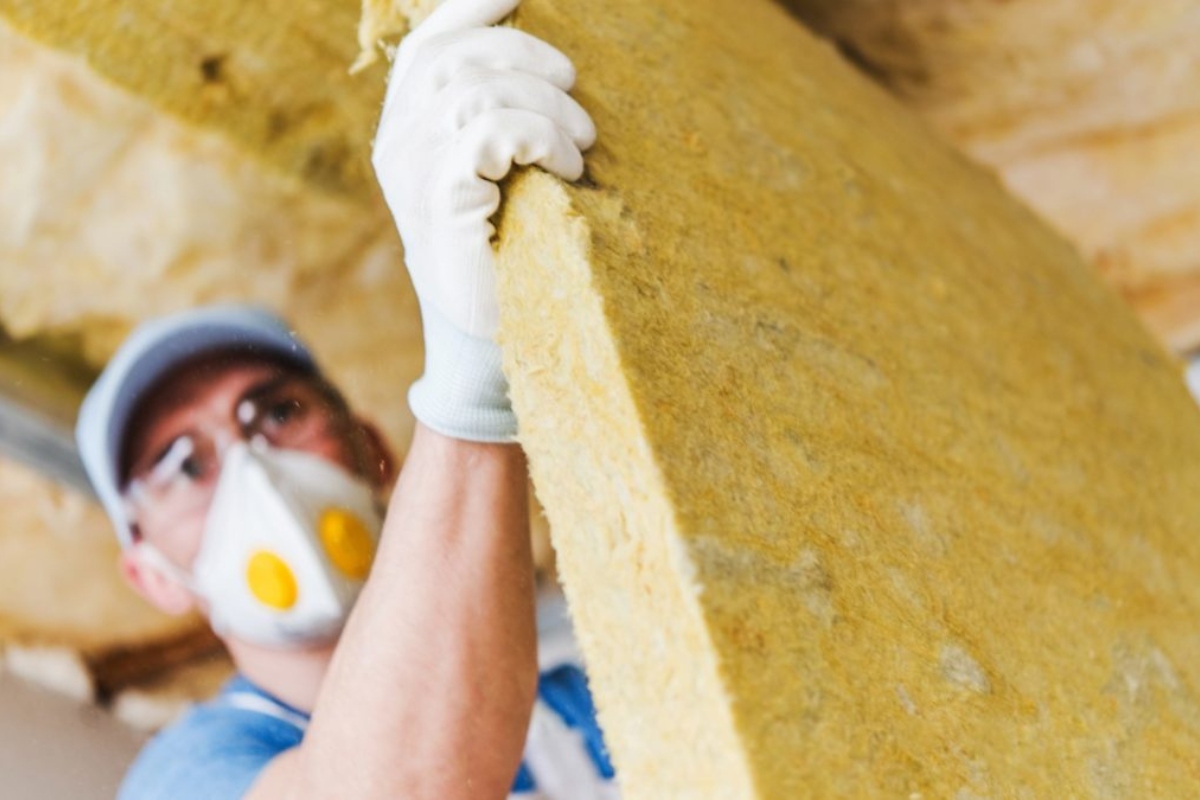
Method 1: Stapling
Stapling is one of the most commonly used methods for holding insulation in place, particularly for flexible insulation materials like fiberglass or mineral wool. It is a simple and effective method that provides a secure attachment to the designated surface. Here’s how to use the stapling method:
- First, ensure that you have the necessary safety equipment, such as gloves and goggles, to protect yourself during the installation process.
- Position the insulation in the desired location, ensuring it is flush against the surface and covering the area completely.
- Using a staple gun, begin at one corner or edge of the insulation and insert staples approximately 6 to 8 inches apart. This spacing ensures even support and prevents sagging.
- Continue stapling along the edges, working your way towards the center. Make sure to maintain consistent spacing between the staples for maximum stability.
- For larger insulation sections, add additional staples in the middle to provide extra support and prevent sagging over time.
- Be cautious not to staple through electrical wires or plumbing pipes that may be concealed behind the insulation. Take the time to locate and mark these objects before stapling.
- Once all the staples are in place, double-check the entire installation to ensure proper attachment and coverage.
It’s important to note that when stapling insulation, avoid compressing or squashing it too tightly. This can reduce its effectiveness and insulation properties. Additionally, make sure to use the appropriate staple size for the insulation thickness to prevent damage.
Stapling is a versatile method that can be used for various insulation types and installations. However, it may not be suitable for rigid insulation materials, which require alternative methods for secure attachment.
Method 2: Taping
Taping is another effective method for holding insulation in place, especially when dealing with rigid insulation panels or boards. It provides a secure bond between the insulation and the surface, ensuring stability and preventing shifting. Here’s how to use the taping method:
- Begin by positioning the insulation panels or boards in the desired location, ensuring they are properly aligned and covering the intended area.
- Using appropriate tape for insulation, such as duct tape or foil tape, start at one corner or edge of the insulation and press the tape firmly onto both the insulation and the surrounding surface.
- Continue applying the tape along the edges, ensuring it is securely adhered and tightly sealed. Overlap the tape slightly to create a continuous bond.
- If working with larger insulation sections, place additional strips of tape in the middle to provide extra reinforcement and prevent sagging.
- Make sure to run your hand or a smooth object over the tape to ensure proper adhesion and eliminate any air pockets or wrinkles.
- Double-check the entire installation to ensure that all edges and corners are securely taped and there are no loose areas.
When using the taping method, it’s important to select tape that is suitable for insulation applications. Specialized insulation tapes provide excellent adhesion and durability, ensuring long-lasting performance.
Keep in mind that taping works best for rigid insulation materials that have a solid structure. For flexible or loose-fill insulation types, consider using alternative methods that provide better support and stability.
Use insulation supports or wire mesh to hold insulation in place. These can be easily installed and will prevent the insulation from sagging or falling out of place.
Method 3: Using Insulation Hangers
Using insulation hangers is an effective method for holding insulation in place, particularly for overhead or vertical installations. Insulation hangers provide a sturdy support system and eliminate the need for adhesive or staples. Here’s how to use insulation hangers:
- Position the insulation in the desired location, ensuring it is properly aligned and covering the intended area.
- For each insulation hanger, place the base against the surface, aligning it with the edge of the insulation.
- Using a hammer, drive the fastener into the surface until it is securely fixed. Repeat this step for each insulation hanger, spacing them approximately 12 to 18 inches apart.
- Once all the hangers are installed, place the insulation over the hangers by sliding it onto the hooks or prongs.
- Ensure that the insulation is evenly distributed and that the hangers are securely holding it in place.
- For larger insulation sections, consider using additional hangers in the middle for added support and stability.
Insulation hangers are available in various types, including stick pins, speed clips, and hammer-in anchors. Choose the appropriate hanger type based on the insulation material and installation requirements. Consult the manufacturer’s guidelines for the recommended hanger type and spacing for optimal results.
This method is particularly useful for suspending insulation from ceilings or walls, as it provides reliable support without compromising the integrity of the insulation material. Insulation hangers are commonly used in commercial buildings, warehouses, and other spaces where large-scale insulation installation is required.
Read more: How To Hold Up Insulation In Ceiling
Method 4: Using Adhesive
Using adhesive is a versatile and efficient method for holding insulation in place, especially for rigid insulation materials and surfaces where other attachment methods may not be feasible. Adhesive provides a strong bond between the insulation and the surface, ensuring long-lasting stability. Here’s how to use the adhesive method:
- Start by preparing the surface and the insulation. Ensure that both are clean, dry, and free from any debris or contaminants that could affect the adhesive’s performance.
- Select an appropriate adhesive based on the insulation type and surface material. Construction adhesive or spray adhesive are commonly used for this purpose.
- Apply a liberal amount of adhesive to the backside of the insulation panel or board, ensuring even coverage.
- Press the insulation firmly against the surface and hold it in place for a few seconds to allow the adhesive to bond.
- If working with larger insulation sections, consider adding additional support by applying adhesive to multiple points along the edges and in the center.
- Wait for the adhesive to dry and cure according to the manufacturer’s instructions. This will vary depending on the specific adhesive used.
- Once the adhesive has fully cured, double-check the entire installation to ensure that the insulation is firmly attached and there are no areas of detachment.
Using adhesive provides a seamless and secure attachment, eliminating the need for visible fasteners or penetrations in the insulation material. However, it’s important to note that adhesive can be difficult to remove, so make sure the placement is accurate before applying.
Always follow the manufacturer’s guidelines and recommendations when selecting and applying adhesive to ensure optimal bonding and long-term performance.
Method 5: Using Wire or Twine
Using wire or twine is a simple yet effective method for holding insulation in place, especially for loose-fill or flexible insulation materials. This method allows for easy adjustment and removal, making it ideal for temporary or DIY insulation projects. Here’s how to use wire or twine to hold insulation in place:
- Begin by positioning the insulation in the desired location, ensuring it covers the intended area and is properly aligned.
- Cut a piece of wire or twine long enough to reach across the insulation and secure it to the surrounding structure.
- Starting at one corner or edge of the insulation, wrap the wire or twine around the insulation and the supporting structure, creating a tight loop.
- Continue wrapping the wire or twine at regular intervals, typically around 1 to 2 feet apart, until you reach the opposite corner or edge.
- Tightly secure the wire or twine by tying a knot or twisting it to ensure it remains in place.
- Repeat this process for each corner or edge of the insulation, ensuring that it is securely held from all sides.
- Double-check the entire installation to ensure that the wire or twine is properly secured, without any loose ends or areas of weakness.
Using wire or twine provides flexibility in adjusting the tension and position of the insulation. It also allows for easy removal or repositioning if necessary. However, it’s important to note that this method may not be as effective for heavy or large insulation sections, as the wire or twine may not provide sufficient support.
Always use wire or twine that is strong enough to withstand the weight of the insulation and select an appropriate gauge or thickness based on the required strength. Take care not to overtighten, as this can compress the insulation and reduce its effectiveness.
This method is commonly used in DIY projects or situations where a temporary insulation solution is needed. However, for permanent installations or professional applications, other methods like stapling or using insulation hangers may be more suitable.
Conclusion
Properly holding insulation in place is crucial for maximizing its effectiveness and ensuring optimal energy efficiency. With the various methods discussed in this article, you have a range of options to choose from based on your insulation type, installation requirements, and personal preferences.
The stapling method provides a simple and effective way to secure flexible insulation materials like fiberglass or mineral wool. Taping is ideal for rigid insulation panels or boards, providing a strong bond and easy installation. Insulation hangers offer a reliable support system, especially for overhead or vertical installations. Using adhesive creates a seamless attachment for rigid insulation materials, while wire or twine provides flexibility and adjustability for temporary or DIY projects.
Remember to consider the specific guidelines and recommendations of the insulation manufacturer when selecting and employing these methods. Always prioritize safety, using appropriate tools and protective equipment during the installation process.
By holding insulation in place using the right method, you can ensure that it remains in its intended position, maximizing its thermal efficiency and reducing energy costs. Choose the method that suits your insulation type and installation needs, and enjoy the benefits of a well-insulated space.
Frequently Asked Questions about How To Hold Insulation In Place
Was this page helpful?
At Storables.com, we guarantee accurate and reliable information. Our content, validated by Expert Board Contributors, is crafted following stringent Editorial Policies. We're committed to providing you with well-researched, expert-backed insights for all your informational needs.


0 thoughts on “How To Hold Insulation In Place”