Articles
How To Get Started On Woodworking
Modified: January 18, 2024
Discover step-by-step articles on how to get started woodworking, from beginner tips to advanced techniques. Gain the skills and knowledge you need to create stunning woodwork projects.
(Many of the links in this article redirect to a specific reviewed product. Your purchase of these products through affiliate links helps to generate commission for Storables.com, at no extra cost. Learn more)
Introduction
Woodworking is a rewarding and fulfilling hobby that allows you to unleash your creativity and create beautiful, functional pieces from raw wood. Whether you’re a beginner or have some experience, getting started with woodworking can be both exciting and daunting. However, with the right guidance and knowledge, you can embark on this journey with confidence.
In this article, we will guide you through the process of getting started with woodworking. From choosing essential tools to understanding woodworking techniques, we will cover everything you need to know to begin your woodworking journey successfully.
Woodworking requires a combination of skill, knowledge, and creativity. It’s important to understand that, like any craft, it takes time and practice to master. So, approach woodworking with patience and a willingness to learn. With dedication and passion, you can unlock the endless possibilities that woodworking offers.
Before we dive into the practical aspects of woodworking, let’s take a moment to appreciate the beauty and versatility of wood as a medium. Wood has been used for centuries to create structures, furniture, and art. It has a warm, natural appeal that adds a touch of elegance to any project.
Woodworking is not just about creating functional pieces; it’s also about the joy of working with your hands and the sense of accomplishment that comes with completing a project. Whether you’re building a simple shelf or a complex piece of furniture, each step of the process carries its own satisfaction.
As you delve into the world of woodworking, you’ll discover the vast array of tools, techniques, and wood types available to you. This article will serve as your guide, providing you with the essential knowledge to get started and laying a foundation for your woodworking journey.
So, let’s roll up our sleeves, grab our tools, and embark on this woodworking adventure together. With dedication and a willingness to learn, you’ll be amazed at the beautiful pieces you can create and the sense of accomplishment that comes with being a woodworker.
Key Takeaways:
- Woodworking is a fulfilling craft that requires patience, practice, and dedication. From choosing essential tools to mastering joinery techniques, embracing challenges as learning opportunities is key to success.
- Creating a safe and organized workspace, understanding wood types and grades, and troubleshooting common woodworking problems are essential for a successful woodworking journey. Embrace the joy of woodworking and let your creativity soar!
Read more: How To Start A Woodworking Business
Choosing Essential Tools
When it comes to woodworking, having the right tools is essential to successfully complete your projects. While there are countless tools available, you don’t need to invest in every single one right from the start. Instead, focus on acquiring a few key tools that will cover the basics and allow you to work on a wide range of projects.
Here are some essential tools that every woodworker should have in their arsenal:
- Measuring Tools: A tape measure, combination square, and a set of measuring calipers are crucial for accurate measurements and ensuring your pieces fit together properly.
- Cutting Tools: A good quality handsaw, a set of chisels, and a coping saw will enable you to make precise cuts and shape your wood.
- Power Tools: While not mandatory, power tools like a cordless drill, circular saw, and jigsaw can greatly speed up your work and make it more efficient.
- Joinery Tools: To create strong and sturdy joints, you’ll need tools like a chisel set, a mallet, a dovetail saw, and a coping saw.
- Sanding and Finishing Tools: A random orbital sander, sandpaper in various grits, and brushes or cloths for applying finishes are necessary for giving your projects a smooth and polished finish.
Investing in high-quality tools may seem expensive at first, but they will last longer and provide better results in the long run. Remember, your tools are an investment in your woodworking journey.
Before purchasing any tools, it’s important to do some research and read reviews to ensure you’re buying quality products that meet your needs. Additionally, consider visiting a local woodworking store or attending woodworking workshops where you can get advice from professionals and try out different tools before making a purchase.
As you gain more experience and refine your woodworking skills, you can gradually expand your tool collection to include specialized tools for specific techniques. However, starting with the essential tools mentioned above will give you a solid foundation to work with and allow you to tackle a wide range of projects.
Remember, woodworking is not just about the tools you have but how you use them. Invest time in mastering the techniques and honing your skills. With practice and patience, you’ll become more adept at woodworking and unlock your creative potential.
Setting Up Your Workspace
Creating a dedicated and well-organized workspace is essential for a smooth and efficient woodworking experience. Whether you have a large workshop or a small corner in your garage, here are some key considerations when setting up your woodworking space:
- Space and Layout: Assess the available space and determine how much area you can allocate to your woodworking activities. Consider the size of your projects and ensure you have enough room to maneuver comfortably.
- Bench or Worktable: A sturdy workbench or worktable is a must-have for any woodworker. It provides a stable surface for cutting, assembling, and shaping your projects. Make sure it’s at a comfortable height for your working preferences.
- Storage Solutions: Woodworking involves a variety of tools, materials, and supplies. Invest in storage solutions such as shelves, cabinets, pegboards, and drawers to keep your workspace organized and easily accessible.
- Lighting: Good lighting is crucial for accurate measurements and precise cuts. Ensure your workspace has ample natural light or invest in bright, adjustable LED lights to illuminate your projects effectively.
- Ventilation: Woodworking can produce dust, fumes, and potentially harmful particles. Adequate ventilation is necessary to maintain a healthy work environment. Consider installing a dust collection system or using fans and open windows to improve airflow.
- Electrical Outlets and Safety: Ensure you have sufficient electrical outlets for your power tools and accessories. Additionally, make sure your workspace is equipped with fire extinguishers, first aid kits, and safety equipment such as goggles, ear protection, and dust masks.
- Workshop Layout: Organize your tools and materials in a logical and efficient manner. Keep frequently used tools within easy reach and group similar items together. This will save you time and prevent clutter in your workspace.
Remember, a clean and organized workspace not only improves productivity but also enhances safety. Take the time to properly arrange your tools, materials, and work area before you start any project. It will save you time and frustration in the long run.
Lastly, don’t forget to personalize your workspace. Add personal touches, inspiration boards, and photographs of your favorite projects to make it a space that fuels your creativity and passion for woodworking.
By creating a functional and organized workspace, you’ll be setting yourself up for success and creating an environment conducive to creativity, focus, and enjoyment in your woodworking endeavors.
Learning Basic Woodworking Techniques
As a beginner in woodworking, it is important to start with a strong foundation of basic techniques. These techniques will serve as the building blocks for more complex woodworking projects. Here are some essential techniques to learn:
- Measuring and Marking: Accurate measurements are crucial for a successful woodworking project. Learn how to use a tape measure, combination square, and marking tools to measure and mark your wood accurately.
- Cutting: Mastering the art of cutting wood is essential. Practice using hand saws, circular saws, and jigsaws to make straight cuts, angled cuts, and curves.
- Joinery: Joinery techniques involve connecting pieces of wood together. Start by learning simple techniques like butt joints, miter joints, and pocket hole joinery. As you gain more expertise, you can explore advanced joinery methods such as dovetail joints and mortise and tenon joints.
- Sanding and Smoothing: Sanding your projects to a smooth finish is crucial for both aesthetics and functionality. Learn how to use different grits of sandpaper and various sanding techniques to achieve the desired smoothness.
- Wood Finishing: Applying a finish to your wood projects enhances their appearance and protects the wood. Explore different types of finishes such as stains, varnishes, oils, and waxes, and learn how to apply them correctly.
- Assembly: Understand the principles of proper assembly. This includes using clamps, glues, and fasteners such as screws and nails to securely join multiple pieces of wood together.
- Hand Tool Techniques: While power tools are efficient, hand tools play a vital role in fine woodworking. Learn how to use hand planes, chisels, and carving tools to refine and shape your wood projects.
There are several resources available to learn these basic woodworking techniques. Consider enrolling in a local woodworking class or workshop, watching online video tutorials, and referring to woodworking books and magazines. These resources will provide you with step-by-step instructions and visuals to help you grasp the techniques effectively.
Remember, practice makes perfect. Don’t be discouraged if you make mistakes in the beginning. Embrace them as learning opportunities and keep honing your skills. Through practice and patience, you’ll develop a strong foundation of woodworking techniques.
As you gain more confidence and experience, challenge yourself by taking on projects that incorporate the techniques you’ve learned. This way, you’ll continue to refine your skills and expand your woodworking repertoire.
Learning basic woodworking techniques is an exciting and fulfilling journey. Embrace the process, be open to learning, and enjoy the satisfaction of creating beautiful, handcrafted pieces from raw wood.
Understanding Wood Types and Grades
When it comes to woodworking, understanding the different types of wood and their grades is essential for choosing the right material for your projects. Each type of wood has its own characteristics, strengths, and weaknesses. Here’s a brief overview to help you navigate the world of wood:
- Hardwoods vs. Softwoods: Wood can be classified into two broad categories: hardwoods and softwoods. Hardwoods come from deciduous trees and are known for their density and durability. Examples include oak, maple, and mahogany. Softwoods come from coniferous trees and are generally lighter and easier to work with. Pine, cedar, and spruce are common softwood species.
- Common Wood Species: There are numerous wood species used in woodworking, each with its unique characteristics. Some popular hardwood species include walnut, cherry, ash, and birch. Softwood species like pine and cedar are commonly used for outdoor projects.
- Wood Grain: The grain pattern of wood refers to the arrangement of fibers in the wood. It can be straight, curly, wavy, or even have knots and burls. Understanding wood grain is crucial for certain woodworking techniques, such as carving and joinery.
- Wood Grades: Wood is graded based on its appearance and quality. Common grading systems include Select, Common, and FAS (Firsts And Seconds). Higher-grade wood is generally more expensive but has fewer defects and a more uniform appearance.
- Wood Moisture Content: Wood contains moisture, and its moisture content affects its stability and suitability for different projects. Green or wet wood has a high moisture content and needs to be dried properly before use. Kiln-dried wood is typically preferred for woodworking projects.
- Sustainability and Environmental Considerations: It’s important to consider the sustainability of the wood you use. Look for wood that has been harvested responsibly and certified by organizations such as the Forest Stewardship Council (FSC).
When selecting wood for your projects, consider factors such as the intended use, desired appearance, and budget. Some projects may require a specific type of wood for its strength or durability, while others may prioritize aesthetics.
It’s also worth noting that wood can change over time due to factors such as humidity and temperature. This can lead to warping, swelling, or shrinking. Understanding how different woods react to these changes will help you choose the most suitable wood for your projects.
Do your research, visit local lumberyards, and talk to experienced woodworkers to get more familiar with the different types of wood and their characteristics. By understanding wood types and grades, you’ll be able to make informed decisions and select the best wood for your woodworking projects.
Read more: What Tools Do You Need To Start Woodworking
Selecting the Right Woodworking Projects
Choosing the right woodworking projects is crucial for both beginners and experienced woodworkers. The projects you undertake should align with your skill level, available time, and interests. Here are some factors to consider when selecting woodworking projects:
- Skill Level: If you’re a beginner, it’s important to start with simple projects that allow you to practice fundamental techniques. As you gain more experience and confidence, you can gradually take on more complex projects that challenge your skills.
- Time Commitment: Assess the amount of time you can dedicate to woodworking. Consider the scope and complexity of the project and ensure it fits within your available time frame. Starting with smaller projects can be a great way to build skills while completing projects in a shorter time span.
- Interest and Passion: Choose projects that align with your interests and passion. Whether it’s furniture, home decor, or outdoor structures, working on projects that excite you will keep you motivated and engaged in your woodworking journey.
- Tools and Equipment: Take into account the tools and equipment you have or are willing to invest in. Some projects may require specialized tools or techniques, so choose projects that align with the tools you have or are willing to acquire.
- Budget and Resources: Evaluate the cost of materials and resources needed for the project. Consider the availability of the required wood species, hardware, and finishes. Starting with projects that fit within your budget and resource availability is essential.
- Project Design and Complexity: Consider the complexity of the design and the techniques involved. It’s important to challenge yourself, but ensure it’s within your skill level. Start with simple designs and gradually progress to more intricate and challenging projects.
When selecting woodworking projects, it’s important to strike a balance between pushing your limits and ensuring a successful outcome. Taking on projects that are too complex or outside of your skill level can lead to frustration and disappointment. On the other hand, choosing projects that are too simple may not provide the desired level of challenge and growth.
Research online, browse through woodworking magazines and books, and explore project ideas from experienced woodworkers. Joining local woodworking clubs or online communities can also provide inspiration and guidance for project selection.
Remember, woodworking is a journey of continuous learning and improvement. Start with projects that build your foundational skills, and gradually progress to more advanced projects. Be patient with yourself, embrace mistakes as learning opportunities, and most importantly, have fun in the process.
By selecting the right woodworking projects, you’ll be able to enhance your skills, develop your creativity, and create beautiful, handmade pieces that you can be proud of.
Start with simple projects like a cutting board or a small shelf to build your skills and confidence. Invest in quality tools and safety equipment. Watch tutorials and read books to learn techniques.
Properly Measuring and Marking Wood
Accurate measurements and precise marking are essential in woodworking to ensure your pieces fit together properly and your project turns out as planned. Properly measuring and marking wood requires attention to detail and the use of the right tools. Here are some tips to help you measure and mark wood accurately:
- Use the Right Tools: Invest in quality measuring tools such as a tape measure, combination square, and a marking knife. These tools will provide precise measurements and clean, crisp markings.
- Measure Twice, Cut Once: This age-old adage holds true in woodworking. Double-check your measurements before making any cuts to avoid costly mistakes.
- Choose the Correct Measurement System: Whether you prefer imperial (inches) or metric (centimeters), ensure you are consistent in your measurements throughout the project.
- Account for Saw Blade Width: When measuring and marking for cuts, take into account the width of the saw blade. This will ensure your final pieces are the intended size.
- Mark with Precision: Use a marking knife or a sharp pencil to make accurate marks on the wood. A marking knife creates a precise, clean cut, while a pencil mark should be thin and clear.
- Consider Wood Expansion: Wood can expand and contract due to changes in humidity. When marking and measuring, consider allowing space for these potential changes to avoid warping or binding of your wood pieces.
- Utilize Story Sticks: Story sticks are a valuable tool in woodworking. They are wooden strips marked with specific measurements. By using a story stick, you can easily transfer measurements to multiple pieces without needing to remeasure each time.
- Use Reference Lines: When marking complex joinery or intricate cuts, use reference lines to guide your cuts. These lines act as visual guides and help ensure accurate and consistent results.
- Clamp Wood Securely: When measuring and marking, ensure the wood piece is securely clamped to avoid any movement. This will help maintain accuracy and prevent mistakes caused by shifting wood.
- Practice Precision: Like any skill, precision in measuring and marking comes with practice. Take your time, be patient, and focus on maintaining accuracy in every step of your woodworking project.
Remember, attention to detail in measuring and marking wood is crucial to the success of your project. Take the time to learn and practice these techniques, as they will significantly improve the quality and accuracy of your woodworking projects.
By following these tips and using the right tools, you can ensure precise measurements and clean markings on your wood, helping you achieve professional-looking results in your woodworking endeavors.
Essential Woodworking Safety Tips
Woodworking can be a fulfilling and enjoyable hobby, but it’s important to prioritize safety in your workshop. By following essential safety practices, you can protect yourself from accidents and ensure a safe working environment. Here are some important woodworking safety tips to keep in mind:
- Wear Personal Protective Equipment (PPE): Always wear the appropriate personal protective equipment, including safety goggles, ear protection, a dust mask, and a fitted apron or clothing that covers your body. This will protect you from flying wood chips, loud noises, harmful dust, and potential injuries.
- Keep Your Workspace Clean and Organized: A clean and organized workspace is essential for safety. Keep your work area free of clutter and ensure tools are stored properly. This reduces the risk of accidents caused by tripping over objects or reaching for tools in a crowded space.
- Use Sharp Tools: Sharp tools are safer to use than dull ones as they require less force and are less likely to slip. Keep your tools sharp and properly maintained to ensure clean cuts and reduce the risk of accidents.
- Always Follow Instructions: Read and understand the instruction manuals for all tools and equipment. Follow the manufacturer’s guidelines for safe operation and maintenance. Improper use of tools can lead to accidents and injuries.
- Practice Proper Tool Handling: Use tools with confidence and caution. Maintain a secure grip, keep your fingers and hands clear of the cutting area, and use appropriate techniques for each tool. Avoid distractions and focus on the task at hand.
- Take Breaks When Fatigued: Woodworking requires focus and attention to detail. Take regular breaks when you feel fatigued to avoid accidents caused by lack of concentration.
- Know Your Materials: Different types of wood have different properties and may react differently to tools and techniques. Understand the characteristics of the wood you are working with to make informed decisions and prevent accidents.
- Use Tools with Safety Features: Many power tools come with safety features such as blade guards and safety switches. Ensure these features are intact and functioning properly before using the tools.
- Securely Clamp Workpieces: When using power tools, make sure your workpiece is securely clamped. Unsecured wood can shift or move unexpectedly and cause accidents during cutting or shaping.
- Learn First Aid: Accidents can happen, even with the utmost care. Take the time to learn basic first aid techniques so you can respond appropriately in case of an emergency.
- Seek Professional Training: If you’re new to woodworking, consider taking a woodworking class or seeking guidance from experienced woodworkers. Proper training will teach you essential techniques and safety practices.
Remember, safety in woodworking should never be compromised. It’s important to develop good safety habits and make them an integral part of your woodworking routine. By prioritizing safety, you can enjoy your woodworking projects with peace of mind and avoid unnecessary accidents or injuries.
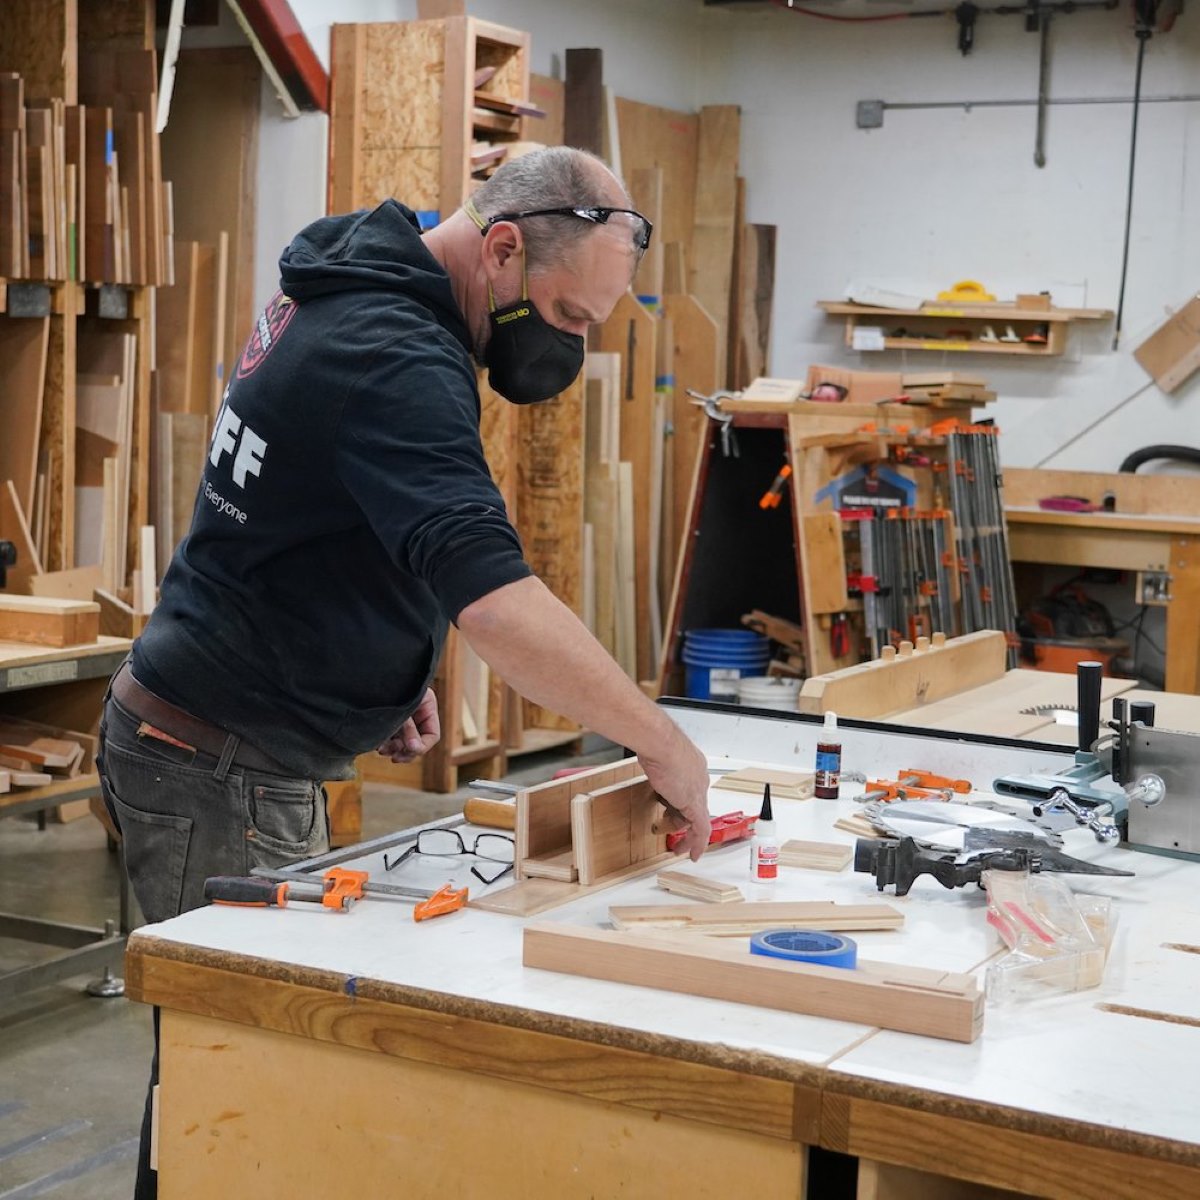
Joinery Techniques for Stronger Woodworking
Joinery is a fundamental aspect of woodworking that involves connecting two or more pieces of wood to create strong and stable structures. There are various joinery techniques that you can employ to enhance the strength and durability of your woodworking projects. Here are some common joinery techniques to consider:
- Dowel Joints: Dowel joints involve drilling holes into both pieces of wood and inserting dowels to join them. This technique provides good alignment and strength, making it suitable for joining panels, frames, and boxes.
- Biscuit Joints: Biscuit joints involve cutting matching slots in the adjoining pieces of wood and inserting oval-shaped biscuits. Biscuit joinery provides quick and accurate alignment and is commonly used in cabinetmaking and edge-to-edge joining.
- Mortise and Tenon Joints: Mortise and tenon joints are durable and versatile. They involve cutting a slot (mortise) in one piece of wood and a corresponding protrusion (tenon) on the other piece. This technique is commonly used in furniture making and can provide strong connections for frames, table legs, and other structural elements.
- Dovetail Joints: Dovetail joints are known for their strength and aesthetic appeal. They involve interlocking trapezoidal pins and tails, creating a secure and visually appealing connection. Dovetails are commonly used in drawer construction and high-end cabinetry.
- Finger Joints: Finger joints, also known as box joints, involve cutting interlocking fingers or notches on the ends of the boards. This technique provides a large surface area for gluing, creating a strong joint that is commonly used in box making and drawer construction.
- Bridle Joints: Bridle joints are similar to mortise and tenon joints but have open-ended mortises. They involve cutting a matching tenon on one piece and a notch (mortise) on the other piece. Bridle joints provide a strong connection and are often used in frame and panel construction.
- Dado Joints: Dado joints involve cutting a groove or slot across the grain to receive another piece of wood. This technique is commonly used in bookcases, shelving units, and cabinetry for holding shelves and dividers.
When selecting a joinery technique, consider the application and strength requirements of your project. Some joinery techniques are more suitable for certain types of projects than others. Additionally, ensure that you have the necessary tools and skills to execute the chosen technique accurately.
Practice each joinery technique on scrap wood before applying it to your actual project. This will allow you to refine your skills and ensure a proper fit and strong connection.
Remember, proper joinery is essential for creating sturdy and long-lasting woodworking projects. Take the time to learn and master different joinery techniques, and choose the technique that best suits your project’s needs. By incorporating strong joinery into your woodworking projects, you’ll enhance their durability and create beautiful pieces that stand the test of time.
Read more: How To Get Alexa To Start A Stopwatch
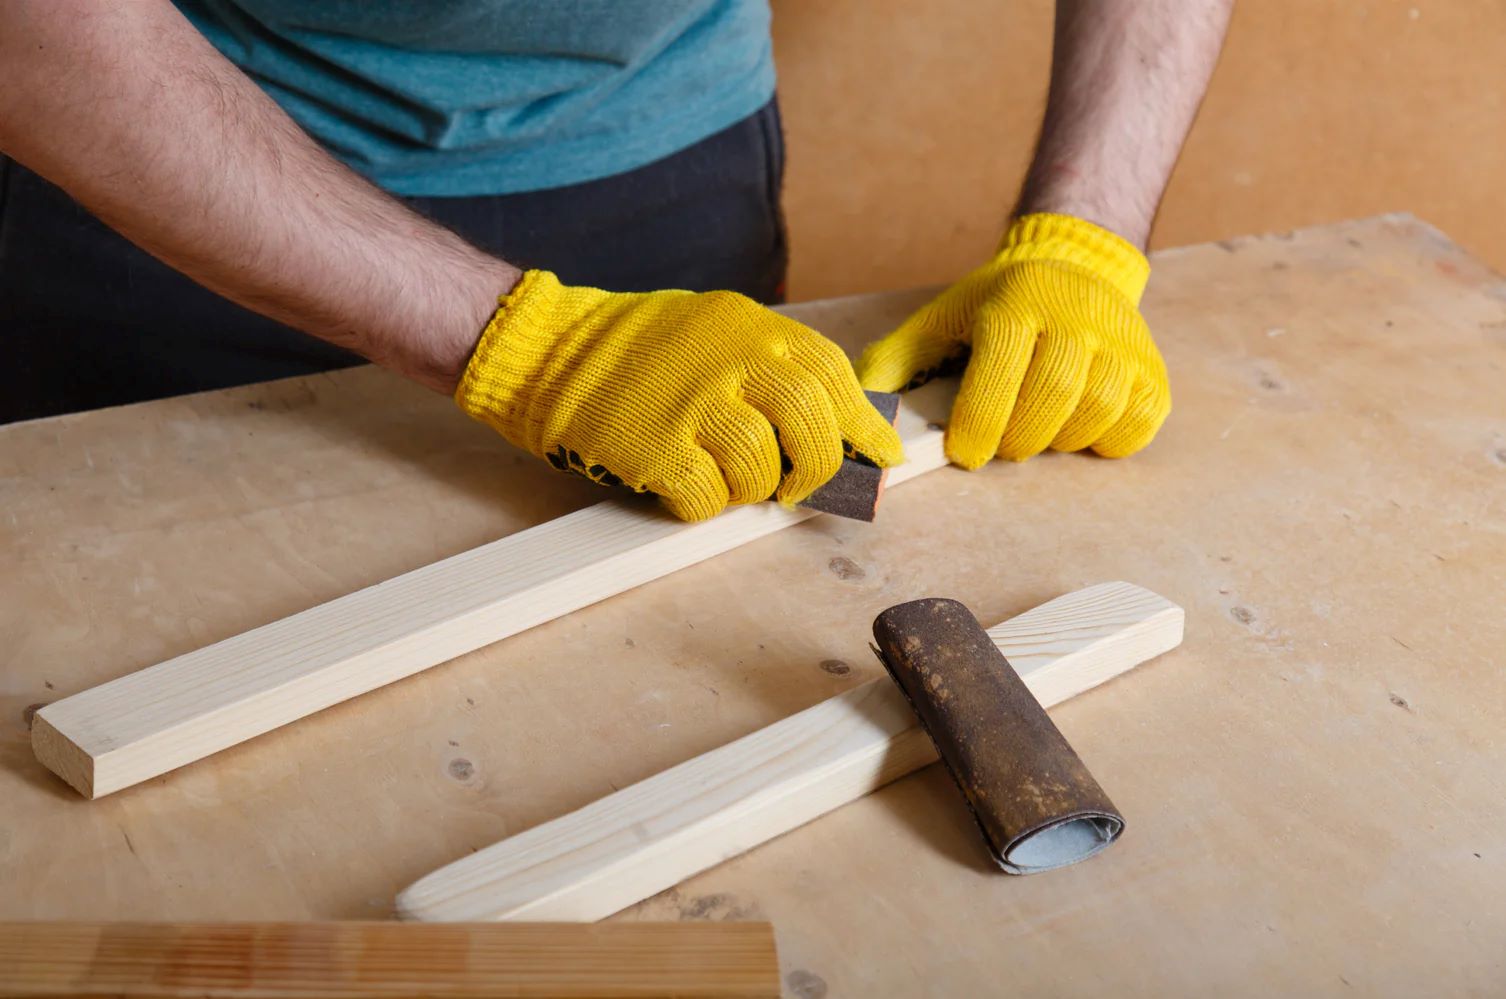
Sanding and Finishing Your Woodworking Projects
Sanding and finishing are important steps in the woodworking process that enhance the appearance, feel, and durability of your projects. Properly sanding and finishing your woodworking projects can bring out the natural beauty of the wood and protect it from everyday wear and tear. Here are some essential tips to help you achieve a smooth and professional-looking finish:
- Start with the Right Grit: Begin sanding with a coarse grit sandpaper to remove any rough surfaces, imperfections, or tool marks. As you progress, gradually switch to finer grits for a smoother finish.
- Sand with the Grain: Always sand with the grain of the wood to achieve a smooth surface and prevent scratches or swirl marks. Sanding against the grain can leave unsightly marks and compromise the final appearance.
- Use a Sanding Block: To maintain a consistent pressure and avoid uneven sanding, use a sanding block or a sanding sponge. This will help achieve a uniform finish across the surface and prevent accidental rounding of edges.
- Remove Dust Between Grits: After sanding with one grit, use a clean, soft cloth or a vacuum to remove dust and debris before moving on to the next finer grit. Dust particles can get trapped in the finish, affecting its appearance and smoothness.
- Apply a Pre-Stain Conditioner: If you’re working with porous woods like pine or cherry, it’s recommended to apply a pre-stain conditioner before staining. This helps the wood absorb stain more evenly and reduces blotchiness.
- Stain or Finish Application: Apply stains or finishes using a brush, rag, or spray, following the manufacturer’s instructions. Apply thin and even coats, and remove any excess to prevent drips or pooling. Allow each coat to dry thoroughly before applying the next.
- Sand between Coats: For a smooth and professional finish, lightly sand the surface between coats using fine sandpaper or steel wool. This helps remove imperfections and allows the subsequent coats to adhere better.
- Choose the Right Finish: Consider the intended use and desired look of your project when choosing a finish. Options include oils, varnishes, lacquers, shellacs, and waxes. Each finish has its own characteristics and level of protection, so choose one that suits your project’s needs.
- Apply a Protective Topcoat: To protect the wood and enhance durability, consider applying a protective topcoat, such as polyurethane or epoxy. These coatings provide a barrier against moisture, UV rays, and general wear and tear.
- Buff and Polish: Once the final coat has dried, you can buff and polish the surface using a fine grit sandpaper or a polishing compound. This helps achieve a smooth and glossy finish, enhancing the overall appearance of your project.
Remember to work in a well-ventilated area and wear appropriate personal protective equipment, such as a dust mask and gloves, when sanding and applying finishes. Follow all safety guidelines provided by the manufacturers of the products you are using.
Sanding and finishing your woodworking projects require patience and attention to detail. Take your time, regularly inspect the surface for any imperfections, and make necessary adjustments to achieve the desired result.
By properly sanding and finishing your woodworking projects, you can elevate their visual appeal, bring out the natural beauty of the wood, and protect your creations for years to come.
Troubleshooting Common Woodworking Problems
Woodworking, like any craft, can come with its fair share of challenges. However, with a little bit of knowledge and problem-solving skills, you can overcome common woodworking problems and ensure quality results. Here are some troubleshooting tips for common woodworking issues:
- Wood Splitting or Splintering: To prevent wood from splitting or splintering, use sharp tools and avoid applying excessive force. If splitting still occurs, you can reinforce weak areas with glue and clamps or use dowels or screws for added strength.
- Gaps or Misalignment: Gaps or misalignment can occur when joining pieces together. To fix this issue, ensure your joinery techniques are precise and accurate. If there are small gaps, you can use wood filler or epoxy to fill them, or adjust the pieces to improve the alignment.
- Uneven Stain or Finish: Uneven staining or finishing can occur due to variations in wood absorbency or inconsistent application. To solve this issue, sand the surface lightly and reapply the stain or finish, taking care to apply it evenly and avoid excess build-up in certain areas.
- Warped Wood: Warping can happen due to changes in humidity or improper drying of the wood. To correct minor warping, you can use clamps, weights, or steam to restore the shape. For severe warping, it may be necessary to replace the wood piece.
- Glue Marks or Excess Glue: Excess glue squeeze-out can leave unsightly marks. To remove dried glue, carefully scrape it off with a chisel or sand it off. Be cautious not to damage the surrounding wood. To prevent excess glue, use clamps and clean up any squeeze-out immediately.
- Inaccurate Cuts: Inaccurate cuts can happen due to various reasons, such as a misaligned fence or blade. Ensure your tools are properly aligned and calibrated. Take the time to measure and mark accurately before making any cuts, and double-check your measurements before proceeding.
- Sanding Marks or Scratches: Sanding marks or scratches can occur due to improper sanding techniques or using the wrong sandpaper grit. Take care to sand with the grain using progressively finer grits of sandpaper. If necessary, sand the entire surface uniformly to eliminate visible scratches.
- Dull Blades or Bits: Dull blades or bits can result in poor cuts and increase the chances of accidents. Regularly sharpen and maintain your blades and bits to ensure clean and smooth cuts. Replace them if they become excessively worn or damaged.
- Wood Tear-out: Tear-out happens when wood fibers are torn instead of cleanly cut. It can occur when working with certain wood species or in areas with irregular grain patterns. To minimize tear-out, use sharp tools, cut with the grain, and make light scoring cuts before making your final cuts.
- Finishing Issues: Issues with finishes, such as bubbling, streaks, or tackiness, can occur due to various factors, including incorrect application or incompatible products. Follow the manufacturer’s instructions carefully, ensure proper surface preparation, and conduct tests on scrap pieces before applying finishes to your project.
Remember, woodworking is a learning process, and it’s natural to encounter challenges along the way. The key is to remain patient, practice problem-solving, and continuously improve your skills.
When faced with woodworking problems, don’t hesitate to seek advice from experienced woodworkers, consult instructional resources, or join online woodworking communities. Often, the collective knowledge and experiences of fellow woodworkers can provide valuable insights to help you troubleshoot and overcome challenges.
By developing your troubleshooting skills and embracing challenges as learning opportunities, you’ll grow as a woodworker and be better equipped to tackle future projects with confidence.
Conclusion
Woodworking is a craft that combines creativity, skill, and passion to create beautiful pieces from raw wood. Whether you’re a beginner or an experienced woodworker, the journey of woodworking is a rewarding and fulfilling one.
In this article, we have covered various aspects of getting started with woodworking. From choosing essential tools to understanding wood types and grades, from setting up your workspace to learning basic techniques, we have provided you with a foundation to embark on your woodworking journey.
Remember, woodworking is a continuous learning process. Take the time to practice and refine your skills. Seek guidance from experienced woodworkers and embrace the challenges that come along the way.
As you progress in your woodworking skills, you’ll have the opportunity to create unique and personalized pieces that showcase your creativity and craftsmanship. Whether it’s building furniture for your home, crafting intricate decorations, or simply enjoying the process of shaping wood with your hands, woodworking allows you to express yourself and bring your ideas to life.
Throughout your woodworking journey, always prioritize safety. Wear the appropriate protective equipment, maintain a clean and organized workspace, and handle your tools with care. By making safety a priority, you can ensure an enjoyable and accident-free woodworking experience.
Now that you have a solid foundation of knowledge, it’s time to roll up your sleeves, get into the workshop, and start creating. Remember, every project you undertake is an opportunity to learn, improve, and explore the endless possibilities that woodworking offers.
So, let your creativity soar, let your passion guide you, and let the sound of tools against wood fill your workspace. Embrace the joy of woodworking and enjoy the fulfillment and satisfaction that comes from creating something with your own hands.
Happy woodworking!
Frequently Asked Questions about How To Get Started On Woodworking
Was this page helpful?
At Storables.com, we guarantee accurate and reliable information. Our content, validated by Expert Board Contributors, is crafted following stringent Editorial Policies. We're committed to providing you with well-researched, expert-backed insights for all your informational needs.


0 thoughts on “How To Get Started On Woodworking”