Articles
How To Learn Furniture Making
Modified: September 2, 2024
Learn the art of furniture making with our step-by-step guide. Discover the tips and tricks to create beautiful and functional pieces. Start your journey today!
(Many of the links in this article redirect to a specific reviewed product. Your purchase of these products through affiliate links helps to generate commission for Storables.com, at no extra cost. Learn more)
Introduction
Have you ever dreamed of creating furniture pieces that perfectly fit your space and reflect your personal style? Furniture making is a rewarding craft that allows you to design and build functional and beautiful pieces with your own hands. Whether you’re a novice or have some experience in woodworking, learning the art of furniture making opens up a world of possibilities to transform your living space.
In this comprehensive guide, we will walk you through the process of learning furniture making from scratch. From selecting the right tools and materials to mastering essential techniques and adding your unique touch, this article will equip you with the knowledge and skills to embark on your furniture-making journey.
Before we dive into the specifics, let’s take a moment to appreciate the beauty of furniture making. From classic designs to contemporary styles, furniture has the power to evoke emotions, enhance functionality, and create a sense of harmony within a space. The artistry and craftsmanship involved in creating furniture pieces make it a time-honored tradition that continues to captivate artisans and enthusiasts alike.
Learning furniture making not only allows you to craft custom pieces for your home but can also open doors to potential career opportunities. As more individuals appreciate the value of handcrafted furniture, there is a growing market for unique and high-quality pieces. Whether you aspire to become a professional furniture maker or simply enjoy the satisfaction of creating your own bespoke furniture, the skills you acquire will serve you well.
So, how do you get started on your furniture-making journey? Let’s explore the key steps and considerations you need to keep in mind as you embark on this exciting adventure.
Key Takeaways:
- Embark on a rewarding furniture-making journey by starting small, investing in quality tools, and prioritizing safety. Join woodworking communities, set clear goals, and embrace the learning process to craft beautiful bespoke pieces.
- Master the art of furniture making by learning essential joinery techniques, choosing the right materials, and paying attention to design elements. Explore resources, troubleshoot common mistakes, and continue expanding your expertise for a fulfilling experience.
Read more: How To Learn Plumbing
Getting Started
Before diving into furniture making, it’s important to familiarize yourself with the foundational aspects of woodworking. While previous experience in woodworking can be helpful, it is not essential. With the right mindset and dedication, anyone can learn furniture making from scratch.
Here are a few steps to help you get started:
- Do Your Research: Look for reliable sources of information, such as books, online tutorials, and woodworking forums, to gain a solid understanding of the basics. Familiarize yourself with different furniture styles, materials, and techniques to broaden your knowledge.
- Join a Woodworking Community: Connect with other furniture makers and woodworking enthusiasts. Join local woodworking clubs, attend workshops, or participate in online forums. Learning from experienced individuals can provide valuable insights and help you build a supportive network.
- Set Goals: Determine what you want to achieve in your furniture-making journey. Whether it’s building a specific piece of furniture or mastering a particular technique, setting clear goals will keep you motivated and focused.
- Start Small: Begin with simple projects that allow you to practice basic woodworking skills. Small items like cutting boards, picture frames, or small side tables can help you master essential techniques before tackling larger, more intricate pieces.
- Invest in Quality Tools: While it’s tempting to buy a range of tools at once, it’s best to start with a few essential tools and gradually expand your collection as you gain experience. Quality tools will not only make your work easier but also produce better results.
- Design and Plan: Sketch out your ideas and create detailed plans for each project. This will ensure you have a clear vision and guide you through the construction process. Pay attention to dimensions, joinery techniques, and aesthetic elements.
- Practice Safety: Woodworking involves sharp tools and potentially hazardous machinery. Prioritize safety by wearing protective gear, following proper usage guidelines, and keeping your workspace well-organized and clutter-free.
As you progress in your furniture-making journey, your skills and confidence will grow. Remember to be patient with yourself and embrace the learning process. With each project, you’ll develop a deeper understanding of the craft and hone your abilities.
Next, let’s delve into the essential tools and equipment you’ll need for your furniture-making endeavors.
Tools and Equipment
Having the right tools and equipment is crucial for successful furniture making. While the specific tools you’ll need may vary depending on the type of furniture you plan to create, there are a few essential tools that every furniture maker should have in their arsenal. Here are some of the key tools:
- Measuring and Layout Tools: Precision is critical in furniture making, so invest in quality measuring tools like a tape measure, combination square, and marking gauge. These tools will help you achieve accurate measurements and ensure your furniture pieces fit together perfectly.
- Cutting Tools: A set of quality chisels, hand saws, and a coping saw are essential for shaping and cutting wood. Additionally, a high-quality table saw or circular saw will be necessary for making precision cuts and rip cuts.
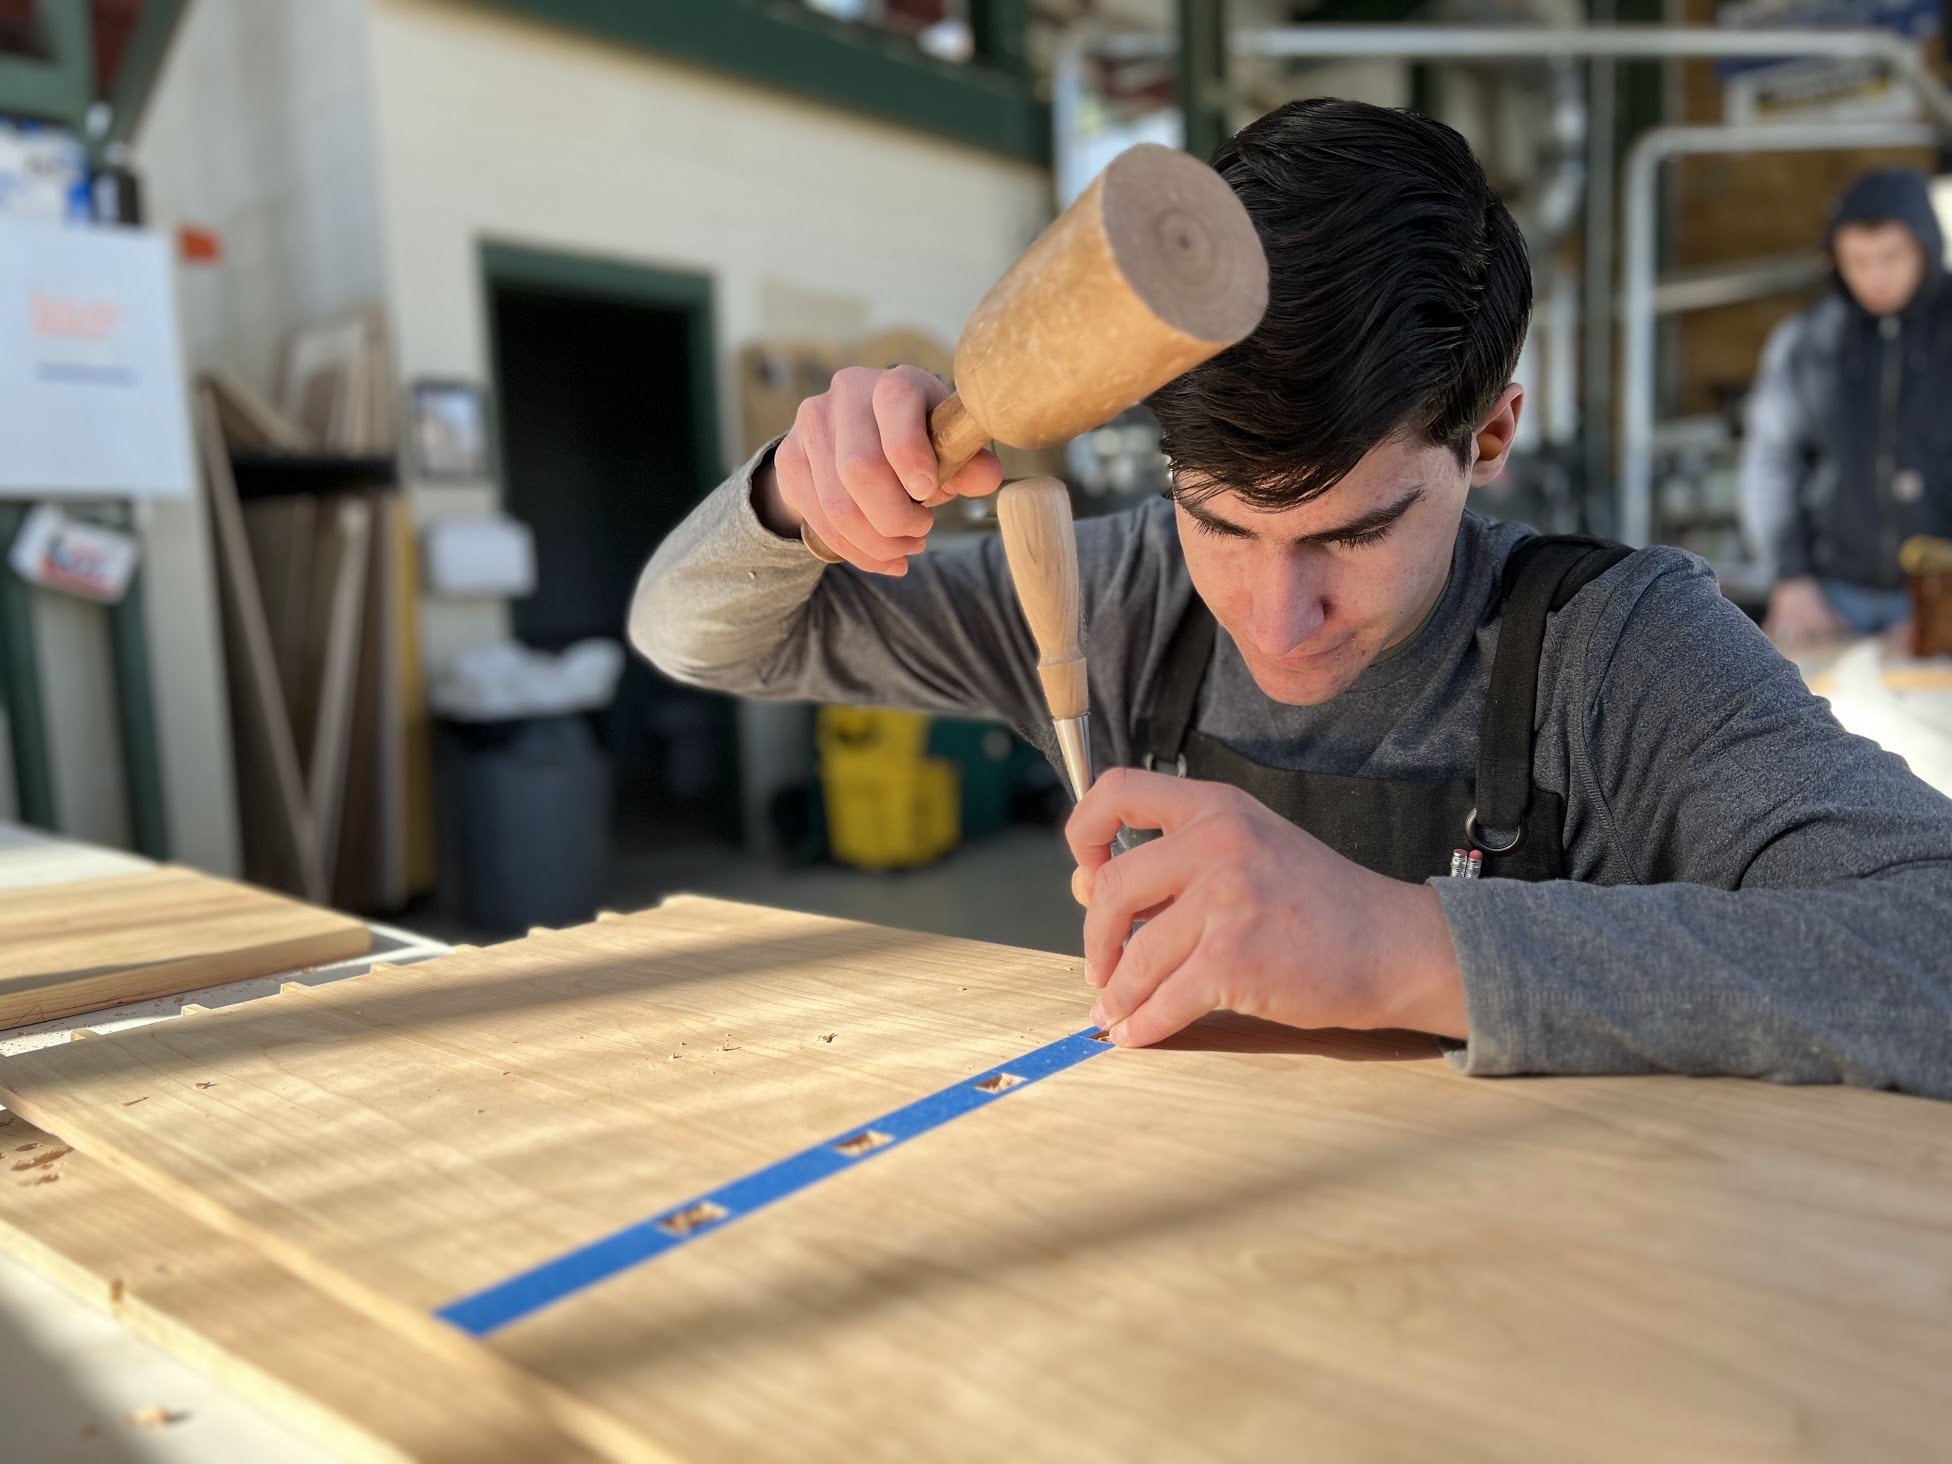
- Joinery Tools: To create strong and durable joints, you’ll need tools like a chisel set, a mallet, a dovetail saw, and a router. These tools will enable you to create various types of joints, such as dovetails, mortise and tenon, and rabbets.
- Sanding and Finishing Tools: Achieving a smooth and polished finish is crucial in furniture making. Invest in a random orbital sander, sanding blocks, and a range of sandpaper grits to achieve the desired surface quality. Additionally, a variety of brushes, rollers, and spray guns will be needed for applying finishes like paint, varnish, or wax.
- Clamps: Clamps are essential for holding pieces of wood together during assembly and glue-ups. A selection of different types and sizes of clamps, such as bar clamps, pipe clamps, and spring clamps, will provide versatility for various projects.
- Power Tools: While not mandatory, power tools can make certain tasks more efficient. Consider investing in a power drill, a jigsaw, a router, and a miter saw to speed up cutting, shaping, and joinery processes.
- Safety Equipment: Prioritize safety by wearing protective gear such as safety glasses, ear protection, and a dust mask. It’s also recommended to have a fire extinguisher and a first aid kit easily accessible in your workspace.
Remember, quality tools are an investment that will last for years and contribute to the overall quality of your furniture pieces. While it may take time to build your tool collection, prioritize acquiring the essentials and gradually expand as your skills and projects progress.
Now that you have an understanding of the necessary tools and equipment, let’s move on to the next crucial aspect of furniture making: choosing the right materials.
Choosing Materials
Choosing the right materials is a critical step in furniture making. The type of wood you select will greatly impact the final look, durability, and performance of your furniture piece. Here are some factors to consider when choosing materials:
- Wood Species: Different wood species have varying characteristics, including grain patterns, hardness, and color. Popular wood choices for furniture making include oak, maple, cherry, walnut, and mahogany. Research different wood species to understand their properties and select one that suits your desired aesthetics and project requirements.
- Grain Pattern and Figure: The grain pattern and figure of wood play a significant role in the overall appearance of your furniture. Consider the desired aesthetic and pick a wood species with a grain pattern that complements your design. Options range from straight grains to highly figured patterns like burls or crotch figures.
- Wood Dimensions: Consider the thickness and width of the wood planks or boards you’ll need for your project. This will depend on the specific design and structural requirements of your furniture piece.
- Sustainability and Environmental Impact: As a responsible furniture maker, it’s essential to consider the sustainability and environmental impact of the materials you choose. Look for wood that is certified by organizations such as the Forest Stewardship Council (FSC) to ensure that it comes from responsibly managed forests.
- Budget: Different wood species vary in cost, so consider your budget when selecting materials. Keep in mind that while some exotic or rare woods may be more expensive, there are often more affordable alternatives with similar aesthetics and properties.
- Seasoning and Moisture Content: Properly seasoned and dried wood is crucial to prevent warping, splitting, and other issues down the line. Ensure that the wood you choose has been properly dried to the appropriate moisture content for the climate in which your furniture will be used.
Aside from wood, other materials like metal components, upholstery fabrics, and decorative elements may be incorporated into your furniture piece. Consider these elements in the design phase and choose materials that coordinate well and contribute to the overall aesthetic appeal.
Remember, the materials you choose will influence the longevity and visual impact of your furniture piece. Take the time to research and select high-quality materials that align with your project goals. With the right materials in hand, you’re ready to dive into the construction phase and master the essential joinery techniques needed to create sturdy and beautiful furniture pieces.
Basic Joinery Techniques
In furniture making, joinery refers to the method used to connect two or more pieces of wood together. Mastering basic joinery techniques is essential for creating strong, durable, and visually appealing furniture pieces. Here are some of the fundamental joinery techniques to learn:
- Dowel Joint: The dowel joint involves drilling holes in two pieces of wood and inserting dowels to connect them. This technique is commonly used for joining boards together or attaching legs to tabletops.
- Mortise and Tenon Joint: Considered one of the strongest joints, the mortise and tenon joint involves cutting a rectangular hole (mortise) in one piece of wood and shaping a corresponding projection (tenon) on another piece to fit snugly into the mortise. This joint is commonly used for joining table legs to aprons or attaching chair backrests.
- Dovetail Joint: The dovetail joint is known for its strength and aesthetics. It involves cutting wedge-shaped tails on one piece of wood and corresponding notches (pins) on the other piece to interlock them together. Dovetails are commonly used in drawer construction and joinery for cabinet work.
- Biscuit Joint: A biscuit joint involves cutting a shallow slot on the edges of two pieces of wood and inserting a thin, oval-shaped wooden biscuit coated with glue. This technique is popular for aligning and reinforcing butt joints, such as in tabletops and panels.
- Box Joint: Box joints, also known as finger joints, involve cutting interlocking rectangular or square fingers on the end of two pieces of wood. This joint is commonly used in box construction, drawer joinery, and sometimes in joinery for cabinet doors.
- Dado Joint: In a dado joint, a groove is cut across the grain of one piece of wood, and another piece fits into that groove. Dados are commonly used in shelf construction and to provide additional support in cabinet and case construction.
While these are just a few examples of basic joinery techniques, there are many more options available. As you gain experience and confidence, you can explore and incorporate more advanced joinery techniques into your projects.
Remember, precision and accuracy are key when it comes to joinery. Take your time, use sharp tools, and double-check your measurements to ensure proper fit and alignment. Practice each joinery technique on scrap wood before attempting it on your actual project to refine your skills.
Now that you have a good understanding of joinery techniques, it’s time to move on to the next step: sanding and finishing your furniture piece.
Read more: How To Learn Construction
Sanding and Finishing
Sanding and finishing are crucial steps in the furniture-making process that greatly enhance the appearance and longevity of your piece. Sanding smooths the wood surface, removing imperfections and preparing it for the application of a finish. Here are the key steps to sanding and finishing your furniture:
- Start with Coarse Grit: Begin sanding with a coarse-grit sandpaper to remove any rough spots, mill marks, or imperfections on the wood surface. Sand parallel to the wood grain, applying even pressure, until you achieve a smooth and even surface.
- Progress to Fine Grits: Gradually move to finer grit sandpapers, working your way up to achieve a smoother finish. This progressive sanding process helps to remove any remaining scratches or marks left by previous grits.
- Remove Dust: After each sanding step, thoroughly clean the wood surface to remove any dust or debris. Use a brush or vacuum to ensure a clean surface for the next sanding stage.
- Apply a Finish: Once you have achieved the desired smoothness, it’s time to apply a finish to protect and enhance the wood. Finishes can include paint, stain, varnish, oil, or wax. Consider the type of wood, the desired color or sheen, and the purpose of the furniture piece when selecting a finish.
- Follow the Manufacturer’s Instructions: Different finishes have specific application guidelines, so make sure to read and follow the instructions provided by the manufacturer. This includes factors like the number of coats required, drying time, and whether sanding between coats is necessary.
- Apply Evenly: Use a brush, rag, or spraying equipment to apply the finish evenly. Work in the direction of the wood grain to achieve a smooth and uniform appearance. Take care to avoid drips, runs, or pooling of the finish.
- Allow Sufficient Drying Time: After applying the finish, allow ample time for it to dry and cure according to the manufacturer’s instructions. This ensures a durable and long-lasting finish.
- Additional Finishing Techniques: If desired, you can further enhance the final appearance of your furniture piece by techniques such as distressing, antiquing, or applying decorative elements like inlays or veneers.
Remember, sanding and finishing require patience and attention to detail to achieve a professional-looking result. Take your time, work systematically, and strive for a smooth and flawless finish that showcases the natural beauty of the wood.
Now that you have completed the sanding and finishing process, it’s time to move on to the final touches of upholstery and padding, depending on the type of furniture you’re creating.
Practice using different types of wood to understand their unique characteristics and how they respond to different tools and techniques.
Upholstery and Padding
Upholstery and padding add comfort, texture, and a touch of luxury to furniture pieces. Whether you’re creating a chair, sofa, or ottoman, mastering upholstery techniques is essential to complete your furniture project. Here are the key steps involved in upholstery and padding:
- Select Upholstery Fabric: Choose a fabric that matches your desired style and durability. Consider factors such as the intended use, color scheme, and texture of the fabric. Upholstery fabrics can vary from natural fibers like cotton and linen to synthetic materials like polyester and microfiber.
- Prepare the Furniture: Remove any existing fabric or padding from the furniture piece. Inspect the frame and repair any damage or loose joints before moving forward with the upholstery process.
- Add Padding: Depending on the level of comfort desired, add appropriate padding materials such as foam, batting, or dacron to cushion the seat, back, and arms of the furniture. Cut the padding to fit the specific dimensions and shape, ensuring a smooth and even distribution.
- Cut and Attach Fabric: Lay out the upholstery fabric, making sure to align any patterns or motifs properly. Carefully measure and cut the fabric pieces to fit each section of the furniture. Secure the fabric to the furniture frame using staples, tacks, or adhesive, starting with the seat and then moving to the back, arms, and other sections.
- Create and Attach Piping or Welting: If desired, add decorative piping or welting along the edges of the furniture to give it a polished and finished look. This can be done using pre-made piping or by creating your own with fabric strips and cord.
- Ensure Tautness and Smoothness: As you attach the fabric, ensure a tight, wrinkle-free fit by pulling the fabric evenly and tucking it securely. Use upholstery tools like staple removers, rubber mallets, or upholstery hammers to achieve a smooth and professional finish.
- Finish with Trim or Buttons: To add extra flair, you can incorporate decorative trims, nailheads, or buttons into your upholstery. These details can enhance the overall aesthetic and create a customized look for your furniture piece.
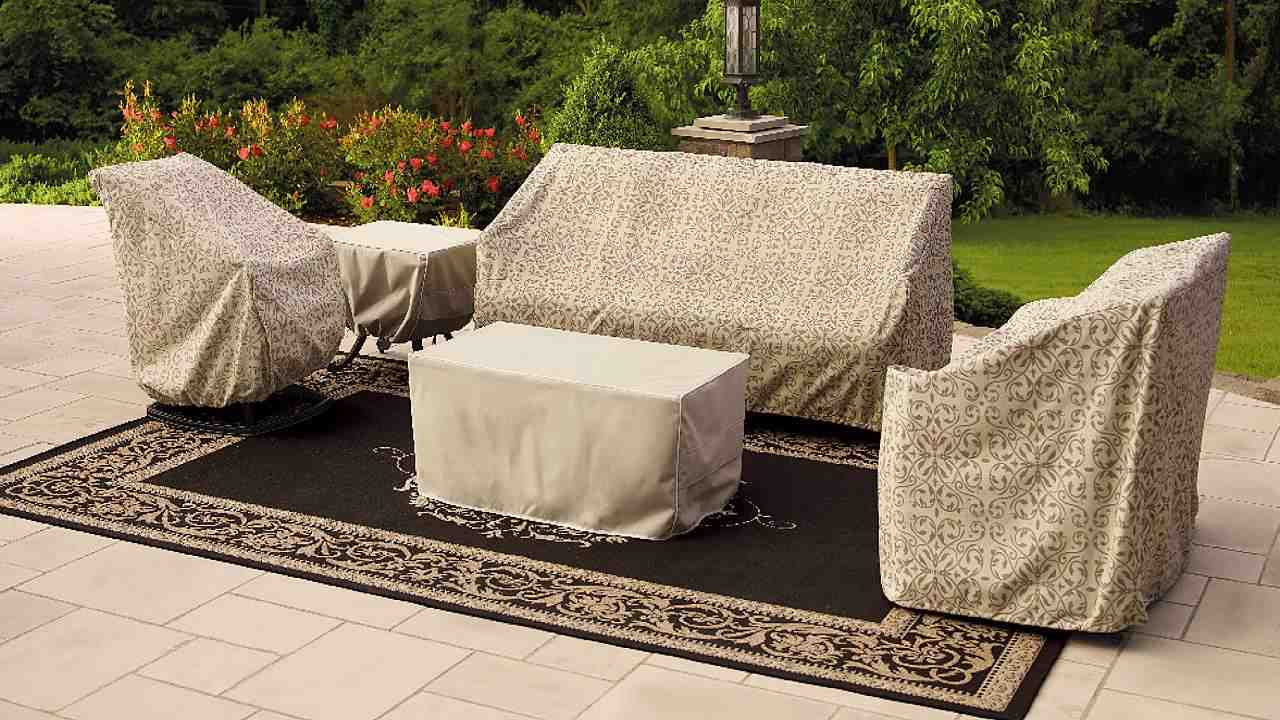
- Reinforce and Protect: Once the upholstery is complete, inspect the furniture for any loose or weak areas. Reinforce the frame or joints if necessary. Additionally, consider adding protective elements like dust covers or stain-resistant treatments to prolong the lifespan of the upholstery.
Remember, upholstery requires precision and attention to detail to achieve a professional finish. Take your time with each step, ensuring that the fabric is taut, seams are straight, and the overall appearance is consistent and well-crafted.
With upholstery and padding complete, your furniture piece is now ready to be enjoyed. However, before we conclude this guide, let’s explore the importance of design elements and aesthetics in furniture making.
Design Elements and Aesthetics
In furniture making, design elements and aesthetics play a significant role in creating visually appealing and harmonious pieces. The design choices you make can greatly influence the overall style and impact of your furniture. Here are essential considerations when it comes to design elements and aesthetics:
- Form and Proportion: The form and proportion of a furniture piece determine its overall shape and size. Consider the intended function, space limitations, and visual balance when determining the form and proportion of your furniture. Strive for harmony and coherence in the design.
- Style: Furniture styles can range from traditional to contemporary, with various subcategories and influences. Research and choose a style that resonates with your personal taste and complements your existing décor. Pay attention to details like the shape of legs, the curve of armrests, or the type of hardware in achieving the desired style.
- Color and Finish: Color greatly impacts the mood and visual impact of a furniture piece. Consider the color of the wood, fabric, or paint used in your furniture, and ensure it aligns with your overall design scheme. The finish of your furniture, whether it is natural, stained, painted, or distressed, also contributes to its aesthetics.
- Texture: Texture refers to the tactile qualities of the materials used in your furniture. Consider incorporating different textures, such as smooth wood, textured fabric, or metal accents, to add visual interest and depth to your piece.
- Details and Ornamentation: Pay attention to the small details that can elevate the design of your furniture. Consider adding decorative elements like carvings, inlays, or turned legs to create focal points and a sense of craftsmanship.
- Functionality: While aesthetics are important, the functionality of your furniture should not be overlooked. Ensure that the design serves its intended purpose and provides comfort, usability, and practicality.
When designing your furniture piece, take inspiration from various sources, such as architecture, nature, or other furniture designs. Sketch your ideas and consider creating mock-ups or prototypes to evaluate the overall visual impact and functionality.
Remember, designing furniture is a combination of artistic expression and practicality. Strive to create pieces that are not only visually striking but also functional and suited to the needs of the user.
Now that we’ve covered design elements and aesthetics, it’s important to address safety precautions to ensure a safe and enjoyable furniture-making experience.
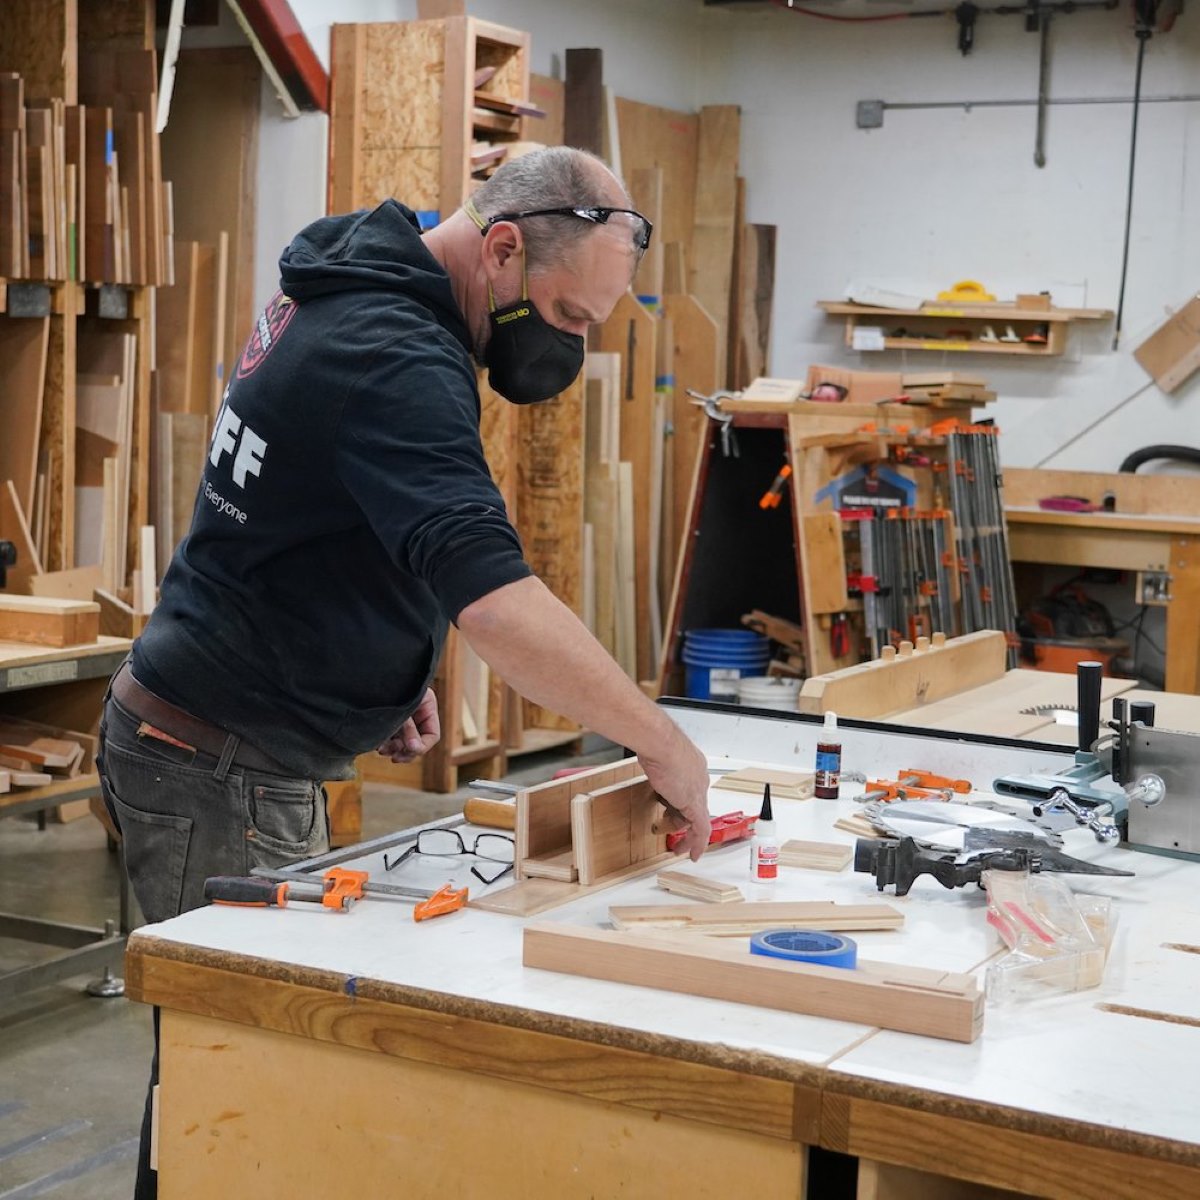
Safety Precautions
Safety should always be a top priority when engaging in furniture making or any woodworking activities. By taking necessary precautions, you can prevent accidents and injuries. Here are some key safety measures to keep in mind:
- Protective Gear: Always wear appropriate protective gear, including safety goggles, hearing protection, and a dust mask or respirator. Woodworking generates dust, noise, and the potential for flying debris, so protecting your eyes, ears, and respiratory system is crucial.
- Sharp Tools: Keep your tools sharp and in good condition. Dull or improperly maintained tools can be dangerous and increase the risk of accidents. Regularly inspect your tools and ensure that they are properly sharpened to reduce the chance of slips or kickbacks.
- Proper Tool Usage: Follow the manufacturer’s instructions for each tool and understand how to safely operate it. Be mindful of proper hand placement and body positioning when using power tools to avoid accidents.
- Work Area Safety: Maintain a clean and organized work area to minimize hazards. Keep your workspace well-lit, free from clutter, and ensure that cords and cables are properly secured to prevent trips and falls.
- Fire Safety: Woodworking involves the use of flammable materials like varnishes, stains, and solvents. Keep a fire extinguisher nearby and familiarize yourself with its usage. Additionally, store flammable materials properly and away from potential ignition sources.
- Electrical Safety: When working with power tools, make sure to unplug them when not in use, and handle cords and plugs with care. Inspect electrical equipment regularly for any damage or frayed wires. Avoid using damaged electrical tools.
- Good Ventilation: Proper ventilation is important to maintain a healthy work environment. When working with chemicals or producing dust, ensure that your workspace is well-ventilated to minimize exposure to harmful fumes or airborne particles.
- Education and Training: Stay informed about safe woodworking practices by attending workshops, classes, or seminars. Continuous education and training help you stay updated on the latest safety techniques and best practices.
Remember, accidents can happen even with the utmost caution. If an accident does occur, make sure you have a fully-stocked first aid kit readily available in your workshop and know how to administer basic first aid.
By prioritizing safety and taking necessary precautions, you can create a secure and enjoyable woodworking experience. Now, let’s explore troubleshooting and common mistakes that you may encounter during the furniture-making process.
Read more: How To Make Furniture With Pallets
Troubleshooting and Common Mistakes
During your furniture-making journey, you may encounter challenges and make mistakes along the way. However, these obstacles can be valuable learning opportunities. Here are some common mistakes and troubleshooting tips to help you overcome them:
- Measurement Errors: Accurate measurements are crucial in furniture making. Double-check your measurements before cutting any materials. If you do make a measurement error, consider adjusting your design or finding a creative solution to fix the mistake.
- Joint Gaps: Gaps in joints can weaken the overall structure of your furniture. To fix joint gaps, evaluate the cause – it could be due to incorrect measurements, improper cutting, or wood movement. Depending on the situation, you may need to make adjustments, use filler, or remake the joint.
- Uneven Stain or Finish: Uneven staining or finishing can be caused by a variety of factors, including inconsistent application, insufficient sanding, or improper preparation. To resolve this issue, consider sanding the surface and reapplying the stain or finish with proper technique and consistency.
- Wood Splitting or Cracking: Wood splitting or cracking can happen due to improper drying, changes in humidity, or working with low-quality wood. To prevent this, make sure the wood is properly seasoned and acclimated to your workshop environment. Additionally, avoid using excessive force when cutting or joining the wood.
- Lack of Stability: If your furniture piece feels unstable or wobbly, it may be due to uneven legs or an imbalanced design. Check the levelness of your furniture and make necessary adjustments or reinforcements to ensure stability.
- Finishing Issues: Problems with the finish, such as brush marks, drips, or bubbling, can occur due to improper application or inadequate preparation. Sand out any imperfections and apply thin, even layers of finish following the manufacturer’s instructions. Practice on scrap wood before applying the finish to your actual furniture project.
- Compromised Safety: Inadequate safety precautions can lead to accidents or injuries. If you find yourself compromising safety, take a step back and reassess your working habits. Carefully follow safety guidelines and prioritize your well-being throughout the entire furniture-making process.
- Design and Functionality Issues: If your furniture piece does not turn out as expected in terms of design or functionality, take time to analyze the issue. Identify the root cause and learn from it for future projects. Consider making adjustments or refinements to improve the design or functionality of the piece.
Learning from your mistakes and finding solutions is an essential part of the furniture-making journey. Remember that even professional furniture makers encounter challenges, and the key is to persevere and apply your newfound knowledge and skills to overcome them.
Now, armed with troubleshooting tips, it’s time to explore resources and further learning opportunities to continue expanding your furniture-making expertise.
Resources and Further Learning
As you continue to grow as a furniture maker, there are various resources and learning opportunities available to expand your knowledge and skills. Here are some valuable resources to consider:
- Books: There are numerous books dedicated to the art of furniture making, providing in-depth knowledge on woodworking techniques, joinery, design principles, and more. Look for titles written by renowned woodworking experts to gain valuable insights and inspiration.
- Online Tutorials: The internet offers a vast array of online tutorials and video courses that cover a wide range of furniture-making topics. Websites and platforms dedicated to woodworking provide step-by-step instructions, project plans, and tips from experienced makers. Take advantage of these resources to learn new techniques and refine your skills.
- Woodworking Communities and Forums: Engaging with fellow furniture makers through online forums and community platforms can provide a wealth of information and support. Join discussions, ask questions, and share your experiences to connect with like-minded individuals and gain valuable insights from their expertise.
- Woodworking Workshops and Classes: Local woodworking clubs, community colleges, or vocational schools often offer woodworking workshops and classes. These hands-on learning experiences allow you to work alongside experienced instructors, gaining practical knowledge in a collaborative and supportive environment.
- Mentorship and Apprenticeships: Seeking mentorship from an experienced furniture maker can be incredibly valuable. Consider reaching out to established professionals in your community and inquire about the possibility of apprenticing under them. This practical, one-on-one learning experience can provide personalized guidance and mentorship.
- Trade Shows and Exhibitions: Attending trade shows and woodworking exhibitions can expose you to a wide range of woodworking techniques, innovations, and industry trends. Explore displays, interact with experts, and attend workshops or demonstrations to broaden your knowledge and discover new possibilities in furniture making.
Remember, learning is a continuous process, and the world of furniture making is ever-evolving. Stay curious, seek out new resources, and challenge yourself with increasingly complex projects. Embrace every opportunity to expand your skills and deepen your understanding of the craft.
Congratulations on embarking on this rewarding journey of furniture making. With dedication, practice, and a thirst for knowledge, you are well on your way to creating beautiful and functional pieces that will be cherished for years to come.
Frequently Asked Questions about How To Learn Furniture Making
Was this page helpful?
At Storables.com, we guarantee accurate and reliable information. Our content, validated by Expert Board Contributors, is crafted following stringent Editorial Policies. We're committed to providing you with well-researched, expert-backed insights for all your informational needs.


0 thoughts on “How To Learn Furniture Making”