Articles
How To Learn Woodworking
Modified: October 28, 2024
Learn woodworking through informative articles and step-by-step tutorials. Enhance your woodworking skills and create impressive projects with our expert tips and techniques.
(Many of the links in this article redirect to a specific reviewed product. Your purchase of these products through affiliate links helps to generate commission for Storables.com, at no extra cost. Learn more)
Introduction
Welcome to the world of woodworking, a fascinating craft that allows you to unleash your creativity and create beautiful and functional objects from wood. Whether you are a beginner or have some experience, learning woodworking can be an incredibly rewarding journey that allows you to develop your skills, express your artistic vision, and even make practical items for your home or as gifts for others.
In this article, we will guide you through the process of learning woodworking, starting from the basics and gradually moving towards more advanced techniques. We will cover everything from the essential tools you’ll need to the safety precautions you should follow. So, let’s dive in and explore the world of woodworking together!
Woodworking is not just about building furniture; it’s also about building a foundation of knowledge and skills. It requires a combination of technique, precision, and a deep understanding of the materials you’re working with.
Whether you’re interested in carving intricate designs, constructing durable cabinets, or crafting elegant wooden sculptures, woodworking offers a wide range of possibilities.
Woodworking is not only a productive hobby but also a way to connect with nature. As you work with different types of wood, you’ll gain an appreciation for the unique characteristics and beauty of each species. You’ll also learn to make sustainable choices by selecting responsibly sourced wood and using it efficiently.
Learning woodworking requires practice and patience. It’s important to start with simple projects and gradually challenge yourself with more complex tasks as your skills improve.
In the following sections, we will explore the essentials of woodworking, including the tools you’ll need, the types of wood you’ll work with, basic techniques, safety precautions, and more. So, get ready to embark on an exciting journey into the world of woodworking!
Key Takeaways:
- Embrace the journey of woodworking, from mastering basic techniques to exploring advanced methods. Prioritize safety, learn from mistakes, and let creativity guide your projects for a fulfilling and rewarding experience.
- Dive into the world of woodworking with patience and passion. From selecting the right tools to troubleshooting common problems, enjoy the process of creating beautiful and functional pieces with your own hands.
Read more: Learn How To Wood Work With Hand Tools
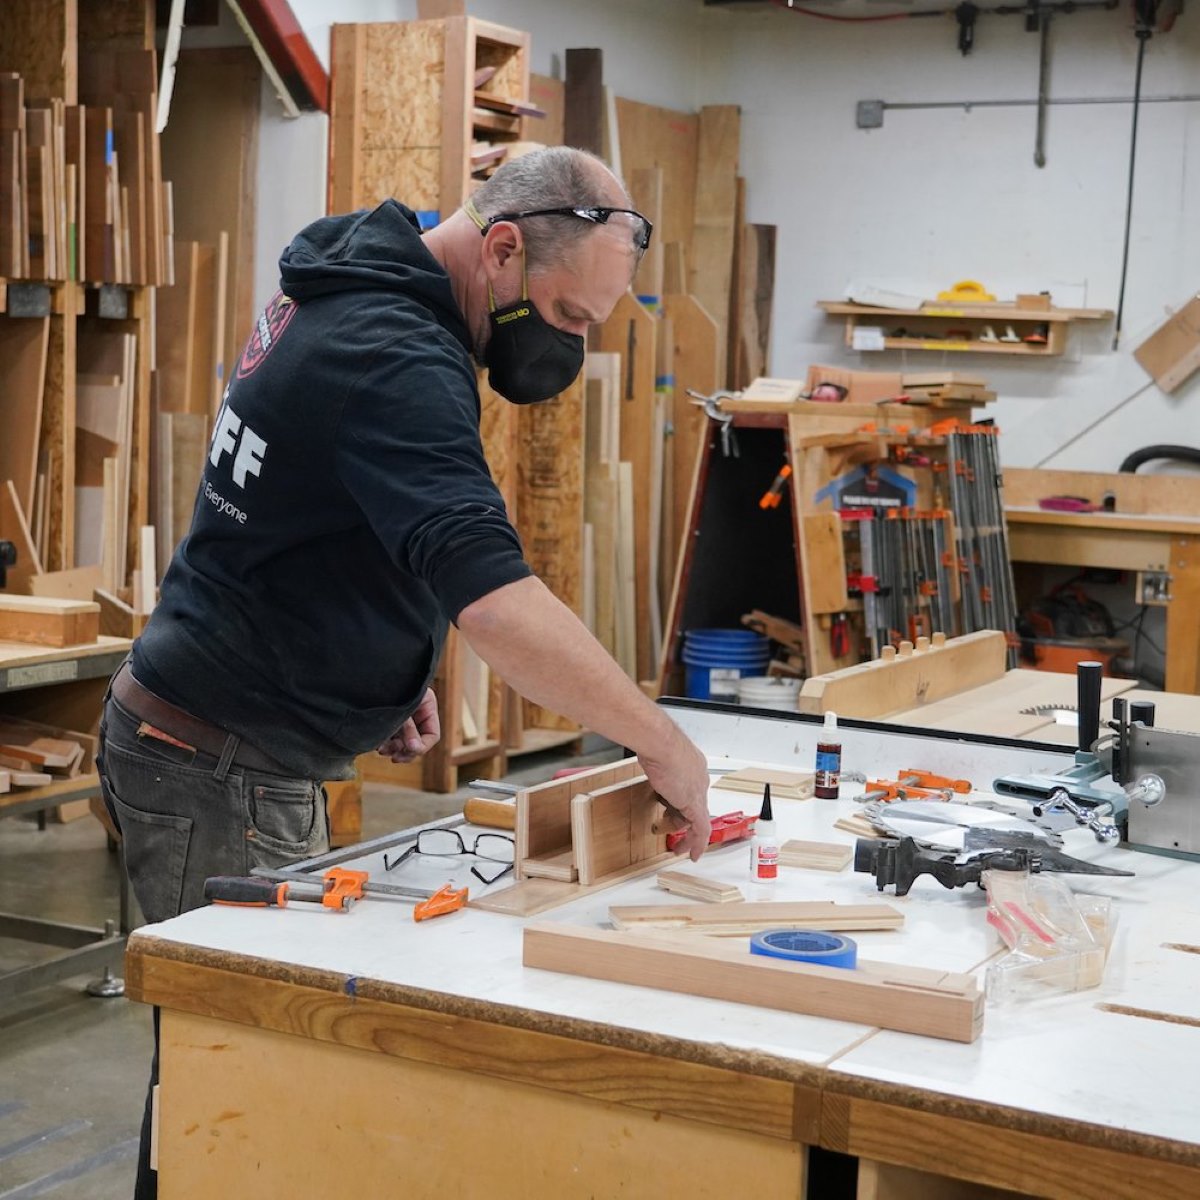
Getting Started with Woodworking
If you’re new to woodworking, getting started can feel a bit intimidating. But fear not! With the right approach and a willingness to learn, you’ll be well on your way to becoming a skilled woodworker. Here are some steps to help you get started:
- Set up your workspace: Find a dedicated area in your home or garage where you can set up your woodworking shop. It should be well-ventilated and have enough space for your tools and materials. A sturdy workbench is essential for woodworking projects.
- Acquire essential tools: Invest in some basic woodworking tools to get started. Some essential tools include a circular saw, a jigsaw, a drill, a miter saw, and a sander. These tools will allow you to make basic cuts, drill holes, and sand your projects.
- Start with simple projects: It’s important to start with beginner-friendly projects that will help you build your skills and confidence. Consider making small items like a cutting board, a picture frame, or a wooden box. These projects will help you practice measuring, cutting, and joining wood.
- Learn woodworking terminology: Familiarize yourself with common woodworking terms and techniques. Understanding terms like crosscut, rip cut, dado, and spline will be crucial as you follow woodworking plans and instructions.
- Master basic woodworking techniques: Learn the basics of measuring, marking, and cutting wood accurately. Practice making straight cuts, bevel cuts, and miter cuts. You should also learn different methods of joining wood, such as using screws, nails, dowels, or glue.
- Take advantage of online resources: There are many online tutorials, videos, and forums where you can learn from experienced woodworkers. Websites like YouTube and woodworking blogs provide step-by-step instructions and helpful tips to guide you in your woodworking journey.
- Join a woodworking class or workshop: Consider enrolling in a local woodworking class or workshop to learn from experienced instructors and interact with fellow woodworkers. These classes are a great way to learn new techniques, get hands-on experience, and receive valuable feedback on your projects.
- Practice, practice, practice: Like any skill, woodworking requires practice to improve. Don’t be discouraged if your first few projects don’t turn out perfectly. View mistakes as learning opportunities and keep honing your skills through consistent practice.
Remember, woodworking is a craft that takes time to master. Be patient and enjoy the process of learning and creating with wood. As you gain experience, you’ll develop your own style and techniques that will set your woodworking projects apart.
So, get started today, and let your woodworking journey begin!
Essential Tools for Woodworking
When it comes to woodworking, having the right tools is essential to tackle various projects effectively. While the specific tools you’ll need may vary depending on the type of woodworking you pursue, here are some essential tools that every aspiring woodworker should consider having in their arsenal:
- Measuring and Marking Tools: A tape measure, combination square, and marking gauge are crucial for accurate measurements and layout. These tools ensure that your cuts and joints are precise.
- Cutting Tools: A circular saw or a table saw is a versatile tool for making straight cuts. A jigsaw allows for more intricate cuts, while a miter saw is ideal for precise angle cuts. A coping saw and a hacksaw are also handy for finer cuts and shaping.
- Hand Tools: Essential hand tools include a set of chisels for shaping and carving, a block plane for smoothing rough surfaces, a coping saw for curved cuts, a hammer for driving nails, and screwdrivers for assembling projects.
- Joinery Tools: To join pieces of wood together, you’ll need tools like clamps for holding pieces in place, a mallet for tapping joints together, and various types of screws, nails, and dowels depending on your preferred method of joinery.
- Sanding Tools: Sanding is an important step in woodworking to achieve smooth surfaces. A random orbital sander or a sanding block with different grits of sandpaper will help you achieve a polished finish.
- Drilling and Screwdriving Tools: A cordless drill/driver is indispensable for making holes and driving screws. Invest in a set of drill bits of different sizes to accommodate various needs and types of wood.
- Safety Equipment: Safety should be a top priority when working with wood. Invest in safety equipment such as safety goggles, hearing protection, and a dust mask to protect yourself from debris and harmful particles.
- Workbench: A sturdy workbench with a vise is essential for holding your workpieces securely while you work on them. It provides stability and a comfortable working height.
- Storage and Organization: As your collection of tools grows, it’s important to have a storage system in place. Consider a tool box or a pegboard to keep your tools organized and easily accessible.
- Sharpening Tools: Keeping your tools sharp is crucial for efficient and precise woodworking. Have a sharpening stone or a honing guide to maintain the cutting edges of your chisels, plane irons, and other cutting tools.
Remember, investing in quality tools will not only make your woodworking experience more enjoyable but also ensure better results in your projects. Start with the essentials and gradually expand your tool collection as you tackle more advanced projects.
With the right tools at your disposal, you’ll be well-equipped to take on a wide range of woodworking projects and bring your creative visions to life!
Understanding Different Types of Wood
When it comes to woodworking, understanding the characteristics of different types of wood is essential. The type of wood you choose for your projects can greatly impact the final outcome in terms of aesthetics, durability, and workability. Here are some common types of wood used in woodworking:
- Hardwoods: Hardwoods come from deciduous trees and are known for their density and durability. Examples of hardwoods include oak, mahogany, walnut, maple, and cherry. Hardwoods are often used for furniture, cabinetry, and decorative woodworking projects.
- Softwoods: Softwoods come from coniferous trees and are generally less dense than hardwoods. Pine, cedar, fir, and redwood are common types of softwood. Softwoods are commonly used in construction, outdoor projects, and for making wood frames and trim.
- Plywood: Plywood is made by layering thin sheets of wood veneer and bonding them together with adhesive. It is known for its strength and stability. Plywood is often used for cabinets, furniture, and other structural applications.
- MDF: Medium-density fiberboard (MDF) is made by compressing wood fibers with a resin binder. It is a cost-effective and versatile option that can be used for furniture, shelving, and trim. MDF is easy to work with but is not as strong as solid wood.
- Particleboard: Particleboard is made by compressing wood particles and binding them with resin. It is an economical option for projects where strength and durability are not a primary concern, such as shelving or interior cabinetry.
- Exotic Woods: Exotic woods, such as teak, rosewood, and ebony, come from trees found in specific regions around the world. These woods are highly prized for their unique colors, grain patterns, and superior durability. They are often used in high-end furniture and specialty woodworking.
- Reclaimed Wood: Reclaimed wood is salvaged from old buildings, barns, or other structures. It offers a rustic charm and a sense of history to woodworking projects. Reclaimed wood can be used for furniture, flooring, and decorative accents.
When selecting wood for your projects, consider factors such as the intended use, the desired appearance, and the availability of the wood. It’s important to choose wood that is appropriate for the project at hand and matches your woodworking skills. Some woods may be more challenging to work with due to their hardness or grain patterns.
Additionally, keep in mind that different woods may require specific care and finishing techniques. Some woods may need to be sealed or treated to protect them from moisture or insects.
By understanding the characteristics and uses of different types of wood, you can make informed decisions when selecting materials for your woodworking projects. Experimenting with different types of wood will also allow you to explore new possibilities and broaden your woodworking skills.
Remember, each type of wood has its own unique personality and brings a distinct beauty to your creations. Embrace the variety and enjoy the process of working with different woods in your woodworking projects!
Basic Woodworking Techniques
Mastering basic woodworking techniques is essential for any woodworker, whether you’re a beginner or have some experience. These techniques form the building blocks of woodworking and will help you create precise and well-crafted projects. Here are some fundamental woodworking techniques to familiarize yourself with:
- Measuring and Marking: Accurate measurements are crucial in woodworking. Use a tape measure or a ruler to measure and mark the desired length or width on your wood. Use a marking gauge or a pencil to make precise markings for cuts or joinery.
- Cutting: Cutting wood accurately is a fundamental skill in woodworking. Use a circular saw, a jigsaw, or a table saw to make straight cuts. For more intricate cuts or curves, a coping saw or a bandsaw can be used. Always follow proper safety precautions when using cutting tools.
- Joinery: Joinery involves connecting two or more pieces of wood together. Common joinery techniques include using screws or nails, dowels, mortise and tenon joints, box joints, and dovetail joints. The choice of joinery technique depends on the project and the desired strength and appearance.
- Planing and Smoothing: Planing is the process of removing irregularities and smoothing the surfaces of the wood. A hand plane or a power planer can be used to achieve flat, smooth surfaces. Sanding with progressively finer grits of sandpaper is also essential for achieving a polished finish.
- Routing: Routing is a technique that involves using a router to shape edges, create decorative profiles, or make grooves in the wood. A router can be used with various router bits to achieve different designs and finishes.
- Sanding and Finishing: Sanding is crucial for achieving a smooth and polished surface. Start with coarse-grit sandpaper and gradually move to finer grits for a smooth finish. After sanding, apply a finish such as stain, paint, or varnish to protect and enhance the appearance of the wood.
- Assembly: Assembling your woodworking projects involves joining different pieces together. Use clamps or other securing methods to hold the pieces in place while the glue dries or the joinery is set. Pay attention to alignment and ensure a tight and sturdy connection.
- Basic Carving and Shaping: Carving and shaping techniques can add intricate details and personal touches to your woodworking projects. Use carving chisels, gouges, or a Dremel tool to create decorative elements or sculpt wood into desired shapes.
- Woodturning: Woodturning involves shaping a piece of wood on a lathe. This technique is commonly used to create bowls, vases, and other round or cylindrical objects. A lathe and a set of turning tools are needed for woodturning projects.
Remember, practice is key to mastering these techniques. Start with simple projects and gradually move on to more complex ones as you gain confidence and skill. There are many online tutorials and resources available to help you learn and refine your woodworking techniques.
By mastering these basic woodworking techniques, you’ll be well-equipped to tackle a wide range of projects and bring your creative ideas to life with precision and craftsmanship. Enjoy the process of learning and experimenting, and soon you’ll be creating beautiful and functional pieces with confidence!
Read more: How To Learn Furniture Making
Safety Precautions in Woodworking
Woodworking can be a highly satisfying and rewarding hobby, but it’s important to prioritize safety to prevent accidents and injury. Woodworking involves the use of sharp tools, heavy machinery, and potentially hazardous materials. By following proper safety precautions, you can ensure a safe and enjoyable woodworking experience. Here are some essential safety tips to keep in mind:
- Wear Personal Protective Equipment (PPE): Always wear appropriate safety gear, including safety goggles, ear protection, a dust mask, and work gloves. Safety goggles will protect your eyes from flying debris, while ear protection will reduce the risk of hearing damage. A dust mask will protect you from inhaling harmful particles, and work gloves will provide extra protection for your hands.
- Use Sharp and Well-Maintained Tools: Sharp tools are safer to use than dull ones. Keep your cutting tools, such as saw blades and chisels, sharp and in good condition. Dull tools require more force to use, increasing the risk of slips and accidents. Regularly inspect and maintain your tools to ensure they are in proper working order.
- Follow Manufacturer’s Instructions: Read and understand the manufacturer’s instructions before using any tools or machinery. Each tool may have specific safety guidelines and operating procedures that need to be followed. Make sure you are familiar with how to use the tool correctly and safely.
- Use Tools and Machinery Safely: Practice proper techniques when using tools and machinery. Keep your fingers and hands away from the cutting edge of tools. Use push sticks or blocks to guide the wood through a table saw or jointer. Never wear loose clothing or jewelry that could get caught in the machinery.
- Maintain a Clutter-Free Workspace: Keep your woodworking area clean and organized. Clutter can create tripping hazards and can cause accidents. Ensure that all tools, materials, and scraps are properly stored to prevent accidents and to ensure easy access to what you need.
- Properly Ventilate Your Workspace: When working with wood, dust and fumes can be released into the air. Make sure your workspace is well-ventilated to minimize the inhalation of potentially harmful particles. If working indoors, consider using a dust collection system or wearing a respirator to protect your lungs.
- Use Appropriate Safety Guards and Devices: Table saws, drill presses, and other machinery typically come with safety guards and devices. These are installed to protect you from potential accidents. Make sure these guards are properly in place and functional before operating the machinery.
- Educate Yourself: Stay informed about woodworking safety practices. Read books, watch tutorials, and consult reputable sources on woodworking safety. Joining a woodworking club or taking a safety course can also provide you with valuable insights and guidance.
- Know Your Limits: Recognize your skill level and don’t attempt projects or techniques that are beyond your capabilities. Start with simpler projects and gradually advance as you gain experience and confidence in your woodworking skills.
- Stay Focused and Alert: Woodworking requires concentration and focus. Avoid distractions, such as using your phone or having interruptions while operating power tools. Being present and fully aware of your surroundings will help prevent accidents.
Remember, safety should always be a priority in woodworking. By following these safety precautions and exercising caution, you can create a safe environment and enjoy the craft of woodworking without unnecessary risks. Prioritize safety and have a rewarding and injury-free woodworking experience!
Start with simple projects and gradually work your way up to more complex ones. Focus on learning the basic techniques and skills before taking on advanced projects.
Common Woodworking Joints
Woodworking joints are the methods used to connect two or more pieces of wood together. Strong and well-crafted joints are essential for the structural integrity and durability of your woodworking projects. Here are some common woodworking joints that you should be familiar with:
- Butt Joint: The butt joint is one of the simplest and most basic woodworking joints. It involves joining two pieces of wood together by simply butting them against each other. It can be reinforced with screws, nails, or dowels for added strength.
- Miter Joint: A miter joint is formed by cutting two pieces of wood at a 45-degree angle and joining them together to form a 90-degree corner. It is often used for corners in picture frames, molding, and boxes.
- Dado Joint: A dado joint is created by cutting a groove or channel in one piece of wood and fitting another piece into it. It is commonly used in cabinet construction, shelves, and bookcases to provide a sturdy and hidden joint.
- Dovetail Joint: The dovetail joint is a strong and visually appealing joint known for its interlocking teeth-like shape. It is commonly used in furniture and cabinetry. The dovetail joint requires precision and skill to create but offers excellent strength and longevity.
- Rabbet Joint: A rabbet joint involves cutting a notch or groove along the edge of one piece of wood, allowing another piece to fit into it. It is frequently used in cabinet backs, drawer bottoms, and picture frames for reinforcement and alignment.
- Mortise and Tenon Joint: The mortise and tenon joint is a versatile and strong joint used in various woodworking projects. It involves cutting a square or rectangular hole (mortise) in one piece of wood and fitting a corresponding projection (tenon) on another piece into it. It is commonly used in furniture, door frames, and table legs.
- Dowel Joint: A dowel joint involves drilling holes in two pieces of wood and inserting dowels to connect them. Dowels are cylindrical wooden rods that provide alignment and strength to the joint. Dowel joints are frequently used in cabinetmaking, furniture assembly, and bookshelves.
- Biscuit Joint: A biscuit joint is created by using a biscuit joiner to cut matching slots in two pieces of wood and then inserting a flat, football-shaped piece (biscuit) of compressed wood into the slots. Biscuit joints are commonly used for joining boards together to create wider panels, such as tabletops and panel doors.
- Halving Joint: A halving joint involves cutting a groove halfway through the thickness of two pieces of wood and fitting them together. This joint is ideal for creating frames and structural supports.
- Tongue and Groove Joint: The tongue and groove joint is commonly used in flooring, paneling, and cabinetry. It involves cutting a groove (slot) in one piece of wood and a corresponding tongue (projection) on another piece that fits into the groove. This joint creates a tight and secure connection.
Each woodworking joint has its own strengths, weaknesses, and applications. The choice of joint depends on factors such as the type of project, the desired strength, and the level of skill required. Experimenting with different joints will expand your woodworking skills and allow you to tackle a wider range of projects.
Remember, practice and precision are key to creating strong and well-crafted joints. Take your time to carefully measure, mark, and fit the pieces together. With experience and patience, you’ll become proficient in creating precise and enduring woodworking joints.
Finishing and Staining Wood Projects
Finishing and staining are crucial steps in woodworking that give your projects a polished and professional look while protecting the wood from damage and wear. These processes enhance the natural beauty of the wood and allow you to customize the color and sheen of your finished pieces. Here’s a guide to finishing and staining wood projects:
- Sanding: Before applying any finishes, it’s important to sand the wood to achieve a smooth and even surface. Start with a lower grit sandpaper to remove any roughness or imperfections, and gradually move to higher grits for a finer finish. Sanding between coats of finish will also help achieve a smoother final result.
- Choosing the Right Finish: There are various types of finishes available, each with its own advantages and characteristics. Common finishes include polyurethane, lacquer, shellac, and varnish. Consider factors such as the desired level of protection, the look you want to achieve, and the durability needed for your specific project.
- Application Methods: Finishes can be applied using different methods, such as brushing, wiping, spraying, or dipping. The method you choose depends on the type of finish, the size and shape of your project, and personal preference. Follow the manufacturer’s instructions for the specific finish you’re using.
- Applying the Finish: Apply the finish in thin, even coats, working with the grain of the wood. Avoid overapplying or leaving excessive amounts of finish, as this can lead to drips, bubbles, or uneven drying. Allow the recommended drying time between coats, and lightly sand with a fine-grit sandpaper before applying subsequent coats.
- Staining: Staining is an optional step that adds color to the wood and can enhance its grain patterns. Before staining, test the stain on a scrap piece or an inconspicuous area of your project to ensure you achieve the desired color. Apply the stain evenly, working with the grain, and wipe off any excess to prevent uneven or blotchy coloring.
- Sealing: After staining or applying the desired number of finish coats, consider sealing the wood to enhance its durability. A sealer, such as shellac or sanding sealer, can help seal the wood and create a smooth surface for subsequent finishes. Apply the sealer following the manufacturer’s instructions.
- Final Sanding and Polishing: Once the finish has fully dried, sand the surface with a fine-grit sandpaper to achieve a smooth and even finish. You can also consider polishing the surface using a buffing wheel or a polishing compound for an added level of shine and smoothness.
- Maintenance: Regular maintenance will help preserve the beauty and integrity of your finished wood projects. Avoid placing hot or wet items directly on the finished surface, and use coasters or trivets to protect the wood. Clean the surface with a damp cloth or mild wood cleaner and periodically reapply a thin coat of finish to rejuvenate and protect the wood.
Remember, patience and attention to detail are key when finishing and staining wood projects. Take your time to prepare the wood surface properly, follow the application instructions, and allow sufficient drying time between coats. With practice, you’ll develop techniques and achieve stunning finishes that will make your woodworking projects truly stand out.
So, unleash your creativity, choose the right finish for your project, and enjoy the process of transforming raw wood into beautifully finished pieces!
Building Your First Woodworking Project
Embarking on your first woodworking project is an exciting and rewarding experience. It’s an opportunity to put your newfound skills to use and create something tangible with your own hands. Building your first woodworking project doesn’t have to be intimidating; with careful planning and execution, you can successfully complete a project you’ll be proud of. Here are some tips to guide you through the process:
- Select a Suitable Project: Choose a project that aligns with your skill level and interests. Starting with a small and simple project, such as a cutting board, a wooden box, or a picture frame, is ideal for beginners. As you gain confidence and experience, you can gradually take on more complex projects.
- Plan and Prepare: Before getting started, create a detailed plan for your project. This plan should include measurements, a materials list, and step-by-step instructions. Take the time to gather all the necessary tools, materials, and supplies. Proper planning and preparation will help ensure a smoother building process.
- Measure Twice, Cut Once: Accurate measurements are critical in woodworking. Double-check your measurements before making any cuts to avoid costly mistakes. Use a combination square, a measuring tape, or a marking gauge to ensure precision.
- Follow Safety Precautions: Prioritize safety throughout the construction process. Wear appropriate safety gear, such as safety glasses, ear protection, and a dust mask. Use tools and equipment correctly and securely, and follow safety guidelines for each tool. Always maintain a clean and organized workspace to minimize hazards.
- Take Your Time: Woodworking requires patience and attention to detail. Take your time and work at a comfortable pace. Rushing can lead to mistakes and subpar results. Focus on each step, ensuring accuracy and quality at every stage of the project.
- Practice Good Joinery Techniques: Properly joining the pieces of your project is essential for its durability and strength. Use appropriate joinery techniques, such as dowels, screws, or dovetails, depending on your project and skill level. Follow the proper steps and use clamps or helpers to ensure a tight fit and secure bond.
- Don’t Fear Mistakes: Mistakes are a natural part of the learning process. Don’t be discouraged if you encounter setbacks or errors along the way. Instead, view them as valuable learning experiences. Learn from your mistakes, make necessary adjustments, and continue working towards a successful outcome.
- Finish with Care: Finishing your project is the final step to enhance its appearance and protect the wood. Sand the surface thoroughly and apply a suitable finish, such as varnish, stain, or paint. Follow the manufacturer’s instructions and apply thin, even coats for the best results.
- Celebrate Your Achievement: Once you’ve completed your first woodworking project, take a moment to appreciate your accomplishment. Admire the finished piece and reflect on what you’ve learned along the way. Remember, woodworking is a lifelong journey of continuous improvement and growth, so celebrate this milestone and be proud of your achievement!
Building your first woodworking project is an opportunity to channel your creativity, practice your skills, and create something of value. Embrace the process, learn from each step, and enjoy the sense of fulfillment that comes with completing a woodworking project with your own hands. With each project, you’ll gain more confidence and expand your woodworking skills. So, roll up your sleeves, gather your tools, and get ready to bring your first woodworking project to life!
Read more: How To Learn About Hand Tools
Advanced Woodworking Techniques
Once you have mastered the basic woodworking techniques, you may be eager to challenge yourself and explore more advanced woodworking methods. Advanced woodworking techniques require precision, skill, and a deeper understanding of the craft. Here are some advanced woodworking techniques to consider:
- Hand-Cut Dovetails: Hand-cut dovetails are an intricate and beautiful joint that requires precise sawing and chiseling skills. This technique involves creating interlocking tails and pins, resulting in a strong and visually appealing joint. Practice and patience are key to achieving tight-fitting dovetail joints.
- Box Joints: Box joints, also known as finger joints, are similar to dovetails but are simpler to create. They involve cutting alternating notches and fingers that interlock to create a strong joint. Box joints are commonly used in boxes, drawers, and other projects that require strong corner joints.
- Decorative Inlay: Inlay is the practice of embedding contrasting materials, such as wood, metal, or shell, into a recess or groove on the surface of a project. Inlay adds visual interest and can be used to create intricate patterns or designs. It requires precision routing, careful fitting, and polishing techniques.
- Wood Carving and Sculpting: Wood carving allows you to create intricate designs, decorative elements, or even sculptural pieces from a block of wood. Advanced wood carving techniques involve using various carving gouges, chisels, and mallets to shape the wood and create intricate details. Practice and a steady hand are essential for achieving the desired results.
- Cabinetmaking and Joinery: Advanced cabinetmaking involves constructing more complex pieces, such as cabinets, dressers, or built-in furniture. This technique requires precise measurements, advanced joinery methods, and the ability to work with different types of wood and materials.
- Marquetry and Veneering: Marquetry and veneering involve applying thin layers of decorative wood or other materials to create patterns, pictures, or designs on the surface of a project. These techniques require meticulous precision, knowledge of different wood species, and skills in cutting and fitting veneer pieces.
- Woodturning: Woodturning involves shaping a spinning piece of wood on a lathe into various forms such as bowls, vases, or table legs. Advanced woodturning techniques include creating intricate details, using different gouges and chisels, and mastering the art of hollowing out and refining the turned piece.
- Compound Angles: Working with compound angles requires advanced mathematical understanding and precise cutting techniques. Projects with compound angles, such as angled joinery, tapered legs, or segmented turning, can add complexity and visual interest to your woodworking projects.
- Fine Finishing Techniques: Advanced finishing techniques involve achieving flawlessly smooth surfaces, using different application methods such as French polishing, spray finishing, or hand-rubbed oil finishes. It also involves employing techniques like shading, toning, or glazing to bring out the natural beauty of the wood and enhance the project’s appearance.
- Advanced Joinery Techniques: Moving beyond basic joinery, advanced techniques include complex joints such as compound miter joints, sliding dovetails, bridle joints, or double mortise and tenon joints. These techniques require precision, meticulous planning, and expert execution.
Advanced woodworking techniques require patience, practice, and a willingness to push your skills to the next level. Each new technique you learn will expand your woodworking repertoire and open up new possibilities for your projects. Remember to always take safety precautions, continuously learn, and seek inspiration from experienced woodworkers and woodworking resources.
As you advance in your woodworking journey, challenge yourself with new techniques, focus on honing your skills, and embrace the satisfaction that comes with creating intricate and masterful woodworking projects.
Troubleshooting Common Woodworking Problems
Woodworking, like any craft, comes with its fair share of challenges and obstacles. From misaligned joints to uneven surfaces, woodworking problems can arise at any stage of a project. Here are some common woodworking problems you may encounter and how to troubleshoot them:
- Wood Splitting or Splintering: Splitting or splintering can occur when driving nails or screws too close to the edges of the wood. To prevent this, pre-drill holes slightly wider than the nail or screw diameter and avoid placing fasteners too close to the edges. Choosing the right type and size of fasteners for the wood density is also important.
- Uneven or Wavy Surfaces: Uneven or wavy surfaces can result from improper sanding or planing techniques. Before applying any finish, thoroughly sand the wood surface using progressively finer grit sandpaper. Ensure that you maintain a consistent sanding pressure and follow the grain of the wood. If needed, use a hand plane or power planer to level the surface.
- Gaps in Joints: Gaps between joints can occur due to insufficient clamping pressure or inaccurately cut or measured joints. To avoid gaps, ensure that you apply sufficient pressure when clamping the joint. Double-check your measurements and use precise cutting techniques to achieve tight-fitting joints. If gaps appear after glue-up, consider using wood fillers or veneer to fill them.
- Finishing Issues: Problems with finishes, such as drips, bubbles, or uneven coatings, can occur during the application process. Thoroughly clean and prepare the wood surface before applying the finish. Follow the manufacturer’s instructions for the specific finish and apply thin, even coats. Sand between coats using fine-grit sandpaper to achieve a smooth finish.
- Wood Warping or Cupping: Warping or cupping can happen when the wood loses or absorbs moisture unevenly. To prevent this, properly acclimate the wood to the workshop environment prior to starting your project. Use well-seasoned and properly dried wood. Store and work with wood in an environment with stable humidity levels. Properly seal or finish all surfaces of the wood to minimize moisture absorption or loss.
- Difficulty with Wood Joinery: Joinery problems can arise from inaccurate cuts or improper assembly techniques. Ensure that you carefully measure and mark your pieces before cutting to ensure accurate joinery. Use proper techniques, jigs, or templates to guide your cuts or drilling. Dry-fit the joint before applying glue to ensure a proper fit. Take your time and make necessary adjustments to achieve a precise and sturdy joint.
- Chip-Outs or Tear-Outs: Chip-outs or tear-outs can occur when cutting across end grain or working with highly figured or brittle wood. To minimize chip-outs, use a sharp blade or cutting tool appropriate for the wood. Take light passes when cutting across end grain and use a backer board to support the wood fibers. Consider using a scoring knife or tape to reduce splintering on delicate or brittle wood.
- Staining or Finishing Problems: Issues with stain or finish can arise from improper surface preparation, incompatible products, or uneven application. Ensure the wood is clean, dry, and free from previous finishes or contaminants before applying stain or finish. Test the stain or finish on a scrap piece or an inconspicuous area before applying it to the entire project. Follow the manufacturer’s instructions and apply the stain or finish evenly using the recommended techniques.
When facing woodworking problems, it’s essential to remember that mistakes are an opportunity to learn and grow in your craft. Embrace these challenges with a problem-solving mindset, seek advice from experienced woodworkers, study resources and tutorials, and experiment with different solutions.
Remember, woodworking is a journey that requires practice, patience, and continuous learning. By troubleshooting common woodworking problems, you’ll develop the skills and knowledge to tackle any obstacles that come your way and create stunning, well-crafted pieces.
Conclusion
Woodworking is a captivating craft that combines creativity, skill, and passion. Whether you’re a beginner or an experienced woodworker, the journey of learning and mastering woodworking techniques is an ongoing process that will continually challenge and inspire you. Throughout this article, we have explored various aspects of woodworking, from getting started with the essential tools to troubleshooting common problems that may arise.
By understanding different types of wood, from hardwoods to softwoods, and becoming familiar with basic woodworking techniques, you can begin to create beautiful and functional projects. As your skills progress, you can explore more advanced techniques such as hand-cut dovetails, marquetry, or woodturning, expanding your woodworking possibilities.
Throughout your woodworking journey, it’s crucial to prioritize safety, following proper safety precautions and using appropriate protective equipment. Don’t be afraid to make mistakes and learn from them, as they are opportunities for growth and improvement. Take your time, pay attention to details, and practice regularly to refine your skills and achieve precision in your work.
Remember that woodworking is not just about the end product, but also about the joy and fulfillment that comes from creating something with your own hands. Embrace the unique characteristics and beauty of different types of wood, and let your creativity guide you as you bring your visions to life.
Whether you’re building your first woodworking project or tackling more advanced endeavors, continue to seek inspiration, learn from experienced woodworkers, and explore the wealth of resources available. Join woodworking communities, take classes, or participate in workshops to connect with like-minded individuals and expand your knowledge.
Lastly, enjoy the journey. The process of woodworking is as important as the final result. Cherish the moments you spend working with wood, whether it’s the feel of the tools in your hands, the satisfying sound of sawing through a piece of wood, or the sense of accomplishment when you complete your project.
So, go forth with confidence and passion, embrace the challenges, and let your creativity soar in the world of woodworking. May your woodworking endeavors be filled with joy, creativity, and endless possibilities! Happy woodworking!
Frequently Asked Questions about How To Learn Woodworking
Was this page helpful?
At Storables.com, we guarantee accurate and reliable information. Our content, validated by Expert Board Contributors, is crafted following stringent Editorial Policies. We're committed to providing you with well-researched, expert-backed insights for all your informational needs.


0 thoughts on “How To Learn Woodworking”