Articles
How To Make A Woodworking Bench Vise
Modified: January 6, 2024
Learn how to make a woodworking bench vise with our informative articles. Discover tips, techniques, and step-by-step guides for building your own vise.
(Many of the links in this article redirect to a specific reviewed product. Your purchase of these products through affiliate links helps to generate commission for Storables.com, at no extra cost. Learn more)
Introduction
Woodworking is a timeless craft that allows people to create beautiful and functional pieces using their creativity and skills. One essential tool that every woodworker needs is a bench vise. A bench vise provides stability and security when working on various woodworking projects, making it an indispensable tool for any workshop.
While there are many bench vise options available in the market, building your own woodworking bench vise can bring a sense of accomplishment and customization to your workshop. Not only will you have a functional and durable tool, but you will also have the satisfaction of crafting it yourself.
In this article, we will guide you through the step-by-step process of making a woodworking bench vise. We will provide a list of materials and tools needed and explain each step in detail to ensure you can follow along, even if you’re a beginner in woodworking.
Before we delve into the construction process, it’s important to note that safety should always be a top priority. Make sure to wear appropriate safety gear, such as safety goggles and gloves, when working with tools and materials.
Now let’s gather our materials and get started on building a woodworking bench vise that will become an essential tool in your woodworking journey.
Key Takeaways:
- Building your own woodworking bench vise not only provides a valuable tool, but also allows you to showcase your skills and creativity, offering a sense of accomplishment and personalization to your workshop.
- Prioritizing safety, choosing high-quality materials, and following the step-by-step process outlined in this guide will result in a reliable and versatile bench vise that serves as an essential companion in your woodworking journey.
Read also: 9 Amazing Woodworking Vise for 2024
Materials and Tools Needed
Before we begin constructing our woodworking bench vise, let’s gather the necessary materials and tools. Here’s a list of what you’ll need:
Materials:
- Hardwood boards (such as oak or maple)
- Vise screw and handle
- Wood glue
- Wood screws
- Finish (such as varnish or wood stain)
- Sandpaper (various grits)
Tools:
- Table saw or circular saw
- Drill
- Clamps
- Mallet or hammer
- Chisels
- Screwdriver
- Sandpaper
- Measuring tape
It’s important to choose high-quality hardwood boards for the construction of your bench vise, as they need to withstand the pressure and ensure stability during woodworking tasks. Oak and maple are popular choices due to their strength and durability.
The vise screw and handle can be purchased from specialized woodworking stores or online. Make sure to select a vise screw that suits the size and weight requirements of your woodworking projects.
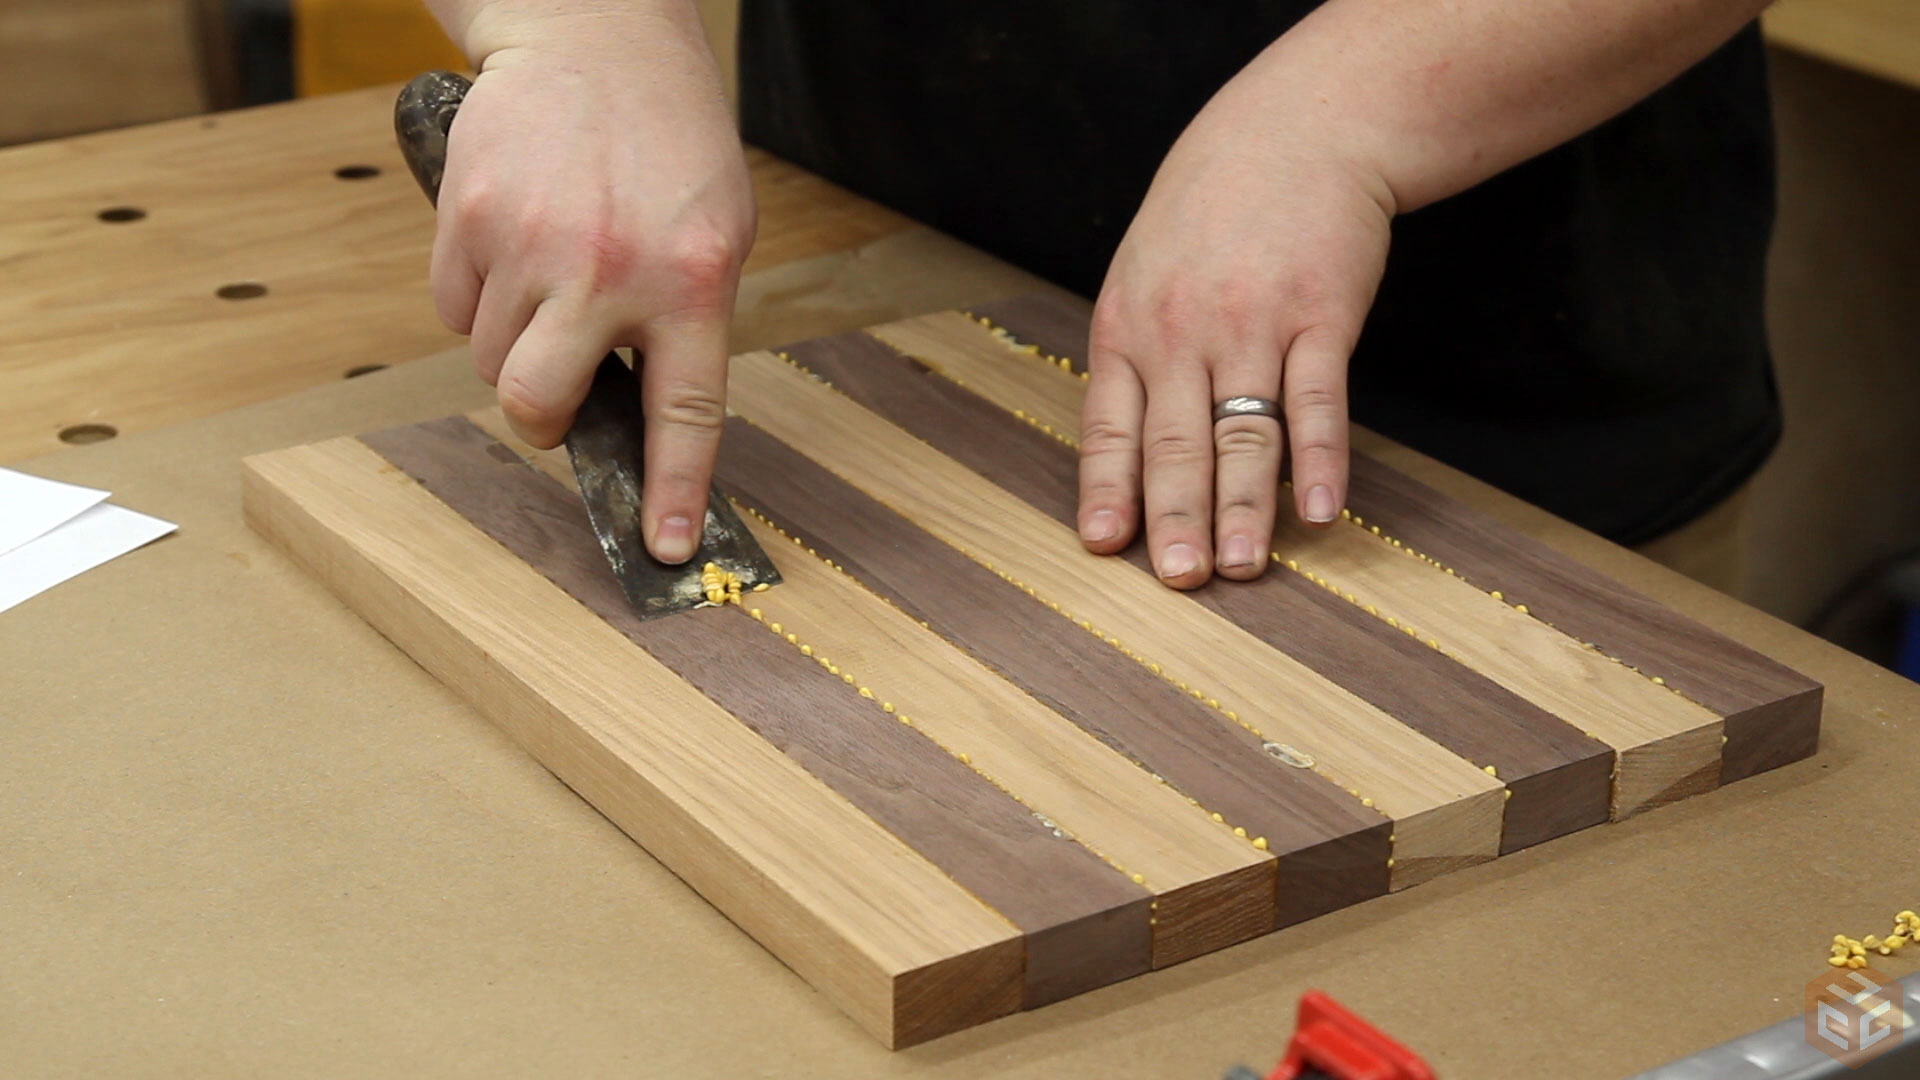
Wood glue will be used to securely bond the different wooden parts together. Look for a strong and fast-drying wood glue that is suitable for woodworking applications.
Wood screws will be used to attach various components of the bench vise. Make sure to select screws that are appropriate in size and strength to ensure proper assembly.
To give your bench vise a finished look and protect the wood from wear and tear, you’ll need a suitable finish, such as varnish or wood stain. Choose a finish that is compatible with the type of wood you’re using and follow the manufacturer’s instructions for application.
Sandpaper of various grits will be needed to smooth out rough edges, refine surfaces, and prepare the wood for finishing. Make sure to have different grits available, ranging from coarse to fine.
With the necessary materials and tools gathered, we’re ready to move on to the construction process. Let’s start building our woodworking bench vise!
Step 1: Choosing the Wood for Your Bench Vise
The wood you choose for your bench vise is crucial for its strength, durability, and overall performance. Hardwoods are the ideal choice for this project, as they have natural strength and can withstand the pressure applied during woodworking tasks.
Two popular choices for bench vise construction are oak and maple. Oak is known for its strength and resistance to wear and tear. It is a dense and durable wood that can handle heavy loads. Maple, on the other hand, is renowned for its stability and smoothness. It is a light-colored hardwood with a fine and even grain pattern.
When selecting the wood for your bench vise, consider the size and weight requirements of the projects you typically work on. Thicker and heavier pieces of wood are suitable for larger woodworking projects that exert significant force. Thinner and lighter wood can be used for smaller projects where less pressure is applied.
It’s also important to choose wood that is free from defects such as knots, cracks, or warping. These imperfections can weaken the vise and compromise its stability. Inspect each piece of wood carefully, and if you notice any defects, set it aside and select another piece.
Additionally, consider the moisture content of the wood. It’s important to use properly dried wood to prevent any warping or shrinking in the future. Look for kiln-dried or air-dried wood, as it will be more stable and less likely to change in size or shape.
Remember, the quality of the wood will directly affect the performance and longevity of your bench vise. Investing in high-quality hardwood will ensure a strong and reliable tool that will serve you well for years to come.
Once you have chosen the appropriate wood for your bench vise, proceed to the next step, which involves cutting the wood pieces.
Step 2: Cutting the Wood Pieces
Now that you have selected the suitable hardwood for your bench vise, it’s time to cut the wood pieces to build the various components of the vise. This step involves precision and accuracy to ensure proper fit and functionality.
Start by measuring and marking the dimensions of the wood pieces according to the design of your bench vise. Use a measuring tape and a pencil to make accurate measurements and clear markings.
Next, set up your table saw or circular saw with the appropriate blade for cutting hardwood. Make sure to adjust the settings and align the saw fence to the desired width of the wood pieces.
Take each piece of wood and carefully feed it through the saw, following the marked lines. Maintain a steady and controlled movement to achieve clean and accurate cuts.
Keep in mind that some components may require precise angles or beveled edges. In such cases, adjust the saw accordingly and make the necessary cuts to achieve the desired shape.
After cutting all the wood pieces, use sandpaper to smooth out any rough edges or imperfections caused by the cutting process. Start with a coarse grit sandpaper and gradually move to finer grits for a polished finish.
Always prioritize safety during this step. Ensure that you are wearing safety goggles and taking the necessary precautions while operating power tools.
Once you have finished cutting and sanding the wood pieces, proceed to the next step, which involves creating the jaws of the bench vise.
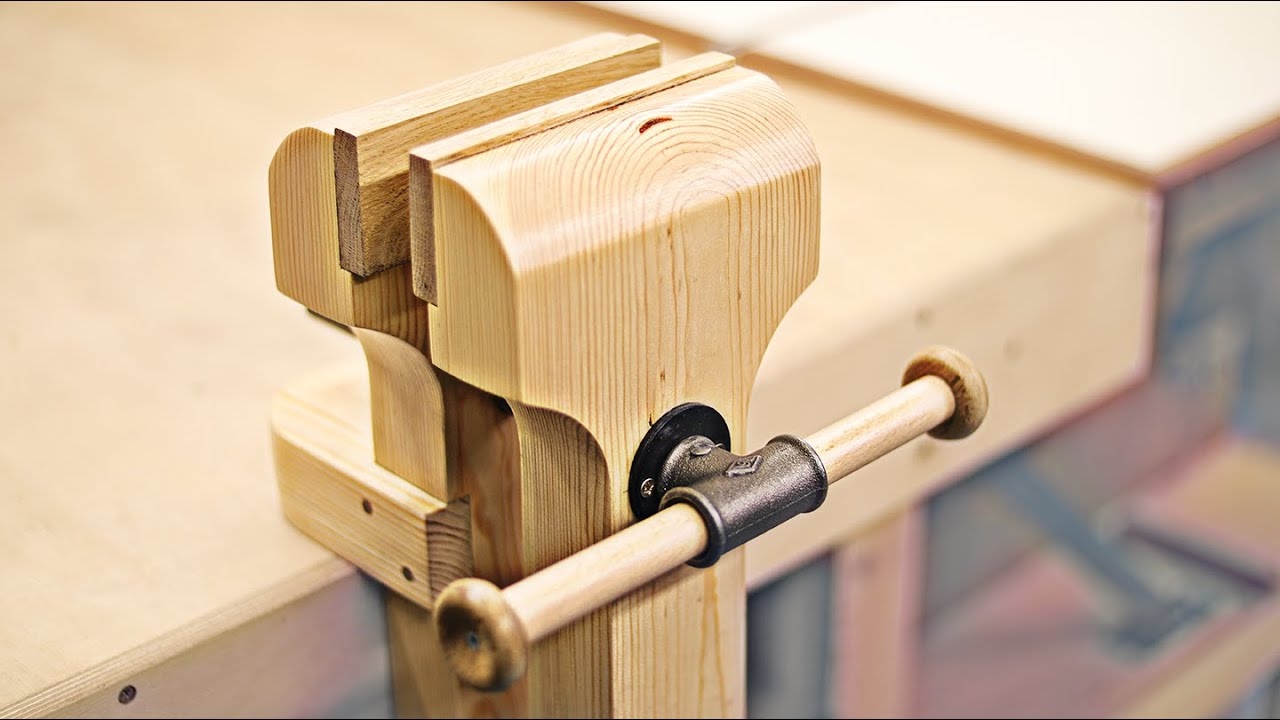
Step 3: Creating the Jaws of the Bench Vise
Now that you have cut the wood pieces, it’s time to move on to creating the jaws of the bench vise. The jaws are the parts of the vise that hold your workpiece securely in place.
Start by selecting two appropriately sized wood pieces that will serve as the jaws. These pieces should be wide enough to accommodate the size of your workpieces and long enough to provide sufficient clamping surface.
Using a chisel or a router, create a recessed area along the inner faces of both jaw pieces. This recess will allow space for the vise screw and handle to fit between the jaws.
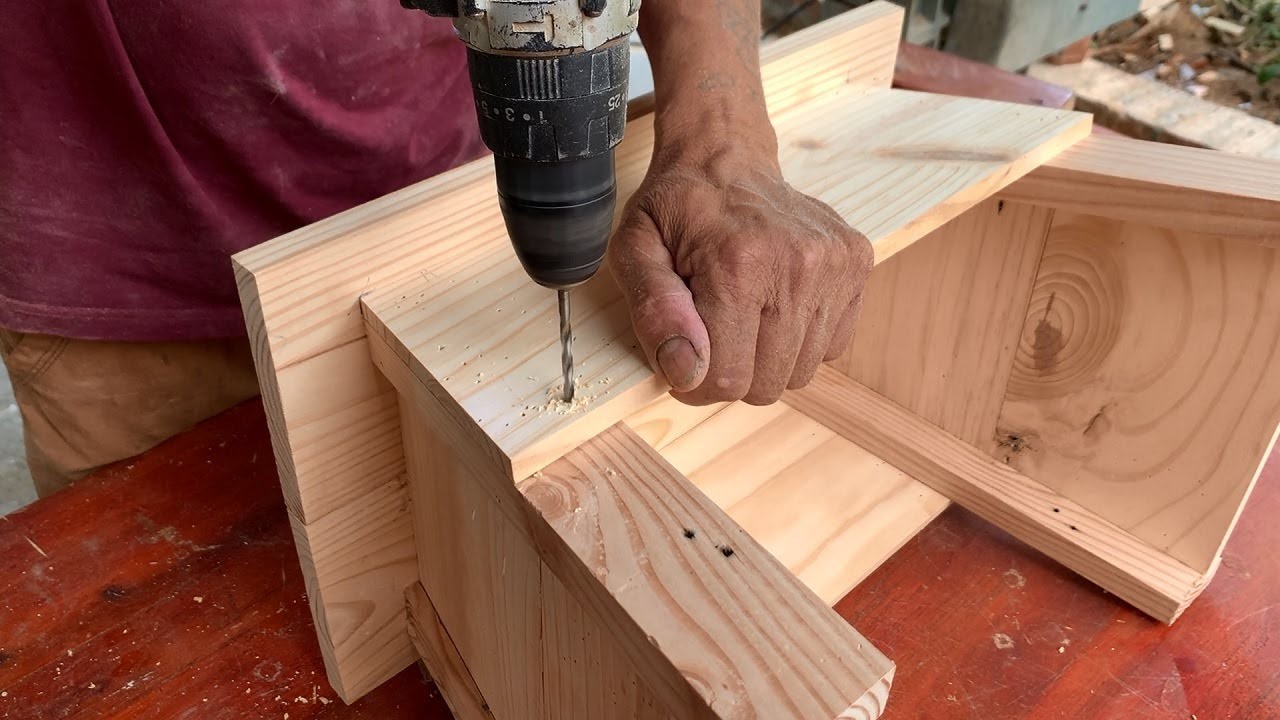
Next, mark and drill holes near the edges of the jaws. These holes will accommodate the wooden screws that will attach the jaws to the vise body.
Apply a generous amount of wood glue to the recessed areas of the jaws and position them together, ensuring that the holes align perfectly. Use clamps to hold the jaws firmly in place while the glue dries. Wipe off any excess glue that squeezes out.
Allow the glue to cure as per the manufacturer’s instructions. Once the glue has dried, remove the clamps and check that the jaws are securely joined together.
Smooth the surfaces of the jaws with sandpaper, ensuring that there are no rough spots or splinters. You can also round off the edges of the jaws for a more comfortable grip and to prevent any damage to your workpieces.
With the jaws created, we can now move on to constructing the vise screw in the next step.
When making a woodworking bench vise, ensure that the jaws are made from hardwood for durability and stability. Additionally, use quality hardware for smooth operation.
Read more: How To Build Woodworking Bench
Step 4: Constructing the Vise Screw
The vise screw is a critical component of the bench vise, responsible for tightening and releasing the jaws to securely hold your workpiece. In this step, we will focus on constructing the vise screw.
Start by selecting a suitable vise screw and handle. The vise screw should be long enough to pass through the jaws with some excess length on either end. The handle should provide a comfortable grip for easy operation.
Measure and mark the placement of the vise screw on the underside of the top part of your bench vise. This is where the screw will be attached, allowing it to rotate and apply pressure to the jaws.
Using a drill, bore a hole through the marked location, ensuring that the diameter of the hole matches the size of the vise screw. Make sure the hole is straight and perpendicular to the vise surface to ensure smooth operation.
Insert the vise screw through the hole, allowing a portion of it to extend below the vise top. Attach the vise handle to the exposed end of the screw, ensuring a secure and tight fit.
Test the rotation of the vise screw by turning the handle. It should rotate smoothly and without any obstructions. Make any necessary adjustments to ensure proper functionality.
With the vise screw constructed, we are now ready to move on to assembling the bench vise in the next step.
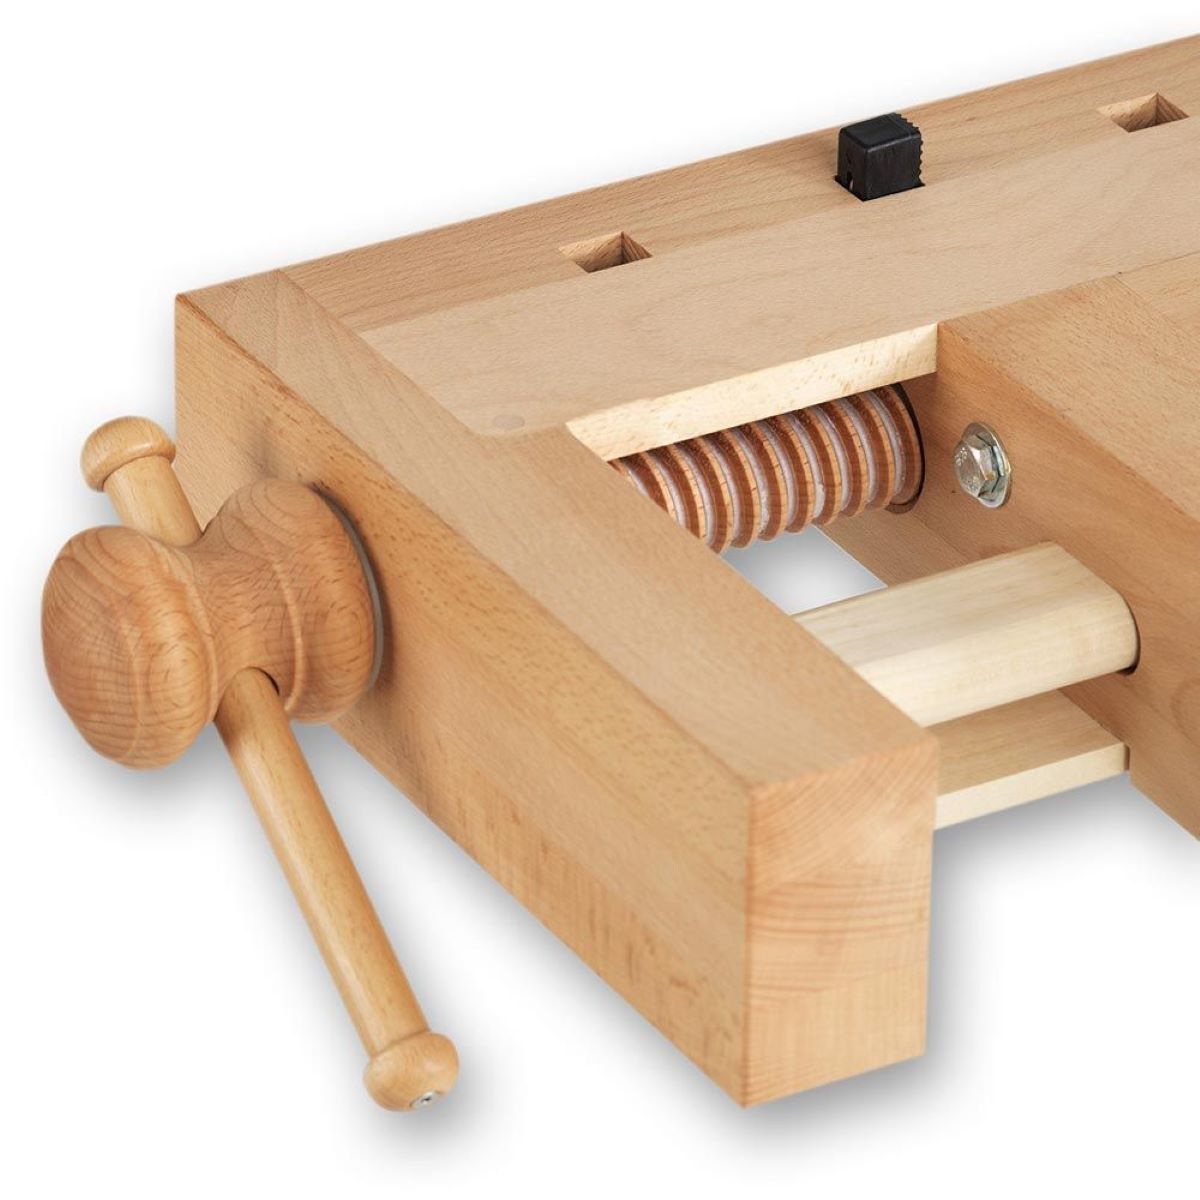
Step 5: Assembling the Bench Vise
Now that we have completed the individual components of the bench vise, it’s time to assemble them together to create a fully functional woodworking tool.
Begin by positioning the vise screw through the holes on the jaws. Ensure that the screw extends evenly on both sides of the jaws, allowing for smooth movement and secure clamping.
Place the jaws with the vise screw in between onto the vise body. Align the holes in the jaws with the corresponding holes in the vise body.
Using wood screws, attach the jaws securely to the vise body. Drive the screws through the holes, ensuring a tight and stable connection. Make sure to countersink the screw heads to prevent any interference with the clamping area.
Test the movement of the vise screw and jaws by opening and closing the vise. The jaws should move smoothly and clamp securely. Make any necessary adjustments to ensure proper alignment and functionality.
As with any woodworking project, it’s essential to take your time during assembly to ensure accuracy and stability. Double-check all the connections and make any necessary modifications before proceeding.
Once the bench vise is fully assembled, test it with various workpieces to ensure its effectiveness and stability. Make any final adjustments as needed.
With the bench vise fully assembled and functional, we can move on to the final step: adding finishing touches.
Step 6: Adding Finishing Touches
While the functionality of the bench vise is of utmost importance, adding finishing touches can enhance its appearance and protect the wood from wear and tear. In this final step, we will focus on applying a finish to the bench vise.
Before applying any finish, ensure that the wood surfaces are smooth and free from any dust or debris. Sand the entire vise, including the jaws and vise body, using progressively finer grits of sandpaper until you achieve a smooth and polished surface.
If desired, apply a wood conditioner to the vise to ensure even absorption of the finish and prevent blotching. Follow the manufacturer’s instructions for application and drying time.
Select a suitable finish for your bench vise, such as varnish or wood stain. Consider the type of wood you used and the level of protection and aesthetic appeal you desire.
Apply the chosen finish to the vise using a brush or lint-free cloth, following the grain of the wood. Ensure an even and thorough coating, covering all surfaces of the vise. Allow the first coat to dry completely, and then apply additional coats as needed to achieve the desired finish.
After the final coat has dried, inspect the bench vise for any areas that may require touch-ups or additional sanding. Smooth out any rough spots or imperfections, and then wipe the vise clean with a soft cloth.
Once the finish has fully cured, your bench vise is ready to be put to use. It will not only serve as a valuable tool in your woodworking projects but also showcase the craftsmanship and attention to detail you put into its creation.
Remember to regularly maintain and clean your bench vise to ensure its longevity and optimal performance. Regularly lubricate the vise screw to keep it operating smoothly, and clean the jaws to prevent any debris from interfering with clamping.
With the finishing touches complete, step back and admire your handcrafted woodworking bench vise. It’s now ready to assist you in your future woodworking endeavors with stability, security, and a touch of personal craftsmanship.
——————————————————————————————
Creating your own woodworking bench vise not only provides you with a valuable tool but also allows you to showcase your skills and creativity. Follow the steps outlined in this guide, from choosing the right wood to adding the final finish, and enjoy the satisfaction of constructing a bench vise tailored to your needs.
Remember to prioritize safety throughout the construction process, wear appropriate safety gear, and take the necessary precautions with the tools and materials. With proper attention to detail and craftsmanship, your handcrafted bench vise will become an essential companion in your woodworking journey.
Conclusion
Building your own woodworking bench vise is a rewarding and fulfilling project that allows you to create a tool customized to your specific needs. Throughout the steps of choosing the wood, cutting the pieces, creating the jaws, constructing the vise screw, assembling the vise, and adding finishing touches, you have gained valuable knowledge and honed your woodworking skills.
A well-built bench vise serves as a reliable and versatile tool in any woodworking workshop. It provides stability, security, and precise clamping, enabling you to tackle various projects with confidence. By following the steps outlined in this guide and using quality materials and tools, you have now created a bench vise that will serve you for years to come.
Remember to regularly maintain and care for your bench vise to ensure its longevity. Lubricate the vise screw, keep the jaws clean, and periodically inspect for any adjustments or repairs. Taking care of your bench vise will ensure its optimal performance and allow you to continue enjoying the benefits it offers.
Embrace the craftsmanship and personalization of your handmade bench vise. It is a testament to your creativity, skill, and dedication to the craft of woodworking. Whether you’re a beginner or a seasoned woodworker, this project has provided you with the opportunity to further develop your skills and expand your toolkit.
Now, armed with a sturdy bench vise, you can confidently embark on new woodworking projects, knowing that you have a reliable tool by your side. Embrace the joy of creating, the satisfaction of craftsmanship, and the endless possibilities the world of woodworking offers.
As you continue your woodworking journey, remember the satisfaction of building your own bench vise and let it serve as a reminder of your capabilities and the potential you have as a woodworker. Keep exploring, experimenting, and creating, and may your bench vise be a constant source of inspiration and support in all your future woodworking endeavors.
Frequently Asked Questions about How To Make A Woodworking Bench Vise
Was this page helpful?
At Storables.com, we guarantee accurate and reliable information. Our content, validated by Expert Board Contributors, is crafted following stringent Editorial Policies. We're committed to providing you with well-researched, expert-backed insights for all your informational needs.


0 thoughts on “How To Make A Woodworking Bench Vise”