Articles
How To Hang Criss Cross Curtains
Modified: October 20, 2024
Discover the best method to hang criss cross curtains with our informative articles. Easily create a stylish and functional window treatment for your home.
(Many of the links in this article redirect to a specific reviewed product. Your purchase of these products through affiliate links helps to generate commission for Storables.com, at no extra cost. Learn more)
Introduction
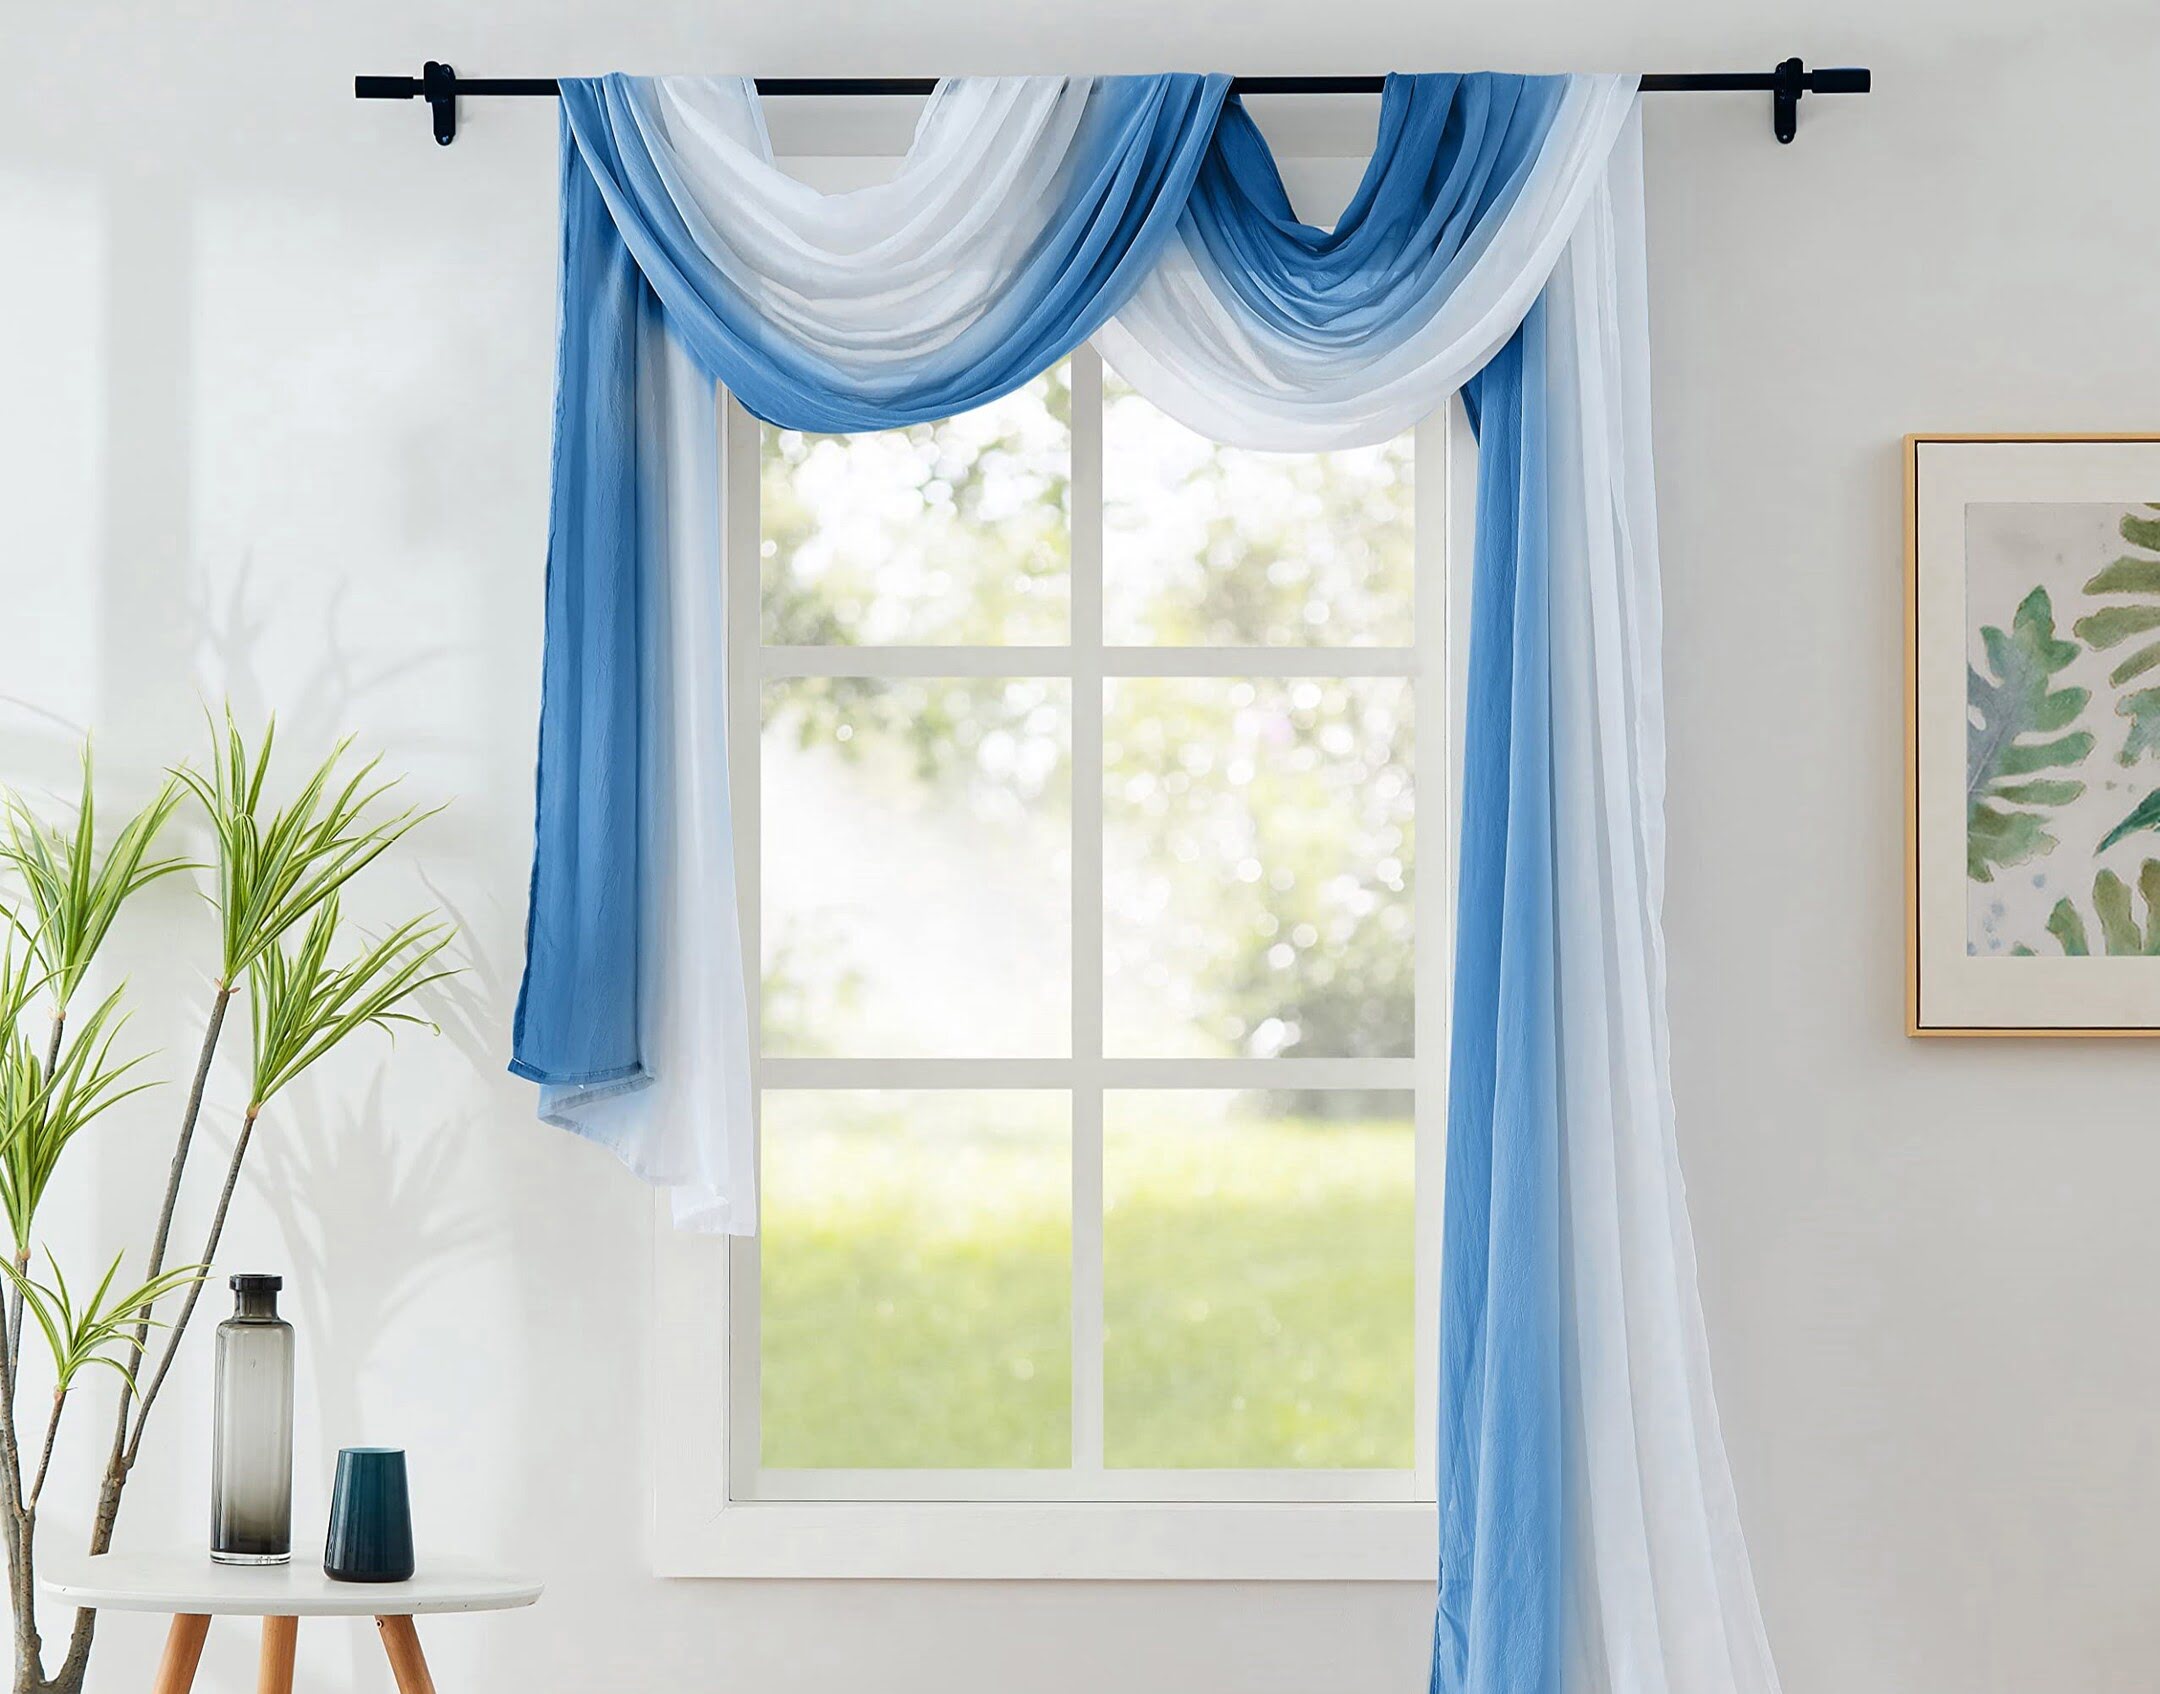
Curtains can play a significant role in transforming the look and feel of any room. They not only provide privacy and block out sunlight but also add a touch of elegance and style to your space. One popular curtain hanging style that has gained popularity in recent years is the criss cross curtains. This unique and visually appealing hanging technique adds depth and dimension to your windows, creating a stunning visual effect.
If you’re looking to hang criss cross curtains in your home but aren’t sure where to start, you’ve come to the right place. In this article, we will guide you through the step-by-step process of hanging criss cross curtains, from gathering the necessary materials to adjusting and securing them in place.
So, let’s get started and turn your windows into a beautiful focal point with criss cross curtains!
Key Takeaways:
- Transform your windows into stunning focal points by learning how to hang criss cross curtains. Elevate your space with elegance and style while enjoying the functionality of this unique hanging technique.
- Achieve a visually appealing criss cross pattern by following a step-by-step guide. From gathering materials to making final adjustments, create a captivating and sophisticated ambiance with your window treatments.
Read more: How To Hang Curtains With Sheers
Step 1: Gather the necessary materials
Before you begin hanging criss cross curtains, it’s important to gather all the materials you’ll need. Having everything at hand will make the process smoother and more efficient. Here’s a list of the essential materials:
- Curtains: Choose curtains that complement your room decor and measure them to ensure they are the right size for your windows.
- Curtain rods: Opt for adjustable curtain rods that fit the width of your windows. Make sure they are sturdy enough to hold the weight of your curtains.
- Mounting hardware: Depending on the type of walls you have (drywall, concrete, etc.), you’ll need appropriate screws, anchors, or brackets to securely install the curtain rods.
- Level: A level will help ensure that your curtain rods are straight and properly aligned.
- Tape measure: Use a tape measure to determine the proper placement of the curtain rods and curtains.
- Pencil: A pencil is essential for marking the positions of the curtain rods.
- Drill or screwdriver: You’ll need a power drill or screwdriver to install the mounting hardware and secure the curtain rods in place.
- Optional: Additional accessories such as curtain tiebacks or decorative finials can enhance the appearance of your criss cross curtains.
Once you have gathered all the necessary materials, you’re ready to move on to the next step: measuring and marking the placement of the curtains.
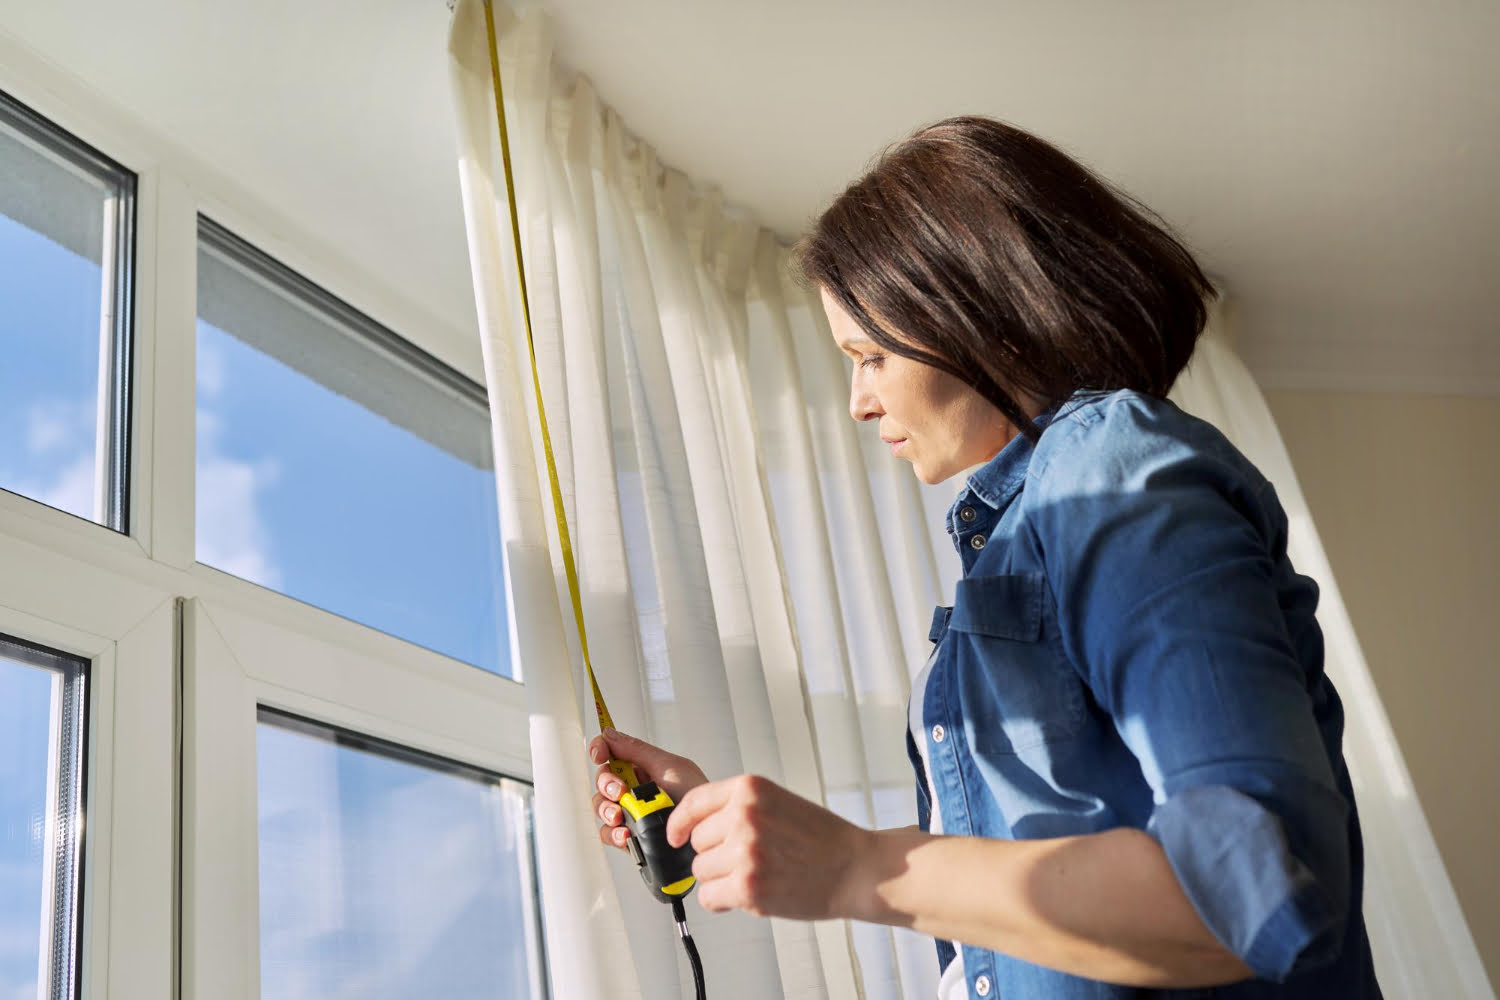
Step 2: Measure and mark the placement
Accurate measurements are essential for properly hanging criss cross curtains. Before you start drilling or installing curtain rods, take the time to measure and mark the placement. Here’s how you can do it:
- Measure the width: Measure the width of your window frame or the area where you want to hang the curtains. This will help determine the width of the curtain rods you’ll need.
- Decide on the height: Consider how high you want your curtains to hang. Typically, curtains are mounted a few inches above the window frame to create an illusion of height and make the room feel more spacious.
- Mark the height: Use a pencil to mark the desired height on both sides of the window frame or wall. Make sure the markings are level and symmetrical.
- Calculate the space: Measure the distance between the marked points to determine the space available for the criss cross pattern. Divide this measurement into equal sections depending on how many criss cross folds you want.
- Mark the sections: Use the tape measure and pencil to mark the positions for the curtain rod brackets. Start from the outer edge of the window frame and work your way towards the center, spacing the marks according to the calculated distance.
Remember to consider any obstructions like window handles or nearby furniture when marking the placement. Take your time to ensure accuracy as it will greatly impact the final look of your criss cross curtains.
Once you have measured and marked the placement, you’re ready to move on to the next step: installing the curtain rods.
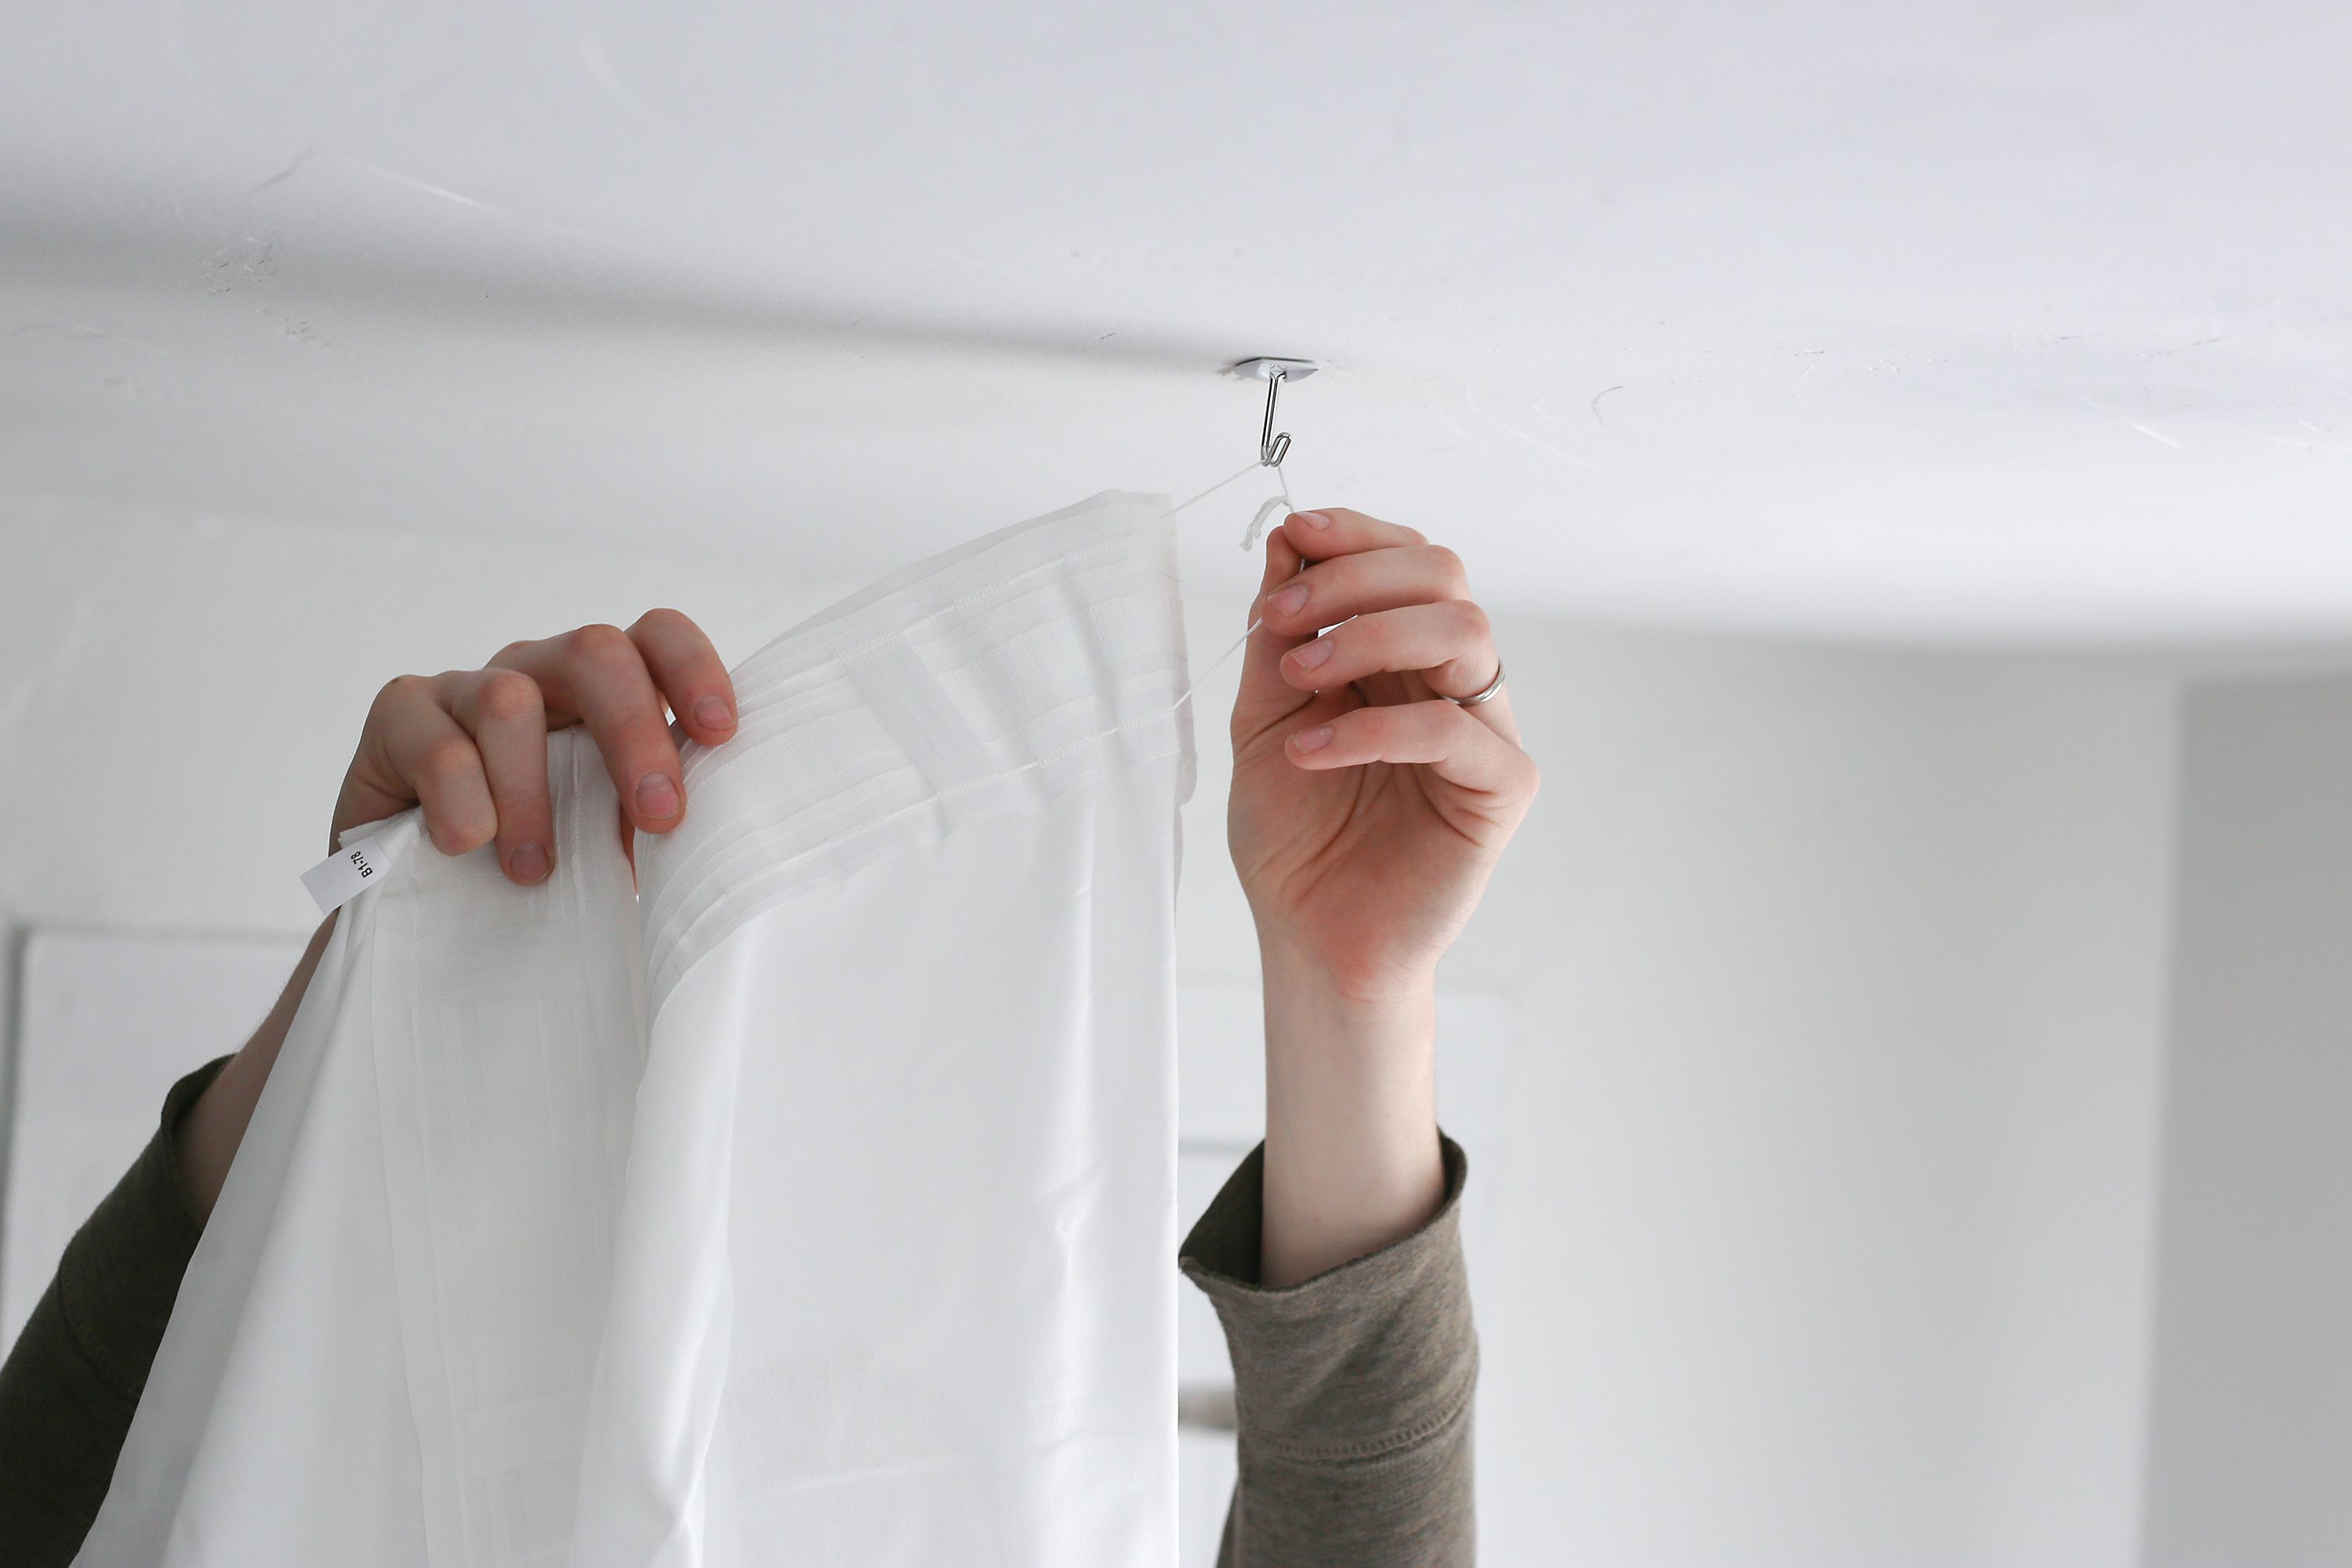
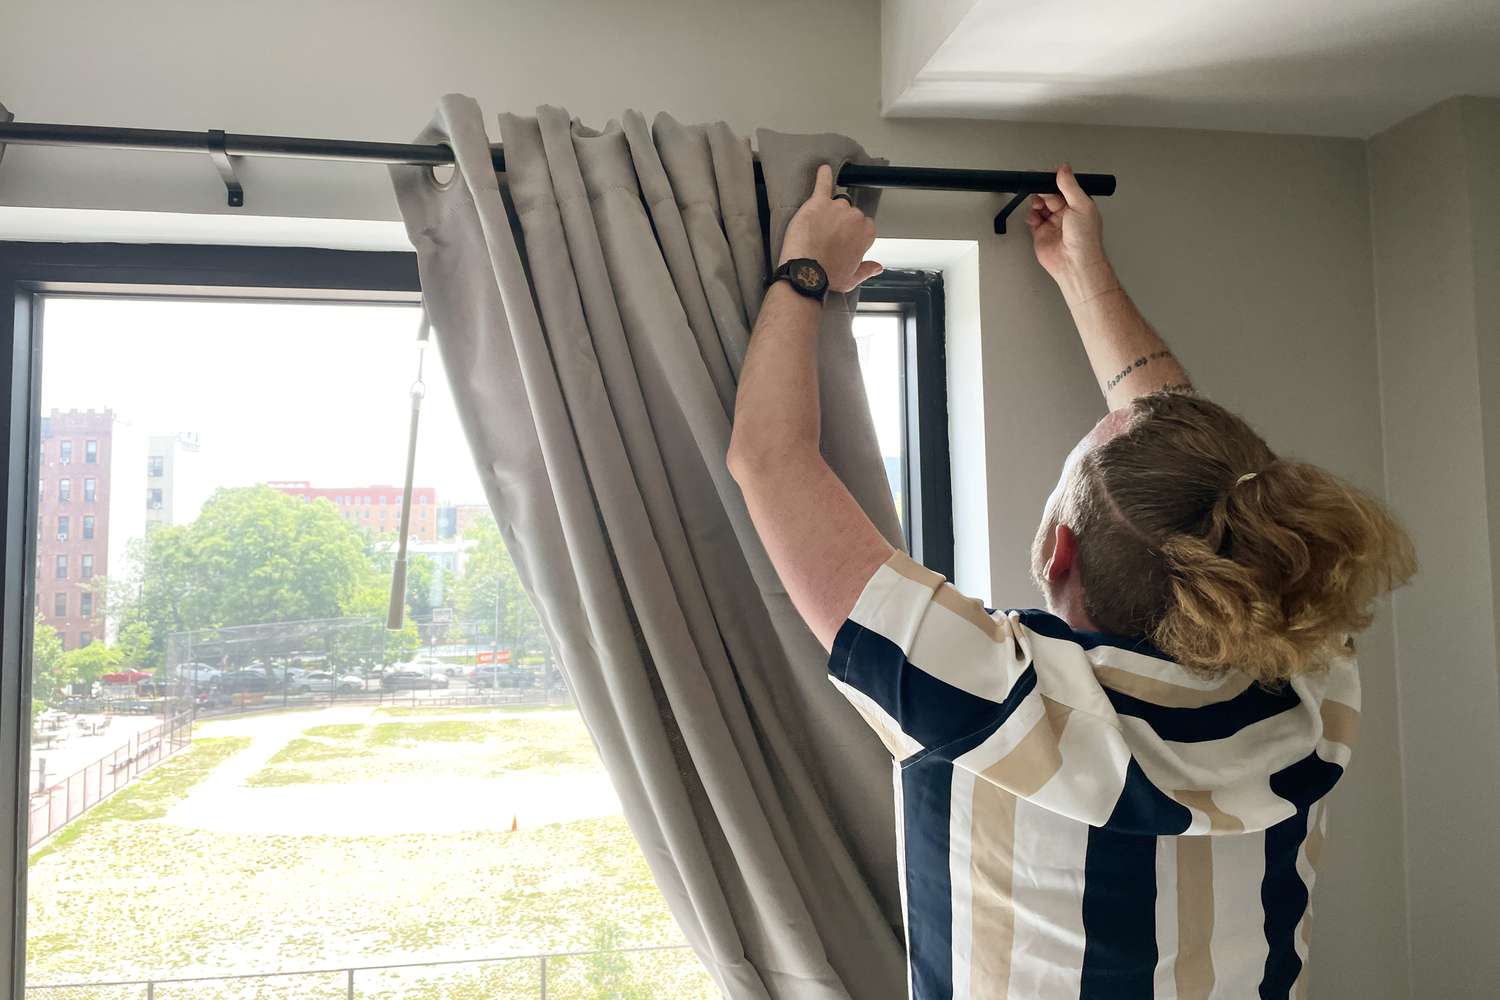
Step 3: Install the curtain rods
With the measurements and markings in place, it’s time to install the curtain rods. Follow these steps to ensure a secure and proper installation:
- Prepare the mounting hardware: Depending on the type of mounting hardware you have, ensure it is compatible with your walls. If needed, use anchors or brackets for added support.
- Align the brackets: Place the brackets on the marked positions, making sure they are level and aligned with each other. Use a level to ensure they are straight.
- Mark the screw holes: Once the brackets are properly aligned, mark the screw holes on the wall using a pencil. Ensure the marks are visible and aligned with the brackets.
- Drill pilot holes: Use a power drill with an appropriate drill bit to create pilot holes at the marked positions. This will make it easier to screw in the mounting hardware.
- Attach the brackets: Place the brackets over the pilot holes and secure them in place using the screws provided with the mounting hardware. Use a screwdriver to tighten them securely.
- Attach the curtain rod: Once the brackets are firmly in place, attach the curtain rod onto the brackets. Follow the specific instructions provided by the manufacturer to ensure proper installation.
- Test the stability: Give the curtain rod a gentle tug to check if it is securely mounted. If there is any wobbling or instability, reinforce the brackets or adjust the screws as necessary.
Repeat the installation process for any additional curtain rods needed for your criss cross curtains. Once all the curtain rods are installed, you’re ready to move on to the exciting step of hanging the curtains in a criss cross pattern.
Now that the curtain rods are securely in place, let’s move on to the next step: hanging the curtains.
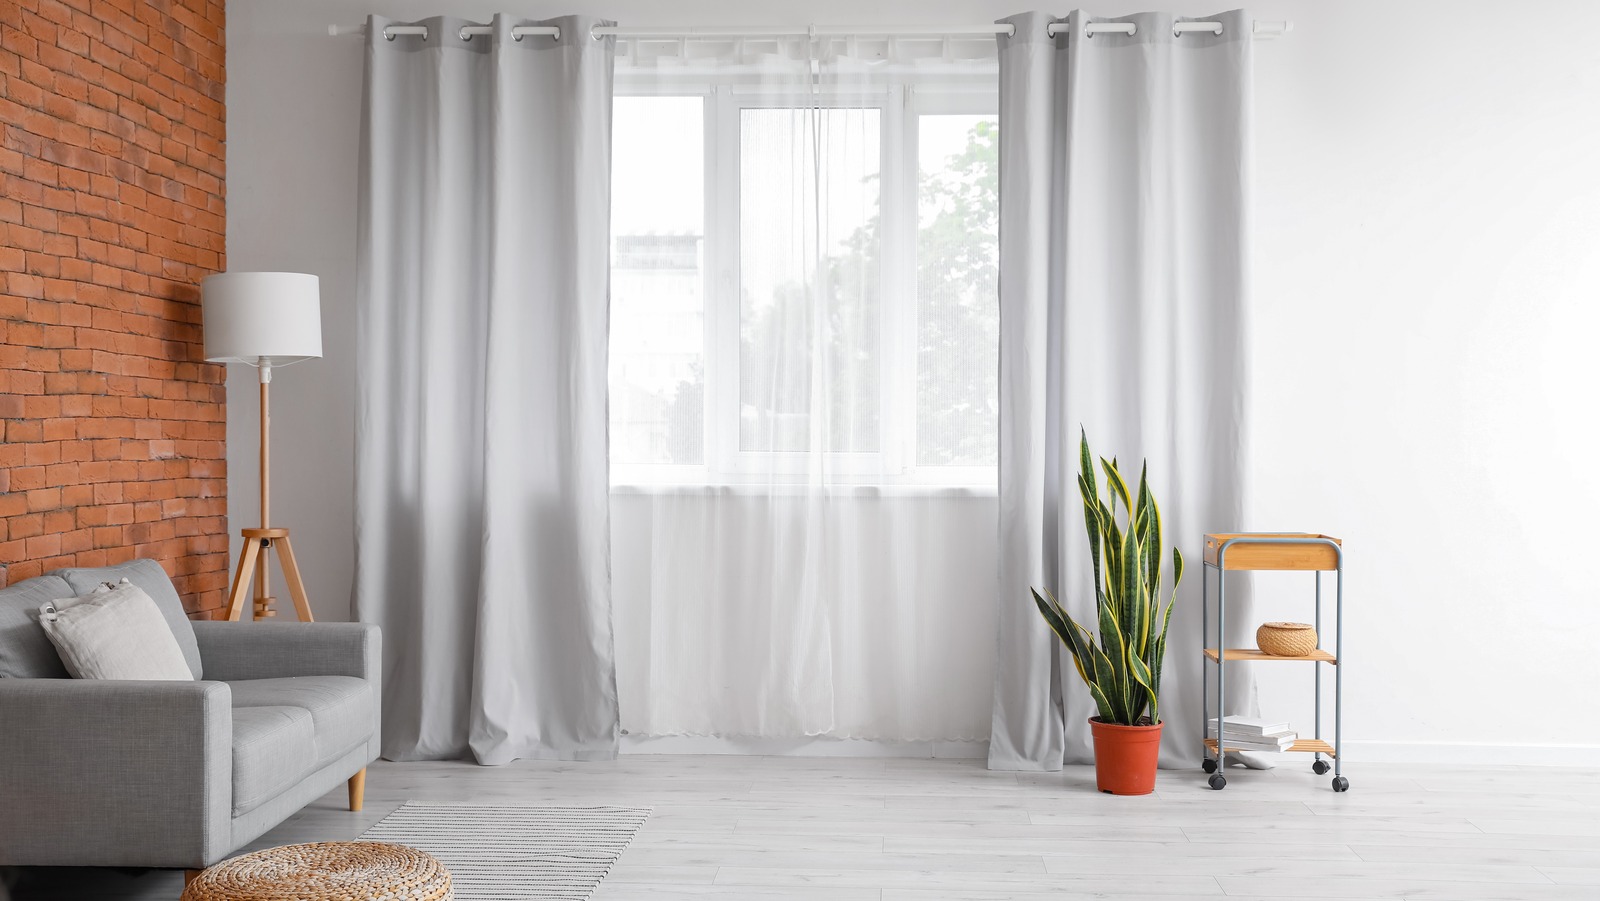
When hanging criss cross curtains, make sure to measure the width of the window and add extra fabric for the criss cross effect. Use curtain hooks to create the criss cross pattern and ensure the curtains are evenly spaced.
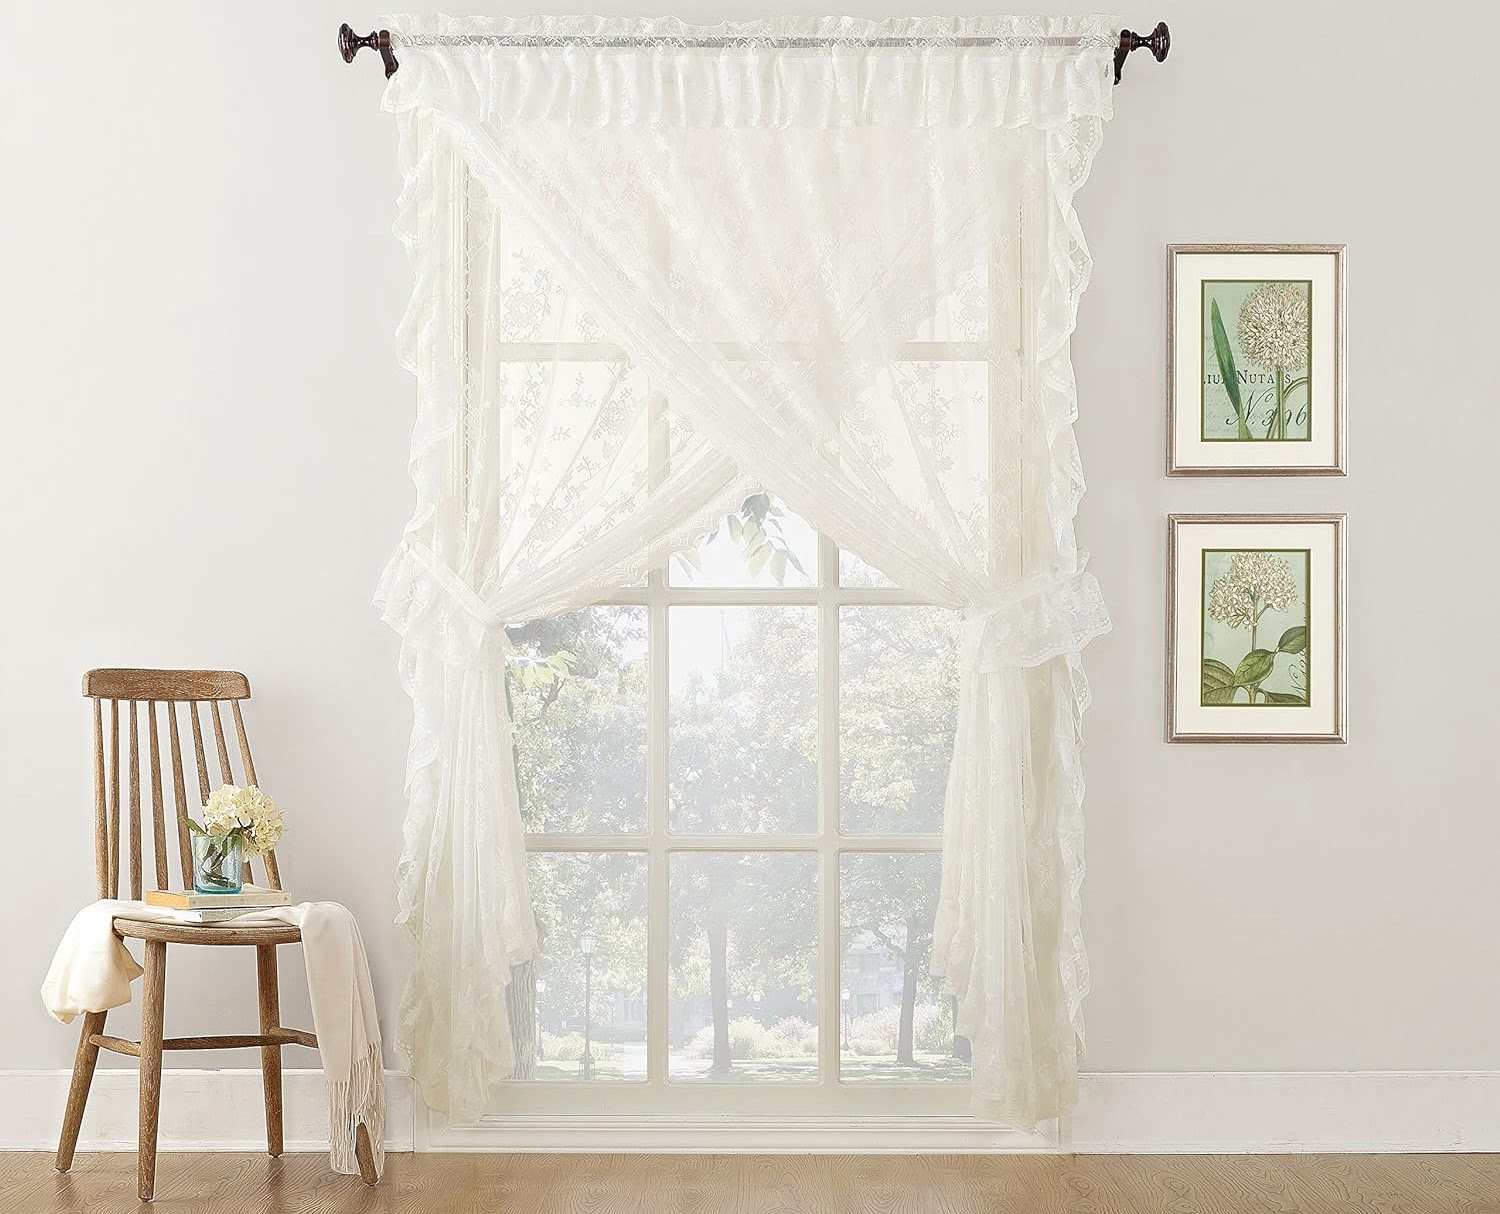
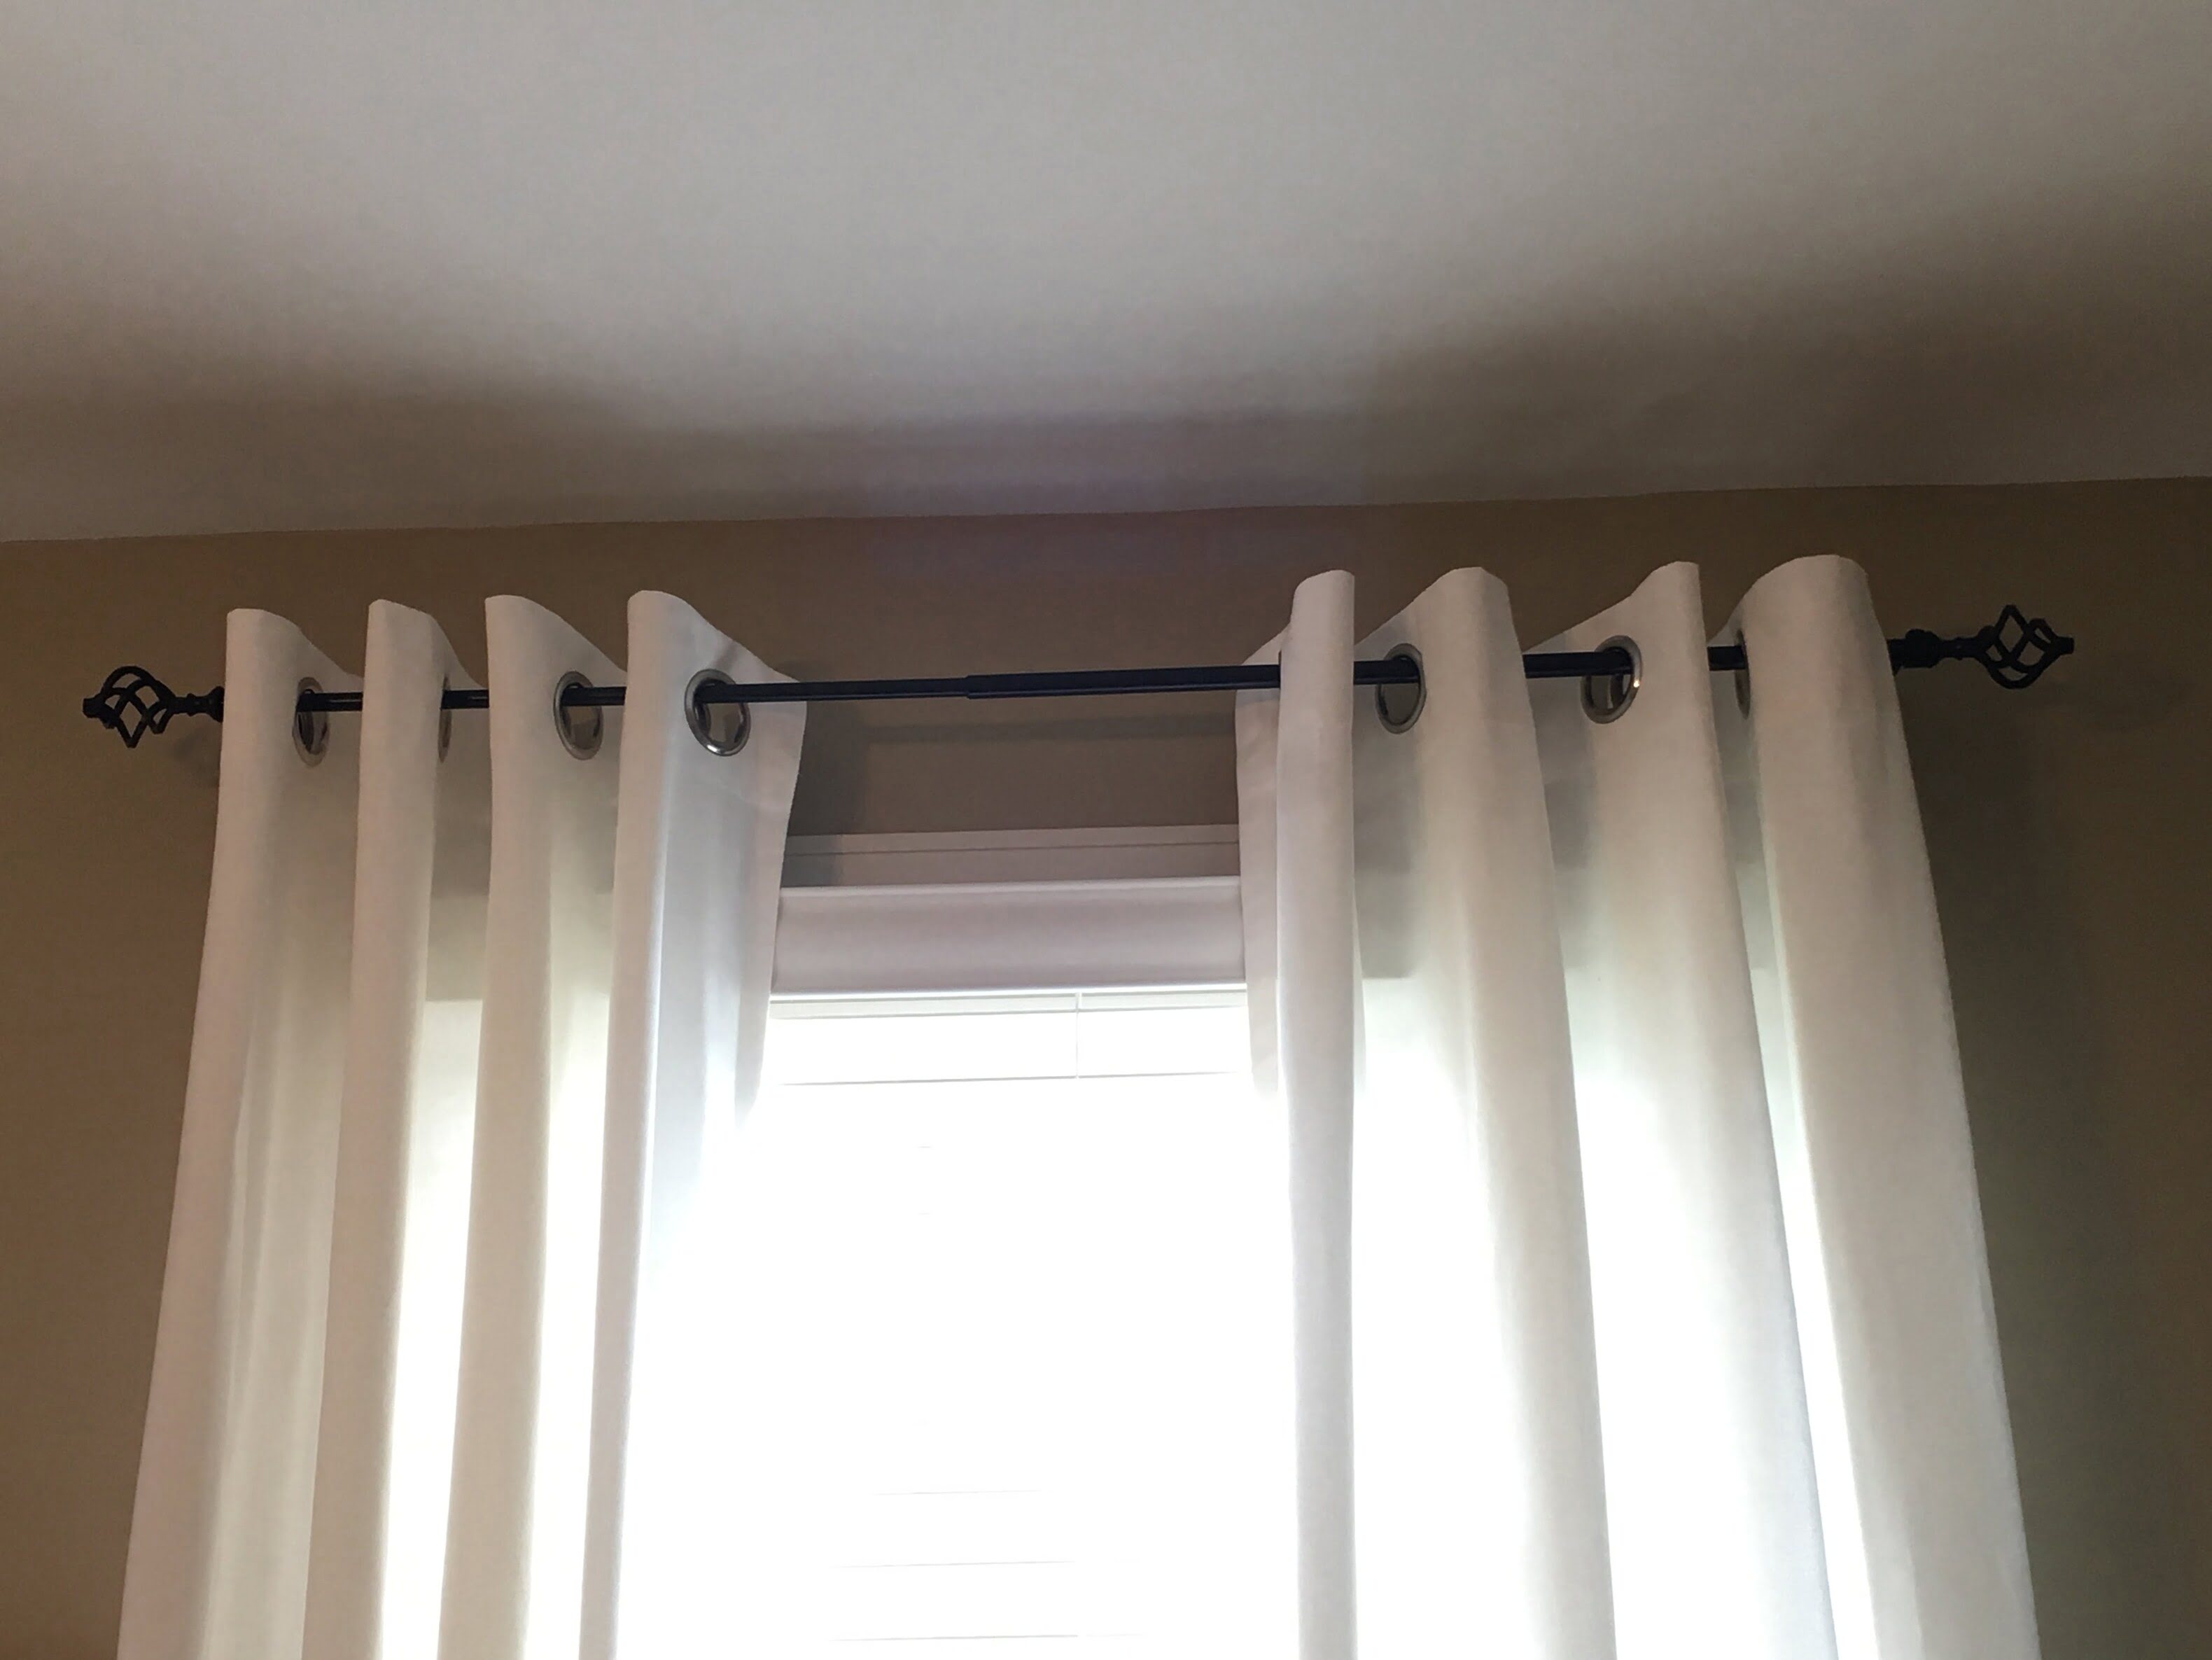
Step 4: Hang the curtains
Now that you have your curtain rods installed, it’s time to hang the curtains in a criss cross pattern. Follow these steps to achieve a stunning criss cross effect:
- Start with the first panel: Take one curtain panel and hold it up to one side of the window. The edge should align with the outermost bracket.
- Create the criss cross fold: Take the top corner of the curtain panel and fold it diagonally towards the center of the window. Arrange it in a neat and even fold.
- Slide the fold behind the bracket: Slide the folded corner behind the bracket, ensuring that the curtain hangs evenly and touches the floor. Adjust the fold as necessary to achieve the desired length.
- Repeat with the second panel: Take the second curtain panel and repeat the same process on the opposite side of the window. Start by aligning the edge with the outermost bracket and create a criss cross fold.
- Slide the fold behind the bracket: Slide the folded corner behind the bracket on the opposite side. Adjust the fold and length as needed to match the first panel.
- Adjust and straighten: Once both panels are hung in a criss cross pattern, step back and take a look at the overall effect. Adjust and straighten the panels as necessary to ensure they are evenly balanced and aligned.
Make sure that the curtains hang evenly and the folds are symmetrical on both sides of the window. This will create a visually appealing criss cross effect that enhances the overall aesthetics of the room.
Now that the curtains are hanging beautifully in a criss cross pattern, it’s time to move on to the final step: adjusting and securing the curtains.
Read more: How To Hang Curtains On Gazebo
Step 5: Adjust and secure the curtains
After hanging the curtains in a criss cross pattern, it’s important to make some final adjustments to ensure they are properly secured and aligned. Follow these steps to achieve a polished and finished look:
- Check the drape: Take a step back and assess the overall drape of the curtains. Make sure they hang evenly and are not bunched together or dragging on the floor.
- Adjust the folds: If needed, adjust the criss cross folds of the curtains to create a balanced and symmetrical appearance. Smooth out any unevenness or wrinkles in the fabric.
- Straighten the rods: Ensure that the curtain rods are level and straight. Use a level to check their alignment and make any necessary adjustments to straighten them.
- Secure the curtains: Once you are satisfied with the position and appearance of the curtains, secure them in place. This can be done by tightening any included screws or brackets to hold the curtain rods firmly.
- Add finishing touches: As a final touch, you can enhance the overall look of the criss cross curtains by adding curtain tiebacks or decorative finials. These accessories can further elevate the style and elegance of your window treatments.
Remember, the goal is to achieve a balanced and visually pleasing criss cross pattern with evenly hanging curtains. Take your time to make the necessary adjustments and ensure the curtains are securely in place.
By following these steps, you have successfully hung criss cross curtains in your space. Enjoy the beautiful and unique look that this hanging style brings to your windows!
Conclusion
Congratulations! You have successfully learned how to hang criss cross curtains and transform your windows into stunning focal points. By following the step-by-step guide provided in this article, you have gained the knowledge and skills needed to achieve a beautifully draped and visually appealing criss cross pattern.
Remember, the key to hanging criss cross curtains is proper measurement, careful placement, and secure installation of curtain rods. Take the time to gather the necessary materials, measure and mark the placement, install the curtain rods, hang the curtains in a criss cross pattern, and make any necessary adjustments to ensure a polished and finished look.
Criss cross curtains not only provide functionality by offering privacy and blocking out sunlight, but they also add an element of style and elegance to any room. The unique folding pattern adds depth and visual interest, creating a captivating and sophisticated ambiance.
Now that you’ve learned how to hang criss cross curtains, you have the freedom to get creative with your window treatments. Experiment with different fabric colors, patterns, and textures to personalize your space and make it truly your own.
So, what are you waiting for? Gather your materials, measure your windows, and let your creativity shine as you hang criss cross curtains to elevate the aesthetics of your home. Enjoy the beauty and functionality that this unique hanging style brings to your space!
Now that you've mastered hanging criss cross curtains, why not elevate your window dressing skills even further? Dive into our latest guide on expansive window treatments, where you'll find eleven elegant styles sure to transform any room. Perfect for those seeking fresh ideas, our detailed guide offers a wealth of inspiration for stylish, contemporary living spaces. Don't miss out on these fabulous drapery styles that can redefine the look and feel of your home.
Frequently Asked Questions about How To Hang Criss Cross Curtains
Was this page helpful?
At Storables.com, we guarantee accurate and reliable information. Our content, validated by Expert Board Contributors, is crafted following stringent Editorial Policies. We're committed to providing you with well-researched, expert-backed insights for all your informational needs.


0 thoughts on “How To Hang Criss Cross Curtains”