Articles
How To Hang Curtains On Ceiling
Modified: October 20, 2024
Learn how to hang curtains on the ceiling with our informative articles. Follow our step-by-step guide for a professional and stylish look.
(Many of the links in this article redirect to a specific reviewed product. Your purchase of these products through affiliate links helps to generate commission for Storables.com, at no extra cost. Learn more)
Introduction
When it comes to decorating a space, curtains are an essential element that can transform the overall look and feel of a room. While most people hang curtains at window height, have you ever considered hanging them on the ceiling? This unique and stylish approach can create a striking visual impact and add a touch of drama to any space.
Hanging curtains on the ceiling offers several benefits that go beyond just aesthetics. By extending the curtains all the way to the ceiling, you can create the illusion of higher ceilings, making the room appear more spacious and grand. Additionally, this technique allows for a seamless and uninterrupted window treatment, as the curtains can be drawn across the entire length of the window without any gaps.
Whether you’re looking to add depth to a small room, create a cozy and intimate setting, or simply elevate the style of your space, hanging curtains on the ceiling is a versatile and effective solution. In this article, we’ll guide you through the step-by-step process of hanging curtains on the ceiling, ensuring that you have all the information you need to achieve a professional and polished look.
Before we dive into the practicalities, let’s take a look at the materials and tools you’ll need for this project.
Key Takeaways:
- Elevate your space by hanging curtains on the ceiling for a visually stunning effect that adds elegance, sophistication, and practical benefits like the illusion of higher ceilings and maximized natural light.
- Follow our step-by-step guide to achieve a professional and polished look, from measuring and marking the ceiling to installing the curtain track and adding finishing touches for a seamless and visually pleasing result.
Read more: How To Hang Curtains On Slanted Ceiling
Benefits of Hanging Curtains on the Ceiling
Hanging curtains on the ceiling offers a range of benefits that can vastly improve the look and feel of your space. Here are some of the key advantages:
- Heightened Elegance: Hanging curtains from the ceiling instantly adds a touch of elegance and sophistication to any room. The elongated drape of the curtains draws the eye upward, creating a visually stunning effect.
- Illusion of Height: By extending the curtains to the ceiling, you create the illusion of higher ceilings. This can be particularly beneficial in smaller spaces or rooms with low ceilings, as it helps to create a sense of airiness and spaciousness.
- Maximized Natural Light: When curtains are hung at window height, they can obstruct a portion of the natural light that enters the room. However, by hanging curtains on the ceiling, you can fully maximize the amount of light that filters through the window. This enhances the overall brightness of the space, creating an inviting and uplifting atmosphere.
- Increased Privacy: Floor-to-ceiling curtains provide enhanced privacy by covering the entire window and reducing the visibility from outside. This is especially useful for ground-level windows or rooms that face busy streets or neighboring properties.
- Improved Acoustic Benefits: Hanging curtains on the ceiling can help improve the acoustics of a room by absorbing sound waves. This can be particularly beneficial in spaces with hard surfaces, such as living rooms or home theaters, as the curtains help to reduce echoes and create a more balanced sound environment.
- Cozy and Intimate Atmosphere: By enveloping the entire space with curtains, you can create a cozy and intimate atmosphere. It adds a sense of warmth and comfort, making the room feel more inviting and relaxing.
- Flexibility in Window Treatment: When curtains are hung at window height, they have limited flexibility in terms of how far they can be drawn. However, by hanging them on the ceiling, you can fully open or close the curtains without any limitations, allowing for complete control over the level of light and privacy you desire.
With these benefits in mind, it’s clear that hanging curtains on the ceiling is a worthwhile endeavor that can elevate the style and functionality of any room.
Step-by-Step Guide on Hanging Curtains on the Ceiling
Now that you understand the benefits of hanging curtains on the ceiling, let’s dive into the step-by-step process of achieving this stylish look. Follow these instructions to successfully hang your curtains from the ceiling:
- Measure and Mark the Ceiling: Start by measuring the width of the window and determining how far above the window frame you want your curtains to hang. Use a measuring tape to mark the desired locations on the ceiling.
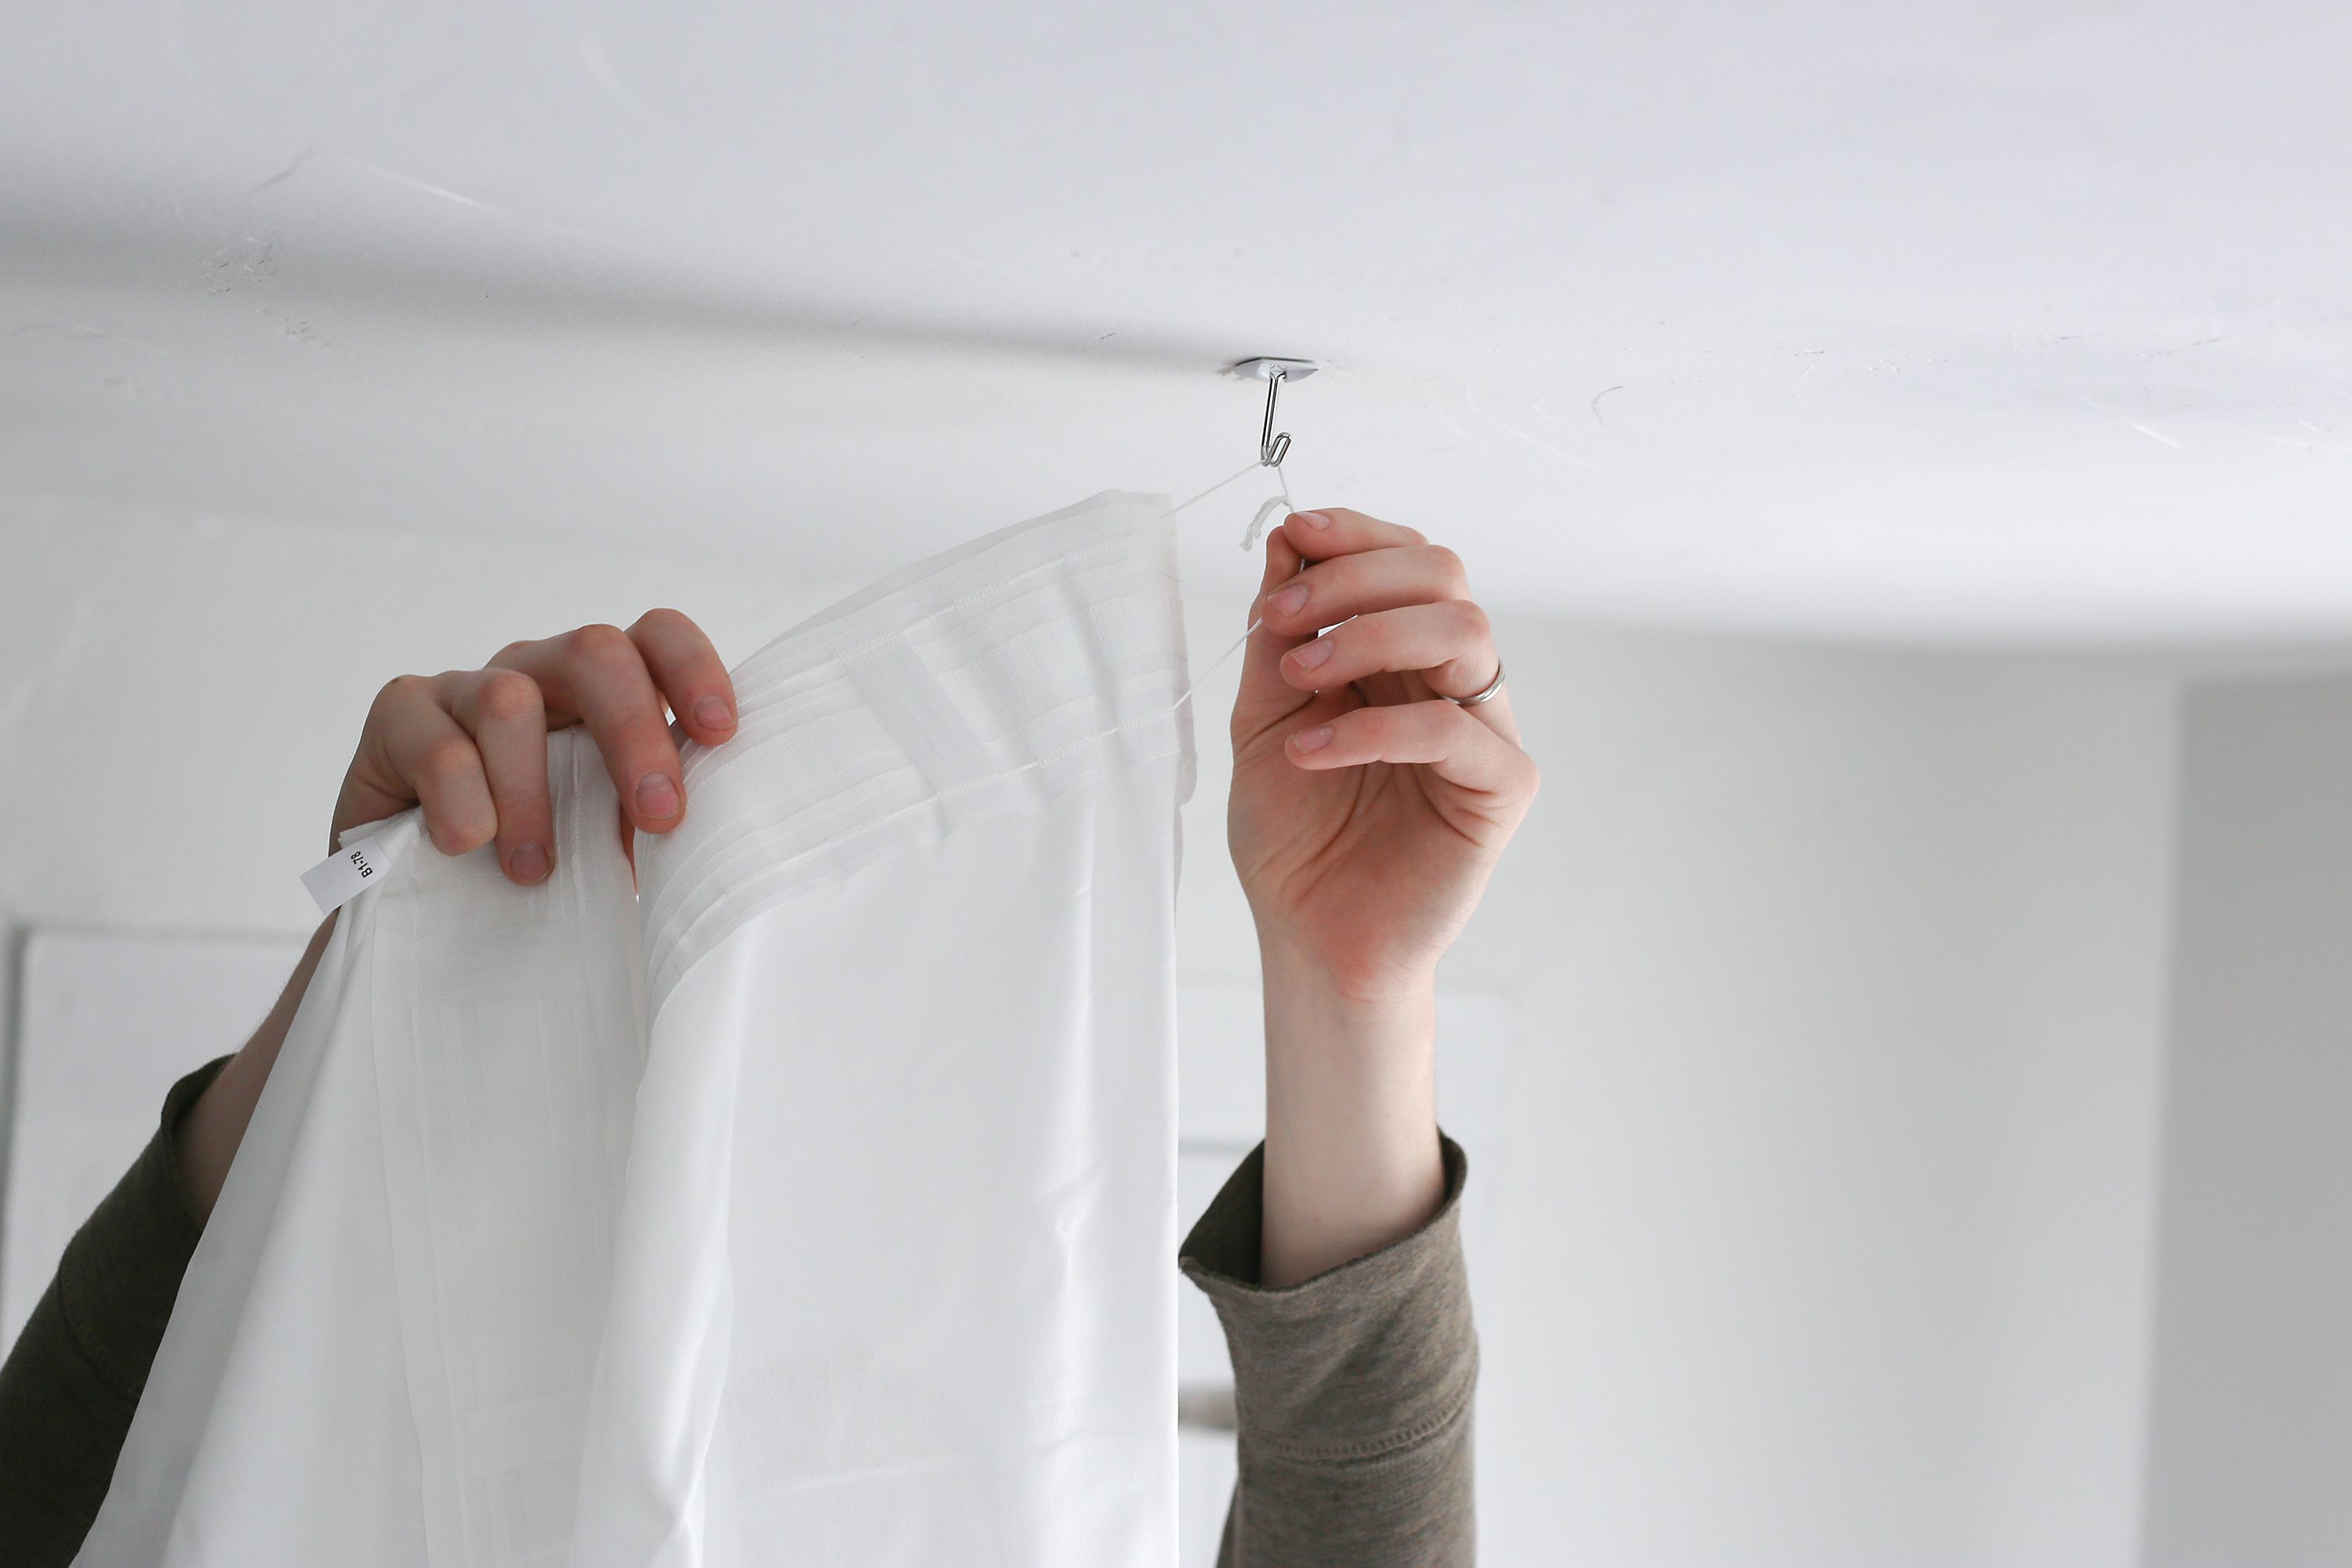
- Install the Curtain Track: Once you have marked the locations, it’s time to install the curtain track. Choose a track that is suitable for your curtains and ceiling type. Use a pencil or chalk to mark the screw hole locations on the ceiling, following the instructions provided with the track. Use a drill and appropriate screws to securely attach the track to the ceiling.
- Attach the Curtains to the Track: Hang your curtains onto the track by sliding the curtain hooks or rings onto the track. Make sure the curtains are evenly distributed and hang straight. If needed, adjust the hooks or rings to achieve the desired height and alignment.
- Finishing Touches: Once the curtains are properly attached to the track, step back and ensure they hang uniformly and gracefully. Adjust any uneven sections or wrinkles for a polished look. You can also add curtain tiebacks or clips to hold the curtains in place when not in use.
By following these steps, you can successfully hang your curtains on the ceiling and transform the appearance of your space. Now, let’s move on to the materials and tools you’ll need for this project.
Materials and Tools Required
Before you begin hanging curtains on the ceiling, gather the necessary materials and tools to ensure a smooth and successful installation. Here’s a list of what you’ll need:
Materials:
- Curtain track or rod: Choose a track or rod that is suitable for your curtains and ceiling type. Consider the weight and length of your curtains when selecting the appropriate track.
- Curtains: Select curtains that complement the style and color scheme of your space. Measure the width and length of the window to determine the size of the curtains needed.
- Curtain hooks or rings: These are necessary for attaching the curtains to the track or rod. Ensure you have enough hooks or rings to evenly distribute along the entire length of the track.
- Screws and anchors: Depending on the type of ceiling, you may need screws and anchors to secure the curtain track. Choose the appropriate size and type of screws and anchors for your specific ceiling material.
- Measuring tape: Use a measuring tape to accurately measure the width of the window and the desired height for the curtains.
Read more: How To Hang Curtains With Vaulted Ceilings
Tools:
- Drill: A drill is necessary for creating holes in the ceiling for the screws and anchors.
- Screwdriver: Use a screwdriver to tighten the screws and secure the curtain track in place.
- Pencil or chalk: These tools are helpful for marking the ceiling with precise measurements.
- Ladder or step stool: Depending on the height of your ceiling, you may need a ladder or step stool to access the installation area safely.
Make sure to gather all the necessary materials and tools before you start the installation process. This will help ensure a seamless and efficient hanging of curtains on the ceiling.
Now that you have everything ready, let’s move on to the next steps to measure and mark the ceiling for installation.
Measure and Mark the Ceiling
Before installing the curtain track, it’s important to accurately measure and mark the ceiling to ensure proper alignment and spacing. Follow these steps to measure and mark the ceiling:
- Measure the Window Width: Use a measuring tape to measure the width of the window from one side to the other. This will help determine the length of the curtain track you’ll need.
- Determine the Hanging Height: Decide how far above the window frame you want your curtains to hang. This can depend on personal preference or the desired aesthetic. Commonly, curtains are hung a few inches above the window frame to create a more visually appealing look.
- Mark the Hanging Points: Use a pencil or chalk to mark the hanging points on the ceiling. Start by measuring and marking from the corners of the window frame where you want the curtains to begin. Make sure these marks are leveled and symmetrical on each side.
- Distribute Hanging Points: With the initial marks made, distribute additional hanging points along the width of the window. The spacing between the hanging points will depend on the weight and length of your curtains, as heavier curtains may require more support. Generally, evenly spacing the hanging points every 12 to 18 inches should provide sufficient support.
Remember to make precise marks using a level or straight edge, ensuring that the hanging points are aligned. Take your time during this step, as accurate measurements and markings will contribute to a professional and visually pleasing installation.
Once you have measured and marked the ceiling, you are ready to move on to the next step – installing the curtain track. Let’s proceed to discover the installation process.
Install the Curtain Track
Now that you have measured and marked the ceiling for the curtain track, it’s time to move on to the installation process. Follow these steps to install the curtain track:
- Prepare the Track: Start by unpacking the curtain track and ensuring that all the necessary components are included. Familiarize yourself with the different parts, such as the track itself, brackets, and screws.
- Align the Track: Position the track along the marked hanging points on the ceiling. Make sure the track is level and parallel to the window. If needed, use a level or straight edge to double-check the alignment.
- Mark the Screw Hole Locations: Once the track is properly aligned, use a pencil or chalk to mark the screw hole locations on the ceiling through the pre-drilled holes in the track. These marks will guide you during the drilling process.
- Drill Pilot Holes: With the screw hole locations marked, use a drill and an appropriate drill bit to create pilot holes at each marked spot. Pilot holes will help prevent the ceiling from splitting when you insert the screws.
- Attach the Brackets: After drilling pilot holes, attach the brackets to the ceiling by screwing them into the pilot holes. Make sure the brackets are securely fastened and aligned with the screw hole locations you marked.
- Secure the Curtain Track: Once the brackets are in place, position the curtain track onto the brackets. Secure the track to the brackets by inserting the provided screws through the holes in the track and into the brackets. Tighten the screws to ensure a secure fit.
- Check Stability: Give the curtain track a gentle pull to check its stability. Ensure that it is firmly attached to the brackets and can support the weight of the curtains without any wobbling or sagging.
By following these steps, you can successfully install the curtain track onto the ceiling. Next, we’ll move on to attaching the curtains to the track. Let’s proceed to the next section for further instructions.
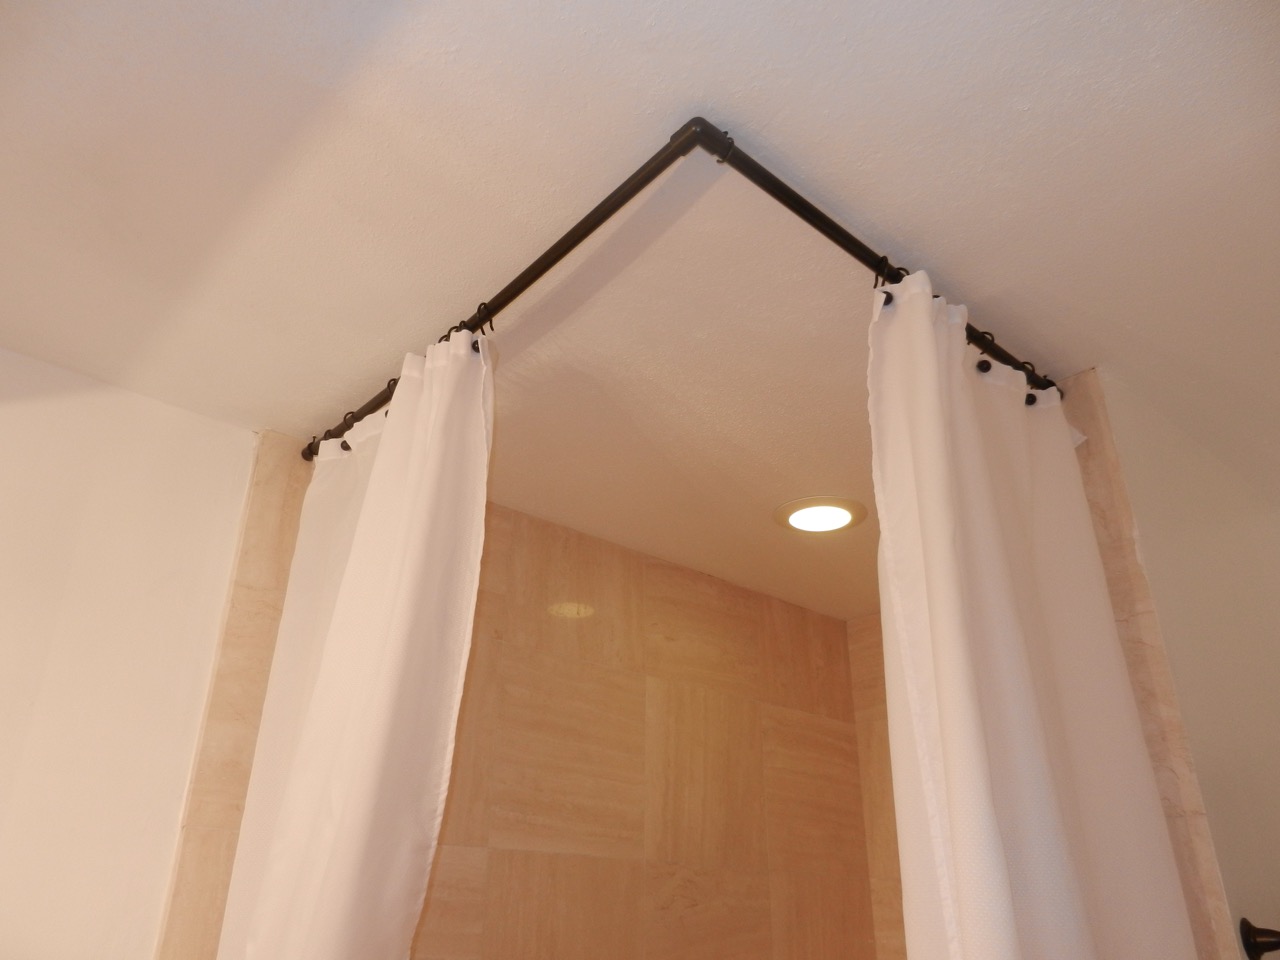
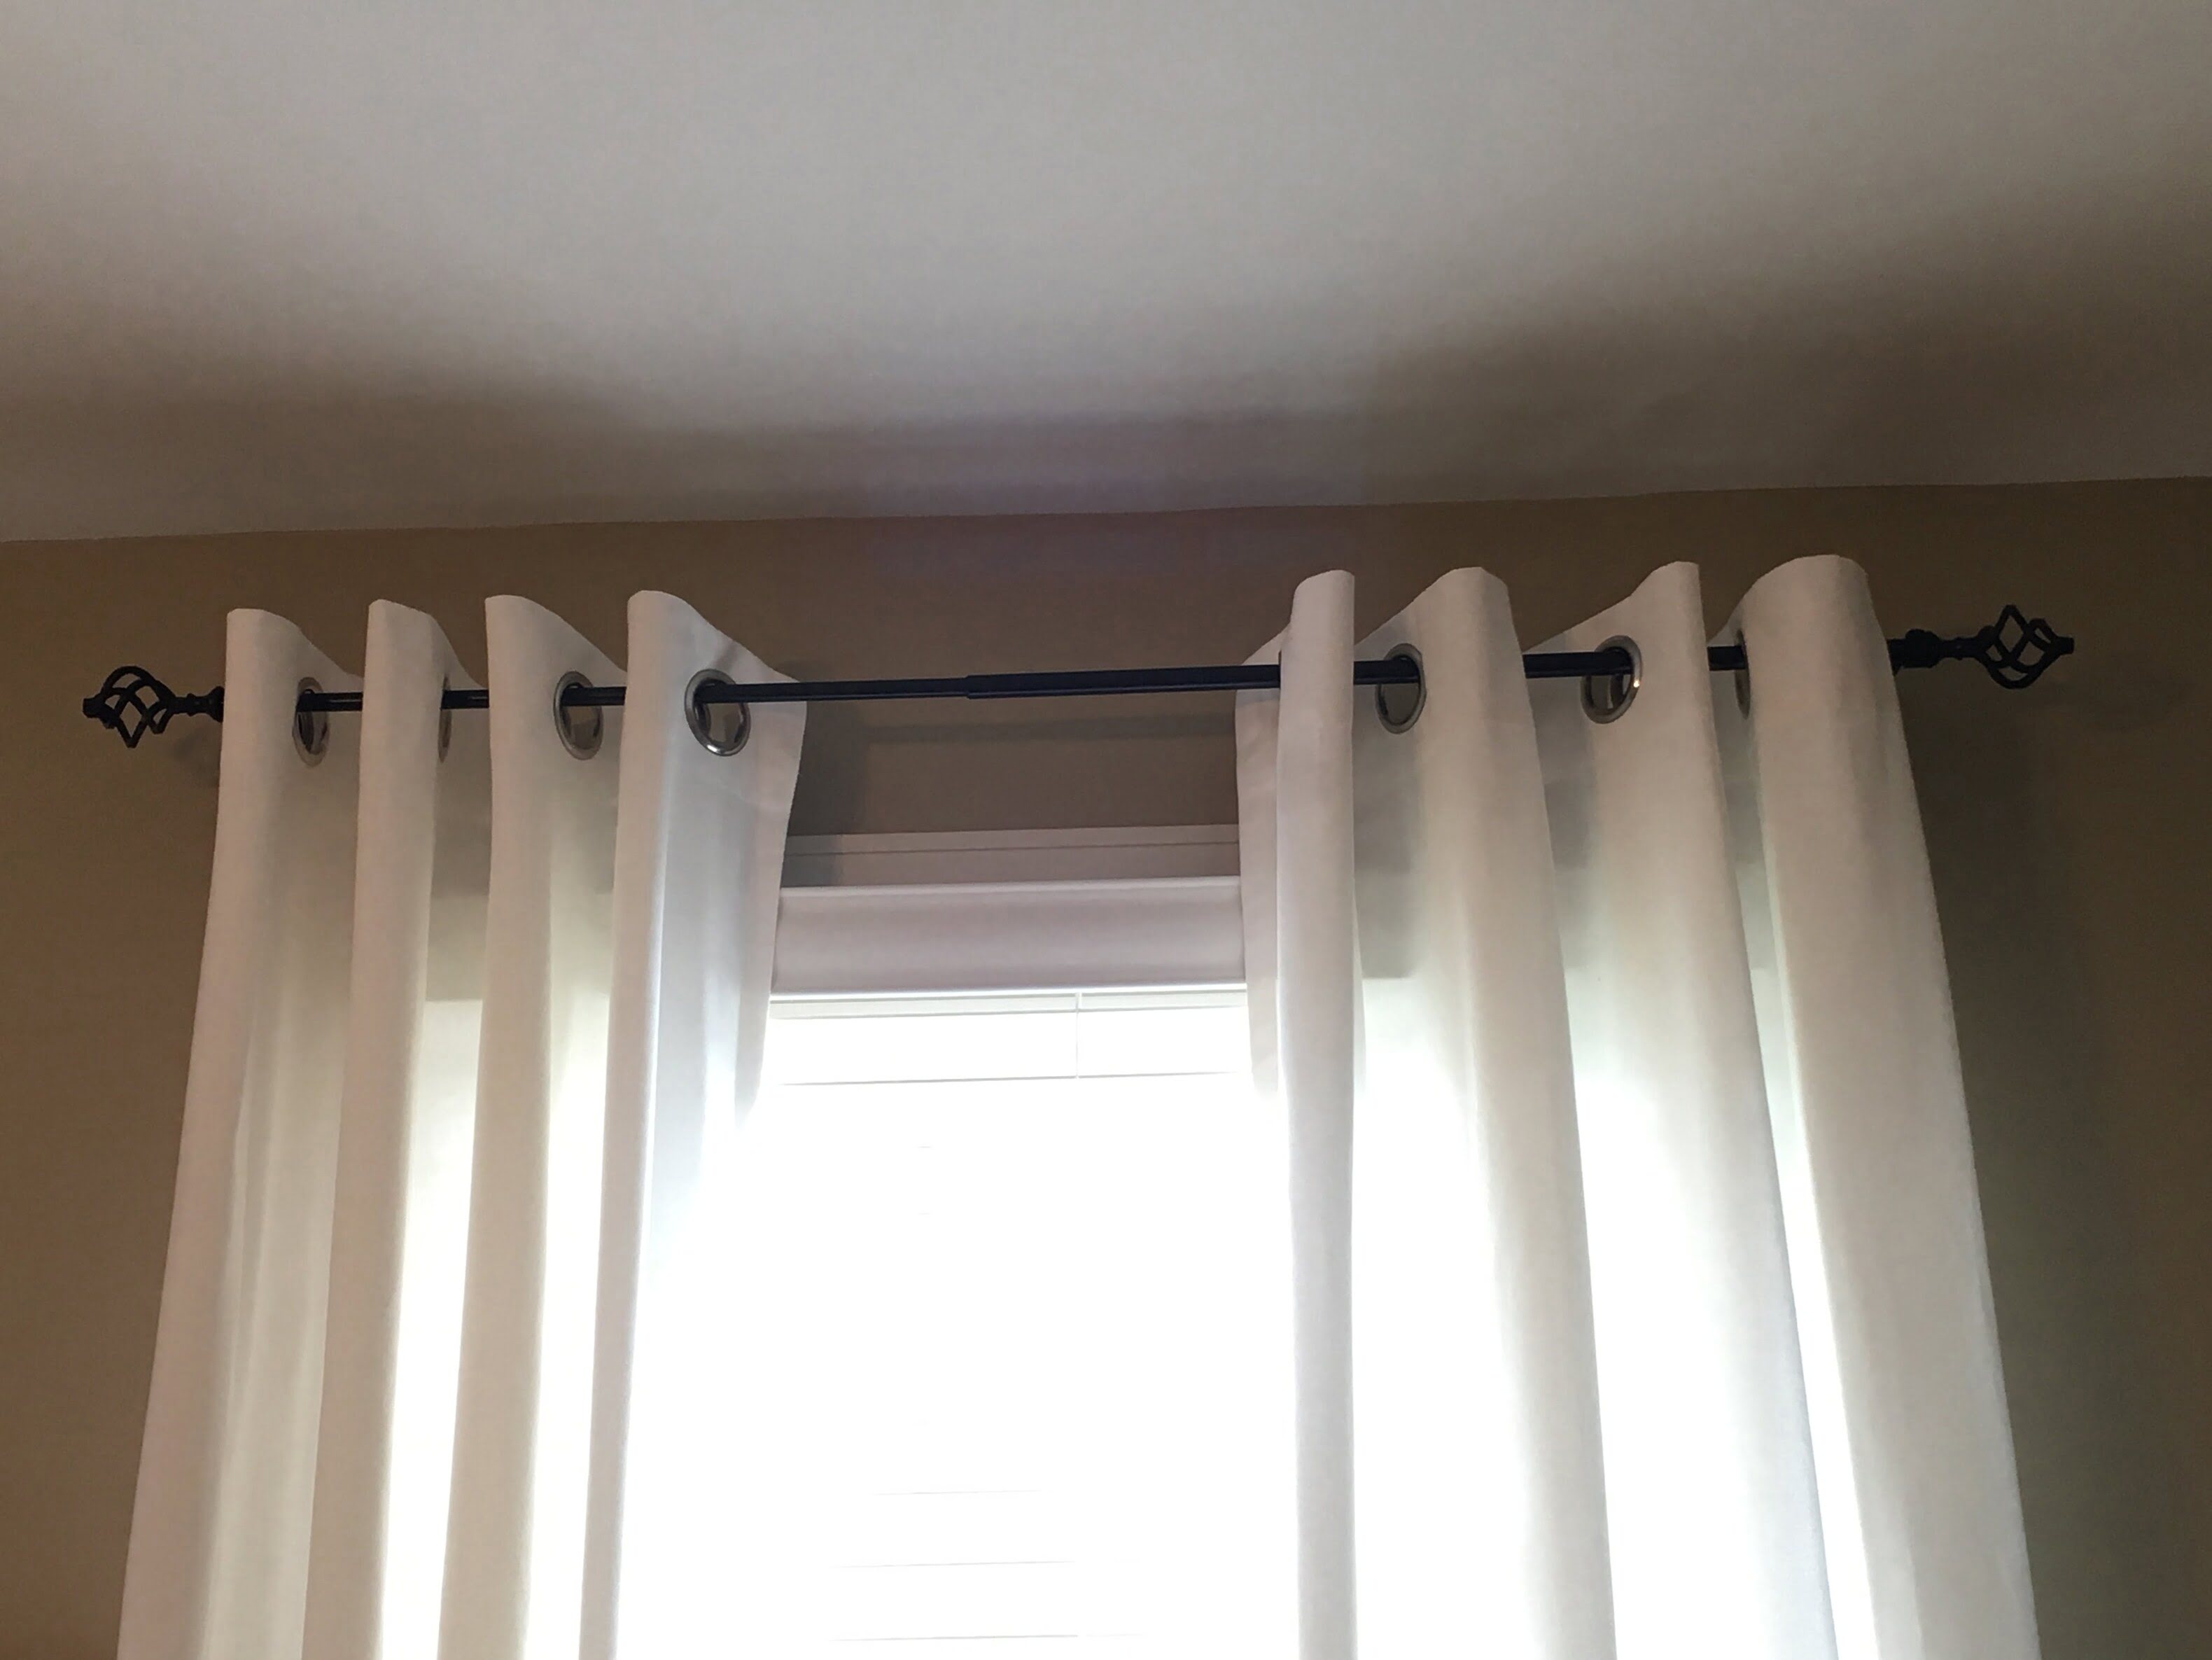
When hanging curtains on the ceiling, use ceiling-mounted curtain tracks or rods for a sleek and modern look. This will also create the illusion of higher ceilings and make the room feel more spacious.
Attach the Curtains to the Track
With the curtain track properly installed on the ceiling, it’s time to attach the curtains. Follow these steps to securely hang your curtains onto the track:
- Gather the Curtain Hooks or Rings: Depending on the type of curtain track you have, gather the appropriate curtain hooks or rings. Ensure that you have enough hooks or rings to evenly distribute along the track.
- Prepare the Curtains: If your curtains have built-in tabs or grommets, slide the curtain hooks or rings directly onto them. If not, create even folds along the top edge of the curtains and attach the hooks or rings to the folded sections.
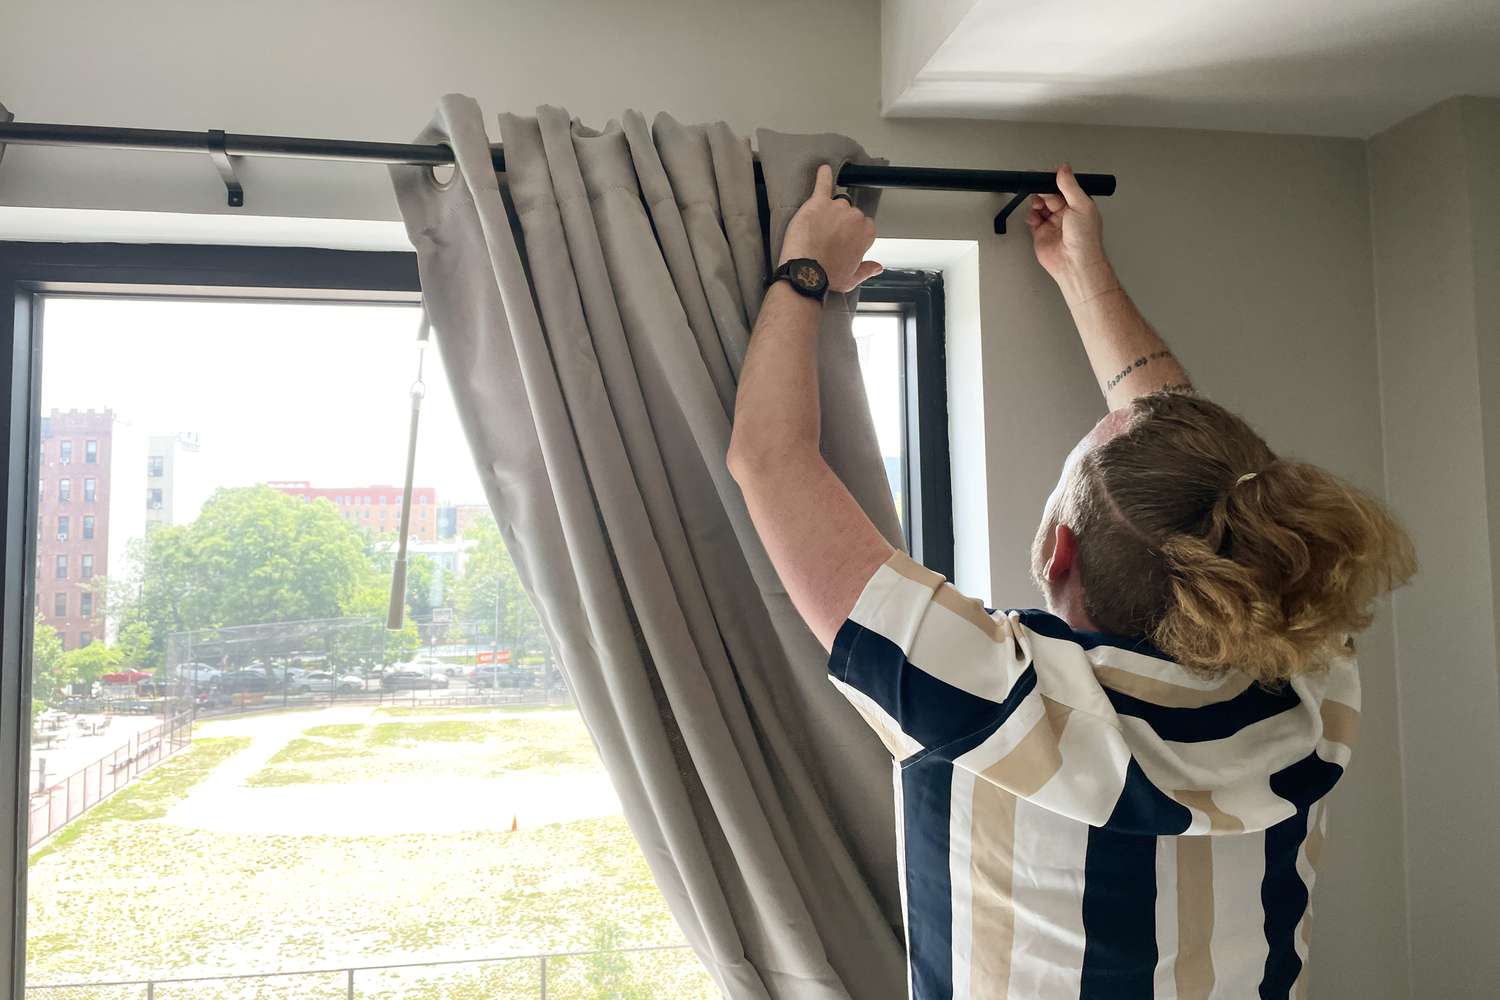
- Hang the Curtains: Start by hanging the first curtain panel onto the hooks or rings at one end of the track. Ensure that the curtain is properly aligned and evenly distributed. Continue hanging the remaining curtain panels in the same manner, ensuring that they overlap slightly for a full and seamless appearance.
- Adjust the Height and Alignment: Once all the curtains are hung, step back and assess their height and alignment. Adjust the hooks or rings as needed to ensure that the curtains hang straight and at the desired height. This is also a good time to ensure that the curtains are evenly spaced and distribute properly along the track.
- Test the Movement: Gently test the movement of the curtains by sliding them along the track. Ensure that they glide smoothly without any obstructions or excessive friction. If necessary, make adjustments to the hooks or rings to improve their movement.
By following these steps, you can successfully attach your curtains to the track and achieve a polished and professional look. With the curtains in place, we’re almost finished! In the next section, we’ll discuss some final touches to ensure your curtains hang beautifully.
Read more: How To Hang Curtains From Drop Ceiling
Finishing Touches
Now that you’ve successfully hung your curtains on the ceiling, it’s time to add some final touches to complete the look. These finishing touches will ensure that your curtains hang beautifully and enhance the overall aesthetic of the room. Here are some suggestions:
- Adjust the Length: If your curtains are too long and touch the floor, you may want to hem or adjust their length to prevent tripping or unnecessary dragging. Consider hiring a professional seamstress or using a sewing machine to achieve a clean and precise hem.
- Curtain Tiebacks: Implement curtain tiebacks to hold the curtains in place and create elegant drapes when they’re not in use. Choose tiebacks that complement the style and color of your curtains and secure them at the desired position on the wall.
- Curtain Clips: If you prefer a more casual and relaxed look, opt for curtain clips instead of tiebacks. These clips attach directly to the curtains and allow for a more natural and effortless appearance.
- Valances or Pelmet: Consider adding a valance or pelmet above the curtains to further enhance their appearance. Valances and pelmets are decorative fabric panels that hang above the curtains, adding an extra layer of style and sophistication.
- Accessorize: Don’t forget to accentuate your curtain installation by adding complementary accessories, such as curtain rods, finials, or decorative holdbacks. These additions can add personal style and flair to your window treatment.
- Ensure Curtain Alignment: Regularly check that the curtains are hanging straight and evenly aligned. Adjust the position of hooks or rings as needed to maintain a consistent appearance. This will help preserve the overall aesthetic of the curtains.
By paying attention to these finishing touches, you can ensure that your curtains hang beautifully and enhance the overall ambiance of your space. Now, let’s take a look at some tips and tricks to help you successfully carry out these steps.
Tips and Tricks for Hanging Curtains on the Ceiling
Here are some helpful tips and tricks to consider when hanging curtains on the ceiling:
- Choose the Right Track: Select a curtain track or rod that is appropriate for the weight and length of your curtains. Ensure that the track is sturdy enough to support the curtains and glides smoothly along its length.
- Consider Ceiling Type: Different ceiling types may require different installation methods. Ensure that you use the appropriate screws, anchors, or brackets for your specific ceiling material, whether it’s drywall, concrete, or plaster.
- Ensure Proper Alignment: Use a level or straight edge to ensure that the curtain track is installed evenly and parallel to the window. Verify that the track is level before attaching the brackets to achieve a professional and balanced look.
- Measure Twice, Install Once: Double-check your measurements before installing the curtain track. Accurate measurements are crucial to ensure that the curtains hang at the desired height and evenly span the window.
- Test Curtain Movement: Before completing the installation, test the movement of the curtains along the track. Ensure that they glide smoothly and without any obstructions. Adjust the position of the hooks or rings as necessary to improve their movement.
- Customize Curtain Length: Tailor the length of the curtains to suit your preference and the overall aesthetic of the room. Hemming the curtains to an appropriate length will prevent them from dragging on the floor or interfering with furniture.
- Coordinate Colors and Patterns: Consider the color scheme and patterns in your room when selecting curtains. Choose colors and patterns that complement the existing décor and create a cohesive and harmonious look.
- Regular Maintenance: Keep the curtains clean and dust-free by periodically vacuuming or gently shaking them. Follow the manufacturer’s care instructions for washing or dry cleaning to preserve their appearance and longevity.
- Experiment with Layers: Don’t be afraid to layer curtains with different textures or fabrics to create depth and visual interest. Play with combinations of sheer and opaque curtains to achieve the desired lighting and privacy levels.
- Seek Professional Assistance: If you’re unsure about the installation process or prefer a seamless and professional finish, consider hiring a professional curtain installer. They have the experience and expertise to ensure a flawless installation.
By keeping these tips and tricks in mind, you can achieve a successful and visually stunning curtain installation on the ceiling. With your curtains securely hung and the final touches in place, your space will be transformed into a stylish and inviting haven.
Now, let’s wrap up the article with a summary of the key points we’ve covered.
Conclusion
Hanging curtains on the ceiling is a unique and stylish approach that can completely transform the look and feel of a room. By extending the curtains all the way to the ceiling, you create a visually stunning effect that adds elegance and sophistication. Not only does this technique enhance the aesthetic appeal, but it also offers practical benefits such as creating the illusion of higher ceilings and maximizing natural light.
Through our step-by-step guide, we’ve provided you with the knowledge and instructions needed to successfully hang curtains on the ceiling. From measuring and marking the ceiling to installing the curtain track and attaching the curtains, you now have the tools to achieve a professional and polished look.
Remember to consider the materials and tools required for the project, measure and mark the ceiling accurately, and ensure the proper installation of the curtain track. Once the curtains are hung, add finishing touches such as adjusting the length, incorporating curtain tiebacks or clips, and considering valances or pelmets to enhance the overall appearance.
Additionally, we’ve shared some valuable tips and tricks to help you along the way. By choosing the right track, ensuring proper alignment, and customizing curtain length, you can achieve a seamless and visually pleasing result. Don’t hesitate to experiment with different colors, patterns, and layering techniques to create a personalized and stylish look that suits your space.
Now that you have the knowledge and guidance, it’s time to embark on your curtain-hanging adventure. Transform your space, elevate the style, and enjoy the elegance and functionality that ceiling-mounted curtains can bring.
So go ahead, gather your materials, measure your space, and let your creativity soar as you bring your vision of hanging curtains on the ceiling to life!
If you loved learning about hanging curtains from the ceiling, you'll find even more inspiration in our guides on enhancing your living space. For those looking to add a touch of magic to their rooms, our article on room decor provides fabulous ideas that transform any area into a captivating space. Meanwhile, DIY enthusiasts will appreciate our comprehensive guide on home improvements, offering practical tips to upgrade your habitat with your own hands. Dive into these resources to make your home truly yours!
Frequently Asked Questions about How To Hang Curtains On Ceiling
Was this page helpful?
At Storables.com, we guarantee accurate and reliable information. Our content, validated by Expert Board Contributors, is crafted following stringent Editorial Policies. We're committed to providing you with well-researched, expert-backed insights for all your informational needs.


0 thoughts on “How To Hang Curtains On Ceiling”