Articles
How To Iron Hanging Curtains
Modified: August 27, 2024
Learn how to effectively iron your hanging curtains with our informative articles. Simplify your chore and achieve wrinkle-free curtains today.
(Many of the links in this article redirect to a specific reviewed product. Your purchase of these products through affiliate links helps to generate commission for Storables.com, at no extra cost. Learn more)
Introduction
Ironing hanging curtains can be a daunting task, but with the right techniques and tools, you can achieve wrinkle-free and perfectly pressed curtains that will enhance the overall look of your home. Whether you have decorative curtains, sheer panels, or heavy drapes, proper ironing can help restore their crispness and freshness. In this article, we will guide you through the process of ironing hanging curtains and provide helpful tips to make your task easier.
Ironing hanging curtains is not only essential for maintaining their appearance but also for ensuring that they hang properly and drape beautifully. Wrinkled curtains can create a messy and unkempt look, while well-pressed curtains can instantly elevate the style and ambiance of any room. So, let’s dive into the proper methods and techniques to achieve perfectly ironed curtains.
To begin, it is crucial to gather all the necessary tools and materials before you start ironing. This includes a high-quality iron, an ironing board or a flat, clean, and heat-resistant surface, a water spray bottle, and a clean white cloth.
When selecting an iron, consider one with adjustable heat settings to suit different fabric types. This will allow you to control the temperature based on the specific requirements of your curtains. Additionally, opt for an iron that has a steam function, as this can help remove stubborn wrinkles more efficiently.
Choosing the right ironing surface is equally important. An ironing board with a durable and padded cover is an ideal choice. However, if you don’t have an ironing board, you can use a clean towel or a heat-resistant table or countertop as a makeshift ironing surface.
Once you have gathered your tools and prepared your ironing station, it’s time to prepare the hanging curtains for ironing. Start by gently removing the curtains from their hanging position. Lay them flat on a clean surface, ensuring that there are no obstructions or wrinkles.
Before you begin ironing the curtains, inspect them for any stains or spots. Treat any stains with a gentle stain remover or mild detergent, and allow the curtains to air dry if necessary. It is essential to address any stains before ironing, as heat can set the stains and make them more difficult to remove later on.
Now that your curtains are ready for ironing, let’s move on to the ironing techniques that will help you achieve the best results..
Key Takeaways:
- Elevate your home’s ambiance with wrinkle-free curtains by following proper ironing techniques, selecting the right tools, and handling delicate fabrics with care. Achieve professional results with patience and practice.
- Overcome common ironing challenges by troubleshooting issues like stubborn wrinkles, shine marks, and fabric scorching. Implement wrinkle prevention tips to maintain crisp, polished curtains for a stylish home.
Read more: How To Hang Curtains With Sheers
Proper Preparation
Before you begin ironing hanging curtains, it is crucial to properly prepare them to ensure the best results. Here are some essential steps to follow for proper preparation:
- Read the Care Instructions: Start by checking the care label attached to the curtains. This will provide valuable information regarding the suitable ironing temperature and any specific instructions for the fabric. Different fabrics have different requirements, and following the care instructions will prevent any damage or shrinking.
- Unravel and Untangle: If your curtains have been stored or packed, they may be wrinkled and tangled. Before ironing, gently unravel and untangle the curtains to ensure a smooth ironing process.
- Remove Hardware: If your curtains have any hooks, rings, or other hardware, it is recommended to remove them before ironing. Ironing curtains with attached hardware can cause damage or scratches to both the curtains and the ironing surface.
- Pre-Spot Stains: Inspect your curtains for any stains or spots. If you notice any, pre-treat them before ironing. Use a gentle stain remover or a mild detergent and follow the product’s instructions for stain removal.
- Prepare the Iron: Ensure that your iron is clean and free from any residue or mineral buildup. If necessary, follow the manufacturer’s instructions for cleaning the iron. Additionally, fill the iron’s water reservoir if you plan on using the steam function. Use distilled or filtered water to prevent mineral buildup in the iron.
- Choose the Right Ironing Surface: Select a suitable ironing surface, such as an ironing board with a padded cover. The padding will help provide a smooth and even ironing surface. If you don’t have an ironing board, a clean, heat-resistant table or countertop can work as an alternative. Ensure that the surface is clean and free from any dirt or debris that can transfer onto your curtains.
- Set Up Proper Ventilation: Ironing can release steam and heat, which may lead to a humid environment. To prevent any moisture from damaging your curtains or surrounding areas, make sure you have proper ventilation. Open a window or turn on a fan to maintain air circulation during the ironing process.
By following these proper preparation steps, you will ensure that your curtains are ready for ironing, and you can achieve the best results with minimal effort. Now that you have prepared your curtains, it’s time to move on to selecting the right iron for the job.
Selecting the Right Iron
Choosing the right iron for ironing hanging curtains is essential to achieve optimal results and prevent any damage to your curtains. Here are a few factors to consider when selecting the right iron for the job:
Adjustable Heat Settings:
Look for an iron that offers adjustable heat settings. Different curtain fabrics require different heat levels to prevent scorching or melting. Delicate fabrics such as silk or lace may require lower heat settings, while heavier fabrics like cotton or polyester may require higher heat settings to remove stubborn wrinkles. Having the ability to adjust the heat settings accordingly ensures that you can safely iron a variety of curtain materials.
Steam Function:
A steam function is an important feature to have in an iron when ironing hanging curtains. The steam helps to relax the fabric fibers, making it easier to remove wrinkles. It is especially useful for thicker or heavier curtains. Look for an iron with a visible steam burst, continuous steam, or vertical steam function. These features allow you to control the amount of steam released, providing flexibility based on the fabric and the level of stubborn wrinkles.
Read more: How To Hang Curtains On Gazebo
Soleplate Material:
The soleplate material of the iron is another factor to consider. Opt for an iron with a smooth, non-stick soleplate. This will glide easily over the fabric, preventing any snags or damage. Ceramic, stainless steel, and titanium are popular soleplate materials known for their smooth gliding abilities. Avoid irons with rough or scratched soleplates, as they can potentially snag or leave marks on your curtains.
Size and Weight:
The size and weight of the iron can impact your overall ironing experience. Choose an iron that is comfortable to hold and maneuver. A lightweight iron can reduce fatigue and make it easier to handle. Additionally, consider the size of the iron’s water tank if you plan on using the steam function frequently. A larger water tank can provide more continuous steam, reducing the need for frequent refills.
Auto Shut-off Feature:
An auto shut-off feature is a valuable safety feature to look for in an iron. This feature automatically turns off the iron after a certain period of inactivity. It provides peace of mind, especially if you accidentally leave the iron unattended. This feature helps prevent accidents and potential fabric damage in case you forget to turn off the iron.
By considering these factors, you will be able to select the right iron that meets your specific needs and ensures the best ironing results for your hanging curtains. Once you have the right iron, the next step is to choose the appropriate ironing surface for your curtains, which we will discuss next.
Choosing the Right Ironing Surface
Having a suitable ironing surface is crucial for achieving effective and smooth ironing results when working with hanging curtains. Here are some factors to consider when selecting the right ironing surface:
Read more: How To Hang Valance And Curtains
Ironing Board:
An ironing board is the ideal surface for ironing curtains. Look for an ironing board with a sturdy frame and a padded cover. The padding provides cushioning and helps create a smooth surface for effective ironing. Ensure that the cover is clean, free from any stains or residue that could transfer onto your curtains. Adjustable height settings are beneficial, as they allow you to customize the board’s height to your comfort level.
Portable Ironing Mat:
If you don’t have an ironing board, a portable ironing mat can be a suitable alternative. Ironing mats are designed to provide a flat surface for ironing on various surfaces, such as countertops or tables. Look for a mat with a non-slip backing to prevent any movement during ironing. Ensure that the mat is heat-resistant and can withstand the heat of the iron without causing damage to the surface underneath.
Clean Towel or Flat Surface:
If you don’t have access to an ironing board or ironing mat, you can use a clean towel or a flat, heat-resistant surface as a makeshift ironing surface. Place the towel or surface on a sturdy table or countertop, ensuring that it is smooth and free from any debris or dirt that could transfer onto your curtains.
Additional Considerations:
- Size: Ensure that the ironing surface is large enough to accommodate the size of your curtains. You should be able to spread out the curtains flatly without any obstructions.
- Accessibility: Choose an ironing surface that is easily accessible and comfortable for you to work on. This will prevent any strain or discomfort during the ironing process.
- Ventilation: Ironing can produce steam and heat, so it’s important to have proper ventilation in the area where you’re ironing. Ensure that the ironing surface is placed in a well-ventilated space to prevent moisture buildup and allow for adequate air circulation.
Remember to always iron on a clean surface to avoid transferring any dirt, stains, or debris onto your curtains. By selecting the right ironing surface, you’ll have a stable and smooth surface to effectively iron your hanging curtains. Now that you have chosen the appropriate ironing surface, let’s move on to the next step – preparing the hanging curtains for ironing.
Read more: How To Hang Curtains On Ceiling
Preparing the Hanging Curtains
Before you begin ironing your hanging curtains, it’s important to properly prepare them to ensure the best ironing results. Here’s how to prepare your hanging curtains for ironing:
Remove the Curtains:
Start by gently removing the curtains from their hanging position. Take care not to tug or pull too forcefully, as this can damage the curtains or the hardware holding them in place. If your curtains have multiple panels, separate them to make the ironing process easier.
Lay Them Flat:
Once you have removed the curtains, lay them flat on a clean and spacious surface. Ensure that the curtains are spread out evenly without any folds or creases. Straighten the fabric gently with your hands, smoothing out any wrinkles or kinks.
Inspect for Stains:
Take a close look at your curtains and inspect them for any stains or spots. If you notice any, it’s best to pre-treat them before ironing. Follow the recommended stain removal method for the specific fabric to avoid damaging the curtains during the ironing process. Always test the stain remover on a small and less visible area of the curtains first.
Read more: How To Hang Temporary Curtains
Unravel and Untangle:
If your curtains have been stored or packed, they may be tangled or wrinkled. Take the time to gently unravel and untangle them before ironing. This will make the ironing process smoother and prevent any further wrinkling or creasing.
Smooth Out Folds:
Check for any folded areas or creases in the fabric and smooth them out gently. Use your hands to gently stretch the fabric to remove any stubborn folds. This step will help ensure that the curtain fabric is smooth and ready for ironing.
Secure Any Loose Seams or Hems:
Before you start ironing, check the curtains for any loose seams or hems. If you find any, use a needle and thread to secure them properly. This will prevent the seams or hems from getting stretched or distorted during the ironing process.
By properly preparing your hanging curtains before ironing, you’ll create a solid foundation for achieving wrinkle-free and well-pressed curtains. Once your curtains are prepared, you’re ready to move on to the ironing techniques that will help you achieve the best results.
Ironing Techniques
Ironing hanging curtains requires a proper technique to ensure smooth, wrinkle-free results. Here are some essential ironing techniques to help you achieve the best results:
Read more: How To Measure To Hang Curtains
Start with the Top:
Begin by ironing the top portion of your hanging curtains. This includes the header or the area where the rod or hooks are inserted. Lay the curtains flat and place the iron at the top, applying gentle pressure as you move the iron across the fabric. Iron in a smooth, downward motion to avoid creating new wrinkles. Be mindful of any decorations or trims on the header and iron around them if necessary.
Work in Sections:
To make ironing more manageable, divide your curtains into smaller sections. Start ironing one section at a time, moving horizontally across the fabric. This method allows you to focus on one area at a time, ensuring that each section receives the appropriate amount of heat and attention. It also helps prevent the fabric from cooling down before you finish ironing the entire curtain.
Use the Steam Function:
If your iron has a steam function, utilize it to your advantage. Steam can help relax the fabric and make it easier to remove wrinkles. Hold the iron slightly above the fabric and press the steam button as you move it across the section you’re ironing. Be careful not to overdo it with the steam, as too much moisture can leave watermarks on the fabric.
Apply Even Pressure:
Apply even pressure as you iron. Too much pressure can stretch the fabric, while too little pressure may not effectively remove the wrinkles. Use a steady, gliding motion, allowing the heat and steam to penetrate the fabric and smooth out any creases. If you encounter stubborn wrinkles, apply a bit more pressure or steam to the affected area, being cautious not to scorch the fabric.
Read more: How To Hang Blackout Curtains
Iron Vertically:
When ironing curtains, it’s generally best to iron vertically, following the natural lines of the fabric. This ensures a smoother appearance and helps the curtains hang properly. Ironing against the grain or horizontally can potentially distort the fabric weave and create uneven results.
Avoid Ironing Sheer Fabrics Directly:
If you’re working with sheer curtains, it’s best to avoid ironing them directly. Instead, place a clean, white cloth over the curtains and iron over the cloth. This provides a protective barrier and prevents any shine or damage that direct ironing might cause to delicate sheer fabrics.
Keep the Iron Moving:
Avoid leaving the iron sitting in one spot for too long, as this can lead to scorching or burning the fabric. Keep the iron moving continuously to distribute the heat evenly and minimize the risk of damage.
By following these ironing techniques, you’ll be able to effectively remove wrinkles and achieve beautifully pressed hanging curtains. Next, let’s explore how to handle delicate fabrics to ensure their longevity and quality.
Handling Delicate Fabrics
When it comes to ironing delicate fabrics, it’s important to approach the process with care and gentleness. Delicate fabrics require special attention to prevent damage and maintain their integrity. Here are some tips for handling delicate fabrics when ironing hanging curtains:
Read more: How To Hang Curtains On Balcony
Adjust the Heat Settings:
Delicate fabrics such as silk, satin, or lace require lower heat settings to avoid scorching or melting. Consult the care label on your curtains for guidance on the appropriate temperature range. If there are no specific instructions, start with a low heat setting and gradually increase if needed. Using a pressing cloth or clean white cloth between the iron and the fabric can provide an extra layer of protection.
Test on a Hidden Area:
Before ironing delicate fabrics, it’s wise to test a small, inconspicuous area first. This ensures that the fabric can handle the heat and the ironing process without getting damaged. If the fabric reacts negatively, such as puckering or discoloration, reduce the heat or consider alternative ironing methods to prevent further damage.
Use a Pressing Cloth:
A pressing cloth is a thin, clean cloth that is placed over the delicate fabric before ironing. It acts as a barrier between the iron and the fabric, preventing direct contact and reducing the risk of damage. Ensure that the pressing cloth is clean and free from any dirt or debris that could transfer onto the fabric. Silk organza or muslin cloths are commonly used as pressing cloths for delicate fabrics.
Steam with Caution:
While steam can be used to remove wrinkles from delicate fabrics, it’s important to be cautious. Excessive steam or prolonged exposure to moisture can cause water spots or damage sensitive fabrics. Hold the iron slightly above the fabric and apply short bursts of steam, allowing the fabric to absorb the moisture gradually. If needed, lightly press the fabric with the pressing cloth to smooth out any remaining wrinkles.
Read more: How To Hang Sidelight Curtains
Iron Inside Out:
If the fabric allows, consider ironing the delicate curtains inside out. This way, you can directly iron the fabric without worrying about any embellishments or delicate details. Ironing inside out can help protect the fabric’s surface and prevent any marks or shine caused by the iron.
Hang Delicate Fabrics Properly:
Once you’ve finished ironing delicate curtains, hang them properly to maintain their shape and prevent new wrinkles. Hang the curtains immediately on a curtain rod or a suitable hanger to ensure that they drape naturally. Avoid overcrowding or tightly bunching the fabric, as this can lead to new wrinkles forming.
By following these tips, you’ll be able to handle delicate fabrics with care and ensure that your hanging curtains remain in excellent condition. Now, let’s move on to some useful tips for preventing wrinkles and maintaining the crispness of your curtains.
Wrinkle Prevention Tips
Preventing wrinkles in your hanging curtains is key to maintaining their neat and polished appearance. Here are some helpful tips to minimize wrinkles and keep your curtains looking their best:
Proper Folding and Storage:
When you are not using your curtains, take the time to fold them neatly. Start by removing any hooks or hardware, then fold the curtains along their natural creases or seams. Avoid folding them tightly or in small, compact bundles, as this can lead to deep and stubborn wrinkles. Store the folded curtains in a cool, dry place such as a linen closet or a dedicated curtain storage area.
Read more: How To Hang Curtains In Kitchen
Avoid Overcrowding:
Avoid overcrowding your curtains when storing them or hanging them on the rod. Curtains that are tightly packed or bunched together are more prone to wrinkles. Allow sufficient space between each curtain to promote airflow and prevent them from rubbing against each other, which can cause wrinkles to form.
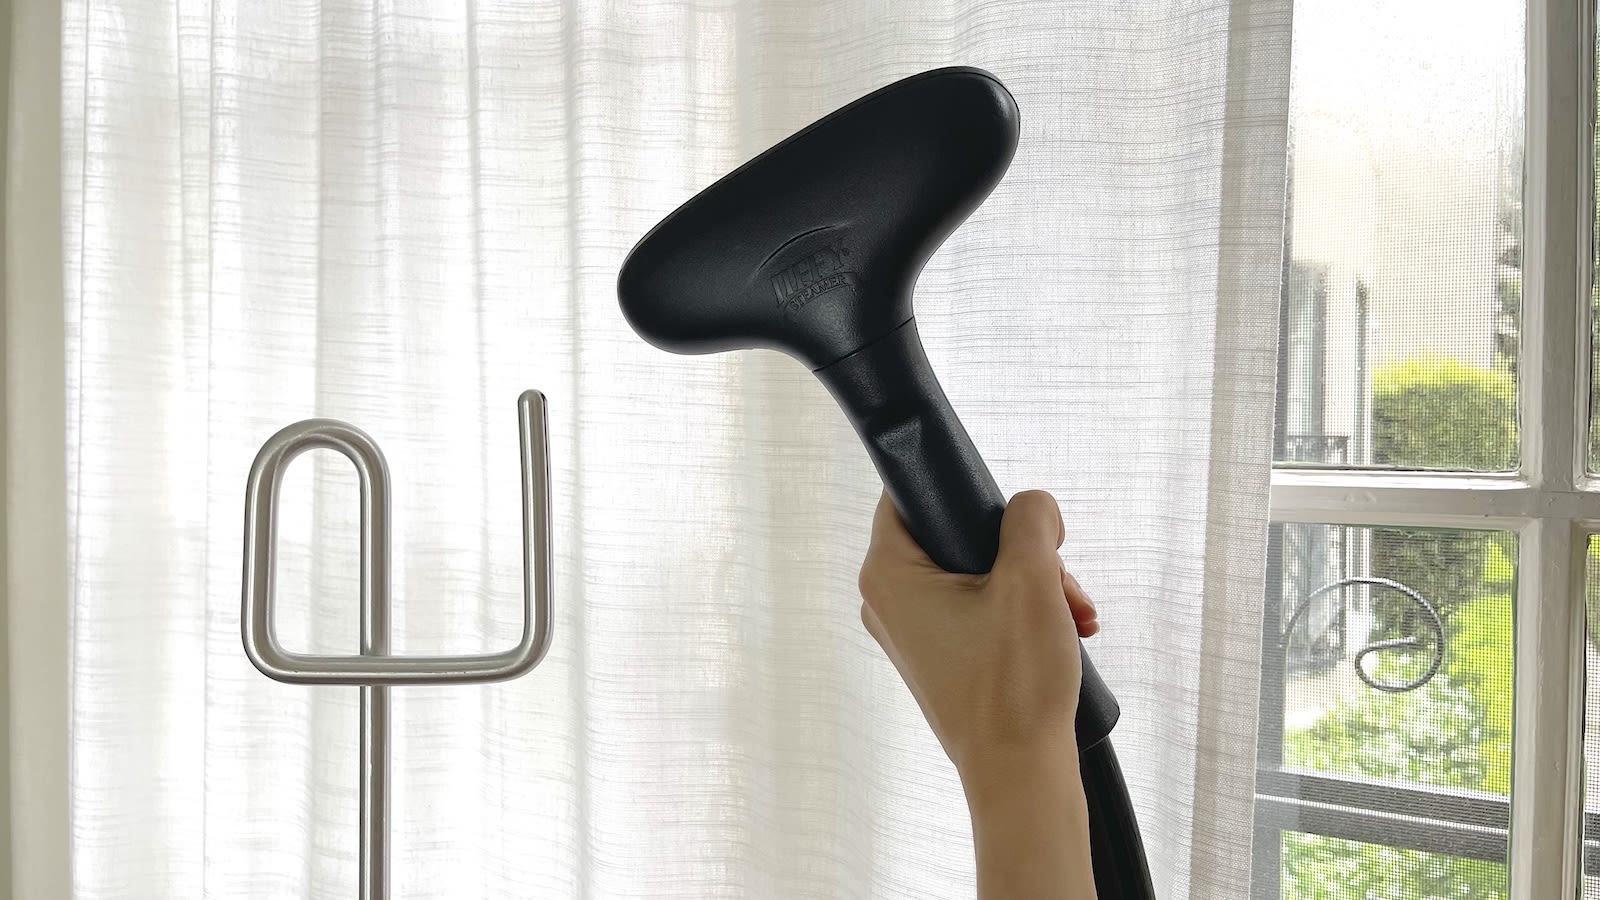
Regular Refreshing:
Give your hanging curtains a regular refreshing to prevent minor wrinkles from becoming more pronounced. You can do this by using a fabric steamer or a handheld garment steamer. Simply hold the steamer a few inches away from the fabric and use gentle, sweeping motions to release any wrinkles. Alternatively, you can hang the curtains in the bathroom while running a hot shower to create steam that will help relax and smooth out the fabric.
Limit Sun Exposure:
Excessive exposure to direct sunlight can cause curtains to fade, weaken, and develop wrinkles. Protect your curtains from prolonged sun exposure by using sheer or blackout curtains as a barrier, drawing them closed during the brightest hours of the day. Additionally, consider rotating your curtains periodically to ensure even sun exposure across the fabric.
Remove and Shake:
If you notice minor wrinkles in your curtains, you can often remove them by gently shaking the fabric. Start at the top of the curtain and work your way down, giving the fabric a gentle shake to loosen any creases. Repeat this motion along the length of the curtain until the wrinkles are minimized or eliminated.
Read more: How To Hang Grommet Curtains
Invest in Wrinkle-Resistant Fabrics:
When choosing new curtains, consider selecting fabrics that are labeled as wrinkle-resistant. These fabrics are treated or woven in a way that minimizes wrinkle formation, making them easier to maintain and requiring less ironing. However, it’s important to note that even wrinkle-resistant fabrics may still benefit from occasional steaming or light ironing to ensure a perfectly crisp look.
By implementing these wrinkle prevention tips, you can keep your hanging curtains looking fresh and wrinkle-free for longer periods. However, if you do encounter stubborn wrinkles or face any ironing issues, don’t worry – we will address troubleshooting those in the next section.
Troubleshooting Ironing Issues
Ironing hanging curtains can sometimes come with its challenges. However, with a few troubleshooting techniques, you can overcome common ironing issues and achieve the desired results. Here are some solutions to help you troubleshoot ironing issues:
Stubborn Wrinkles:
If you encounter stubborn wrinkles that are not easily removed, try the following methods:
- Apply some water or use the steam function on your iron to dampen the fabric slightly before ironing. The moisture will help relax the fibers, making it easier to smooth out the wrinkles.
- Use a little pressure when ironing over the stubborn wrinkles. Apply firmer pressure while continually moving the iron back and forth to concentrate the heat on the affected area.
- If the fabric allows, flip the curtain over and iron the backside of the fabric. This can help stretch the fibers and smooth out the wrinkles more effectively.
Shine Marks:
Shine marks can occur if the iron is too hot or if too much pressure is applied. To mitigate shine marks:
- Reduce the heat setting on your iron to avoid singeing the fabric. Test a small inconspicuous area first to ensure that the lower heat setting does not cause any damage.
- Place a clean, white cloth or a pressing cloth between the iron and the fabric. This will act as a protective barrier and help prevent shine marks.
- Iron gently without applying excessive pressure. Allow the heat and steam to do the work, and avoid leaving the iron on one spot for too long.
Read more: How To Hang Eyelet Curtains
Iron Marks:
If you accidentally leave the iron on the fabric for too long or apply excessive heat, iron marks may appear. Here’s how to address them:
- Moisten a clean white cloth or a sponge with water and gently dab the affected area. Be careful not to saturate the fabric, as excessive moisture can cause water spots.
- Next, use a fabric steamer or hold a steam iron a few inches away from the fabric. Direct the steam towards the iron marks while gently pressing the fabric with the cloth to help lift and even out the marks.
- If the iron marks persist, you may need to rewash the curtains following the fabric’s care instructions and repeat the process. Be sure to let the curtains dry thoroughly before ironing again.
Fabric Scorching:
Scorch marks can occur if the iron is too hot or left on the fabric for too long. To address fabric scorching:
- Assess the extent of the damage. If the scorch marks are minimal, you can attempt to gently buff them using a clean white cloth or a sponge damped with a fabric-safe stain remover.
- If the scorch marks are significant or the fabric cannot be salvaged, consider altering the curtains by trimming off the affected areas or repurposing them if possible.
- Take preventive measures by adjusting the iron’s heat settings to those appropriate for the fabric and using pressing cloths when ironing delicate materials.
By employing these troubleshooting techniques, you can tackle common ironing issues and achieve the desired outcome for your hanging curtains. Remember to always proceed with caution and test any methods on a small, hidden area before working on the entire curtain. With practice and patience, you’ll become adept at ironing your curtains to perfection.
Conclusion
Ironing hanging curtains doesn’t have to be a daunting task. With the proper techniques and tools, you can achieve wrinkle-free and beautifully pressed curtains that enhance the overall aesthetics of your home. By following the guidelines provided in this article, you can effectively iron your hanging curtains and overcome common ironing challenges.
Proper preparation is crucial for successful ironing. Selecting the right iron with adjustable heat settings and a steam function, along with choosing a suitable ironing surface, sets the foundation for achieving optimal results. Preparing the hanging curtains by untangling, inspecting for stains, and laying them flat is essential to ensure a smooth ironing process.
When ironing, apply the appropriate techniques to achieve wrinkle-free curtains. Starting from the top, working in sections, and using steam when necessary helps to relax the fabric and remove wrinkles effectively. Handling delicate fabrics with care, using pressing cloths, and adjusting the iron’s heat settings are essential for preventing damage and maintaining the quality of the fabric.
Implementing wrinkle prevention tips such as proper folding and storage, avoiding overcrowding, and regular refreshing can help minimize wrinkles and keep your curtains looking crisp. Troubleshooting common ironing issues, such as stubborn wrinkles, shine marks, iron marks, and fabric scorching, ensures that you can overcome obstacles that may arise during the ironing process.
Ultimately, by following the guidelines and tips provided in this article, you’ll be equipped with the knowledge and techniques to iron your hanging curtains with confidence and achieve professional-looking results. Remember to read and follow the care instructions for your specific curtains to ensure that you’re using the appropriate heat settings and ironing methods for the fabric.
So, go ahead and transform your hanging curtains from wrinkled to wonderfully pressed, elevating the ambiance and style of your home. With practice and patience, you’ll master the art of ironing hanging curtains and enjoy the benefits of having beautifully maintained window treatments.
Frequently Asked Questions about How To Iron Hanging Curtains
Was this page helpful?
At Storables.com, we guarantee accurate and reliable information. Our content, validated by Expert Board Contributors, is crafted following stringent Editorial Policies. We're committed to providing you with well-researched, expert-backed insights for all your informational needs.


0 thoughts on “How To Iron Hanging Curtains”