Home>Articles>How To Hide Wires For Wall Mounted TV Over Fireplace

Articles
How To Hide Wires For Wall Mounted TV Over Fireplace
Modified: January 19, 2024
Learn how to hide wires for your wall mounted TV over the fireplace with our informative articles.
(Many of the links in this article redirect to a specific reviewed product. Your purchase of these products through affiliate links helps to generate commission for Storables.com, at no extra cost. Learn more)
Introduction
When it comes to home decor and design, a wall-mounted TV over a fireplace can be a stylish and space-saving solution. However, one of the biggest challenges in this setup is dealing with the unsightly mess of wires that can ruin the aesthetic appeal and create a hazardous environment. Thankfully, there are several techniques and tools available to help hide those wires and create a seamless look.
In this article, we will guide you through the step-by-step process of hiding wires for a wall-mounted TV over a fireplace. Whether you’re a DIY enthusiast or a novice, with the right tools, materials, and techniques, you can achieve a clean and organized look while enhancing the overall appearance of your living space.
But why is it so important to hide these wires? Well, aside from the obvious reason of enhancing the visual appeal, there are a few other key factors to consider. First and foremost, exposed wires can pose a safety hazard, especially if you have young children or pets in your home. Secondly, hiding the wires eliminates the risk of accidentally tripping over them, which can cause damage to both the TV and the wires themselves.
Furthermore, concealing the wires behind the wall not only creates a cleaner and clutter-free environment, but it also allows for easier cleaning and maintenance. Without the hassle of maneuvering around visible wires, you can easily dust and clean the area around the TV and fireplace without any obstructions.
Now that we understand the importance of hiding wires for a wall-mounted TV over a fireplace, let’s dive into the tools and materials you’ll need for this project.
Key Takeaways:
- Hiding wires for a wall-mounted TV over a fireplace is crucial for safety, aesthetics, and organization. It enhances the visual appeal, prevents safety hazards, and creates a clutter-free living space for a more immersive viewing experience.
- The step-by-step process involves choosing the right mounting bracket, measuring and marking the wall, planning cable routing, and installing an in-wall cable management kit. Attention to detail and proper execution are essential for a successful and seamless wire hiding solution.
Read more: How To Mount TV On Stone Fireplace
Why it’s important to hide wires
When it comes to creating a clean and organized living space, hiding wires for a wall-mounted TV over a fireplace is crucial. Here are some key reasons why it’s important to tackle this task:
Enhanced aesthetic appeal: Exposed wires can be an eyesore, disrupting the overall visual harmony of your living room. By hiding the wires, you can create a sleek and seamless look that showcases the elegance of your wall-mounted TV and fireplace.
Safety considerations: Safety should always be a top priority, especially in a household with children or pets. Exposed wires can be a potential hazard, offering tempting opportunities for curious little hands or paws to chew or tug on. By concealing the wires, you can eliminate this risk and provide a safer environment for everyone.
Preventing damage: Exposed wires are susceptible to damage from accidental bumps, spills, or even the occasional pet scratching. By hiding them, you can protect your wires from potential harm, ensuring the longevity and functionality of your TV and cable connections.
Reduced clutter and improved organization: An organized living space contributes to a sense of calm and clarity. When wires are left exposed, they create a cluttered and messy appearance, making it difficult to maintain a clean and organized living area. By hiding the wires, you can create a neat and tidy atmosphere that enhances the overall ambiance of your room.
Easier cleaning and maintenance: Cleaning around exposed wires can be a tedious and time-consuming task. Hiding them allows for easy access to the TV and fireplace surfaces, making cleaning and maintenance much simpler. This not only saves you time, but it also promotes a cleaner and healthier living environment.
Improved focus and relaxation: With hidden wires, your focus can be fully directed towards enjoying your favorite movies, shows, or cozy fireplace moments, without any distractions or visual disruptions. This helps create a more immersive and relaxing viewing experience.
By understanding the importance of hiding wires and the benefits it brings, you can take the necessary steps to create a visually pleasing and safe environment. In the next section, we will discuss the essential tools and materials you need to hide those wires effectively.
Tools and Materials Needed
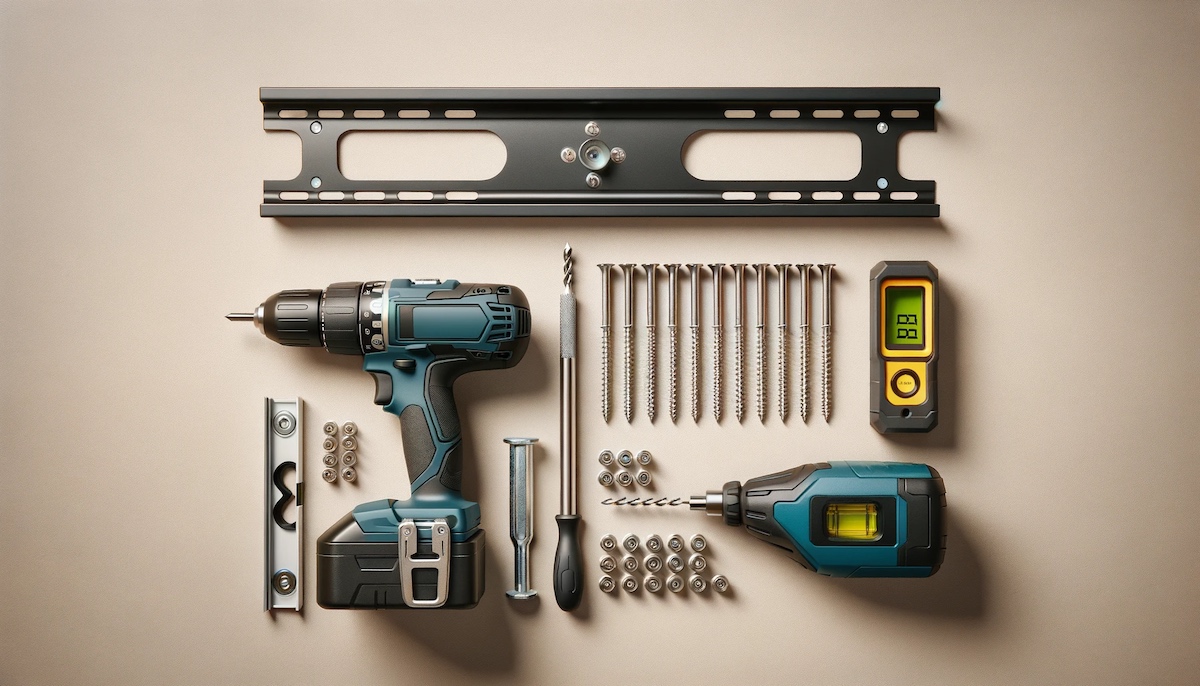
Before you begin the process of hiding wires for a wall-mounted TV over a fireplace, it’s important to gather the necessary tools and materials. Here’s a list of what you’ll need:
Tools:
- Stud finder
- Measuring tape
- Pencil
- Level
- Power drill
- Drill bits
- Fish tape or wire snake
- Drywall saw or utility knife
- Screwdriver
Materials:
- Mounting bracket for TV
- In-wall cable management kit
- Cable ties or clips
- HDMI cables (if needed)
- Electrical wire (if extending power outlets)
- 1-gang or 2-gang electrical box (if necessary)
- Electrical outlet cover (if relocating outlets)
- Wall paint or touch-up paint (if needed)
These tools and materials will help you navigate through the process of hiding wires and ensure a successful installation. Make sure to have them on hand before you begin, as it will save you time and prevent any interruptions during the project.
In the next section, we will discuss the step-by-step process of hiding wires for a wall-mounted TV over a fireplace, starting with choosing the right mounting bracket.
Step 1: Choose the Right Mounting Bracket
Choosing the right mounting bracket is the first crucial step in hiding wires for a wall-mounted TV over a fireplace. Here are some considerations to keep in mind:
Compatibility: Ensure that the mounting bracket you choose is compatible with your TV’s size and weight. Check the manufacturer’s specifications or consult with a professional to determine the appropriate bracket for your TV model.
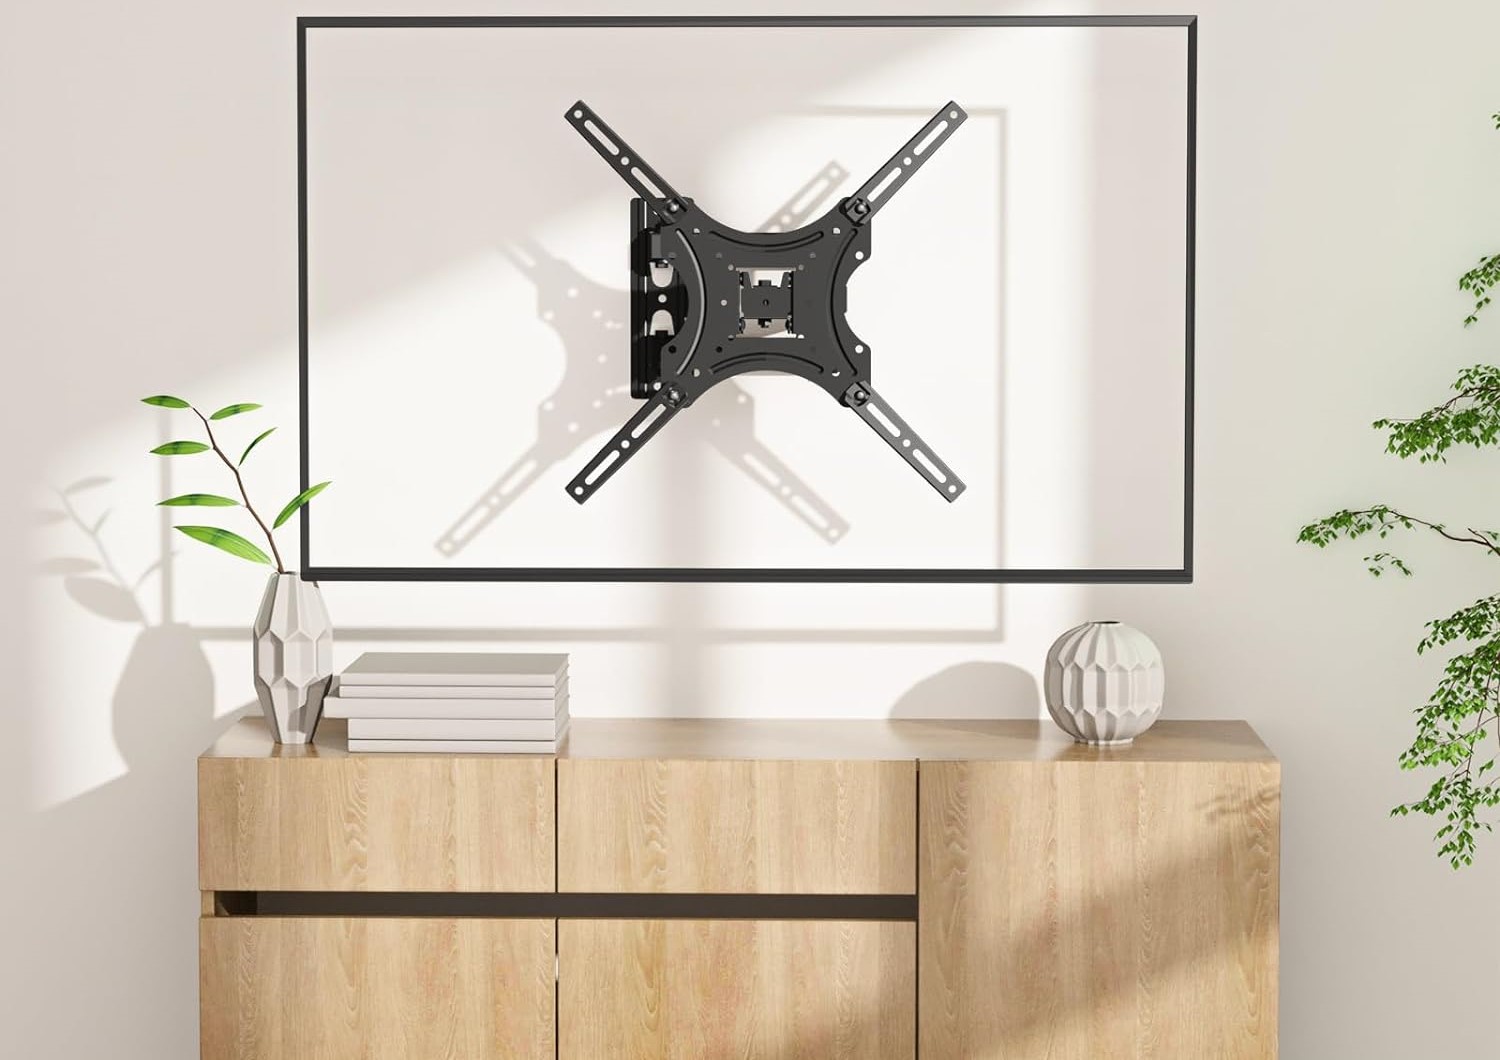
Type of Mount: There are various types of TV mounts available, including fixed mounts, tilt mounts, and full-motion mounts. Consider your preferred viewing angle and flexibility in adjusting the TV position when selecting the type of mount.
Stud-finding Capability: Look for a mounting bracket equipped with a built-in stud finder or markings that indicate the stud locations on the wall. This will aid in securely attaching the bracket to the wall for added stability.
Cable Management Features: Some mounting brackets come with built-in cable management systems or hooks that allow you to route and conceal wires more easily. These features can greatly simplify the process of hiding wires behind the wall.
Quality and Durability: Invest in a high-quality mounting bracket that provides sufficient strength and durability to support your TV’s weight and withstand long-term use. Avoid opting for cheap or flimsy brackets that may compromise the safety and stability of your installation.
Research different mounting bracket options and read customer reviews to ensure you make an informed decision. Once you have selected the right bracket for your TV, you can proceed to the next step: measuring and marking the wall.
Step 2: Measure and Mark the Wall
Measuring and marking the wall is an essential step in the process of hiding wires for a wall-mounted TV over a fireplace. Follow these steps to ensure accurate measurements and proper placement:
1. Measure the Fireplace and TV: Measure the width and height of the fireplace, as well as the dimensions of your TV. This will help determine the ideal height and position for mounting the TV, taking into consideration factors such as viewing angle and distance from the fireplace.
2. Mark the Center Line: Using a pencil, vertically mark the center line of the fireplace. This will serve as a reference point for aligning the TV and mounting bracket.
3. Determine the Mounting Height: Determine the desired height for mounting the TV. Generally, the center of the TV should be at eye level when seated. Take into account any furniture or obstacles below the TV that may impact the placement.
4. Mark the Mounting Bracket Location: Measure and mark the location where the top of the mounting bracket will be installed. Use a level to ensure the marks are straight and aligned with the center line of the fireplace.
5. Locate Wall Studs: Use a stud finder to locate and mark the position of the wall studs along the horizontal line where the mounting bracket will be installed. This step is crucial for ensuring a secure and stable mount.
6. Verify Clearances: Check for any obstructions or clearances that may affect the installation, such as electrical outlets, light switches, or vents. Make necessary adjustments to avoid interference with the TV or wiring.
By accurately measuring and marking the wall, you can ensure that the TV is mounted at the right height and properly aligned with the fireplace. This sets the foundation for a successful installation. In the next step, we will discuss how to locate electrical outlets and plan cable routing for hiding the wires.
Read more: How To Hide Wires On Brick Wall
Step 3: Locate Electrical Outlets and Plan Cable Routing
Locating electrical outlets and planning the route for cable wiring is an important step in hiding wires for a wall-mounted TV over a fireplace. Follow these steps to ensure a well-organized and safe cable setup:
1. Identify Existing Outlets: Take note of the location and proximity of existing electrical outlets near the fireplace. These outlets will serve as the power source for your TV and any additional devices.
2. Assess Outlet Placement: Determine if the existing outlets are conveniently located for your TV setup. Ideally, the outlets should be positioned at a suitable height, near the mounting bracket, to minimize visible wire exposure.
3. Plan for Power and Signal Cables: Consider the cable routing options for both power cables and signal cables (such as HDMI or audio cables). Determine the most direct and concealed path, avoiding obstacles and ensuring clear access to the outlets.
4. Determine Cable Length: Measure the distance from the TV to the nearest power outlet, as well as any other devices you may be connecting. This will help determine the length of cables you will need to purchase or plan for custom cable wiring.
5. Check Code Compliance: Ensure that any new wiring you plan to install adheres to local electrical codes and safety regulations. If you’re unsure or uncomfortable with electrical work, consult a licensed electrician for assistance.
6. Consider In-Wall Cable Concealment: If you want a more seamless and hidden cable setup, you can plan for in-wall cable concealment using an in-wall cable management kit. This involves routing the cables through the wall and using a kit to create discreet outlets for connecting devices.
By strategically locating electrical outlets and planning the route for cable wiring, you can minimize visible wire exposure and create a clean and organized setup. In the next step, we will discuss how to install the mounting bracket on the wall to prepare for mounting the TV.
Use a cable management kit to hide wires for a wall-mounted TV over a fireplace. These kits include channels and covers to conceal and organize the cables, creating a clean and professional look.
Step 4: Install the Mounting Bracket on the Wall
Installing the mounting bracket is a crucial step in the process of hiding wires for a wall-mounted TV over a fireplace. Follow these steps to ensure a secure and sturdy installation:
1. Gather Your Tools: Before you begin, gather the necessary tools for installing the mounting bracket, including a power drill, appropriate drill bits, a screwdriver, and a level.
2. Find the Studs: Use a stud finder to locate the wall studs within the marked area where the mounting bracket will be installed. Studs provide the necessary support and stability for securely attaching the bracket to the wall.
3. Mark the Screw Hole Locations: Once you have located the studs, hold the mounting bracket against the wall and mark the screw hole locations using a pencil. Make sure the bracket is level before marking the holes.
4. Pre-drill Screw Holes: Use an appropriate drill bit to pre-drill pilot holes at the marked locations. This will prevent the wall from splitting or cracking when you secure the mounting bracket in place.
5. Attach the Mounting Bracket: Line up the pre-drilled holes on the mounting bracket with the pilot holes on the wall. Securely attach the bracket to the wall using screws or bolts, making sure it is firmly anchored to the studs for maximum stability.
6. Check for Level and Stability: Once the mounting bracket is installed, use a level to ensure it is perfectly horizontal or tilted according to your desired viewing angle. Gently test the stability of the bracket to ensure it is securely attached to the wall.
By properly installing the mounting bracket, you are setting the foundation for a safe and secure wall-mounted TV installation. In the next step, we will discuss how to mount the TV onto the bracket, ensuring a seamless look without visible wires.
Step 5: Securely Mount the TV onto the Bracket
Mounting your TV onto the bracket is an exciting step in the process of hiding wires for a wall-mounted TV over a fireplace. Follow these steps to ensure a secure and seamless installation:
1. Gather Your Tools: Before you begin, gather the necessary tools for mounting the TV onto the bracket, which may include a screwdriver, the TV’s manual, and an extra set of hands to assist you.
2. Locate the Mounting Holes: Check the back of your TV to locate the mounting holes. Refer to the TV’s manual for specific instructions on where the mounting holes are located and the appropriate size screws or bolts to use.
3. Align the Mounting Plate: Position the mounting plate or bracket attachment onto the back of the TV, aligning the mounting holes with the corresponding holes on the TV. Ensure that the mounting plate is securely attached to the TV according to the manufacturer’s instructions.
4. Secure the TV to the Mounting Bracket: With the help of an assistant, carefully lift the TV and align the mounting plate with the bracket on the wall. Gently lower the TV onto the bracket, ensuring a secure fit. Follow the manufacturer’s instructions to secure the TV to the bracket using the appropriate screws or bolts.
5. Double-Check Stability and Levelness: Once the TV is mounted, double-check the stability and levelness. Make any necessary adjustments to the TV’s position or the bracket’s tightness to ensure a secure and level installation.
6. Connect and Organize Cables: With the TV successfully mounted, begin connecting the necessary cables, such as HDMI or audio cables. Use cable ties or clips to organize and route the cables along the back of the TV and towards the desired cable management solution.
By securely mounting the TV onto the bracket, you are one step closer to achieving a clean and organized look for your wall-mounted TV over the fireplace. In the next step, we will discuss how to route and conceal the wires behind the wall to further enhance the aesthetics of your setup.
Step 6: Route and Conceal the Wires Behind the Wall
Routing and concealing the wires behind the wall is a crucial step in achieving a clean and seamless look for your wall-mounted TV over a fireplace. Follow these steps to effectively hide the wires:
1. Determine the Cable Route: Plan the route for your cables from the TV to the desired cable management solution or outlet. Consider the most direct and concealed path, avoiding obstacles such as studs and electrical wiring.
2. Use a Fish Tape or Wire Snake: Attach the cables to a fish tape or wire snake and carefully feed it through the wall, following the planned cable route. It may be necessary to make small holes or use existing cutouts to navigate the wires behind the wall.
3. Extend Power Outlets if Needed: If your existing power outlets are not conveniently located for your TV setup, you may need to extend them. Consult a licensed electrician to safely extend power outlets or consider using an in-wall power extension kit.
4. Install an In-Wall Cable Management Kit: For a more professional and aesthetically pleasing cable management solution, consider installing an in-wall cable management kit. This kit typically consists of a recessed wall plate with built-in channels for running cables.
5. Cut Openings for the Cable Management Kit: Use a drywall saw or utility knife to carefully cut openings on the wall for the cable management kit. Ensure that the size and shape of the cutouts match the dimensions of the wall plate.
6. Route the Cables into the Cable Management Kit: Feed the cables through the openings and into the channels of the cable management kit. Carefully organize and secure the cables within the channels to maintain a neat and tidy appearance.
7. Attach the Wall Plate: Once the cables are properly routed, attach the wall plate of the cable management kit to the wall, covering the cutouts. Make sure the wall plate is securely fastened and aligned with the surrounding wall.
8. Test and Tidy Up: After routing and concealing the wires, test all connections to ensure everything is working properly. Take the time to tidy up any visible cables on the way to the cable management kit, using cable ties or clips to keep them organized and hidden.
By effectively routing and concealing the wires behind the wall, you can achieve a clean and clutter-free look for your wall-mounted TV over the fireplace. In the next step, we will discuss how to install an in-wall cable management kit for a more seamless wire hiding solution.
Read more: How To Mount A TV Stand On The Wall
Step 7: Install an In-Wall Cable Management Kit
Installing an in-wall cable management kit is an excellent way to achieve a professional and seamless wire hiding solution for your wall-mounted TV over a fireplace. Follow these steps to effectively install the cable management kit:
1. Choose the Right Cable Management Kit: Select an in-wall cable management kit that suits your needs, taking into consideration the number of cables you plan to route and conceal. Ensure that the kit is compatible with your wall type (e.g., drywall or plaster).
2. Preparation: Gather the necessary tools for the installation, including a measuring tape, pencil, level, drywall saw, and screwdriver. Make sure the power to the area is turned off before starting any work.
3. Measure and Mark: Determine the desired location for the cable management kit on the wall, ensuring it is within reach of the cables you want to conceal. Use a measuring tape and pencil to mark the dimensions of the cutout area for the kit.
4. Cut the Opening: Use a drywall saw or utility knife to carefully cut along the marked dimensions, creating an opening for the cable management kit. Take caution not to damage any existing wiring or plumbing within the wall.
5. Mount the Cable Management Kit: Attach the cable management kit to the wall by securing it with screws or adhesive, following the manufacturer’s instructions. Make sure the kit is flush against the wall surface and securely fastened.
6. Route the Cables: Feed the cables through the opening of the cable management kit, ensuring they are neatly organized and arranged within the channels. Use cable ties or clips to secure the cables within the kit, keeping them tidy and hidden.
7. Adjust and Test: Adjust the cables within the cable management kit to ensure they are situated comfortably and not putting any strain on the connections. Test all the connections to ensure that everything is working properly before proceeding to the next step.
8. Close the Opening: If necessary, use touch-up paint or wall putty to seamlessly blend the cable management kit opening with the surrounding wall, creating a smooth and cohesive appearance.
By installing an in-wall cable management kit, you can effectively conceal the wires behind the wall for a clean and professional-looking setup. In the next step, we will discuss how to test and adjust the TV for optimal viewing.
Step 8: Test and Adjust the TV for Optimal Viewing
After hiding the wires and installing the wall-mounted TV over the fireplace, it’s time to test and adjust the TV for optimal viewing. Follow these steps to ensure a comfortable and enjoyable viewing experience:
1. Power On the TV: Turn on the TV and ensure it is receiving power from the connected outlets. Check that all the cables are securely plugged into their respective ports on the TV and any additional devices.
2. Test the Picture Quality: Play a high-definition video or a test pattern to assess the picture quality. Check for any pixelation, color issues, or other abnormalities that may require adjusting the TV settings or cables.
3. Adjust the Mounting Angle: If your mounting bracket allows for tilt or swivel adjustments, carefully adjust the TV’s angle to achieve the optimal viewing position. Consider factors such as glare, seating position, and personal preference.
4. Check for Viewing Comfort: Sit in your typical viewing position and assess the viewing comfort. Ensure that the TV is positioned at a height and angle that allows for comfortable viewing without straining your neck or eyes.
5. Calibrate the TV Settings: Use the TV’s calibration settings or calibration tools to optimize the picture quality. Adjust settings such as brightness, contrast, color temperature, and backlight to achieve your desired viewing experience.
6. Test Audio Quality: Play audio content and assess the audio quality. Adjust the volume and any audio settings as needed. Consider connecting external speakers or a sound system for enhanced sound performance if desired.
7. Evaluate Cable Management: Take a final look at the cable management solution and ensure that the wires are neatly organized and hidden behind the wall or within the cable management kit. Make any necessary adjustments to ensure a clean and clutter-free appearance.
8. Make Final Adjustments: Spend some time testing different types of content (e.g., movies, TV shows, gaming) and experimenting with minor adjustments to achieve your desired picture and audio quality. Make note of any changes you would like to make for future reference.
By testing and adjusting the TV for optimal viewing, you can ensure a comfortable and immersive entertainment experience, while also appreciating the clean and organized aesthetic of your wall-mounted TV over the fireplace.
Conclusion
Congratulations on successfully hiding wires for your wall-mounted TV over the fireplace! By following the steps outlined in this guide, you have created a clean and organized setup that not only enhances the aesthetics of your living space but also ensures the safety and functionality of your entertainment system.
By choosing the right mounting bracket, accurately measuring and marking the wall, locating electrical outlets, routing and concealing wires, and installing an in-wall cable management kit, you have achieved a seamless and clutter-free look. The result is a comfortable and enjoyable viewing experience without the distraction of visible wires or safety hazards.
Remember, proper planning and attention to detail are essential throughout the process. Taking the time to measure, mark, and locate the best placement for your TV and cables will yield the best results. Additionally, always adhere to safety guidelines and consult professionals when needed, especially when working with electrical wiring.
With the wires hidden and the TV mounted, take a moment to sit back and appreciate the transformation. Enjoy your favorite movies, TV shows, or relax by the fireplace, knowing that the wires are neatly concealed and the focus can now solely be on the content you love.
If you ever need to make adjustments or modifications in the future, refer back to this guide or seek the assistance of professionals to ensure a seamless and safe process.
Thank you for following this guide, and we hope you enjoy your new and improved wall-mounted TV setup!
Frequently Asked Questions about How To Hide Wires For Wall Mounted TV Over Fireplace
Was this page helpful?
At Storables.com, we guarantee accurate and reliable information. Our content, validated by Expert Board Contributors, is crafted following stringent Editorial Policies. We're committed to providing you with well-researched, expert-backed insights for all your informational needs.


0 thoughts on “How To Hide Wires For Wall Mounted TV Over Fireplace”