Articles
How To Hold Up Insulation In Ceiling
Modified: October 20, 2024
Learn how to properly hold up insulation in your ceiling with these helpful articles.
(Many of the links in this article redirect to a specific reviewed product. Your purchase of these products through affiliate links helps to generate commission for Storables.com, at no extra cost. Learn more)
Introduction
When it comes to insulating your home, the ceiling is often an area that is overlooked. However, proper insulation in the ceiling can significantly improve energy efficiency and reduce heating and cooling costs. But how do you hold up insulation in the ceiling? In this article, we will guide you through the steps to effectively install and secure insulation in your ceiling.
Insulation plays a vital role in maintaining a comfortable indoor temperature by preventing heat transfer between the interior and exterior of your home. Without proper insulation, heat can easily escape during the winter months, and cool air can seep out in the summer. This not only leads to discomfort but also increases energy consumption and costs.
Installing insulation in your ceiling may seem like a daunting task, but with the right materials and techniques, it can be done relatively easily. By following a few simple steps, you can ensure that your insulation stays securely in place, providing maximum efficiency and comfort.
Before we dive into the installation process, let’s first gather the necessary materials and tools you’ll need for the job.
Key Takeaways:
- Proper insulation in the ceiling is essential for energy efficiency and comfort. By following the steps outlined, you can effectively install and secure insulation, leading to reduced energy costs and a more comfortable living environment.
- Choosing the right insulation type, preparing the area, and securing the insulation are crucial steps in the process. Regular inspections and adjustments will ensure long-term effectiveness and energy savings.
Read more: How To Hold Insulation In Place
Step 1: Gather the Necessary Materials
Before you begin installing insulation in the ceiling, it’s crucial to gather all the materials and tools you will need. Having everything prepared ahead of time will make the installation process smoother and more efficient. Here is a list of the essential materials you will need:
- Insulation material: There are various types of insulation available, including fiberglass, spray foam, and cellulose. Choose the insulation material that best suits your needs and budget.
- Measuring tape: A measuring tape will help you determine the dimensions of the ceiling area and cut the insulation to the appropriate size.
- Utility knife: A sharp utility knife is essential for cutting insulation material accurately.
- Safety goggles and gloves: It’s important to protect yourself while working with insulation. Safety goggles will shield your eyes from debris, and gloves will prevent skin irritation.
- Ladder or scaffolding: Depending on the height of your ceiling, you may need a ladder or scaffolding to reach the installation area safely.
- Staple gun and staples: To secure the insulation in place, you will need a staple gun and staples. Make sure you choose the appropriate staples for the thickness of your insulation material.
It’s essential to ensure that you have all the necessary materials before you start the installation process. Running out of supplies midway through the project can cause unnecessary delays and frustrations. Once you have gathered all the materials, you can move on to choosing the appropriate insulation type.
Step 2: Choose the Appropriate Insulation Type
Choosing the right insulation type for your ceiling is crucial in order to achieve optimal energy efficiency and comfort. Several factors should be considered when selecting insulation:
- R-value: The R-value of insulation indicates its thermal resistance. The higher the R-value, the better the insulation’s ability to resist heat transfer. The R-value required for your ceiling will depend on your climate zone and local building codes.
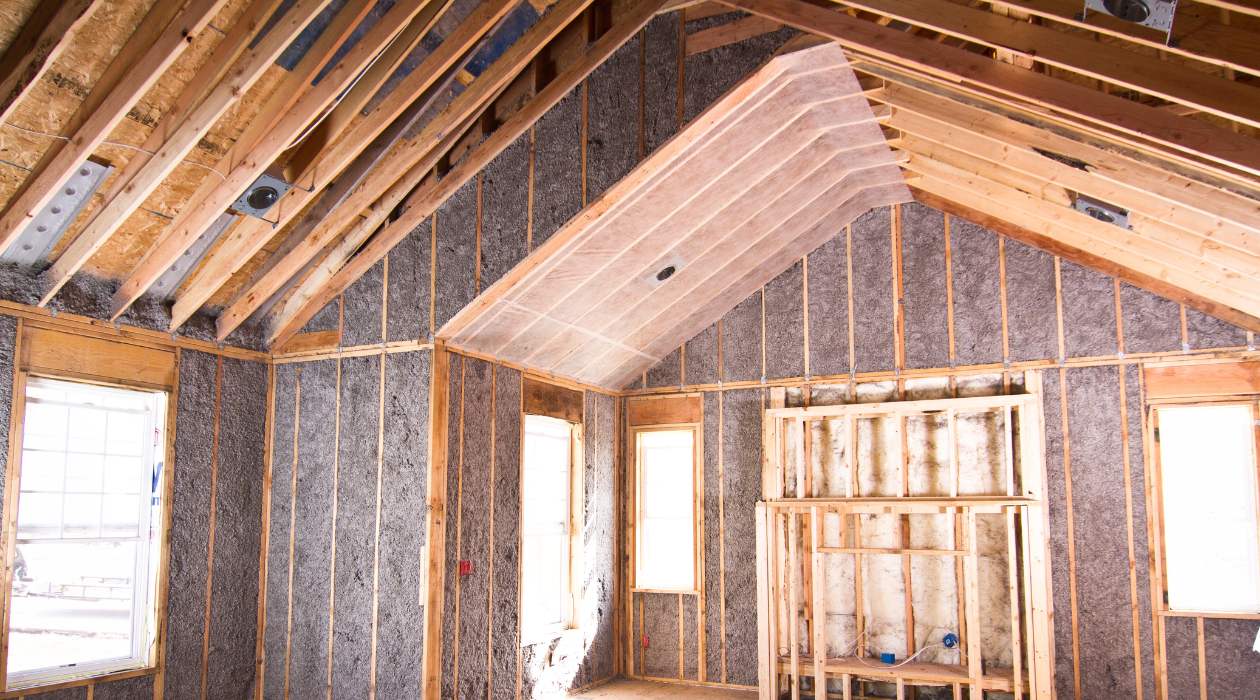
- Insulation material: There are different types of insulation materials available, each with its own advantages and considerations. Fiberglass insulation is a popular choice due to its affordability and versatility. Spray foam insulation offers excellent thermal performance and can effectively seal air leaks. Cellulose insulation is eco-friendly and provides good soundproofing properties.
- Moisture resistance: Depending on the location of your home, you may need insulation that is resistant to moisture. This is especially important in areas prone to high humidity or potential water leaks.
- Air sealing: Insulation can help reduce air leakage in your home, enhancing energy efficiency. Consider insulation options that also provide air sealing properties, such as spray foam insulation, to prevent drafts and improve indoor air quality.
When choosing the appropriate insulation type for your ceiling, it’s recommended to consult with a professional or do thorough research to understand the pros and cons of each option. Consider your budget, climate, and specific requirements to make an informed decision. Once you have selected the insulation type, you can move on to preparing the ceiling area for installation.
Step 3: Prepare the Ceiling Area
Before you can begin installing insulation in your ceiling, it’s essential to properly prepare the area. This step involves ensuring a clean and safe environment for the installation process. Here’s how to prepare your ceiling area:
- Clean the ceiling: Remove any debris, dust, or cobwebs from the ceiling surface. A clean surface will allow the insulation to adhere properly and prevent any potential obstructions during installation.
- Seal air leaks: Inspect the ceiling for any gaps, cracks, or air leaks. Use caulk or weatherstripping to seal these openings to prevent air leakage and maintain energy efficiency.
- Clear the area: Move any furniture or objects that may obstruct the installation process. Make sure the area is clear and accessible for easy movement during installation.
- Ensure proper ventilation: Adequate ventilation is essential to prevent moisture buildup and maintain a healthy indoor environment. Make sure your ceiling has proper ventilation in place before installing insulation.
- Protect electrical fixtures: If there are electrical fixtures, such as recessed lighting or fans, in the ceiling, take measures to protect them from insulation. Use specialized covers or insulation shields to ensure they are not covered by insulation material.
Taking the time to prepare your ceiling area before installation will ensure a smooth and hassle-free process. It will also contribute to the overall effectiveness and longevity of the insulation. Once you have prepared the area, you can move on to the actual installation of the insulation in the ceiling.
Consider using insulation support wires or rods to hold up insulation in the ceiling. These can be easily installed and provide a sturdy support for the insulation.
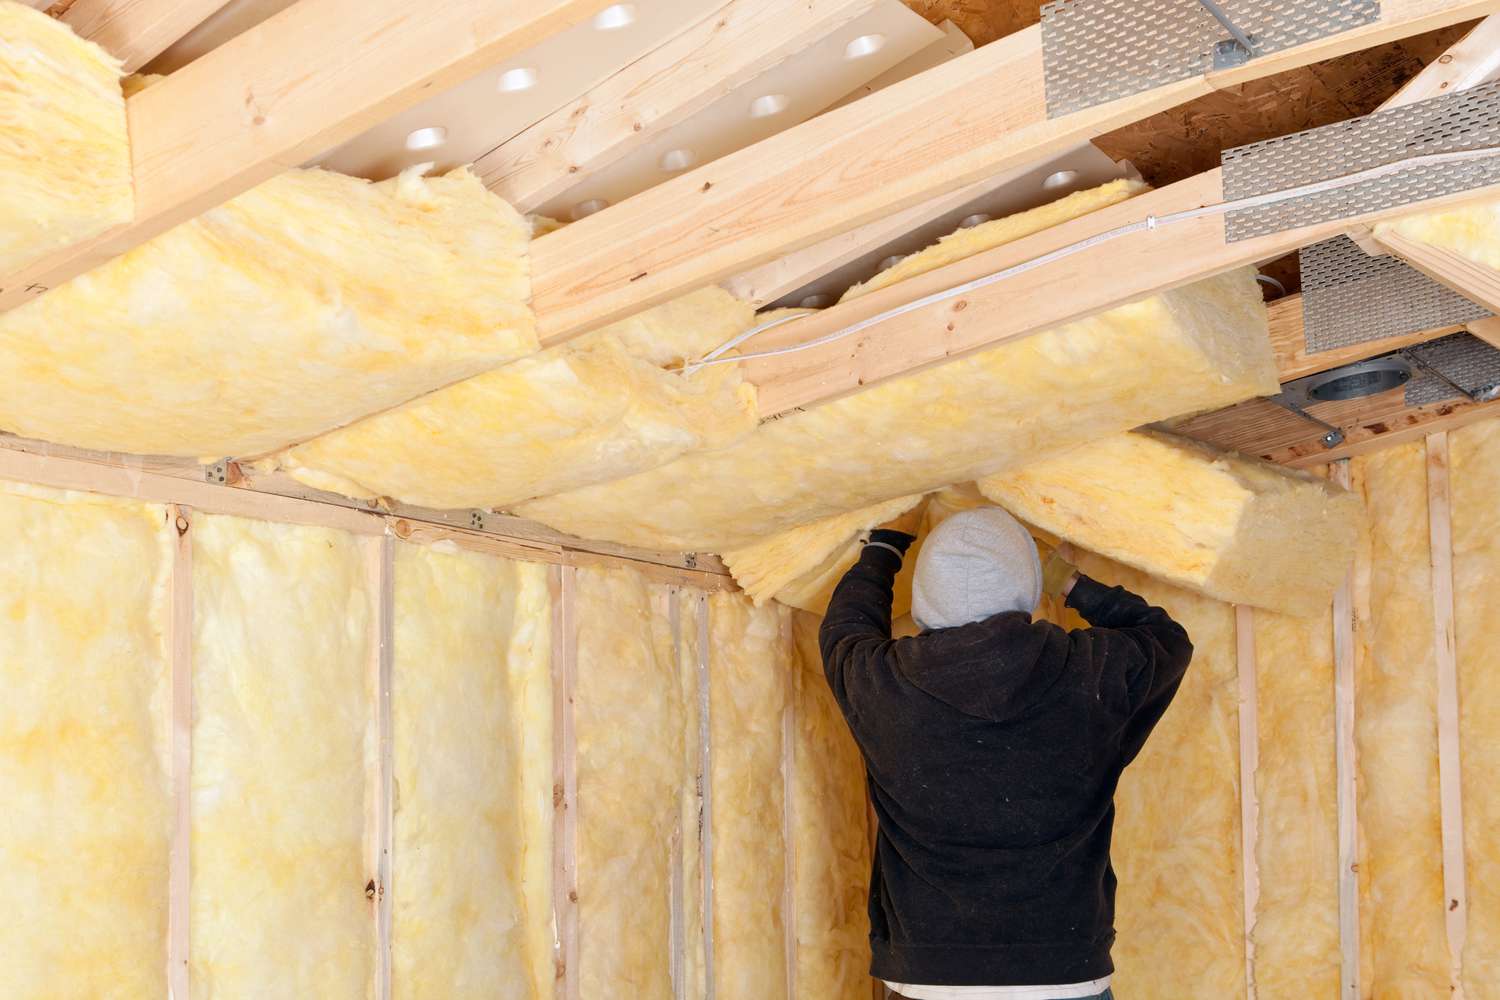
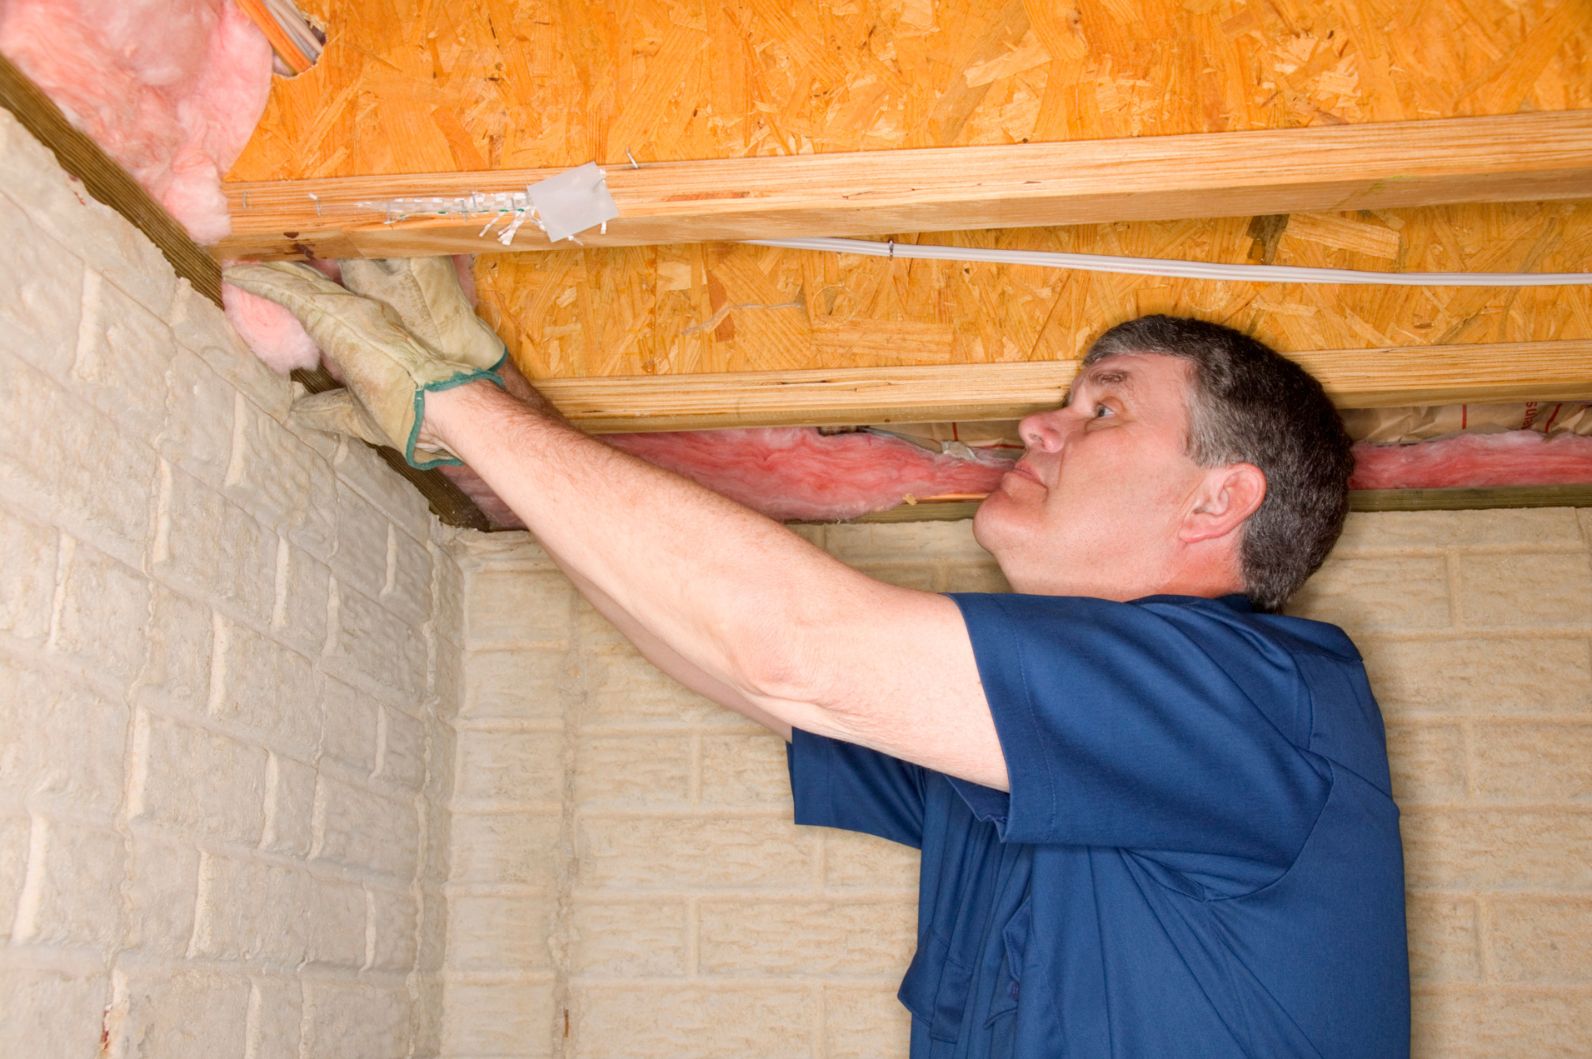
Step 4: Installing the Insulation
Now that you’ve gathered the necessary materials, chosen the appropriate insulation type, and prepared the ceiling area, it’s time to start installing the insulation. Follow these steps to effectively install the insulation in your ceiling:
- Measure and cut: Use a measuring tape to determine the dimensions of the ceiling area where the insulation will be installed. Cut the insulation material to fit the dimensions accurately using a sharp utility knife.
- Start at one end: Begin the installation process at one end of the ceiling and work your way across. This will ensure a systematic and consistent installation.
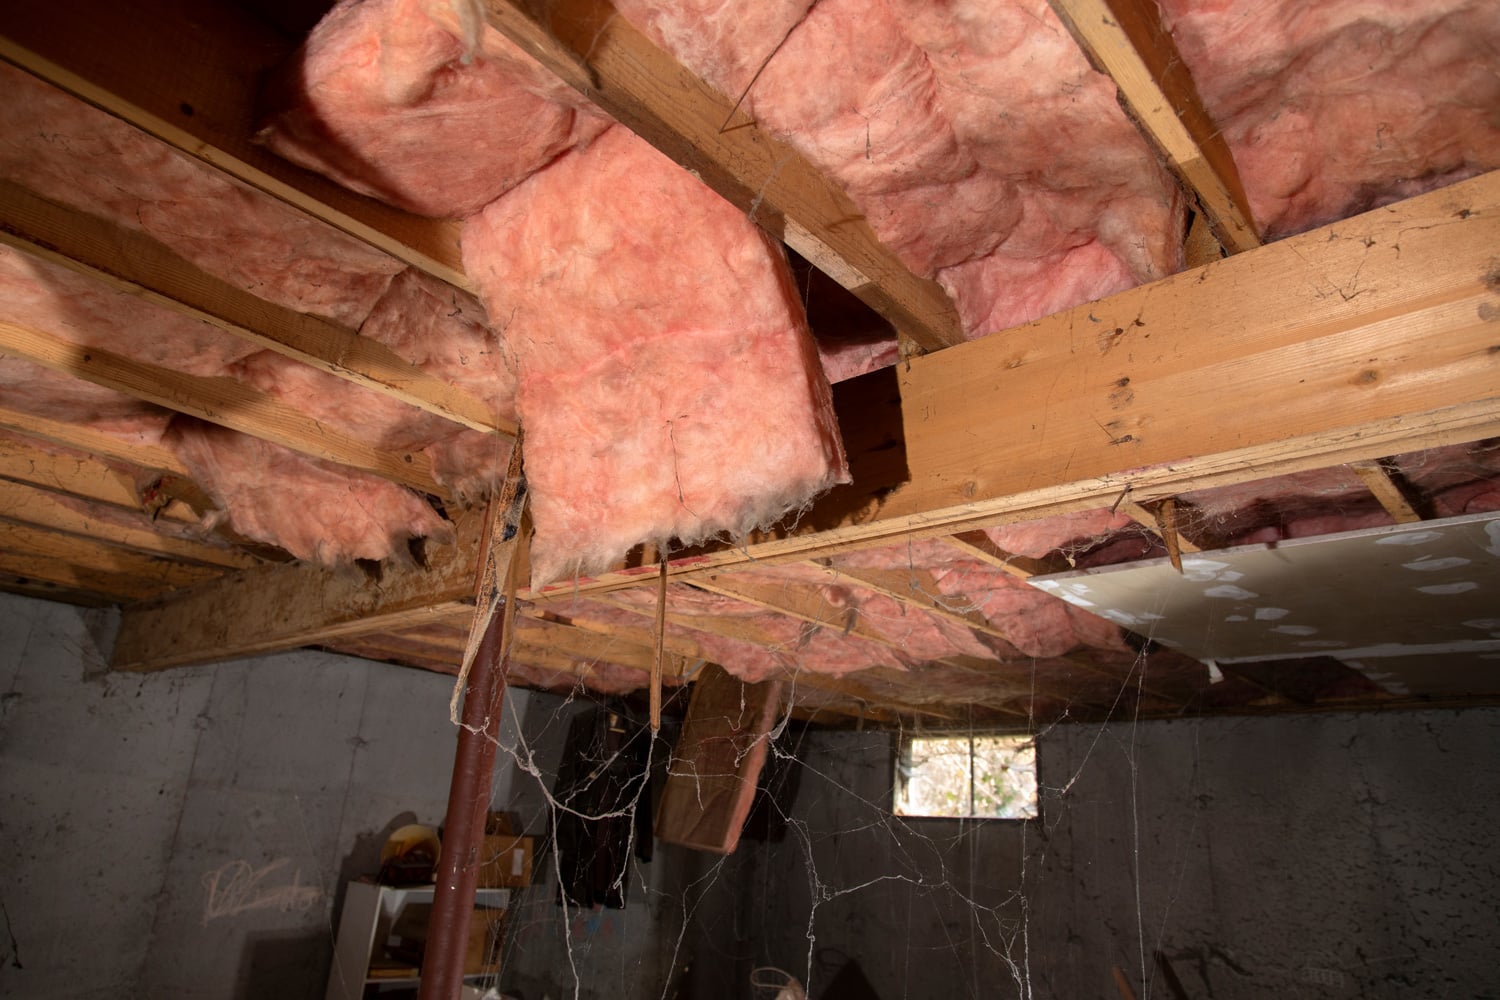
- Fit the insulation: Place the cut insulation pieces snugly into the ceiling cavity. Ensure a tight fit, but be careful not to compress the insulation too much, as it may reduce its effectiveness.
- Continue installing: Repeat the process for each section of the ceiling, aligning the insulation pieces closely together. Ensure that there are no gaps or spaces left between the insulation materials.
- Trim if needed: If you encounter obstacles such as wiring or vents, carefully trim the insulation to accommodate them. Make sure not to damage any existing electrical or mechanical systems.
- Pay attention to safety: While installing insulation, always prioritize safety. Wear protective goggles, gloves, and a mask to avoid any irritation or respiratory issues caused by insulation materials.
- Take breaks if necessary: Installing insulation can be physically demanding. Take breaks as needed to avoid fatigue and to maintain focus during the installation process.
By following these steps, you can ensure a proper and efficient installation of insulation in your ceiling. Keep in mind that proper installation is crucial for the insulation to function effectively and provide the desired energy efficiency and comfort benefits.
With the insulation installed, now it’s time to secure it in place to prevent any sagging or movement over time. Move on to the next step to learn how to secure the insulation in your ceiling.
Read more: How To Insulate A Garage Ceiling
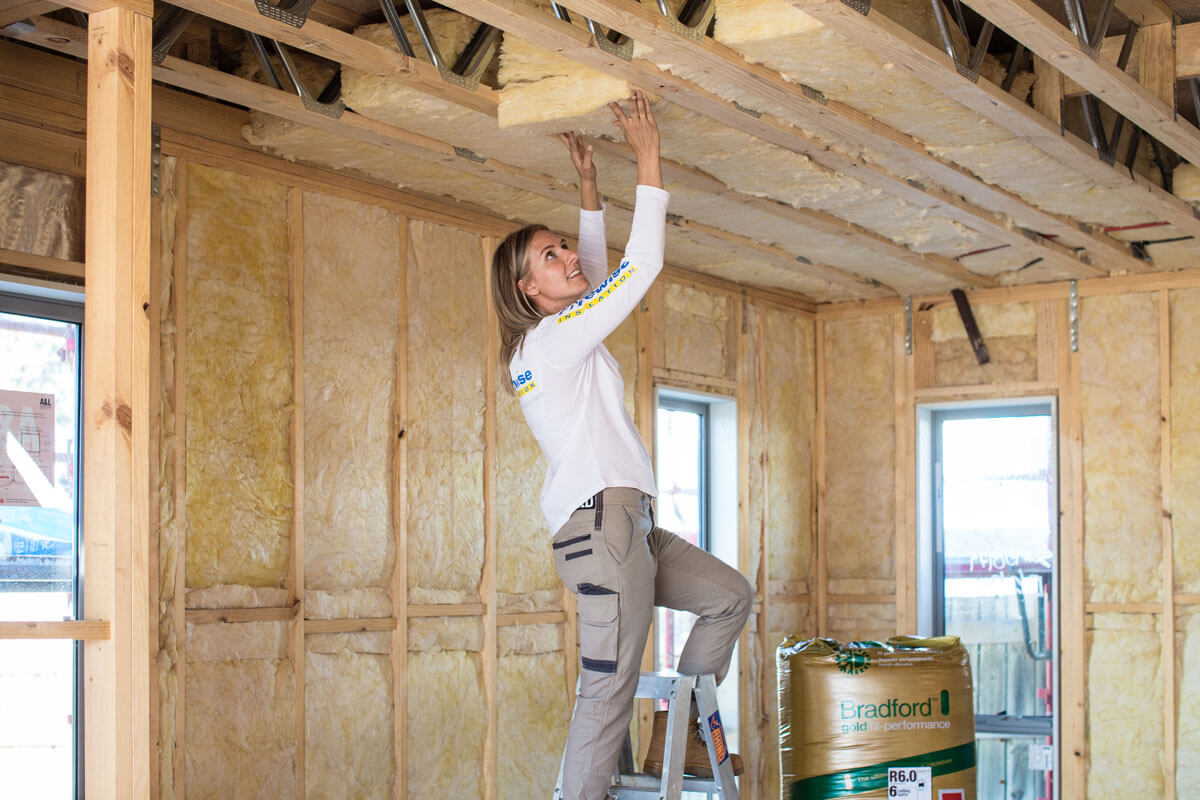
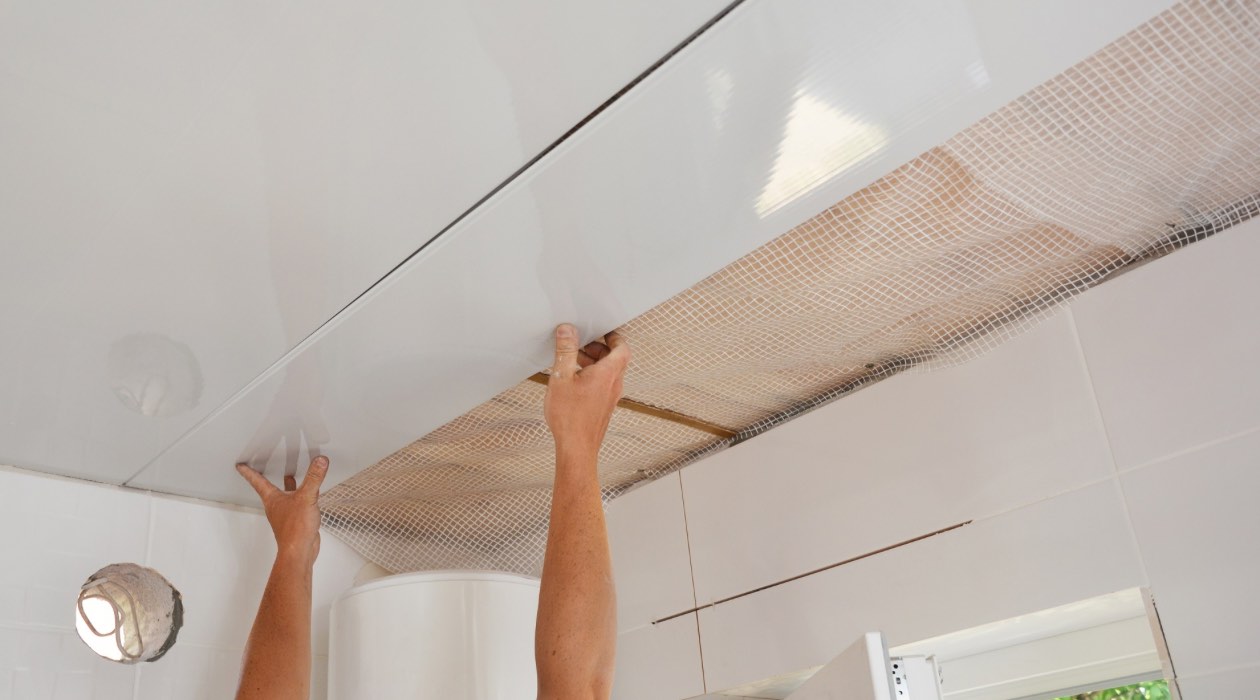
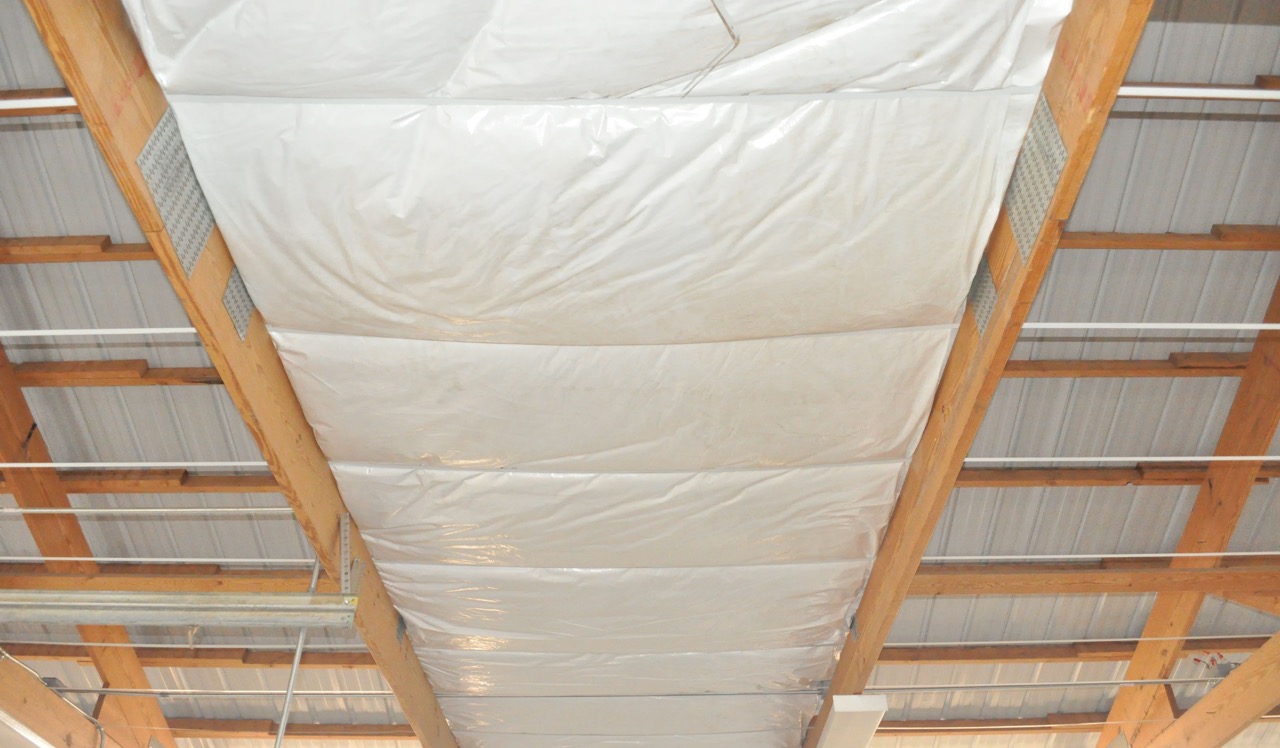
Step 5: Securing the Insulation in Place
After successfully installing the insulation in your ceiling, the next step is to secure it in place to prevent any sagging or movement over time. Here’s how you can effectively secure the insulation:
- Use a staple gun: A staple gun is a commonly used tool for securing insulation. Start by positioning the staple gun against the insulation and the ceiling surface.
- Insert staples: Press the staple gun firmly and insert staples through the insulation and into the ceiling material. Space the staples evenly along the edges and throughout the middle of the insulation.
- Ensure a secure grip: Make sure the staples penetrate both the insulation and the ceiling material sufficiently to create a secure grip. This will prevent the insulation from shifting or falling down over time.
- Avoid compressing the insulation: Take care not to apply excessive force while stapling, as it may compress the insulation. The insulation should remain fluffy and not be flattened, as this can reduce its thermal efficiency.
- Check for any sagging areas: Once you’ve secured the insulation with staples, do a quick visual inspection to ensure there are no sagging areas. If you notice any, insert additional staples to provide additional support and prevent sagging.
Securing the insulation is crucial to maintain its integrity and ensure it functions effectively. By properly stapling the insulation to the ceiling, you’ll create a stable and durable insulation barrier that will last for years to come.
With the insulation in place and securely fastened, you can move on to the final step: inspecting and testing the installation to ensure its effectiveness.
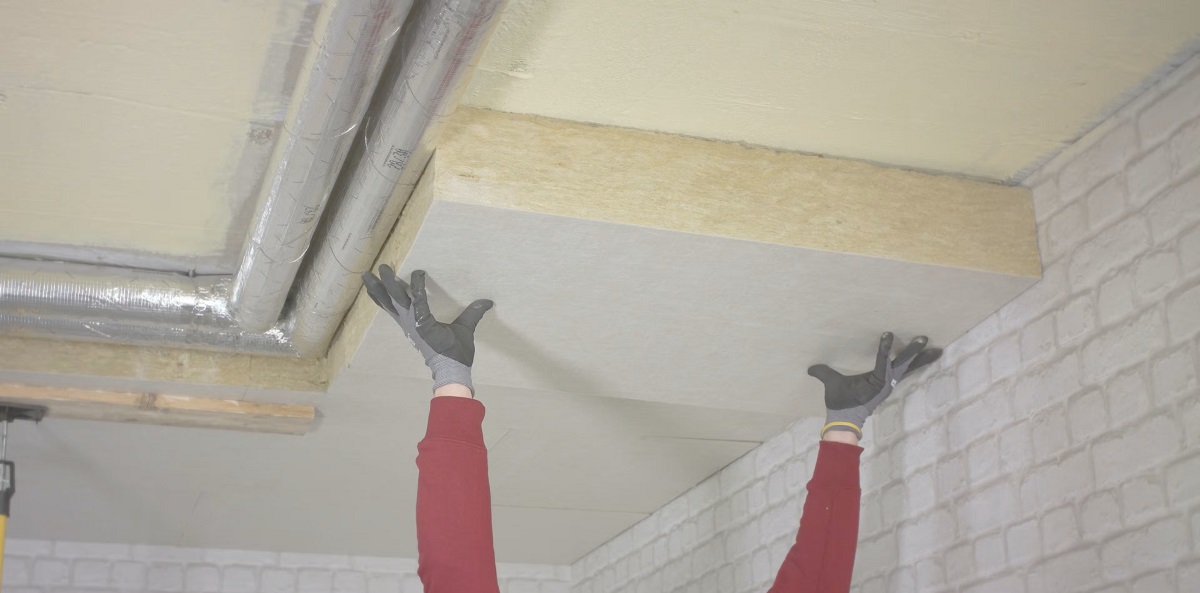
Step 6: Inspect and Test the Installation
After completing the installation and securing the insulation in your ceiling, it’s important to inspect and test the effectiveness of the insulation. This step allows you to identify any areas that may require further adjustment or improvement. Follow these guidelines to inspect and test the insulation:
- Visual inspection: Conduct a thorough visual inspection of the installed insulation. Look out for any gaps, loose areas, or signs of compression. Ensure that the insulation covers the entire ceiling area uniformly without any missing sections.
- Air leaks: Check for any signs of air leakage around the edges of the insulation or in the ceiling joints. Use your hands to feel for any drafts or cool spots. If you notice any air leaks, seal them with caulk or weatherstripping.
- Thermal camera or infrared thermometer: If available, use a thermal camera or an infrared thermometer to assess the thermal efficiency of the insulation. Scan the ceiling surface to identify any areas with significant heat loss or temperature variations.
- Energy consumption monitoring: Monitor your energy consumption before and after the insulation installation. If you notice a significant reduction in energy usage, it indicates that the insulation is effectively retaining heat or cool air, leading to energy savings.
- Consult professionals if needed: If you have doubts about the effectiveness of the insulation or if you discover any issues during the inspection, it’s recommended to consult with insulation professionals. They can provide further guidance, perform assessments, and suggest remedial actions if necessary.
Regular inspections and assessments of the insulation in your ceiling will help ensure its optimal performance and identify any maintenance needs. By making necessary adjustments or improvements, you can enhance the energy efficiency and comfort of your home.
Congratulations! By following these steps, you have successfully installed and secured insulation in your ceiling. Not only will this contribute to energy savings, but it will also create a more comfortable living environment. Enjoy the benefits of a well-insulated home!
Should you have any further questions or concerns about insulation or any other home improvement topics, feel free to reach out for additional guidance.
Conclusion
Installing insulation in your ceiling is a crucial step in creating a more energy-efficient and comfortable home. By following the steps outlined in this article, you can successfully hold up insulation in your ceiling and reap the benefits of improved thermal insulation and reduced energy costs.
Starting with gathering the necessary materials, choosing the appropriate insulation type, and preparing the ceiling area, you set the foundation for a successful installation. Paying attention to details such as measuring and cutting the insulation precisely, securing it in place with staples, and inspecting the final results ensure a well-executed job.
With proper insulation in your ceiling, you can expect improved regulation of indoor temperature, reduced heat loss during the winter, and decreased heat gain during the summer. This translates to energy savings, reduced environmental impact, and increased overall comfort throughout the year.
Remember, insulation installation is not a one-time task. Periodically inspecting the insulation, addressing potential air leaks, and monitoring energy consumption will allow you to make necessary adjustments and maintain its effectiveness over time.
If you’re unsure about any aspect of the installation process or if you encounter any issues, don’t hesitate to seek professional assistance. Insulation professionals can offer valuable expertise and ensure that your insulation is installed correctly.
By taking the time and effort to hold up insulation in your ceiling, you are investing in the long-term energy efficiency and comfort of your home. Enjoy the benefits of a well-insulated living space, and take pride in your contribution to a more sustainable future.
Now that you have the knowledge and guidance, it’s time to get started on your insulation project. Good luck, and enjoy the benefits of a well-insulated and energy-efficient home!
Now that you've mastered securing insulation above, why stop there? Perfecting your home's energy efficiency involves more than just the ceiling. Dive into our detailed guide on how to install insulation on exterior walls. This article walks you through each critical step, ensuring your living space remains snug and energy bills stay low year-round. Don't miss out; give those walls the attention they deserve and reap the benefits of a well-insulated home.
Frequently Asked Questions about How To Hold Up Insulation In Ceiling
Was this page helpful?
At Storables.com, we guarantee accurate and reliable information. Our content, validated by Expert Board Contributors, is crafted following stringent Editorial Policies. We're committed to providing you with well-researched, expert-backed insights for all your informational needs.


0 thoughts on “How To Hold Up Insulation In Ceiling”