Home>Gardening & Outdoor>Landscaping Ideas>How To Hold Down Artificial Grass
Landscaping Ideas
How To Hold Down Artificial Grass
Modified: October 20, 2024
Learn how to properly secure artificial grass with our landscaping ideas. Discover the best methods for holding down artificial turf and keeping it in place.
(Many of the links in this article redirect to a specific reviewed product. Your purchase of these products through affiliate links helps to generate commission for Storables.com, at no extra cost. Learn more)
Introduction
Artificial grass has become a popular choice for homeowners and businesses seeking a low-maintenance and visually appealing alternative to natural grass. Whether you're revamping your backyard, creating a pet-friendly play area, or enhancing the curb appeal of your property, installing artificial grass can transform your outdoor space. However, to ensure that your artificial grass stays in place and maintains its pristine appearance, it's crucial to secure it properly.
In this comprehensive guide, we will walk you through the essential steps to hold down artificial grass effectively. From preparing the base to securing the edges and applying infill material, each step plays a vital role in ensuring the longevity and stability of your artificial grass installation. By following these guidelines, you can achieve a professional-looking result and enjoy the benefits of a lush, green lawn without the hassle of constant maintenance.
Let's dive into the details of how to hold down artificial grass and create a stunning outdoor environment that will withstand the test of time.
Key Takeaways:
- Properly preparing the base, laying the turf with precision, securing the edges, and applying infill material are essential steps to ensure long-lasting and visually appealing artificial grass installation.
- By meticulously following the steps outlined in this guide, homeowners and businesses can create a vibrant and low-maintenance outdoor space that withstands the test of time, providing enduring beauty and functionality.
Read more: How To Hold Down Fake Grass
Step 1: Prepare the Base
The foundation of any successful artificial grass installation lies in the preparation of the base. This crucial step sets the stage for a durable and visually appealing result. Here's a detailed breakdown of how to prepare the base for your artificial grass:
Clear the Area
Begin by clearing the area where the artificial grass will be installed. Remove any existing grass, weeds, rocks, or debris. This process ensures a smooth and even surface for laying the base materials.
Excavate the Soil
Once the area is cleared, it's time to excavate the soil to a depth of around 3 to 4 inches. This allows room for the base materials and ensures proper drainage. Use a shovel or a turf cutter to remove the top layer of soil, taking care to maintain a consistent depth across the entire area.
Install Edging
To contain the base materials and prevent the edges of the artificial grass from shifting, install edging around the perimeter of the area. This can be achieved using flexible plastic or metal edging secured into the ground with stakes. The edging should sit slightly above the excavated area to hold the base materials in place.
Read more: How To Put Down Landscaping Rocks
Add Base Material
With the edging in place, it's time to add the base material. A common choice for the base is a combination of crushed rock and sharp sand. Spread a layer of crushed rock evenly across the excavated area, followed by a layer of sharp sand. Use a compactor or roller to ensure the base material is firmly packed and level.
Create a Slope
If the area is prone to water accumulation, it's essential to create a slight slope to facilitate drainage. This can be achieved by grading the base material to allow for proper water runoff. A gentle slope of around 1 inch for every 4 feet is typically sufficient to prevent water from pooling on the surface.
By meticulously preparing the base according to these steps, you establish a stable and well-draining foundation for your artificial grass. This meticulous groundwork sets the stage for the subsequent steps in the installation process, ensuring a professional and long-lasting result.
Step 2: Lay the Artificial Grass
With the base meticulously prepared, the next pivotal step in the artificial grass installation process is laying the turf. This phase demands precision and attention to detail to achieve a seamless and natural-looking result. Here's a comprehensive guide on how to lay the artificial grass effectively:
Roll Out the Turf
Begin by unrolling the artificial grass across the prepared base, taking care to position it in the desired orientation. Ensure that the grain of the turf faces the same direction for a consistent and visually appealing finish. If multiple rolls of turf are required to cover the area, align the seams carefully to minimize visibility.
Read more: How To Fix Astro Turf Down
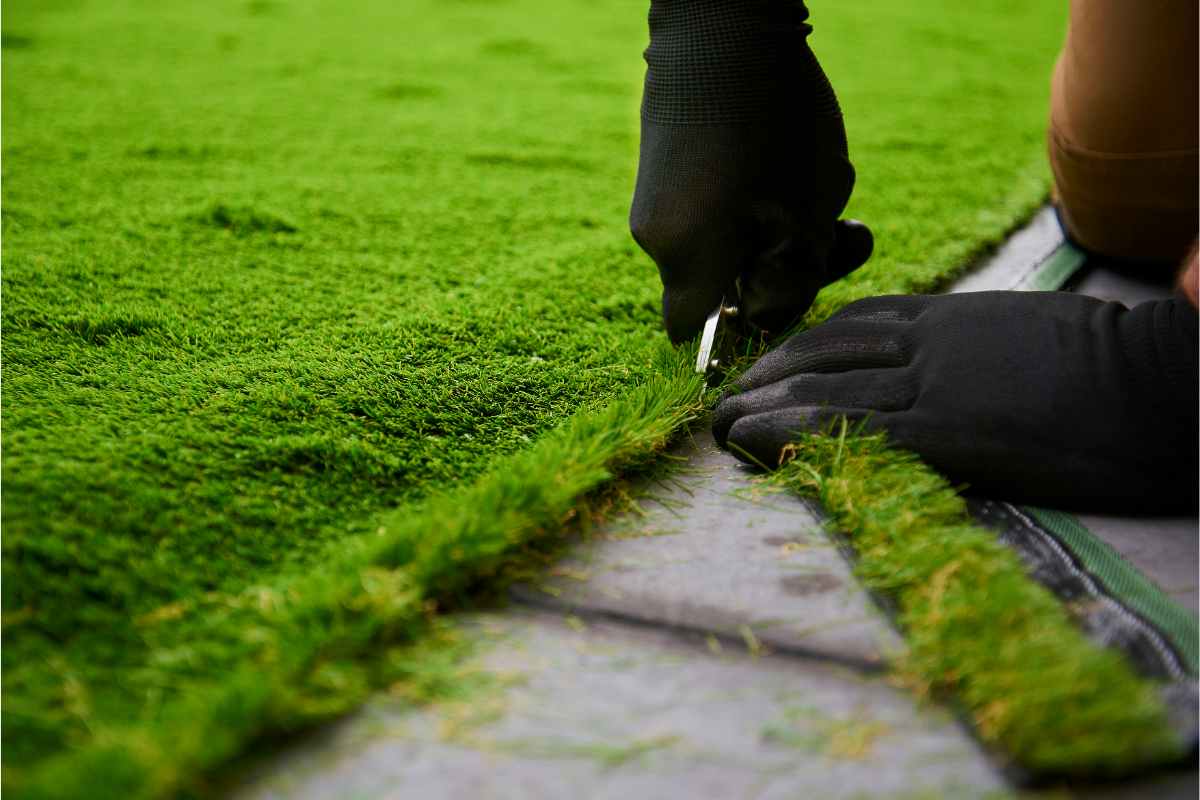
Trim Excess Material
Once the turf is positioned, trim any excess material using a sharp utility knife. Pay close attention to edges, corners, and obstacles such as trees or flower beds. A precise cut ensures a snug fit and a polished overall appearance.
Joining Seams
If multiple rolls of turf are necessary to cover the area, joining the seams seamlessly is crucial. Use high-quality seam tape and adhesive to bond the edges of the turf securely. Ensure that the seams are aligned precisely to maintain a uniform surface.
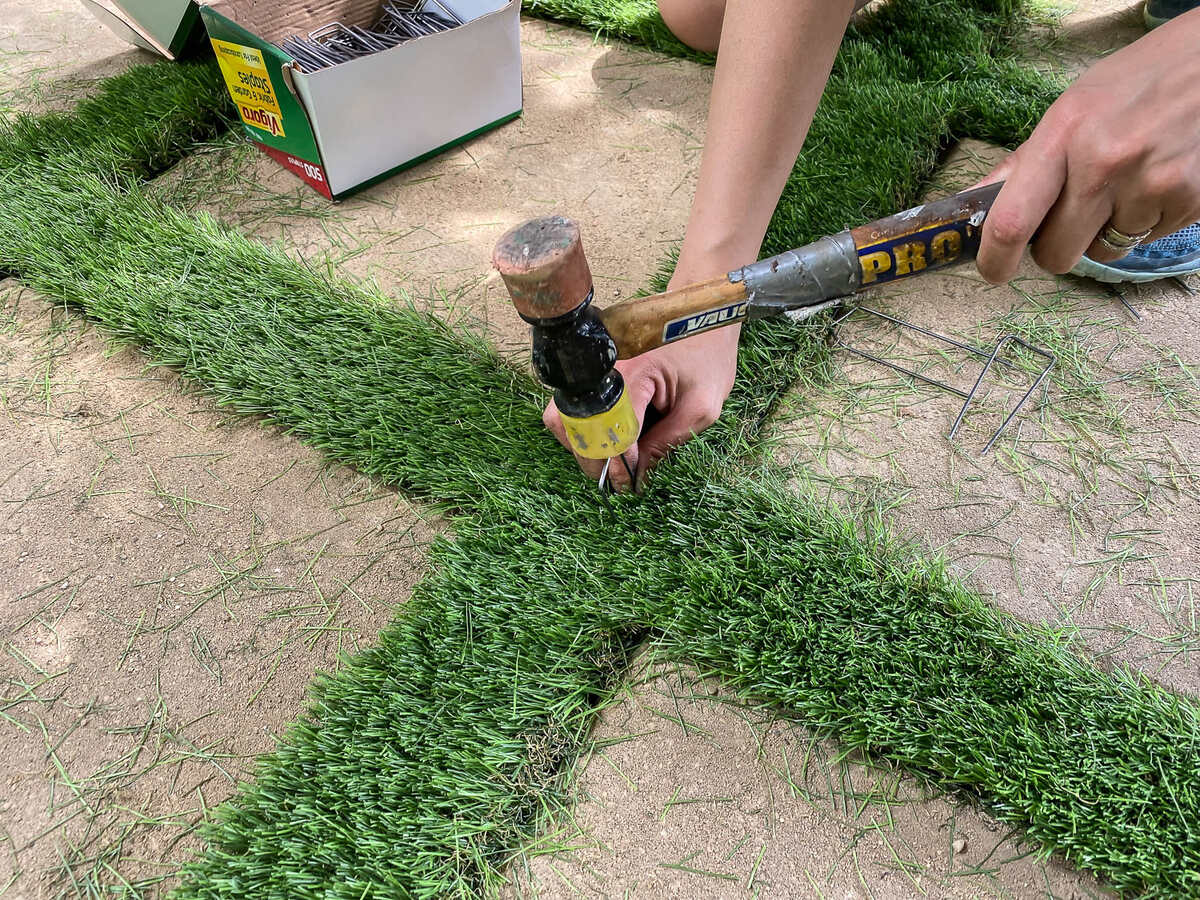
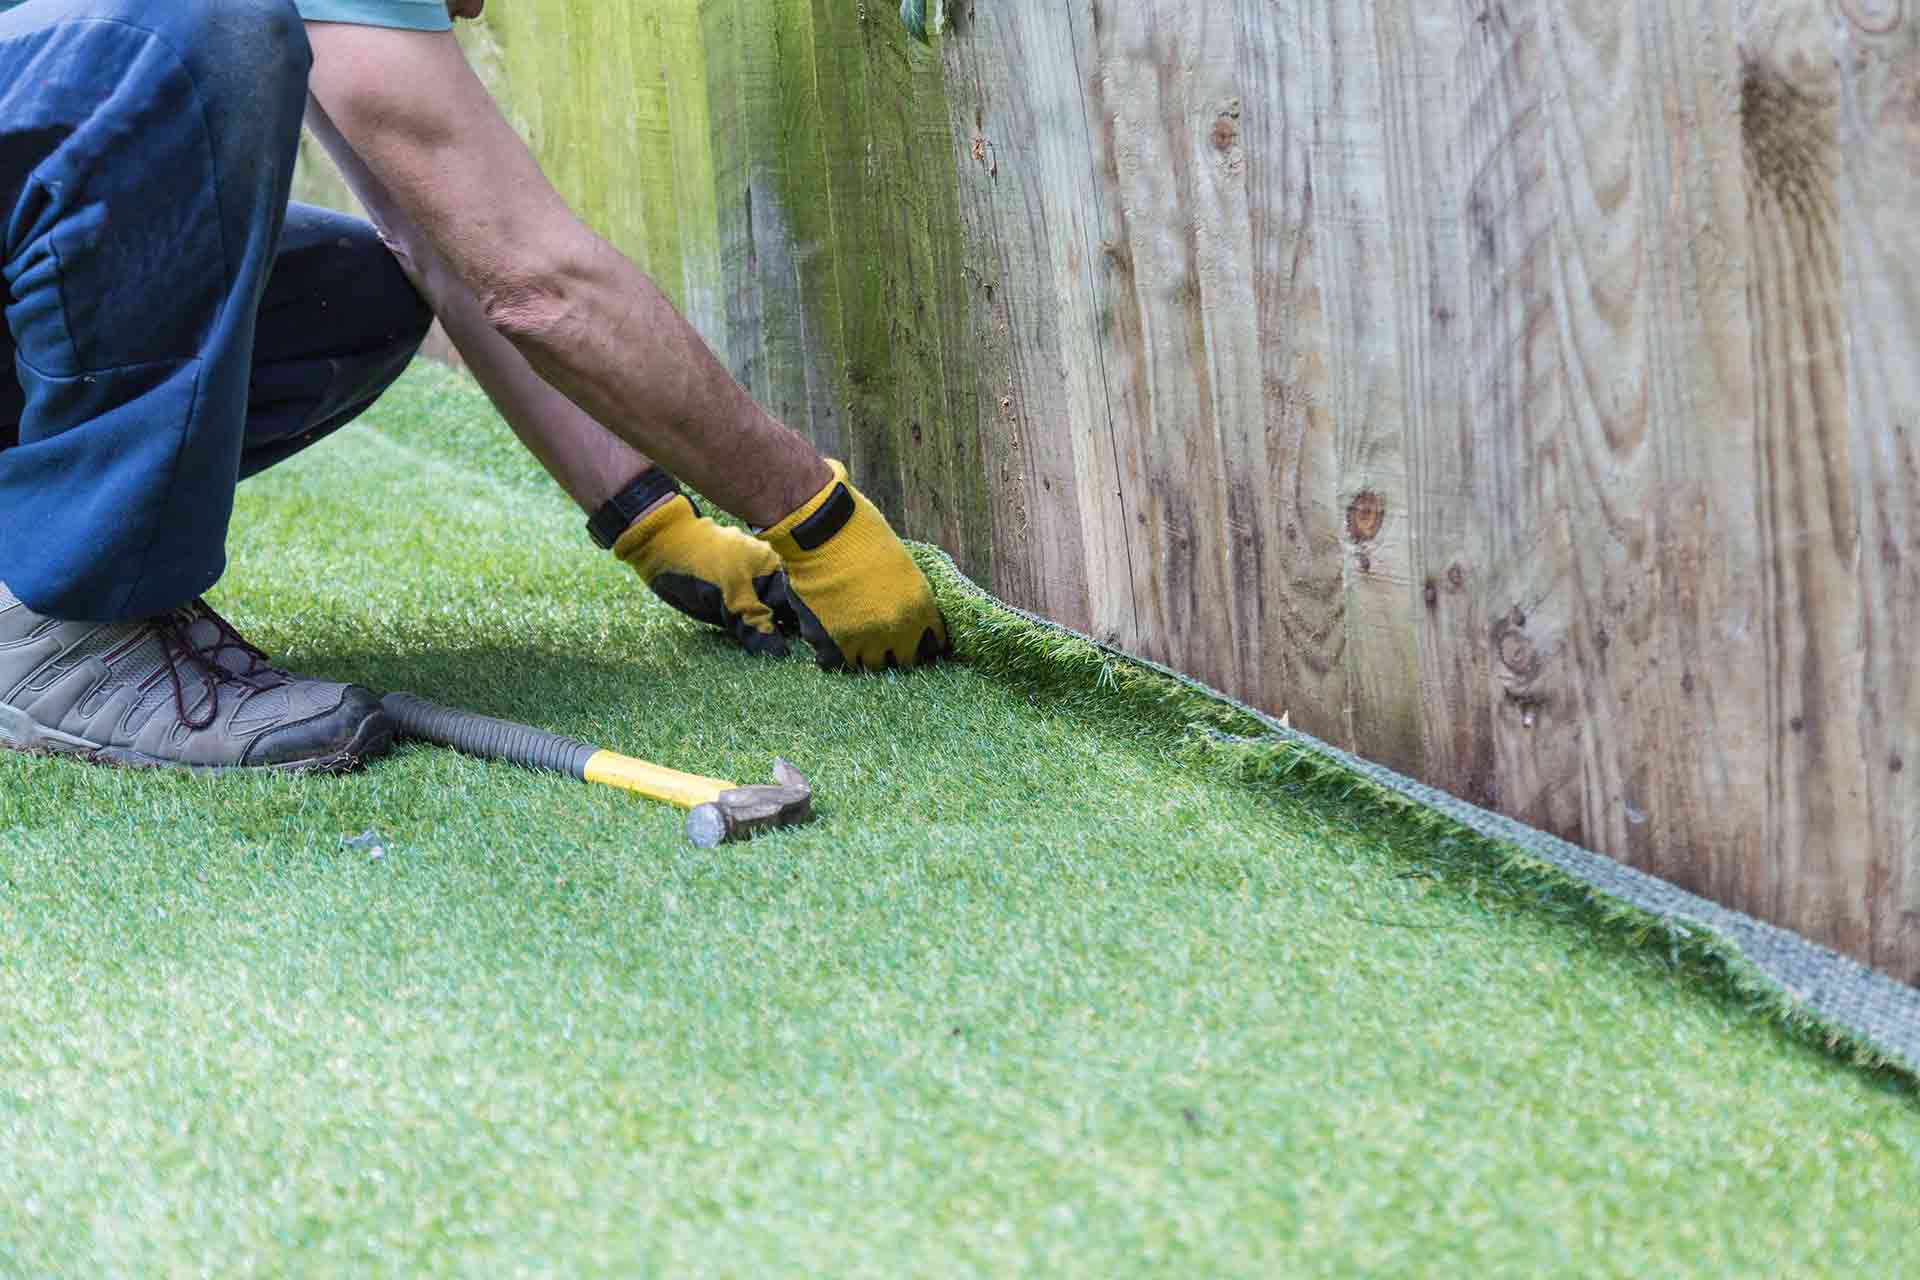
Secure the Turf
To prevent shifting or wrinkling, secure the turf in place using galvanized nails or turf staples. Place the fasteners along the edges and within the central portion of the turf, spacing them approximately 6 inches apart. Be mindful not to overdrive the fasteners, as this can create unevenness in the surface.
Brush and Fluff
After the turf is secured, use a stiff-bristled brush to fluff up the grass fibers and eliminate any visible creases or folds. Brushing the turf against the grain helps the blades stand upright, contributing to a lush and natural appearance.
Read more: How Much Weight Can A Paver Patio Hold
Inspect and Adjust
Thoroughly inspect the entire turf surface for any irregularities or imperfections. Address any areas where the turf may be uneven or misaligned, ensuring a smooth and uniform finish.
By meticulously following these steps, you can lay the artificial grass with precision and achieve a professional-looking result. This phase sets the stage for the final steps in the installation process, bringing you one step closer to enjoying a vibrant and low-maintenance outdoor space.
Step 3: Secure the Edges
Securing the edges of the artificial grass is a critical step that contributes to the overall stability and polished appearance of the installation. Properly securing the edges prevents the turf from shifting, curling, or becoming dislodged over time. Here's a detailed breakdown of how to effectively secure the edges of your artificial grass:
Edge Trim Installation
Begin by installing edge trim along the perimeter of the artificial grass area. Edge trim serves as a protective barrier, holding the edges of the turf in place while providing a clean and defined border. Choose high-quality edge trim that is durable and resistant to environmental elements.
Secure with Nails or Staples
Once the edge trim is in place, secure it by driving galvanized nails or turf staples through the trim and into the base material. Position the fasteners approximately 6 inches apart to ensure a secure hold. Be mindful of the placement to maintain a consistent and tidy appearance along the edges.
Read more: How Much Weight Can A Rooftop Garden Hold?
Adhesive Application
For added reinforcement, apply a high-strength adhesive along the inner edge of the trim where it meets the artificial grass. This adhesive creates a strong bond, further securing the edges and preventing any potential lifting or movement. Use a suitable adhesive recommended for artificial grass installations to ensure optimal performance.
Seam Joining and Trimming
In cases where multiple sections of artificial grass are joined together, ensure that the seams along the edges are securely bonded using seam tape and adhesive. Trim any excess turf along the edges to achieve a clean and seamless finish. A precise and snug fit minimizes the visibility of seams and contributes to a cohesive appearance.
Brush and Inspect
After securing the edges, use a brush to fluff up the grass fibers along the perimeter. This step helps blend the edges with the surrounding landscape and ensures a natural transition. Thoroughly inspect the secured edges to confirm that the turf is firmly in place and that the trim is securely fastened.
By meticulously following these steps to secure the edges of your artificial grass, you establish a robust and visually appealing perimeter that enhances the overall integrity of the installation. Properly secured edges contribute to the longevity and professional finish of your artificial grass, ensuring that it remains an enduring and attractive feature of your outdoor space.
Step 4: Apply Infill Material
Applying infill material is a crucial step in the artificial grass installation process, contributing to the stability, resilience, and natural feel of the turf. Infill serves multiple purposes, including providing support for the synthetic blades, enhancing drainage, and minimizing the risk of turf compaction. Here's a detailed guide on how to effectively apply infill material to your artificial grass:
Read more: How To Tack Down Grass Carpet On Patio
Select the Appropriate Infill
Before applying infill, it's essential to choose the appropriate type based on the specific requirements of your installation. Common infill materials include silica sand, rubber granules, and a combination of both. Silica sand provides stability and support, while rubber granules offer cushioning and resilience. Consider factors such as foot traffic, intended use, and local climate when selecting the infill material best suited for your artificial grass.
Spread Evenly Across the Turf
Once the infill material is selected, evenly spread it across the surface of the artificial grass using a drop spreader or a shovel. Ensure thorough coverage, paying particular attention to high-traffic areas and any seams where multiple sections of turf are joined. A consistent application of infill material contributes to uniform support and resilience across the entire turf surface.
Brush Infill into the Fibers
After spreading the infill, use a power broom or a stiff-bristled brush to work the material into the fibers of the artificial grass. This process helps the infill settle between the blades, providing stability and preventing the turf from matting down. Brushing the infill into the fibers also contributes to a natural and well-maintained appearance, enhancing the overall aesthetic of the artificial grass.
Add Infill as Needed
Depending on the type of infill material and the specific requirements of your installation, additional infill may be necessary to achieve the desired level of support and resilience. Regularly monitor the turf surface and add infill as needed to maintain optimal performance and appearance. Adequate infill ensures that the artificial grass retains its lush and natural feel over time.
Read more: How Much Weight Can A Paver Patio Hold
Inspect and Adjust
Once the infill material is applied, thoroughly inspect the turf surface to ensure that the infill is distributed evenly and effectively integrated into the fibers. Address any areas where the infill may be sparse or uneven, making adjustments as needed to achieve a consistent and well-supported artificial grass surface.
By meticulously following these steps to apply infill material, you enhance the performance, durability, and visual appeal of your artificial grass installation. Properly applied infill contributes to a resilient and natural-looking turf that withstands the demands of everyday use while maintaining its lush and inviting appearance.
Conclusion
In conclusion, holding down artificial grass is a multi-faceted process that demands meticulous attention to detail and a methodical approach. By following the essential steps outlined in this guide, you can achieve a professional and enduring artificial grass installation that enhances the beauty and functionality of your outdoor space.
The foundation of the entire installation lies in the preparation of the base. Clearing the area, excavating the soil, installing edging, and adding the appropriate base material create a stable and well-draining foundation for the artificial grass. This groundwork sets the stage for a successful installation, ensuring that the turf remains level, secure, and resilient over time.
Laying the artificial grass with precision and care is paramount to achieving a seamless and natural-looking result. From unrolling the turf and trimming excess material to securing the turf in place and brushing the fibers, each step contributes to a polished and visually appealing finish. Attention to detail during this phase ensures that the artificial grass maintains its lush and vibrant appearance for years to come.
Securing the edges of the artificial grass is a critical step that enhances the overall stability and longevity of the installation. Properly securing the edges prevents shifting and ensures a tidy and well-defined border, contributing to the professional finish of the artificial grass.
Applying infill material provides essential support, resilience, and natural feel to the artificial grass. Selecting the appropriate infill, spreading it evenly across the turf, and integrating it into the fibers contribute to the overall performance and aesthetic appeal of the installation.
By meticulously following these steps, you can hold down artificial grass effectively, creating a vibrant and low-maintenance outdoor environment that withstands the test of time. Whether it's a residential lawn, a pet-friendly play area, or a commercial landscaping project, a well-installed artificial grass surface offers enduring beauty and functionality.
Incorporating these essential steps into your artificial grass installation ensures that your outdoor space becomes a welcoming and visually stunning area for relaxation, recreation, and enjoyment. With proper maintenance and care, your artificial grass will continue to provide a vibrant and resilient landscape for years to come.
Frequently Asked Questions about How To Hold Down Artificial Grass
Was this page helpful?
At Storables.com, we guarantee accurate and reliable information. Our content, validated by Expert Board Contributors, is crafted following stringent Editorial Policies. We're committed to providing you with well-researched, expert-backed insights for all your informational needs.

0 thoughts on “How To Hold Down Artificial Grass”