Home>Articles>How Much Does It Cost To Install A Water Line For An Ice Maker
Articles
How Much Does It Cost To Install A Water Line For An Ice Maker
Modified: August 25, 2024
Discover the cost of installing a water line for an ice maker with our informative articles. Find out the expenses involved and make an informed decision.
(Many of the links in this article redirect to a specific reviewed product. Your purchase of these products through affiliate links helps to generate commission for Storables.com, at no extra cost. Learn more)
Introduction
Installing a water line for an ice maker is an essential step for those who want to enjoy the convenience of having ice readily available in their home or business. Whether you’re setting up a brand new ice maker or replacing an existing one, it’s important to understand the cost factors and considerations involved in the installation process.
Having a water line installed for your ice maker allows for a constant supply of water to produce ice cubes, ensuring you never run out during those hot summer days or parties. However, the cost of installation can vary depending on several factors, such as the complexity of the installation, the type and length of the water line, and whether you choose to hire a professional or tackle the project yourself.
In this article, we will explore the factors that can influence the cost of installing a water line for an ice maker, the materials and tools you’ll need for the installation, and whether hiring a professional is necessary or if a DIY approach is feasible. Additionally, we will outline the average costs of materials and labor associated with this type of installation and provide some tips on how to save money along the way.
So, if you’re ready to delve into the world of ice maker water line installations and discover how much it may cost you, let’s get started!
Key Takeaways:
- Installing a water line for an ice maker involves considering factors like location, materials, and labor costs. DIY options and professional help both have their benefits, so weigh your options carefully.
- To save money on installation, compare prices, consider DIY options, and reuse existing materials. Regular maintenance can also help prolong the lifespan of your ice maker and water line.
Read more: How To Unclog Water Line To Ice Maker
Factors Affecting the Cost of Installing a Water Line for an Ice Maker
When it comes to installing a water line for an ice maker, several factors can influence the overall cost of the project. Understanding these factors will help you better plan and budget for the installation. Here are some key considerations:
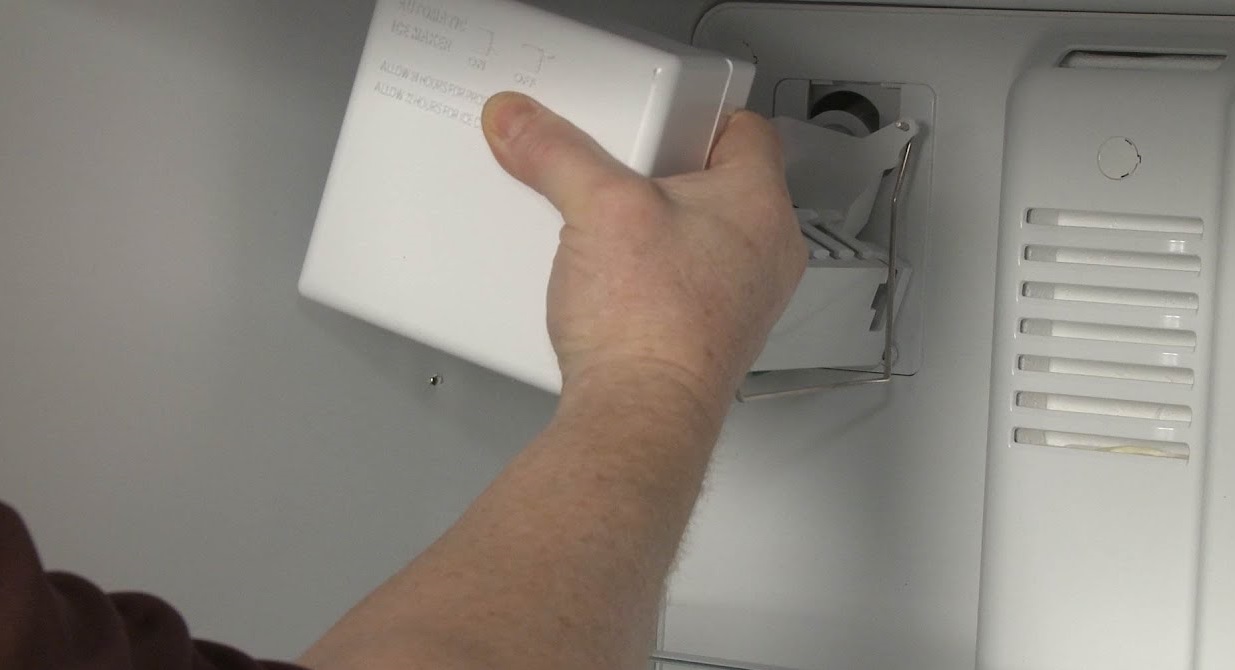
1. Location of the Ice Maker: The location of your ice maker plays a significant role in determining the cost of installation. If the ice maker is located near an existing water line, the installation may be relatively straightforward and less expensive. However, if the ice maker is in a remote area or far from a water source, running the water line to that location may require additional materials and labor, which can increase the overall cost.
2. Distance and Complexity of the Water Line: The length and complexity of the water line required for the ice maker can impact the cost. If the ice maker is in close proximity to a water source, the length of the water line needed may be minimal, resulting in lower installation costs. However, if the ice maker is located on a different floor or in a separate building, the distance and complexity of running the water line can increase both material and labor costs.
3. Type of Water Line: The type of water line you choose for the ice maker installation can also affect the cost. There are various options available, including copper pipes, plastic tubing, and stainless steel braided lines. Copper pipes are more durable and provide better water flow but can be more expensive. Plastic tubing is less expensive but may not be as durable or aesthetically pleasing. Stainless steel braided lines offer a good balance of durability and cost.
4. Labor Costs: Hiring a professional plumber or contractor to install the water line will incur additional labor costs. These costs can vary depending on the complexity of the installation, the location of the ice maker, and the rates of the specific professional you hire. It’s essential to gather multiple quotes and compare prices to ensure you get the best deal.
5. Permits and Regulations: Depending on your location, there may be specific permits and regulations associated with installing a water line for an ice maker. These requirements can vary, and obtaining the necessary permits can add to the overall cost of the installation. It’s crucial to check with your local building or plumbing department to ensure compliance with regulations and obtain the necessary permits.
By considering these factors, you will have a better understanding of the potential cost associated with installing a water line for an ice maker. Remember to take into account the specifics of your situation and consult with professionals to get accurate estimates for your project.
Materials and Tools Needed for the Installation
Installing a water line for an ice maker requires specific materials and tools to ensure a successful and efficient installation. Here is a list of the essential items you will need:
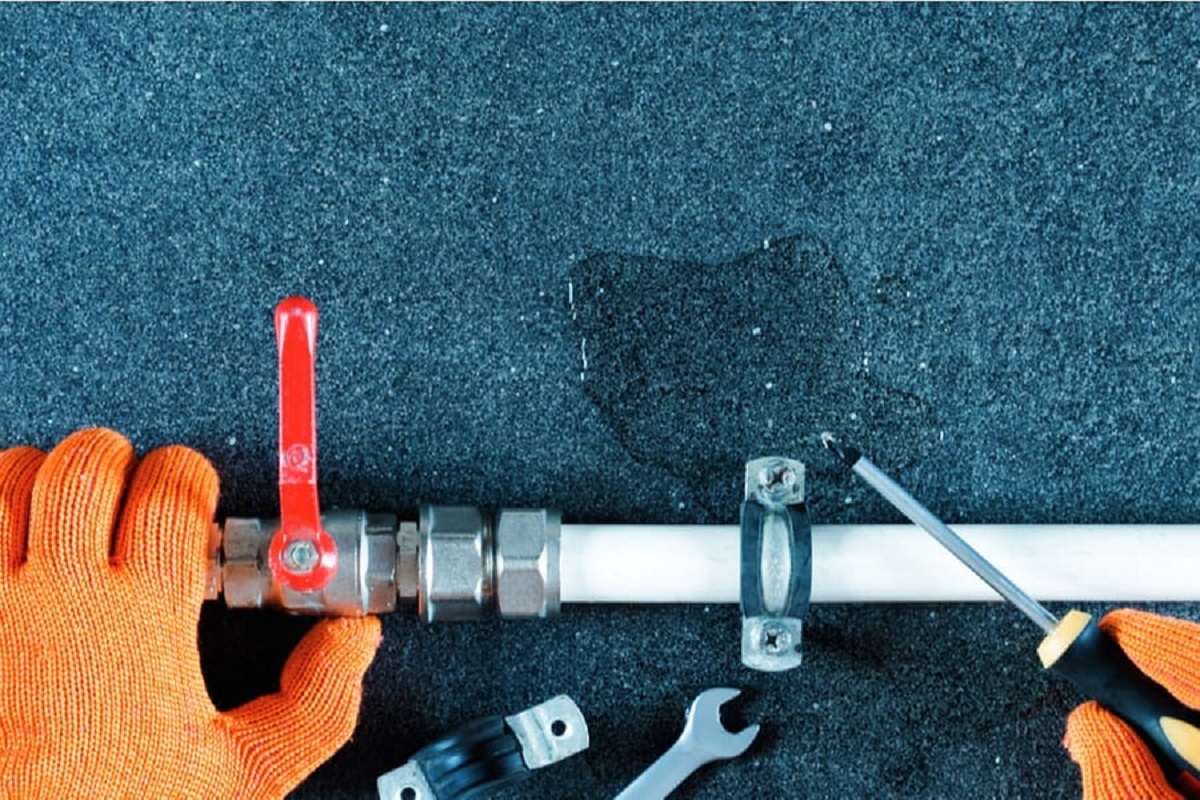
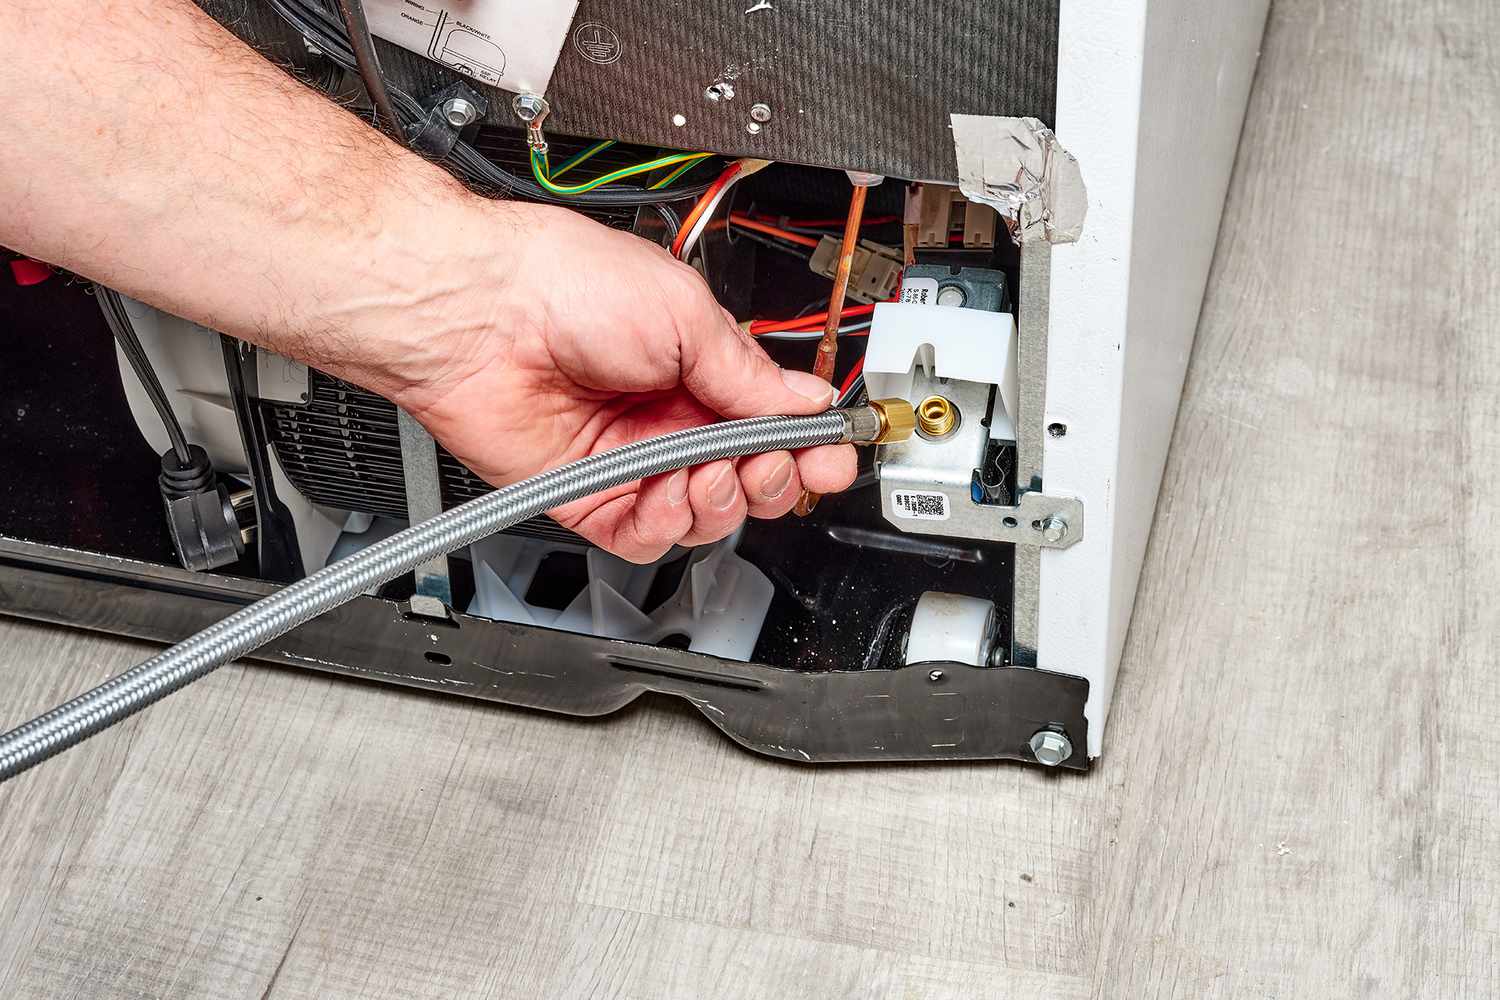
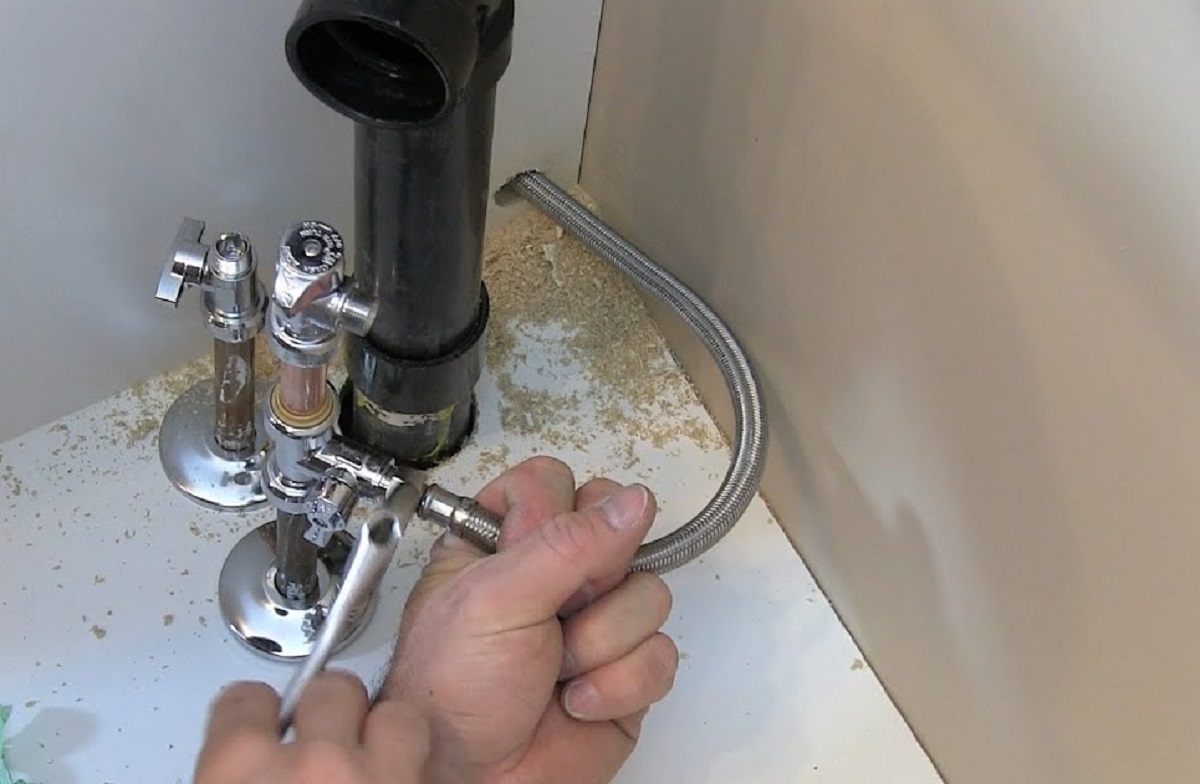
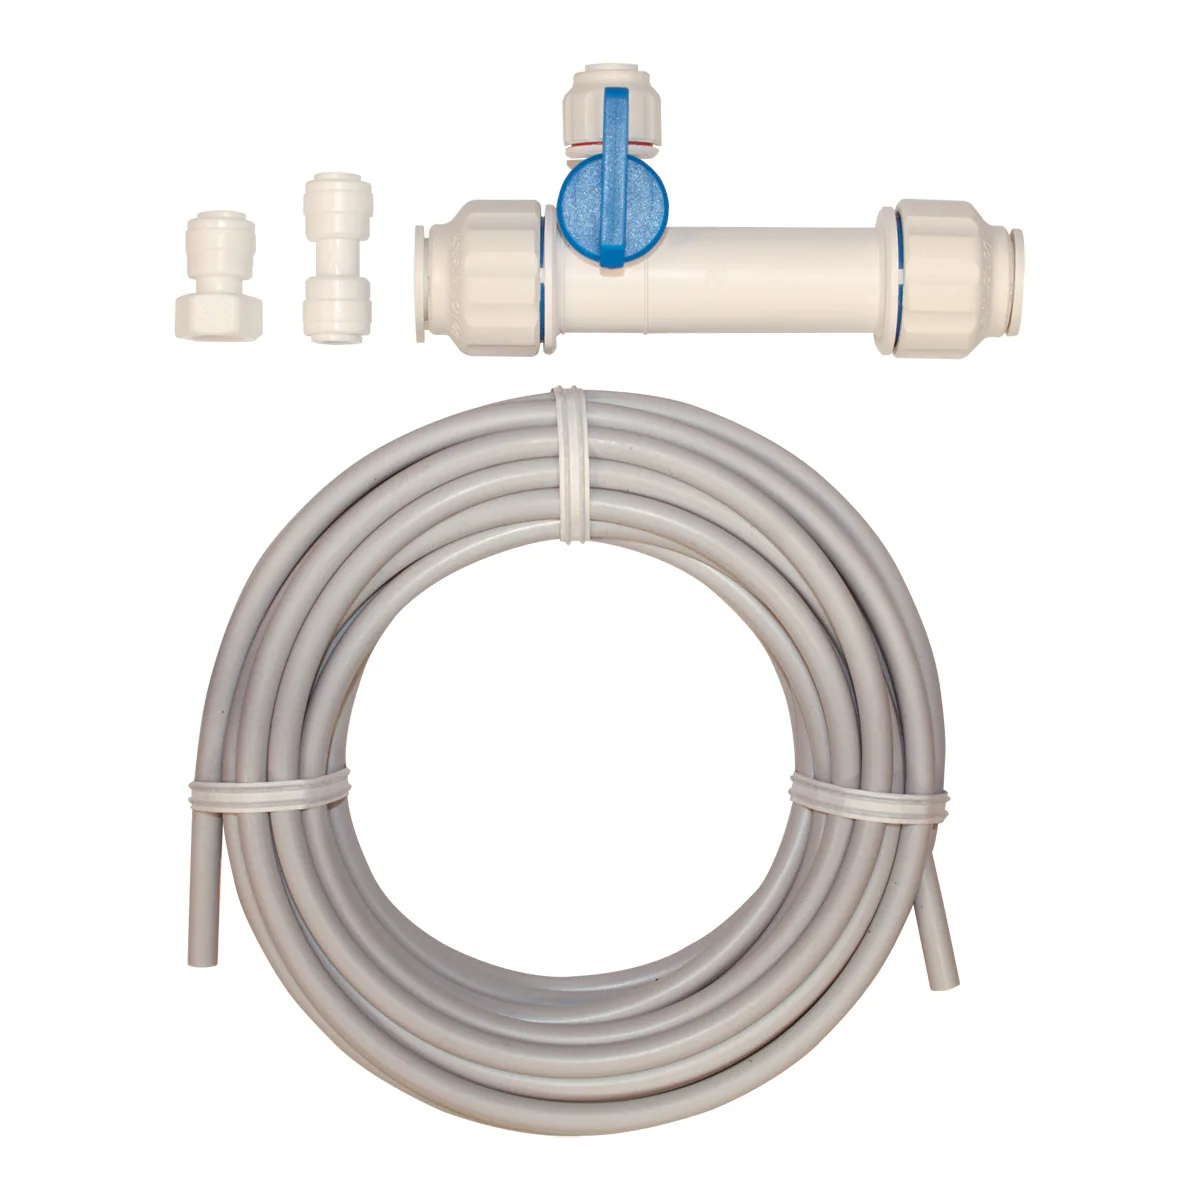
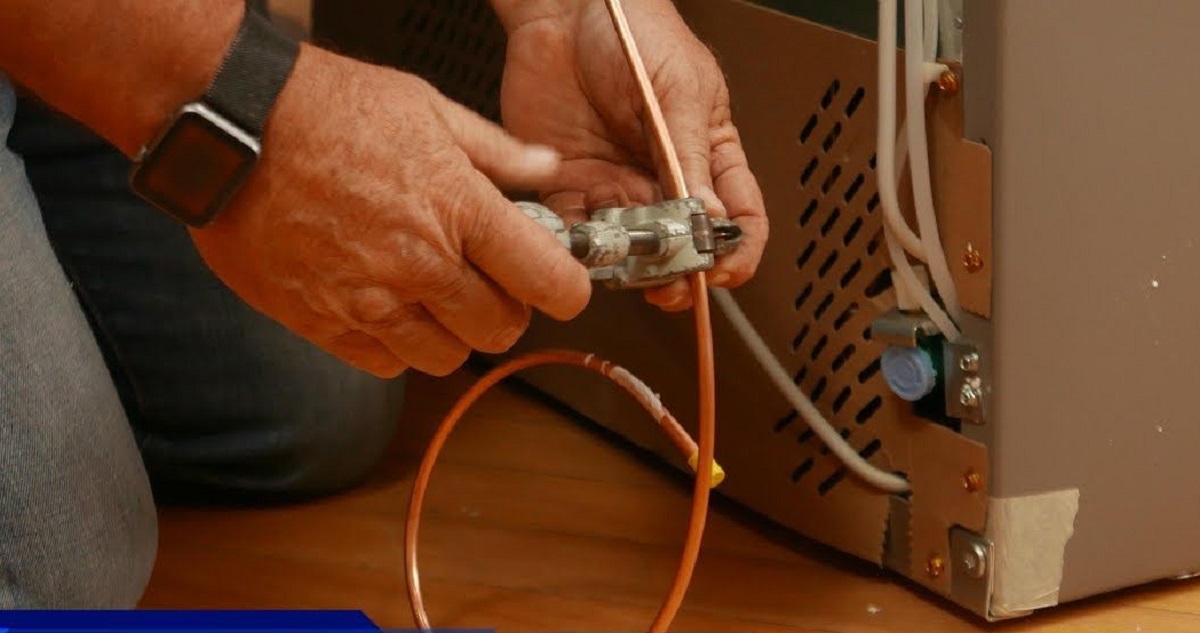
1. Water Line: The water line is the primary material needed for the installation. The type and length of the water line will depend on your specific needs and preferences. Common options include copper pipes, plastic tubing, or stainless steel braided lines. Ensure that the water line is compatible with your ice maker and meets the necessary regulations.
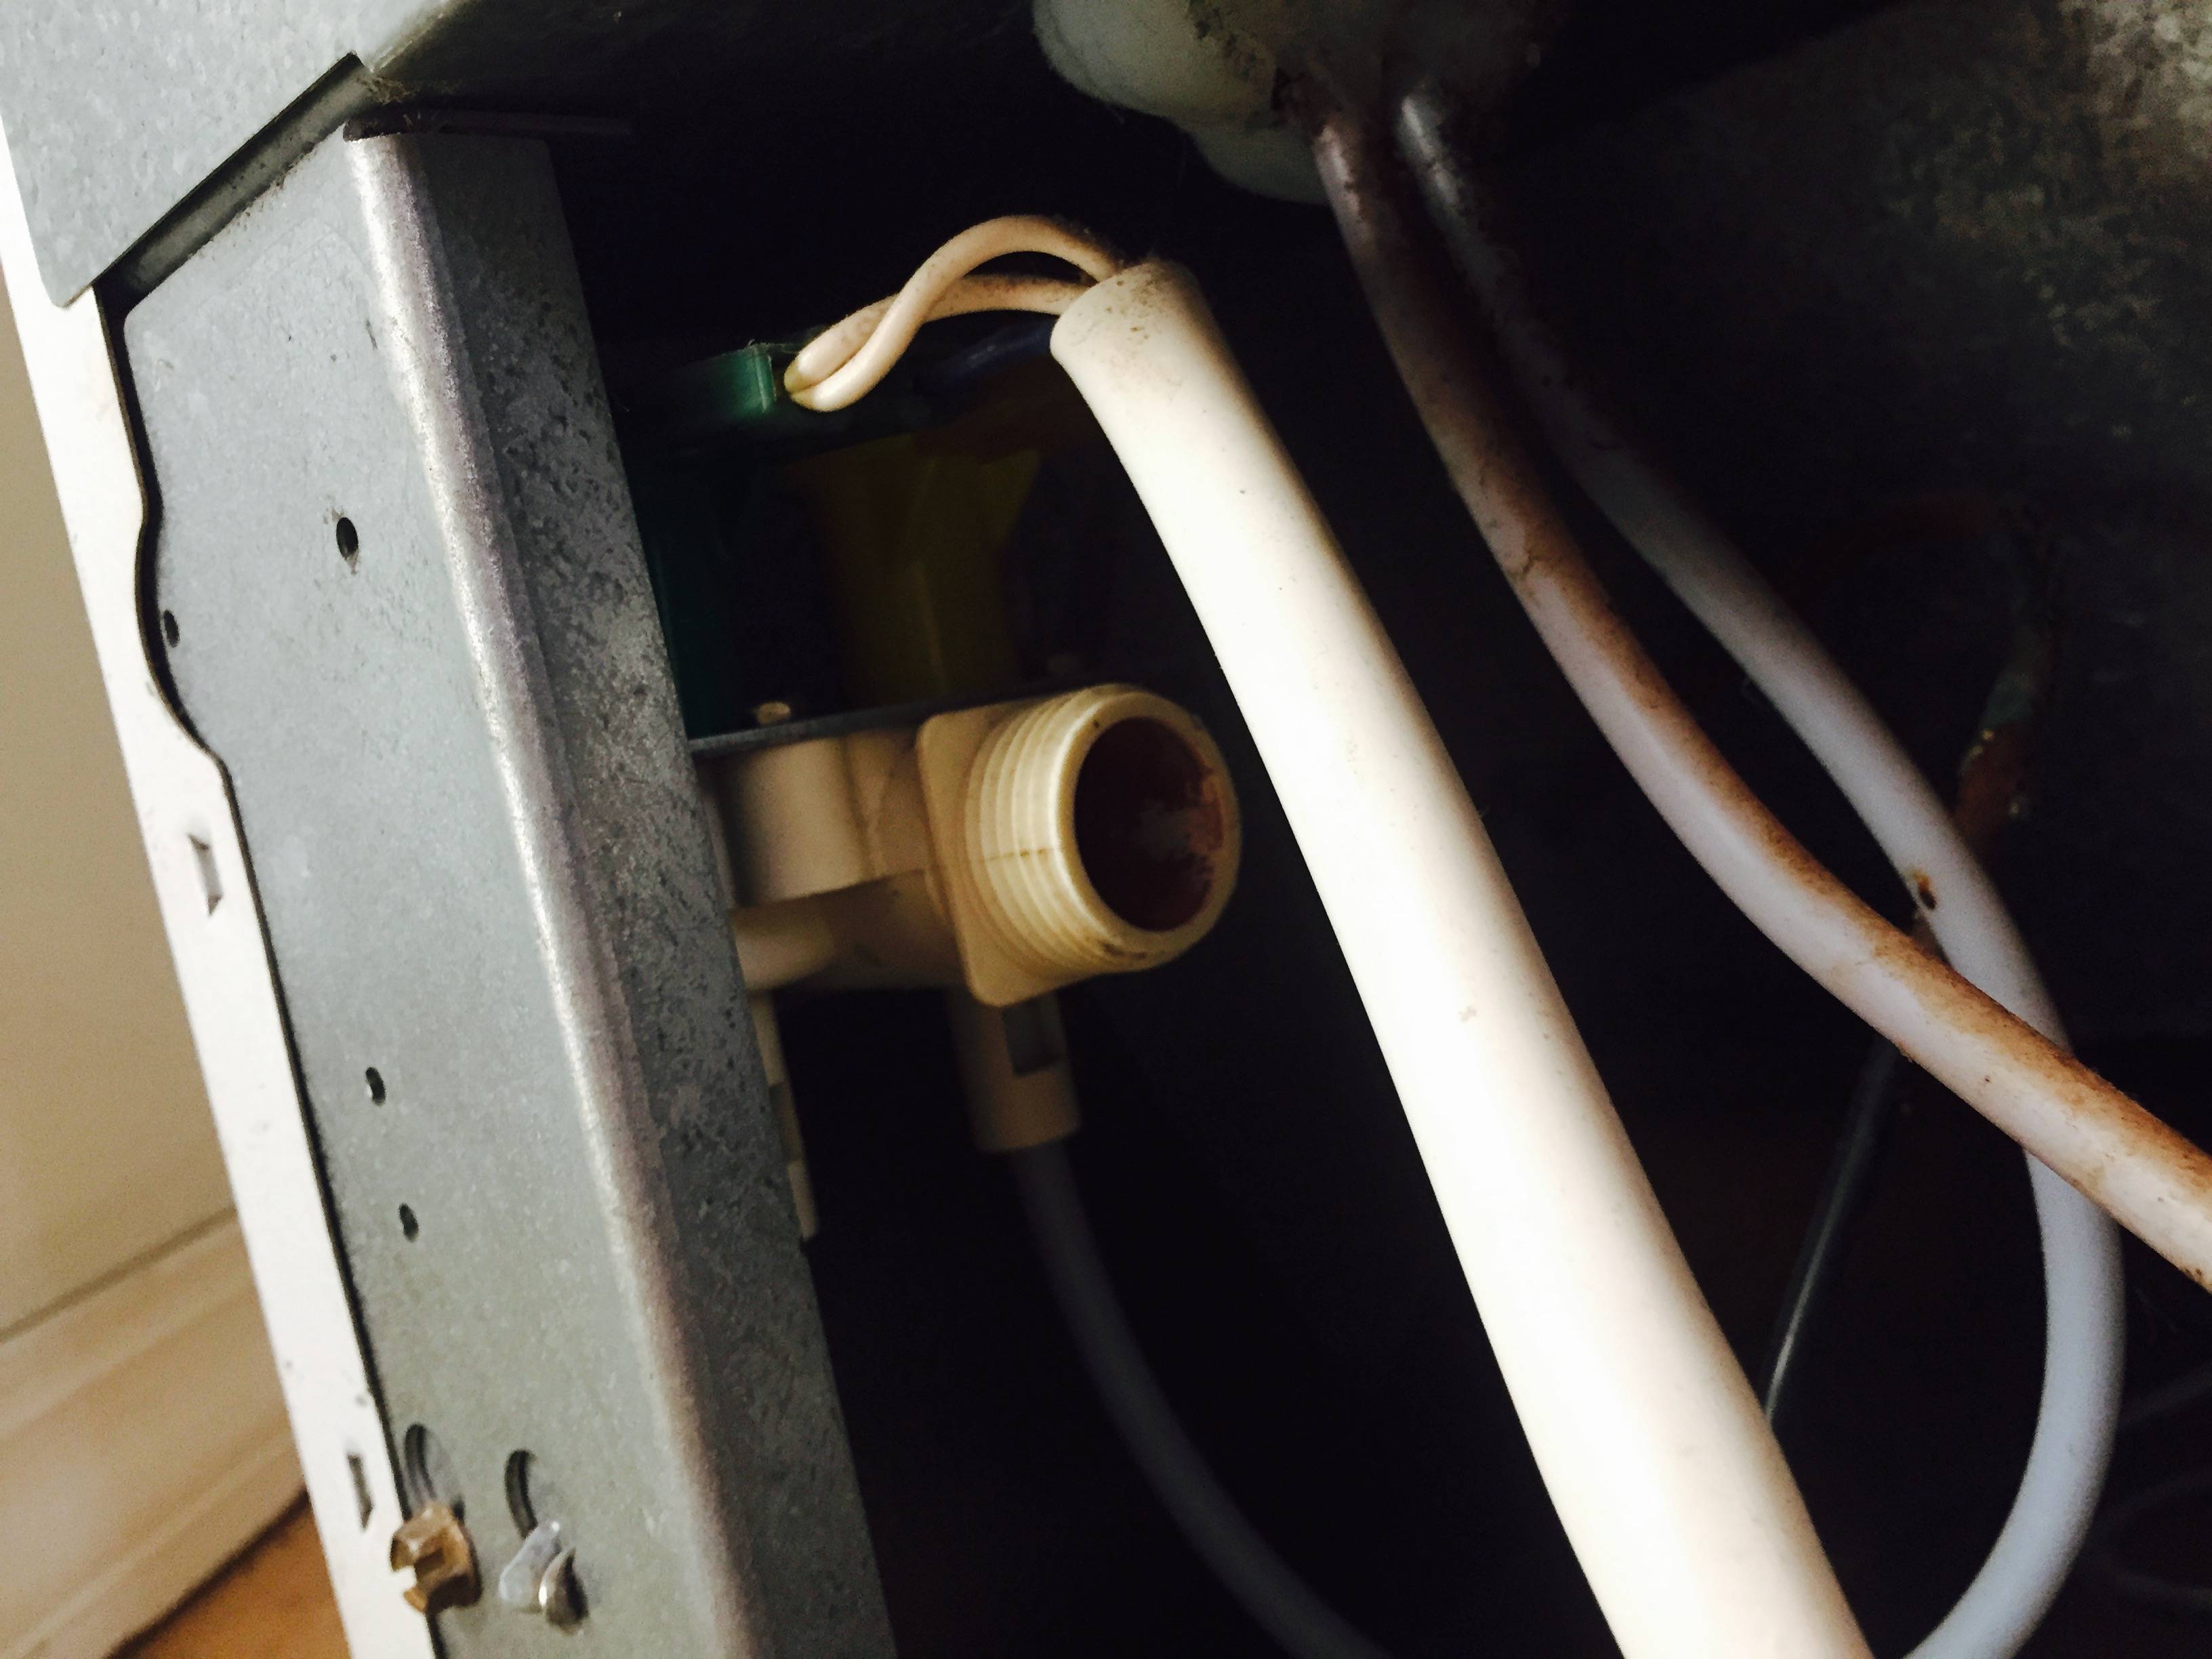
2. Shut-Off Valve: A shut-off valve is a crucial component that allows you to control the water flow to the ice maker. It should be installed near the water source for quick and easy access. Make sure the shut-off valve is of good quality and compatible with the chosen water line.
3. Fittings and Connectors: Various fittings and connectors are necessary to join the water line with the shut-off valve and the ice maker. These include compression fittings, adapters, and couplings. It’s important to match the fittings and connectors with the chosen water line to ensure a secure and leak-free connection.
4. Teflon Tape or Pipe Compound: Teflon tape or pipe compound is used to create a watertight seal when connecting the fittings and connectors. Apply the tape or compound to the threaded areas of the fittings to prevent water leaks.
5. Mounting Hardware: Depending on the location of the ice maker, you may need mounting hardware such as brackets or clips to secure the water line in place. This ensures that the water line remains stable and does not move or get damaged.
6. Tools: You will need a set of basic tools for the installation process. These commonly include a pipe cutter or tubing cutter to cut the water line to the desired length, an adjustable wrench to tighten fittings, pliers for handling smaller components, and a tape measure to accurately measure distances. Additionally, you may need a drill and appropriate bits if you need to create holes or mount hardware.
7. Tubing Insulation: Consider using insulation for the water line to prevent condensation and help maintain the temperature of the water flowing to the ice maker. Insulation can be particularly useful if the water line is exposed to fluctuating temperatures or in areas with high humidity.
Remember to check the manufacturer’s recommendations for your specific ice maker model and consult with a professional if you are unsure about the materials and tools needed for your installation. Having the right materials and tools on hand will make the process smoother and ensure a successful ice maker water line installation.
Hiring a Professional vs. DIY Installation
When it comes to installing a water line for an ice maker, you’ll need to decide whether to hire a professional or tackle the installation as a DIY project. Here are some factors to consider before making your decision:
1. Skill and Experience: Installing a water line for an ice maker requires some plumbing knowledge and skills. If you have experience with plumbing or have successfully completed similar projects in the past, a DIY installation may be feasible for you. However, if you’re not confident in your abilities or lack previous experience, hiring a professional is the safer option. Professionals have the necessary expertise and knowledge to handle the installation efficiently and effectively.
2. Time and Convenience: Installing a water line for an ice maker can be time-consuming, especially if you’re not familiar with the process. DIY installations often require researching, gathering materials, and navigating through any potential challenges. If you’re short on time or prefer the convenience of having an expert handle the project, hiring a professional will save you valuable time and effort. Professionals will have the necessary tools and experience to complete the installation efficiently.
3. Safety and Compliance: Plumbing installations require adherence to specific safety standards and local building codes. Hiring a professional ensures that your water line installation is done correctly and in compliance with regulations. Professionals have a thorough understanding of safety measures and building codes, reducing the risk of potential problems or hazards down the line.
4. Warranty and Guarantee: Many professional plumbers offer warranties or guarantees on their workmanship. This means that if any issues arise after the installation, the plumber will come back to fix them at no extra cost. This can provide peace of mind and protect your investment. If you opt for a DIY installation, any problems that may arise will be your responsibility to fix.
5. Cost Considerations: Cost is a significant factor in deciding whether to hire a professional or do the installation yourself. While DIY installations may seem cost-effective initially, it’s important to consider the potential costs of mistakes or damage that could occur during the process. If you’re not confident in your abilities, mistakes could end up costing you more in the end. Additionally, professionals often have access to wholesale pricing for materials, which can help offset their service fees.
Ultimately, the decision of whether to hire a professional or opt for a DIY installation depends on your skills, time constraints, and comfort level with the project. If you have the necessary knowledge and feel confident in your abilities, a DIY installation can be a cost-effective option. However, if you’re unsure or want to ensure a seamless and hassle-free installation, hiring a professional plumber is highly recommended.
Average Cost of Materials
When budgeting for the installation of a water line for an ice maker, it is essential to consider the average cost of materials. While prices may vary depending on factors such as location and supplier, here is a rough estimate of the average cost of materials you will need for the installation:
1. Water Line: The cost of the water line will depend on the type and length you choose. On average, copper pipes can range from $1.50 to $5 per linear foot, while plastic tubing can cost between $0.20 to $0.50 per foot. Stainless steel braided lines may range from $10 to $50 depending on the length and quality.
2. Shut-Off Valve: A shut-off valve typically costs between $5 to $20, depending on the brand and quality. It’s essential to choose a durable valve to ensure proper water flow control.
3. Fittings and Connectors: The cost of fittings and connectors can vary depending on the material and type. On average, compression fittings can cost between $1 to $5 each, while adapters and couplings may range from $1 to $10 per piece.
4. Teflon Tape or Pipe Compound: Teflon tape is generally inexpensive, costing around $1 for a roll. Pipe compound prices can range from $5 to $15, depending on the brand and size.
5. Mounting Hardware: Mounting hardware, such as brackets or clips, typically range from $5 to $15, depending on the type and quantity needed.
6. Tubing Insulation: Tubing insulation prices can vary depending on the size and material. On average, expect to spend around $10 to $20 for insulation to cover several feet of water line.
It’s important to note that these prices are rough estimates and can fluctuate depending on location and specific suppliers. Additionally, always compare prices and quality from different stores or online retailers to ensure you’re getting the best value for your money.
To get an accurate estimate of the cost of materials for your installation project, consider measuring the required length of the water line and creating a detailed list of all the necessary components. This will help you calculate the costs more precisely and avoid any surprises during the installation process.
Remember that labor costs are not included in the average cost of materials. If you decide to hire a professional for the installation, labor expenses will need to be factored into your overall budget.
When installing a water line for an ice maker, consider the cost of materials such as pipes, fittings, and valves, as well as the labor involved. It’s also important to factor in any additional costs for permits or professional installation.
Read more: How To Replace Ice Maker Water Line
Average Cost of Labor
When installing a water line for an ice maker, you may choose to hire a professional to handle the labor involved in the installation process. While the cost of labor can vary depending on factors such as location and the complexity of the job, here is an estimate of the average cost of labor for installing a water line for an ice maker:
Hourly Rate: Plumbers and contractors typically charge an hourly rate for their services. Hourly rates can vary widely, ranging from $50 to $150 per hour, depending on the location and experience of the professional. Keep in mind that rates can also be higher during peak seasons or for emergency services.
Estimates: Some professionals may provide a project estimate based on the specifics of your ice maker water line installation. The estimate will take into account factors such as the complexity of the installation, the distance of the water line, and any necessary permits or additional work. It’s important to request multiple estimates and compare them to ensure you’re getting a fair price.
Additional Costs: In addition to the hourly rate or project estimate, there may be additional costs associated with the labor. For example, if the professional needs to make adjustments to your plumbing system or install additional valves or connectors, these may require extra time and materials, which can increase the overall labor cost.
Travel and Service Fees: Depending on the distance of your location from the plumber’s base and any additional service fees involved, travel and service fees may be added to the labor cost. These fees typically cover the professional’s transportation to and from your location and any other expenses incurred during the installation process.
It’s important to note that the costs provided are average estimates and can vary depending on your specific location and the rates charged by professionals in your area. It is always recommended to obtain multiple quotes from different plumbers or contractors to ensure you’re getting a fair and competitive price for the labor.
When budgeting for your ice maker water line installation, be sure to factor in the anticipated labor costs and compare them with the cost of materials. While DIY installations can save on labor expenses, it’s crucial to assess your own skill level and the complexity of the project before deciding to tackle it yourself. Hiring a professional ensures a proper and efficient installation, providing peace of mind and reducing room for errors or future complications.
Additional Costs to Consider
When installing a water line for an ice maker, it’s important to consider additional costs beyond just the materials and labor. These additional costs can vary depending on various factors, such as the specific requirements of your installation and any unforeseen circumstances that may arise. Here are some additional costs to consider:
1. Permits and Inspections: Depending on your local building codes and regulations, you may need to obtain permits for the installation of a water line for an ice maker. Permit fees can vary, and it’s essential to check with your local building department to determine the specific requirements and associated costs. Additionally, inspections may be required before or after the installation, which may incur additional fees.
2. Removal or Disposal Costs: If you are replacing an existing ice maker or water line, you may need to consider the cost of removing and disposing of the old equipment and materials. This can involve labor costs or fees at recycling or waste disposal facilities. Be sure to include these costs in your budget, especially if you’re hiring a professional for the installation.
3. Water Filter: Depending on the quality of your water supply and personal preferences, you may need to install a water filter system for your ice maker. A water filter can help improve the taste and quality of the ice cubes. The cost of a water filter system can vary depending on the type and brand you choose, ranging from $50 to several hundred dollars. Consider this additional cost if you want to ensure clean and fresh ice.
4. Repairs or Modifications: In some cases, unexpected repair or modification costs may arise during the installation process. For example, the plumber may discover outdated or damaged pipes that need replacement or additional work, which can increase the overall cost. It’s important to be prepared for these potential additional expenses and have some flexibility in your budget.
5. Maintenance and Upkeep: While not directly associated with the installation process, it’s important to consider ongoing maintenance and upkeep costs for your ice maker and water line. This can include regular filter changes, valve inspections, and any necessary repairs in the future. These costs should be factored into your long-term budget to ensure the proper functioning and longevity of your ice maker.
By considering these additional costs, you can create a more comprehensive budget for your ice maker water line installation. It’s always recommended to allocate some extra funds for unexpected expenses or potential modifications that may arise during the installation process. Consulting with professionals and obtaining multiple quotes can also help provide a more accurate estimate of the overall costs involved in your specific installation.
Tips for Saving Money on Installation
Installing a water line for an ice maker can be a significant project, but there are ways to minimize costs and save money during the installation process. Here are some tips to help you save money:
1. Comparison Shop: Before purchasing materials or hiring a professional, take the time to shop around and compare prices from different suppliers or contractors. This will help you find the best deals and potentially save money on the cost of materials or labor.
2. DIY Where Possible: If you have the necessary skills and knowledge, consider tackling some aspects of the installation yourself. This can save on labor costs, as you will not need to hire a professional for the entire project. However, be sure to assess your own abilities and consult with a professional if needed to ensure a safe and successful installation.
3. Reuse Existing Materials: If you’re replacing an existing ice maker or water line, assess whether any components can be reused. For example, if the shut-off valve is still in good condition, you may not need to purchase a new one. Reusing materials can help save money on additional purchases.
4. Discounts and Sales: Keep an eye out for discounts or sales on materials or appliances. Many suppliers or hardware stores periodically offer promotions or discounts on plumbing materials. Take advantage of these opportunities to save money on the cost of materials.
5. Obtain Multiple Quotes: When hiring a professional, it’s important to obtain multiple quotes from different plumbers or contractors. This allows you to compare prices and find the best value for your money. However, ensure that the professionals you consider are reputable and have positive reviews to avoid compromising on quality.
6. Consider Off-Peak Seasons: Consider scheduling your installation during off-peak seasons for plumbers and contractors. During busy times, such as summer or holidays, labor rates may be higher. By selecting a less busy time, you may be able to negotiate a lower rate or find professionals who are more willing to offer discounts.
7. Do Your Own Prep Work: Save money on labor costs by doing some of the preparatory work yourself. This can include cleaning the installation area, removing any obstacles or debris, and ensuring it is accessible for the professionals when they arrive. Doing these tasks on your own can help reduce the overall installation time and, thus, the labor cost.
8. Regular Maintenance: Once the installation is complete, practice regular maintenance to prolong the lifespan of your ice maker and water line. Regularly clean the ice maker and change filters as recommended by the manufacturer. This can help prevent costly repairs or replacements down the line.
By implementing these money-saving tips, you can reduce the overall cost of installing a water line for your ice maker. Remember to balance cost-savings with quality to ensure a reliable and efficient installation.
Conclusion
Installing a water line for an ice maker can greatly enhance the convenience and functionality of your home or business. While there are costs involved in the installation process, understanding the factors that affect the overall cost and taking steps to save money can help make the project more manageable.
Factors such as the location of the ice maker, the complexity of the water line, and the type of materials used can all influence the cost of installation. Additionally, choosing whether to hire a professional or embark on a DIY installation can have cost implications as well.
When budgeting for the installation, it is crucial to consider the average cost of materials and labor. Gathering multiple quotes, comparing prices, and exploring opportunities for discounts or sales can help save on expenses. DIY installation can also be a cost-effective option if you have the necessary skills and knowledge, but it is important to assess your own abilities and consult with professionals if needed.
It’s worth noting that additional costs, such as permits, disposal fees, and maintenance, should also be considered when planning your budget. Being prepared for these expenses will help avoid any unexpected financial surprises.
In conclusion, installing a water line for an ice maker is an investment that can provide long-lasting benefits. By carefully considering the factors affecting costs, obtaining multiple quotes, and exploring cost-saving opportunities, you can successfully navigate the installation process while staying within your budget. Whether you decide to hire a professional or embark on a DIY installation, prioritize safety, quality, and efficiency to ensure a well-functioning ice maker water line that will serve you for years to come.
Now that you're equipped with knowledge on installing a water line for your ice maker, why stop there? Keeping that ice maker clean not only ensures it runs efficiently but also maintains the quality of ice it produces. Dive into our next guide on proper appliance upkeep, where we reveal handy strategies for keeping your refrigerator's ice-making companion in tip-top shape. Don't miss out on these practical insights to keep your kitchen appliances performing their best.
Frequently Asked Questions about How Much Does It Cost To Install A Water Line For An Ice Maker
Was this page helpful?
At Storables.com, we guarantee accurate and reliable information. Our content, validated by Expert Board Contributors, is crafted following stringent Editorial Policies. We're committed to providing you with well-researched, expert-backed insights for all your informational needs.


0 thoughts on “How Much Does It Cost To Install A Water Line For An Ice Maker”