Articles
How To Shut Off Water To Ice Maker
Modified: August 25, 2024
Learn how to easily shut off the water supply to your ice maker with our informative articles. Keep your ice maker running smoothly and prevent any leaks or water damage.
(Many of the links in this article redirect to a specific reviewed product. Your purchase of these products through affiliate links helps to generate commission for Storables.com, at no extra cost. Learn more)
Introduction
Welcome to our guide on how to shut off the water to your ice maker. Whether you’re facing a malfunctioning ice maker that needs to be repaired or you simply want to turn off the water supply temporarily, knowing how to shut off the water is an important skill for every homeowner. By following a few simple steps, you’ll be able to quickly and safely cut off the water supply to your ice maker.
In this article, we will walk you through the process of shutting off the water to your ice maker. We’ll provide you with clear instructions and valuable tips to ensure a smooth and hassle-free experience. So let’s get started!
Key Takeaways:
- Safely shut off your ice maker’s water supply by locating the shut-off valve, turning off the water, verifying the shut-off, and powering down the ice maker. Prevent potential leaks and damage with these simple steps.
- Knowing how to shut off your ice maker’s water supply is a crucial skill for homeowners. By following the step-by-step process, you can ensure a smooth and efficient procedure, avoiding potential water leaks and damage.
Read more: How To Shut Off Water
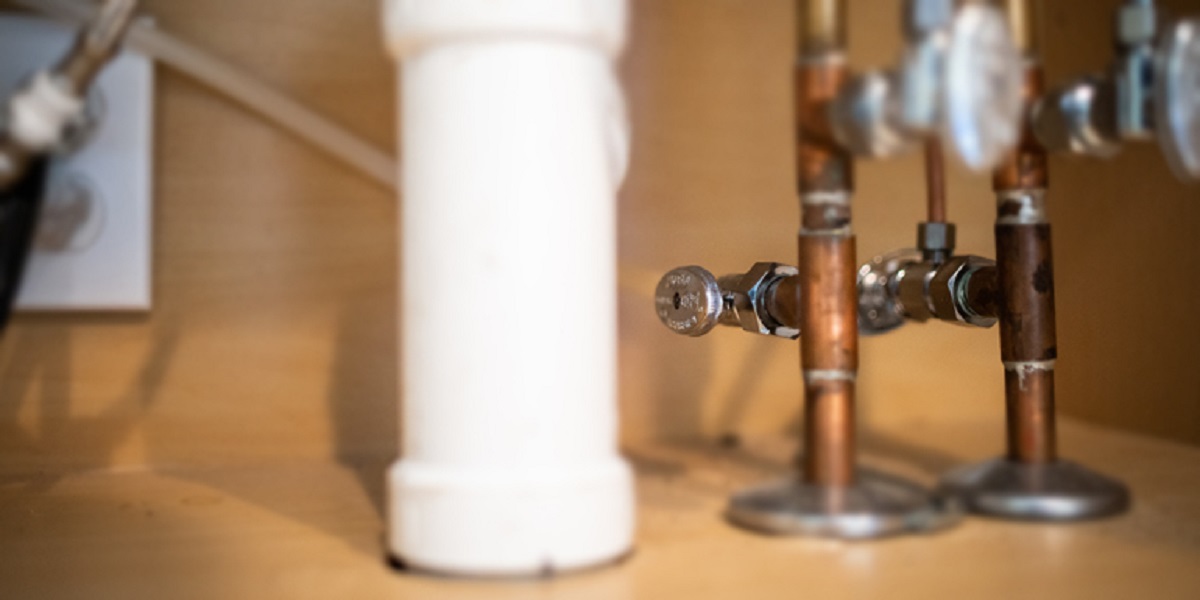
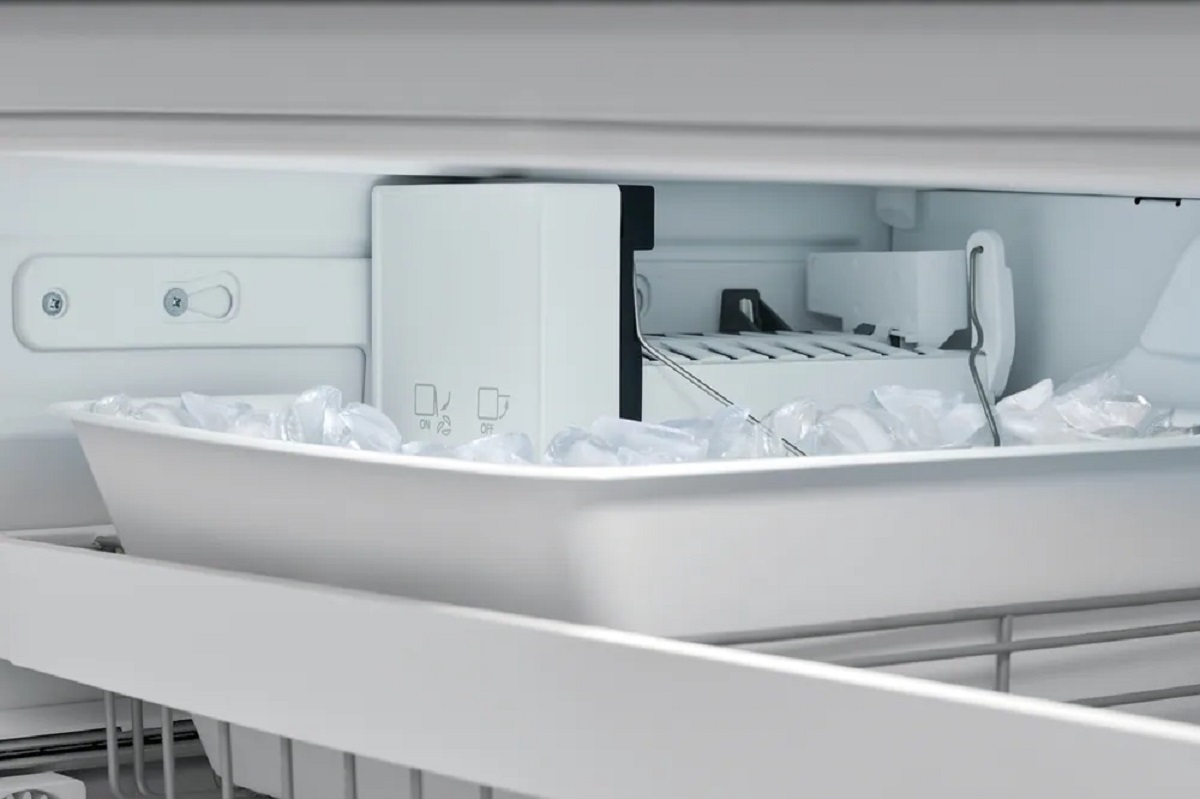
Step 1: Locate the Shut-Off Valve
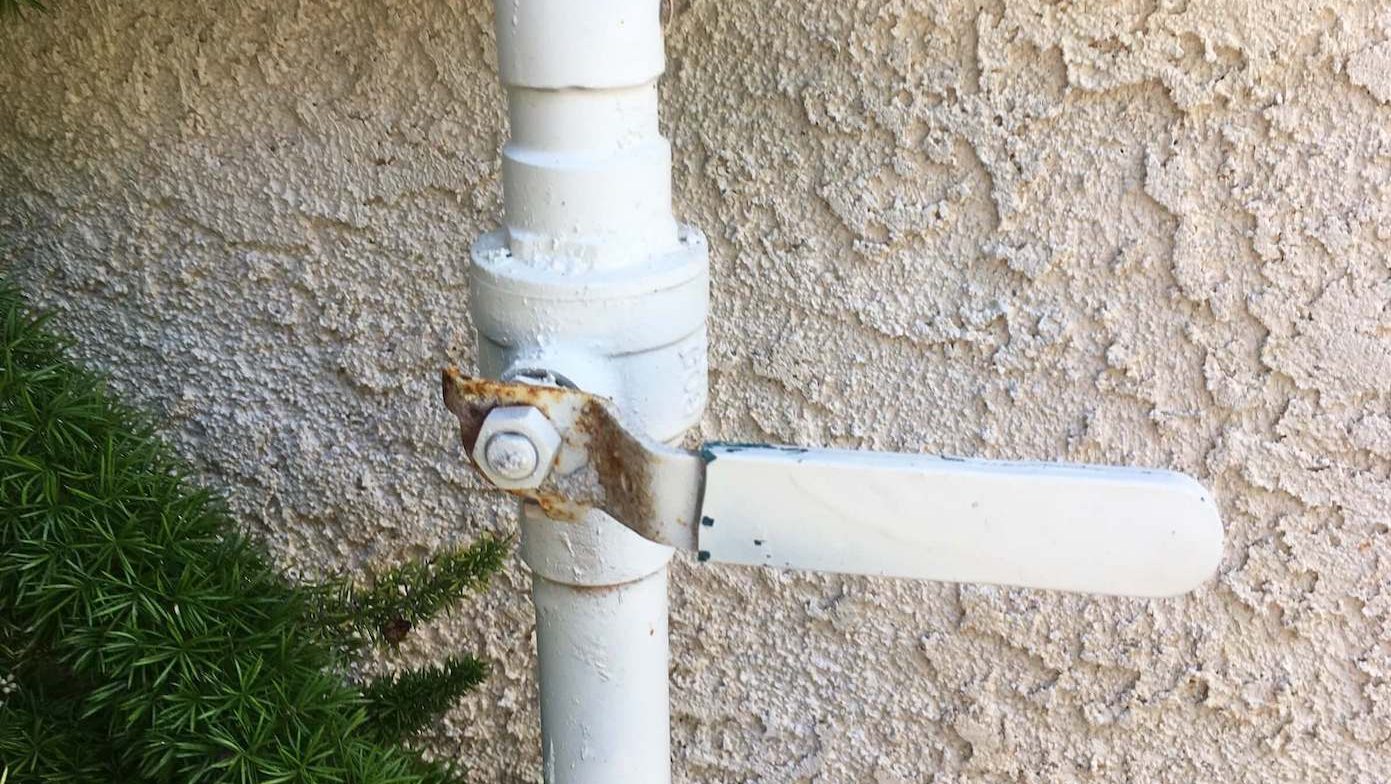
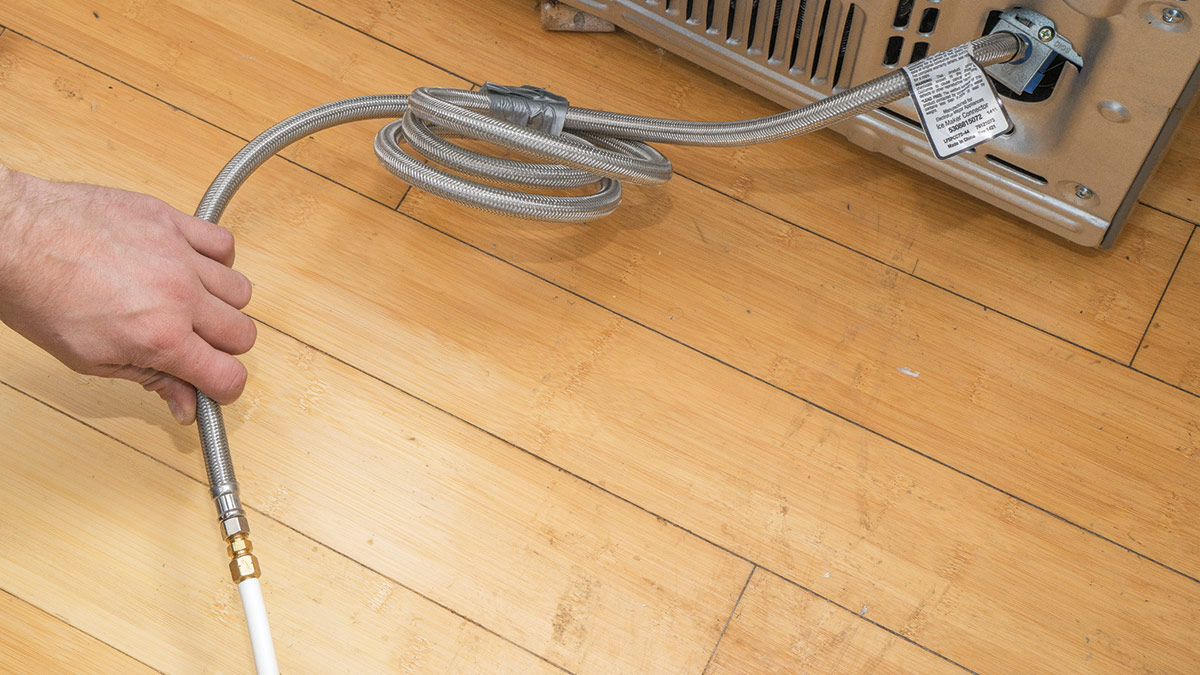
The first step in shutting off the water to your ice maker is to locate the shut-off valve. The shut-off valve is typically located near the ice maker or in close proximity to the main water line of your home.
To find the shut-off valve, start by checking under the kitchen sink or behind the refrigerator. Look for a small, metal valve connected to a flexible water supply line. The shut-off valve may be a lever, a wheel, or a handle that you can turn.
If you can’t find the shut-off valve in these areas, refer to your ice maker’s manual or contact the manufacturer for guidance. In some cases, the shut-off valve may be located in a different area of your home, such as the basement or utility room.
Once you have located the shut-off valve, make sure it is easily accessible and not obstructed by any objects. This will ensure that you can quickly and easily reach the valve when needed.
Remember, it’s important to take precautionary measures before attempting to shut off the water supply. If you’re unsure about the location of the shut-off valve or have any concerns regarding your ability to shut off the water safely, it is best to consult a professional plumber.
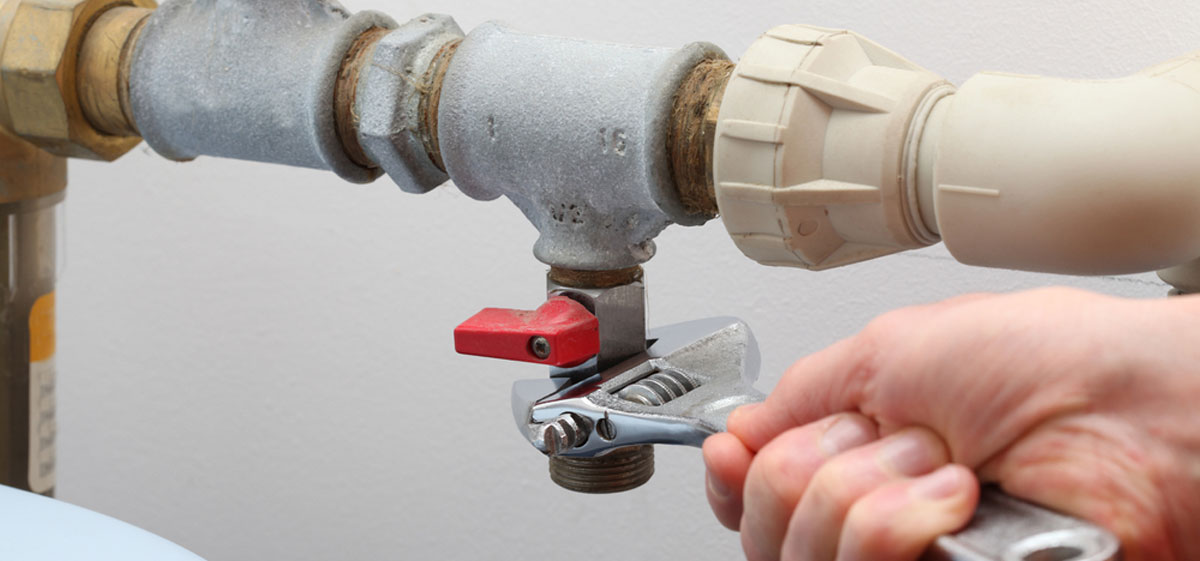
Step 2: Turn Off the Water Supply
Now that you’ve located the shut-off valve, it’s time to turn off the water supply to your ice maker. Follow these steps to ensure a proper shutdown:
- Before turning off the water supply, it’s a good idea to unplug the ice maker or switch off the circuit breaker to ensure there is no power flowing to the unit.
- Gently turn the shut-off valve clockwise (to the right) until it is fully closed. This will stop the flow of water to the ice maker. If your shut-off valve is a lever, switch it to the “off” position.
- Be careful not to force the valve or apply excessive pressure, as this could damage the valve or the water line.
After closing the shut-off valve, it’s a good practice to inspect the valve and the surrounding area for any signs of leaking or dripping water. If you notice any leaks, use a wrench to tighten the connection or consider contacting a professional plumber for assistance.
It’s essential to ensure that the water supply is completely turned off to avoid any potential damage or flooding. Take your time to make sure the valve is securely closed and the water flow has ceased before moving on to the next step.
Note that turning off the water supply to the ice maker will not affect the water supply to the rest of your home. Other appliances and fixtures that rely on water will still have access to water unless their own individual shut-off valves are closed as well.
Locate the shut-off valve for the water line that supplies the ice maker. It is typically located behind the refrigerator or under the sink. Turn the valve clockwise to shut off the water.
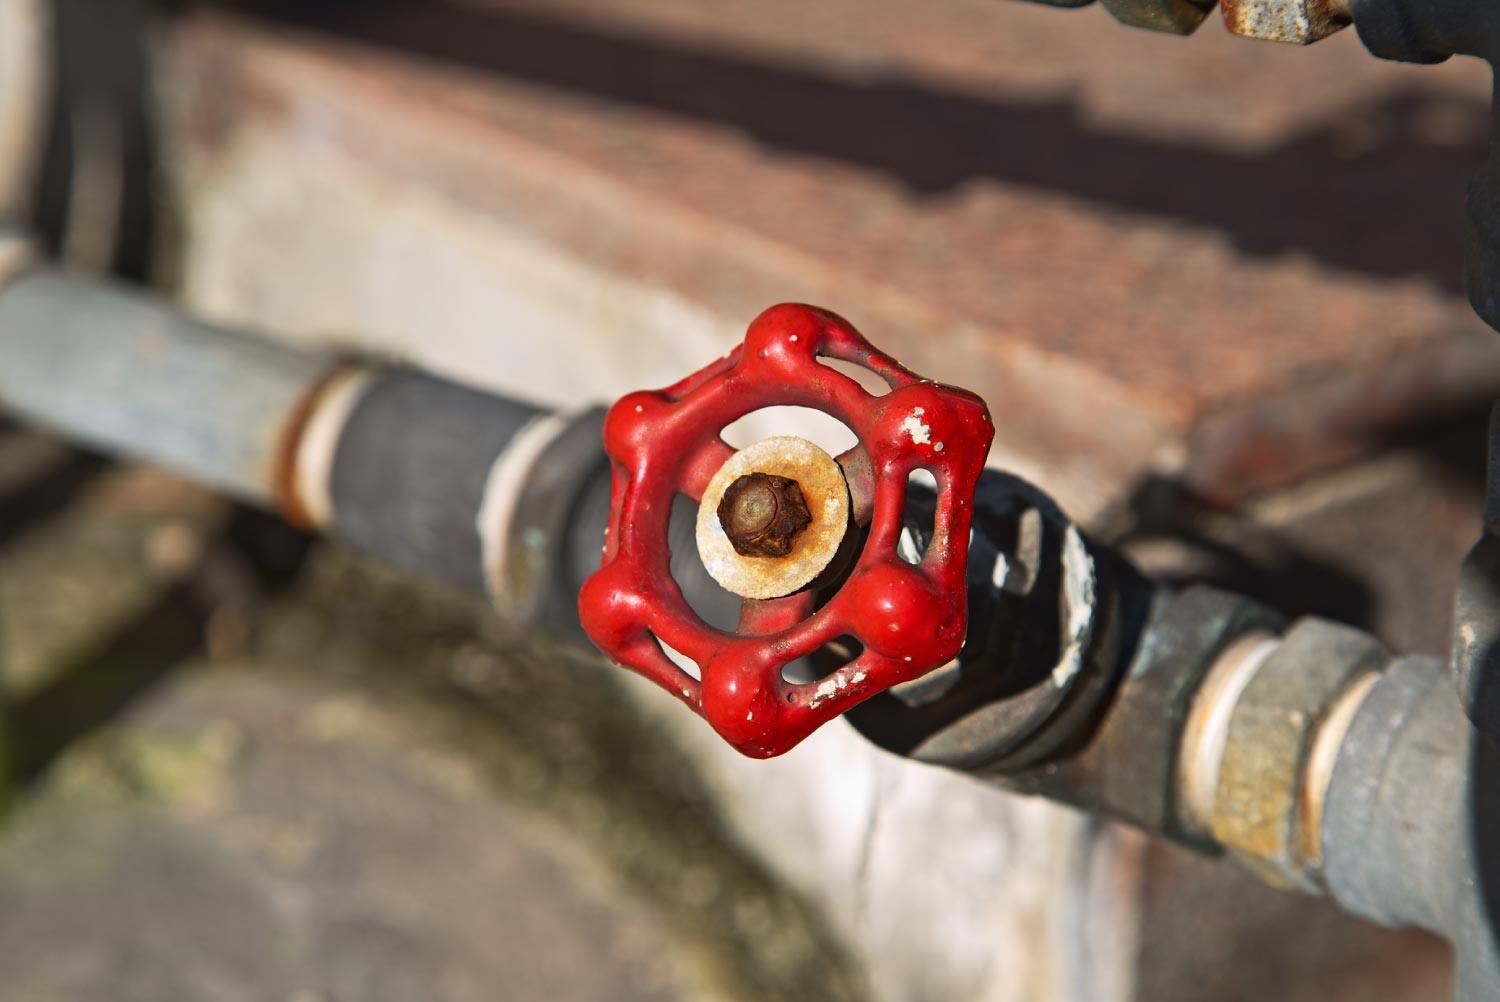
Step 3: Verify that Water is Shut Off
After turning off the water supply to your ice maker, it’s important to verify that the water flow has been completely shut off. This step will help ensure that no water is still reaching the ice maker and prevent any potential leaks or accidents from occurring.
Here’s how you can verify that the water is shut off:
- Check the ice maker and its water line for any signs of water flow. Look for dripping or running water near the shut-off valve or along the water supply line. If you observe any water, it means the shut-off valve may not be fully closed, or there may be a leak in the line.
- Inspect the ice maker itself for any water supply indicators. Some models may have a light or display that shows water is being supplied. If you see any indication of water flow, it means the shut-off valve needs to be closed tighter or there may be an issue with the ice maker system.
- Listen for the sound of running water. If you can hear water flowing through the ice maker or the water line, it means the shut-off valve is not fully closed, and you need to adjust it further.
If you encounter any of the above situations where water is still flowing or leaking, revisit the shut-off valve and make sure it is fully closed. Turn the valve clockwise (to the right) until you can no longer hear any water flow or observe any signs of leakage.
Once you have successfully verified that the water flow has been shut off, you can proceed to the next step of shutting off the ice maker itself.
Keep in mind that if you are unable to stop the water flow or suspect a more significant issue with your ice maker, it is advisable to contact a professional technician or plumber for further assistance.
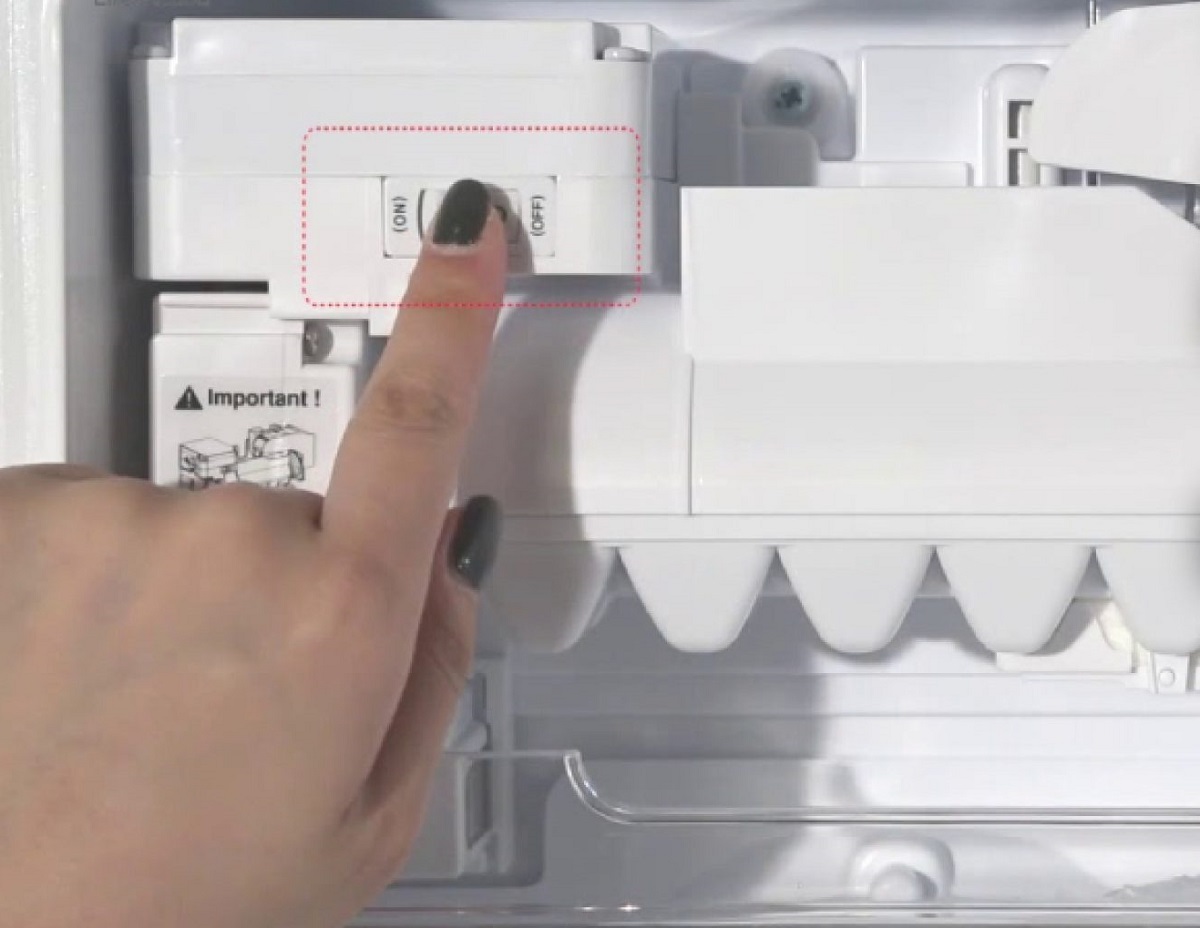
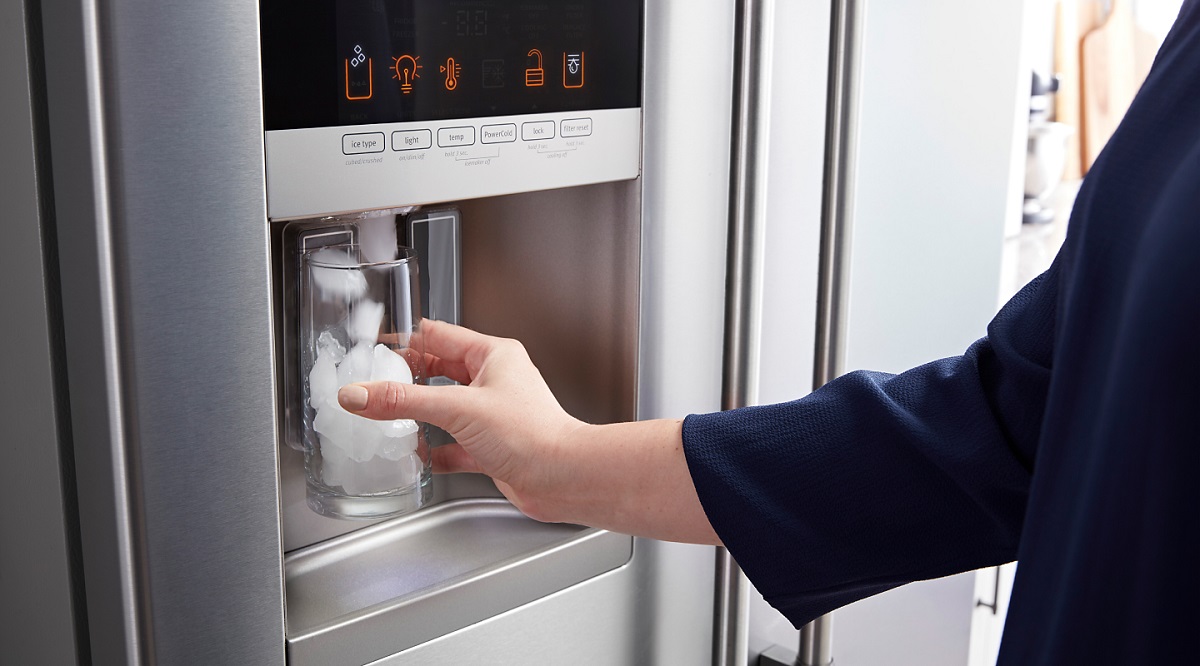
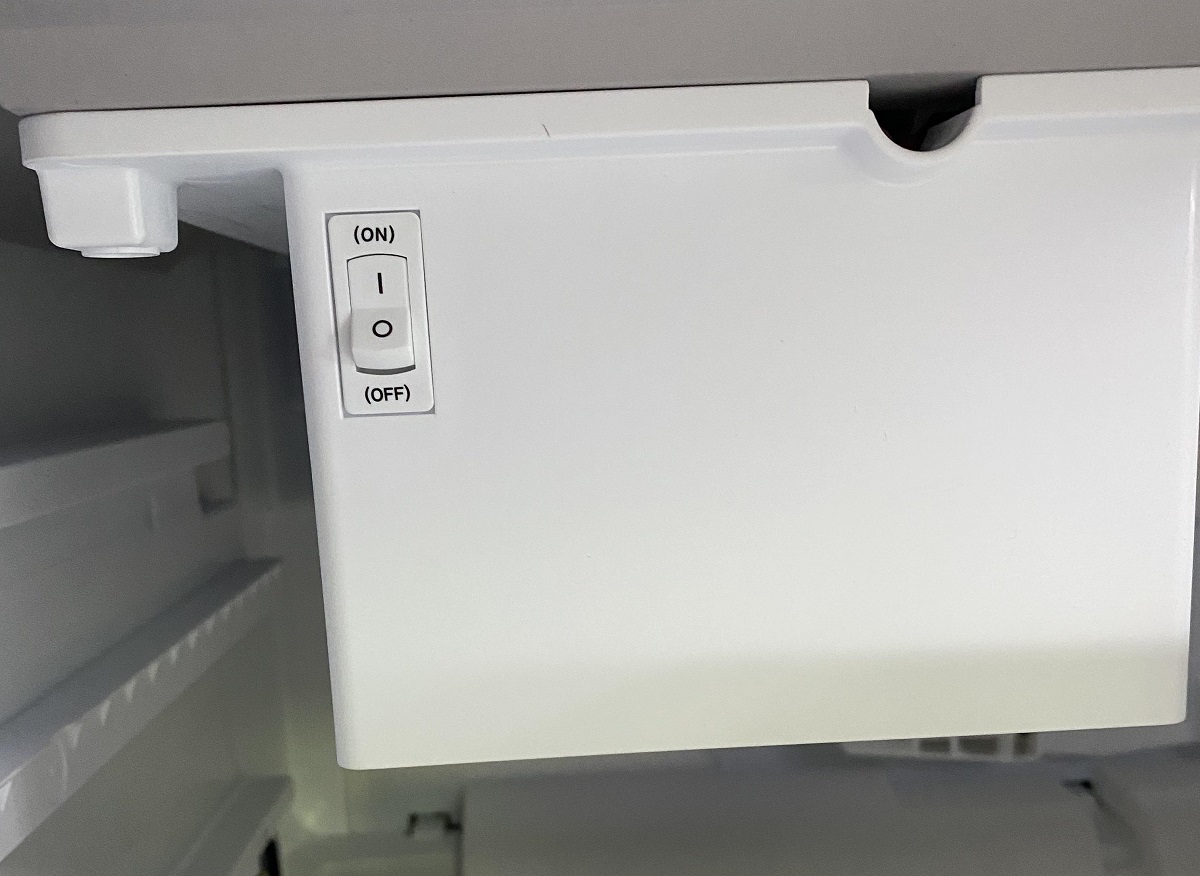
Step 4: Shutting Off the Ice Maker
Now that you have successfully turned off the water supply to your ice maker, it’s time to shut off the ice maker itself. This step will ensure that the ice maker does not continue to cycle or attempt to produce ice while the water supply is turned off.
Follow these steps to shut off the ice maker:
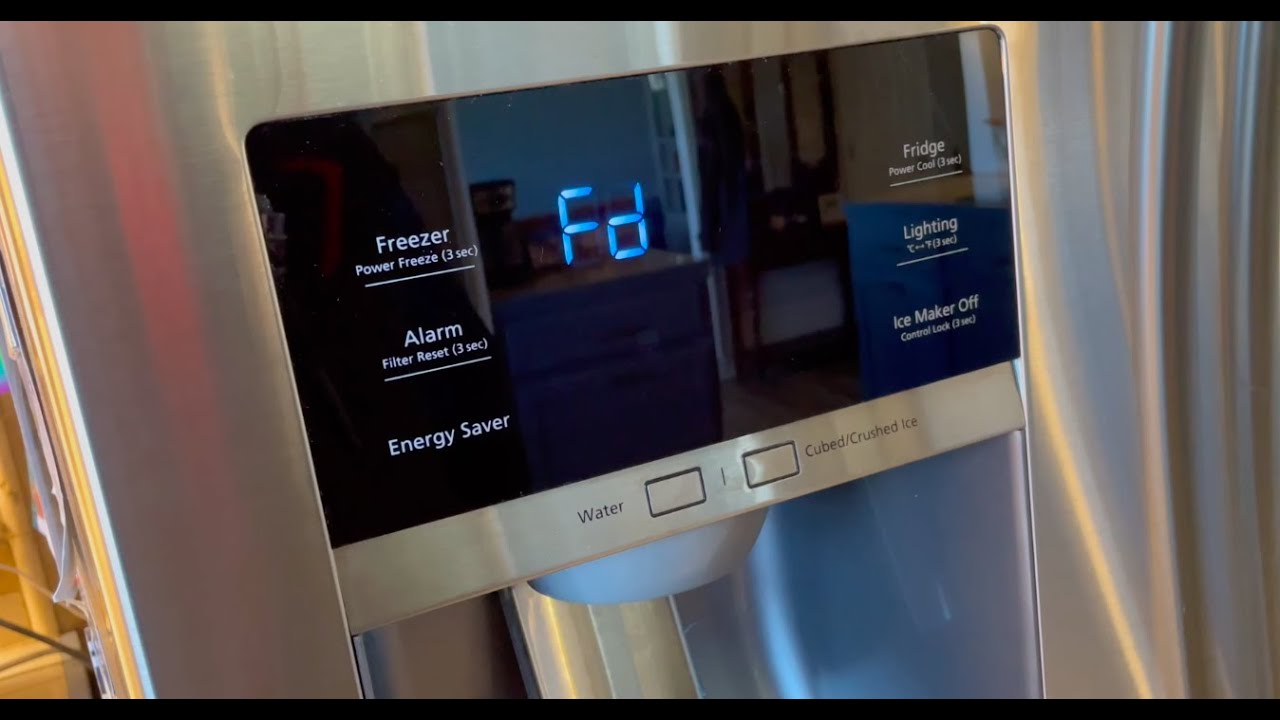
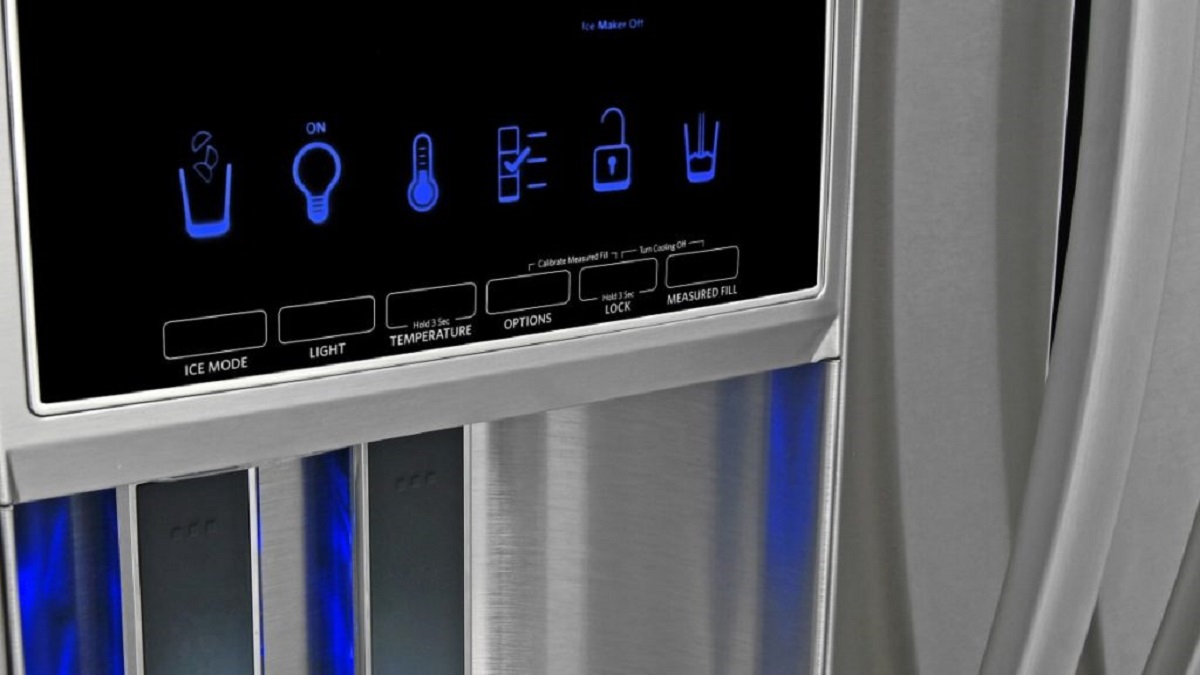
- Locate the power switch or the control panel of the ice maker. This is usually located on the front or back of the unit.
- Switch off the power to the ice maker by either flipping the power switch to the “off” position or pressing the appropriate button on the control panel.
- Depending on your ice maker model, you may need to also turn off any additional features or settings related to ice production. Refer to the user manual or manufacturer’s instructions for specific details.
- Make a final visual check to ensure that the ice maker is powered off and not running. Look for any lights or indicators that might suggest the ice maker is still active.
By shutting off the ice maker, you are preventing it from attempting to cycle or operate without a water supply. This will help protect your ice maker from potential damage and conserve energy while the water supply is turned off.
If, at any point, you need to turn the water supply and ice maker back on, simply follow the above steps in reverse order. Remember to gradually turn on the water supply to avoid sudden pressure surges, and allow the ice maker to cycle properly before using the ice.
Once you have shut off the ice maker and confirmed that it is no longer running, you can rest assured that both the water supply and the ice maker itself have been safely turned off.
Read also: 13 Amazing Ice Maker Shut Off Valve for 2025
Conclusion
Knowing how to shut off the water to your ice maker is a useful skill that every homeowner should possess. Whether you need to perform maintenance, repair a malfunctioning ice maker, or temporarily halt the production of ice, following the proper steps to shut off the water supply is critical.
In this guide, we have provided you with a step-by-step process to help you successfully shut off the water to your ice maker. By locating the shut-off valve, turning off the water supply, verifying that the water is shut off, and shutting off the ice maker itself, you can ensure a safe and efficient procedure.
Remember, it’s important to exercise caution when working with the water supply and electrical components of your ice maker. If you’re unsure about any step or have concerns about your ability to perform the procedure, don’t hesitate to seek professional assistance from a plumber or technician.
By properly shutting off the water to your ice maker, you can avoid water leaks, prevent potential damage to your ice maker or home, and have peace of mind knowing that you’re taking proactive steps to maintain your appliances.
We hope that this guide has provided you with the information you need to confidently shut off the water to your ice maker. Stay tuned for more useful articles and guides to help you with your home maintenance endeavors!
Now that you've mastered shutting off your ice maker's water supply, why not keep your appliance in top shape? A clean ice maker ensures hygiene and efficiency, so don't miss our guide on maintaining your refrigerator's ice feature. Also, if you're setting up a new ice maker or need a fresh installation, our detailed instructions on installing water lines will make the process smooth and hassle-free. Stay prepared and avoid future hassles with these practical tips!
Frequently Asked Questions about How To Shut Off Water To Ice Maker
Was this page helpful?
At Storables.com, we guarantee accurate and reliable information. Our content, validated by Expert Board Contributors, is crafted following stringent Editorial Policies. We're committed to providing you with well-researched, expert-backed insights for all your informational needs.
0 thoughts on “How To Shut Off Water To Ice Maker”