Home>Articles>How To Install An Electric Baseboard Heater Thermostat
Articles
How To Install An Electric Baseboard Heater Thermostat
Modified: January 9, 2024
Learn how to install an electric baseboard heater thermostat with our comprehensive articles. Enhance the comfort and efficiency of your heating system with expert guidance.
(Many of the links in this article redirect to a specific reviewed product. Your purchase of these products through affiliate links helps to generate commission for Storables.com, at no extra cost. Learn more)
Introduction
Installing an electric baseboard heater thermostat is a simple and cost-effective way to control the temperature in your home. A thermostat allows you to set the desired temperature and ensures that your heating system runs efficiently. Whether you want to replace an old thermostat or install a new one, this guide will walk you through the steps to successfully complete the installation.
Before we get started, it’s important to note that electrical work can be dangerous if not done correctly. If you’re unsure or uncomfortable working with electrical components, it’s always best to hire a professional. However, if you feel confident in your abilities and follow safety precautions, installing a baseboard heater thermostat can be a rewarding DIY project.
In this guide, we’ll cover the necessary tools and materials you’ll need, how to turn off the power, removing the old thermostat, preparing the wiring, installing the new thermostat, connecting the wiring, mounting the thermostat, and testing the thermostat to ensure it’s working properly.
Ready to take control of your home’s heating system? Let’s dive in and get started on installing your electric baseboard heater thermostat!
Key Takeaways:
- Takeaway 1: Installing an electric baseboard heater thermostat is a rewarding DIY project that enhances home comfort and energy efficiency. Prioritize safety, gather the right tools, and follow the step-by-step process for a successful installation.
- Takeaway 2: By installing a new thermostat, you gain control over your home’s heating system, allowing you to adjust the temperature for increased comfort and reduced energy consumption. Enjoy a cozy and inviting living space with a well-regulated heating system.
Read more: How To Wire Baseboard Heater Thermostat
Step 1: Gather the Necessary Tools and Materials
Before you start the installation process, it’s important to gather all the tools and materials you’ll need. Having everything on hand will help ensure a smooth and efficient installation. Here’s a list of the essential tools and materials:
- Screwdriver: You’ll need a screwdriver, either flathead or Phillips, depending on the type of screws used in your thermostat.
- Wire strippers: Wire strippers will come in handy for removing the insulation from the wires, allowing you to make proper connections.
- Electrical tape: Electrical tape is used to secure and insulate the wired connections, ensuring safety and reliability.
- Wire connectors: Wire connectors, also known as wire nuts, are necessary for joining wires together securely.
- Voltage tester: A voltage tester is essential for verifying that the power is turned off before you begin working with the wiring.
- New thermostat: Make sure you have a compatible baseboard heater thermostat that meets your specific needs. Check the specifications and features to ensure it’s suitable for your setup.
- Owner’s manual: Consult the owner’s manual for both the old and new thermostat to understand the wiring requirements and any specific installation instructions.
- Pencil and paper: Keeping a pencil and paper handy will help you take notes, draw diagrams, and keep track of any important information during the installation process.
By gathering and preparing these tools and materials, you’ll be well-equipped to tackle the installation process without any delays or interruptions.
Step 2: Turn Off the Power
Before you begin working on the installation of your electric baseboard heater thermostat, it’s crucial to turn off the power to ensure your safety. Follow these steps to turn off the power:
- Locate the circuit breaker: Identify the circuit breaker that controls the power supply to your baseboard heater. It should be labeled accordingly.
- Switch the breaker to the “off” position: Flip the breaker switch to the off position. This will cut off the power supply to the heater and the thermostat.
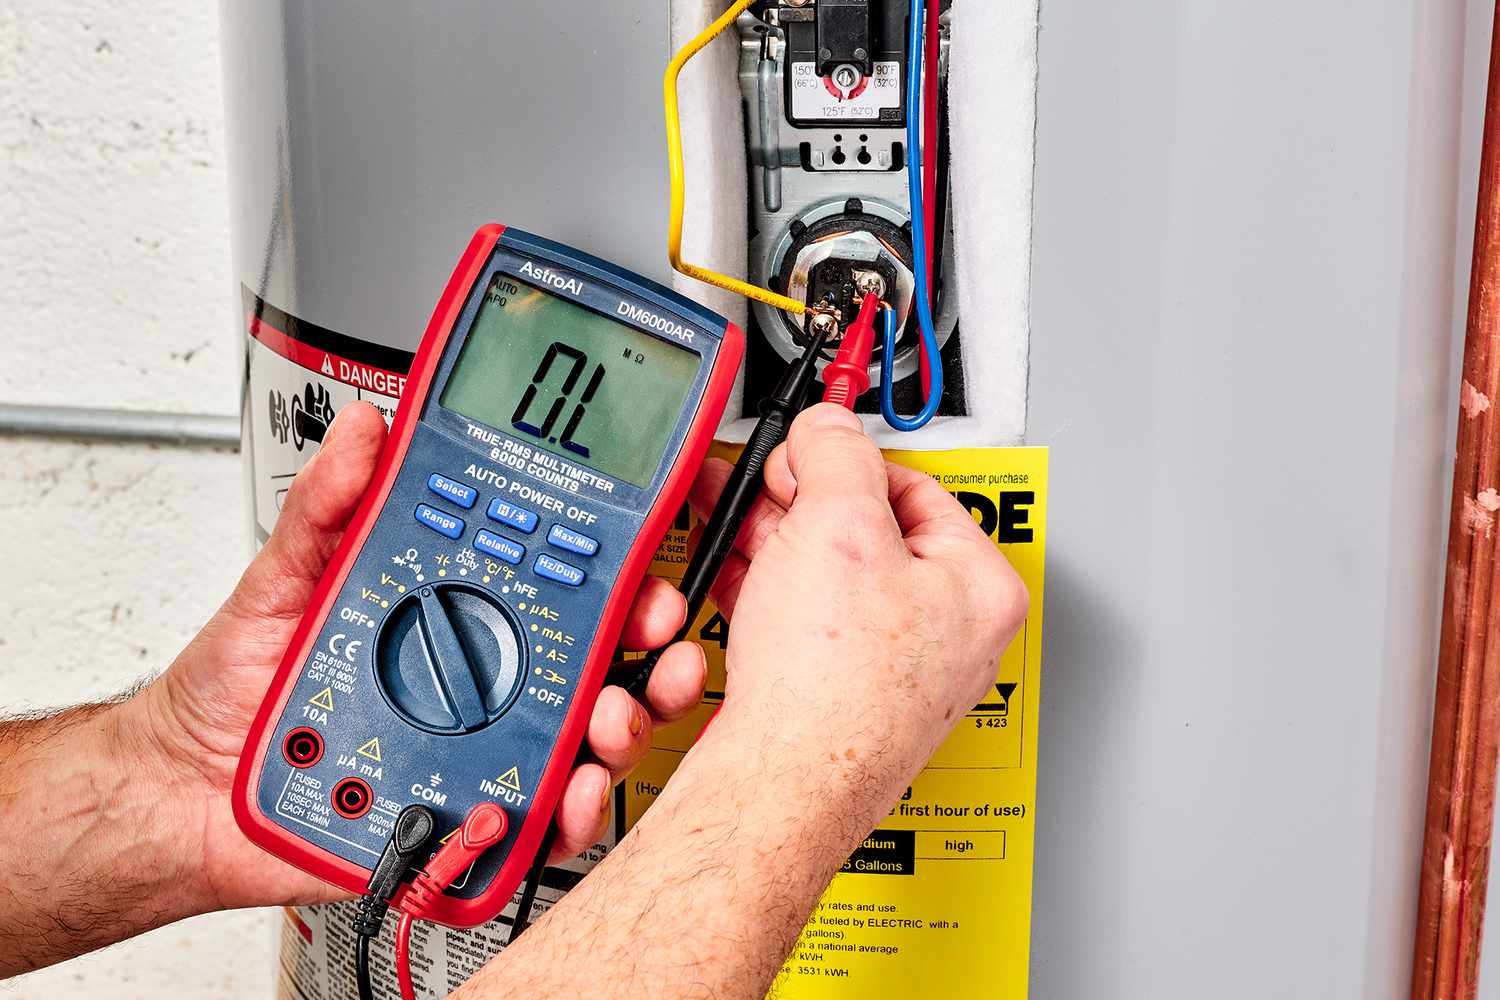
- Double-check with a voltage tester: Even after switching off the breaker, it’s essential to verify that there is no electrical current flowing to the thermostat. Use a voltage tester to test the wires and terminals for any residual voltage. If the tester indicates voltage, double-check your circuit breaker to ensure it is completely turned off.
By turning off the power, you eliminate the risk of electrical shock or damage to the thermostat during the installation process. It’s crucial to follow these steps and take appropriate safety measures before proceeding to the next steps.
Step 3: Remove the Old Thermostat
Now that the power is turned off, you can safely proceed with removing the old thermostat. Follow these steps to remove the old thermostat:
- Remove the thermostat cover: Gently remove the cover of the old thermostat by unscrewing any screws or clips holding it in place.
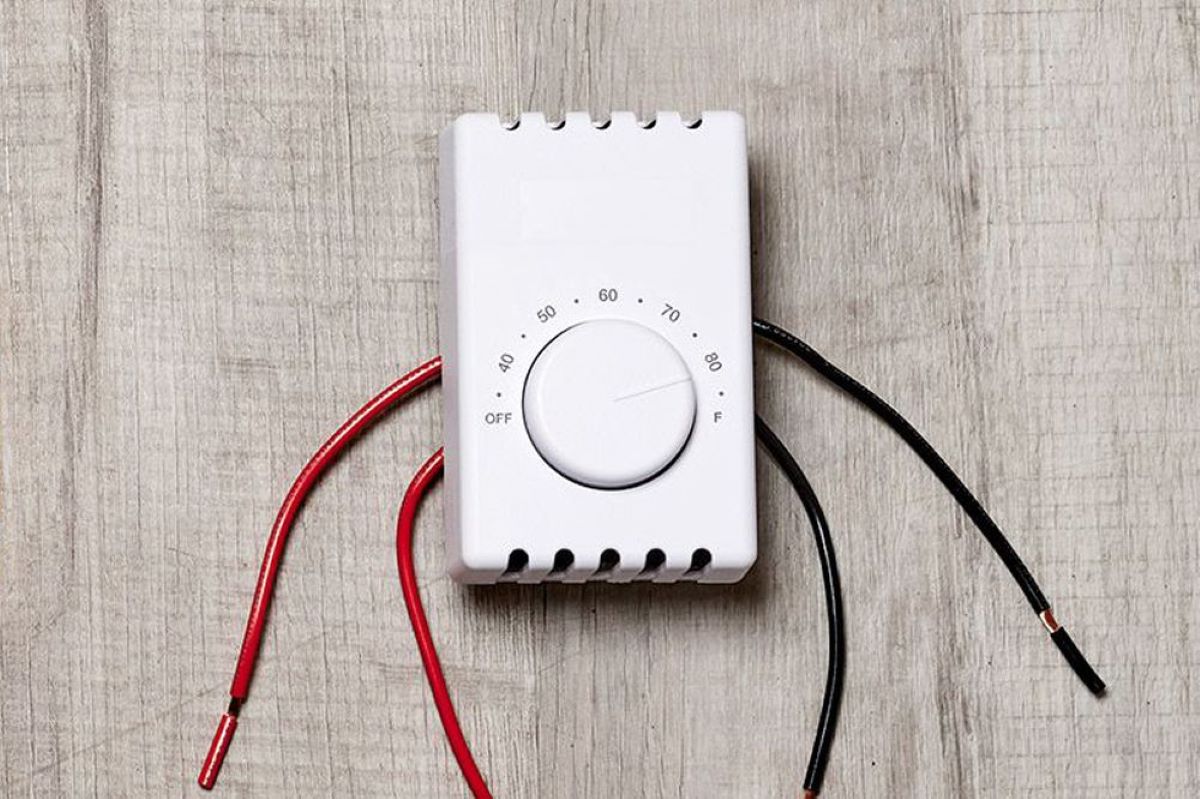
- Identify the wiring: Carefully observe and take note of the wiring connections on the old thermostat. Note which wires are connected to which terminals.
- Disconnect the wiring: Use a screwdriver or pliers to loosen the screws holding the wires in place on the thermostat terminals. Once the screws are loose, remove the wires from the terminals and separate them.
- Remove the thermostat from the wall: Unscrew the mounting plate or bracket that holds the thermostat to the wall. Gently pull the thermostat away from the wall, making sure not to damage the wires.
With the old thermostat removed, you now have a clean slate to install the new thermostat. Take this opportunity to inspect the wiring, making sure there are no damages or loose connections. If you notice any issues, address them before proceeding further.
It’s also a good idea to take a photo or make a note of the old thermostat’s wiring configuration. This will come in handy when installing the new thermostat, ensuring you connect the wires correctly.
Now that the old thermostat is removed, you’re ready to move on to the next step, which is preparing the wiring for the new thermostat installation.
Step 4: Prep the Wiring
With the old thermostat removed, it’s time to prepare the wiring for the installation of the new electric baseboard heater thermostat. Follow these steps to prep the wiring:
- Inspect the wiring: Check the condition of the wires for any signs of damage, fraying, or loose connections. If you notice any issues, it’s crucial to address them before proceeding.
- Strip the wire ends: Use wire strippers to carefully remove the insulation from the ends of the wires, exposing about ½ inch of bare copper wire. This will allow for proper connection to the terminals of the new thermostat.
- Group the wires: Bundle together the wires according to their colors or markings. This will help keep them organized and make it easier to connect them to the corresponding terminals on the new thermostat.
- Label the wires (optional): If the wires are not already labeled, consider using small labels or colored tape to mark each wire’s purpose. This will further simplify the installation process.
It’s important to ensure that the wires are prepped and ready before proceeding to install the new thermostat. Taking the time to inspect and properly prepare the wiring will help ensure a smooth and successful installation.
Once the wiring is prepped, you’re ready to move on to the next step, which is installing the new electric baseboard heater thermostat.
When installing an electric baseboard heater thermostat, make sure to turn off the power at the circuit breaker before beginning the installation. This will ensure your safety while working with electrical components.
Read also: 13 Best Baseboard Heater Thermostat For 2025
Step 5: Install the New Thermostat
Now that the wiring is prepped, it’s time to install the new electric baseboard heater thermostat. Follow these steps to properly install the new thermostat:
- Position the mounting plate: Hold the mounting plate against the wall in the desired location. Make sure it is level and mark the screw hole locations with a pencil.
- Drill pilot holes (if necessary): If the mounting plate requires screws, use a drill and appropriate bit size to create pilot holes at the marked locations. This will make it easier to screw in the mounting plate securely.
- Attach the mounting plate: Line up the holes on the mounting plate with the pilot holes or screw locations. Use a screwdriver or drill to securely fasten the mounting plate to the wall.
- Feed the wiring through the mounting plate: Carefully guide the bundled wires through the opening in the mounting plate. Ensure that there is enough wire length to connect them to the terminals on the new thermostat.
- Attach the thermostat to the mounting plate: Align the tabs or brackets on the thermostat with the corresponding slots or hooks on the mounting plate. Gently push the thermostat onto the mounting plate until it clicks into place securely.
Once the new thermostat is installed on the mounting plate, take a moment to ensure that it is level and firmly attached. Refer to the owner’s manual for any specific instructions or additional steps for your particular model of thermostat.
With the new thermostat in place, you’re now ready to connect the wiring in the next step.
Step 6: Connect the Wiring
With the new thermostat installed, it’s time to connect the wiring. Follow these steps to ensure a proper and secure connection:
- Refer to the wiring diagram: Consult the owner’s manual or the provided wiring diagram for your thermostat model. This will guide you on which wires should be connected to which terminals.
- Match the wires: Take each wire group from the prepped wiring and match them to their corresponding terminals on the thermostat. This is where labeling the wires can be helpful, if you’ve done so.
- Secure the connections: Once the wires are matched to their respective terminals, use a screwdriver to tighten the terminal screws securely. This ensures a proper electrical connection and reduces the risk of loose connections.
- Insulate the connections: After the connections are made, wrap electrical tape around the exposed ends of the wires and terminals. This provides insulation and added security to the wiring connections.
It’s important to pay attention to the wiring connections and ensure they are connected correctly. If you have any doubts or uncertainties, refer to the owner’s manual or consult a professional to avoid any potential wiring mistakes.
Once the wiring is properly connected and insulated, you’re one step closer to completing the installation process. Next, we’ll move on to mounting the thermostat in the final step.
Step 7: Mount the Thermostat
With the wiring connected, it’s time to securely mount the thermostat on the mounting plate. Follow these steps to ensure a stable and professional installation:
- Align the thermostat: Position the thermostat on the mounting plate, aligning it with the tabs or hooks. Make sure it fits snugly and is centered on the plate.
- Secure the thermostat: Depending on the type of mounting mechanism, use the appropriate method to secure the thermostat to the mounting plate. This may involve sliding it into place or using screws to fasten it down.
- Check for stability: After the thermostat is mounted, give it a gentle shake to ensure it is securely attached. It should not feel loose or wobbly.
By properly mounting the thermostat, you ensure that it is in a stable position and will stay securely in place. This is important to maintain accurate temperature readings and to prevent any accidental dislodging during regular use.
With the thermostat securely mounted, you’re almost done! In the final step, you’ll power on and test the thermostat to ensure it functions correctly.
Step 8: Power On and Test the Thermostat
Congratulations! You’re in the final step of installing your electric baseboard heater thermostat. In this step, you’ll power on the thermostat and conduct a test to ensure everything is working as expected. Here’s what you need to do:
- Turn on the power: Go back to the circuit breaker panel and switch on the breaker that controls the power to the baseboard heater and thermostat. This will restore power to the system.
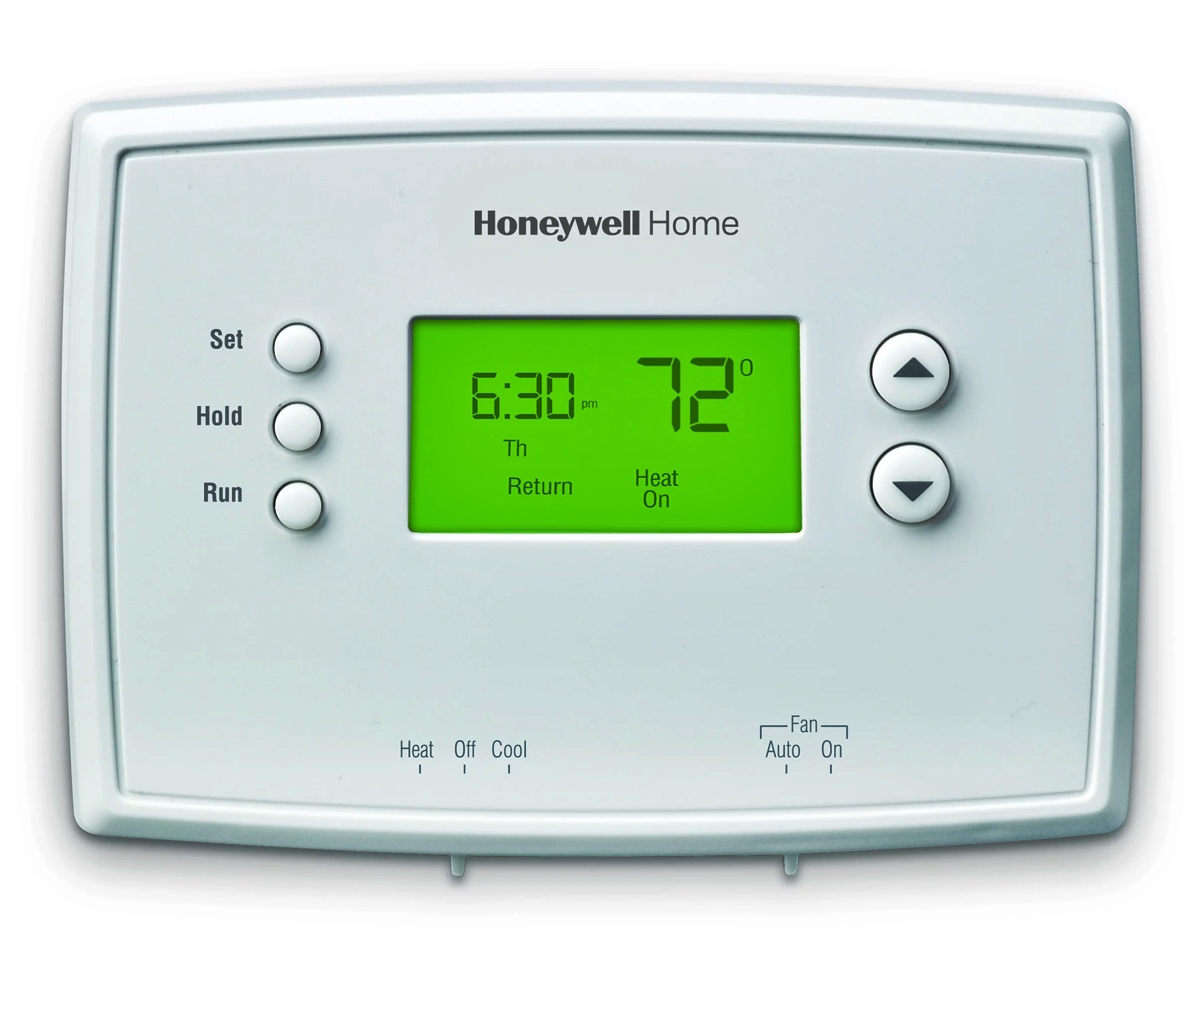
- Set the desired temperature: On the newly installed thermostat, adjust the temperature settings to your desired comfort level. This will activate the heating system.
- Check for heat: Carefully monitor the baseboard heater to see if it starts producing heat. It may take a few moments for the heat to kick in, so be patient. If the heater remains cold, double-check the wiring connections and consult the thermostat’s troubleshooting guide.
- Test the thermostat’s functionality: Explore all the functions and settings of the thermostat, such as adjusting the temperature, setting timers or schedules, and activating any additional features it may have. Ensure that the thermostat is responding accurately to your commands.
- Verify temperature accuracy: Use a separate thermometer (such as a digital or analog one) to check the temperature near the baseboard heater. Compare this reading with the temperature displayed on the thermostat. They should be relatively close, providing an accurate reading and controlling the heating system effectively.
If everything is functioning properly, well done! You have successfully installed and tested your new electric baseboard heater thermostat. Enjoy the enhanced temperature control and energy efficiency it brings to your home.
However, if you encounter any issues during the testing phase or notice any irregularities, refer to the owner’s manual or seek professional assistance to diagnose and rectify the problem.
Remember, safety is paramount when working with electrical components. If at any point during the installation or testing process you feel unsure or uncomfortable, it’s recommended to consult a professional electrician.
With the thermostat successfully installed and tested, you can now sit back, relax, and enjoy a comfortably heated space in your home.
Read more: How To Hang Curtains With Baseboard Heaters
Conclusion
Congratulations on successfully installing an electric baseboard heater thermostat! By following the step-by-step guide, you’ve taken control of your home’s heating system and improved energy efficiency. Here’s a recap of the installation process:
- Gather the necessary tools and materials.
- Turn off the power to the baseboard heater.
- Remove the old thermostat.
- Prep the wiring by inspecting and stripping the wire ends.
- Install the new thermostat onto the mounting plate.
- Connect the wiring using the provided wiring diagram.
- Mount the thermostat securely onto the plate.
- Power on the thermostat and test its functionality.
Throughout the installation process, remember to prioritize safety and double-check your work to ensure proper connections and insulation. It’s always recommended to consult the owner’s manual provided with your thermostat and seek professional help if needed.
By installing an electric baseboard heater thermostat, you can enjoy the convenience of adjusting the temperature to your desired level, leading to increased comfort and energy savings in your home. The thermostat allows you to efficiently manage your heating system, ensuring that it runs only when necessary.
Remember, maintaining a comfortable indoor temperature is essential for a cozy and inviting living space, and an electric baseboard heater thermostat is an excellent addition to achieve that.
Now that you’ve successfully installed your new thermostat, sit back, relax, and enjoy the benefits of a well-regulated heating system. Stay cozy and warm throughout the seasons while reducing energy consumption and costs.
Thank you for following along with this guide, and we hope that it has been helpful in your thermostat installation journey. If you have any other questions or need further assistance, don’t hesitate to seek professional help or refer back to the owner’s manual of your specific thermostat model.
Frequently Asked Questions about How To Install An Electric Baseboard Heater Thermostat
Was this page helpful?
At Storables.com, we guarantee accurate and reliable information. Our content, validated by Expert Board Contributors, is crafted following stringent Editorial Policies. We're committed to providing you with well-researched, expert-backed insights for all your informational needs.
0 thoughts on “How To Install An Electric Baseboard Heater Thermostat”