
Articles
How To Put Electrical Box In Drywall
Modified: December 7, 2023
Learn how to put an electrical box in drywall with our informative articles. Step-by-step guides and helpful tips to ensure a safe and efficient installation.
(Many of the links in this article redirect to a specific reviewed product. Your purchase of these products through affiliate links helps to generate commission for Storables.com, at no extra cost. Learn more)
Introduction
When it comes to electrical installations, one common task that homeowners may encounter is putting an electrical box in drywall. An electrical box, also known as a junction box, is a crucial component that provides a safe and secure enclosure for electrical connections. Whether you’re installing a new light fixture, an outlet, or any other electrical device, knowing how to properly put an electrical box in drywall is essential.
This article will guide you through the step-by-step process of installing an electrical box in drywall. We’ll cover everything from determining the placement of the box to testing the electrical connection once the installation is complete. By following these instructions, you can ensure a safe and professional-looking installation.
Before we begin, it’s important to note that working with electricity can be dangerous if not done properly. If you’re not confident in your abilities, it’s always a good idea to hire a licensed electrician to perform the installation. Safety should be the top priority when dealing with electrical work. With that said, let’s dive into the steps to install an electrical box in drywall.
Key Takeaways:
- Safely and effectively install an electrical box in drywall by following step-by-step guidelines, ensuring proper placement, secure installation, and thorough testing for a successful DIY electrical project.
- Prioritize safety and consider hiring a professional electrician for complex tasks, while mastering the skill of putting an electrical box in drywall to tackle various electrical projects with confidence and efficiency.
Step 1: Determine the Placement of the Electrical Box
The first step in installing an electrical box in drywall is to determine the ideal placement for the box. This will depend on the specific electrical device you’re installing, such as an outlet or a switch. Here are a few key considerations to keep in mind:
- Building codes: Familiarize yourself with local building codes that dictate the placement of electrical boxes. These codes may specify the required height from the floor, the distance between electrical boxes, and other important guidelines.
- Accessibility: Ensure that the electrical box will be easily accessible once the device is installed. It should be at a convenient height for using or plugging in electrical appliances.
- Stud location: To ensure a secure installation, it’s best to place the electrical box near a wall stud. Studs are vertical wooden beams behind the drywall that provide structural support. Use a stud finder or tap on the wall to locate the studs.
- Clearance: The electrical box should have enough clearance around it to accommodate the device you’re installing. For example, if you’re installing an outlet, make sure there is enough space for the plug to fit without obstruction.
Once you’ve considered these factors, use a pencil to mark the desired location for the electrical box on the drywall. Double-check your measurements and ensure that it aligns with the guidelines set by local building codes. Take your time during this step to ensure accuracy, as it will dictate the success of the rest of the installation process.
Once you have determined the placement of the electrical box and marked it on the drywall, you’re ready to move on to the next step: cutting a hole in the drywall.
Step 2: Mark the Location on the Drywall
After determining the ideal placement for the electrical box, the next step is to mark the location on the drywall. This will serve as a guide for cutting the hole in the next step. Follow these steps to accurately mark the location:
- Measure the dimensions of the electrical box: Using a tape measure, determine the width and height of the electrical box. These measurements will help you create an accurate marking on the drywall.
- Use a level: Place a level against the wall, aligning it with the vertical line where you want to install the electrical box. This will ensure that the box is correctly positioned and avoids any crooked installations.
- Mark the outline: Using a pencil, mark the outline of the electrical box on the drywall. Start with the top and bottom edges, making sure to align them with the level line. Then mark the sides, enclosing the space where the box will be placed.
- Double-check your markings: Take a moment to carefully review the markings you made. Confirm that they are accurate and align with your desired placement for the electrical box. Adjust if necessary.
By marking the location on the drywall, you create a clear visual guide for the next step of cutting a hole in the wall. Take your time during this step to ensure precision and accuracy.
Once you have marked the location on the drywall, you’re ready to proceed to step 3: cutting a hole in the drywall to accommodate the electrical box.
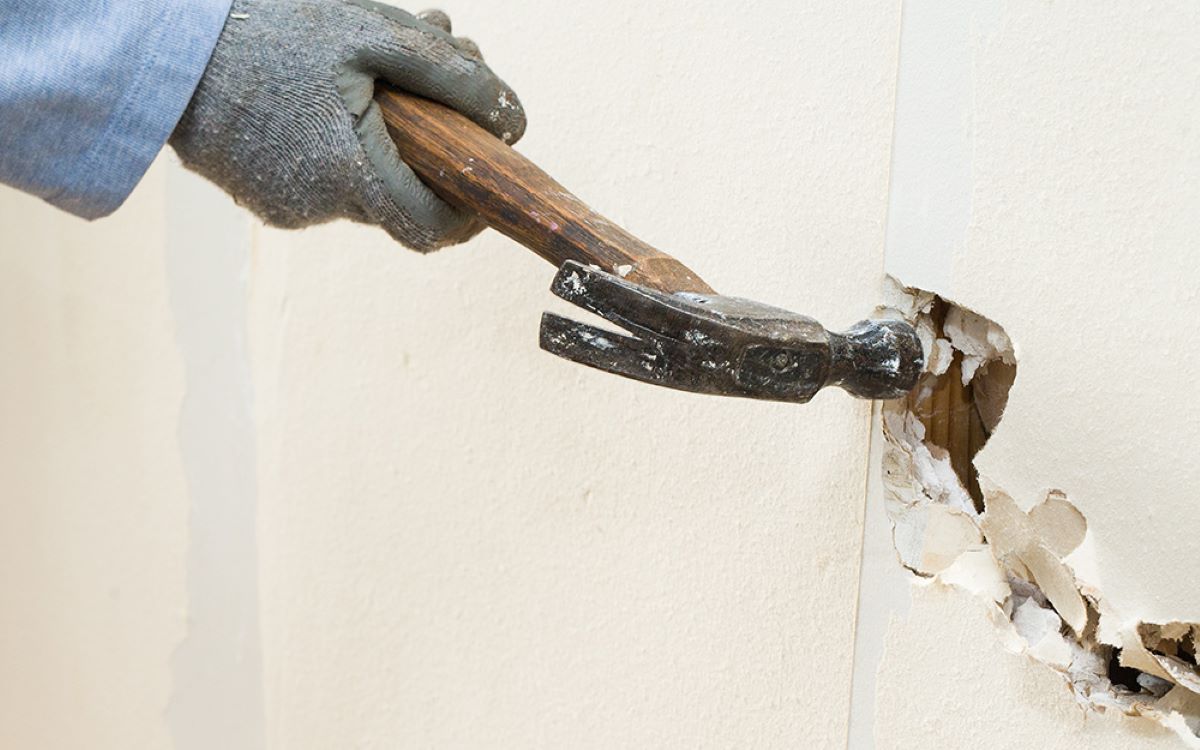
Step 3: Cut a Hole in the Drywall
Now that you’ve marked the location of the electrical box on the drywall, it’s time to cut a hole to accommodate the box. Follow these steps to cut a clean and precise hole:
- Gather the necessary tools: To cut the hole, you’ll need a drywall saw or a keyhole saw. Additionally, grab a utility knife, a pencil, and a pair of safety goggles for eye protection.
- Start with a pilot hole: Using a utility knife, carefully score the outline of the electrical box that you marked on the drywall. This will provide a starting point for cutting with the saw.
- Use the saw to cut the hole: Insert the blade of the saw into the scored section of the drywall and start cutting along the marked outline. Take your time and use steady, smooth movements to ensure a clean cut. Keep the saw within the marked lines and be cautious not to cut beyond the lines or damage any electrical wiring behind the drywall.
- Remove the cut piece: Once you’ve cut along the entire outline, gently push the cut section of the drywall inward to detach it from the wall. Set it aside, as you may need it for patching later on.
- Check the size of the hole: With the hole cut, verify that it is the correct size to accommodate the electrical box. The box should fit snugly into the hole without any gaps. Trim the edges if necessary for a better fit.
Remember to wear safety goggles throughout the cutting process to protect your eyes from any debris. Additionally, be cautious and take your time to avoid any accidents or damage to the drywall or electrical components.
With the hole successfully cut, it’s time to move on to step 4: installing the electrical box into the drywall.
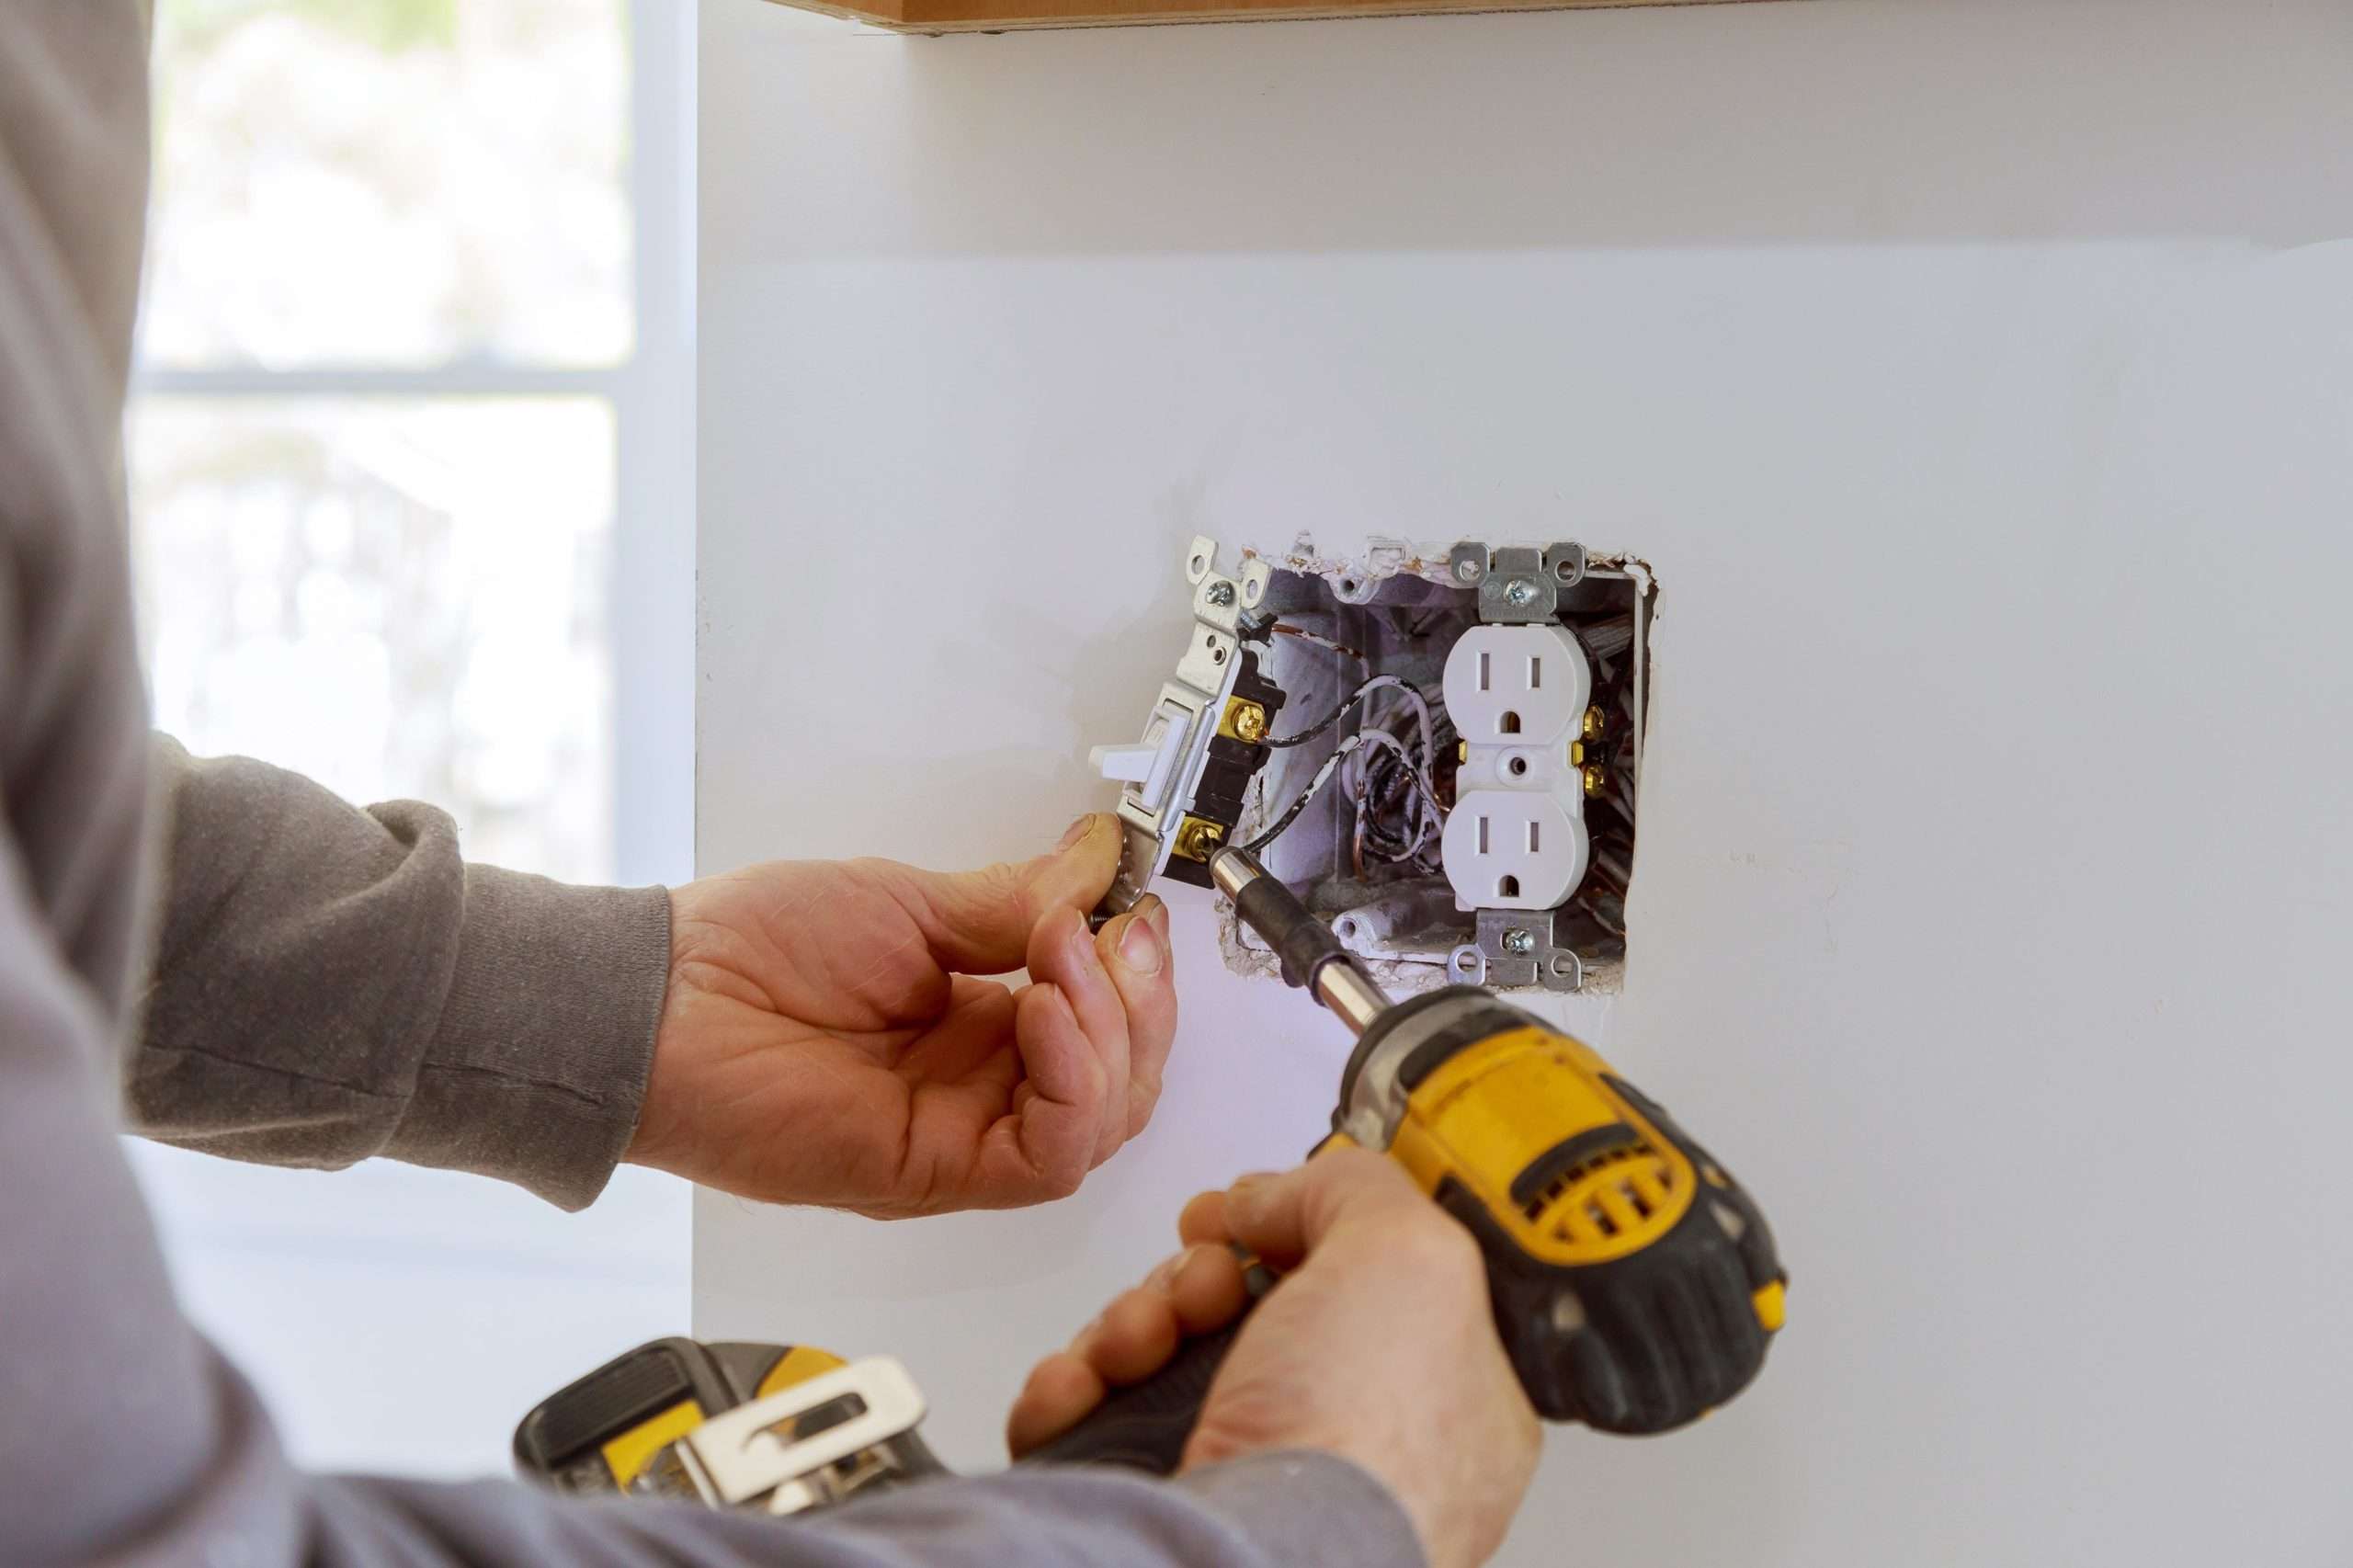
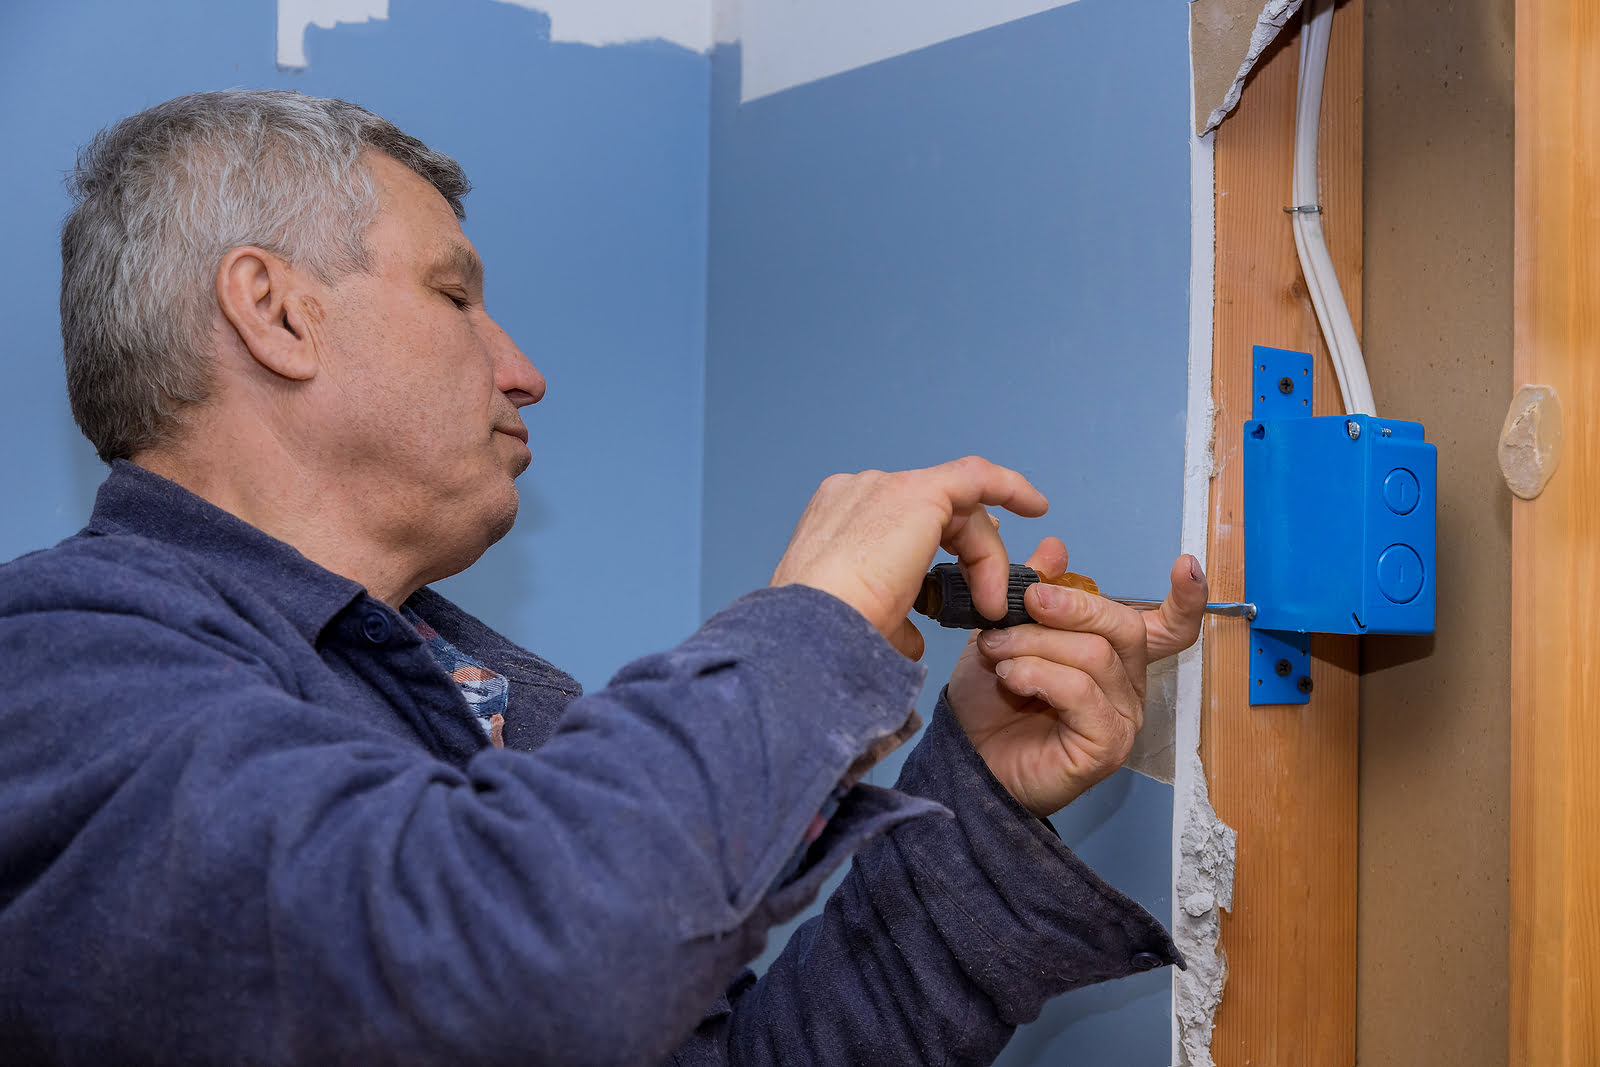
Step 4: Install the Electrical Box
After cutting the hole in the drywall, it’s time to install the electrical box. The electrical box serves as a secure enclosure for the electrical connections. Follow these steps to properly install the box:
- Position the box: Hold the electrical box against the hole in the drywall, ensuring that it is aligned with the opening. The box should be flush with the surface of the wall, with the mounting holes in the box lining up with the edges of the hole.
- Secure the box: Once the box is properly positioned, use screws or nails to secure it to the drywall. Drive the screws or nails through the mounting holes on the box and into the surrounding drywall. Make sure the box is tightly secured and does not wobble or move.
- Check for stability: Give the box a gentle shake to check its stability. It should be firmly attached to the drywall without any movement. If it feels loose, tighten the screws or nails further.
It’s important to ensure the electrical box is securely fastened to the drywall, as it will provide the foundation for the rest of the electrical installation. A stable and properly installed box will ensure the safety of both the electrical connections and the wall structure.
With the electrical box successfully installed, you’re ready to move on to step 5: connecting the wiring to the electrical box.
When installing an electrical box in drywall, use a stud finder to locate a stud for secure mounting. Trace the outline of the box, then carefully cut out the drywall using a keyhole saw. Ensure the box is flush with the wall and secure it in place with screws.
Read more: How To Put Up Drywall In Concrete Basement
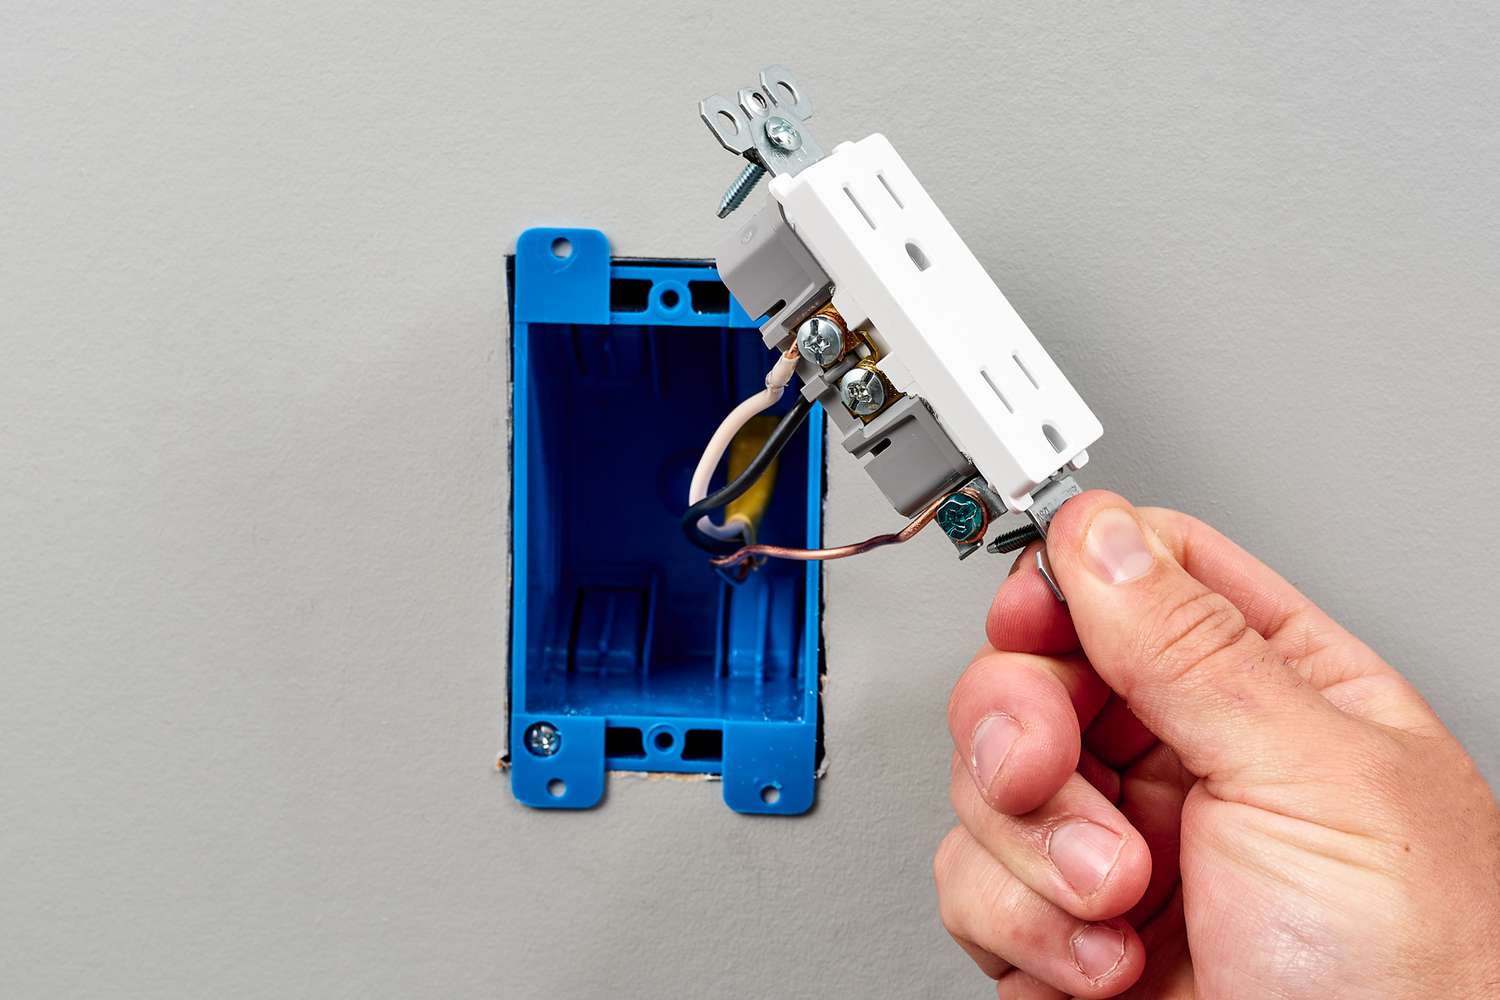
Step 5: Connect the Wiring to the Electrical Box
Now that the electrical box is installed, it’s time to connect the wiring to the box. This step involves making proper electrical connections to power the device you’re installing. Follow these steps to safely connect the wiring:
- Gather the necessary tools: Before you begin, gather wire cutters, wire strippers, electrical tape, and wire nuts.
- Prepare the wires: If necessary, strip the outer insulation of the electrical wires to expose the inner conductors. Use wire strippers and carefully follow the instructions or gauge markings on the strippers to achieve the correct strip length.
- Connect the wires: Start by connecting the black (hot) wire to the brass-colored screw terminal on the electrical box. This wire carries the electrical current. Loosen the screw terminal, insert the stripped end of the wire, and tighten the screw securely. Repeat the same process for the white (neutral) wire, connecting it to the silver-colored screw terminal. Finally, connect the bare copper or green wire (ground) to the green screw terminal or grounding screw in the box.
- Secure the connections: After making the connections, twist a wire nut over each set of connected wires. This will securely hold the wires together and protect the electrical connections. Wrap electrical tape around the base of each wire nut for additional insulation and safety.
- Double-check the connections: Carefully inspect each connection to ensure that they are properly secured and none of the wire strands are exposed. If necessary, adjust the connections or tighten the wire nuts further.
Remember to handle the wiring with caution and make sure the power is turned off at the main electrical panel before making any connections. If you’re unsure about the wiring or electrical connections, it is highly recommended to consult a licensed electrician for assistance.
With the wiring successfully connected to the electrical box, you’re ready to move on to step 6: securing the electrical box in the drywall.
Step 6: Secure the Electrical Box in the Drywall
Now that the wiring is connected to the electrical box, it’s important to ensure that the box is securely fastened to the drywall. This step will help maintain the stability of the installation and prevent any movement or damage. Follow these steps to properly secure the electrical box in the drywall:
- Insert any screws or nails: If your electrical box has additional screw or nail slots, use them to reinforce the box’s attachment to the drywall. Insert the screws or nails into the appropriate slots and drive them into the wall until they are secure.
- Add support brackets: For larger or heavier electrical devices, it may be necessary to add additional support brackets to hold the box in place. Attach these brackets to the electrical box and secure them to the adjacent wall studs using screws.
- Test the stability: After securing the electrical box with screws, nails, or support brackets, give it a gentle shake to check its stability. The box should be firmly attached to the drywall without any movement. If it feels loose, ensure that all screws and brackets are properly tightened.
Securing the electrical box in the drywall is crucial to maintaining the integrity of the installation. A stable and securely fastened box ensures the safety of both the electrical connections and the surrounding wall structure.
With the electrical box securely in place, you’re ready to move on to step 7: testing the electrical connection to ensure it is working properly.
Step 7: Test the Electrical Connection
After completing the installation of the electrical box and connecting the wiring, it’s essential to test the electrical connection to ensure everything is working properly. This step will verify that the device you installed is receiving power and functioning as expected. Follow these steps to test the electrical connection:
- Turn on the power: If you had turned off the power at the main electrical panel during the installation process, now is the time to turn it back on. Flip the corresponding circuit breaker to restore power to the area where the electrical box is installed.
- Perform a visual inspection: Carefully examine the electrical box and the connected device for any signs of damage or loose connections. Ensure that all wire nuts are properly secured and that there are no exposed wires. Additionally, check for any unusual smells or visible sparks.
- Test the device: If you installed an outlet, plug in a small electrical device such as a lamp or phone charger to test if it receives power. If you installed a switch, turn it on and off to verify its functionality. Confirm that the device is operating as intended.
- Check for proper grounding: If you installed a device that requires grounding, such as a three-prong outlet, use a grounding tester or a multimeter to ensure that the grounding wire is properly connected and providing a reliable ground connection.
- Consult a professional if necessary: If you encounter any issues during the testing process, or if the device is not functioning correctly, it is best to consult a licensed electrician. They will have the expertise to diagnose and resolve any electrical issues safely.
Testing the electrical connection is a crucial final step to ensure that the installation is successful and that the device is receiving proper power. It provides peace of mind and ensures the safety and functionality of the electrical installation.
With the electrical connection successfully tested, you have completed the process of putting an electrical box in drywall. Congratulations!
Conclusion
Putting an electrical box in drywall is an essential skill for any homeowner or DIY enthusiast. By following the step-by-step process outlined in this article, you can safely and effectively install an electrical box to accommodate various devices such as outlets, switches, or light fixtures.
Remember to always prioritize safety when working with electricity. If you’re unsure about any step of the installation process or if you encounter any electrical issues, it’s best to consult a licensed electrician. Their expertise and knowledge will help ensure a successful and safe installation.
To recap, the process of putting an electrical box in drywall includes determining the placement of the box, marking the location on the drywall, cutting a hole in the drywall, installing the electrical box, connecting the wiring to the box, securing the box in the drywall, and testing the electrical connection.
A properly installed and secure electrical box will provide a safe and reliable encasing for your electrical connections. It allows you to power and operate devices efficiently while maintaining the integrity of your walls.
Remember, if you’re not confident in your abilities or if you’re dealing with complex electrical installations, it’s always recommended to hire a professional electrician. They have the experience and knowledge to handle intricate electrical tasks and ensure the highest level of safety.
By mastering the skill of putting an electrical box in drywall, you can tackle a variety of electrical projects in your home. With attention to detail and a commitment to safety, you’ll be well-equipped to handle your electrical installation needs effectively.
So, whether you’re adding new outlets to your living room or installing a light switch in the hallway, use this guide as your go-to resource for installing electrical boxes in drywall. Happy DIYing!
Frequently Asked Questions about How To Put Electrical Box In Drywall
Was this page helpful?
At Storables.com, we guarantee accurate and reliable information. Our content, validated by Expert Board Contributors, is crafted following stringent Editorial Policies. We're committed to providing you with well-researched, expert-backed insights for all your informational needs.


0 thoughts on “How To Put Electrical Box In Drywall”