Articles
How To Install Granite Countertops
Modified: March 1, 2024
Learn how to install granite countertops with our informative articles. Discover step-by-step guides and expert tips for a flawless installation.
(Many of the links in this article redirect to a specific reviewed product. Your purchase of these products through affiliate links helps to generate commission for Storables.com, at no extra cost. Learn more)
Introduction
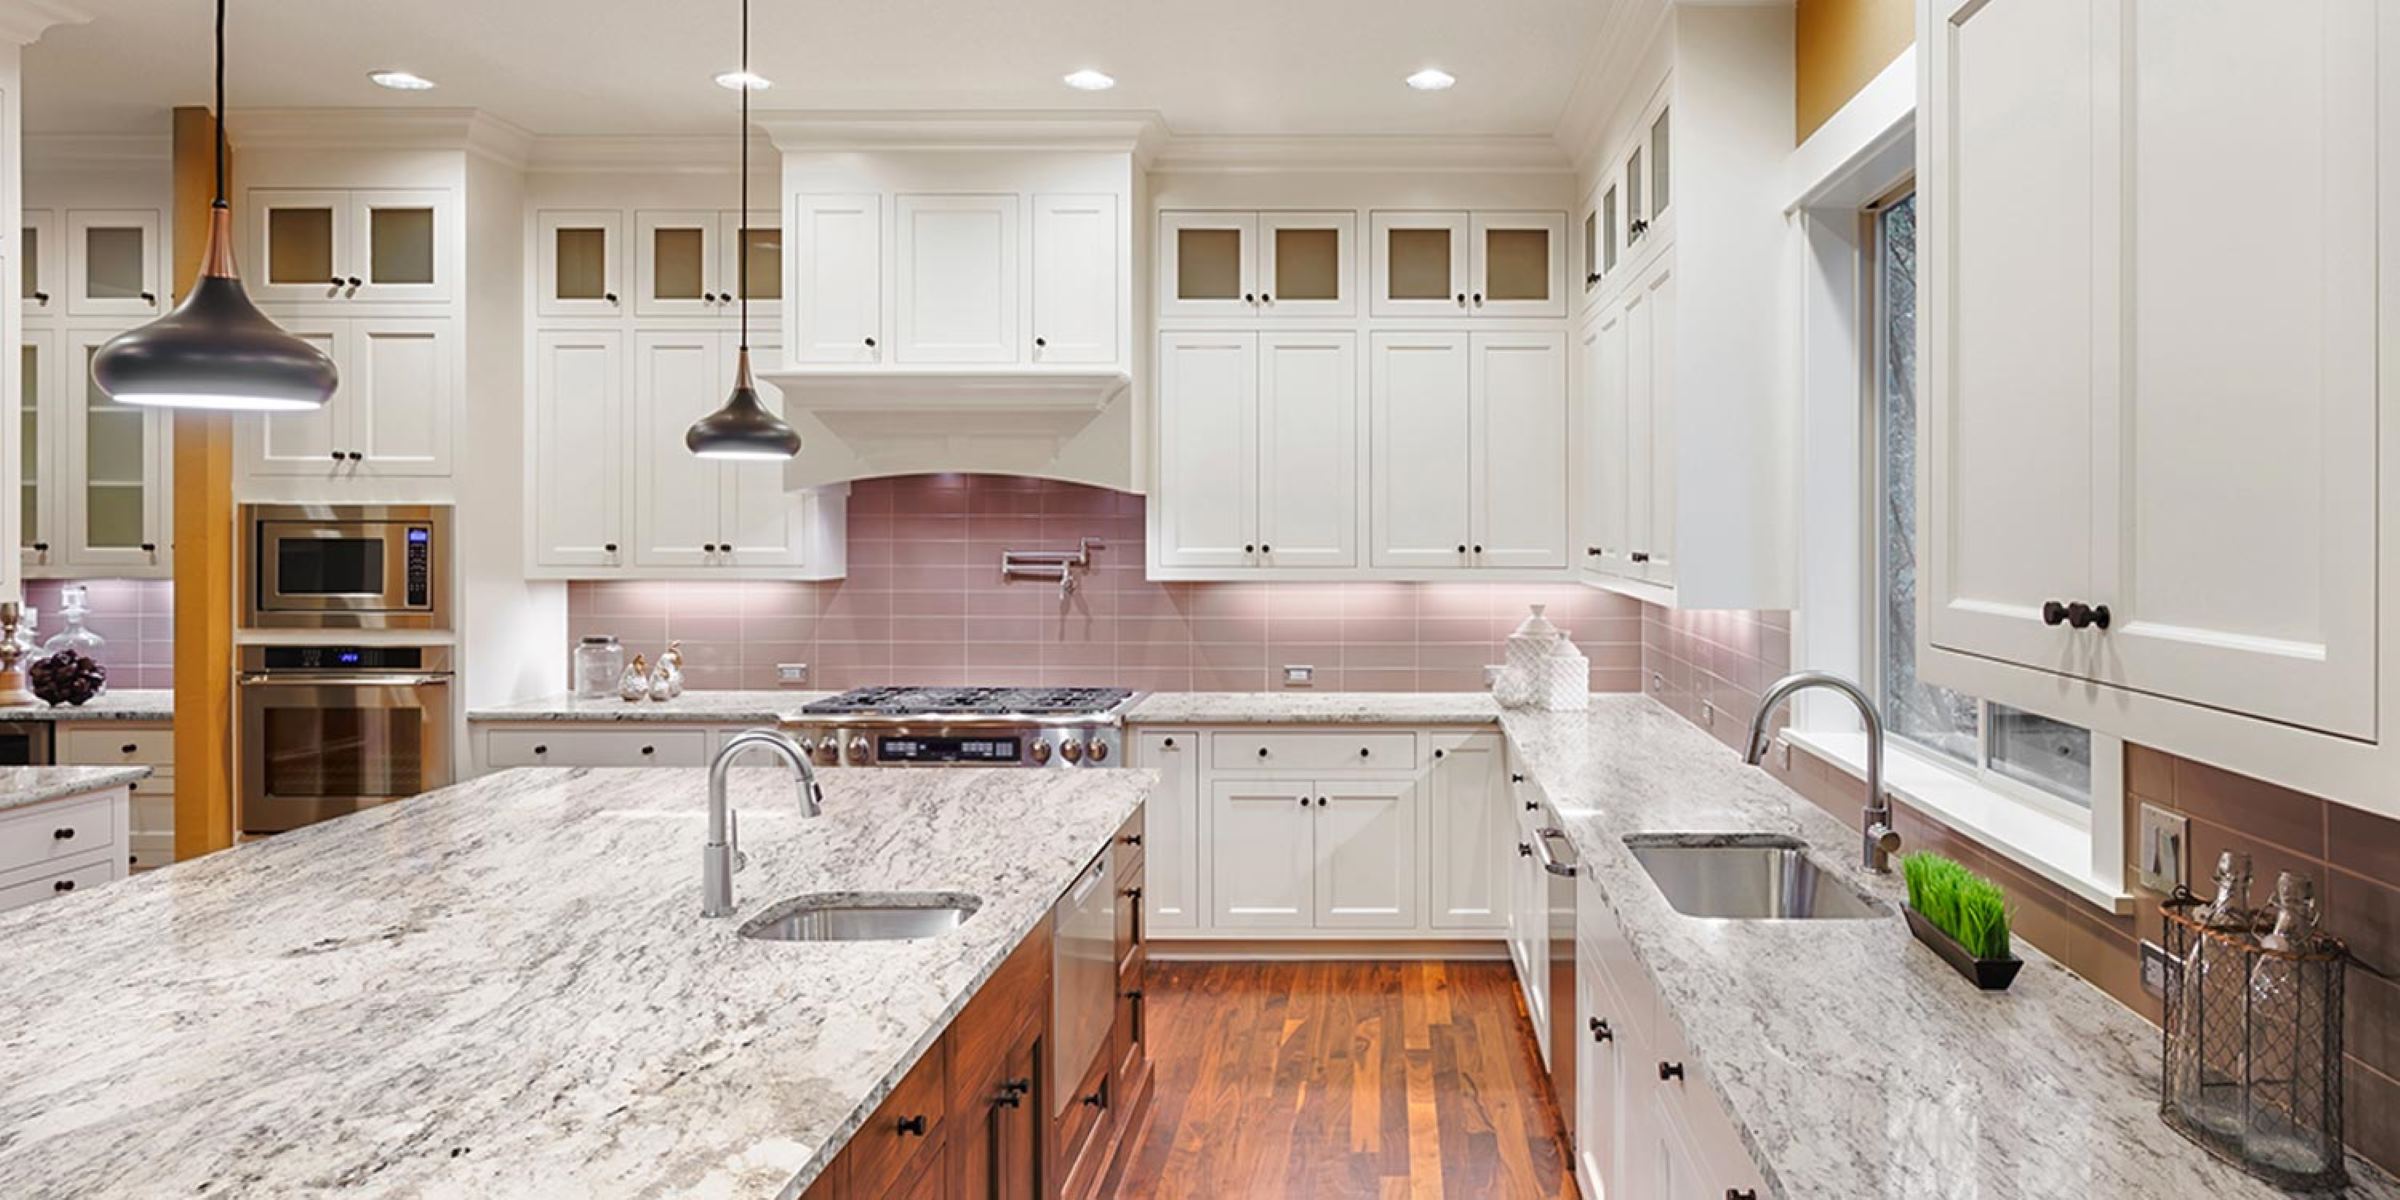
Installing granite countertops can be a fantastic way to enhance the beauty and functionality of your kitchen or bathroom. Granite is a natural stone that is known for its durability, heat resistance, and stunning aesthetics. Moreover, it adds a touch of elegance and sophistication to any space where it is installed. While hiring a professional to install granite countertops is an option, it can be quite expensive. If you are handy and willing to put in some effort, you can save money by installing the countertops yourself.
In this article, we will guide you through the step-by-step process of installing granite countertops in your home. Whether you choose to install them in your kitchen or bathroom, these steps will help you achieve professional-looking results that you can be proud of. So, roll up your sleeves, grab your tools, and let’s get started!
Key Takeaways:
- Installing granite countertops requires careful measurement, precise cutting, and proper sealing. By following the step-by-step guide, you can achieve a professional-looking result and enjoy the beauty and functionality of granite in your home.
- Safety, patience, and attention to detail are essential when installing granite countertops. From gathering materials to completing the final touches, taking the time to do it right will result in stunning and long-lasting countertops.
Read more: How To Install Cooktop On Granite Countertop
Step 1: Gathering Materials
Before you begin the installation process, it is crucial to gather all the necessary materials and tools. Having everything ready beforehand will ensure a smooth and efficient installation process. Here are the materials and tools you will need:
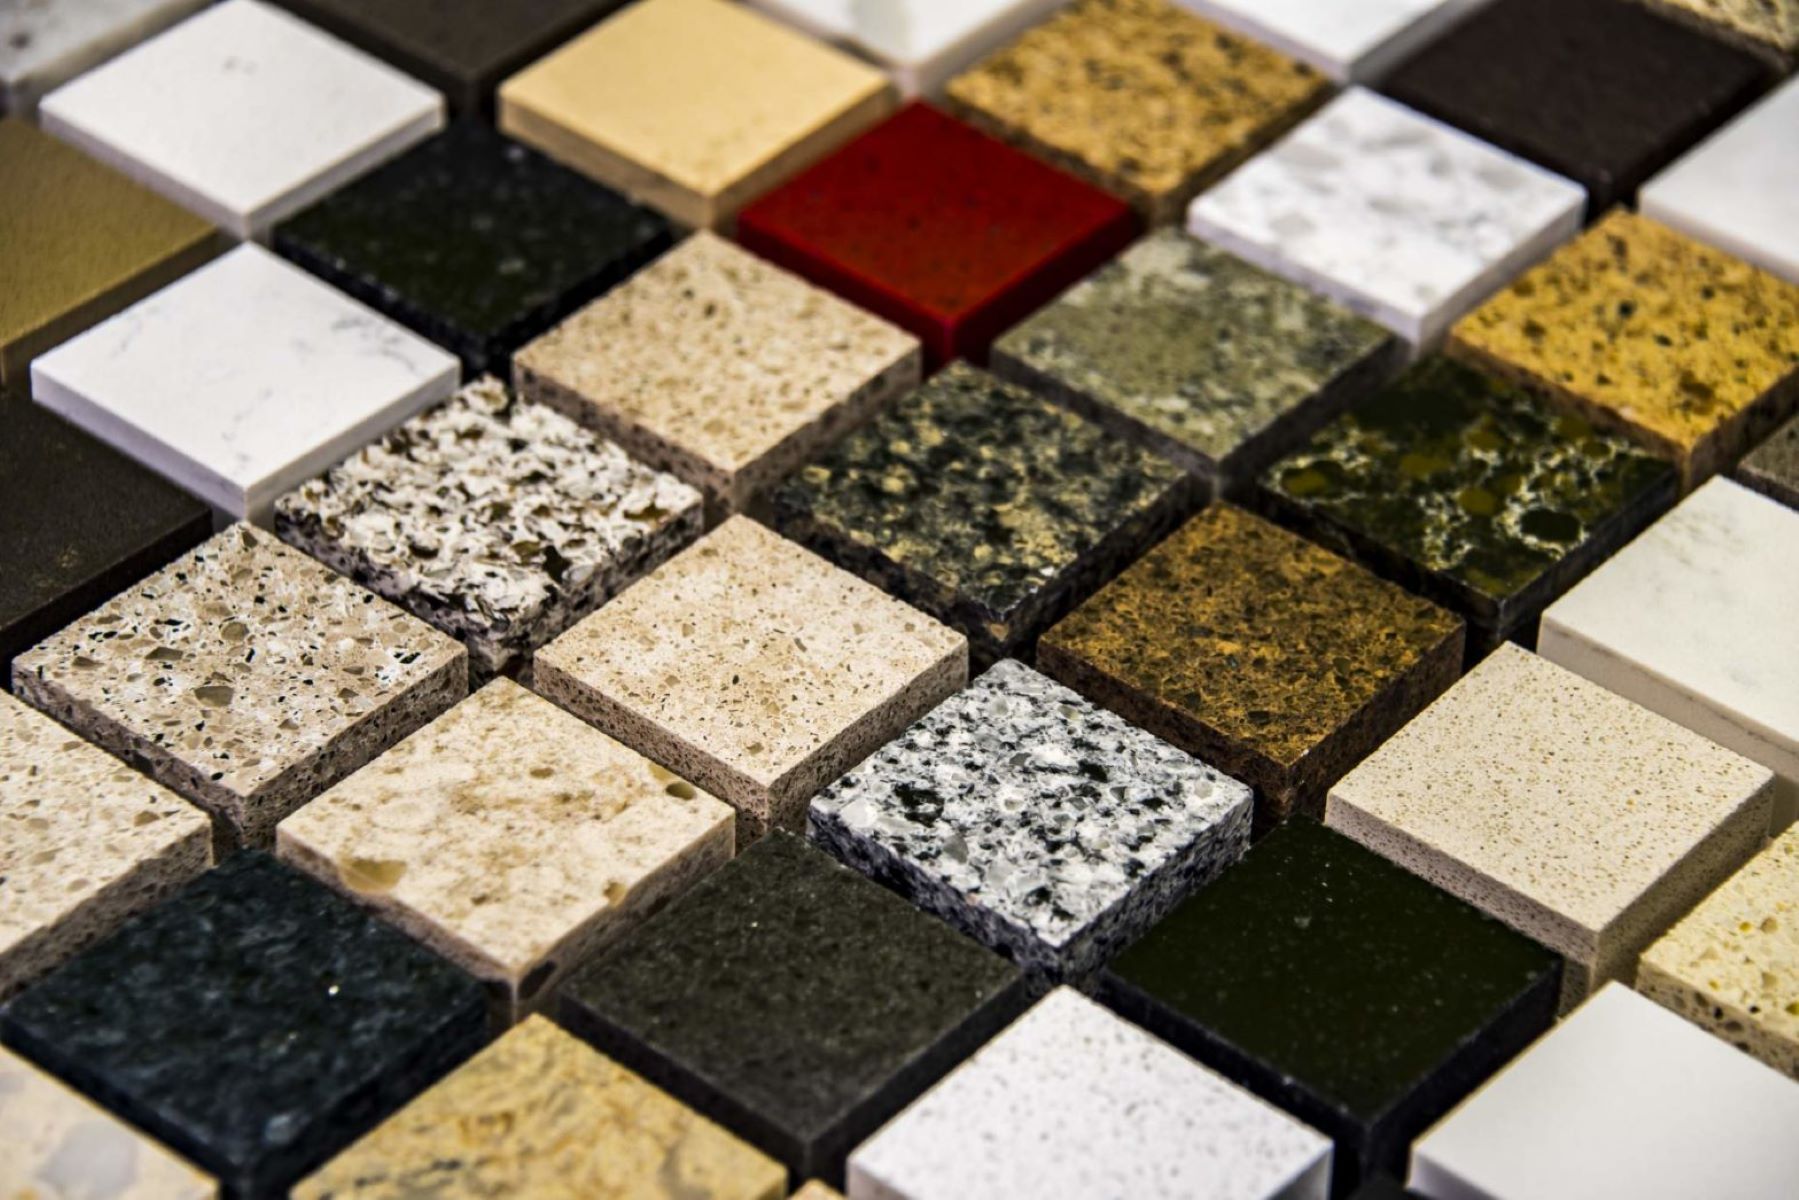
- Granite countertops: Measure the dimensions of your countertop area accurately and purchase granite slabs accordingly. Make sure to consider any cutouts for sinks or cooktops.
- Plywood or backer board: This will serve as the base for the granite countertops.
- Construction adhesive: Choose a high-quality adhesive that is suitable for granite installation.
- Level: A level tool will help you ensure that the countertops are installed evenly and leveled.
- Router with a diamond blade: You will need a router to cut the sink and cooktop openings in the granite slabs.
- Jigsaw: A jigsaw with a diamond blade will be used to make any additional cuts on the granite countertops, if needed.
- Caulk: Purchase a caulk that matches the color of your granite countertops to seal any gaps and create a clean finish.
- Screws and screwdriver: You will need screws to secure the plywood or backer board to the cabinets.
- Sealer: It is essential to have a high-quality sealer to protect and maintain the beauty of your granite countertops.
- Appropriate safety gear: Safety goggles, gloves, and a dust mask are necessary to protect yourself during the installation process.
Once you have gathered all the materials and tools, ensure that you have a clear workspace and enough room to maneuver the granite slabs safely. It is also recommended to have a helper to assist with lifting and positioning the heavy countertops during the installation.
Step 2: Measuring the Countertop Area
Accurate measurements are crucial for a successful granite countertop installation. Before you start cutting the granite slabs, it is essential to measure the countertop area accurately. Here’s how you can do it:
- Clean the existing countertops: Remove any items or appliances from the existing countertops and ensure that they are clean and free from any debris.
- Place a masking tape: Start by placing a masking tape along the edges of the existing countertops. This will help protect the surface and provide a visual reference when measuring.
- Measure the length: Use a tape measure to measure the length of the countertop from one end to the other. Measure along the front edge of the countertops for accuracy.
- Measure the width: Measure the width of the countertops at various points to account for any irregularities or changes in width along the length of the countertop.
- Measure the overhang: If you want to have an overhang on the countertop, measure the desired overhang distance from the front edge of the cabinets.
- Measure any cutouts: If you have any sink or cooktop cutouts, measure the dimensions of the opening accurately.
- Write down the measurements: Note down all the measurements you have taken, making sure to label each measurement to avoid confusion. This will help you determine the size of the granite slabs you need.
It is recommended to double-check all your measurements before proceeding to the next step. Any inaccuracies in the measurements can lead to ill-fitting countertops and ruin the overall appearance of your installation. If you’re unsure about your measuring skills, consider consulting with a professional or seek assistance from a more experienced individual.
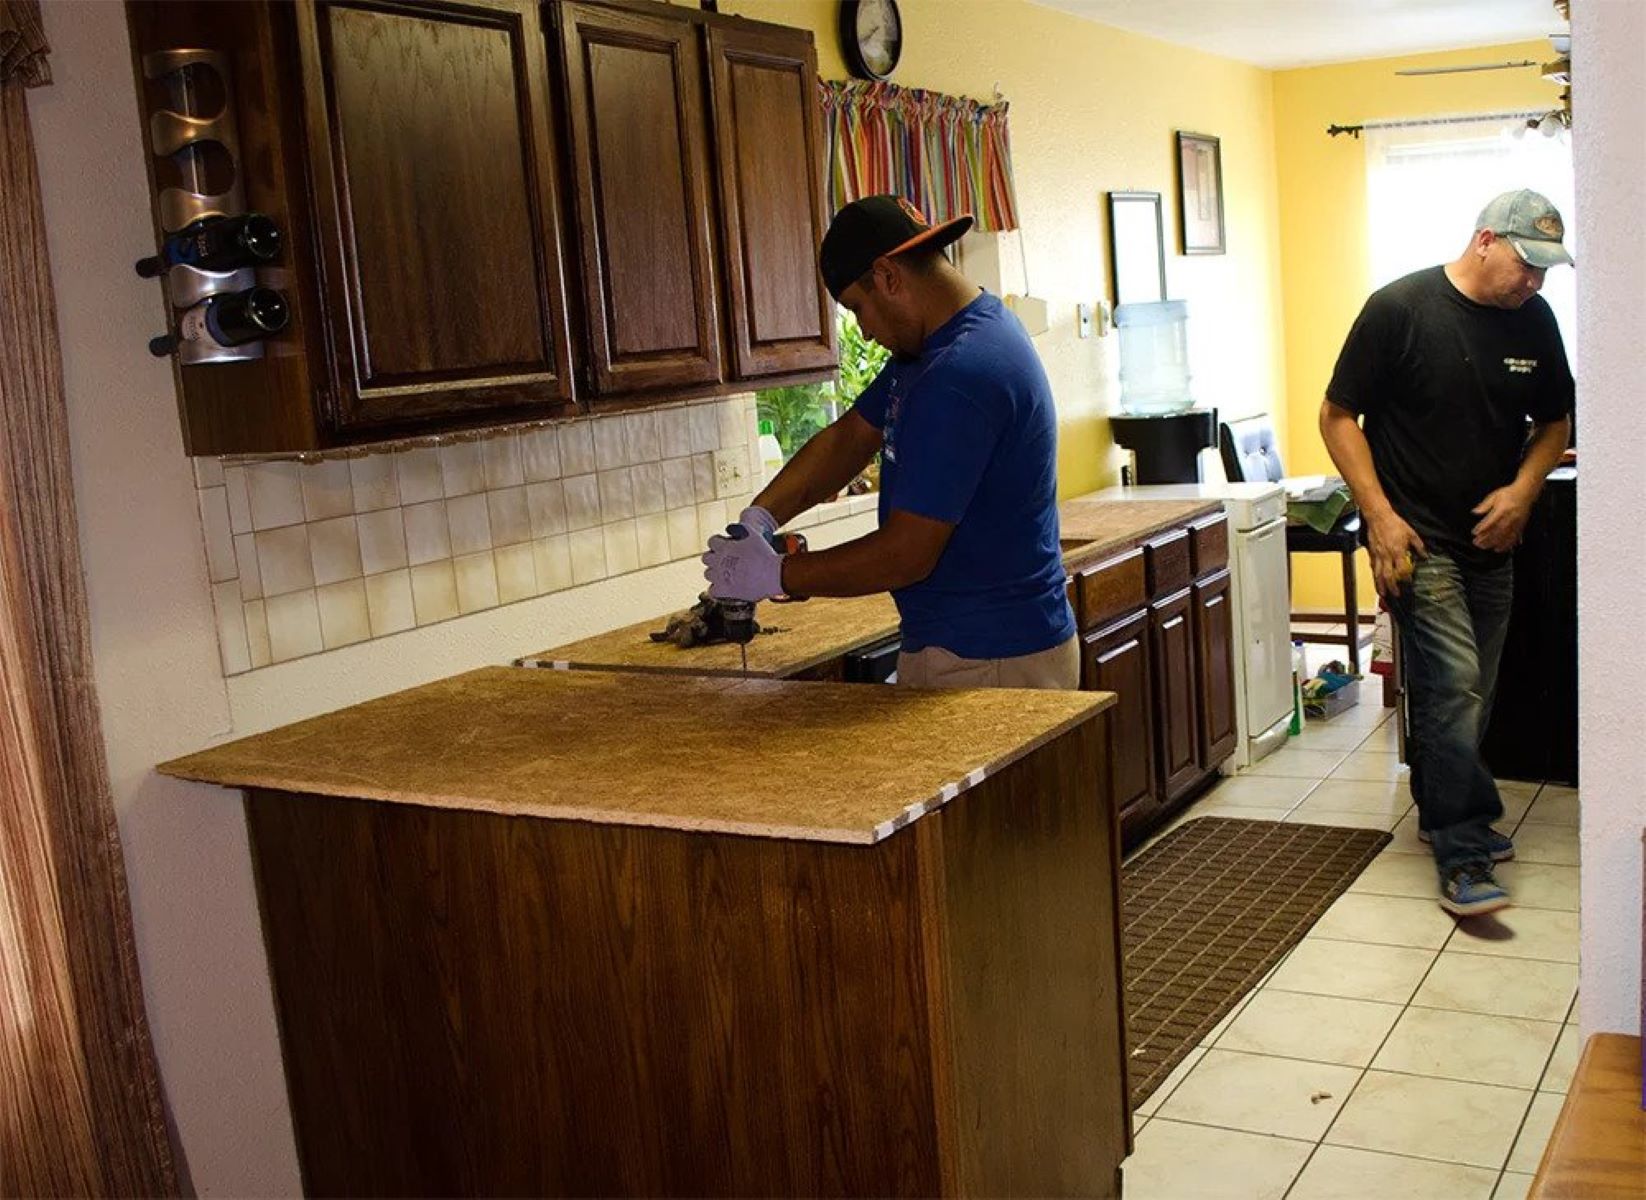
Step 3: Removing Existing Countertops
Before you can begin installing your new granite countertops, you need to remove the existing countertops. Here’s a step-by-step guide on how to do it:
- Turn off the water and disconnect the plumbing: If you’re removing countertops in your kitchen, start by turning off the water supply to the sink. Disconnect the plumbing connections, including the water lines and the drainpipes. Place a bucket or towels underneath to catch any water or debris.
- Remove any appliances or fixtures: If there are any appliances or fixtures attached to the countertops, such as a cooktop or sink, disconnect and remove them. Follow the manufacturer’s instructions for proper removal.
- Loosen and remove any fasteners: Most countertops are secured to the cabinets with screws or adhesive. In some cases, there might also be brackets or clips holding them in place. Use a screwdriver or drill to loosen and remove any fasteners or brackets.
- Cut through the caulking: To separate the countertops from the walls, use a utility knife or caulk removal tool to cut through the caulking along the edges. This will help release the countertops from the wall.
- Begin prying the countertops off: With the fasteners and caulking removed, gently start prying the countertops away from the cabinets. Use a pry bar or putty knife to carefully lift the countertops. If they’re stuck, apply gentle force or tap a rubber mallet to loosen them.
- Remove the countertops in sections: Depending on the size and weight of the countertops, it may be easier to remove them in sections. Use caution and have someone assist you if needed when lifting and carrying the sections out of the workspace.
- Clean the cabinets: Once the countertops are removed, take the time to clean and prepare the cabinets for the new installation. Remove any remaining debris or adhesive from the surface.
It’s important to handle the countertops with care during removal to prevent damage to the cabinets or walls. If you’re uncertain about removing the existing countertops yourself, it’s advisable to seek professional help to ensure a smooth and safe removal process.
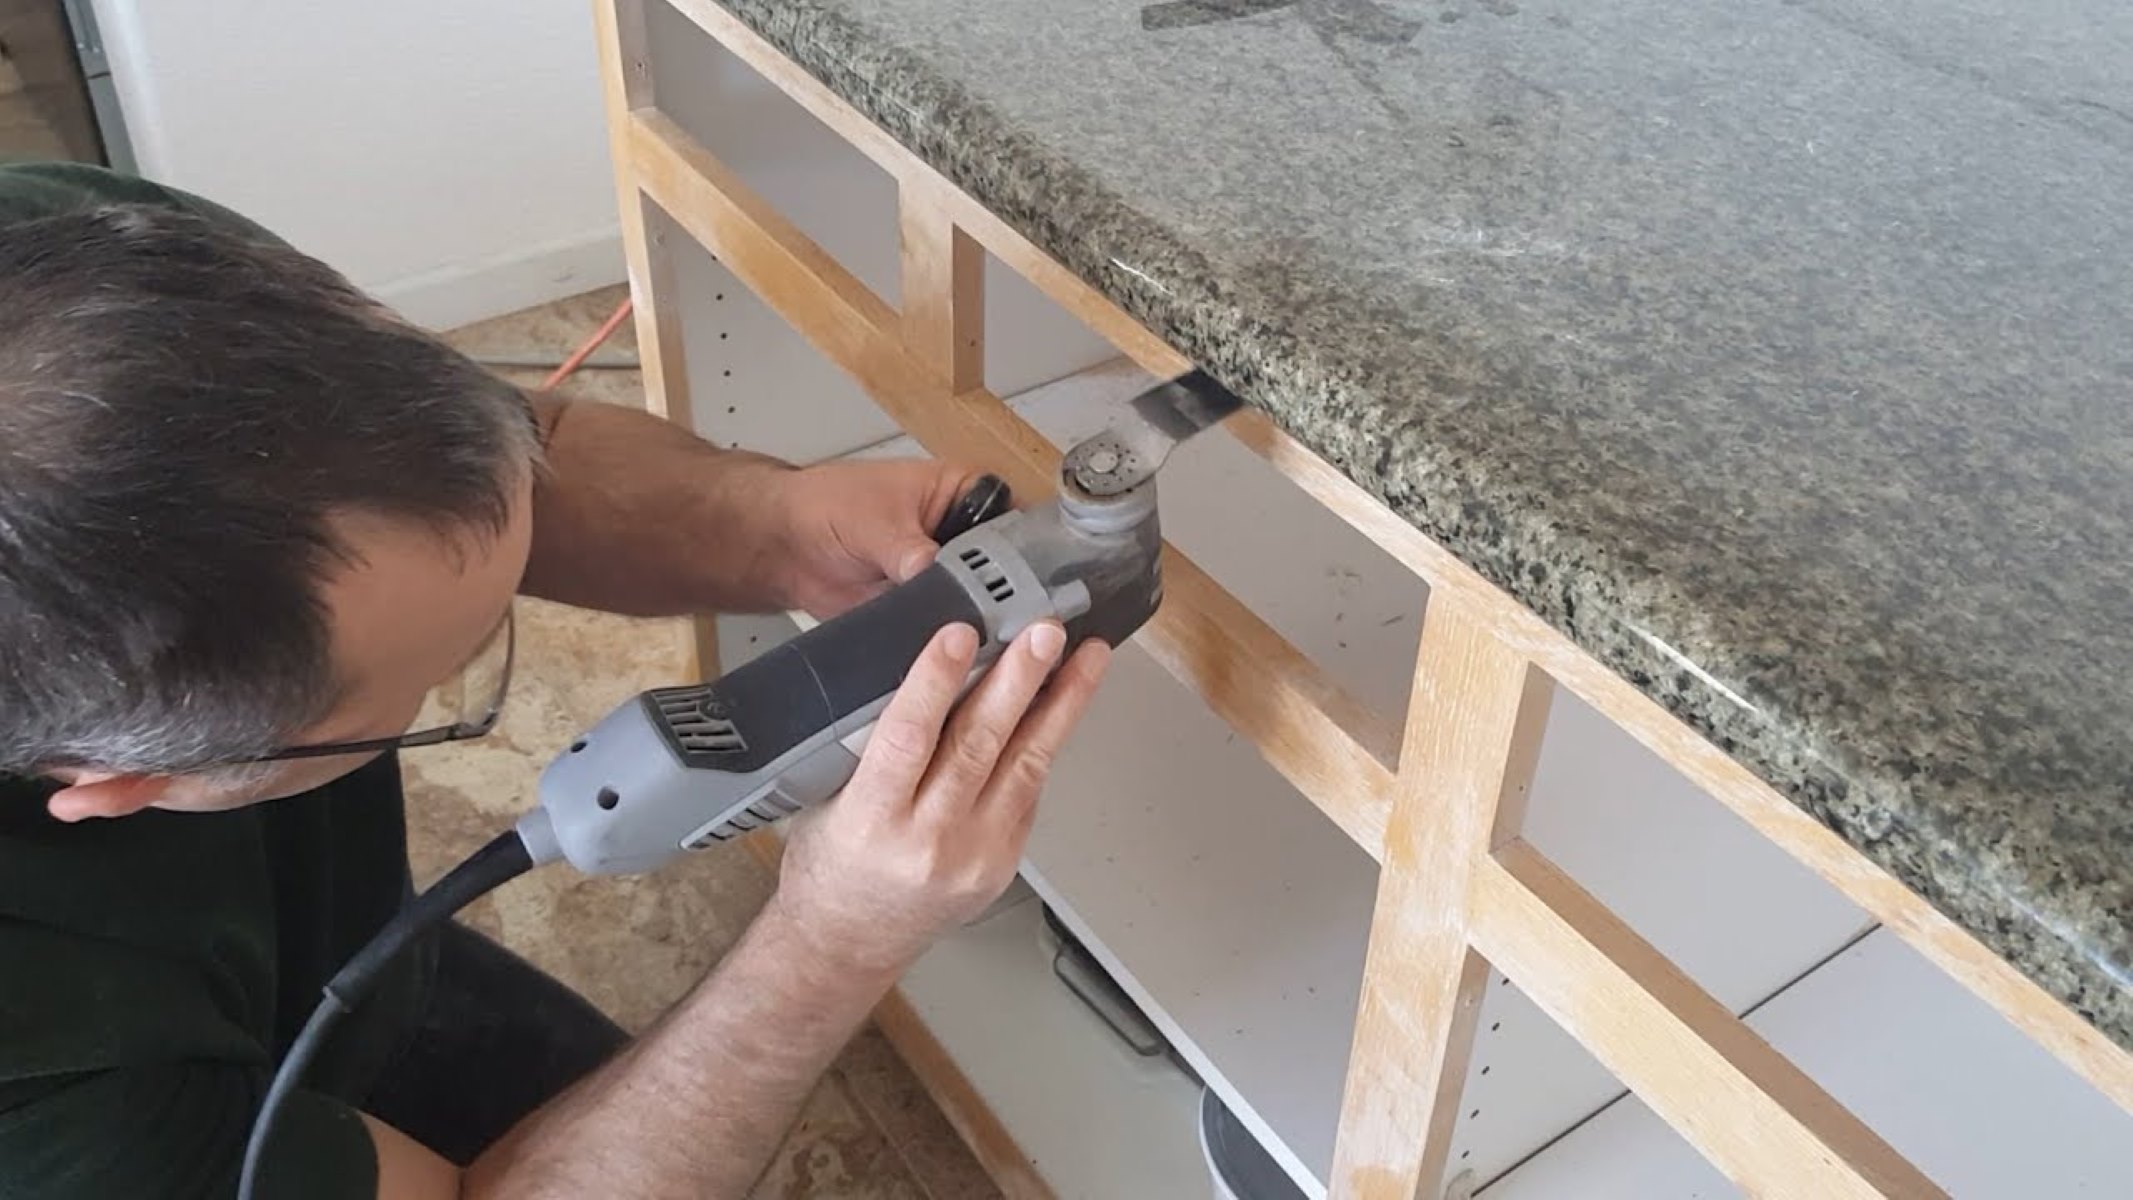
Step 4: Preparing the Base
Preparing the base is a crucial step in the installation process to ensure your granite countertops are stable and properly supported. Follow these steps to prepare the base:
- Inspect the cabinets: Before you begin, inspect the cabinets to ensure they are in good condition and able to support the weight of the granite countertops. Repair any loose or damaged areas as needed.
- Measure and cut the plywood or backer board: Measure the dimensions of your countertop area and cut the plywood or backer board to fit. The thickness of the plywood or backer board should match the thickness of your granite countertops.
- Position and secure the plywood or backer board: Place the cut plywood or backer board on top of the cabinets, ensuring it’s level and fits snugly. Secure it to the cabinets using screws, placing them every few inches along the edges and in the center for extra stability.
- Create a cutout for sink or cooktop: If you have a sink or cooktop, use a jigsaw to carefully cut out the appropriate opening in the plywood or backer board. Ensure the size and shape of the cutout match the specifications of your sink or cooktop.
- Seal the seams: Apply a bead of construction adhesive along the seams where the plywood or backer board meets. This will create additional stability and prevent any shifting in the future.
- Double-check the level: Use a level to ensure the plywood or backer board is even and level. Make any necessary adjustments if needed.
Preparing a solid and level base is vital for a successful granite countertop installation. Taking the time to properly secure the plywood or backer board will provide a strong foundation and prevent any uneven or unstable surfaces that may compromise the integrity of your countertops.
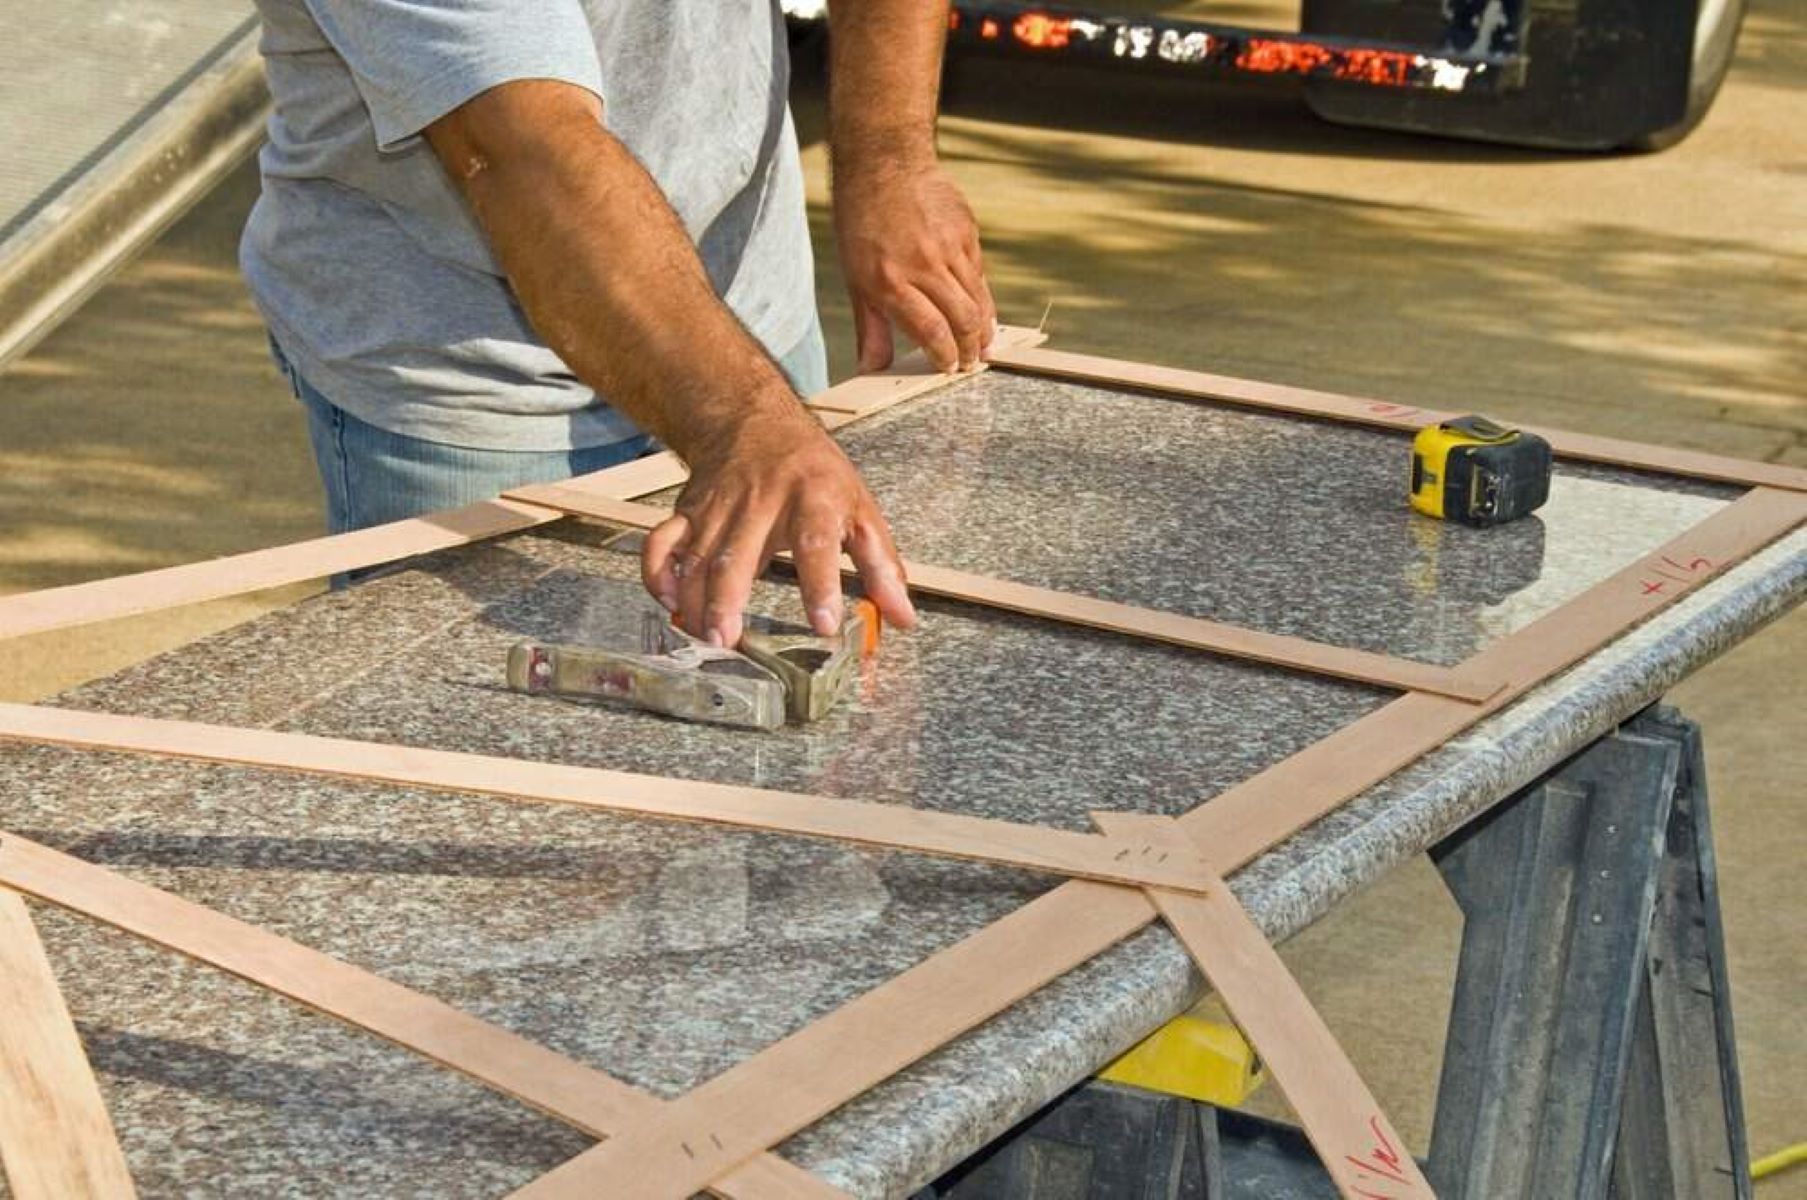
Step 5: Cutting and Fitting the Granite
Once you have prepared the base, it’s time to cut and fit the granite slabs to your countertop area. Follow these steps for a precise and accurate fit:
- Measure and mark the granite slabs: Measure the dimensions of your countertop area on the granite slabs. Use a pencil or marker to mark the cutting lines on the slabs, ensuring they correspond to the measurements taken earlier.
- Set up a workspace: Find a suitable area to work on the granite slabs. Lay down plywood or a similar protective surface to prevent any damage during the cutting process.
- Put on safety gear: Safety should be a priority when working with granite. Put on safety goggles, gloves, and a dust mask to protect yourself from flying debris and inhaling dust particles.
- Cut the granite slabs: Use a router with a diamond blade to cut along the marked lines on the granite slabs. Take your time and make smooth, steady cuts to ensure accuracy. If there are any curved cuts or detailed shapes required, use a jigsaw with a diamond blade.
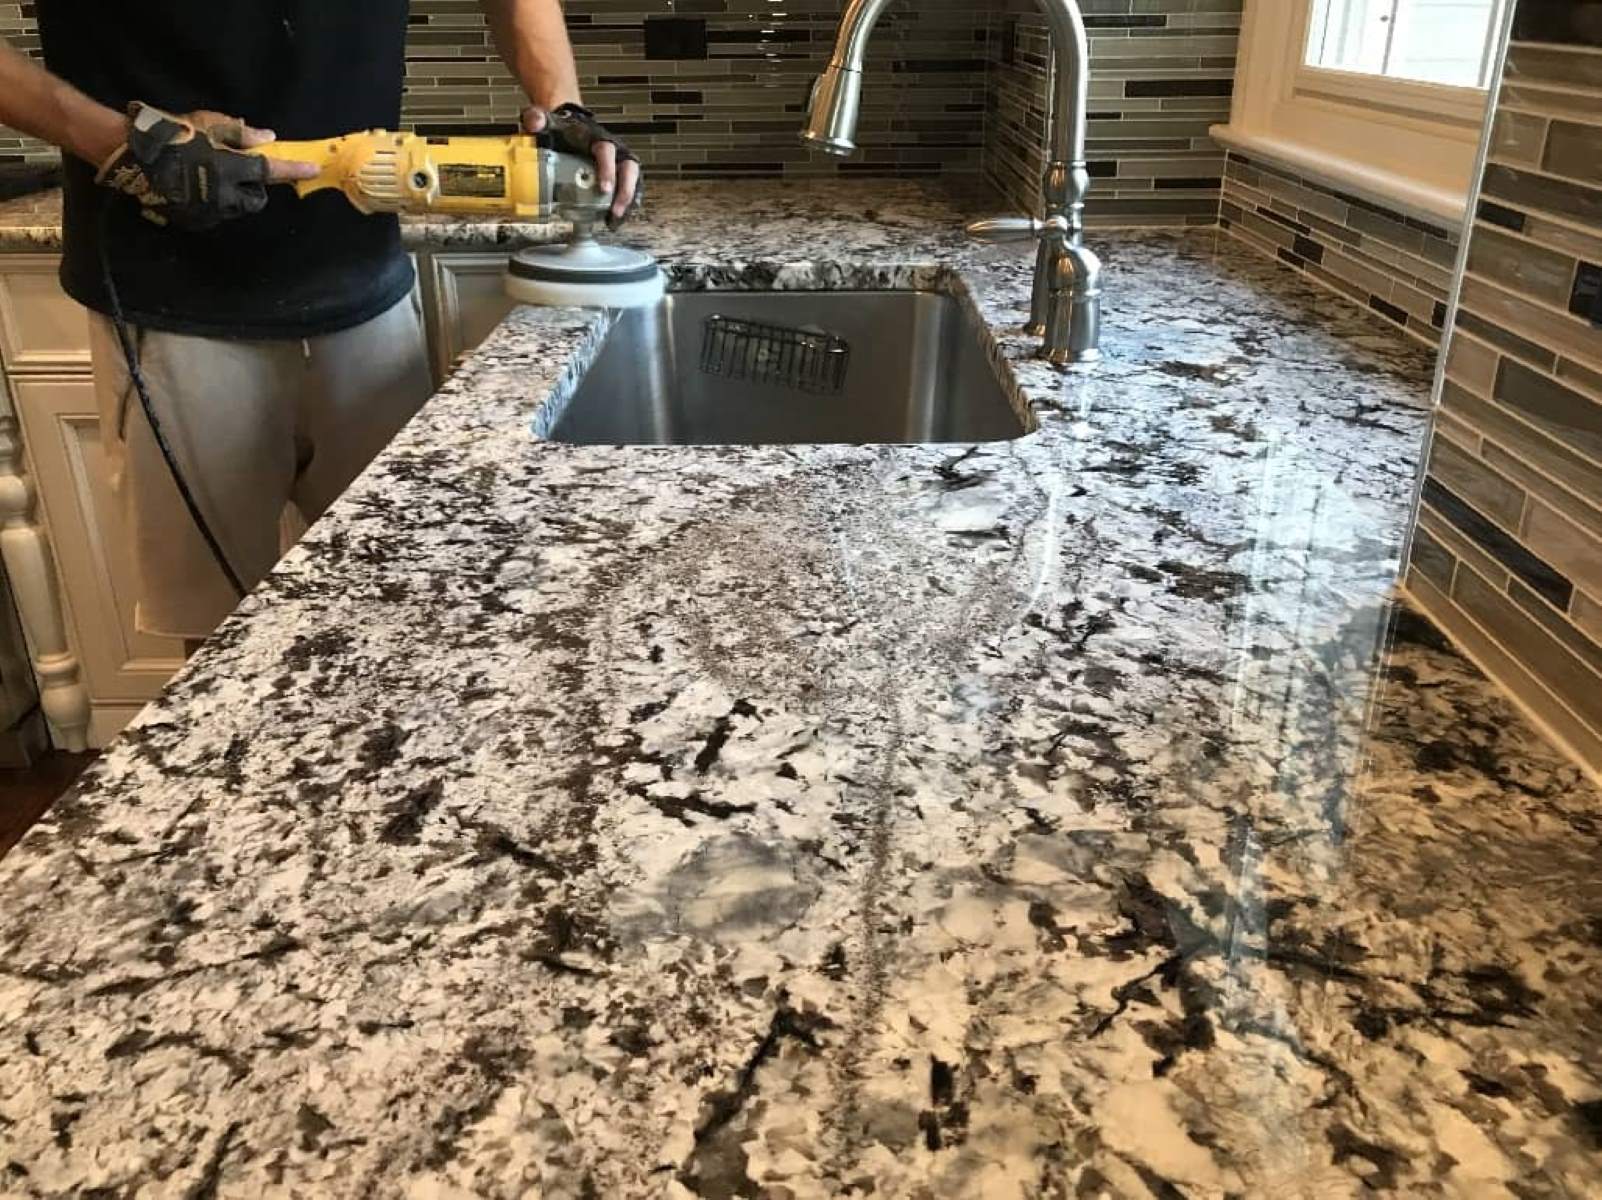
- Finishing touches: After making the cuts, use a diamond polishing pad to smooth the edges of the granite slabs. This will create a clean and polished look. Take extra care when handling and transporting the cut granite pieces to avoid chipping or breakage.
- Dry fit the granite slabs: Carefully place the cut granite slabs onto the prepared base to check the fit. Make any necessary adjustments by trimming or shaping the granite slabs as needed to achieve a precise fit.
Remember to work slowly and cautiously when cutting and fitting the granite slabs. Double-check your measurements and take accurate cuts to ensure a seamless and secure installation. If you’re unsure about the cutting process, it’s best to consult with a professional or seek guidance from someone experienced in working with granite.
When installing granite countertops, make sure to properly seal the surface to protect it from stains and damage. Use a high-quality sealant and follow the manufacturer’s instructions for best results.
Step 6: Applying Adhesive and Setting the Granite
Now that the granite slabs have been cut and fitted to your countertop area, it’s time to securely attach them to the base. Follow these steps to apply adhesive and set the granite slabs:
- Clean the base: Ensure that the plywood or backer board is clean and free from dust or debris. Use a damp cloth or mop to wipe down the surface and remove any residue.
- Apply the adhesive: Use a high-quality construction adhesive that is specifically designed for granite installation. Apply the adhesive evenly onto the base using a notched trowel or a putty knife.
- Position the granite slabs: Carefully place the granite slabs onto the adhesive, starting from one end and working your way across. Press down firmly to ensure proper adhesion. Use a level to check for any unevenness and make adjustments as needed.
- Leave room for expansion joint: Granite is a natural stone that may expand and contract with temperature changes. Leave a small gap, typically around 1/16 inch, between the slabs to accommodate this expansion. Fill the gap with a matching color caulk once the installation is complete.
- Secure the slabs: To hold the granite slabs securely in place while the adhesive cures, use clamps or braces. Place them strategically along the edges and allow the adhesive to dry according to the manufacturer’s instructions.
- Remove excess adhesive: Once the adhesive has fully cured, carefully remove any excess adhesive that may have squeezed out during the installation. Use a putty knife or scraper to gently scrape off the excess, taking care not to damage the granite or the surrounding surfaces.
Setting the granite slabs with adhesive ensures a strong and stable installation. It’s important to follow the adhesive manufacturer’s instructions for the proper drying and curing time to allow the slabs to securely bond to the base. Patience during this step will yield a long-lasting and professionally installed granite countertop.
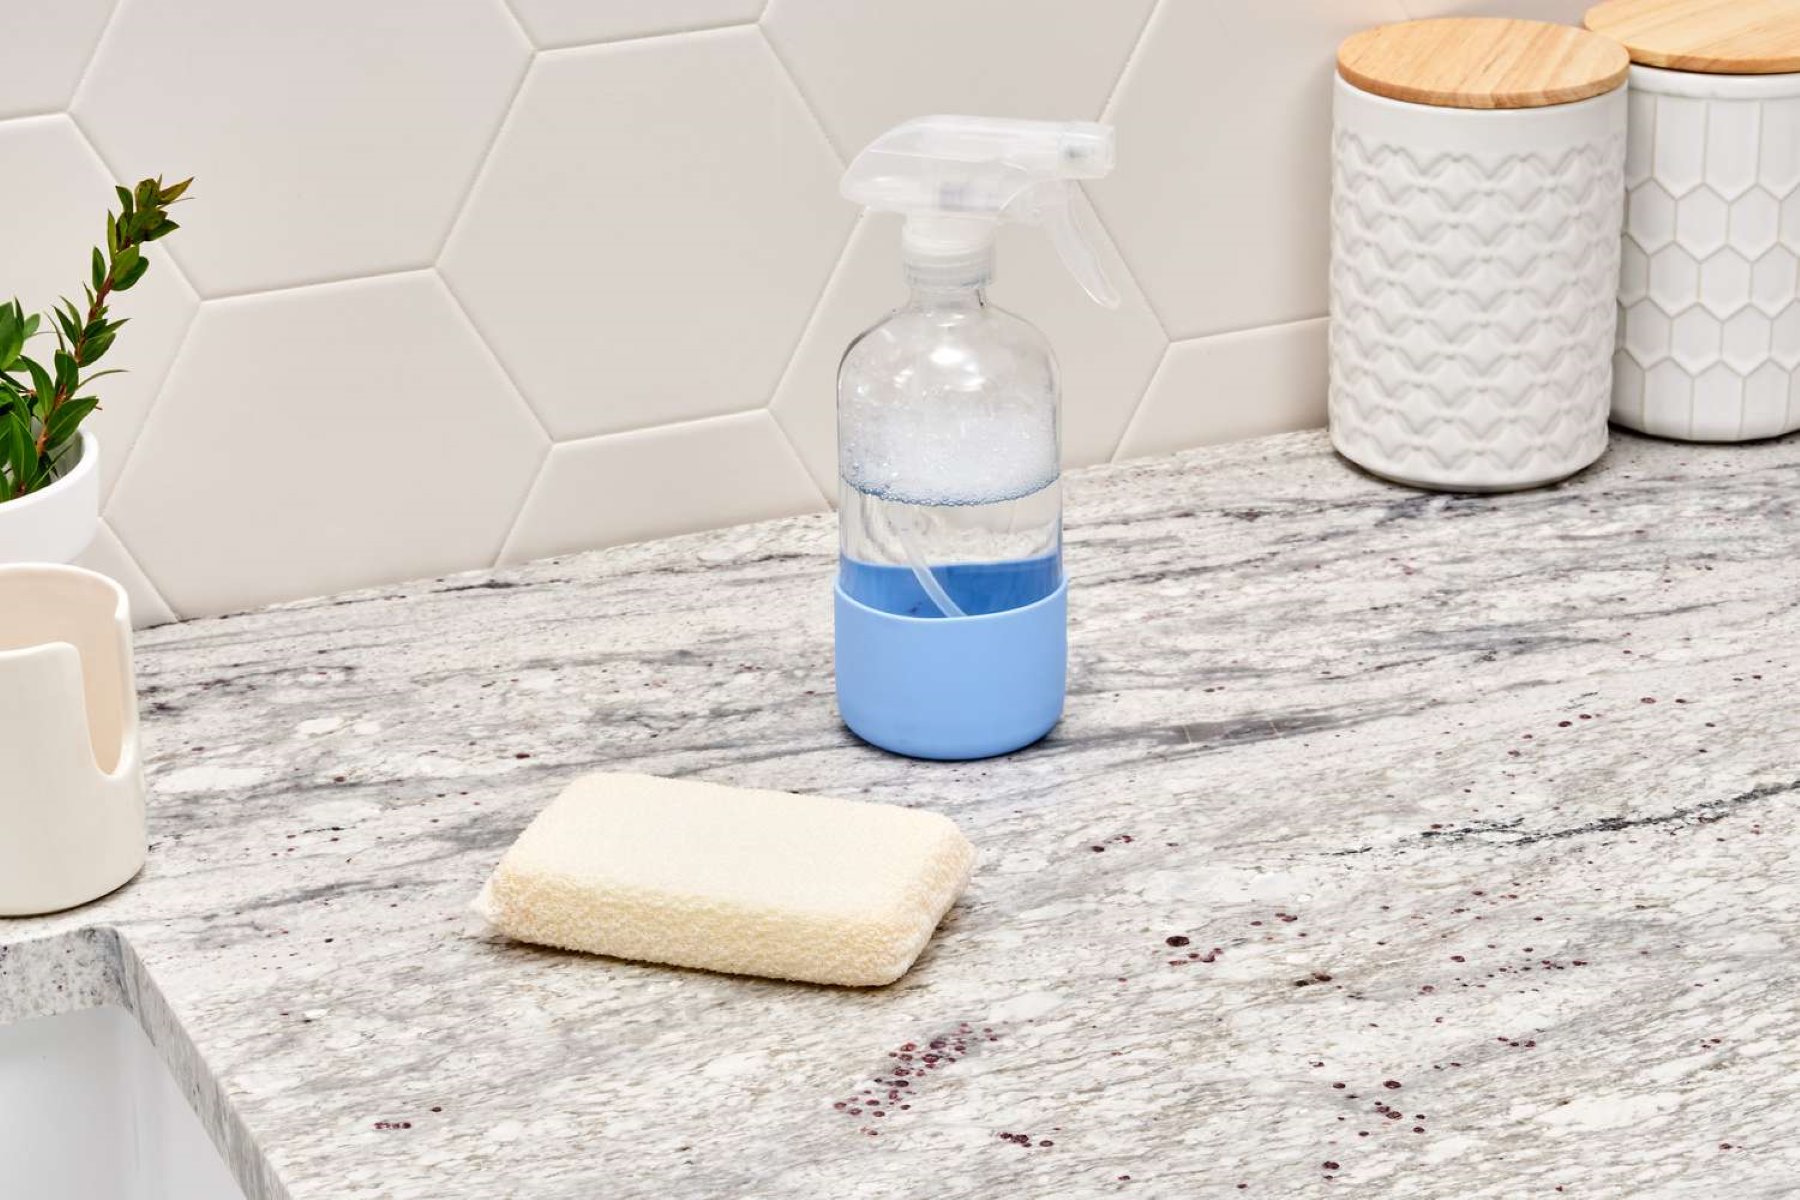
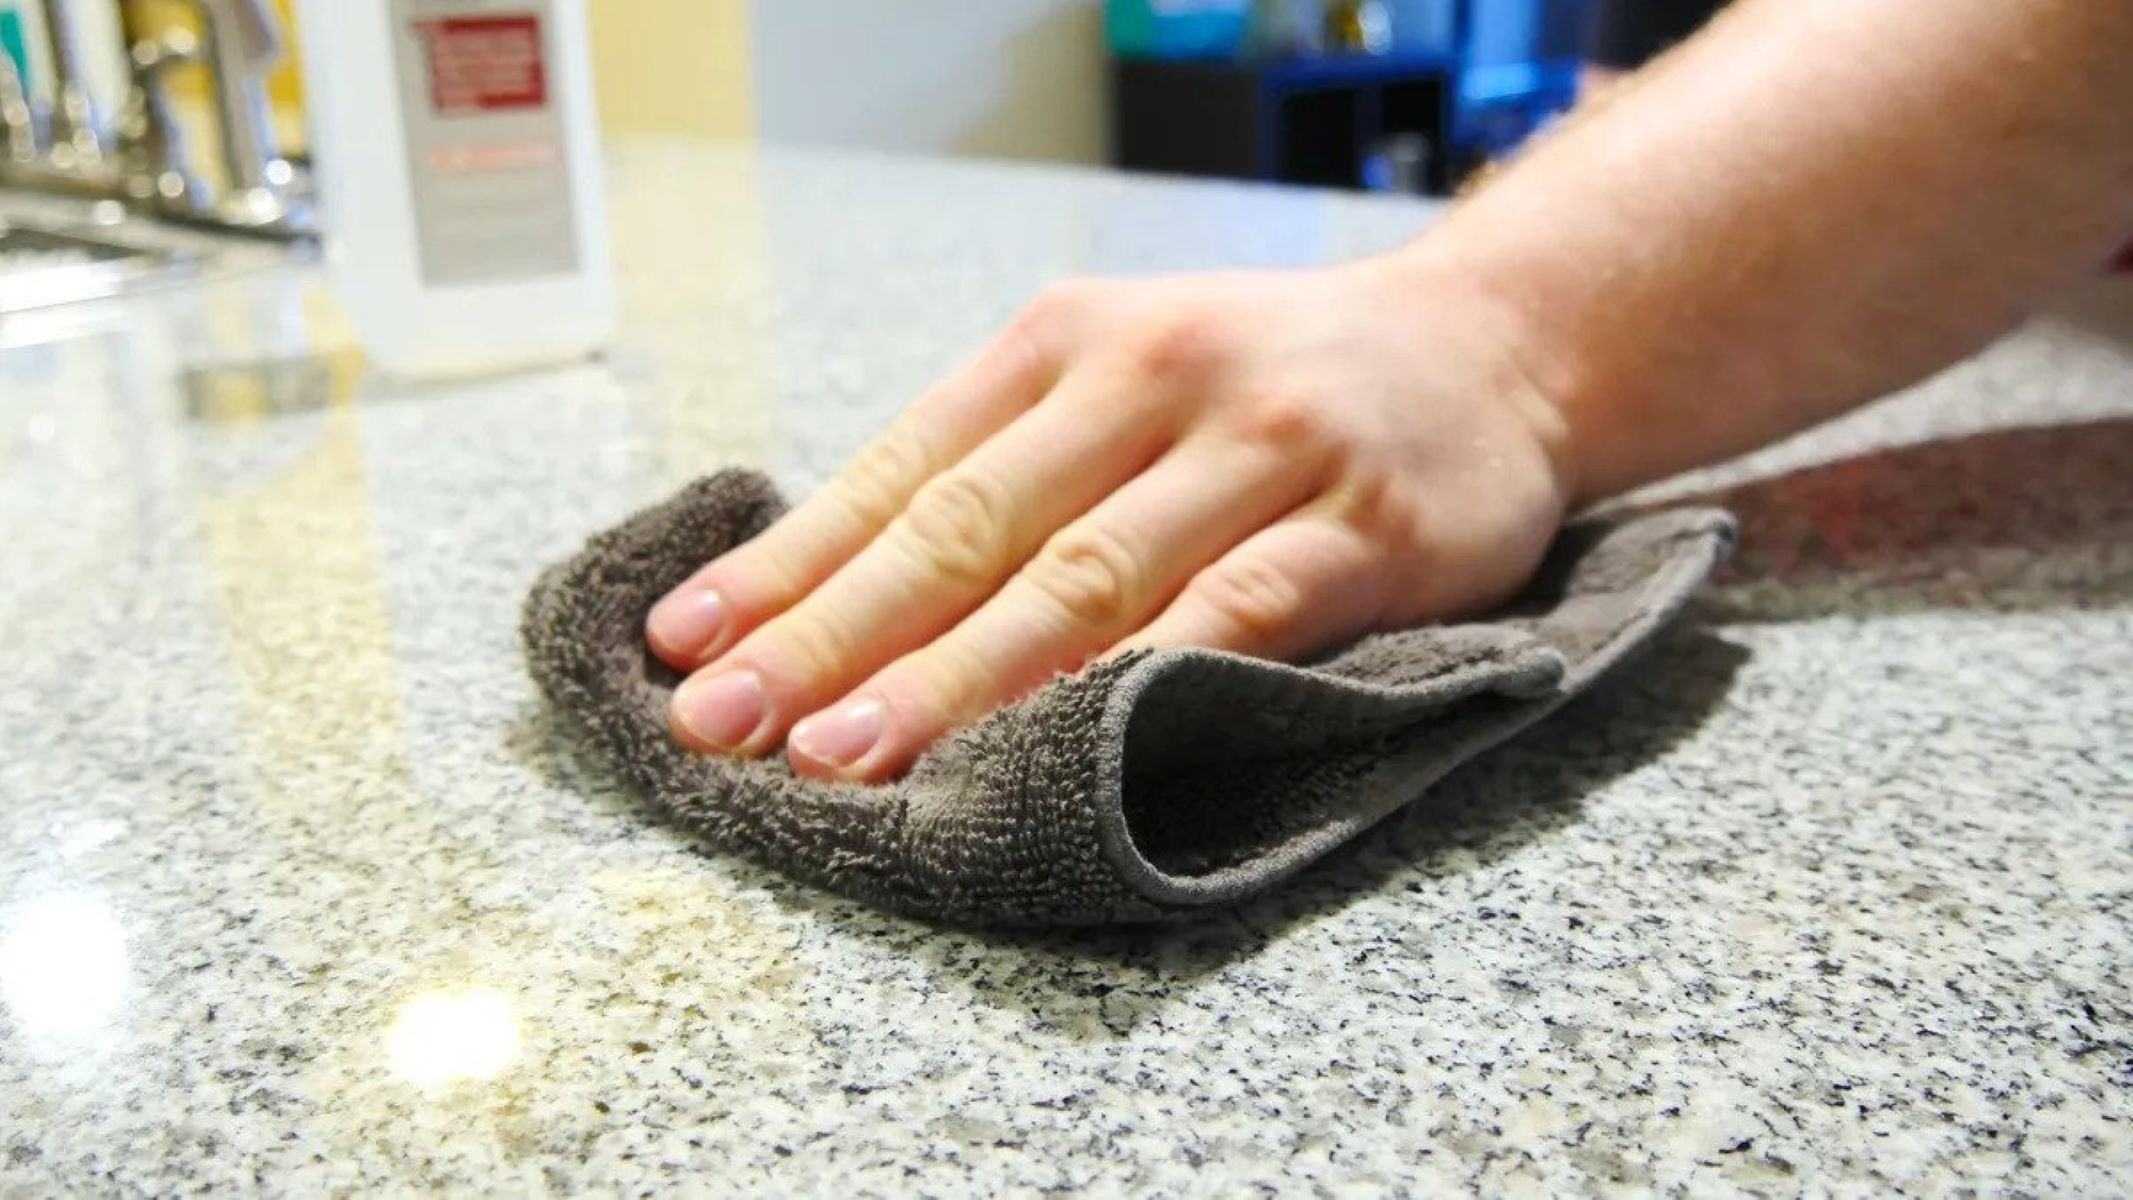
Step 7: Sealing the Granite Countertop
Sealing your granite countertop provides an added layer of protection and helps maintain its beauty and durability over time. Follow these steps to effectively seal your granite countertop:
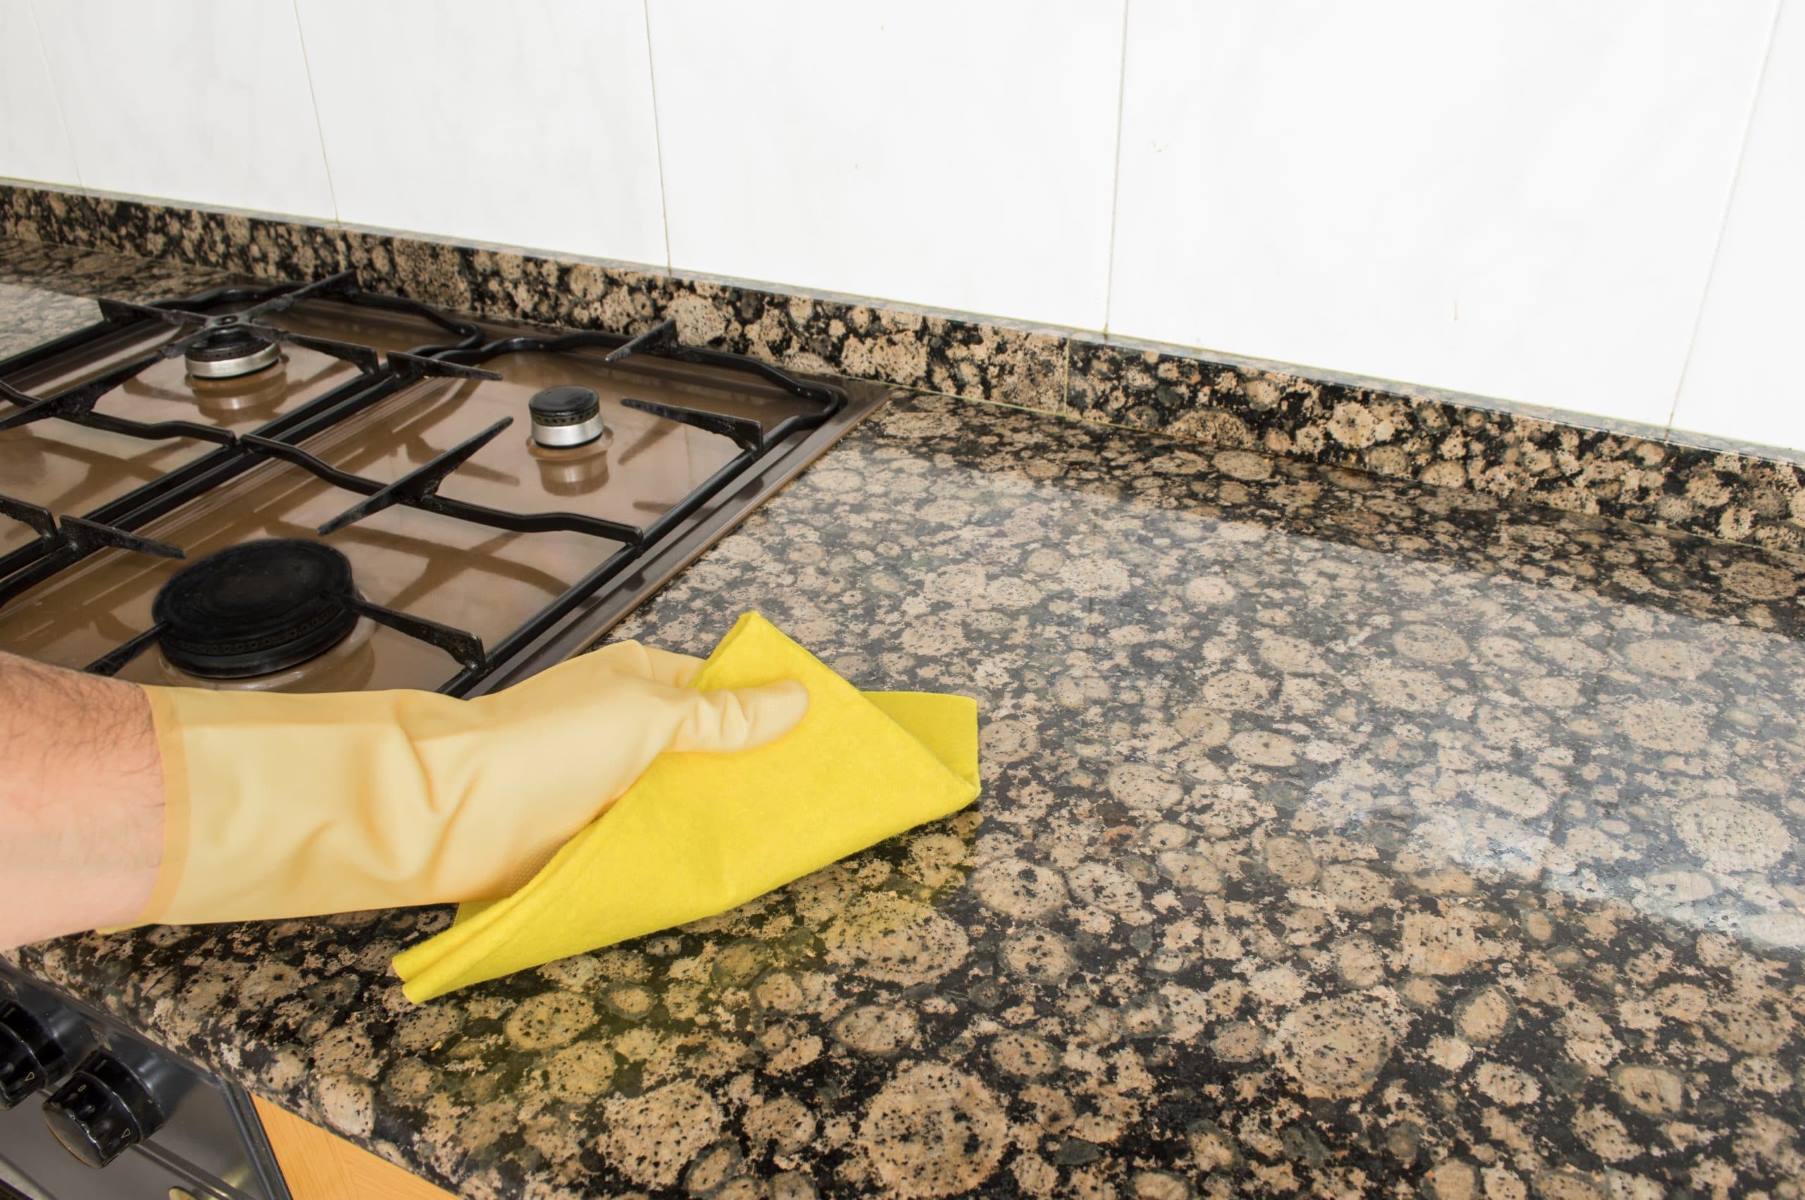
- Clean the countertop: Start by thoroughly cleaning the granite countertop using a mild detergent and water. Remove any debris, grease, or stains from the surface. Ensure the countertop is completely dry before proceeding to the next step.
- Choose the right sealer: Select a high-quality granite sealer that is suitable for your specific type of granite. Different types of granite may have varying levels of porosity, so it’s important to use a sealer that is designed to penetrate and protect your particular granite surface.
- Apply the sealer: Following the manufacturer’s instructions, pour a small amount of the sealer onto the countertop. Use a clean cloth or sponge to spread the sealer evenly across the surface, working in small sections at a time. Allow the sealer to sit for the recommended amount of time to penetrate the granite.
- Wipe off excess sealer: After the sealer has had time to penetrate the granite, use a clean, dry cloth to wipe off any excess sealer from the surface. Be thorough in this step to avoid leaving behind streaks or residue.
- Allow the sealer to cure: Let the sealer cure for the recommended amount of time before using the countertop. This usually takes between 24 to 48 hours. Avoid placing any objects or using the countertop during this curing period.
- Perform a water test: Once the sealer has cured, perform a simple water test to ensure the effectiveness of the seal. Sprinkle a few drops of water onto the countertop and observe if the water beads up or is absorbed. If the water beads up, the seal is intact. If it is absorbed, reapply the sealer as needed.
- Maintain regular sealing schedule: Granite countertops should be resealed periodically to maintain optimal protection. Follow the manufacturer’s recommendations for the frequency of resealing based on the specific sealer used.
Regularly sealing your granite countertop helps prevent staining and damage caused by spills and everyday use. It’s important to follow the instructions provided by the sealer manufacturer and establish a consistent sealing schedule to keep your granite countertop looking its best for years to come.
Step 8: Installing the Sink and Faucet
Installing the sink and faucet is the next step in completing your granite countertop installation. Follow these steps for a successful sink and faucet installation:
- Measure and mark the sink and faucet locations: Position the sink and faucet on the granite countertop to determine their placement. Use a pencil or marker to mark the precise locations of the sink and faucet holes.
- Prepare the sink and faucet: Read the manufacturer’s instructions for the sink and faucet installation. Assemble any necessary components, such as brackets or clips, according to the instructions provided.
- Cut out the sink hole: Use a jigsaw with a diamond blade to carefully cut out the sink hole from the marked location on the granite countertop. Take your time and make smooth, controlled cuts to avoid any damage to the countertop.
- Install the sink: Once the sink hole is cut, carefully lower the sink into place. Ensure that the sink is level and aligned with the countertop. Follow the manufacturer’s instructions to secure the sink using the provided clips or brackets.
- Attach the faucet: Position the faucet on the pre-determined hole and secure it according to the manufacturer’s instructions. Connect the necessary water supply lines to the faucet using a wrench to ensure a tight fit. Follow any additional instructions provided by the manufacturer for the specific faucet model.
- Check for leaks: Once the sink and faucet are installed, turn on the water supply and run water to check for any leaks. Inspect all connections and tighten any fittings as needed to ensure a watertight connection.
- Seal around the sink and faucet: Use a matching color caulk to seal the edges around the sink and faucet. Apply a thin, even bead of caulk to create a watertight seal and prevent any water from seeping underneath the countertop.
- Clean up and perform final checks: Clean the sink and countertop, removing any debris or fingerprints. Double-check all connections to ensure everything is secure and functioning properly.
Properly installing the sink and faucet is essential for a functional and visually appealing granite countertop. Take your time during this step to ensure accurate positioning and follow the manufacturer’s instructions for a successful installation.
Read more: How Are Granite Countertops Made
Step 9: Final Touches and Cleanup
You’re almost done with your granite countertop installation! The final touches and cleanup will help ensure a polished and professional result. Follow these steps to complete the process:
- Remove any protective covering: If you have used any protective covering on your granite countertop during the installation, carefully remove it. Dispose of it properly.
- Check for any loose or uneven edges: Inspect the edges of your granite countertops for any loose pieces or uneven areas. If you find any, apply a small amount of adhesive to secure or level them as necessary.
- Inspect and clean the countertop: Thoroughly clean the granite countertop surface using a granite-safe cleaner and a soft cloth. Remove any dust, debris, or residue left from the installation process.
- Apply a final coat of sealer: Apply a final coat of granite sealer to reinforce the protection and enhance the natural beauty of your countertops. Follow the manufacturer’s instructions for application and drying time.
- Reinstall appliances and fixtures: Once the countertop is cleaned and sealed, reinstall any appliances, fixtures, or accessories that were removed during the installation process. Follow the manufacturer’s instructions for proper installation.
- Perform a final inspection: Take a step back and inspect your newly installed granite countertops from various angles. Look for any imperfections, unevenness, or areas that require touch-ups. Make necessary adjustments or corrections as needed.
- Clean up the workspace: Dispose of any leftover materials or debris from the installation process. Thoroughly clean the work area to ensure a safe and tidy environment.
- Enjoy your new granite countertops: With the final touches and cleanup complete, it’s time to enjoy your beautiful and functional granite countertops! Take pride in your accomplishment and relish in the elegance and durability that granite brings to your space.
Completing the final touches and cleanup will help showcase the true beauty of your granite countertops. Take the time to ensure everything is in place, properly sealed, and aesthetically pleasing. Now, you can take pleasure in your newly installed granite countertops for many years to come!
Conclusion
Congratulations on successfully installing your granite countertops! By following the step-by-step guide outlined in this article, you have transformed your kitchen or bathroom into a beautiful and functional space. Installing granite countertops can be a rewarding endeavor that adds value and elegance to your home.
Throughout the installation process, you have learned the importance of gathering materials, measuring accurately, removing existing countertops, preparing the base, cutting and fitting the granite, applying adhesive, sealing the countertops, installing the sink and faucet, and completing the final touches and cleanup.
Remember, safety is crucial during the installation process. Always wear appropriate safety gear, such as goggles and gloves, and take your time to ensure precise measurements and cuts. If you ever feel unsure about any step, it’s recommended to seek professional assistance.
With proper care and maintenance, your granite countertops will continue to impress for years to come. Regularly clean and seal your countertops to protect them from stains and maintain their natural beauty. Avoid using abrasive cleaners or harsh chemicals that can damage the granite surface.
Whether you chose granite for its durability, heat resistance, or timeless appeal, your new countertops will undoubtedly become a focal point in your home. Enjoy the beauty and functionality they bring, and take pride in your DIY granite countertop installation!
Frequently Asked Questions about How To Install Granite Countertops
Was this page helpful?
At Storables.com, we guarantee accurate and reliable information. Our content, validated by Expert Board Contributors, is crafted following stringent Editorial Policies. We're committed to providing you with well-researched, expert-backed insights for all your informational needs.


0 thoughts on “How To Install Granite Countertops”