Home>Articles>How To Install VEVOR 110Lbs Commercial Ice Maker
Articles
How To Install VEVOR 110Lbs Commercial Ice Maker
Modified: August 25, 2024
Learn how to install the VEVOR 110Lbs commercial ice maker with our informative articles. Ensure smooth operation and efficient ice production for your business.
(Many of the links in this article redirect to a specific reviewed product. Your purchase of these products through affiliate links helps to generate commission for Storables.com, at no extra cost. Learn more)
Introduction
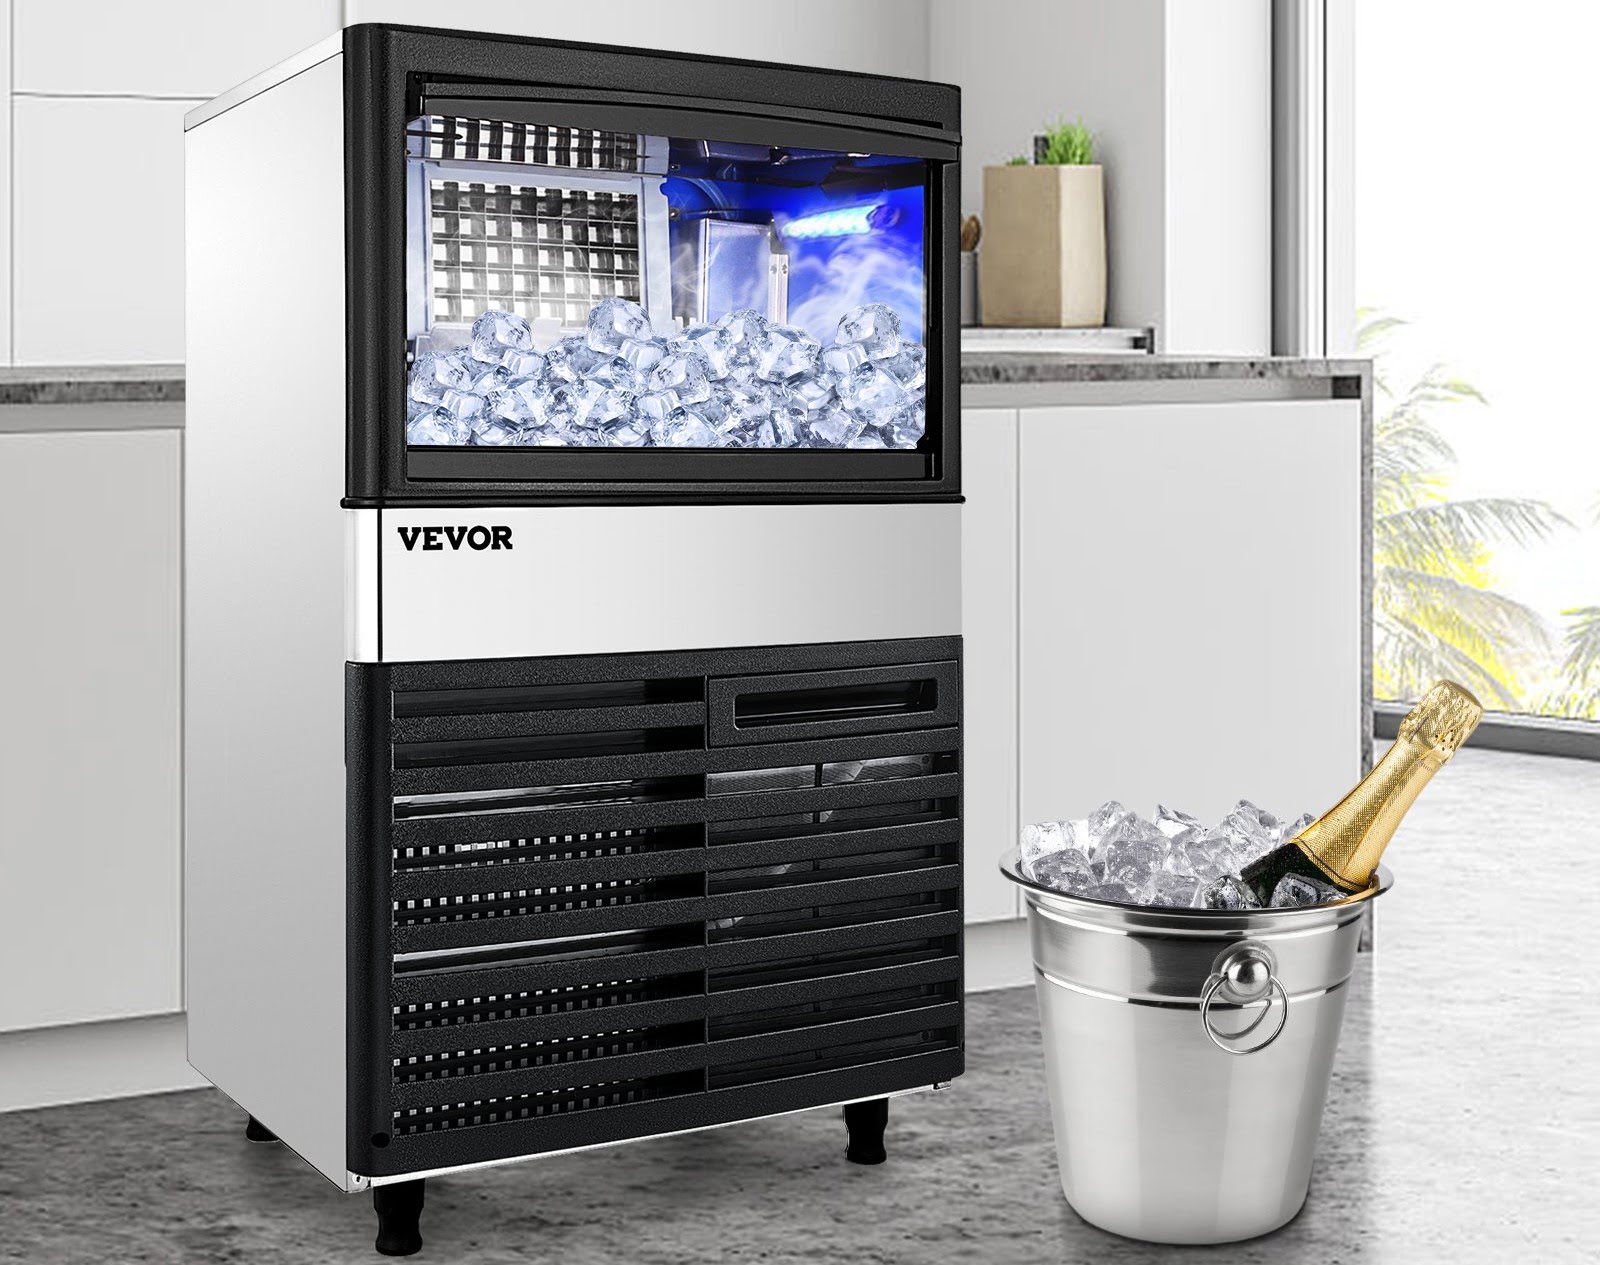
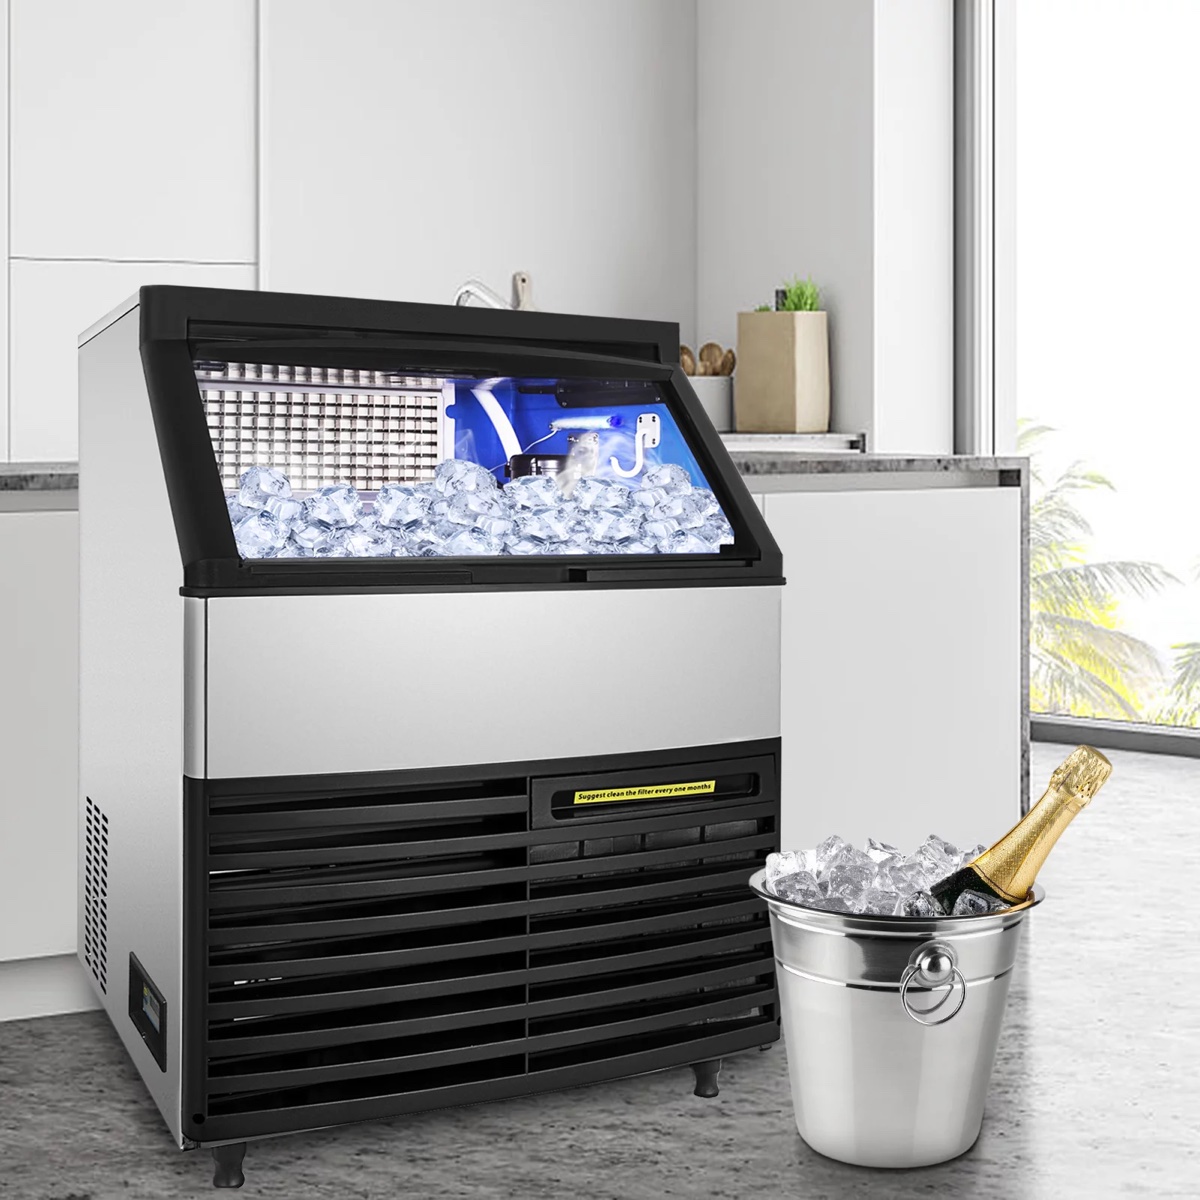
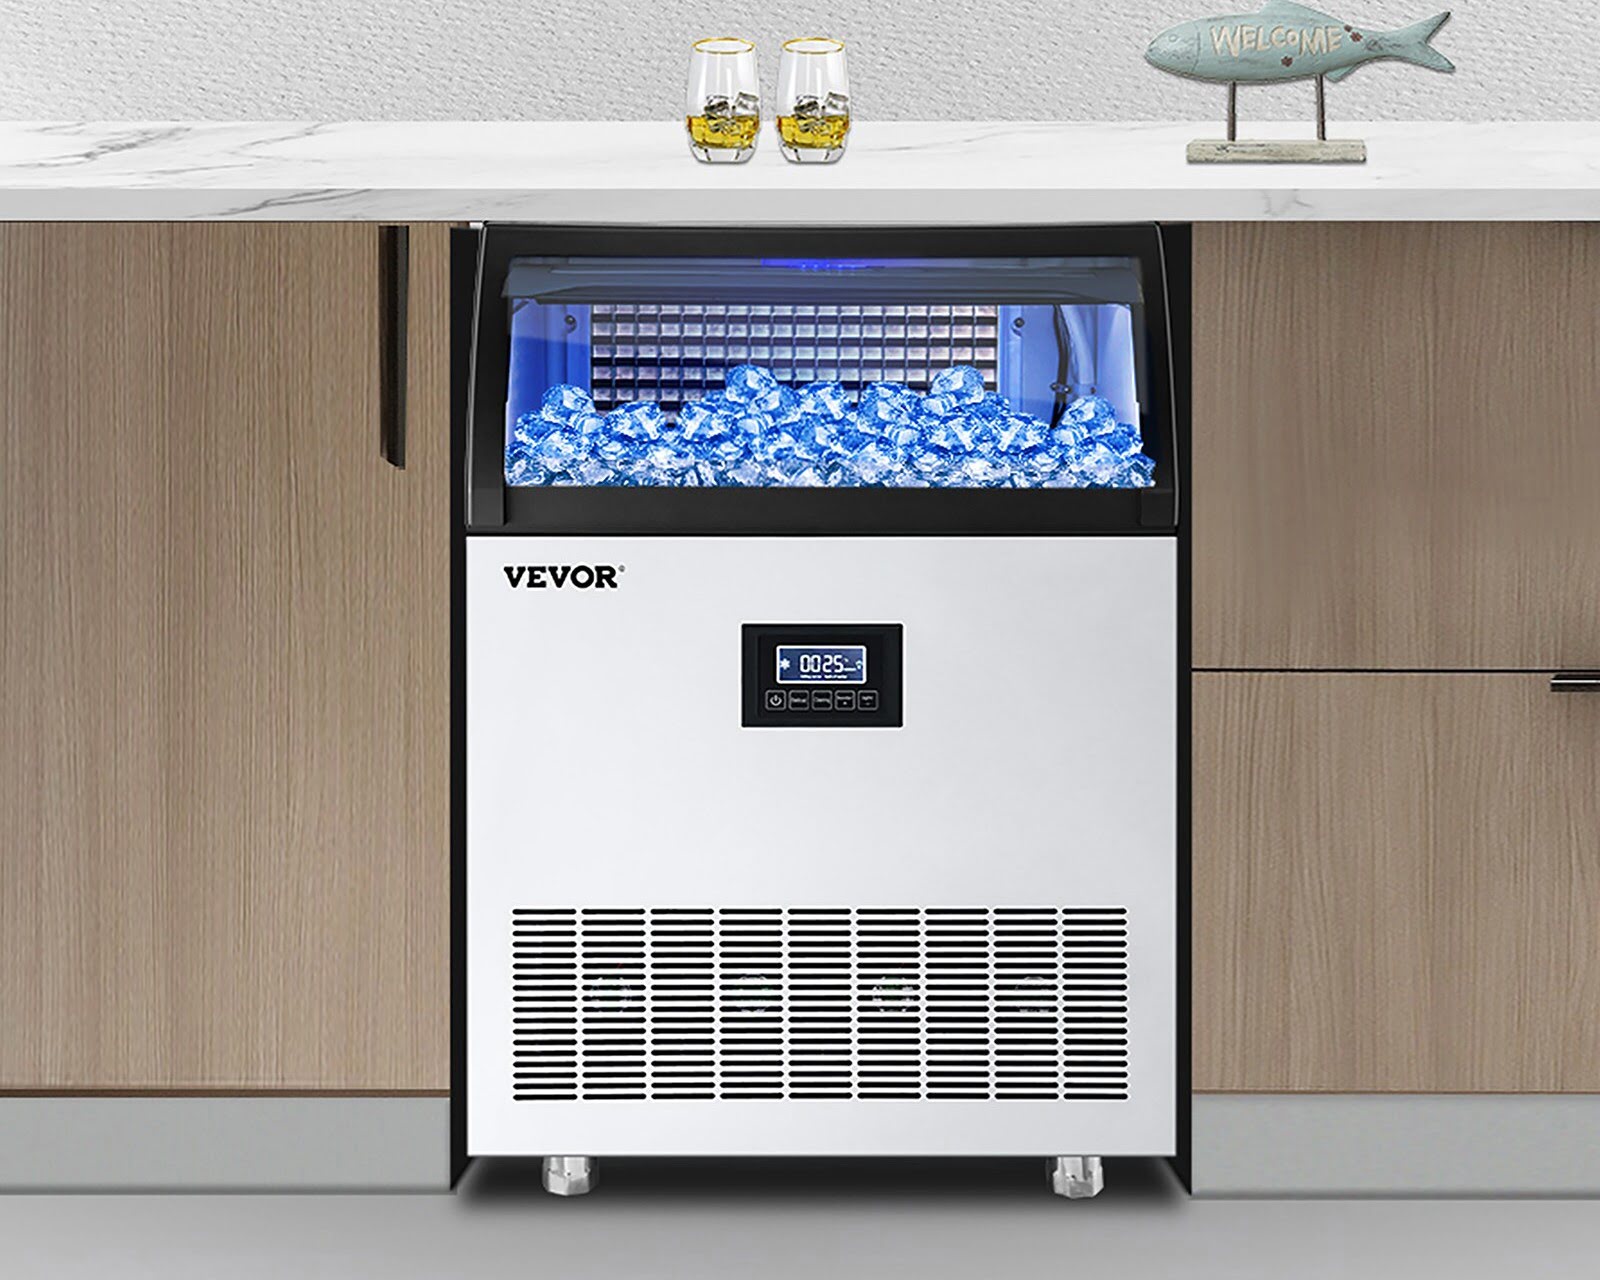
Welcome to our comprehensive guide on how to install the VEVOR 110Lbs Commercial Ice Maker. Whether you’re setting up a new ice maker for your restaurant, cafe, or any other commercial establishment, this step-by-step guide will walk you through the installation process and ensure that your ice maker is up and running in no time.
The VEVOR 110Lbs Commercial Ice Maker is a high-quality and efficient machine capable of producing up to 110 pounds of ice per day. It is designed to meet the demanding needs of commercial settings, providing a steady supply of ice for your business. By following the installation steps outlined in this guide, you can have this ice maker installed and ready to use in no time.
Before we start, it’s important to note that proper installation is crucial for the optimal performance and longevity of your ice maker. By following these steps, you will ensure that your VEVOR ice maker operates smoothly and efficiently, providing you with a reliable source of ice for your business.
So, without further ado, let’s dive into the installation process and get your VEVOR 110Lbs Commercial Ice Maker up and running.
Key Takeaways:
- Easy Installation
Installing the VEVOR 110Lbs Commercial Ice Maker is a breeze with our step-by-step guide. From unboxing to choosing ice types, get your ice maker up and running in no time for a steady supply of ice. - Maintenance Matters
Regular cleaning and maintenance are crucial for keeping your VEVOR 110Lbs Commercial Ice Maker in top condition. Follow the guidelines to ensure optimal performance and a reliable ice production system.
Read more: How To Clean A Commercial Ice Maker
Requirements
Before you begin the installation process for your VEVOR 110Lbs Commercial Ice Maker, it’s essential to gather all the necessary tools and materials. Here’s what you’ll need:
- A VEVOR 110Lbs Commercial Ice Maker
- Access to a water supply
- A power source
- A level
- A wrench or adjustable pliers
- Water filter (optional but recommended)
- Drip tray (optional but recommended)
Ensure that you have all these items ready before starting the installation. It will help the process go smoothly and minimize any potential delays or interruptions.
If you have all the necessary tools and materials, you’re ready to proceed with the installation of your VEVOR 110Lbs Commercial Ice Maker. Let’s move on to the next step, which is unboxing the ice maker.
Step 1: Unboxing
The first step in installing your VEVOR 110Lbs Commercial Ice Maker is to unbox the machine and carefully remove all the packaging materials. Follow these steps:
- Locate the box containing your VEVOR 110Lbs Commercial Ice Maker.
- Use a box cutter or scissors to carefully cut through the tape and open the box.
- Gently lift the ice maker out of the box, taking care not to damage any of the components.
- Remove any protective foam or packaging materials from the ice maker.
- Inspect the machine for any visible signs of damage or missing parts. If you notice any issues, contact the manufacturer or supplier for assistance.
During the unboxing process, it’s crucial to handle the ice maker with care and avoid any unnecessary rough handling. This will help prevent any potential damage to the machine or its components.
Once you have successfully unboxed the VEVOR 110Lbs Commercial Ice Maker and ensured that everything is in good condition, you’re ready to move on to the next step, which is preparing the location for installation.
Step 2: Preparing the Location
Now that you have unboxed your VEVOR 110Lbs Commercial Ice Maker, it’s time to prepare the location where you will be installing the machine. Follow these steps:
- Choose a suitable location for your ice maker. It should be on a level surface and near a water supply and power source.
- Ensure that the location has enough space to accommodate the dimensions of the ice maker and allows for proper ventilation.
- Use a level to check if the surface is even. If it’s not, adjust the leveling feet of the ice maker to ensure stability.
- Clear any debris, dust, or obstacles from the installation area to prevent interference with the ice maker’s operation.
- If desired, place a drip tray underneath the ice maker to catch any water spills or drips.
It’s important to consider the proximity to a water supply and power source when choosing the installation location. The ice maker will require both to operate efficiently. Additionally, ensuring that the machine is on a level surface will prevent any imbalance or potential damage.
Remember to consult the user manual provided by VEVOR for any specific location requirements or recommendations for your particular model of the 110Lbs Commercial Ice Maker.
With the location prepared, you’re now ready to move on to the next step, which is connecting the water supply to the ice maker.
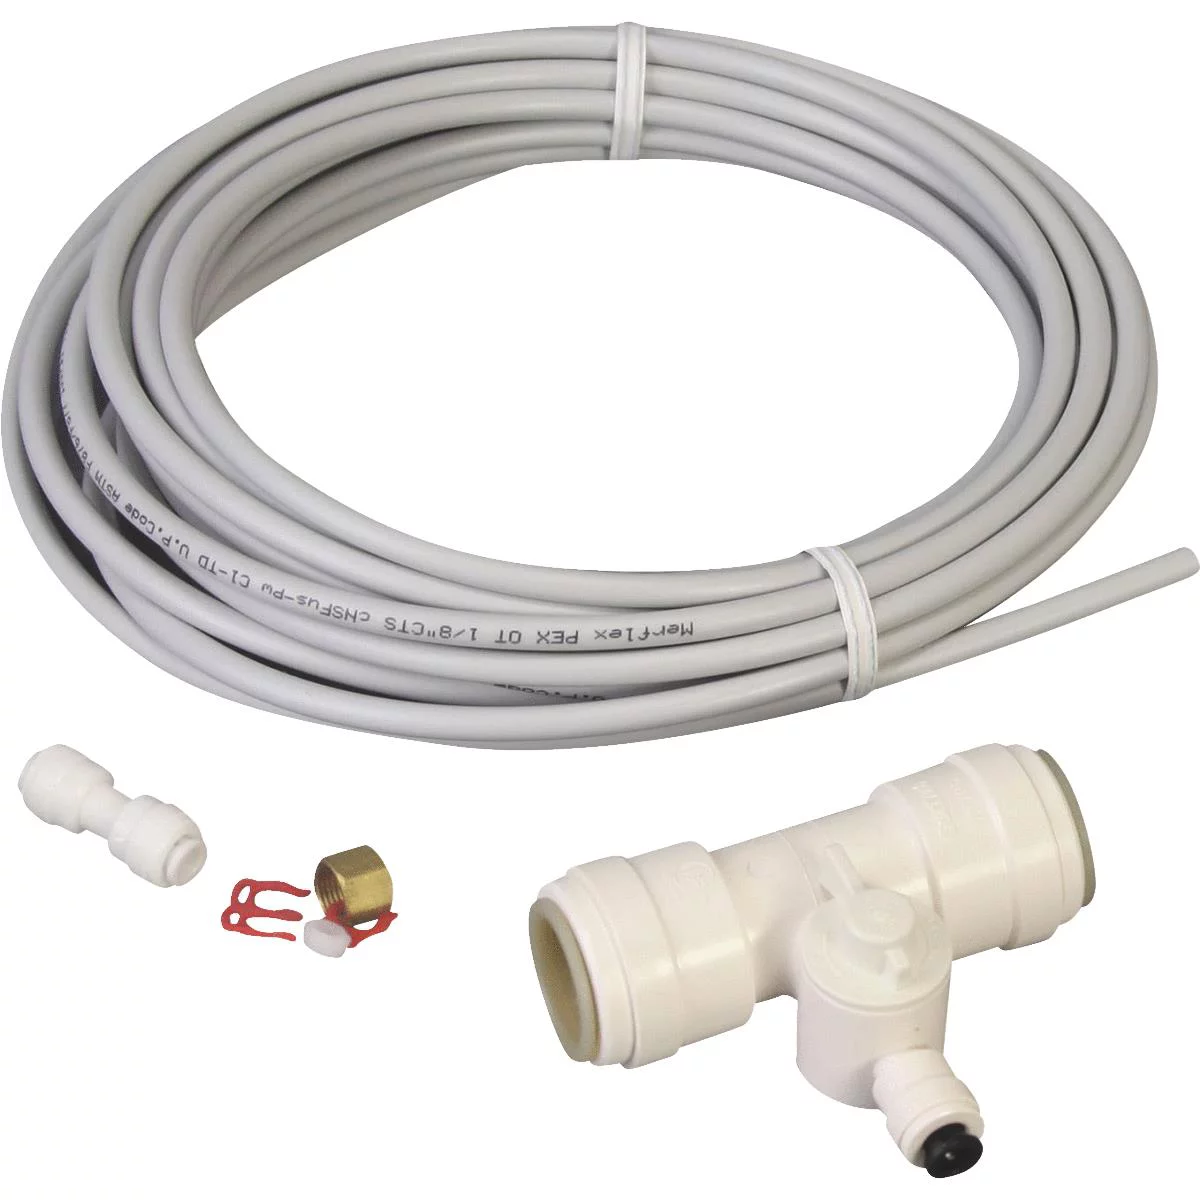
Step 3: Connecting Water Supply
After preparing the location for your VEVOR 110Lbs Commercial Ice Maker, the next step is to connect the water supply. Follow these instructions:
- Locate the water inlet valve on the back of the ice maker.
- Connect one end of the water supply line to the water inlet valve.
- Ensure a secure connection by tightening the fitting with a wrench or adjustable pliers.
- Connect the other end of the water supply line to a reliable source of clean water. This can be a water line directly from your building’s plumbing or a dedicated water supply line.
- If desired, install a water filter between the water supply line and the ice maker to improve water quality.
- Turn on the water supply and check for any leaks. Tighten the connections if necessary.
It’s crucial to use a water supply line that is capable of providing a sufficient flow rate to the ice maker. Consult the user manual of your VEVOR 110Lbs Commercial Ice Maker for any specific requirements or recommendations regarding the water supply.
Properly connecting the water supply line is essential for the ice maker to function correctly and produce high-quality ice. Once you have successfully connected the water supply, you can proceed to the next step, which is powering on the ice maker.
Read also: 10 Best Commercial Ice Maker for 2025
Step 4: Powering on the Ice Maker
Now that you have connected the water supply to your VEVOR 110Lbs Commercial Ice Maker, it’s time to power on the machine. Follow these steps:
- Locate the power cord on the back of the ice maker.
- Plug the power cord into a grounded electrical outlet.
- Ensure that the power switch on the ice maker is in the “Off” position.
- Turn on the power switch to supply electricity to the machine.
Once you have powered on the ice maker, you should see the control panel light up and indicate that the machine is receiving power. It may take a few moments for the ice maker to initialize and prepare for operation.
It’s important to note that you should only use a dedicated electrical outlet and avoid using extension cords or power strips. This will help ensure a stable power supply and prevent any potential electrical issues.
With the VEVOR 110Lbs Commercial Ice Maker powered on, you’re ready to move on to the next step, which involves the initial setup of the machine.
Before installing the VEVOR 110Lbs Commercial Ice Maker, make sure to carefully read the instruction manual provided by the manufacturer. This will ensure that you understand the installation process and can avoid any potential issues.
Step 5: Initial Setup
After powering on your VEVOR 110Lbs Commercial Ice Maker, it’s time to complete the initial setup. Follow these steps:
- Refer to the user manual provided by VEVOR to familiarize yourself with the control panel and its functions.
- Set the desired language and unit of measurement (Fahrenheit or Celsius) on the control panel, if applicable.
- Configure any other necessary settings, such as time, date, or ice making preferences, according to your specific needs.
- Wait for the ice maker to complete its initial startup sequence. This may involve the machine running a self-diagnostic test and ensuring that all components are functioning correctly.
During the initial setup, it’s important to follow the instructions provided in the user manual to ensure proper configuration and calibration of the ice maker. This will help optimize its performance and functionality.
It’s worth noting that the initial setup steps may vary slightly depending on the specific model of the VEVOR 110Lbs Commercial Ice Maker you have. Therefore, it’s crucial to consult the user manual for accurate and model-specific instructions.
Once you have completed the initial setup, you’re ready to move on to the next step, which involves choosing the type of ice you want the machine to produce.
Step 6: Choosing Ice Type
With your VEVOR 110Lbs Commercial Ice Maker properly set up, you have the option to choose the type of ice you want the machine to produce. Follow these steps:
- Refer to the user manual to identify the available ice types supported by your specific model of the ice maker.
- Locate the ice type selection button on the control panel of the machine.
- Press the ice type selection button to cycle through the available options.
- Observe the display or indicator lights on the control panel to confirm the selected ice type.
Depending on the model, your VEVOR 110Lbs Commercial Ice Maker may offer different ice types, such as full cube, half cube, or bullet-shaped ice. Choose the ice type that best suits your needs or preferences.
It’s important to note that different ice types may have different production rates and storage capacities. Therefore, choose an ice type that aligns with the demands of your business or establishment.
Once you have chosen your desired ice type, the machine will start producing ice accordingly. You’re now ready to move on to the next step, which involves the ice-making process.
Step 7: Ice Making Process
After selecting the desired ice type on your VEVOR 110Lbs Commercial Ice Maker, it’s time to witness the ice-making process. Here’s an overview of how it works:
- The ice maker will begin the ice-making cycle by initiating the freezing process.
- Water is pumped into the ice-making chamber or mold, depending on the design of your specific ice maker.
- The water is then circulated over a series of refrigerated coils, causing it to freeze into ice.
- As the ice forms, it will gradually build up and take shape within the mold or chamber.
- Once the ice reaches the desired size and consistency, a mechanism will separate it from the remaining water.
- The ice will be deposited into the storage bin or dispenser, ready for use or future storage.
- The ice-making process will continue until the storage bin is full or until you manually turn off the machine.
During the ice-making process, it’s important to allow sufficient time for the machine to produce the desired amount of ice. The duration will vary depending on factors such as the ambient temperature, water temperature, and chosen ice type.
It’s recommended to periodically check the ice level in the storage bin and remove excess ice to prevent overflow or clogging. Ensure that you follow proper sanitation and hygiene practices when handling the ice, as outlined by your local health and safety regulations.
With the ice maker in action, you’re all set to enjoy a steady supply of ice for your commercial needs. However, it’s important to ensure regular cleaning and maintenance to keep the machine performing optimally, which leads us to the next step.
Read also: 13 Best Ice Maker Commercial for 2025
Step 8: Cleaning and Maintenance
To ensure the longevity and optimal performance of your VEVOR 110Lbs Commercial Ice Maker, regular cleaning and maintenance are essential. Follow these guidelines to keep your machine in top condition:
- Refer to the user manual for specific cleaning instructions and recommended cleaning products for your ice maker.
- Regularly clean the exterior of the ice maker using a mild detergent and a soft cloth or sponge. Avoid using abrasive cleaners or harsh chemicals that may damage the surface.
- Remove and clean the ice storage bin or dispenser regularly to prevent the build-up of dirt, debris, or bacteria. Wash it with warm soapy water and rinse thoroughly.
- Inspect and clean the water filter, if applicable, according to the manufacturer’s instructions. It’s recommended to replace the filter periodically to maintain water quality.
- Check and clean the condenser coils of the ice maker to remove any dust or debris. This can be done using a soft brush or vacuum cleaner with a brush attachment.
- Inspect the water supply line for any leaks or damages. Replace any faulty or worn-out parts as necessary.
- Consider implementing a regular maintenance schedule, which may include tasks such as descaling, sanitizing, or inspecting various components. Refer to the user manual for specific maintenance recommendations.
Regular cleaning and maintenance will not only ensure the cleanliness and hygiene of the ice maker but also help prevent any potential performance issues or breakdowns. It’s important to follow the recommended cleaning and maintenance intervals provided by the manufacturer to keep your ice maker in optimal condition.
With proper cleaning and maintenance, your VEVOR 110Lbs Commercial Ice Maker will continue to provide a reliable supply of high-quality ice for your business or establishment.
Congratulations! You have successfully completed the installation and maintenance process for your VEVOR 110Lbs Commercial Ice Maker. Enjoy the benefits of a steady and efficient ice production system for your commercial needs.
Conclusion
Installing the VEVOR 110Lbs Commercial Ice Maker doesn’t have to be a daunting task. By following the step-by-step guide outlined in this article, you can have your ice maker up and running in no time.
We started by unboxing the machine, ensuring that all components were in good condition. Then, we moved on to preparing the installation location, making sure it was level and had access to a water supply and power source. Next, we connected the water supply and powered on the ice maker.
The initial setup involved configuring the settings on the control panel, choosing the desired ice type, and allowing the ice maker to complete its startup sequence. From there, we entered the ice-making process, witnessing the machine freeze water and produce ice of the chosen type.
To maintain the performance and longevity of your VEVOR 110Lbs Commercial Ice Maker, we discussed the importance of regular cleaning and maintenance. By following the recommended cleaning procedures, inspecting components, and implementing a maintenance schedule, you can ensure that your ice maker continues to operate efficiently.
With your newly installed VEVOR 110Lbs Commercial Ice Maker, you can enjoy a reliable supply of ice for your restaurant, cafe, or any other commercial establishment. Whether you need ice for beverages, food preservation, or display purposes, this ice maker has you covered.
Remember to consult the user manual provided by VEVOR for any specific instructions or guidelines related to your particular model. This will ensure that you follow the manufacturer’s recommendations and maximize the performance of your ice maker.
By following this comprehensive installation guide and practicing regular maintenance, you can enjoy the benefits of a high-quality ice maker that meets and exceeds your commercial ice production needs.
Now, it’s time to sit back, relax, and let your VEVOR 110Lbs Commercial Ice Maker take care of your ice requirements. Cheers to cool drinks and satisfied customers!
Ready to master another essential skill for your business or home kitchen? Our comprehensive guide on ice maker installation walks you through every necessary step to ensure your new appliance runs smoothly from the get-go. And if you're looking to upgrade, don't miss our curated list of industrial ice maker models. These top picks are set to transform ice production in 2024, making them perfect for any demanding environment.
Frequently Asked Questions about How To Install VEVOR 110Lbs Commercial Ice Maker
Was this page helpful?
At Storables.com, we guarantee accurate and reliable information. Our content, validated by Expert Board Contributors, is crafted following stringent Editorial Policies. We're committed to providing you with well-researched, expert-backed insights for all your informational needs.


0 thoughts on “How To Install VEVOR 110Lbs Commercial Ice Maker”