Articles
How To Install Ice Maker On GE Refrigerator
Modified: September 2, 2024
Learn how to install an ice maker on your GE refrigerator with our step-by-step articles. Start enjoying ice-cold drinks today!
(Many of the links in this article redirect to a specific reviewed product. Your purchase of these products through affiliate links helps to generate commission for Storables.com, at no extra cost. Learn more)
Introduction
Welcome to our comprehensive guide on how to install an ice maker on a GE refrigerator. Adding an ice maker to your refrigerator can greatly improve your daily convenience by providing a steady supply of ice for drinks and other purposes. While many GE refrigerators come pre-equipped with ice maker capabilities, some models may not have this feature. However, with a few tools and materials, you can easily install an ice maker yourself and enjoy the benefits it offers.
In this step-by-step guide, we’ll walk you through the process of installing an ice maker on your GE refrigerator. From checking compatibility to connecting the water supply line and mounting the ice maker, we’ll cover each stage in detail. By following these instructions, you’ll have a working ice maker that will provide a continuous supply of ice whenever you need it.
Before we dive into the installation process, it’s important to note that while this guide focuses specifically on GE refrigerators, the general steps can be applied to other refrigerator brands as well. However, it’s essential to refer to your refrigerator’s user manual for more specific instructions that may pertain to your particular model.
Now, let’s get started with the tools and materials you’ll need for the installation process.
Key Takeaways:
- Enjoy the convenience of a steady ice supply by installing an ice maker on your GE refrigerator. Follow the comprehensive guide for a hassle-free DIY installation process.
- Ensure a successful ice maker installation by checking compatibility, gathering necessary tools and materials, and following step-by-step instructions. Cheers to refreshing drinks with ice!
Read more: How To Fix Ice Maker Ge Refrigerator
Tools and Materials Needed
Before you begin the installation process, it’s important to gather all the necessary tools and materials to ensure a smooth and successful installation. Here’s a list of what you’ll need:
Tools:
- Flathead screwdriver
- Adjustable wrench
- Power drill
- Tape measure
- Utility knife
- Bucket or container
Materials:
- Ice maker kit (compatible with your GE refrigerator model)
- Waterline kit (comes with compression fittings and tubing)
- Teflon tape (for sealing connections)
Make sure to have all these tools and materials readily available before you proceed with the installation. It’s important to use the appropriate tools for each task to ensure safety and accuracy throughout the process.
Now that you have everything you need, let’s move on to the first step: checking the compatibility of your refrigerator for an ice maker installation.
Step 1: Check the Compatibility
Before starting the installation process, it’s crucial to verify if your GE refrigerator is compatible with an ice maker. Most newer models come with built-in ice maker capabilities, but some older models or lower-end versions may not have this feature.
To check the compatibility, refer to your refrigerator’s user manual or the product specifications. Look for any indications or information regarding the ice maker installation. If your refrigerator is compatible, the manual will provide instructions on how to proceed. If not, you may need to consider alternative options or consult a professional for further guidance.
If your refrigerator is compatible, you can move on to gathering the necessary components for the installation process. Make sure to read and understand the instructions provided by GE for installing an ice maker. This will help ensure a successful and hassle-free installation.
Once you have confirmed the compatibility of your GE refrigerator for an ice maker installation, you’re ready to proceed to the next step: gathering the necessary components.
Step 2: Gather the Necessary Components
Now that you’ve confirmed your GE refrigerator’s compatibility for an ice maker installation, it’s time to gather all the components you’ll need for the installation process. Here’s a list of the essential components:
Ice Maker Kit:
Contact your local appliance store or GE authorized dealer to purchase an ice maker kit that is compatible with your specific GE refrigerator model. The kit will include the necessary components to install and connect the ice maker.
Waterline Kit:
A waterline kit is essential for connecting the ice maker to the water supply. The kit typically includes compression fittings, tubing, and other necessary components. Ensure that the waterline kit is compatible with your refrigerator model and the ice maker kit you have purchased.
Teflon Tape:
Teflon tape is used to seal the connections and prevent any leaks between the waterline components. It’s important to have Teflon tape on hand to ensure a secure and watertight connection.
Before purchasing the components, it’s recommended to double-check with the store or dealer to verify the compatibility and ensure you are getting the correct parts for your specific refrigerator model.
Once you have gathered all the necessary components, you are ready to move on to the next step: shutting off the power supply.
Read more: How Does A Refrigerator Ice Maker Work
Step 3: Shut Off the Power Supply
Before you begin any electrical work or installation process, it’s essential to ensure your safety by shutting off the power supply to the refrigerator. This step will help prevent any accidents or electrical shocks during the installation process.
To shut off the power supply to your GE refrigerator, follow these steps:
- Locate the circuit breaker or fuse box in your home or kitchen.
- Look for the circuit breaker or fuse that controls the power to your refrigerator. It is usually labeled as “refrigerator” or “kitchen appliances.”
- Flip the switch or remove the fuse to cut off the power supply.
Once you have successfully shut off the power supply, verify that the refrigerator is no longer receiving electricity by checking if the lights and other electrical components are turned off.
Remember, safety should always be the top priority when working with electrical appliances. Take extra precautions by wearing rubber gloves and using insulated tools, if necessary, during the installation process.
Now that you have shut off the power supply, you can proceed to the next step: locating the water supply line for the ice maker installation.
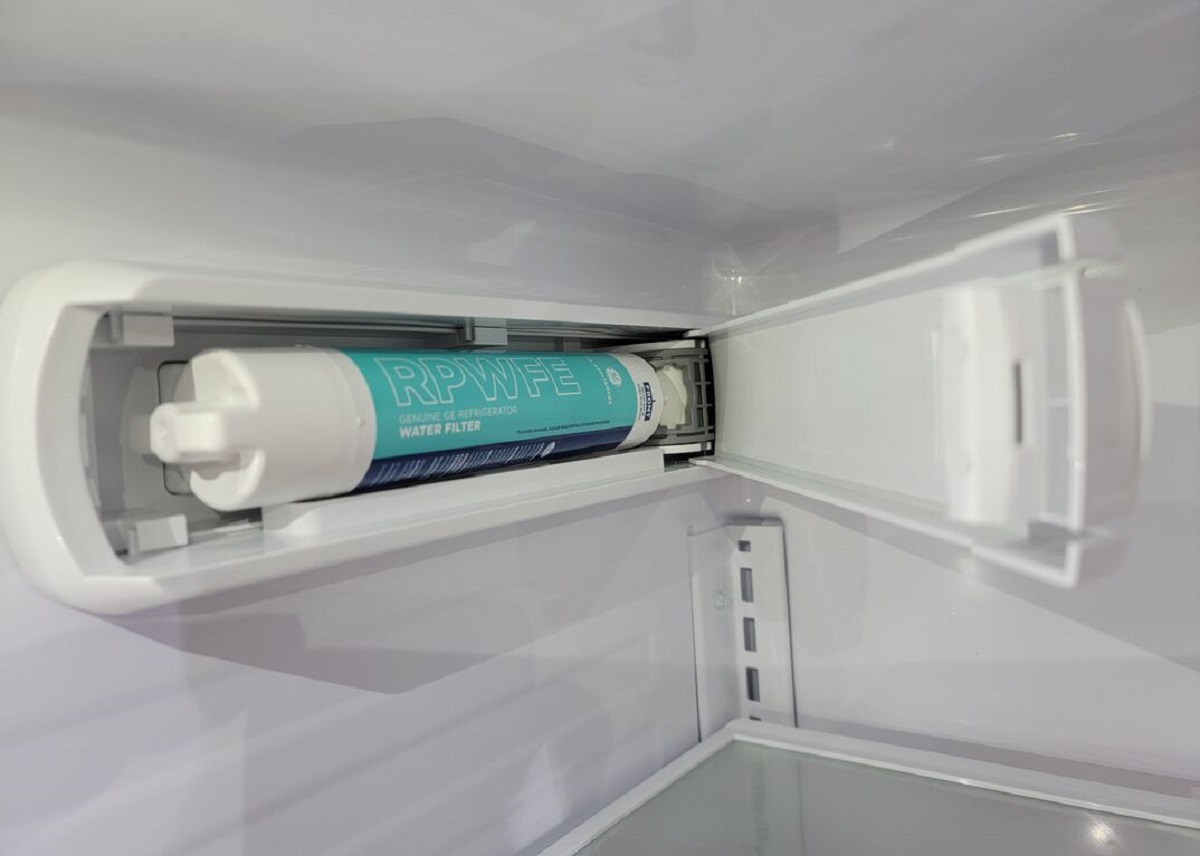
Step 4: Locate the Water Supply Line
Locating the water supply line is an important step in the ice maker installation process. The water supply line is responsible for delivering water to the ice maker, ensuring a constant supply of ice. Follow these steps to locate the water supply line:
- Start by moving your refrigerator away from the wall to gain access to the back panel.
- Look for a small, flexible plastic or copper tube connected to the back of the refrigerator.
- Trace the path of the tube to determine its origin.
- If you have a water dispenser on your refrigerator, the supply line is typically connected to the valve behind the dispenser unit. The valve is usually located at the bottom of the refrigerator or in the lower back area.
- If you don’t have a water dispenser, the supply line may be connected to the household water supply under the sink or in the basement. Follow the tube to its source, taking note of any connections or valves.
It’s important to properly identify the water supply line to ensure a successful ice maker installation. If you have any difficulties or are unsure about locating the water supply line, refer to your refrigerator’s user manual or consult a professional for assistance.
Once you have located the water supply line, you’re ready to move on to the next step: installing the waterline kit.
Step 5: Install the Waterline Kit
Installing the waterline kit is a crucial step in connecting your refrigerator to the water supply for the ice maker. The waterline kit provides the necessary components and tubing to create a reliable connection between the refrigerator and the water source. Follow these steps to install the waterline kit:
- Start by turning off the main water supply to your home. This will prevent any water flow while you work on the installation.
- Next, locate the waterline kit that you gathered earlier. This kit typically includes tubing, fittings, and other necessary components.
- Cut a small section of the waterline tubing to the length required to connect the refrigerator to the water supply. Use a utility knife to make a clean, straight cut.
- Once the tubing is cut, insert one end into the compression fitting provided in the waterline kit. Make sure it is inserted securely and snugly.
- Now, attach the other end of the tubing to the water supply. This can be done by connecting it to the existing water supply line or by utilizing a saddle valve that taps into the main water line.
- Ensure that the connections are tight and secure. You can use an adjustable wrench or pliers to tighten the compression fittings.
It’s important to follow the specific instructions provided with your waterline kit for the best results. Some kits may have additional steps or specific requirements for installation.
Once the waterline kit is installed, you’re ready to move on to the next step: connecting the water supply line to the refrigerator.
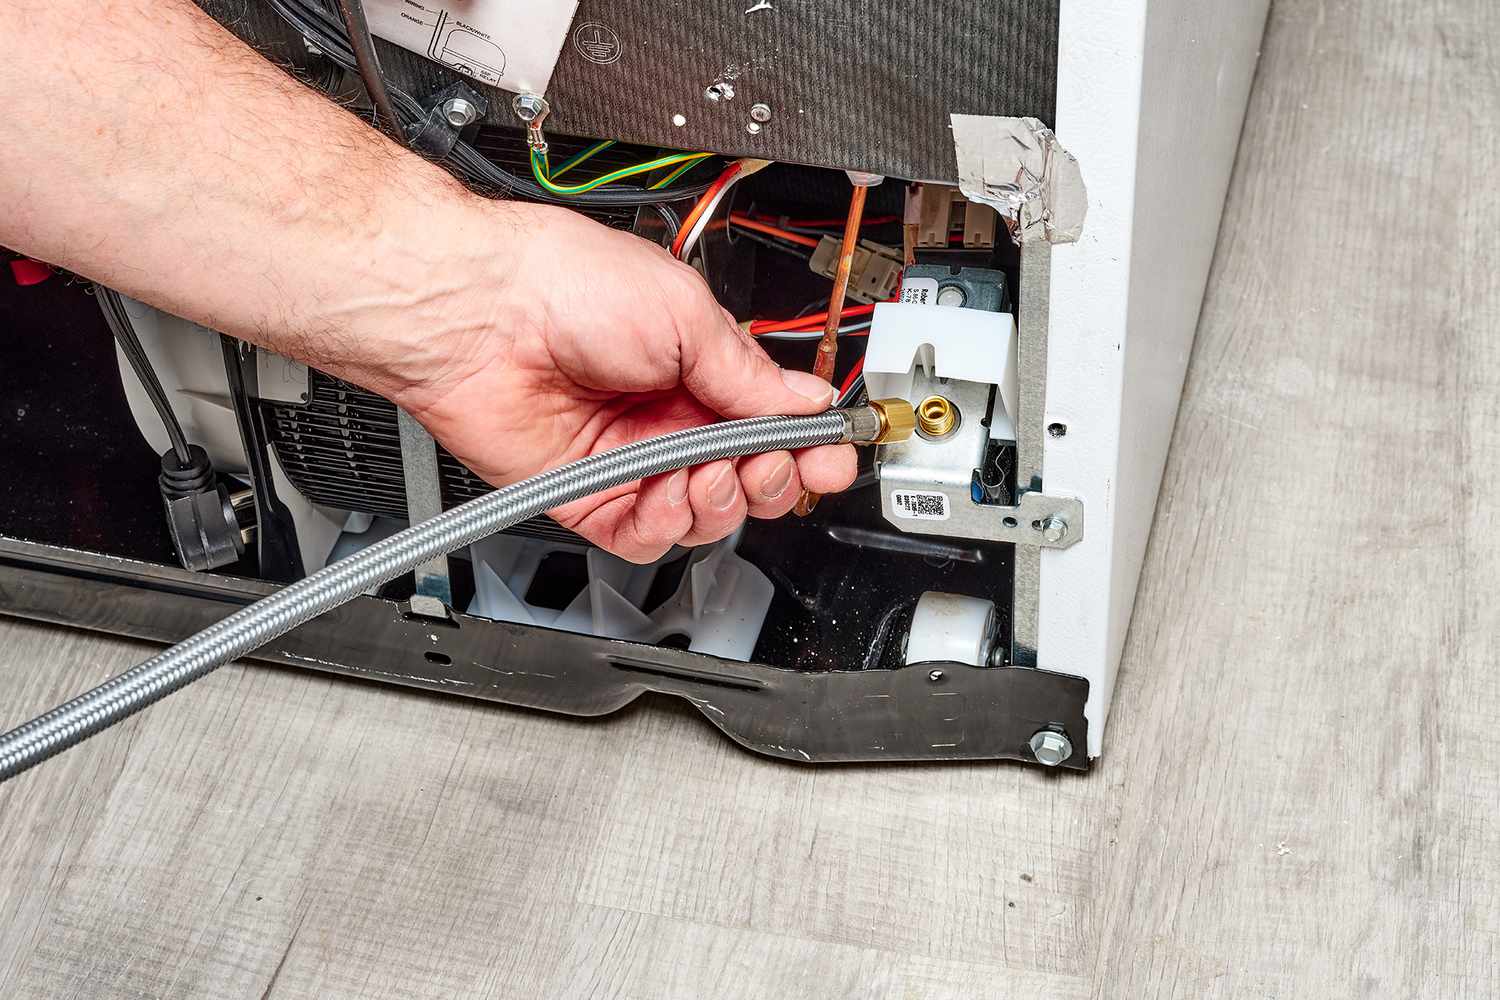
Step 6: Connect the Water Supply Line to the Refrigerator
Now that you have installed the waterline kit and have it properly connected to the water supply, it’s time to connect the water supply line to your GE refrigerator. This step ensures that water can flow from the supply line to the ice maker, allowing it to produce ice. Follow these steps to connect the water supply line to the refrigerator:
- Locate the water inlet valve at the back of your GE refrigerator. It is usually located near the bottom and has a small, threaded nipple.
- Measure and cut a section of tubing from your waterline kit to reach the water inlet valve. Ensure that the tubing is long enough to provide a proper connection but not too long that it becomes difficult to manage.
- Insert one end of the tubing into the compression fitting or adapter provided by your waterline kit.
- Take the other end of the tubing and attach it to the water inlet valve on the refrigerator. Twist it clockwise to secure it tightly in place.
- Use an adjustable wrench or pliers to ensure the connection is tight, but be careful not to overtighten, as it may damage the fittings or tubing.
Double-check all the connections to ensure they are secure and leak-free. If you notice any leaks, tighten the fittings or connections as necessary. It’s important to have a watertight connection to prevent any water damage.
Once the water supply line is successfully connected to the refrigerator, you can move on to the next step: mounting the ice maker.
Read more: What Is A Dual Ice Maker Refrigerator
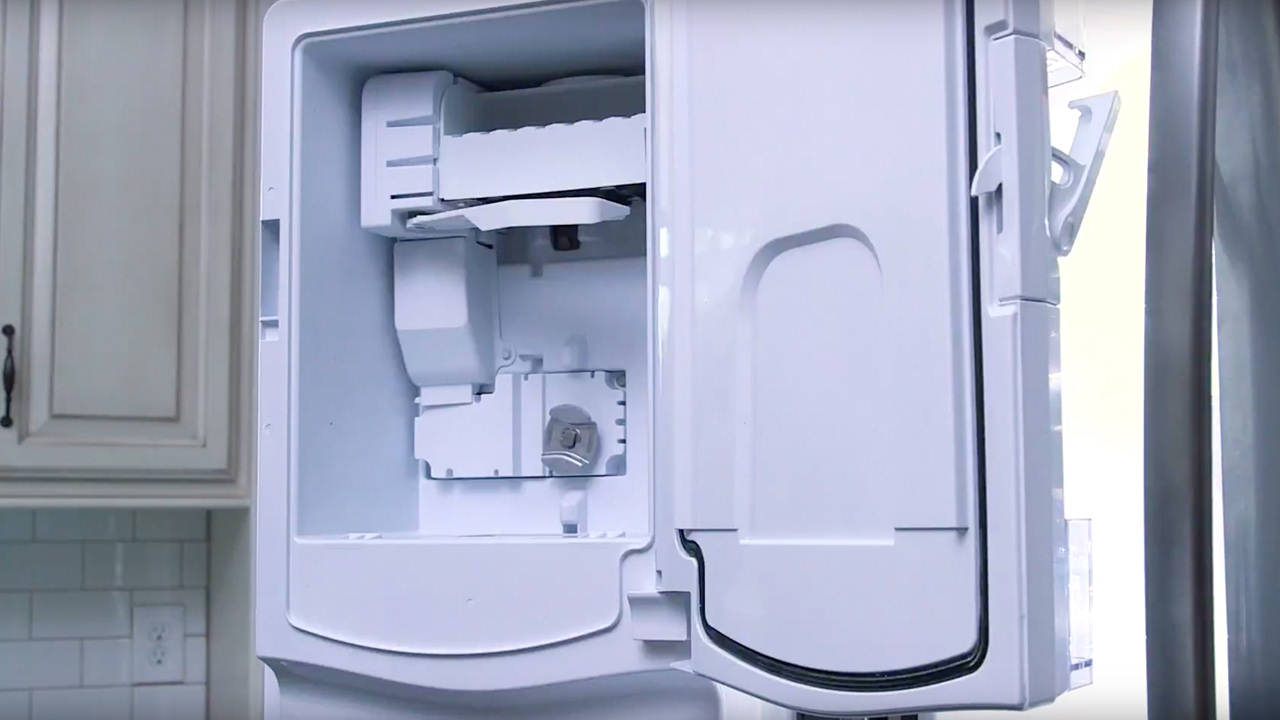
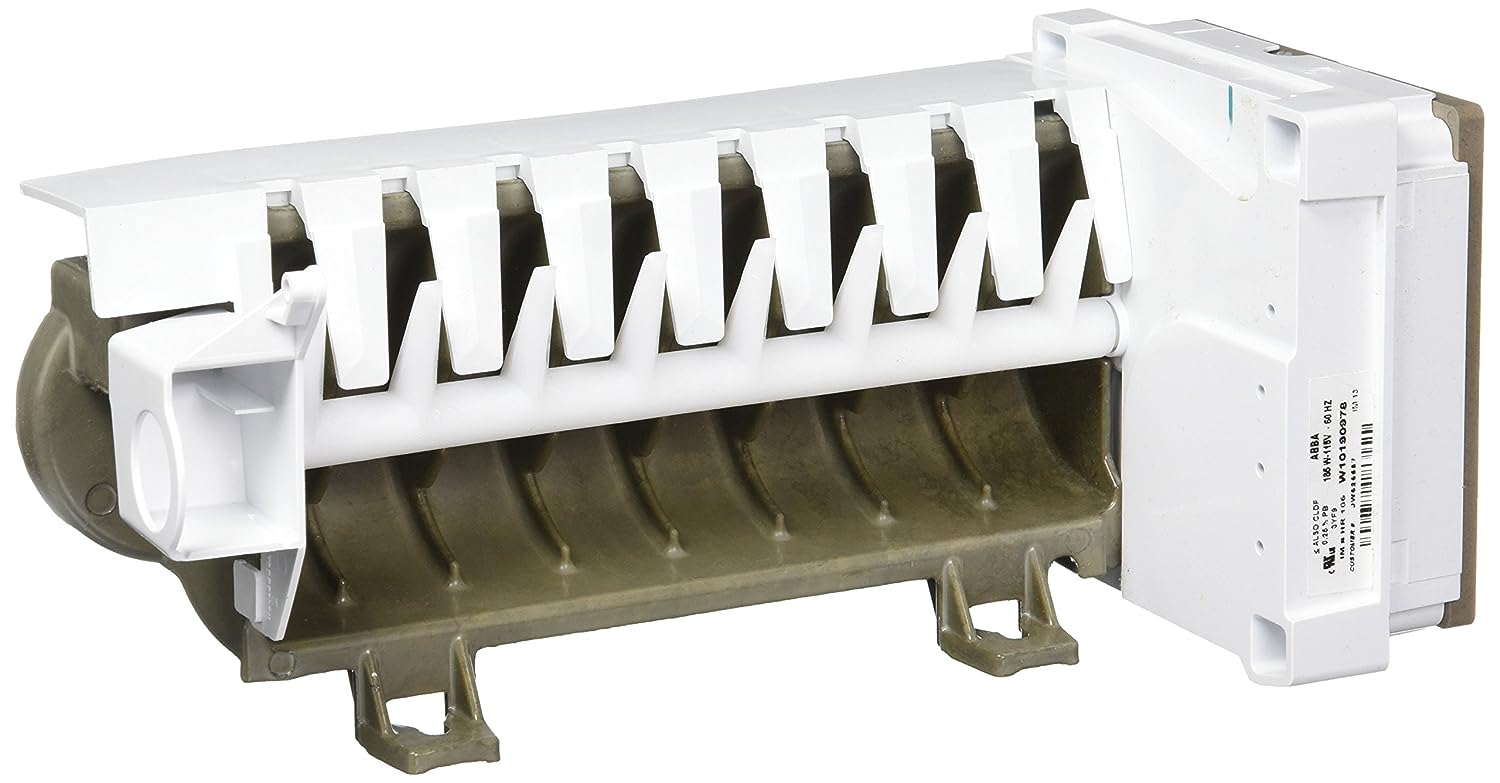
Step 7: Mount the Ice Maker
Mounting the ice maker is a crucial step in the installation process, as it ensures the ice maker is securely attached to your GE refrigerator. Here’s how you can mount the ice maker:
- Locate the mounting brackets or slots on the side or back of your refrigerator, designated for the ice maker installation.
- Position the ice maker in the designated area and align it with the mounting brackets or slots. Make sure it is level and centered.
- Once aligned, use a screwdriver or power drill to secure the ice maker to the brackets or slots. Refer to the manufacturer’s instructions provided with the ice maker for the exact screw size and placement.
- Double-check the mounting to ensure that the ice maker is securely attached and does not wobble. This step is essential to prevent any issues during the ice-making process.
Each refrigerator model may have different mounting mechanisms, so refer to your refrigerator’s user manual or the manufacturer’s instructions for any specific details or requirements.
Once you have successfully mounted the ice maker, you’re ready to move on to the next step: connecting the ice maker to the water supply line.
Before installing an ice maker on your GE refrigerator, make sure to check the compatibility of the ice maker with your specific refrigerator model. This will ensure a smooth installation process and prevent any compatibility issues.
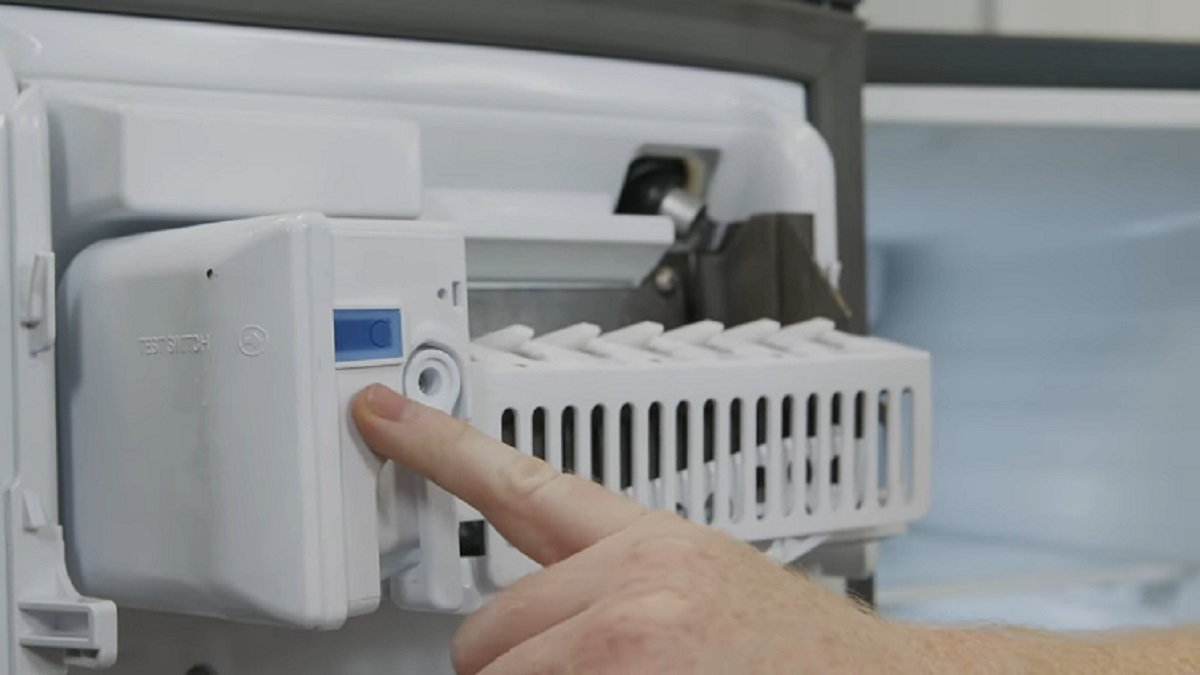
Step 8: Connect the Ice Maker to the Water Supply Line
Now that the ice maker is securely mounted on your GE refrigerator, it’s time to connect it to the water supply line. This step enables the flow of water to the ice maker, allowing it to produce ice. Follow these steps to connect the ice maker to the water supply line:
- Locate the water inlet tube on the back of the ice maker. It is a small plastic tube that connects to the water supply.
- Take the other end of the tubing from your waterline kit (connected to the water supply) and insert it into the water inlet tube. Ensure that it fits securely and is fully inserted.
- If your waterline kit includes a compression fitting or adapter, use it to secure the connection between the water inlet tube and the tubing. Follow the manufacturer’s instructions provided with your waterline kit for the proper installation of the fitting or adapter.
- Check the connection to make sure it is tight and secure. You can use an adjustable wrench or pliers to ensure a proper seal but be cautious not to overtighten.
After connecting the ice maker to the water supply line, it’s important to check for any leaks. Slowly turn on the main water supply and observe the connection for any signs of water leakage. If there are any leaks, tighten the fittings as necessary or refer to your waterline kit’s instructions for troubleshooting steps. A properly sealed connection is vital to prevent water damage and ensure proper ice maker functionality.
With the ice maker successfully connected to the water supply line, you’re ready for the next step: turning on the power supply.
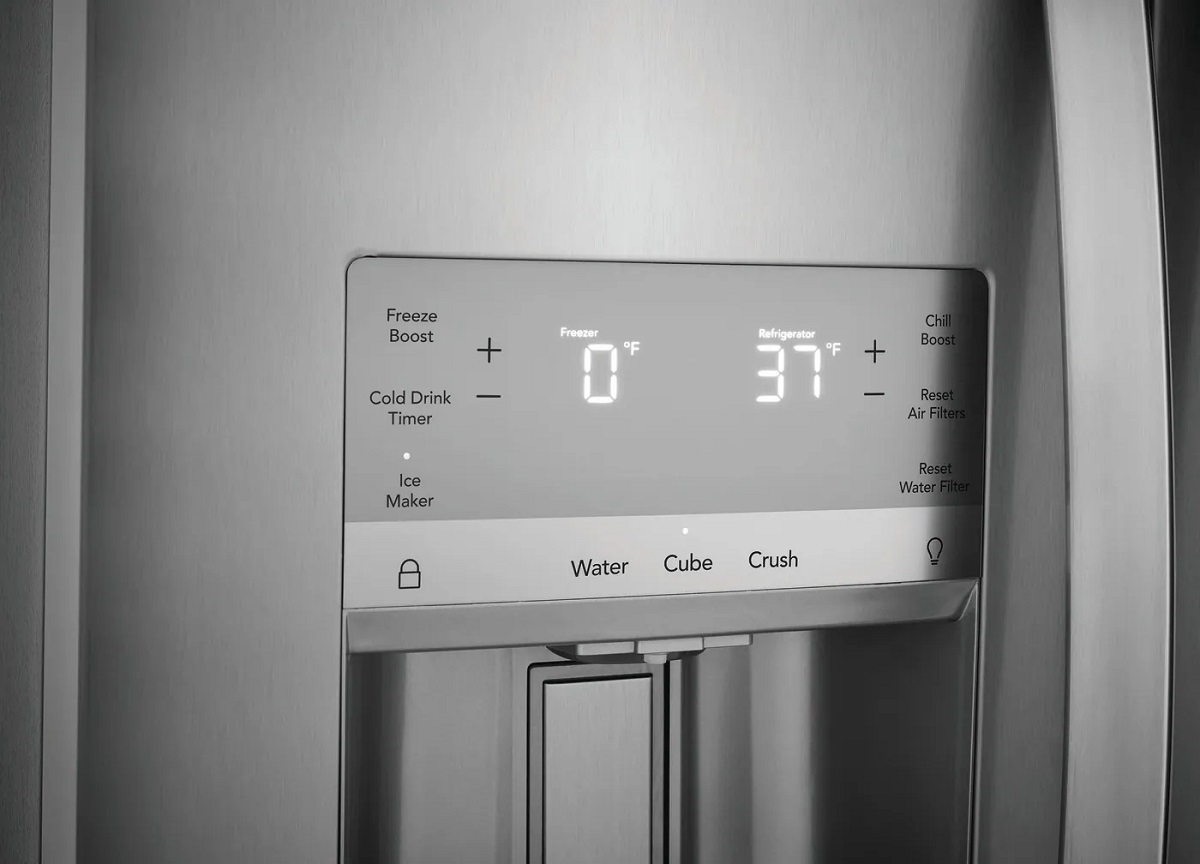
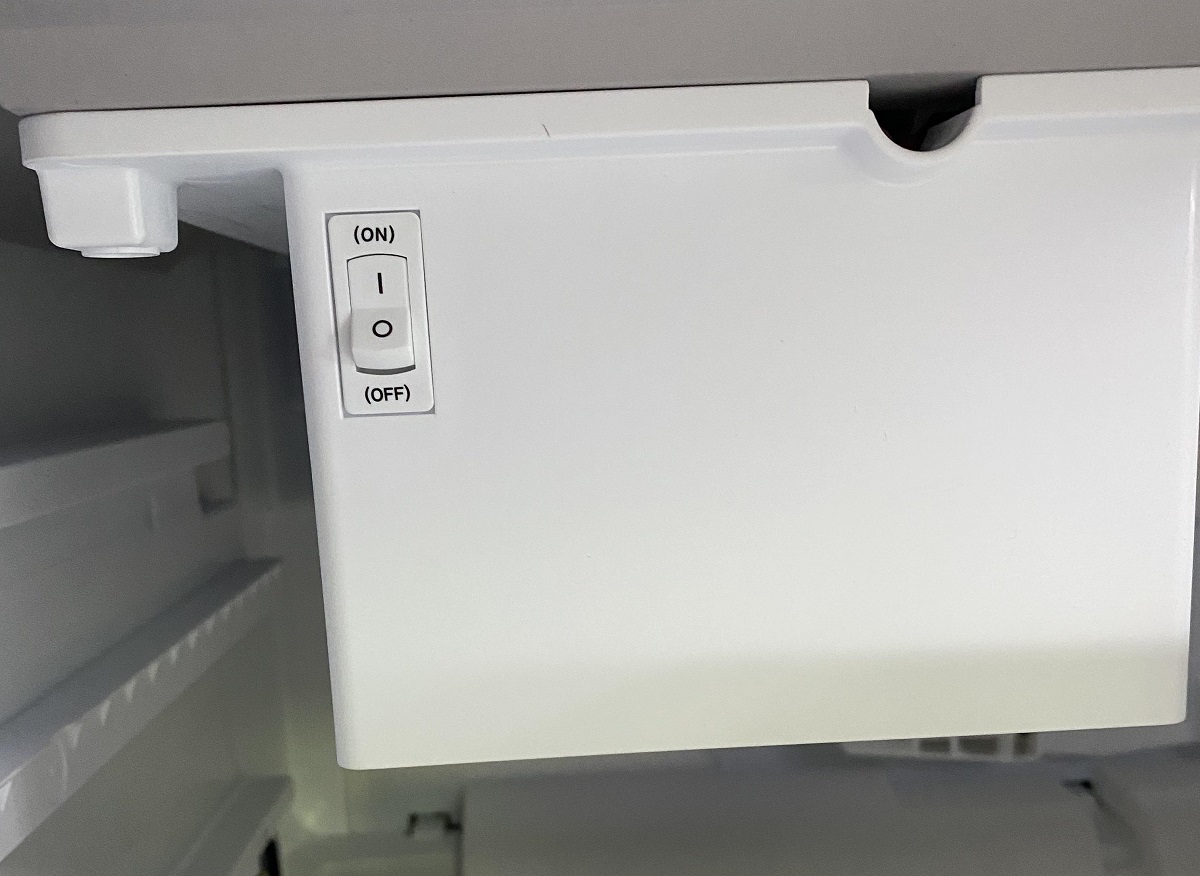
Step 9: Turn On the Power Supply
With the ice maker installed and connected to the water supply, it’s time to turn on the power supply to your GE refrigerator. This step will activate the ice maker and allow it to start producing ice. Follow these steps to turn on the power supply:
- Locate the circuit breaker or fuse box that controls the power to your refrigerator.
- Flip the switch or insert the fuse back into its socket to restore power to the refrigerator.
- Once the power supply is turned on, listen for any sounds or confirm that the lights on the refrigerator are functioning. This indicates that the power has been successfully restored.
- Allow the refrigerator a few minutes to boot up and stabilize its internal temperature before you proceed to the next step.
It’s important to note that after turning on the power supply, it may take some time for the ice maker to start working. The exact time can vary depending on the model, but typically it can take a few hours to a day for the ice maker to produce its first batch of ice. Refer to your refrigerator’s user manual for more specific information on the ice-making process and any recommended waiting times.
With the power supply turned on, you’re ready for the final step: testing the ice maker.
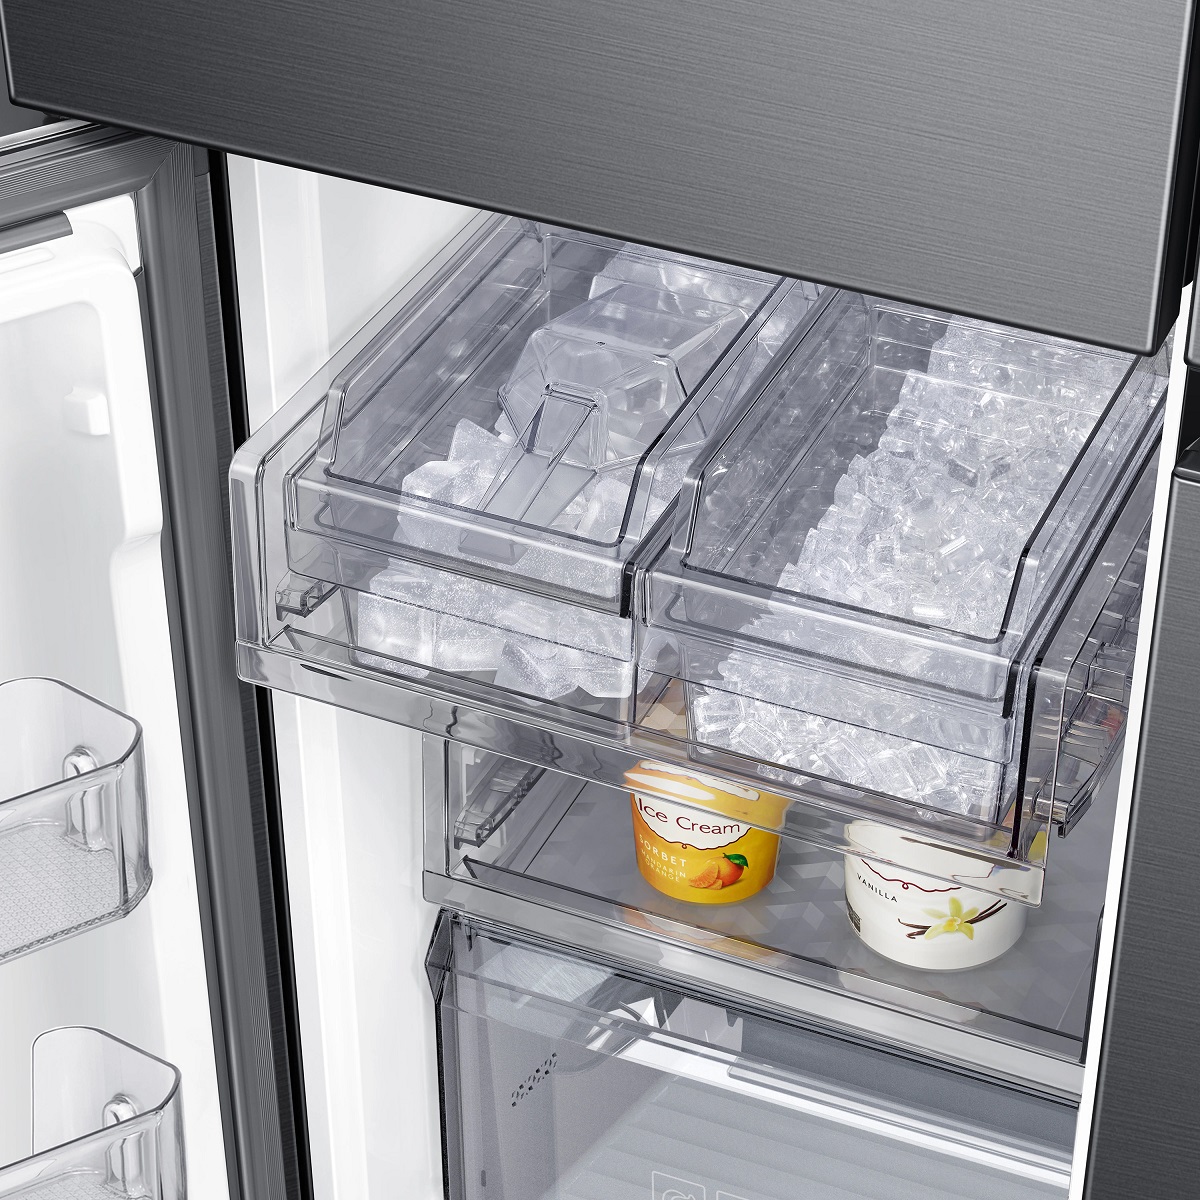
Step 10: Test the Ice Maker
Now that the installation process is complete and the power supply is turned on, it’s time to test the ice maker to ensure it’s working correctly. Testing the ice maker will help you determine if the installation was successful and if the ice maker is producing ice as expected. Follow these steps to test the ice maker:
- Allow a sufficient amount of time for the ice maker to reach the desired temperature. This can vary depending on the model, but it typically takes a few hours to a day for the ice maker to cool down and start producing ice.
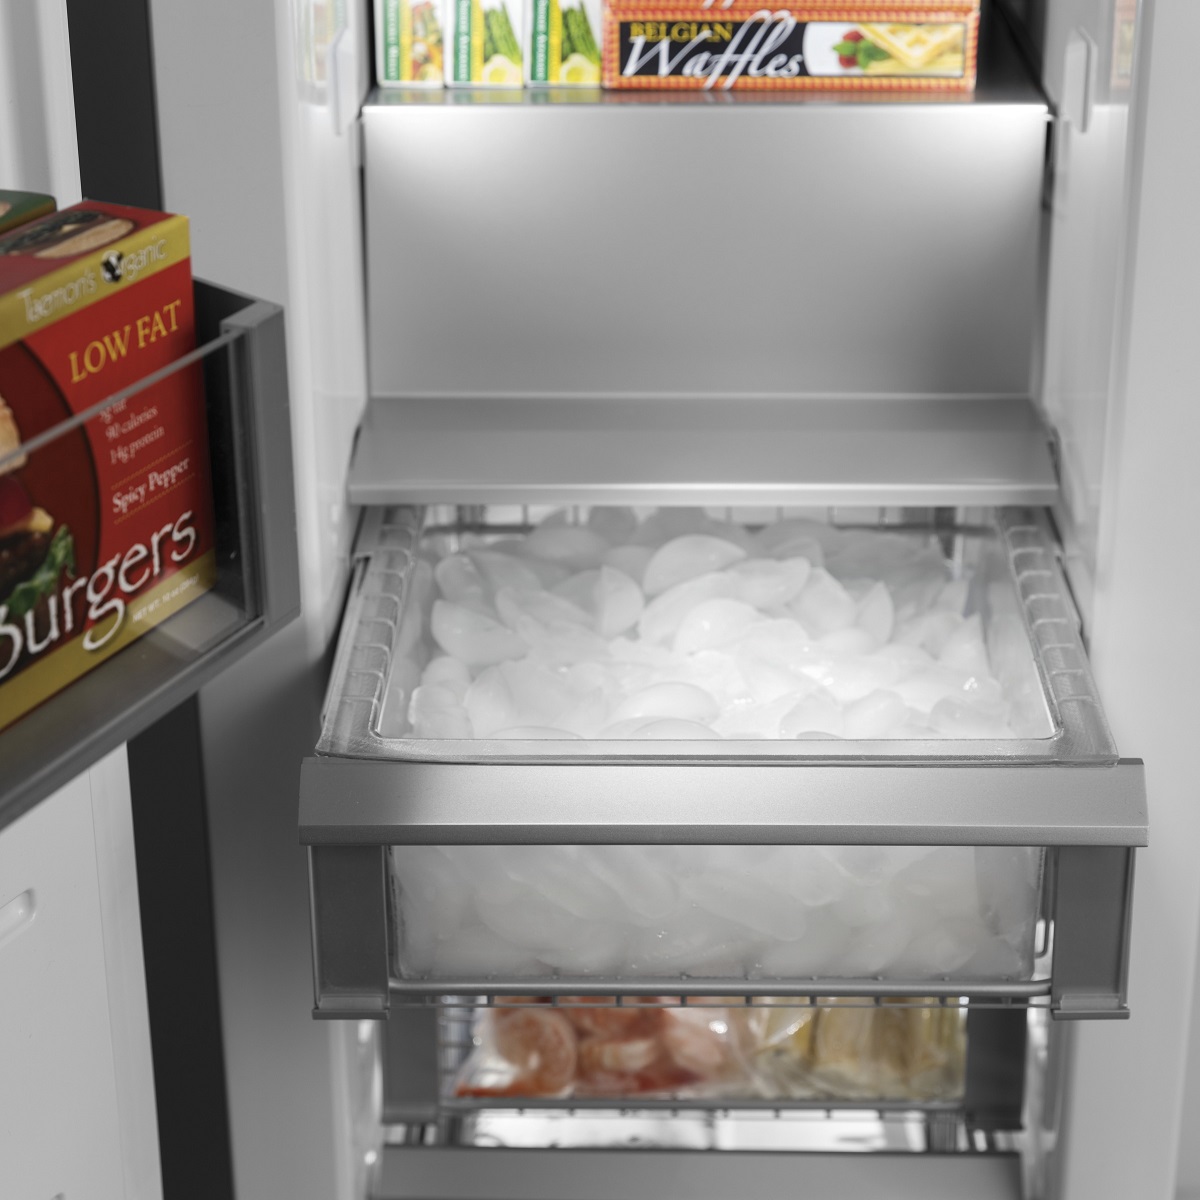
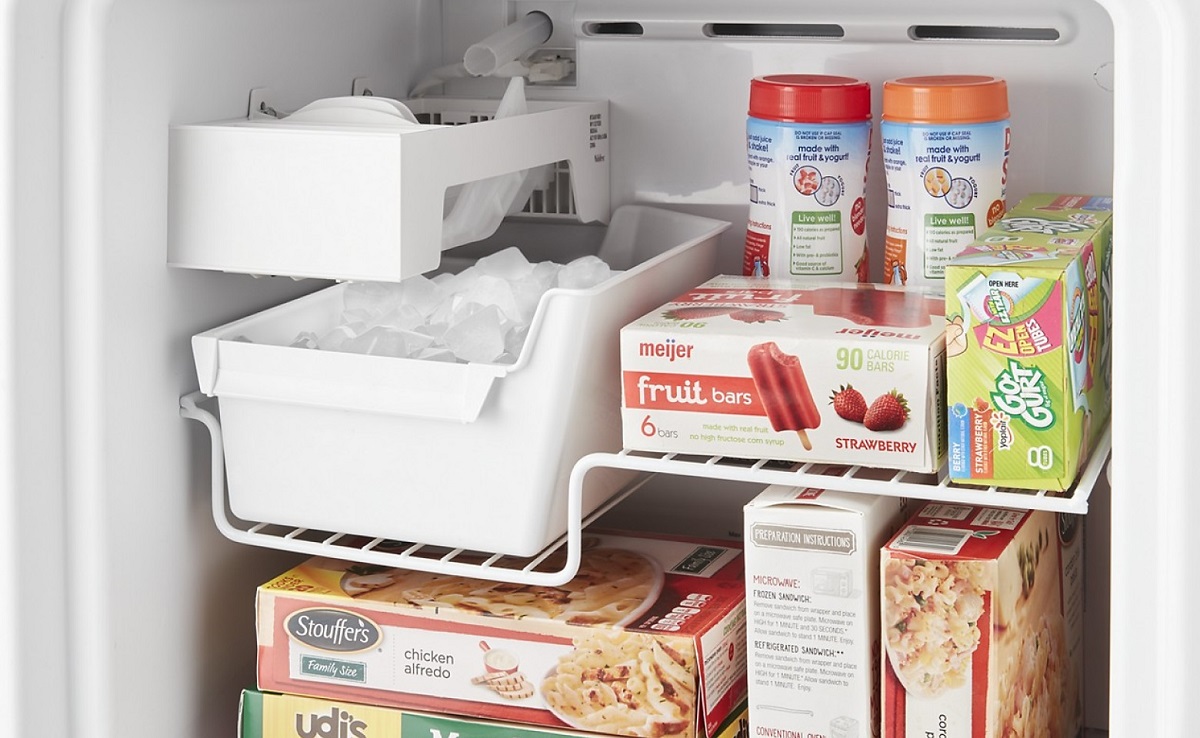
- Once enough time has passed, open the freezer compartment and locate the ice bin. This is where the ice will be stored.
- Check if there is any ice in the bin. If the ice maker is working correctly, you should see some ice cubes or a thin layer of ice.
- Dispense some ice cubes from the ice dispenser, if your refrigerator has one, to ensure that the ice maker is producing ice properly.
- Observe the ice maker over the next few days to see if it consistently produces ice. The ice bin should gradually fill up with ice cubes.
If you notice any issues during the testing phase, such as a lack of ice production or unusual noises, refer to your refrigerator’s user manual for troubleshooting steps. It’s possible that there may be minor adjustments needed or a specific configuration required for optimal ice maker performance.
Congratulations! You have successfully installed and tested the ice maker on your GE refrigerator. Enjoy the convenience of having a constant supply of ice for your beverages and other needs.
As a final note, be sure to maintain regular maintenance and cleaning of your ice maker to ensure its long-term functionality. Refer to your refrigerator’s user manual for specific care instructions and recommendations.
Thank you for following this comprehensive guide, and we hope you find it helpful in installing your ice maker. Cheers to refreshing drinks with ice!
Read more: How To Reset Bosch Refrigerator Ice Maker
Conclusion
Installing an ice maker on your GE refrigerator can greatly enhance your daily convenience, ensuring a steady supply of ice for your drinks and other needs. By following the step-by-step guide in this article, you now have the knowledge and tools to successfully install an ice maker yourself.
We started by checking the compatibility of your refrigerator for an ice maker installation and ensuring you have the necessary tools and materials. We then walked you through shutting off the power supply, locating the water supply line, and installing the waterline kit. Next, we covered connecting the water supply line to the refrigerator and mounting the ice maker.
We then guided you through connecting the ice maker to the water supply line and turning on the power supply. Finally, we emphasized the importance of testing the ice maker to ensure it is functioning correctly and providing a consistent supply of ice.
Remember to refer to your GE refrigerator’s user manual for specific instructions and consult a professional if needed. Regular maintenance and cleaning of your ice maker will help maintain its performance and longevity.
Now that you have successfully installed your ice maker, sit back and enjoy the convenience of having a constant supply of ice whenever you need it. Whether it’s for refreshing beverages or entertaining guests, your ice maker will undoubtedly enhance your everyday life.
Thank you for choosing this guide, and we hope it has been informative and helpful in your ice maker installation journey. Cheers to a well-equipped refrigerator!
Frequently Asked Questions about How To Install Ice Maker On GE Refrigerator
Was this page helpful?
At Storables.com, we guarantee accurate and reliable information. Our content, validated by Expert Board Contributors, is crafted following stringent Editorial Policies. We're committed to providing you with well-researched, expert-backed insights for all your informational needs.


0 thoughts on “How To Install Ice Maker On GE Refrigerator”