Articles
How To Line Up Garage Door Sensors
Modified: January 8, 2024
Learn how to effectively line up garage door sensors with these informative articles. Gain valuable insights and tips to ensure the proper functioning and safety of your garage door.
(Many of the links in this article redirect to a specific reviewed product. Your purchase of these products through affiliate links helps to generate commission for Storables.com, at no extra cost. Learn more)
Introduction
Welcome to our comprehensive guide on how to line up garage door sensors. If you’re experiencing issues with your garage door not closing properly or continuously reversing, the misalignment of the sensors might be the culprit.
Garage door sensors play a crucial role in the safe operation of your garage door. They are responsible for detecting obstructions and preventing the door from closing if something is in its path. However, over time, the sensors can become misaligned due to vibrations, accidental knocks, or other factors.
Aligning garage door sensors is a relatively simple task that you can do yourself with minimal tools and time. By following the steps outlined in this guide, you’ll be able to troubleshoot and fix any sensor alignment issues, ensuring that your garage door operates smoothly and safely.
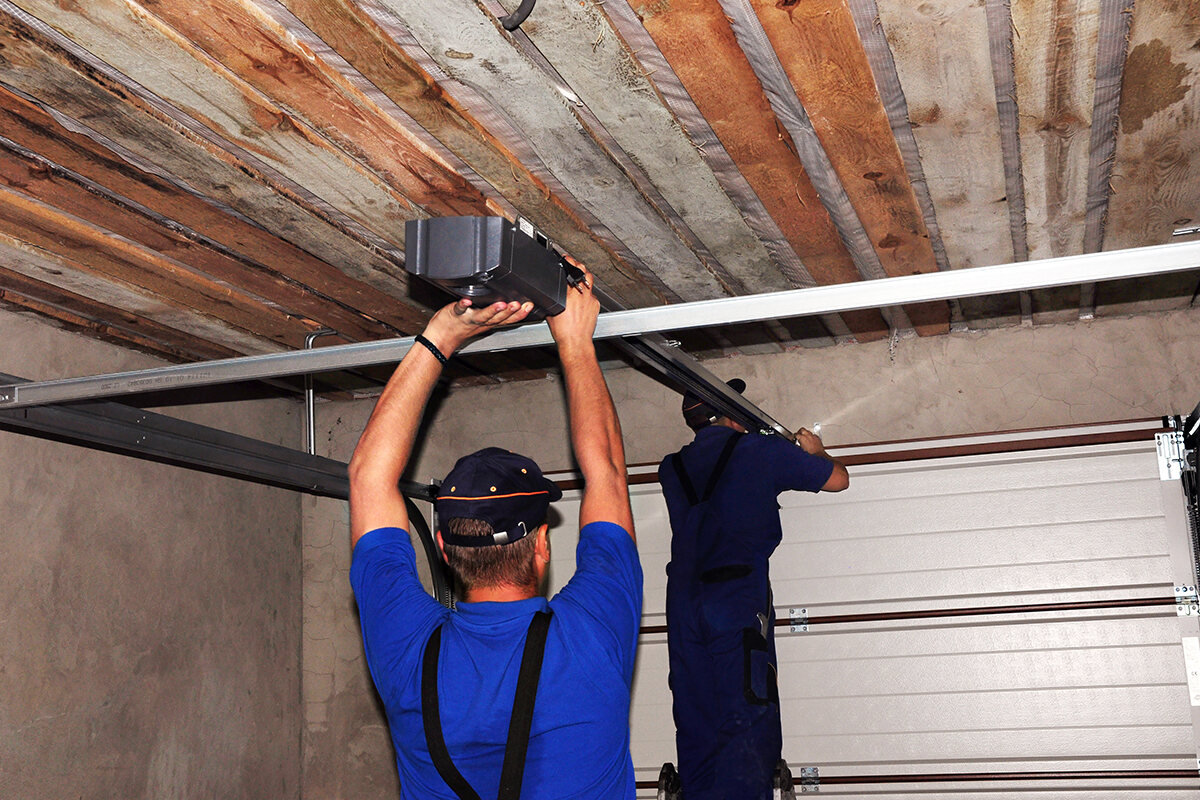
Before we dive into the step-by-step instructions, it’s important to note that safety should always be your top priority. Make sure to disconnect the power to your garage door opener before attempting any adjustments. Additionally, if you’re not comfortable working with electrical components or following these instructions, it’s best to seek professional assistance.
Now, let’s get started with step one: checking the alignment of the sensors.
Key Takeaways:
- Ensure your garage door sensors are properly aligned by following 7 simple steps, including checking alignment, cleaning sensors, and testing for interference. Keep your garage door operating safely and efficiently.
- Prioritize safety and regular maintenance to keep your garage door sensors aligned and functioning optimally. Troubleshoot misalignment issues yourself and enjoy peace of mind with a smoothly operating garage door.
Read more: How To Wire A Garage Door Sensor
Step 1: Check the Alignment of Sensors
The first step in aligning your garage door sensors is to ensure that they are properly lined up. Misalignment can occur over time due to accidental bumps or vibrations, causing the sensors to lose their proper positioning.
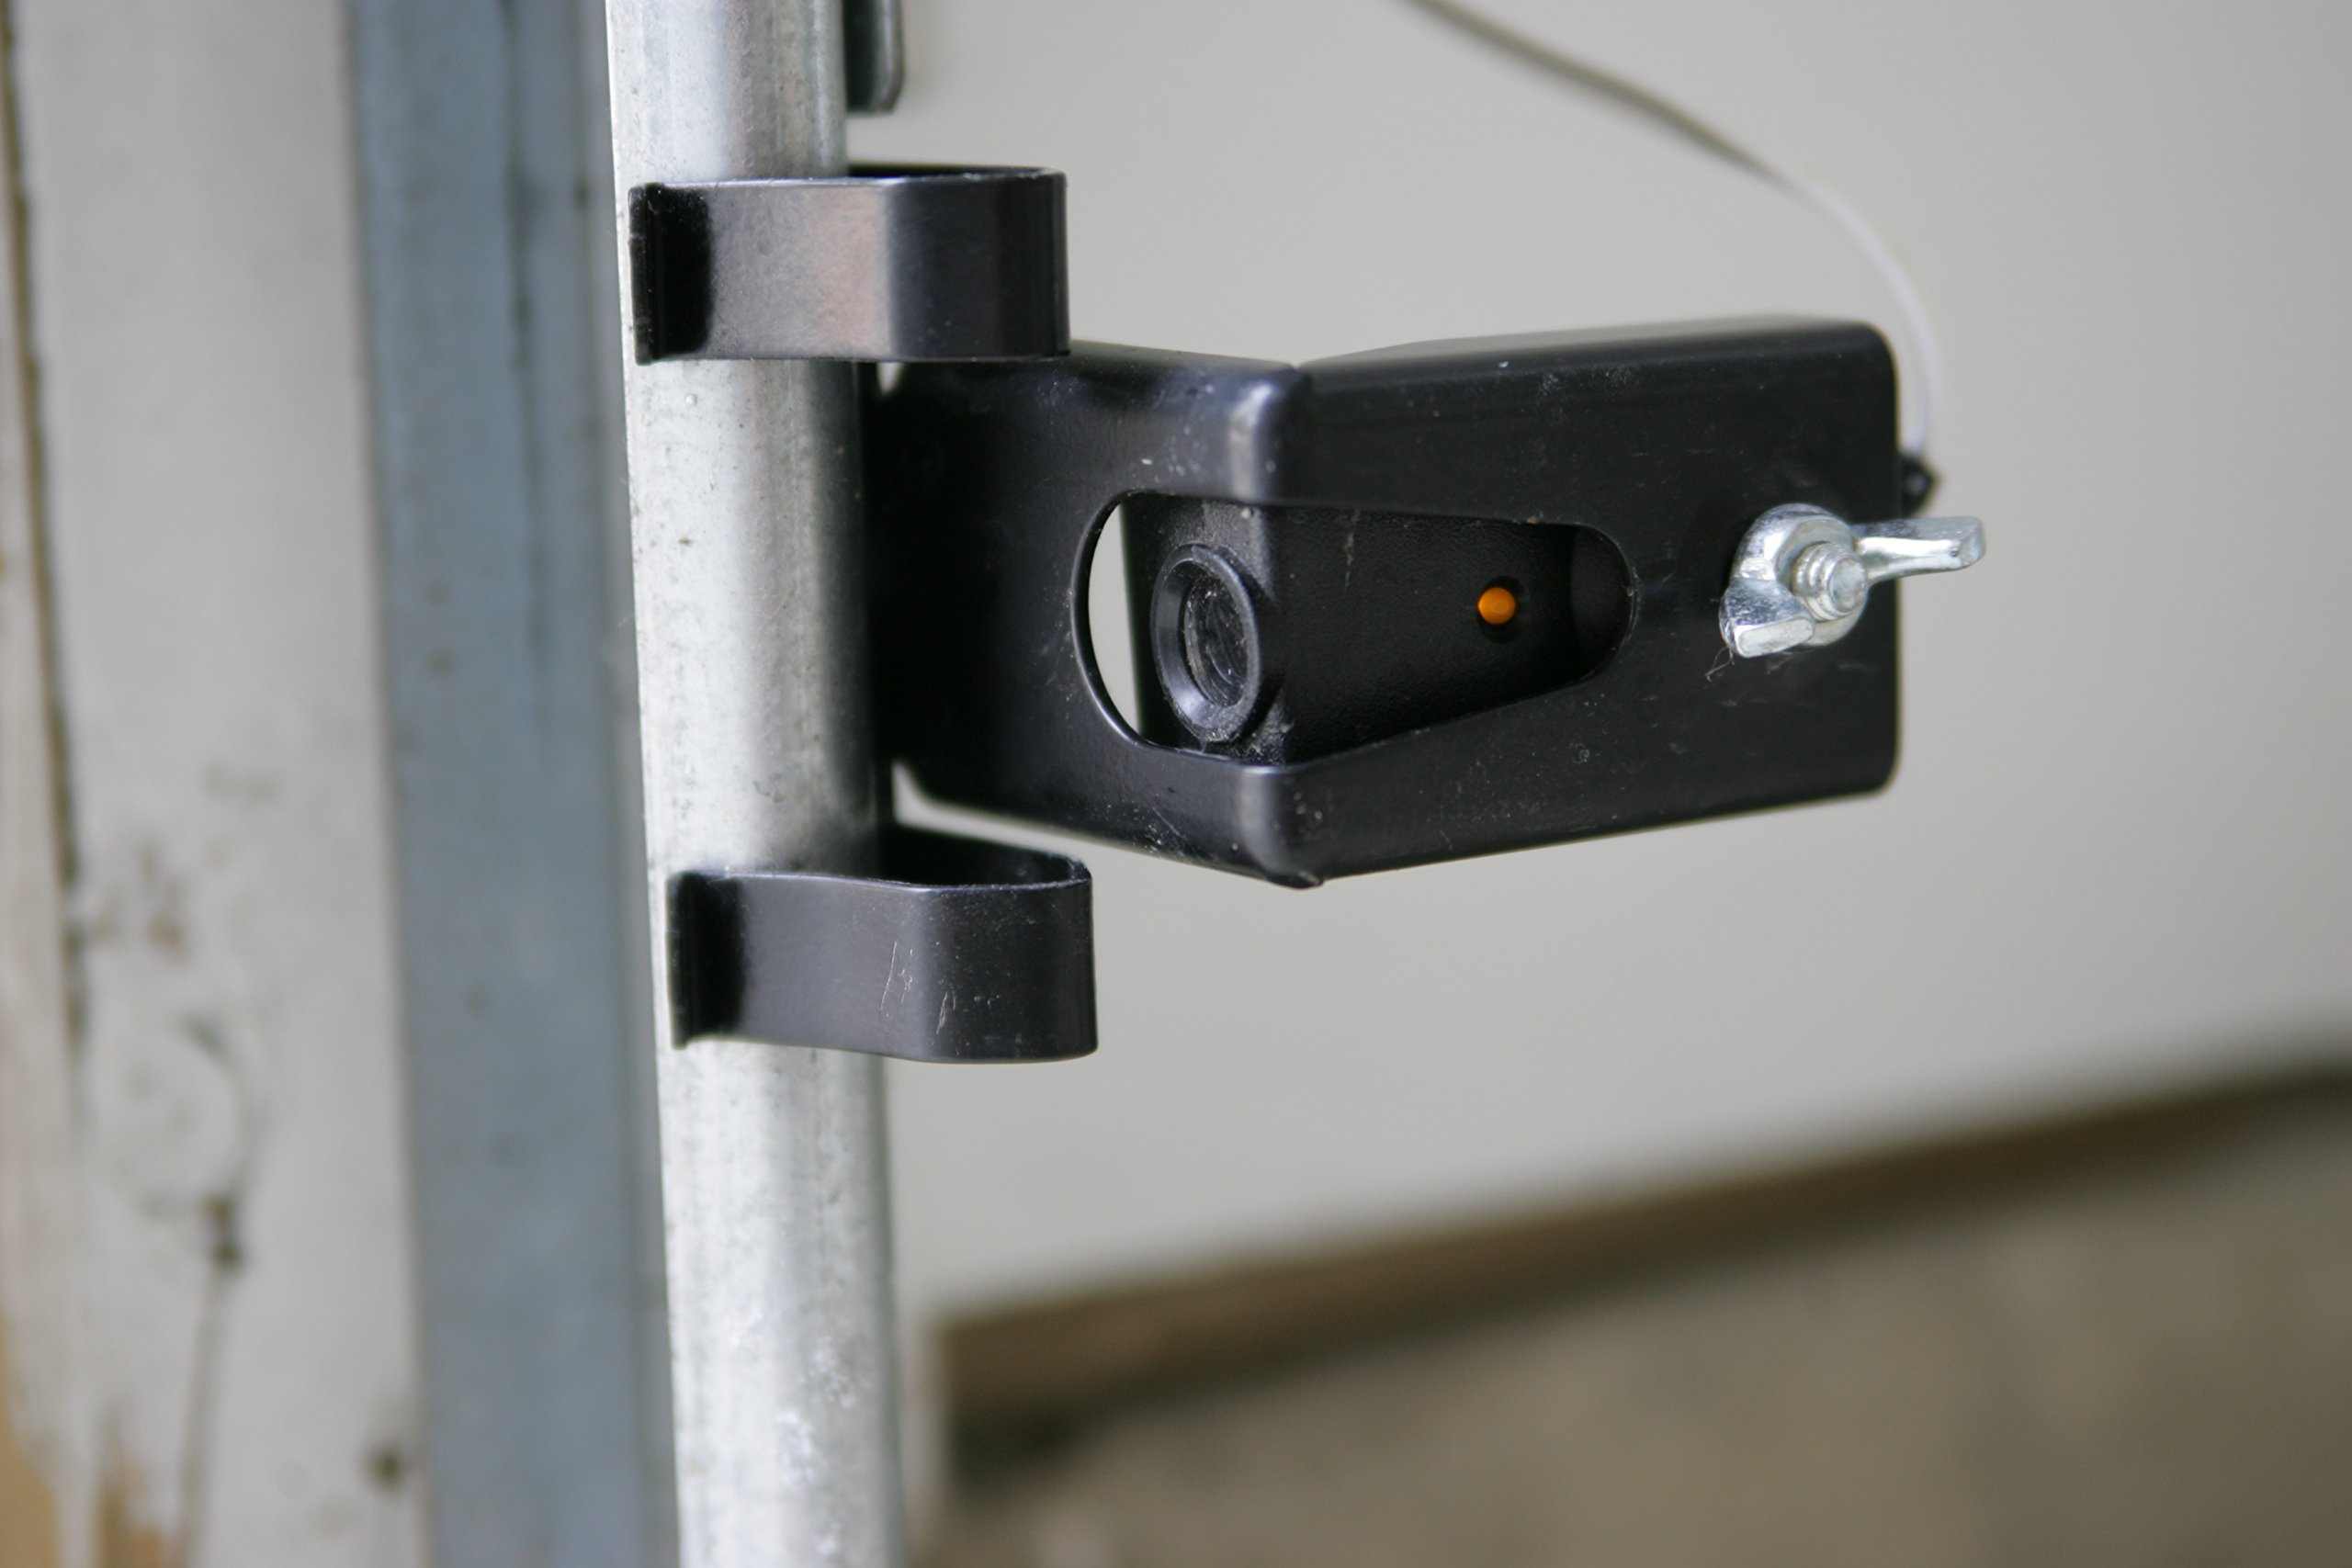
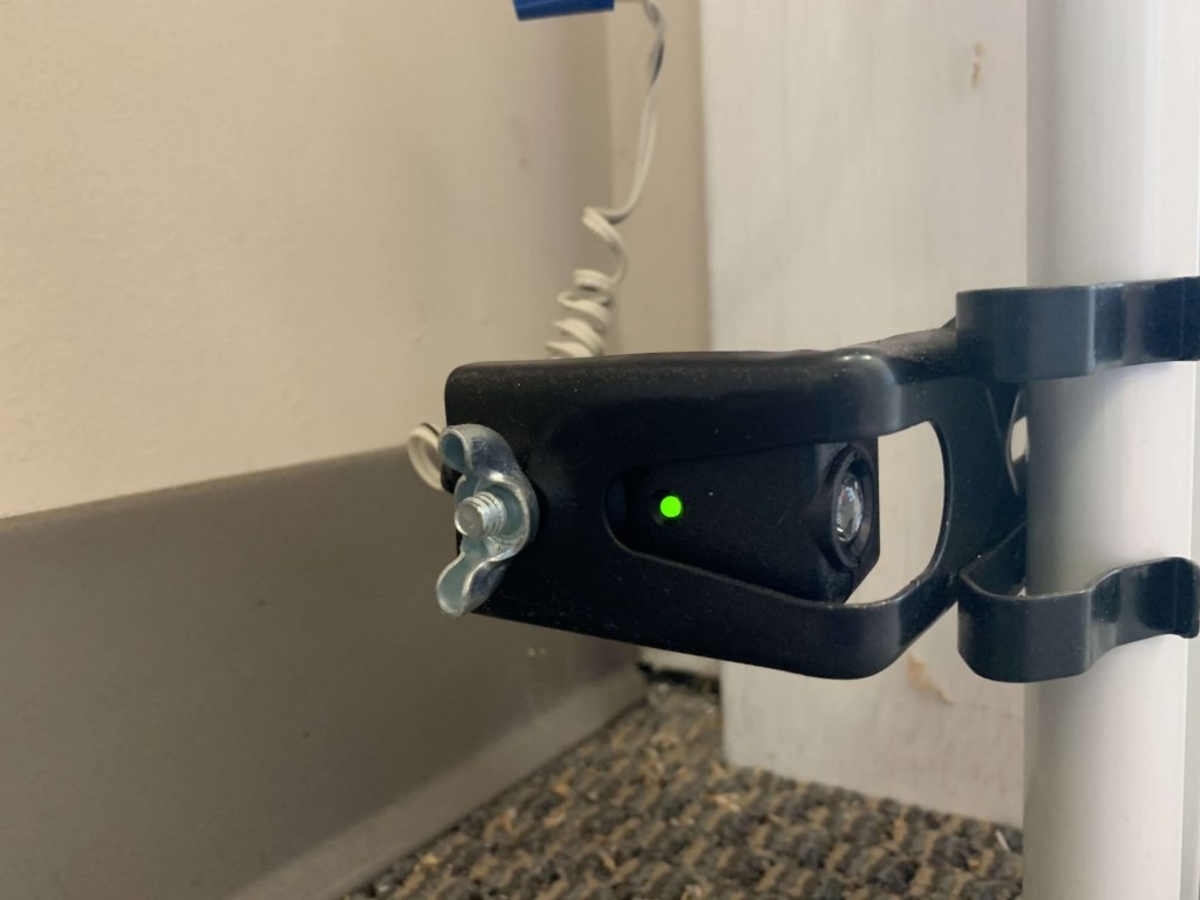
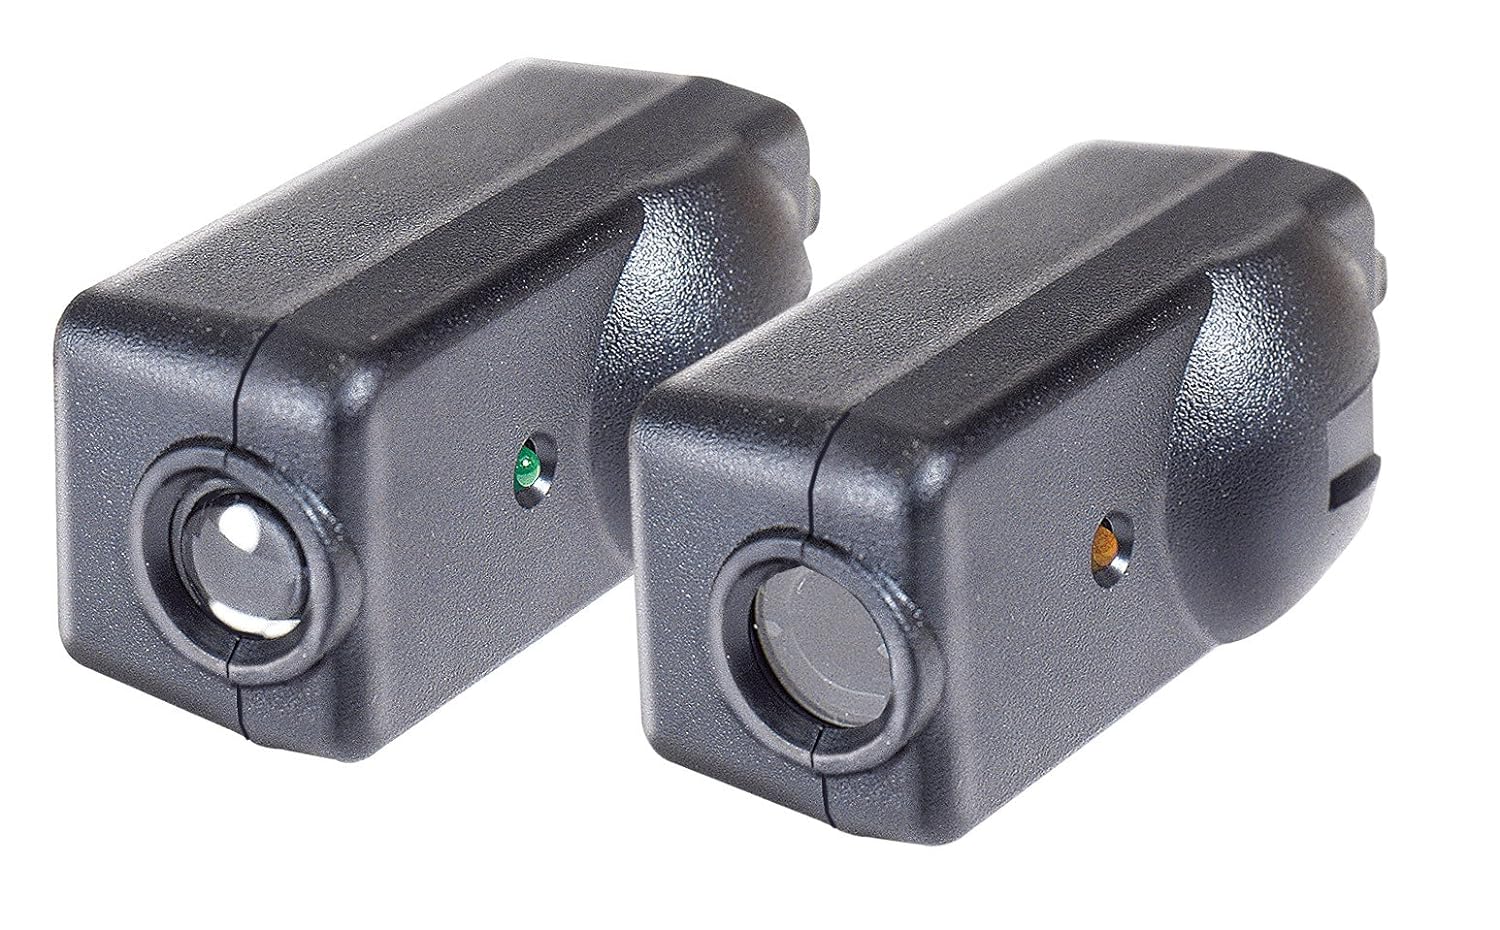
To check the alignment of your garage door sensors, start by identifying the sensor units on each side of the garage door. Typically, there will be one sensor unit on the left side and another on the right side, approximately 6 inches above the floor.
Visually inspect the sensors to see if they are in line with each other. They should be facing each other directly, with no obstructions in between. If you notice any misalignment, gently adjust the sensors until they are parallel to each other.
Use a level to ensure that the sensors are straight and not tilted. Place the level on top of each sensor and make any necessary adjustments to achieve a level reading. This will help ensure accurate detection and operation of the sensors.
Once you have aligned the sensors visually and with the help of a level, it’s time to move on to the next step: cleaning the sensors.
Step 2: Clean the Sensors
After checking the alignment of your garage door sensors, it’s important to clean them to ensure optimal performance. Over time, dirt, dust, and debris can accumulate on the sensors’ lenses, obstructing their ability to detect objects and causing potential issues with the garage door operation.
To clean the sensors, start by gently wiping the lenses with a soft, dry cloth. This will remove any loose dirt or debris that may be sitting on the surface. Be careful not to apply excessive force or use abrasive materials that could scratch or damage the lenses.
If there are stubborn stains or sticky residue on the lenses, dampen a clean cloth or cotton swab with a mild detergent diluted with water. Gently wipe the lenses using this solution, and then follow up with a dry cloth to remove any remaining moisture.
In addition to cleaning the lenses, it’s also important to clear any debris or obstructions around the sensor units. Check the area surrounding the sensors for any spider webs, leaves, or other objects that might interfere with their operation.
Make sure to also inspect the sensor wiring for any signs of damage or fraying. If you notice any issues with the wiring, it’s advisable to contact a professional for repairs.
Once the sensors are clean and free from obstructions, move on to step three: adjusting the sensor bracket position.
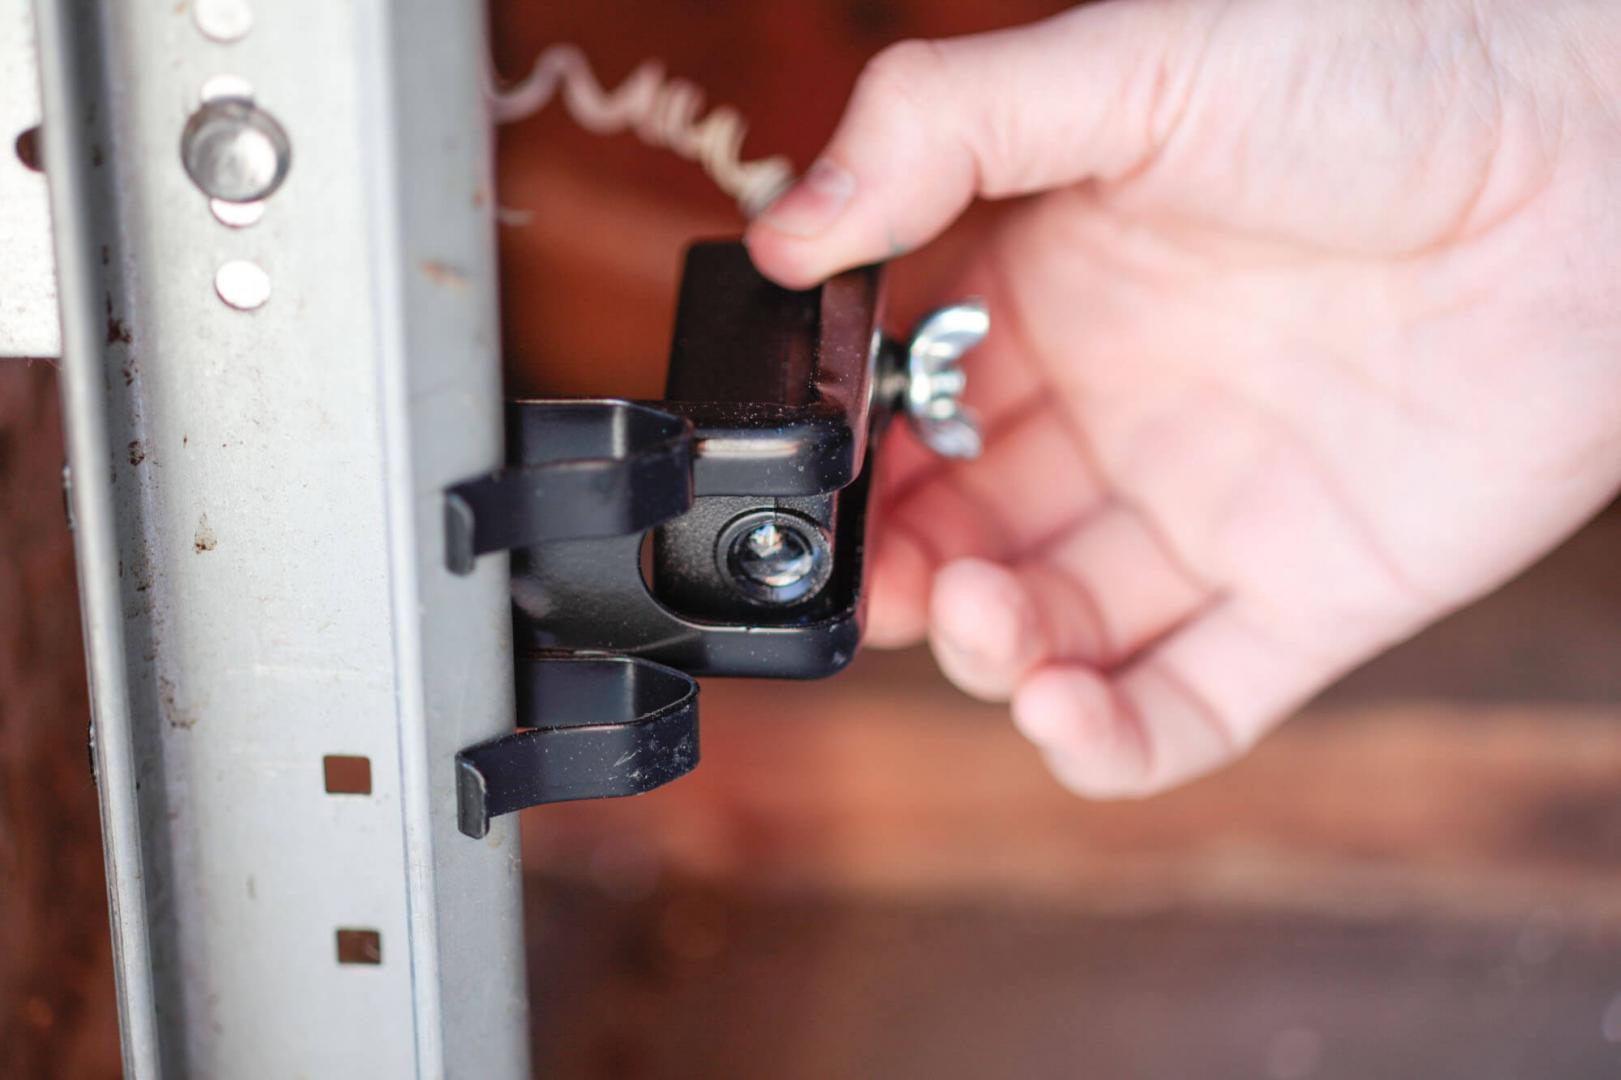
Step 3: Adjust the Sensor Bracket Position
In this step, we will focus on adjusting the position of the sensor brackets. The sensor brackets are the components that hold the sensors in place on each side of the garage door. Proper adjustment of these brackets is crucial for the accurate alignment and functioning of the sensors.
Start by identifying the sensor brackets attached to the garage door frame. These brackets typically have adjustable slots or holes that allow for precise positioning of the sensors.
With the help of a screwdriver or a suitable tool, loosen the screws or bolts securing the sensor brackets. This will allow you to move the brackets and adjust their position.
The goal is to position the brackets so that the sensors align perfectly with each other. Adjust the brackets horizontally and vertically to ensure the best possible alignment.
A helpful tip is to use a laser level or a string to create a straight reference line between the sensors. This will make it easier to adjust the brackets accurately.
Once you have adjusted the sensor brackets, tighten the screws or bolts to secure them in place. Be careful not to overtighten, as this can affect the alignment.
Proceed to the next step, step four, to test the alignment of the garage door sensors.
Step 4: Test the Sensor Alignment
Testing the alignment of your garage door sensors is an essential step to ensure that they are functioning correctly. In this step, we will verify if the adjustments made in the previous steps have resulted in proper sensor alignment.
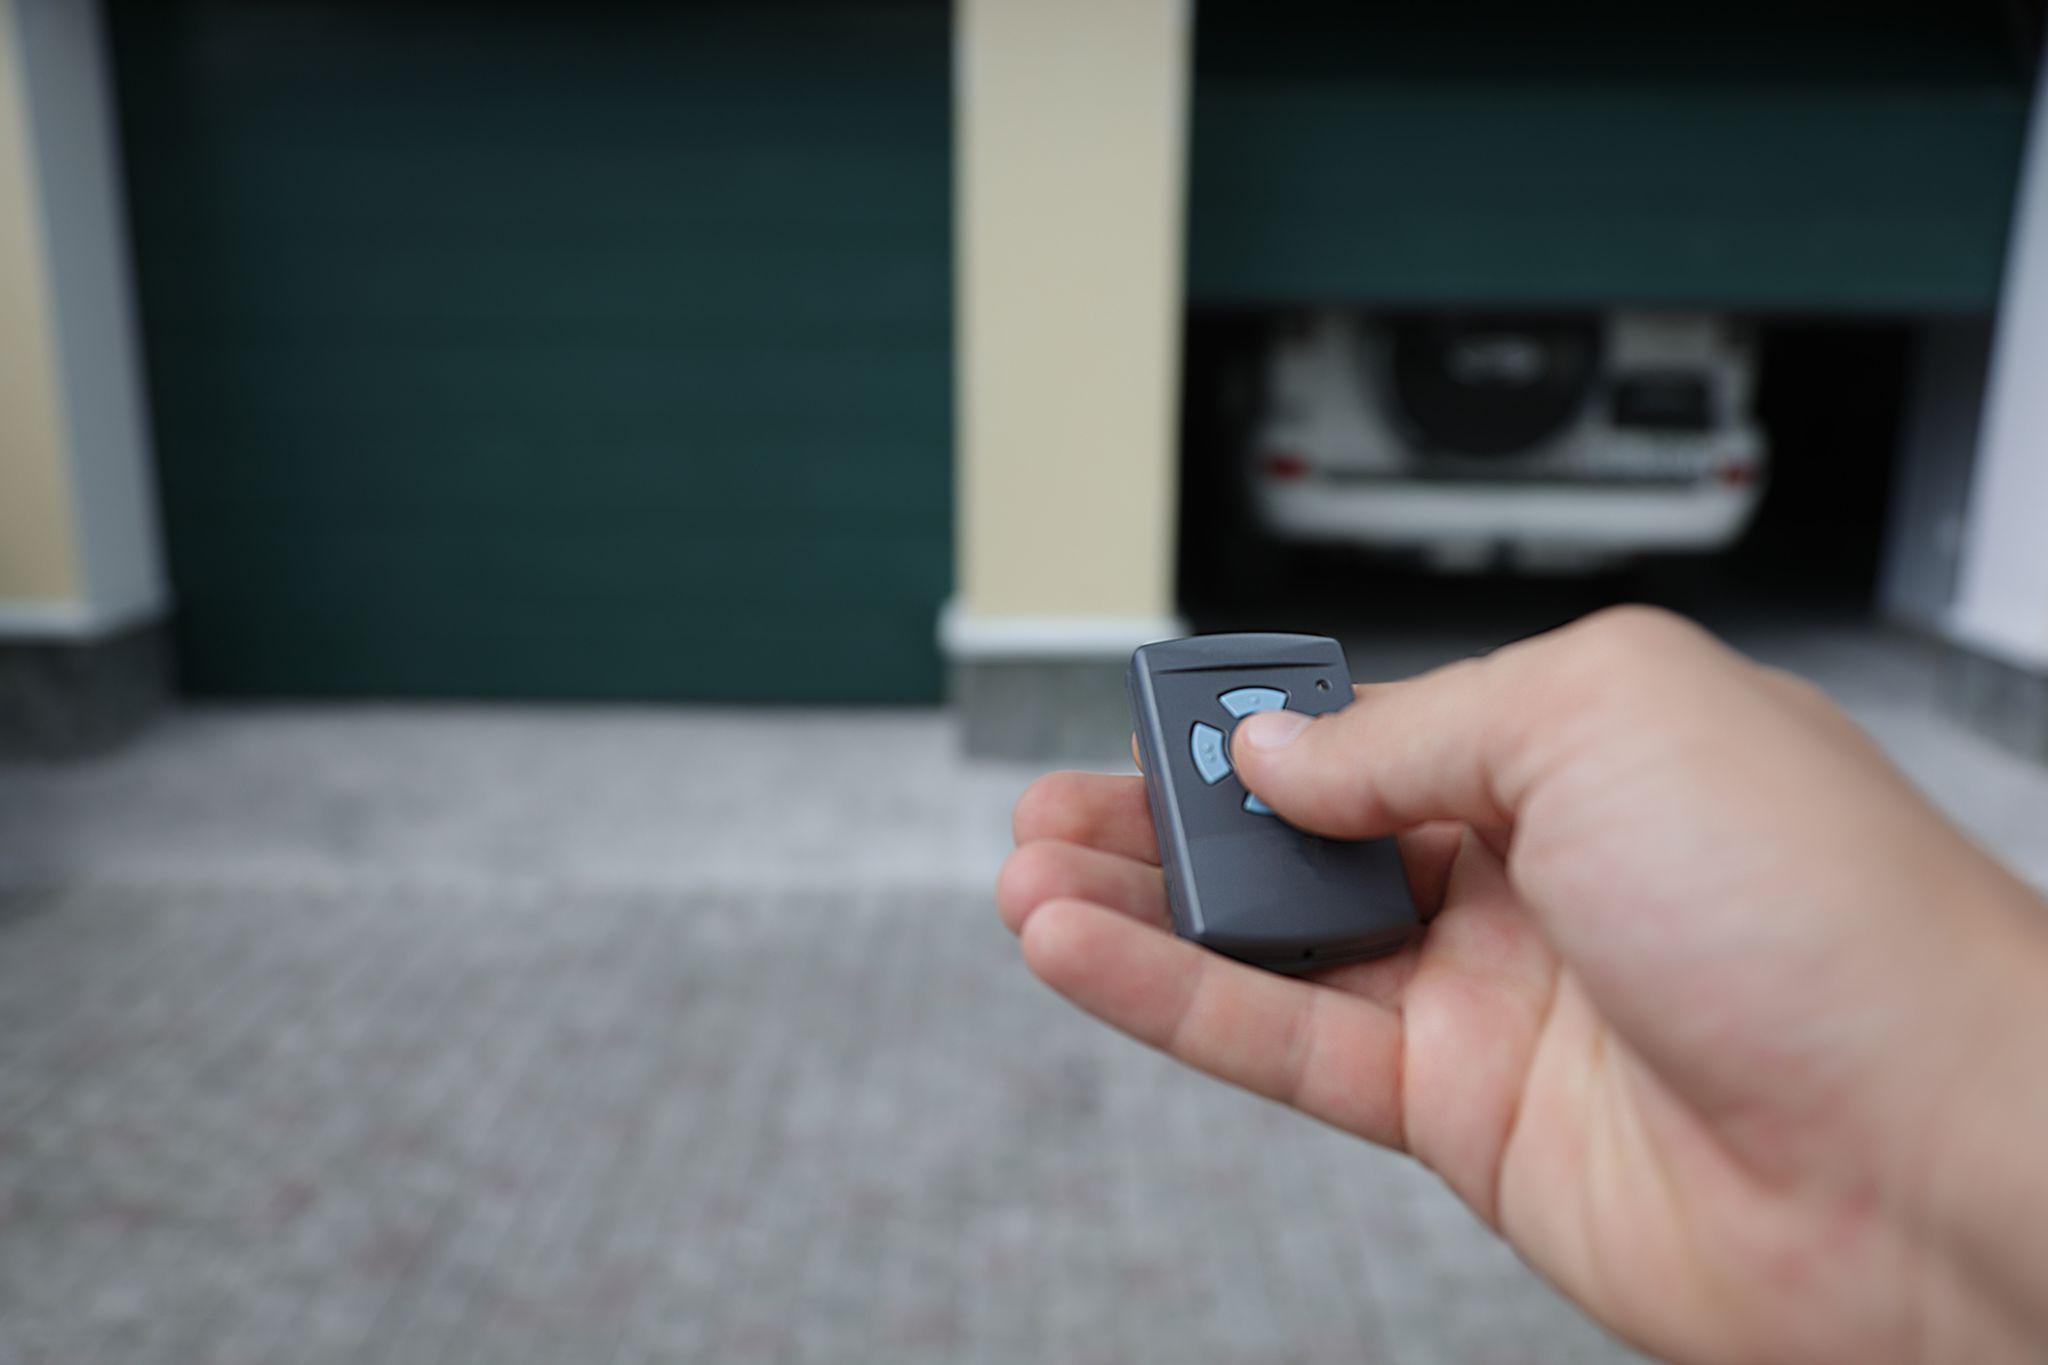
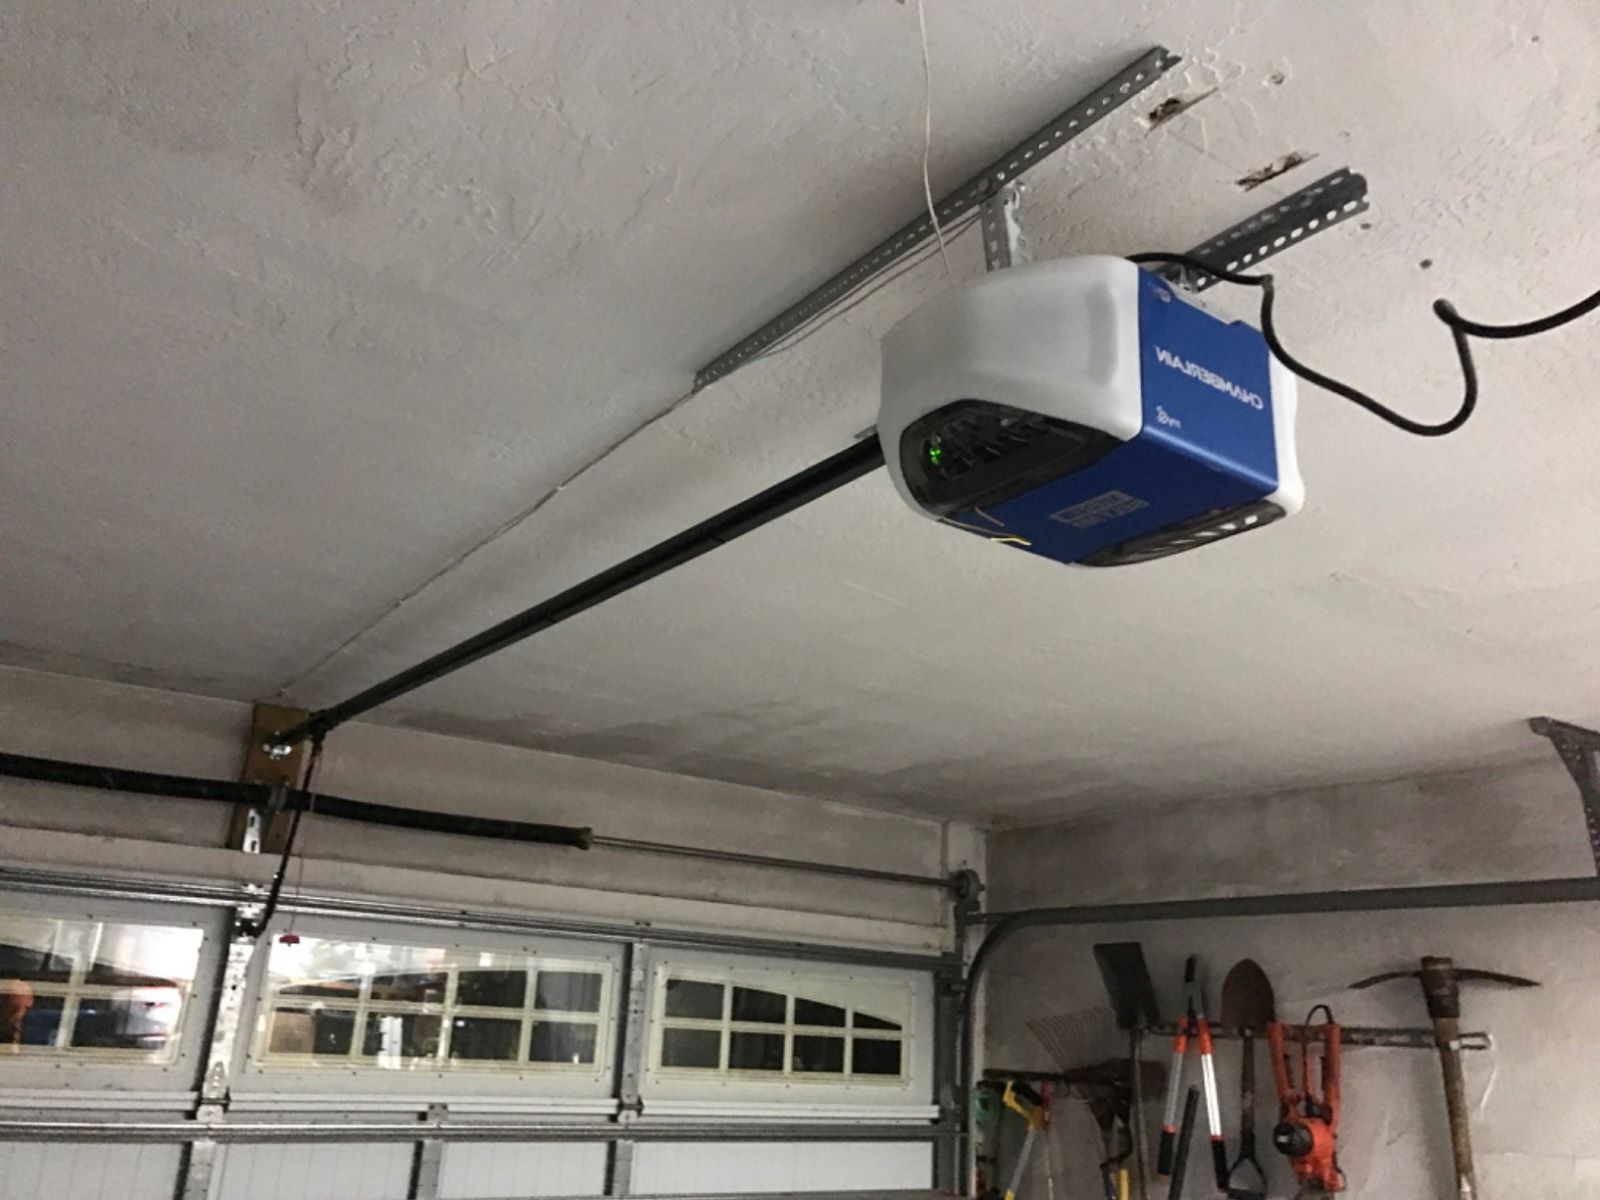
Start by restoring power to your garage door opener and activating the door’s opening mechanism. Use the wall button or remote control to open the garage door.
Observe the behavior of the door as it opens. Pay close attention to the sensors and their indicator lights, if they have any. Ideally, both sensor lights should remain solid or display the same color, indicating that the sensors are properly aligned.
If the sensor lights are blinking or displaying different colors, it indicates that the sensors are still misaligned or there is an issue with their connection.
Try closing the garage door while closely monitoring the behavior of the sensors. Place an object, such as a cardboard box, in the path of the door near the sensors’ beam to simulate an obstruction.
If the sensors are aligned correctly, the garage door should stop and reverse its motion as it detects the object. This safety feature prevents the door from closing on objects or individuals.
If the door does not reverse or continues to reverse even when there are no obstructions, it indicates that there may still be an alignment issue or some other problem with the sensors.
If the sensors are still not aligned, repeat the previous steps to make further adjustments until the sensors are properly aligned and functioning correctly.
Once you are satisfied with the sensor alignment and their performance during testing, proceed to step five: securing the sensor brackets.
Make sure the sensors are aligned and facing each other directly. Use a level to ensure they are at the same height and adjust as needed. Keep the lenses clean for proper function.
Read more: How Do Garage Door Sensors Work
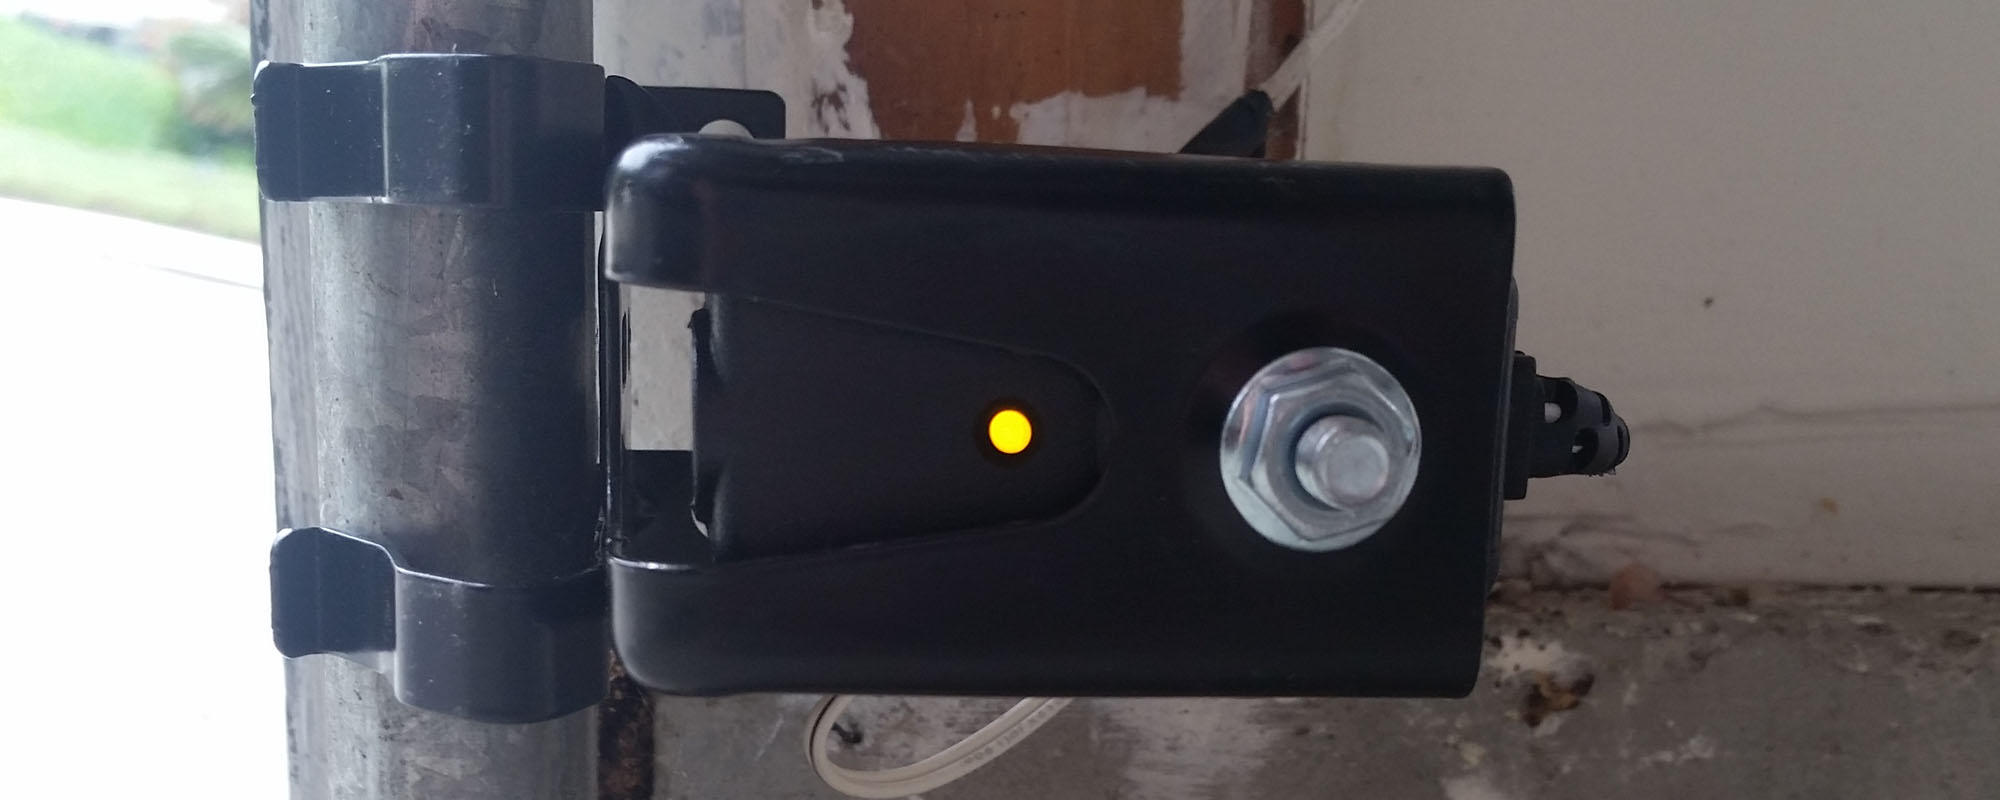
Step 5: Secure the Sensor Bracket
Now that you have successfully aligned your garage door sensors, it’s time to secure the sensor brackets in their final position. This step ensures that the brackets remain stable and maintain the proper alignment of the sensors.
Start by tightening the screws or bolts on the sensor brackets. Use a suitable tool, such as a screwdriver or wrench, to securely fasten the brackets to the garage door frame.
When tightening the screws, be mindful not to overtighten them, as this can cause damage to the brackets or affect the sensor alignment. Aim for a firm hold without excessive force.
Once the sensor brackets are securely fastened, give them a gentle tug to ensure they are stable and firmly in place. If there is any movement or if the sensors shift, you may need to readjust the brackets and resecure them.
If you have followed the previous steps correctly, your garage door sensors should now be properly aligned and securely mounted.
However, it’s recommended to periodically check the sensor brackets and their alignment to ensure they remain in place. Factors such as vibrations or accidental bumps can cause the brackets to shift over time, potentially affecting the sensor alignment.
Now that you have secured the sensor brackets, move on to step six: checking for interference.
Step 6: Check for Interference
In this step, we will examine if there are any sources of interference that could negatively impact the performance of your garage door sensors. Interference can disrupt the sensor signal, leading to malfunctioning or unreliable operation of the door.
Start by inspecting the area surrounding the sensors. Look for any objects that may be blocking the sensor’s line of sight or causing reflections. Common sources of interference include cobwebs, dust, or debris that can accumulate near the sensors.
Clear away any obstructions, ensuring that there is a clear path between the sensors. Use a soft cloth or brush to remove any dust or dirt that may have accumulated on the sensor lenses or reflectors.
Next, consider other possible sources of interference, such as nearby electronics or lighting fixtures. Some devices, like fluorescent lights or motion sensors, can emit signals that interfere with the garage door sensor’s operation. Try turning off or relocating these devices to eliminate the interference.
Another potential source of interference is direct sunlight or bright outdoor lighting. The intense light can affect the sensors’ ability to detect the beam correctly. If this is the case, try shading the sensors or adjusting the angle of reflective surfaces to minimize the impact of sunlight.
Additionally, it’s important to check for any loose or damaged cables or wires connected to the sensors. Loose connections or frayed wires can cause signal disruptions and affect the overall performance of the sensors. If you notice any issues with the wiring, it’s recommended to seek professional assistance for repairs.
By eliminating sources of interference, you’ll ensure that your garage door sensors can function optimally and provide reliable detection of obstacles.
Now that you’ve addressed potential interference, move on to step seven: checking and adjusting the sensor wiring.
Step 7: Check and Adjust Sensor Wiring
In this final step, we will focus on checking and adjusting the wiring connected to the garage door sensors. Proper wiring is crucial for the sensors to receive and transmit signals accurately, ensuring the safe and efficient operation of your garage door.
Start by inspecting the sensor wiring for any visible signs of damage, such as fraying or exposed wires. If you notice any issues, it’s important to address them promptly. Cut away any damaged sections of the wiring and replace them with new wires of the appropriate gauge.
Next, check the connections of the wiring at the sensor brackets and the garage door opener unit. Ensure that the wires are securely fastened and properly inserted into their respective terminals.
If you have recently made any adjustments to the sensor brackets or wiring during the previous steps, double-check the connections to ensure they are tight and secure.
It’s also a good practice to ensure that the wires are neatly organized and not tangled or pinched between moving parts of the garage door or other objects. Proper cable management will help prevent accidental disconnections or damage to the wiring.
If necessary, adjust the length of the wiring to remove any excess slack or tension. Avoid excessive bending or stretching of the wires, as it can weaken their integrity and affect the signal transmission.
Once you have checked and adjusted the sensor wiring, it’s time to test the performance of the garage door sensors one final time. Follow the testing procedure outlined in Step 4 to ensure that the sensors are functioning correctly and providing accurate obstruction detection.
Congratulations! By completing these seven steps, you have successfully aligned and optimized your garage door sensors. Regularly inspect and maintain the sensors to ensure their continued performance and the safe operation of your garage door.
Remember, if you encounter any difficulties during the process or if you’re not comfortable working with electrical components, it’s always best to consult a professional for assistance.
Thank you for reading our comprehensive guide on how to line up garage door sensors. We hope this article has been helpful in resolving any sensor alignment issues you may have encountered.+
Conclusion
Properly aligned garage door sensors are crucial for the safe and efficient operation of your garage door. By following the steps outlined in this guide, you can easily troubleshoot and resolve misalignment issues yourself. Taking the time to ensure that your sensors are aligned correctly can prevent accidents, improve the longevity of your garage door system, and provide you with peace of mind.
Remember, before starting any work on your garage door sensors, always prioritize safety. Disconnect the power to your garage door opener to avoid any potential accidents. Additionally, if you are unsure or not comfortable with electrical work, it’s best to contact a professional for assistance.
In summary, the seven steps to line up garage door sensors are as follows:
- Check the alignment of the sensors.
- Clean the sensors and remove any debris or obstructions.
- Adjust the sensor bracket position for proper alignment.
- Test the sensor alignment by opening and closing the garage door.
- Secure the sensor brackets to ensure stability.
- Check for interference and eliminate any potential sources.
- Inspect and adjust the sensor wiring for proper connections.
By following these steps and regularly maintaining your garage door sensors, you can ensure smooth and reliable operation of your garage door system. If you encounter any persistent issues or need further assistance, don’t hesitate to reach out to a professional garage door technician.
We hope that this guide has been informative and helpful in resolving any sensor alignment issues you may have encountered. Thank you for reading, and may your garage door operate flawlessly for years to come!
Frequently Asked Questions about How To Line Up Garage Door Sensors
Was this page helpful?
At Storables.com, we guarantee accurate and reliable information. Our content, validated by Expert Board Contributors, is crafted following stringent Editorial Policies. We're committed to providing you with well-researched, expert-backed insights for all your informational needs.

0 thoughts on “How To Line Up Garage Door Sensors”