
Articles
How To Trim Garage Door
Modified: August 17, 2024
Learn the step-by-step process of trimming your garage door with our informative articles. Achieve a perfect fit and improve the appearance of your home's exterior.
(Many of the links in this article redirect to a specific reviewed product. Your purchase of these products through affiliate links helps to generate commission for Storables.com, at no extra cost. Learn more)
Introduction
Trimming a garage door is a common home improvement project that can enhance the look and functionality of your garage. Whether you are looking to update your garage’s appearance or need to adjust the size of the opening to accommodate a larger vehicle, knowing how to trim a garage door is a valuable skill. By following the steps outlined in this article, you will be able to tackle this project with confidence and achieve professional-looking results.
Before starting, it’s important to gather the necessary tools and materials. You’ll need a measuring tape, a pencil, a circular saw, sandpaper, a screwdriver, and any necessary trim pieces or weatherstripping.
It’s also essential to take safety precautions. Make sure to wear safety goggles and gloves to protect yourself during the process. Additionally, if you’re unsure about any of the steps or don’t have the necessary tools, it’s always best to consult a professional to ensure a proper installation.
Now, let’s dive into the step-by-step process of trimming a garage door.
Key Takeaways:
- Trimming a garage door is a DIY project that can enhance your home’s appearance and functionality. From measuring and cutting to adding finishing touches, this guide empowers you to achieve professional results with confidence.
- Prioritize safety, precision, and patience when trimming your garage door. By following the step-by-step process and taking necessary precautions, you can transform your garage and add value to your property.
Read more: How To Maintain Garage Door
Tools and Materials Needed
Before you begin trimming your garage door, gather the following tools and materials:
- Measuring tape: This will be used to accurately measure the dimensions of the garage door.
- Pencil: Use a pencil to mark the areas that need to be trimmed.
- Circular saw: A circular saw with a fine-toothed blade will be used to make the necessary cuts.
- Sandpaper: You’ll need sandpaper to smooth out any rough edges after trimming.
- Screwdriver: A screwdriver will come in handy for removing any weatherstripping and trim pieces.
- Trim pieces: If you are planning to add new trim pieces to your garage door after trimming, make sure to have those on hand.
- Weatherstripping: If the existing weatherstripping needs to be replaced, be sure to have the appropriate weatherstripping material ready.
Having these tools and materials ready before you start the project will ensure that you’re well-prepared and can complete the trimming process efficiently.
Step 1: Measure and Mark
The first step in trimming a garage door is to accurately measure and mark the areas that need to be trimmed.
Start by measuring the height and width of the garage door opening using a measuring tape. Make note of these measurements as they will guide you in determining how much material needs to be trimmed.
Next, use a pencil to mark the areas on the garage door where the trimming needs to be done. It’s important to be precise and ensure that the marks are straight and even. Take into consideration any obstructions or features of the door that may affect the trimming process.
Before proceeding to the next step, double-check your measurements and marks to ensure accuracy. This will help prevent any errors or unnecessary cuts during the trimming process.
By taking the time to carefully measure and mark the areas that need to be trimmed, you’ll have a clear guide for the rest of the project and can proceed with confidence.
Step 2: Remove Weatherstripping
Once you have measured and marked the areas that need to be trimmed on your garage door, the next step is to remove the weatherstripping.
Using a screwdriver, gently remove any screws or fasteners that are securing the weatherstripping in place. Take care not to damage the garage door or the weatherstripping during this process.
If the weatherstripping is adhesive-backed, slowly peel it off the door, starting from one corner and working your way along the entire length. Be careful not to tear the weatherstripping or leave behind any adhesive residue.
Removing the weatherstripping will provide you with a clear view of the door’s edges and allow for a clean cut during the trimming process. It’s important to remove the weatherstripping before continuing with the next steps.
Once the weatherstripping has been removed, set it aside for now. You may either reuse it later or replace it with new weatherstripping after the trimming has been completed.
By removing the weatherstripping, you’ll have better access to the door and can proceed with the trimming process more effectively.
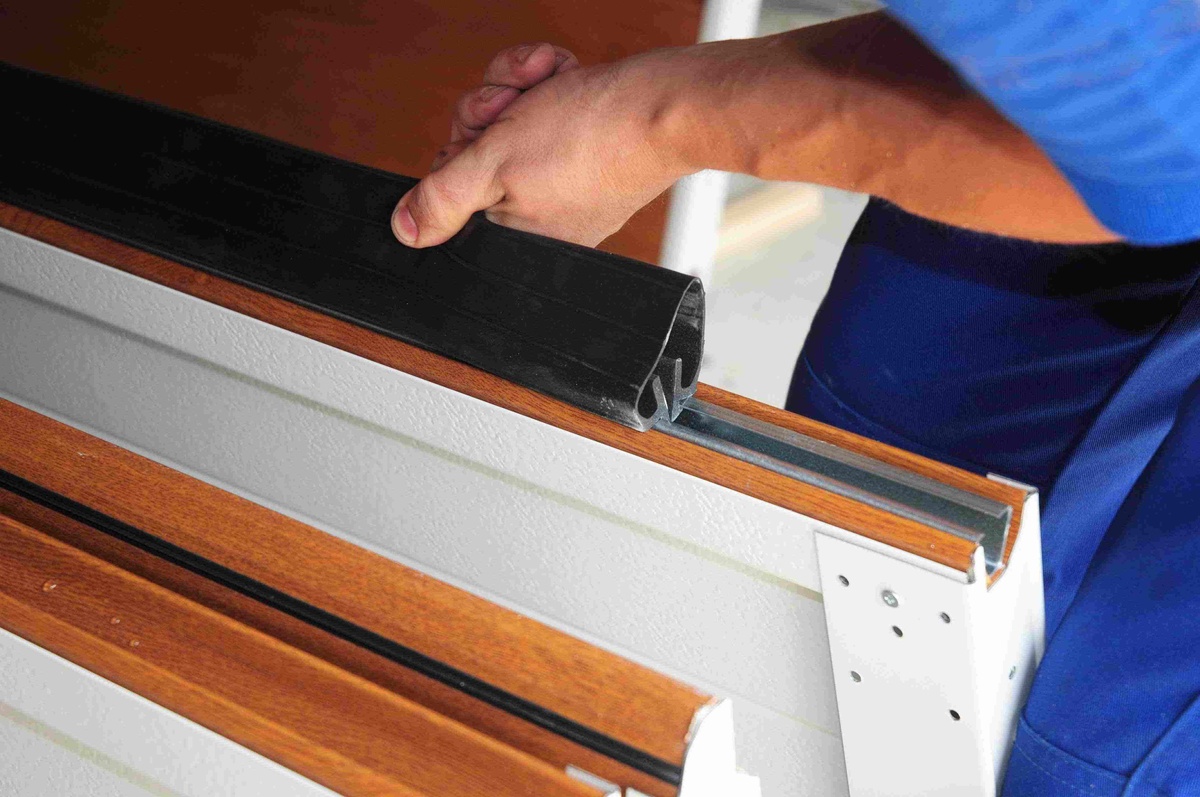
Step 3: Remove Bottom Seal
After removing the weatherstripping, the next step is to remove the bottom seal of the garage door. This step is necessary to ensure a proper trim and smooth operation of the door.
Begin by inspecting the bottom of the garage door for any screws or fasteners holding the bottom seal in place. Use a screwdriver to remove these screws and carefully detach the bottom seal from the door.
If the bottom seal is attached using adhesive, gently peel it off from one corner, working your way along the length of the door. Take care not to damage the door’s surface or leave behind any residue.
Removing the bottom seal will provide a clear, unobstructed surface for the trimming process. It also allows for a more accurate cut and ensures that the door will function properly after the trim.
Set the bottom seal aside for now. You can choose to reinstall it later, depending on your desired outcome and the condition of the seal. If the seal is worn or damaged, you may want to consider replacing it with a new one.
Once the bottom seal has been removed, you’re ready to move on to the next step in the trimming process.
When trimming a garage door, make sure to measure and mark the areas to be trimmed carefully. Use a circular saw with a fine-tooth blade to make clean and precise cuts. Sand the edges to remove any roughness and ensure a proper fit.
Read more: How To Remove A Garage Door
Step 4: Cut the Door
With the necessary preparation steps completed, it’s time to move on to the actual cutting of the garage door. This step requires careful precision and attention to detail.
Using a circular saw equipped with a fine-toothed blade, carefully follow the marked lines on the garage door. It’s important to maintain a steady hand and keep the saw level to ensure a straight and clean cut.
Start the cut at one end of the marked line and slowly work your way along the length of the door. Take your time and apply even pressure to achieve a smooth and precise cut.
As you cut through the door, make sure to support it properly to prevent any instability or damage. You may enlist the help of a second person to assist with holding the door during the cutting process.
Be mindful of any obstructions or features on the door, such as windows or decorative panels. Adjust your cutting technique as necessary to navigate around these elements and maintain the desired aesthetic.
Once the cuts have been made, carefully inspect the edges of the door to ensure they are clean and free from any rough spots or splintering. Use sandpaper to smooth out any imperfections and create a polished finish.
Remember to take breaks as needed and approach this step with patience and caution. The quality of the cut will significantly impact the final appearance and functionality of the trimmed door.
Now that the door has been cut, you can proceed to the next step to refine the fit and make any necessary adjustments.
Step 5: Sand the Edges
After cutting the garage door, it’s important to sand the edges to ensure a smooth and clean finish. This step will help remove any rough spots or splinters caused by the cutting process and create a polished look.
Start by inspecting the edges of the door. Look for any jagged or uneven areas that require sanding. Use sandpaper with a medium grit to gently sand the edges of the door, applying even pressure.
Move the sandpaper in a back-and-forth motion, following the contour of the door’s edge. Be mindful of the direction of the wood grain, as sanding against the grain can cause damage or result in an uneven finish.
Continue sanding until the edges are smooth to the touch and any rough spots have been eliminated. Take your time and periodically check the progress to ensure consistent results.
Once the rough edges have been smoothed out, switch to a finer grit sandpaper to further refine the surface. This will create a polished finish and prepare the door for painting or staining, if desired.
After sanding, use a soft cloth or brush to remove any dust or debris from the surface of the door. This will help ensure a clean and uniform appearance.
Remember to wear protective gloves and safety goggles during the sanding process to protect your hands and eyes from any potential splinters or debris.
Sanding the edges of the door is a crucial step in achieving a professional-looking trim. By taking the time to sand and refine the edges, you’ll be one step closer to a beautifully finished garage door.
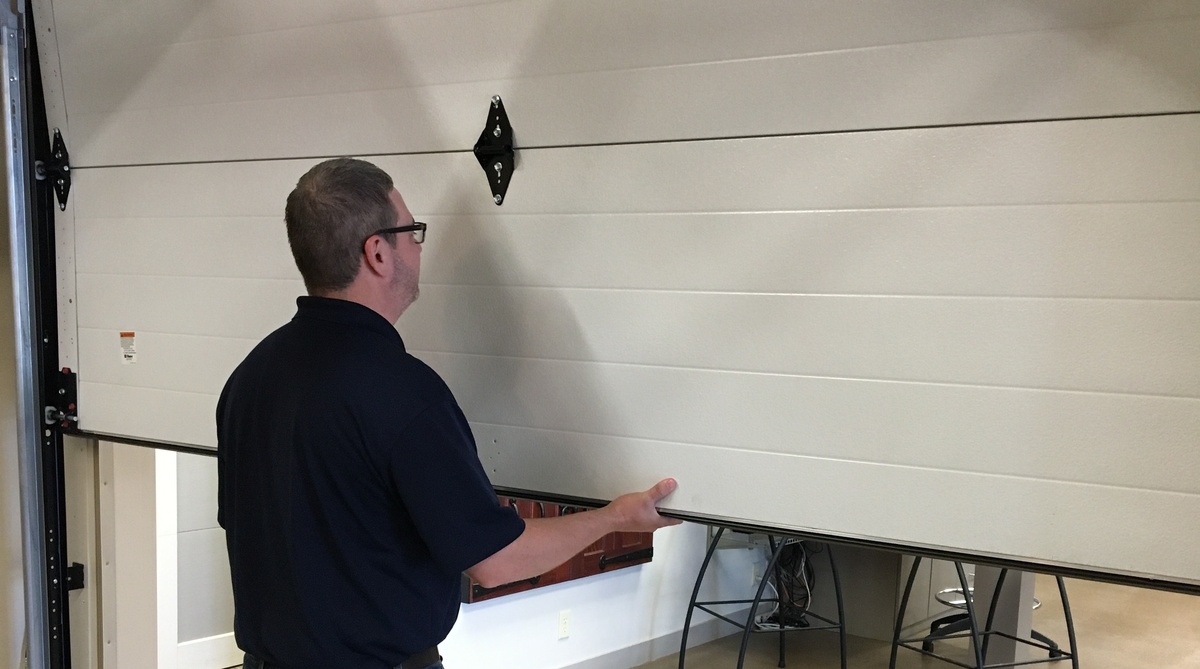
Step 6: Test the Fit
Once you have finished cutting and sanding the edges of the garage door, it’s important to test the fit to ensure that the trimmed door aligns properly with the garage opening. This step will help you make any necessary adjustments before proceeding.
Carefully position the trimmed door back into the garage opening. Take note of how well it fits and check for any gaps or misalignment between the door and the surrounding frame.
Make sure to test the fit from both the inside and outside of the garage to get a comprehensive view. Pay attention to the top, bottom, and sides of the door to ensure that it closes properly and seals tightly.
If you notice any areas where the fit is not optimal, measure and mark those areas for further trimming. Use a pencil to indicate where adjustments need to be made.
At this stage, it may be necessary to remove the door from the opening to make the adjustments more comfortably. Proceed with caution and enlist the help of others if needed to safely handle the door.
Refer back to the earlier steps of marking and cutting to guide you in making the necessary adjustments. Take your time and make precise cuts to ensure a proper fit.
After making the adjustments, retest the fit to ensure that the door aligns correctly and functions smoothly. Make any additional tweaks as needed until you are satisfied with the fit.
Testing the fit is a crucial step to ensure the functionality and aesthetic appeal of the trimmed garage door. Take the time to make any necessary adjustments before moving on to the final step.
Step 7: Apply Finishing Touches
After confirming the fit of the trimmed garage door, it’s time to apply the finishing touches to complete the project. This step involves adding any necessary trim pieces, reinstalling weatherstripping, and finalizing the overall appearance of the door.
If you have additional trim pieces that you’d like to install on the door, now is the time to do so. Measure and cut the trim pieces to the appropriate length and attach them using screws or adhesive, following the manufacturer’s instructions.
Next, reinstall the weatherstripping that was removed earlier, or replace it with new weatherstripping if needed. Ensure that the weatherstripping is properly aligned and securely attached to create a tight seal around the door.
Once the trim and weatherstripping are in place, take a moment to inspect the overall appearance of the door. Assess the smoothness of the edges, the uniformity of the finish, and the cleanliness of the surfaces.
If desired, you can further enhance the look of the door by applying paint or stain to match the existing color scheme or give it a fresh new look. Follow the manufacturer’s instructions for your chosen finish and allow proper drying time before handling the door.
Finally, clean up any debris or dust that may have accumulated during the trimming process. Use a broom or vacuum to remove any sawdust or grit from the garage floor and surrounding areas.
By applying these finishing touches, you’ll ensure that your trimmed garage door not only functions smoothly but also looks aesthetically pleasing and well-maintained.
With the completion of this final step, you can step back and admire your handiwork. Your garage door is now trimmed and ready to enhance the appearance and functionality of your home.
Read more: How To Make A Garage Door
Conclusion
Trimming a garage door can be a rewarding DIY project that can improve the look and functionality of your garage. By following the step-by-step process outlined in this article, you can confidently tackle this task and achieve professional-looking results.
From measuring and marking the areas to removing weatherstripping and the bottom seal, to cutting the door and sanding the edges, each step plays a crucial role in achieving a clean and polished finish. Testing the fit and making any necessary adjustments ensures the door aligns properly with the garage opening.
Applying the finishing touches, such as adding trim pieces and reinstalling or replacing weatherstripping, adds the final touches of functionality and aesthetics to your trimmed garage door. If desired, applying a fresh coat of paint or stain can give the door a new and refreshed look.
Throughout the project, it’s important to prioritize safety and take precautions to protect yourself from any potential hazards. Wearing safety goggles and gloves, and using the appropriate tools and techniques, will help ensure a smooth and accident-free experience.
Remember, if you’re unsure about any of the steps or lack the necessary tools, it’s always wise to consult a professional for guidance and assistance. They can offer valuable insights and ensure a proper installation.
By successfully completing this project, you’ll have a well-trimmed garage door that not only enhances the curb appeal of your home but also improves its functionality. It’s a project that you can be proud of and one that adds value to your property.
Now, armed with the knowledge and understanding of how to trim a garage door, you have the confidence and ability to take on this project and transform your garage. So go ahead and give your garage door the upgrade it deserves!
Congratulations on mastering garage door trimming! If you're feeling handy and eager to tackle more projects around your home, our guide on DIY home projects is just what you need next. This comprehensive resource offers practical tips and creative ideas that can transform any space without breaking the bank. Whether you're looking to revamp a room or add a personal touch to your garden, these DIY insights are perfect for any skill level. Start your next home improvement adventure with confidence!
Frequently Asked Questions about How To Trim Garage Door
Was this page helpful?
At Storables.com, we guarantee accurate and reliable information. Our content, validated by Expert Board Contributors, is crafted following stringent Editorial Policies. We're committed to providing you with well-researched, expert-backed insights for all your informational needs.


0 thoughts on “How To Trim Garage Door”