
Articles
How To Make A Bed Skirt
Modified: October 22, 2024
Learn how to make a bed skirt with our helpful articles. Get step-by-step instructions and expert tips for creating a beautiful and tailored bed skirt.
(Many of the links in this article redirect to a specific reviewed product. Your purchase of these products through affiliate links helps to generate commission for Storables.com, at no extra cost. Learn more)
Introduction
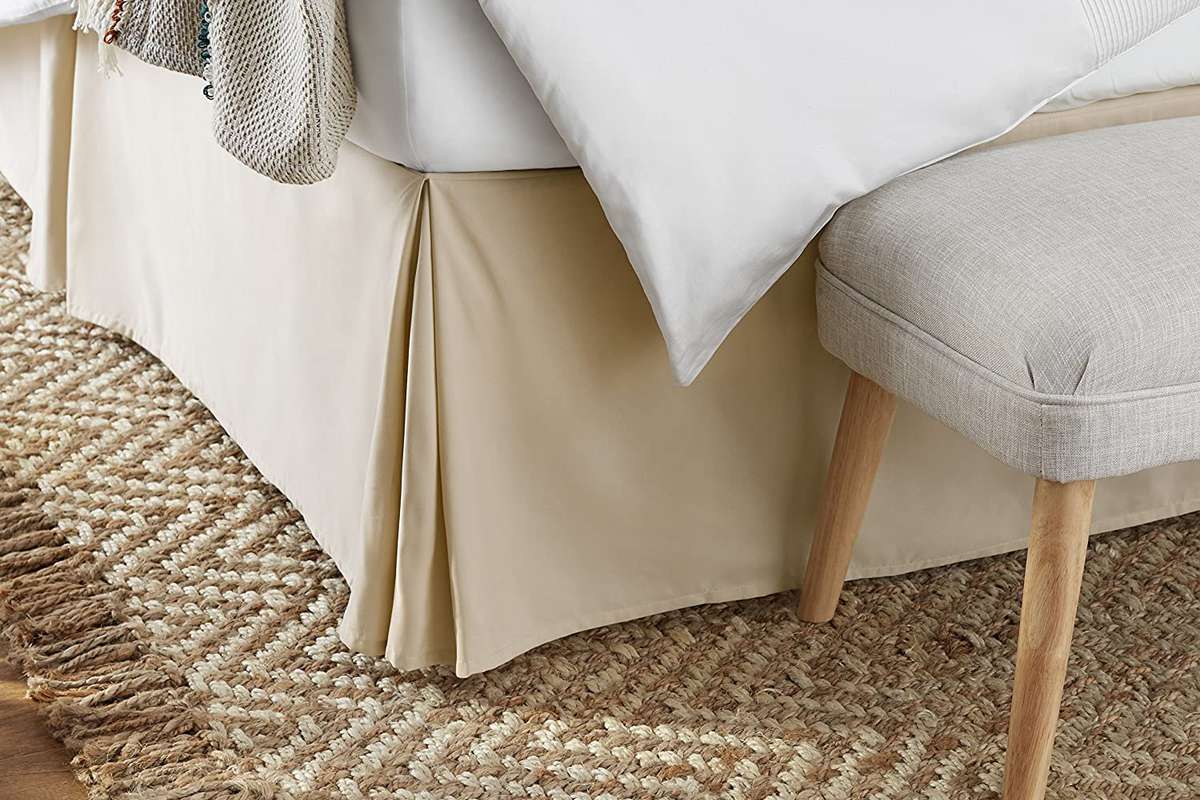
Are you tired of your bed looking plain and unfinished? Adding a bed skirt is a great way to give your bed a polished and stylish look. A bed skirt not only hides the unsightly box spring or underbed storage, but it also adds a decorative touch to your bedroom decor.
In this article, we will guide you on how to make a bed skirt from scratch. Don’t worry if you are not an experienced seamstress – this DIY project is beginner-friendly and can be completed with basic sewing skills. So, let’s gather our materials and get started on giving your bed a beautiful makeover!
Key Takeaways:
- Transform your bed with a custom bed skirt to add style and sophistication to your bedroom decor. Enjoy the sense of accomplishment and personal touch while saving money with this DIY project.
- By following this beginner-friendly guide, you can create a professional-looking bed skirt that hides unsightly box springs and adds a polished finish to your bed. Enjoy the process and the beautiful transformation it brings to your bedroom.
Read more: How To Make A Pleated Crib Bed Skirt
Materials Needed
Before we dive into the step-by-step process of making a bed skirt, let’s gather the materials needed for this project. Here’s what you will need:
- Fabric – Choose a fabric that complements your bedroom decor. Make sure to measure the length and width of your bed before purchasing the fabric to ensure you have enough.
- Measuring tape – This will come in handy when taking measurements for your bed skirt.
- Sewing machine – While it’s possible to sew the bed skirt by hand, a sewing machine will make the process faster and more efficient.
- Thread – Select a thread color that matches or coordinates with your fabric.
- Pins – These will be used to hold the fabric in place while sewing.
- Scissors – A good pair of fabric scissors is essential for cutting the fabric.
- Velcro or elastic – You will need either Velcro or elastic to attach the bed skirt to the box spring or mattress.
- Iron – An iron will be used to press the fabric and create crisp edges.
Once you have gathered all the materials, you’re ready to move on to the next step – taking measurements for your bed skirt.
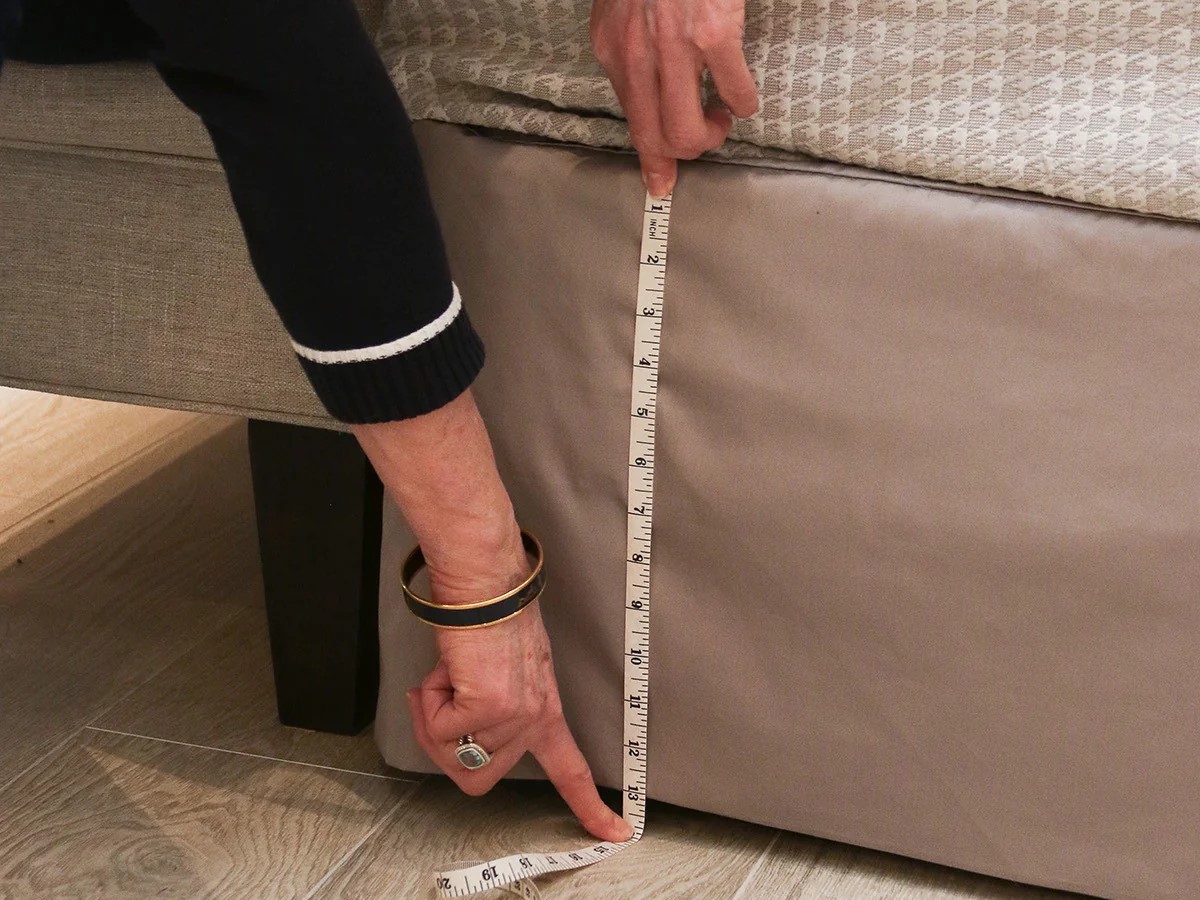
Step 1: Taking Measurements
The first step in making your bed skirt is to take accurate measurements of your bed. This will ensure that the bed skirt fits perfectly and looks tailored.
Start by measuring the length of your bed from the top edge to the floor. Then, measure the width of your bed from one side to the other. These measurements will determine the dimensions of the fabric needed for your bed skirt.
Next, measure the height from the top of the box spring or mattress to the floor. This measurement will determine the drop length of the bed skirt. The drop length is the distance between the top of the bed skirt and the floor.
Once you have taken these measurements, add an additional 2-3 inches to both the length and width. This will allow for seam allowance and ensure a proper fit. For the drop length, add an extra inch to account for hems.
Using a measuring tape, mark the measurements on your fabric with a fabric pen or chalk. Double-check your measurements to ensure accuracy before moving on to the next step.
Now that you have the measurements marked on your fabric, you are ready to move on to selecting the fabric for your bed skirt.
Step 2: Choosing the Fabric
The fabric you choose for your bed skirt will play a crucial role in the overall aesthetics of your bed. It should complement your existing bedroom decor and create a cohesive look.
Consider the style and color scheme of your bedroom when selecting the fabric. If your bedroom has a minimalist and modern vibe, you may opt for a solid-colored fabric in a neutral shade. On the other hand, if your bedroom has a bohemian or eclectic style, you can choose a fabric with bold patterns or vibrant colors.
It’s essential to select a fabric that is durable and easy to clean. Cotton and linen fabrics are popular choices for bed skirts as they are both breathable and machine-washable. If you prefer a more luxurious look and feel, you can opt for silk or satin fabric.
Before purchasing the fabric, make sure you have enough based on the measurements taken in the previous step. It’s better to buy a little extra to account for any mistakes or to create matching pillow shams or other coordinating accessories.
Once you have chosen your fabric, it’s time to move on to the next step – cutting the fabric.
Step 3: Cutting the Fabric
Now that you have selected your fabric, it’s time to cut it according to the measurements you took earlier.
Start by laying the fabric out on a flat surface, ensuring that it is smooth and free from any wrinkles or folds. Align the markings you made on the fabric with the edges of the surface to maintain accuracy.
Using a pair of fabric scissors, carefully cut along the marked lines. Take your time and make sure the cuts are straight and even. Remember to leave the additional 2-3 inches for seam allowance on all sides.
Once you have cut the main panel of the bed skirt, you can proceed to cut any additional panels if you plan on creating a ruffled or layered look. These additional panels will be sewn to the main panel later in the process.
If your fabric has a pattern or design, make sure to align the panels correctly so that the pattern flows seamlessly across the bed skirt. This attention to detail will create a more professional and polished finished product.
After cutting the fabric, it’s a good idea to iron the panels to remove any creases or wrinkles. This will facilitate easier sewing and ensure a neater appearance. Remember to follow the fabric’s ironing instructions to avoid any damage.
With the fabric cut and prepared, it’s time to move on to the next step – sewing the side hems.
Read more: How To Make A Wrap-Around Bed Skirt
Step 4: Sewing the Side Hems
With the fabric cut and prepared, it’s time to start sewing the side hems of the bed skirt. The side hems will give your bed skirt a finished and polished look.
Start by folding the fabric over on one side, about 1/2 inch to 1 inch. Use a hot iron to press the fold and create a crease. This will make it easier to sew a straight hem.
Once the fold is pressed, fold the fabric over again, this time about 1 inch to 1 1/2 inches. Secure the fold with pins, making sure the fabric is flat and smooth. Be careful not to pin through both layers of the fabric – the pins should only go through the outer layer.
Now it’s time to sew the side hem. Using a sewing machine, sew a straight stitch along the edge of the folded fabric, removing the pins as you go. Make sure to backstitch at the beginning and end of the hem to secure the stitches.
Repeat this process for the other side of the bed skirt, ensuring the hems are the same width and length.
Once both side hems are sewn, press them with an iron to create a crisp and professional-looking finish.
With the side hems complete, it’s time to move on to the next step – sewing the bottom hem.
When making a bed skirt, be sure to measure the length and width of your bed before cutting the fabric to ensure a proper fit. Also, consider using a fabric that is easy to wash and maintain.
Step 5: Sewing the Bottom Hem
Now that the side hems are done, it’s time to sew the bottom hem of the bed skirt. The bottom hem will provide a clean and finished appearance to the bed skirt.
Start by folding the bottom edge of the fabric up, about 1 inch to 1 1/2 inches. Use a hot iron to press the fold and create a crease. This will help you sew a straight and even hem.
Once the fold is pressed, fold the fabric over again, this time about 1 inch. Secure the fold with pins, ensuring the fabric is smooth and free from any wrinkles or puckering.
Using a sewing machine, sew a straight stitch along the edge of the folded fabric, removing the pins as you go. Make sure to backstitch at the beginning and end of the hem to secure the stitches.
Once the bottom hem is sewn, iron it to create a crisp and neat finish.
With the bottom hem complete, it’s time to move on to the next step – sewing the top hem.
Step 6: Sewing the Top Hem
Now that we’ve sewn the side and bottom hems, it’s time to focus on the top hem of the bed skirt. The top hem will give the bed skirt a clean and finished look, while also providing a way to attach it to the box spring or mattress.
Start by folding the top edge of the fabric down, about 1/2 inch to 1 inch. Use an iron to press the fold and create a crease. This crease will help you sew a straight hem.
Once the fold is pressed, fold the fabric down again, this time about 1 inch to 1 1/2 inches. Secure the fold with pins, making sure that the fabric is flat and smooth.
Using a sewing machine, sew a straight stitch along the edge of the folded fabric, removing the pins as you go. Be sure to backstitch at the beginning and end to secure the stitches.
Once the top hem is sewn, press it with an iron to create a crisp and professional-looking finish.
With the top hem complete, we can move on to the next step – adding Velcro or elastic to attach the bed skirt.
Step 7: Adding Velcro or Elastic
Now that we have completed the hems, it’s time to add the necessary attachments to secure the bed skirt to the box spring or mattress. There are two common methods for this – using Velcro or elastic.
If you choose to use Velcro, start by cutting small strips of Velcro, approximately 1 inch in length. Sew one side of the Velcro strip along the top edge of the bed skirt, on the wrong side of the fabric. Make sure to space the Velcro evenly along the edge.
Next, sew the matching side of the Velcro strip onto the corresponding area of the box spring or mattress. Make sure to align the Velcro pieces so that they will securely fasten together.
If you prefer to use elastic, measure the width of your bed and cut a piece of elastic that matches this measurement. Pin one end of the elastic to the bed skirt, ensuring it is evenly distributed along the top edge.
Stretch the elastic and pin the other end to the bed skirt, making sure the tension is tight enough to hold the bed skirt in place.
Once everything is pinned in place, sew the Velcro or elastic securely to the bed skirt. Double-check that the attachments are secure and will hold the bed skirt firmly in place.
Now that the attachments are added, we can move on to the final step – attaching the bed skirt to the bed.
Read more: How To Make A Baby Crib Bed Skirt
Step 8: Attaching the Bed Skirt
Congratulations! You’re in the final step of completing your bed skirt. Now, it’s time to attach it to your bed.
Start by laying the bed skirt on the box spring or mattress, aligning the top edge with the edge of the bed. Make sure the bed skirt hangs evenly on all sides.
If you’re using a bed skirt with Velcro attachments, simply press the Velcro strips on the bed skirt onto the matching Velcro strips attached to the bed. This will securely hold the bed skirt in place.
If you opted for an elastic attachment, slide the elastic over the corners of the box spring or mattress. Ensure that the tension of the elastic is even on all corners, as this will help the bed skirt stay in place.
Adjust the bed skirt as needed, making sure it is straight and properly draped. Smooth out any wrinkles or folds for a polished appearance.
Once the bed skirt is attached and positioned to your liking, step back and admire the finished look. You’ve successfully made and attached your custom bed skirt!
Remember to periodically check the attachments to ensure they remain secure. If necessary, readjust or reinforce them to keep the bed skirt in place.
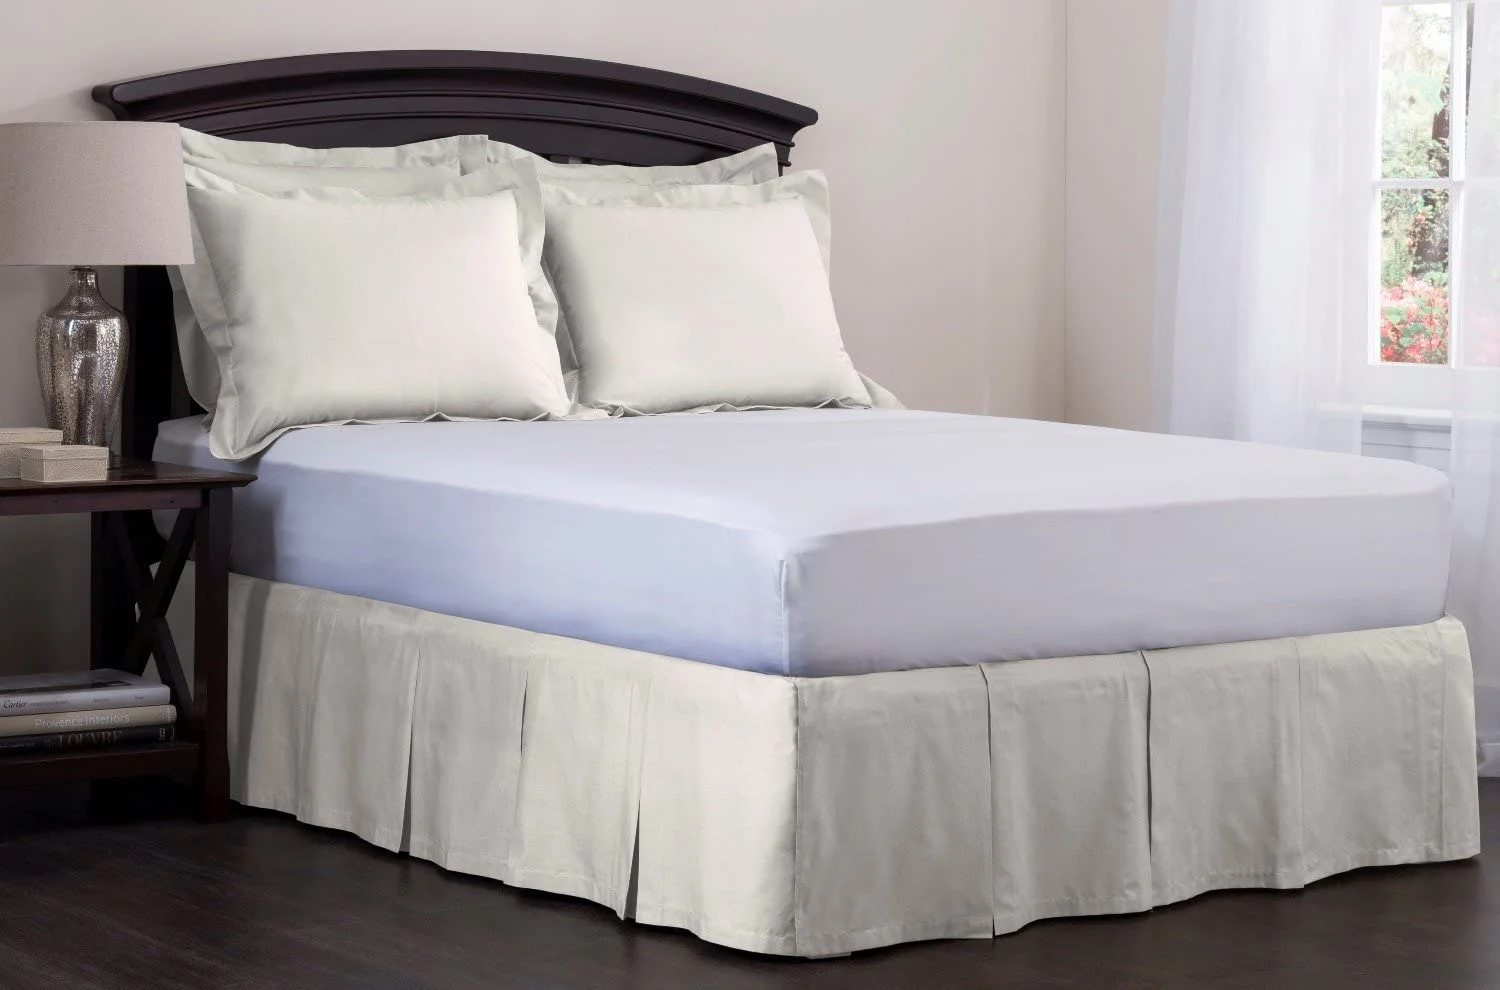
With the bed skirt fully attached, your bed now has a stylish and polished appearance. Enjoy the finished look and the added charm it brings to your bedroom decor!
Conclusion
Congratulations on successfully making your own bed skirt! By following the step-by-step guide provided in this article, you have transformed your bed into a stylish and sophisticated centerpiece in your bedroom.
Making your own bed skirt not only allows you to customize the design and fabric to match your decor, but it also gives you a sense of accomplishment and adds a personal touch to your space. Plus, it’s a cost-effective alternative to purchasing a pre-made bed skirt.
Remember to take accurate measurements, choose the right fabric, and sew the hems with precision to create a professional-looking bed skirt. Adding Velcro or elastic attachments ensures that the bed skirt stays in place securely.
Now that your bed skirt is complete and attached, step back and admire the beautiful transformation it has brought to your bedroom. The finished bed skirt not only hides the box spring or underbed storage but also adds a touch of elegance and sophistication to your sleeping space.
We hope this article has been helpful in guiding you through the process of making a bed skirt. Enjoy the new look of your bed and the cozy atmosphere it creates in your bedroom!
Frequently Asked Questions about How To Make A Bed Skirt
Was this page helpful?
At Storables.com, we guarantee accurate and reliable information. Our content, validated by Expert Board Contributors, is crafted following stringent Editorial Policies. We're committed to providing you with well-researched, expert-backed insights for all your informational needs.


0 thoughts on “How To Make A Bed Skirt”