
Articles
How To Make A Pleated Crib Bed Skirt
Modified: February 25, 2024
Learn how to make a beautiful pleated crib bed skirt with our step-by-step articles. Enhance your nursery decor with this DIY project.
(Many of the links in this article redirect to a specific reviewed product. Your purchase of these products through affiliate links helps to generate commission for Storables.com, at no extra cost. Learn more)
Introduction
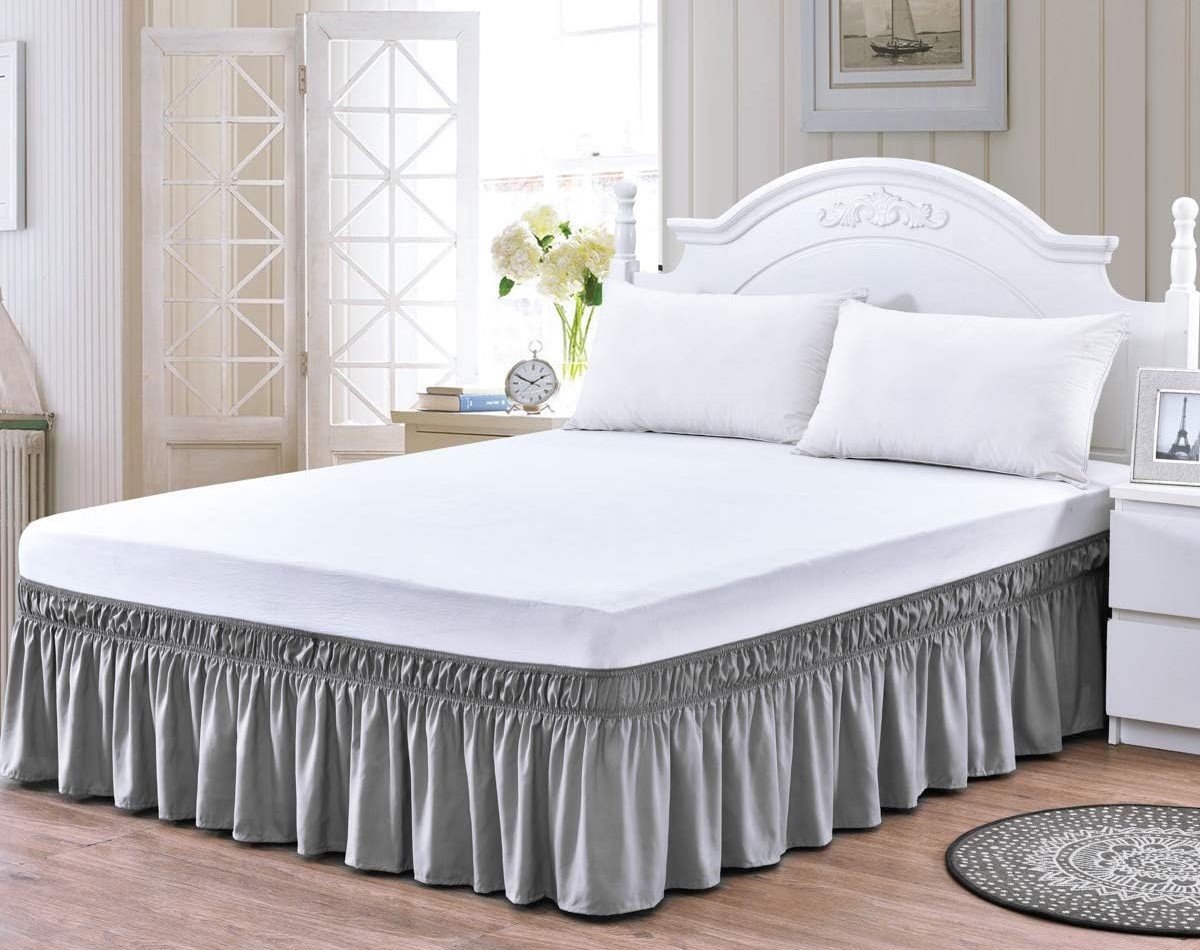
Welcome to the world of DIY crib bedding! If you’re looking to add a touch of elegance and charm to your baby’s crib, a pleated crib bed skirt is the perfect choice. Not only does it provide a stylish look, but it also helps to hide any unsightly storage space or clutter that may be beneath the crib.
Making a pleated crib bed skirt may seem like a daunting task, but with the right materials and a step-by-step guide, you’ll be able to create a beautiful and functional addition to your baby’s nursery. In this article, we’ll walk you through each step of the process, from measuring the crib to attaching the skirt.
Before we begin, it’s important to gather all the materials you’ll need for this project. This includes:
Key Takeaways:
- Transform your baby’s crib into a stylish centerpiece by crafting a pleated crib bed skirt. Conceal clutter and add elegance to the nursery with this DIY project, creating a polished and finished look.
- Embrace creativity and attention to detail as you measure, calculate, and craft a pleated crib bed skirt. Personalize your nursery with homemade items, reflecting your style and adding a touch of charm to the space.
Read more: How To Make A Baby Crib Bed Skirt
Materials Needed
- Fabric of your choice
- Measuring tape
- Fabric scissors
- Sewing machine
- Thread (matching the fabric)
- Pins
- Iron
Now that you have all the necessary materials, let’s dive into the step-by-step process of making a pleated crib bed skirt.
Key Takeaways:
- Transform your baby’s crib into a stylish centerpiece by crafting a pleated crib bed skirt. Conceal clutter and add elegance to the nursery with this DIY project, creating a polished and finished look.
- Embrace creativity and attention to detail as you measure, calculate, and craft a pleated crib bed skirt. Personalize your nursery with homemade items, reflecting your style and adding a touch of charm to the space.
Read more: How To Make A Baby Crib Bed Skirt
Materials Needed
Making a pleated crib bed skirt requires a few basic materials that you can easily find at your local fabric store or online. Here’s a list of what you’ll need:
- Fabric of your choice: Select a fabric that complements your nursery decor and is suitable for crib bedding. It’s best to choose a medium-weight fabric that is easy to work with and holds its shape well.
- Measuring tape: You’ll need a measuring tape to accurately measure your crib and calculate the fabric dimensions.
- Fabric scissors: A sharp pair of fabric scissors will come in handy for cutting the fabric to the desired size.
- Sewing machine: A sewing machine will make the process much easier and faster. If you don’t have one, you can sew the bed skirt by hand, but it will require more time and effort.
- Thread: Choose thread that matches the color of your fabric. This will ensure that the stitches blend in seamlessly.
- Pins: Pins will be used to hold the fabric in place while sewing, making it easier to create the pleats.
- Iron: An iron will be necessary to press the fabric and create crisp pleats.
Ensure that you have all these materials on hand before starting the project. Having everything ready will make the process smoother and more enjoyable.
Step 1: Measuring the Crib
Before you can start creating your pleated crib bed skirt, you’ll need to accurately measure the dimensions of your crib. This step is crucial to ensure that the bed skirt fits properly and looks proportional.
Follow these steps to measure your crib:
- Start by measuring the width of the crib. Use a measuring tape to measure the distance between the two inside edges of the crib frame. Write down this measurement.
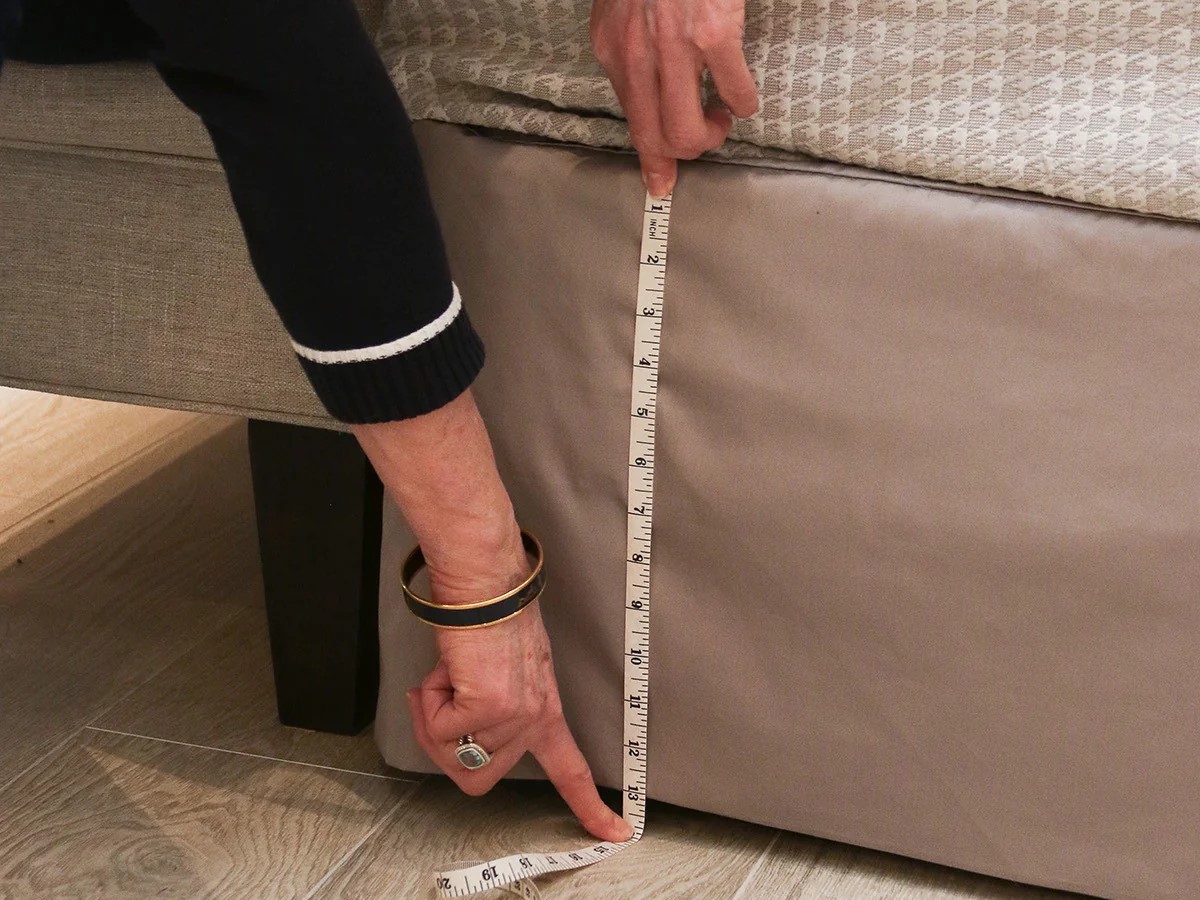
- Next, measure the length of the crib. Place the measuring tape at one end of the inside edge and extend it to the other end. Be sure to measure from the top of the mattress support to where you want the bed skirt to end. Take note of this measurement as well.
- If your crib has a curved or uneven edge, consider measuring along the curve to ensure a more accurate fit. You can use a string to follow the curve and then measure the length of the string.
Once you have these measurements, you’ll be able to calculate the fabric dimensions needed for your pleated bed skirt. Keep in mind that you’ll need to add a few inches to each measurement to account for seam allowances and the hem.
By accurately measuring your crib, you’ll be on your way to creating a perfectly fitted pleated crib bed skirt. Now, let’s move on to the next step: calculating the fabric requirements.
Step 2: Calculating the Fabric Requirements
Now that you have the measurements of your crib, it’s time to calculate the fabric requirements for your pleated crib bed skirt. By accurately calculating the fabric needed, you can ensure that you have enough material to create the desired pleats and coverage.
Follow these steps to calculate the fabric requirements:
- Calculate the width of the fabric: Multiply the width measurement of your crib by two. This accounts for the front and back panels of the bed skirt.
- Calculate the length of the fabric: Add the length measurement of your crib to the desired drop length of the bed skirt. The drop length is how far the skirt will hang down below the mattress. You may choose a specific length based on your preference or the height of the crib.
- Add extra fabric for the pleats: To create pleats, you’ll need to add extra fabric to the width measurement. Depending on the pleat size you prefer, you can add anywhere from 1.5 to 3 times the original width measurement.
- Consider the hem allowance: Leave a few inches of fabric at the top of the bed skirt for hemming. Typically, a 1-inch hem is sufficient, but you can adjust it to your preference.
Once you have the final fabric dimensions, you can purchase the appropriate amount of fabric. Keep in mind that it’s always a good idea to buy extra fabric to account for any mistakes or necessary adjustments during the sewing process.
Now that you have your fabric requirements calculated, it’s time to move on to the next step: preparing the fabric for sewing.
When measuring the fabric for your pleated crib bed skirt, be sure to add extra length to account for the pleats and hemming. This will ensure a perfect fit and professional finish.
Read more: How To Sew A Pleated Bed Skirt
Step 3: Preparing the Fabric
With your fabric measurements in hand, it’s time to prepare the fabric for sewing your pleated crib bed skirt. Preparing the fabric properly will ensure a neat and professional-looking end result.
Follow these steps to prepare the fabric:
- Wash and iron the fabric: Before you start cutting and sewing, it’s important to wash and iron your fabric. This will remove any dirt, shrinkage, or creases from the fabric and make it easier to work with. Follow the fabric’s care instructions for washing and ironing.
- Measure and mark the fabric: Lay the fabric flat on a clean, smooth surface. Use your measurements from Step 2 to mark the fabric accordingly. You can use chalk or fabric pens for marking, ensuring that the marks are visible but won’t stain the fabric.
- Cut the fabric: Using fabric scissors, carefully cut along the marked lines to create the front and back panels of the bed skirt. Make sure to cut straight and accurately for a professional finish.
- Hem the edges: To prevent fraying and give your bed skirt a polished look, fold and iron a small section of each edge towards the wrong side of the fabric. Then, fold it over once more and iron again before sewing the hem in place. Repeat this for all edges of the fabric.
Once you have finished preparing the fabric, you’re ready to move on to the exciting part – creating the pleats! In the next step, we will guide you through the process of creating beautiful pleats for your crib bed skirt.
Step 4: Creating the Pleats
Creating pleats is a key element in making a pleated crib bed skirt. Pleats add texture and visual interest to the bed skirt, giving it a stylish and sophisticated look. Follow these steps to create the pleats:
- Start with one of the short ends of the fabric panel. Fold the fabric towards the wrong side, creating a pleat approximately 2 to 3 inches wide. Pin the pleat in place.
- Continue folding and pinning the fabric, creating a series of pleats. You can fold the fabric in a traditional box pleat style, where each pleat folds in one direction, or experiment with different pleat styles like inverted pleats or accordion pleats.
- Make sure to distribute the pleats evenly along the width of the fabric. Use your measuring tape or a ruler to ensure consistent spacing between the pleats.
- Once all the pleats are pinned in place, press them with an iron to set the folds and create crisp pleats. Be careful not to burn the fabric, especially if you’re using delicate materials.
- Secure the pleats by stitching along the top edge of the fabric, close to the fold. Use a sewing machine or hand stitch, depending on your preference and sewing skills. This will keep the pleats in place during the next steps.
Creating the pleats requires patience and precision, but it’s also a great opportunity to get creative and personalize your bed skirt. Experiment with different pleat styles and arrangements to achieve the desired look that matches your nursery decor.
Now that you’ve successfully created the pleats, it’s time to move on to the next step – attaching the pleats to the fabric.
Step 5: Attaching the Pleats to the Fabric
With the pleats in place, it’s time to attach them to the fabric panels of the crib bed skirt. This step will bring your bed skirt to life and create a beautiful, pleated effect.
- Start with one of the fabric panels. Lay it flat on your work surface, with the wrong side of the fabric facing up.
- Take one of the pleated edges and align it with the top edge of the fabric panel. Make sure the bottom of the pleats extends beyond the fabric panel, as this will be the visible part of the bed skirt.
- Pin the pleats to the fabric, ensuring that they are evenly spaced and secure. This will hold the pleats in place while you sew them.
- Using a sewing machine or hand stitching, sew along the top edge of the fabric panel, securing the pleats in place. Use a straight stitch or a decorative stitch, depending on your preference.
- Continue attaching the pleats along the entire width of the fabric panel, ensuring an even distribution of pleats. Remove the pins as you go.
- Repeat the same process for the other fabric panel, making sure the pleats are aligned and stitched in the same manner.
Attaching the pleats to the fabric requires accuracy and attention to detail. Take your time and ensure that the pleats are evenly spaced and securely attached to achieve a professional-looking bed skirt.
Once you’ve finished attaching the pleats, you’re almost done! In the next step, we’ll guide you through the final step – attaching the bed skirt to the crib.
Step 6: Attaching the Skirt to the Crib
Congratulations! You’re on the final step of making your pleated crib bed skirt. In this step, we will guide you through attaching the bed skirt to the crib, giving your nursery a polished and complete look.
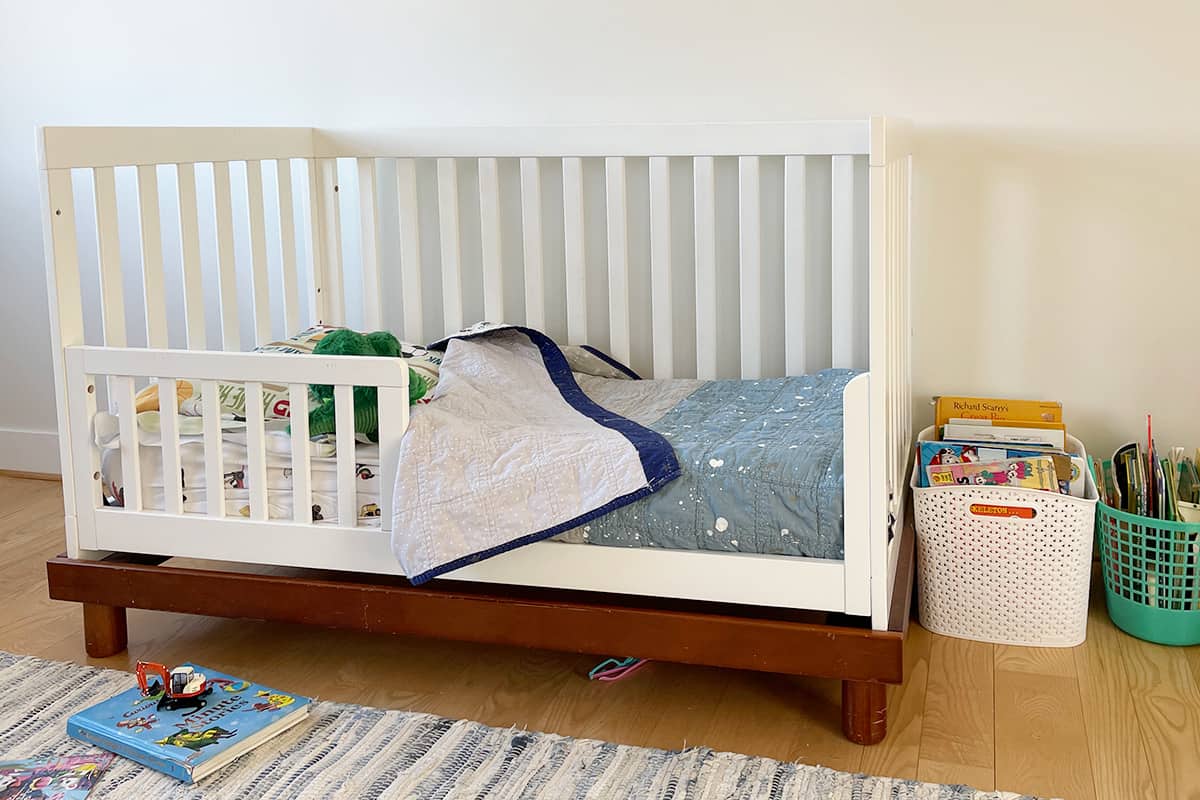
- Start by placing your crib with the mattress in its desired position. Make sure the crib is clean and free from any dust or debris.
- Position the bed skirt around the crib, ensuring that it is centered and the pleated edge hangs down evenly on all sides.
- Using safety pins or fabric clips, attach the bed skirt to the crib. Start by securing the top corners, then work your way down the sides, and finally secure the bottom corners.
- Adjust the bed skirt as needed, making sure it is hanging evenly and covers any space between the mattress and the floor.
- Once you’re satisfied with the position of the bed skirt, remove any visible safety pins or fabric clips and tuck them out of sight.
Attaching the bed skirt to the crib is a simple yet important step to give your nursery that final touch of style. Take your time to ensure that the bed skirt is secure, perfectly aligned, and hangs evenly around the crib.
With the bed skirt attached, step back and admire your handiwork. You have successfully completed the process of making a pleated crib bed skirt!
Congratulations on creating a beautiful and functional addition to your baby’s nursery. The pleated crib bed skirt adds a touch of elegance and charm, while also concealing any storage space beneath the crib. Your little one’s crib will now be a focal point in the room, showcasing your creativity and attention to detail.
We hope this step-by-step guide has been helpful in your DIY journey. Enjoy the fruits of your labor and revel in the joy of a well-crafted pleated crib bed skirt!
Happy sewing!
Read also: 12 Incredible Crib Bed Skirt for 2025
Conclusion
Congratulations on completing your DIY project of making a pleated crib bed skirt! Through careful measuring, calculating fabric requirements, and creating beautiful pleats, you have transformed your baby’s crib into a stylish and functional centerpiece in the nursery.
The pleated crib bed skirt not only adds a touch of elegance and charm to the crib but also helps to conceal any storage space or clutter that may be beneath. It brings together the entire nursery decor, adding a polished and finished look to the room.
By following the step-by-step process outlined in this article, you have learned how to measure the crib accurately, calculate the fabric requirements, prepare the fabric, create pleats, and attach the bed skirt to the crib. The attention to detail and craftsmanship you have put into this project will be evident in the final result.
Remember to choose a fabric that complements your nursery decor and is suitable for crib bedding. Take your time to create well-defined pleats and secure them firmly to the fabric. By doing so, you have created a beautiful pleated crib bed skirt that you and your baby will enjoy for years to come.
We hope that this DIY project has sparked your creativity and inspired you to take on more sewing projects. Making homemade items for your nursery not only saves you money but also allows you to customize and personalize the space to reflect your style and preferences.
Thank you for joining us on this DIY journey. We hope you have found this article informative and helpful. May your nursery be filled with love, comfort, and creativity as you embark on this wonderful journey of parenthood!
Happy crafting!
Frequently Asked Questions about How To Make A Pleated Crib Bed Skirt
Was this page helpful?
At Storables.com, we guarantee accurate and reliable information. Our content, validated by Expert Board Contributors, is crafted following stringent Editorial Policies. We're committed to providing you with well-researched, expert-backed insights for all your informational needs.


0 thoughts on “How To Make A Pleated Crib Bed Skirt”