Articles
How To Make A Rustic Stool With Hand Tools
Modified: August 31, 2024
Discover step-by-step articles on how to create a rustic stool using hand tools. Learn the art of woodworking and crafts in this comprehensive guide.
(Many of the links in this article redirect to a specific reviewed product. Your purchase of these products through affiliate links helps to generate commission for Storables.com, at no extra cost. Learn more)
Introduction
Are you looking to add a touch of rustic charm to your living space? Do you enjoy working with your hands and creating unique pieces of furniture? If so, then making a rustic stool using hand tools is the perfect project for you.
A rustic stool offers both functionality and aesthetic appeal. It can be used as a seat, a side table, or even as a decorative accent piece. The best part is, you don’t need expensive power tools or advanced woodworking skills to create your very own rustic stool.
In this article, we will guide you through the process of making a rustic stool using only hand tools. From selecting the right wood to adding those finishing touches, we’ll cover every step of the process. So grab your tools and let’s get started on this exciting woodworking adventure.
Key Takeaways:
- Embrace the timeless art of woodworking by crafting a rustic stool with hand tools. Select the right wood, shape with care, and finish with pride for a unique and charming addition to your living space.
- Unleash your creativity and craftsmanship by making a rustic stool using only hand tools. From wood selection to finishing touches, enjoy the journey of woodworking and create a functional piece of furniture with handmade charm.
Read more: Who Makes Milwaukee Hand Tools?
Choosing the Right Wood
When it comes to making a rustic stool, choosing the right wood is crucial. You want a wood that is not only sturdy and durable but also adds character and beauty to your finished piece. Here are a few options to consider:
- Oak: Oak is a popular choice for rustic furniture due to its strength and durability. It has a distinct grain pattern that lends a rustic charm to the stool.
- Pine: Pine is another great option for a rustic stool. It is relatively easy to work with and has a light color and subtle grain patterns that add warmth to the piece.
- Cedar: Cedar is known for its natural resistance to decay and insects, making it a great choice for outdoor rustic stools. It has a reddish-brown hue and an appealing aroma.
- Reclaimed Wood: Using reclaimed wood adds an extra element of authenticity to your rustic stool. Look for salvaged wood from old barns, fences, or pallets to create a unique and eco-friendly piece.
When selecting the wood, consider the overall style and color scheme of your space. If you want a lighter and more airy look, opt for pine or cedar. If you prefer a darker and more robust aesthetic, oak or reclaimed wood may be the way to go.
Additionally, pay attention to the quality of the wood. Look for straight boards with minimal knots or cracks. Check for any signs of insect infestation or rot. It’s also important to choose wood that has been properly dried to prevent warping or shrinking in the future.
Once you’ve chosen the perfect wood for your rustic stool, it’s time to prepare it for the construction process.
Preparing the Wood
Before you begin constructing your rustic stool, it’s essential to properly prepare the wood. This step ensures that your finished piece will be sturdy and long-lasting. Here’s what you need to do:
- Square the Edges: Start by squaring the edges of the wood using a hand plane or a chisel. This will create clean and even edges, allowing for seamless joinery later on.
- Smooth the Surfaces: Use a hand plane, a cabinet scraper, or sandpaper to smooth out any rough spots or imperfections on the wood surfaces. This step will give your rustic stool a polished and professional look.
- Remove Splinters: Carefully inspect the wood for any splinters or protruding fibers. Use sandpaper or a sanding block to gently remove these imperfections and ensure a smooth finish.
- Apply a Sealant: Depending on the type of wood you’re using and your desired finish, applying a sealant or wood conditioner can help protect the wood from moisture and enhance its natural beauty. Follow the manufacturer’s instructions for the best results.
Take your time during the preparation process to ensure that the wood is in optimal condition for construction. This step will not only improve the aesthetic appeal of your rustic stool but also contribute to its overall longevity.
Once the wood is prepared, you’re ready to move on to the next steps: measuring and marking the wood for cutting.
Measuring and Marking
Accurate measurements and precise markings are essential to ensure a well-proportioned and balanced rustic stool. Here’s how you can measure and mark the wood effectively:
- Decide on the Stool Dimensions: Determine the desired height, width, and depth of your rustic stool. Consider the purpose of the stool and the space where it will be placed. Standard stool heights range between 18 to 24 inches, but feel free to customize it to fit your needs.
- Measure and Mark the Legs: Measure and mark the length for each leg of the stool. Use a tape measure and a pencil to make accurate markings. Remember to include any additional length for tenons or joinery, if applicable.
- Measure and Mark the Seat: Determine the size and shape of the seat based on your measurements. Mark the dimensions on the wood, ensuring it aligns with the leg markings. Use a square or a straight edge to ensure straight lines and right angles.
- Mark Joinery Locations: If you’re planning on using joinery techniques like mortise and tenon or dowel joints, mark the locations on both the legs and the seat. This will guide you during the construction process and ensure proper alignment.
Take your time to double-check your measurements and markings for accuracy. Remember the old adage: “Measure twice, cut once.” This will help avoid any costly mistakes or unnecessary waste of materials.
With the wood accurately measured and marked, you’re now ready to move on to the next step: cutting the legs.
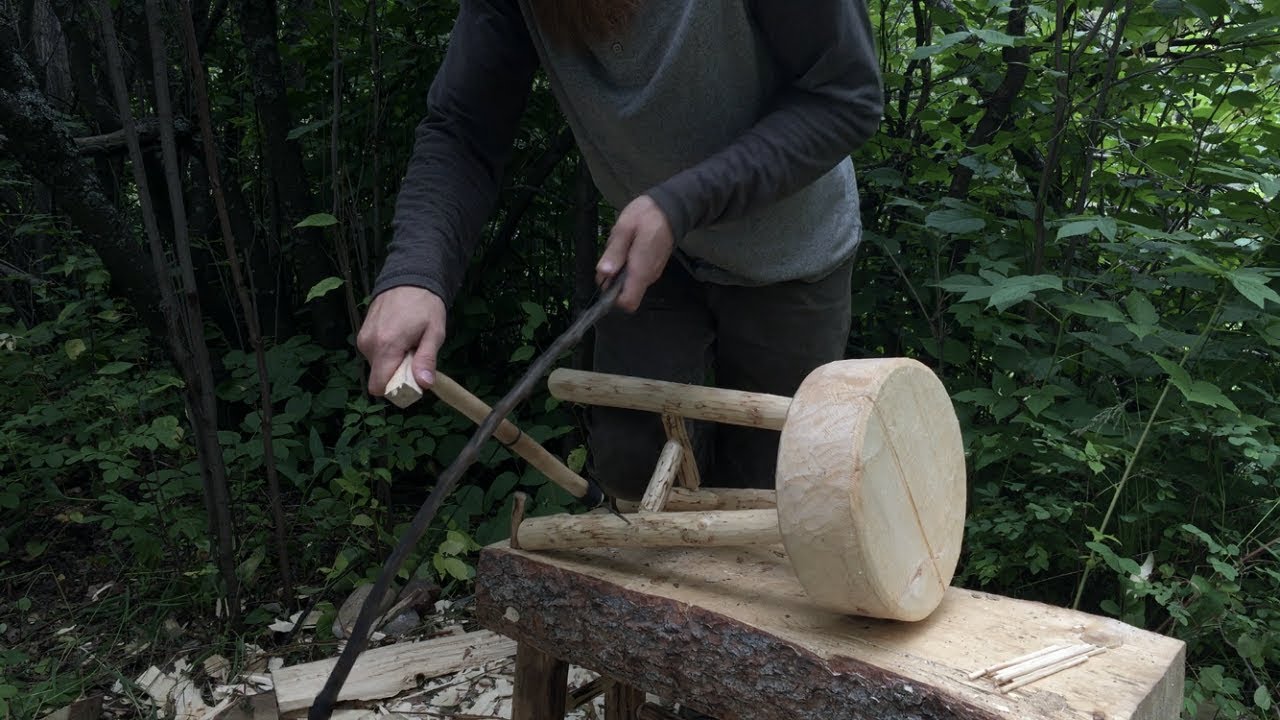
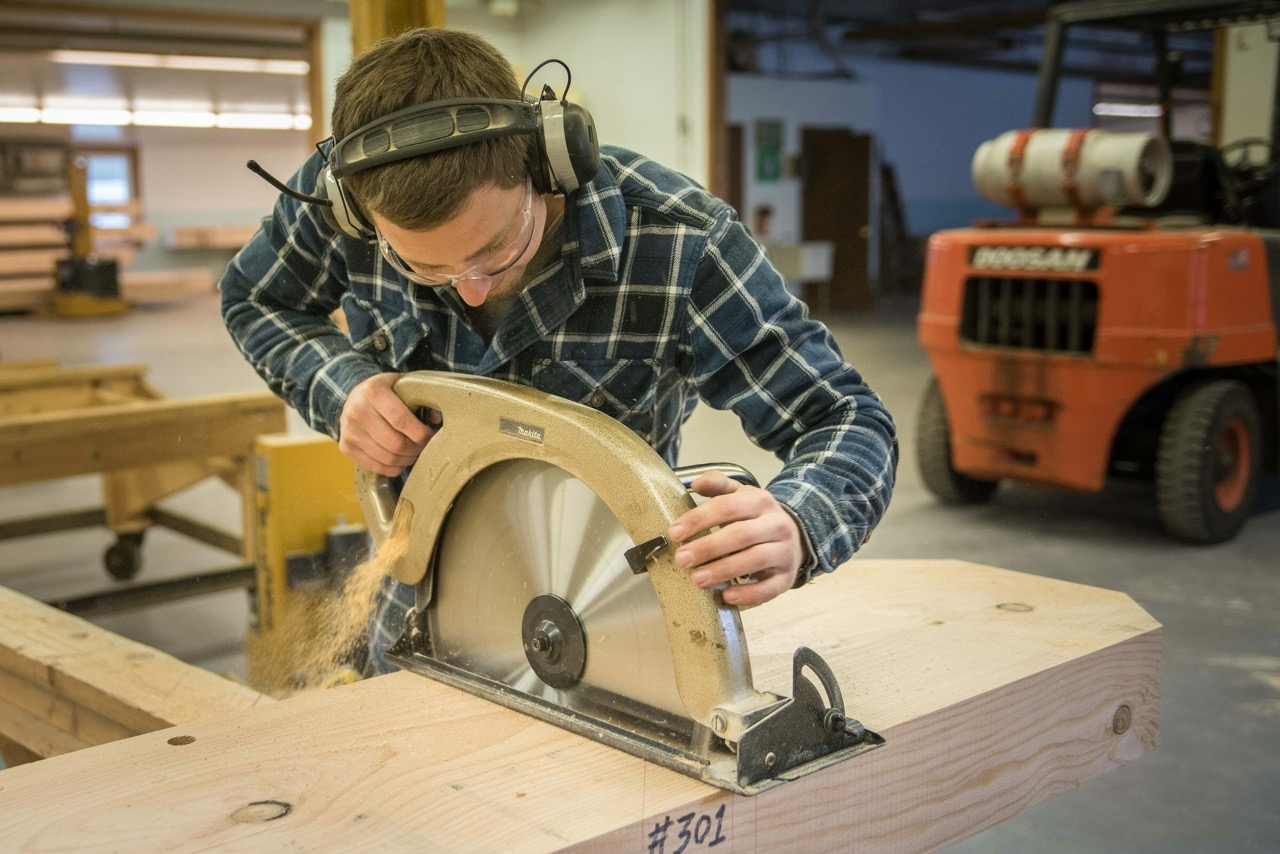
Cutting the Legs
Now that you have measured and marked the wood, it’s time to cut the legs for your rustic stool. Follow these steps to achieve clean and precise cuts:
- Select the Appropriate Saw: Choose a hand saw that is suitable for cutting the type of wood you’re working with. A fine-toothed saw or a tenon saw works well for cutting the legs of the stool.
- Secure the Wood: Secure the wood in a vise or use clamps to hold it securely in place. This will prevent any movement or wobbling during the cutting process.
- Start Cutting: Align the saw on the marked line and start cutting slowly and steadily. Use long, fluid strokes while maintaining control over the saw. Take your time to ensure a straight and clean cut.
- Repeat the Process: Cut the remaining legs using the same technique and consistently follow the marked lines for accurate results. Measure each leg individually to avoid any discrepancies in length.
- Smooth the Cut Ends: Use sandpaper or a file to smooth out any rough edges or splinters on the cut ends of the legs. This will create a clean and polished look.
Remember to work carefully and safely while cutting the legs. Take breaks if needed, and always use appropriate safety equipment like goggles and gloves. With the legs cut and prepared, you’re one step closer to completing your rustic stool.
Next, we’ll move on to shaping the seat of the stool.
When making a rustic stool with hand tools, choose a sturdy hardwood like oak or maple for durability. Use a combination of hand saws, chisels, and hand planes for a traditional, rustic look.
Read more: How To Make A Bow With Hand Tools
Shaping the Seat
Now that you have the legs cut, it’s time to shape the seat of your rustic stool. The seat is not only functional but also adds character and comfort to the overall design. Follow these steps to shape the seat:
- Design the Seat Shape: Decide on the desired shape of the seat. It can be square, round, or even irregular. Use a pencil or a marking tool to outline the shape on the wood.
- Secure the Wood: Clamp the wood securely to your workbench or use a vice. Ensuring stability is important for accurate and safe shaping.
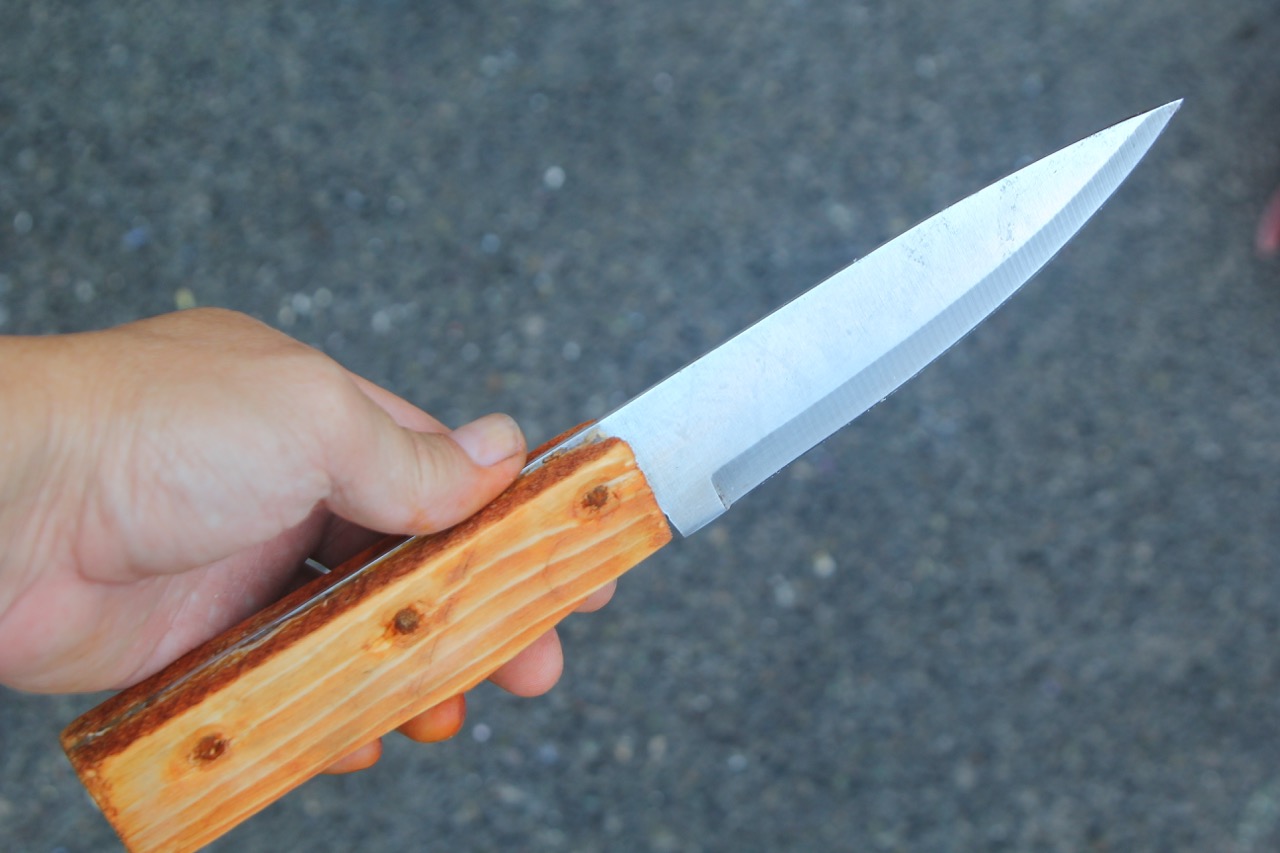
- Remove Excess Material: Use a coping saw, a coping or curved gouge chisel, or a carving knife to remove the excess material outside the marked shape. Take your time and work slowly to achieve smooth and controlled cuts.
- Refine the Shape: Once the rough shape is achieved, use rasps, files, or sandpaper to refine the edges and curves of the seat. Smooth out any imperfections and create a comfortable and visually appealing surface.
Be mindful of the design and dimensions of the seat while shaping. Ensure it provides a comfortable seating experience and complements the overall aesthetic of your rustic stool.
Remember to work in a well-ventilated area, wear appropriate safety gear, and take breaks if needed. With the seat shaped, the next step is to join the legs and the seat together.
Joining the Legs and Seat
Now that you have the legs and the seat prepared, it’s time to join them together to complete your rustic stool. Here are a few common joinery techniques you can use:
- Mortise and Tenon: This traditional joint involves creating a mortise hole in the seat to fit the tenon on the leg. Careful measurement and precise cutting are required for a strong and durable joint. Use a chisel and a mallet to carefully create the mortise and tenon.
- Dowels: Dowel joints involve drilling holes in both the legs and the seat and inserting dowels to secure them together. This is a simpler alternative to mortise and tenon joinery, yet it provides good stability. Use a doweling jig to ensure accurate hole placement.
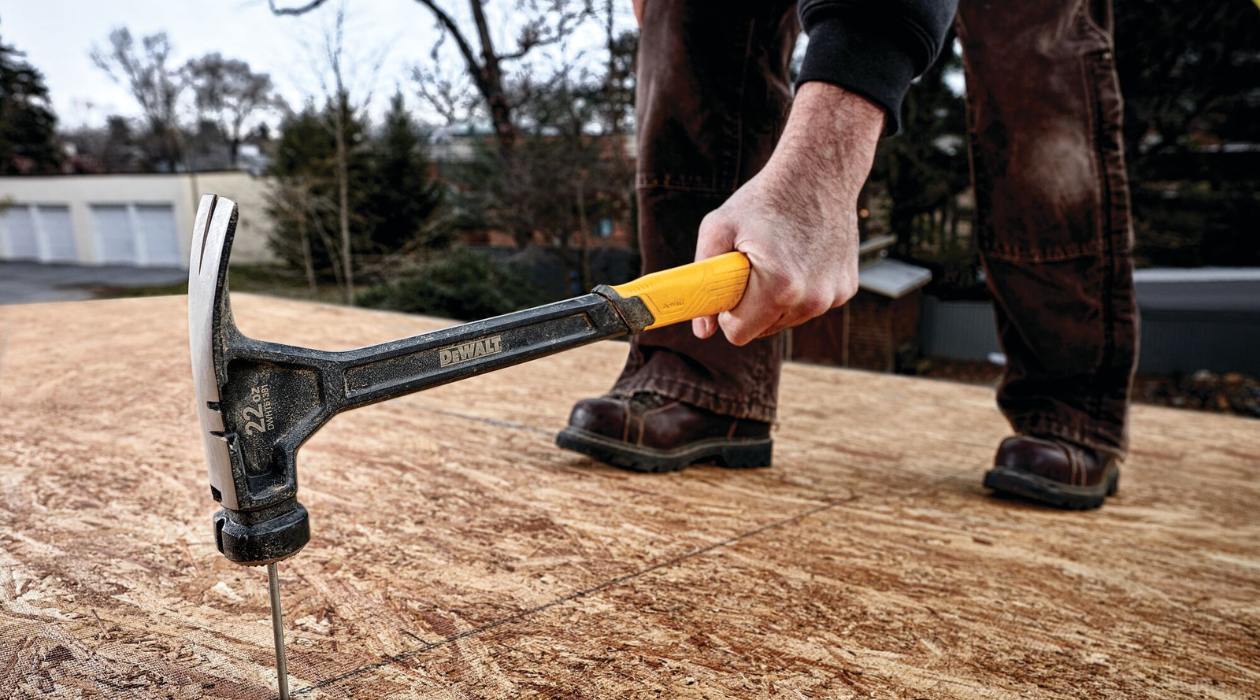
- Corner Braces: If you prefer a more rustic and decorative look, you can use corner braces to join the legs and the seat. These metal or wooden brackets add structural support and can be installed using screws or nails.
Whichever joinery technique you choose, ensure a snug and secure fit between the legs and the seat. Take your time, and make any necessary adjustments during the assembly process. Use clamps or rubber mallets to help align and secure the pieces together effectively.
Once the legs and seat are joined, double-check for stability and straightness. Make any final adjustments if needed before moving on to the next step of sanding and finishing.
Sanding and Finishing
With the legs and seat joined together, it’s time to sand and finish your rustic stool. Sanding the wood not only creates a smooth and polished surface but also prepares it for the finishing process. Here’s what you need to do:
- Sand the Wood: Use sandpaper or a sanding block to sand the entire surface of the stool. Start with a coarse grit sandpaper and gradually work your way up to a finer grit to achieve a smooth finish. Sand in the direction of the wood grain for the best results.
- Remove Dust: After sanding, use a clean, dry cloth or a brush to remove all of the sanding dust from the surface of the stool. This will ensure that the finish adheres properly to the wood.
- Apply a Finish: Select a finish that suits your desired aesthetic and provides protection for the wood. Options include varnish, oil, wax, or a combination of these. Follow the manufacturer’s instructions for proper application and drying times.
- Apply Multiple Coats: Depending on the type of finish you choose, it may be necessary to apply multiple coats for optimal results. Allow each coat to dry thoroughly before applying the next one, and lightly sand the surface between coats for a smooth finish.
- Buff and Polish: Once the final coat is dry, use a fine-grit sandpaper or a buffing wheel to gently buff and polish the surface of the stool. This will enhance the sheen and bring out the natural beauty of the wood.
Take your time during the sanding and finishing process to ensure a high-quality result. Properly treated and finished wood will not only enhance the overall appearance but also protect it from moisture, dirt, and wear over time.
Once the finishing process is complete, stand back and admire your beautifully handcrafted rustic stool!
Conclusion
Congratulations! You have successfully learned how to make a rustic stool using hand tools. By carefully choosing the right wood, preparing it properly, and following the steps to measure, cut, shape, join, and finish, you have created a unique and charming piece of furniture.
Making furniture with hand tools not only allows you to bring your creativity to life but also promotes a deeper connection with the craftsmanship involved. The process of using hand tools allows you to work at your own pace, appreciate the intricacies of the wood, and take pride in the final result.
Your newly crafted rustic stool will not only serve as a functional piece but also add a touch of warmth and character to your living space. Its natural beauty and handmade charm will surely be a conversation starter among your friends and family.
Remember, woodworking is a skill that develops over time. The more projects you undertake, the more proficient you will become. Don’t be afraid to experiment with different designs, wood types, and finishing techniques to create truly unique pieces.
So, grab your hand tools, unleash your creativity, and continue to explore the vast world of woodworking. With each project, you’ll gain valuable experience and develop your own personal style.
Enjoy the journey of woodworking, and may your rustic stool be just the beginning of many more extraordinary creations!
Frequently Asked Questions about How To Make A Rustic Stool With Hand Tools
Was this page helpful?
At Storables.com, we guarantee accurate and reliable information. Our content, validated by Expert Board Contributors, is crafted following stringent Editorial Policies. We're committed to providing you with well-researched, expert-backed insights for all your informational needs.


0 thoughts on “How To Make A Rustic Stool With Hand Tools”